- Title: Supreme Commander 2
- Release Date:
- Developer:
- Publisher:
Information about Supreme Commander 2 is still incomplete. Please help us fill the details of the game using this contact form.
If you’re interested in modding Supreme Commander 2 but lack knowledge, this guide aims to assist you. Before diving in, you should have basic computer skills and the necessary software for working with archives and images in .dds format. For Windows users, WinRar and Paint.net (or Photoshop with a DDS plugin) can be used.
Why don’t textures work in the vanilla game?
There is a minor issue caused by the toc.win.bdf file, which prevents the loading of custom textures. You have two options: either delete this file (which will disable multiplayer) or make a backup copy of it.
While it is possible to play multiplayer without this file, you may encounter desynchronization issues and screen spam after some time.
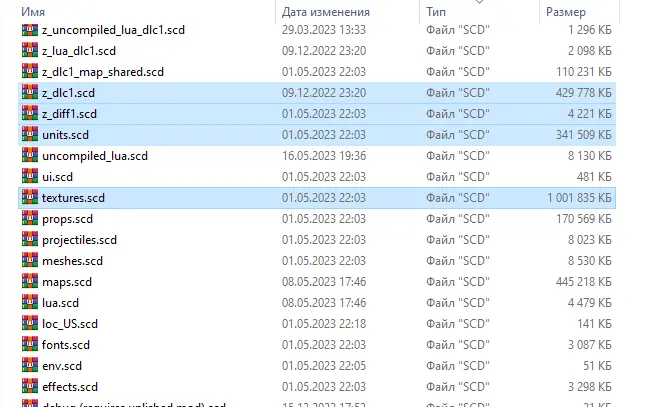
About .scd files and texture searching
Modifying textures by replacing the textures.scd file may seem appealing, but each repaint would require a large file size, which is unnecessary. Let’s break it down step by step.
First, determine what you want to repaint. If it’s a unit texture, you need to search for that texture in units.scd.
If it’s a UI texture, you should look in textures.scd within the UI folder.
For changing projectile textures, you can find the corresponding projectile in the projectiles folder of the same archive. However, this requires knowledge of the projectile’s name, which can be obtained from the blueprints (I will explain what blueprints are at the end). If you want to modify map textures, search in maps.scd.
Regarding DLC, it’s a bit easier. Just check the z_diff1.scd and z_dlc1.scd archives.
It may seem like you need to create separate .scd archives for each texture archive, but it’s simpler than that. Although the resources are packaged into multiple archives, the game treats them as a single entity. If it detects any other .scd archive unrelated to the vanilla game, it will subsequently use resources from your mod. In other words, a single .scd file is sufficient.
Creating a mod
Next, you need to duplicate any .scd archive and remove unnecessary files from it, leaving only one file. If you add at least one file of your own, you can remove the extra file as well. Rename the archive, and now you have the foundation for your mod.
Important note: Do not attempt to create a zip/rar archive and then change its extension to .scd; this method will not work!
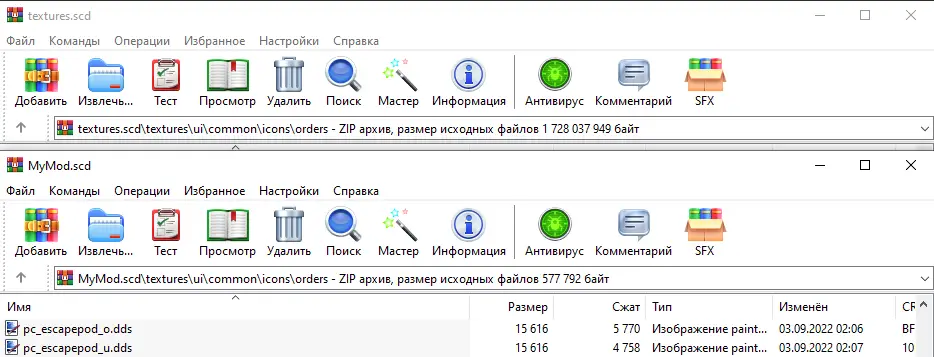
Now, the most crucial step is to ensure that the modified texture follows the same file path as the original. For instance:
If you edited the texture at:
textures/ui/common/texture.dds
Then in your mod, the texture should be placed at the same path. This principle applies to all the files you intend to modify.
Editing textures
Once you have the texture you want to edit, there are several things you can do with it:
- Finalize the details: Make any necessary adjustments and refinements to the texture. This may include fixing imperfections, enhancing certain elements, or adding additional details.
- Resize the texture: If needed, resize the texture while maintaining its original resolution. For example, if the texture is originally a 1:1 square, it should still be a 1:1 square after resizing.
- Add paragraph 3: (Please provide the missing information to complete this paragraph.)
- Upscale the texture: Export the edited texture as a PNG file, then upscale it. After upscaling, convert it back to the DDS format. Keep in mind that large dimensions in DDS files can sometimes cause rendering issues, so be cautious.
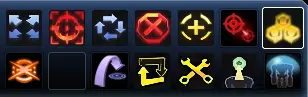
If you reach the point of modifying buttons, follow these guidelines to ensure clarity in their functionality:
textures.scd/textures/ui/common/icons/orders
- _w: Represents the button in a pressed state.
- _u: Indicates that the button is available.
- _o: Represents the button when it is selected.
- _d: Indicates that the button is disabled.
By following these conventions, you can edit almost any texture in the game.
If you find it helpful, you can also refer to my mods as examples to better understand the process.
Examples of texture mods
BetaUI
Replaces some icons on the old version, which was in the screenshot from the official manual for the game.
Upscaled Unit Icons
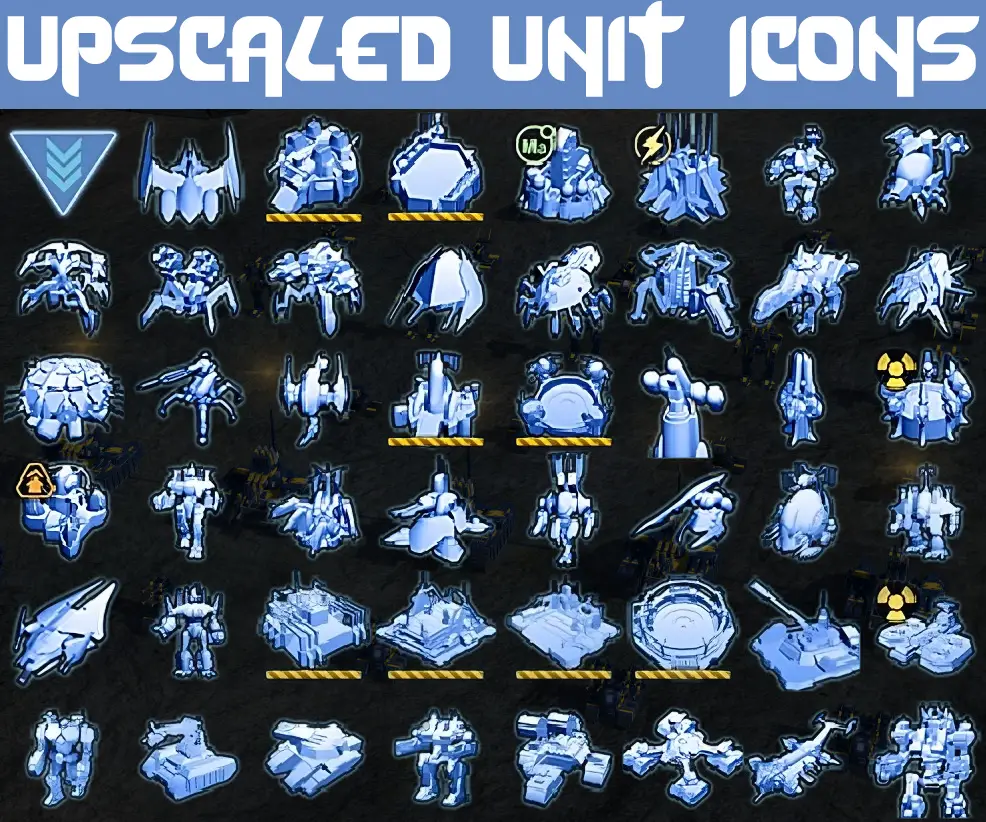
An upscaled version of the textures from 58×58 to 128×128, somewhere better, somewhere the same. If we get a mod that makes it at higher resolutions – the interface is bigger- there is already a mod.
FA Styled Icons
Original icons with backgrounds from SC1 or FA.
So, what after?
Tier 0: Finding the gamedata folder
To begin modding, you need to locate the gamedata folder of the game you want to mod. This folder contains the necessary files and resources for making modifications. The location of the gamedata folder may vary depending on the game and platform you’re using. Typically, you can find it in the installation directory of the game.
Tier 1: Modding Textures and Basic Modifications
Once you have successfully created your mod and the textures are displaying correctly, you can move on to more exciting aspects of modding. In this tier, we’ll explore further possibilities for modifications.
Tier 2: Intermediate Level – Blueprints, Units, and Advanced Modifications
At this level, you can dive into more complex modding techniques. Blueprints play a crucial role in defining various parameters for units, such as their name, economy, appearance, and other attributes. Alongside the blueprint files, there are usually associated script files. Editing these files allows you to modify existing units or create new ones.
You can also explore editing existing files beyond textures. For example, you can add videos in the .usm format, which is a well-known format. However, you may need specific utilities to convert videos into the appropriate format for the game.
Tier 3: Advanced Level – Map Creation, Lua Programming, and Sound
In this tier, you can venture into more advanced modding techniques. You can create new maps using tools like Blender, a powerful 3D modeling and animation software. Additionally, Lua programming can be used to implement custom functionalities and scripts within the game.
Working with sound involves understanding the format of sound files, such as .wav files. However, these files are often protected by encryption keys, which can be found within the game’s archives. To use custom sound files, you may need to package them in .fsb archives.
Remember, as you progress through the tiers, the complexity and technical expertise required for modding increase. It’s essential to have a good understanding of the game’s files, formats, and the modding tools available. Always make backups and test your modifications carefully to ensure they work as intended.
That's everything we are sharing today for this Supreme Commander 2 guide. This guide was originally created and written by kolzar. In case we fail to update this guide, you can find the latest update by following this link.