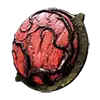
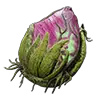
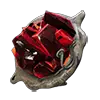
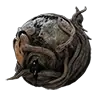
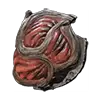
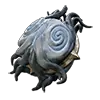
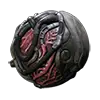
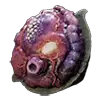
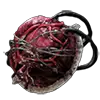
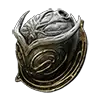
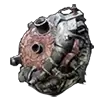
In this guide, I’ll explain where you can locate all the runes in Remnant 2 and detail their purposes and effects. Relics function as the main items for healing and gaining bonuses, with an initial three charges. Yet, there’s the choice to expand these charges through upgrades. Players also have the opportunity to enhance their relics to increase effectiveness and durability.
Dragon Heart
On use
- Heals 70 Health over 0.5s.
Locations
- Player picks it up during prologue in ward 13.
Bloombing Heart
On use
- Heals the user for 35% of caster’s Max Health over 5s. Spawns 3 Healing Orbs which grant 35% of caster’s Max Health over 5s. Orbs last 20s. Recasting removes previous Orbs.
Locations
- In the areas called Yaesha, Imperial Gardens, and The Expanding Glade, you’ll come across a bell tower. As you go up the stairs, continue until you spot a structure that resembles an elevator. After ascending two sets of stairs and reaching the vicinity of this elevator-like structure, step onto it. As soon as the elevator starts moving, quickly disembark. Turn around, and you’ll notice symbols moving upward. Make sure to remember these symbols. Now, head back down to the bottom of the staircases and position yourself in front of the wall situated between them. This wall is actually an illusion, and you can walk right through it to discover a concealed room. Inside this room, insert the four symbols you observed earlier into the circular arrangement at the center. Once you’ve done this, the door ahead will unlock.
Crystal Heart
On use
- Regenerates 100% of Max Health over 10s, Movement Speed is reduced by 50%, and incoming damage is reduced by 25%. Lasts 10s.
Locations
- N’Erud. Reward for the Loose Fuse event.
Decayed Heart
On use
- Causes the next 3 instances of enemy damage taken to trigger 40 Health regeneration over 3s. Lasts 30s.
Locations
- Root Earth. Corrupted Harbor. Past the first open area, at the end of the corridor through opening in roots.
Lifeless Heart
On use
- Heals 30 Health over 0.5s.
Passive
- Relic capacity is doubled.
Locations
- Yaesha. Side with the Ravager and kill the doe to get Ravager’s Mark.
- Equip Ravager’s Mark and go to the statue directly on the left at the beginning of the Forbidden Grove in Yaesha.
- Eat the Fruit of Death 3 times, it will break and give you the Lifeless Heart.
Pulsing Heart
On use
- Pulses every 3s, healing allies within 7m for 20 Health over 0.5s per pulse. Lasts 15s.
Locations
- At Endaira’s End within Yaesha, once you’ve finished the dungeon, proceed to the last room. In this room, position yourself on a pressure plate located on the floor. This action will reveal a concealed door that guides you into a compact maze. Navigate through the maze until you reach its conclusion. At the end of the maze, you’ll encounter a ladder. After successfully surmounting the barrier, refrain from ascending the stairs directly ahead. Instead, opt to turn left. Here, you’ll discover a concealed wall.
Quilted Heart
On use
- Does not provide standard healing. Negates Stamina Drain and cause Evades to heal for 15 Health over 0.25s. Lasts 20s.
Locations
- In the locations of Brocwithe Quarter, Morrow Parish, or Forsaken Quarter within Losomn, there’s an important task to undertake. After you’ve managed to gather both children and accomplish at least fifty percent of the primary events in Losomn, make your way to the Oracle of the Dran. Engage in conversation with the Oracle to progress further in your journey.
Reprocessed Heart
On use
- Converts 5 Health to 40 Mod Power per second for 25s for Both Weapons. Cannot die from conversion.
Locations
- To acquire the Labyrinth, you must successfully navigate the Portal Inertia Event. This involves timing your jump accurately. Your jump should coincide with the moment when the second portal aligns perfectly at the center. Failure to do so will result in a fatal fall.
Resonating Heart
On use
- Regenerates 50% of Max Health over 5s. When heal ends, any overhea| Health is Doubled and awarded over the next 20s.
Locations
- Ashen Wasteland checkpoint on Root Earth.
- Standing with your back in the open window and facing the checkpoint, turn left and go to the next room.
- Turn left again and enter a small room with a hole in the floor.
- Drop down the hole, go a little further, and drop down into the next hole near the windows.
- Turn around, and you’ll see a root pedestal on the right side of the room.
Ripened Heart
On use
- Heals 35 Health over 0.5s and an additional 70 over 5s.
Locations
- Roll the Red Throne on Yaesha. Go to the Widow’s Court. Descend to the lowest area beneath the waterfall and go through an invisible wall in the corner near a chest. Go up the elevator and pick up the ornate lockbox that holds your Thaen seed. Look all over The Widow’s Court for the body of a dead guard that has a Ornate Key. Open the box and go plant the seed in your garden in Ward 13.
- Can be grown on the Thaen fruit tree planted in Ward 13 with the Thaen Seed. You will need to wait 2 days for the tree to grow before it produces fruit. Leave the fruit on the tree for it to ripen.
- Thaen Tree Fruit Ripening Stages:
- 1 Day: Mature Thaen Fruit, Auto-Revive with 30% health and 30 seconds status immunity.
- 2 Day: Elder Thaen Fruit, Auto-Revive with 40% health and 30 seconds status immunity.
- 3 Day: Celestial Thaen Fruit, Auto-Revive with 50% health and 30 seconds of status immunity.
- The fourth time a Ripened Heart is grown instead. This takes a minimum of 13 days from when the tree begins producing fruit.
Runed Heart
On use
- Increases Health Regeneration by 5 and generates 500 Mod Power over 10s.
Locations
- Near the Entangled Gauntlet fast travel point in Labyrinth. Players need to go straight and beneath the staircase on the left side to find a small hidden path.
Salvaged Heart
On use
- Heals 30 Health over 0.25s and restore 300% of current Grey Health.
Passive
- 50% Use Speed bonus
Locations
- Can be crafted at Drzyr Replicator, you will need t10 Lumenite Crystals, 15 Relic Dust, 1,500 Scrap. Dryzr Replicator can be found in N’erud, near the location of The Custodian. Drop a gap on the floor (behind statue) to find him.
Shielded Heart
On use
- Grants a Shield for 100% of Current Health. Lasts 20s or until Shield is removed by damage.
Locations
- Head towards the N’Erud in the Tower of the Unseen. Once you’re in the hall where you encounter E.D. Alpha, locate a statue. Move to the rear of this statue and insert a Stellar-Powered Cell. To continue, navigate your way to a higher level at the back of the statue. Locate an elevator and activate it to ascend, but avoid boarding it. As the elevator rises, it will uncover a hidden opening beneath it. Leap down through this opening to reach a slot where you can insert another Stellar-Powered Cell. As a result of this action, a door on the side of the main hall will unlock. Proceed by passing through this newly opened door.
Siphon Heart
On use
- Grants 10% of base damage dealt as Lifesteal for 10s.
Locations
- N’Erud. Given by the Custodian in exchange for the shining essence echo which is acquired by killing Tal Ratha.
Tormented Heart
On use
- Deals 240 Explosive damage to enemies within 10m and Lifesteals 25% of damage dealt.
Passive
- 20% Use Speed bonus.
Locations
- In Losomn, you can acquire this item as a reward by trading the Override Pin to the Nightweaver’s Web. To proceed, you’ll need to reroll the campaign or adventure mode for Lonsom until you receive the Morrow Parish starting point. Begin playing through the main campaign until you arrive at Clided Chambers, where you will confront the Nightweaver. Upon defeating the Nightweaver, you will obtain an item called the Soulkey Tribute. Afterward, return to Morrow Parish and make your way to the basement area. There, you will come across a bluish spider web. Interact with this web and present the Soulkey Tribute. By doing so, you will be teleported to the tormented version of the Asylum. In this eerie location, search for a bluish web situated within one of the cells, and engage with it to continue your journey.
Tranquil Heart
On use
- Doubles All Health Regeneration for 15s.
Passive
- 2 Health Regeneration per second
Locations
- Can be found in Losomn as a reward for trading Tormented Heart with Nimue.
In Losomn’s Beatific Palace, you can find Nimue. To reach her, you must uncover a hidden path. Upon entering the Beatific Palace, proceed to the right side of the main hall where you’ll discover a lift. However, this lift doesn’t take you to the correct area and passes by it during its movement. To access the intended location, you need to leap off the lift while it’s in motion and land on the floor. Here, you’ll find a chalk door portal that can be activated using the Magic Quill. Once activated, follow the path downwards until you reach the Nimue’s Retreat World Stone. Continue along the path, and you’ll eventually encounter Nimue.
Alternatively, in Losomn’s Morrow Sanatorium, you can also find Nimue. She is concealed behind a secret door situated on the third floor of the Morrow Parish Sanatorium. To open this hidden door, you’ll require the Magic Quill, which can be obtained from the Jester. Upon reaching the incomplete chalk drawing on the Sanatorium’s third floor, utilize the quill to complete the drawing. This action will grant you access to Nimue’s Retreat through the opened door.
Void Heart
On use
- Reduces incoming damage by 50% for 4s. When buff ends, heals 100% of missing Health over 0.75s.
Locations
- Alepsis-Taura in N’Erud. This location unlocks after finishing the Seeker’s Keys Campaign quest and killing Sha’Hala: Spectral Guardian. Do not use Override Pin before the fight. Talk to The Custodian after killing the boss. Then you have to wait 24 hours in real-time. Once Alepsis-Taura is accessible, the rest of the N’Erud become inaccessible.
Enlarged Heart
On use
- Heals 140 health over 0.5s.
Passive
- Double use speed. Relic capacity is halved.
Locations
- Cass at Ward 13 for 1,250 Scrap.
Constrained Heart
On use
- Regenerates 20 Health per second for 5s and grants 2 Stacks of Bulwark while heal is active.
Locations
- Cass at Ward 13 for 1,250 Scrap.
Unsullied Heart
On use
- Heals for 100% of Current Health over 0.5s.
Locations
- Losomn. After you aquire One True King Sigil from Nimue by combining both Faerin’s and Faelin’s Rings. Equip it and then stand in front of the large sword wielding statue in Beatific Palace, it will then raise and grant you the relic.
Diverting Heart
On use
- Reduces Skill Cooldowns by 1s for sec. Lasts 15s.
Locations
- Cass at Ward 13 for 1,250 Scrap after defeating 18 (not confirmed yet, may be 30) world bosses.
That's everything we are sharing today for this Remnant II guide. This guide was originally created and written by Etlina. In case we fail to update this guide, you can find the latest update by following this link.

