- Title: Armored Core VI: Fires Of Rubicon
- Release Date:
- Developer:
- Publisher:
Information about Armored Core VI: Fires Of Rubicon is still incomplete. Please help us fill the details of the game using this contact form.
Have you ever fancied using a 404 speed mech to battle across Rubicon? How about blowing out as many shots as Walter’s bank account will allow with a 4 smg? Oh yeah, if that’s not enough, how about a mech with just six shoulder-mounted energy cannons?
Preface
After successfully completing NG++, I have embarked on a mission to conquer the most formidable adversaries within the realm of Rubicon. My approach? Well, it involves concocting some of the most absurd and unconventional ideas, all while teetering on the fine line between creating a challenging build and ensuring that I still derive enjoyment from the endeavor. In this guide, I shall unveil a collection of these unorthodox builds, elucidating the underlying thought processes that birthed them. I will also provide tactical insights for those audacious individuals who might be tempted to venture into similar territory.
It’s crucial to note that these builds are tailored specifically for single-player gameplay. Should you dare to deploy them in a multiplayer setting, their effectiveness remains a mystery, but your odds of survival likely diminish substantially.
I must emphasize that perusing this guide is ill-advised unless you have successfully conquered at least NG+.
Furthermore, certain aspects of these builds, such as the choice of headgear, are subject to user preference, as their impact on performance can be relatively minimal, unless explicitly stated otherwise.
Now, I must confess that I haven’t completed the entire campaign with every single one of these builds. Their sheer number makes such a feat impractical. However, my testing regimen follows a specific sequence: I pit these creations against the Arena Raven, Balteus, and Spider. Only after emerging victorious from these three battles do I grant my seal of approval to a build, deeming it capable of withstanding a wide range of challenges. Admittedly, it’s worth noting that the two non-AC bosses I mentioned have recently undergone nerfs, but that’s a topic for another discussion. Lastly, it’s essential to understand that this guide is primarily intended to showcase these builds, some of which feature color schemes chosen purely for aesthetic reasons, as the whimsy of color was not a primary consideration in their creation.
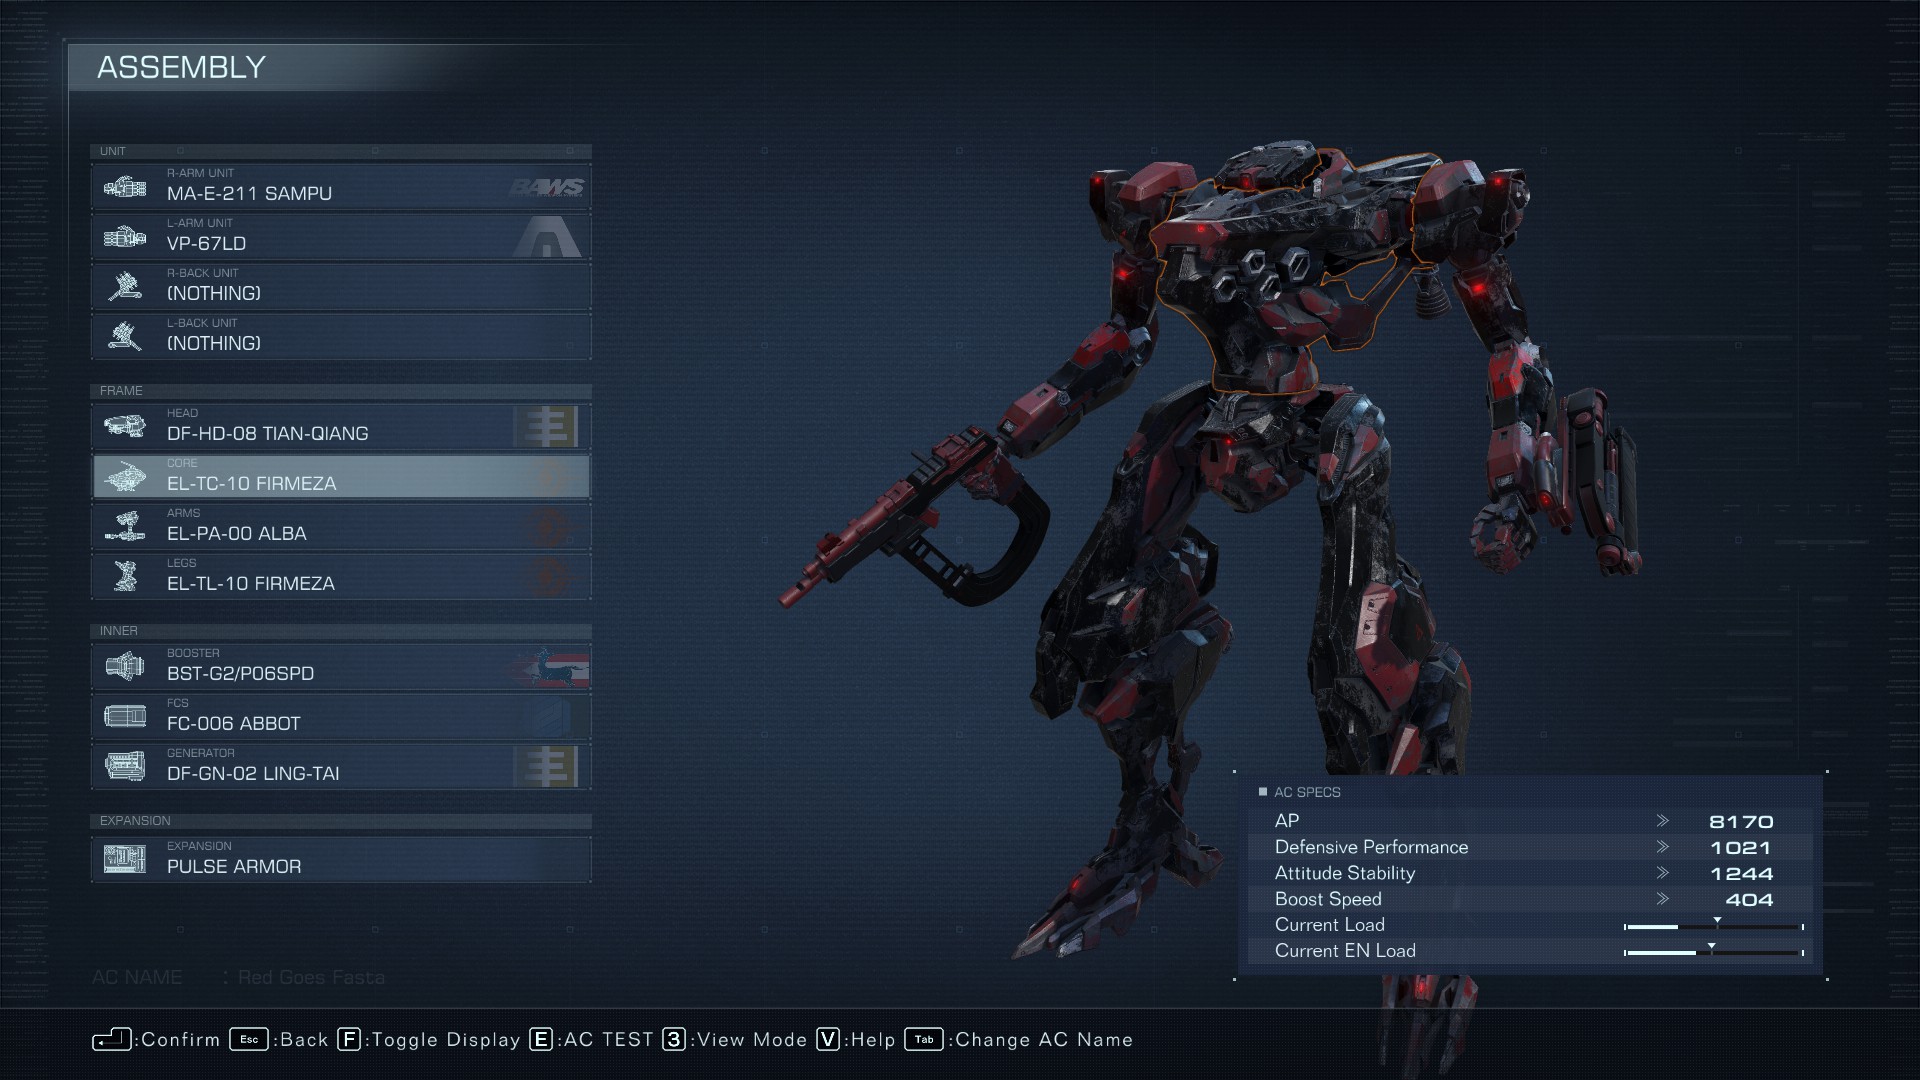
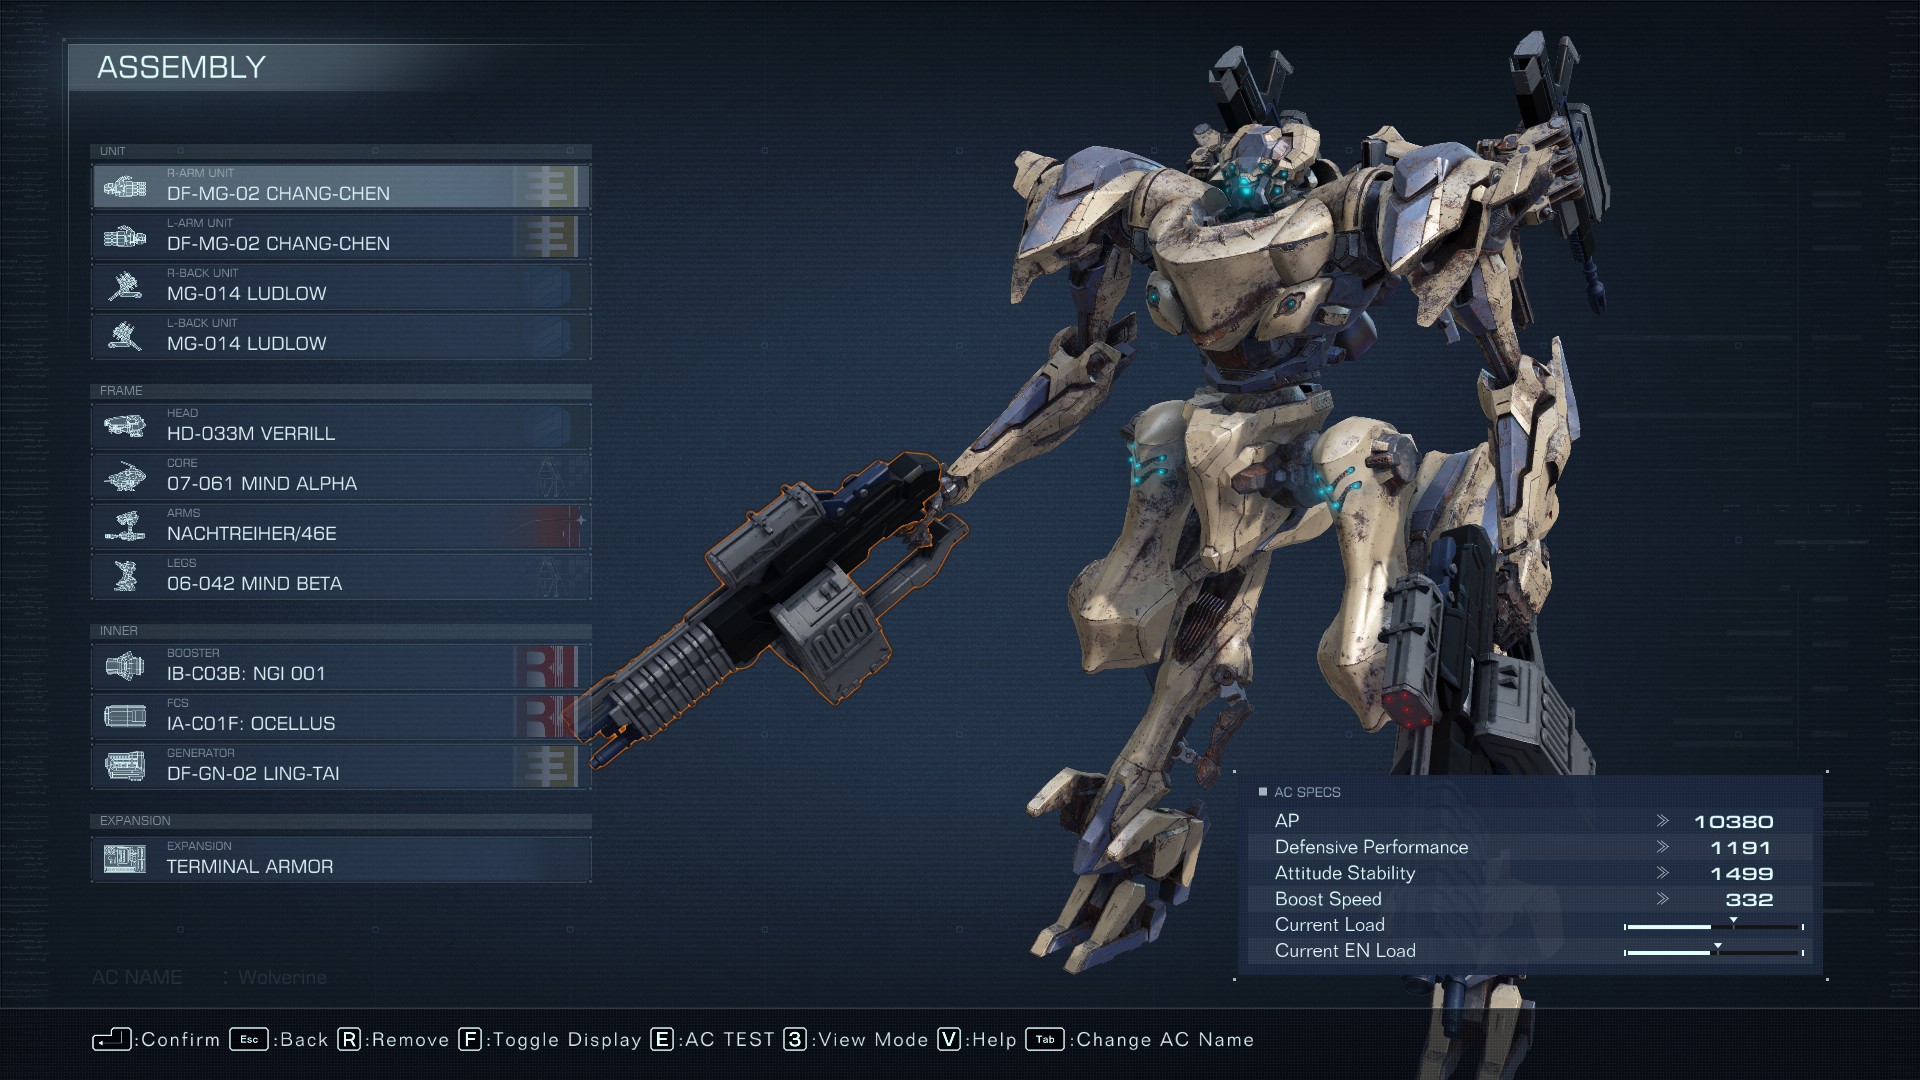
#1 Mach 11
The concept behind our inaugural creation, “Mach 11,” was a pursuit of the utmost speed while maintaining a combat-ready Armored Core (AC). The result is a rather peculiar contraption, boasting a breakneck speed of 404, despite its rather unattractive appearance. Surprisingly, it holds its own quite effectively against common foes and even other ACs. However, when confronted with sturdier adversaries like the Spider, relying on your incredible speed becomes the primary strategy – simply, “don’t get hit.”
Given the limited armament, the tactics are fairly straightforward: exploit your remarkable velocity to evade enemy attacks, employ the burst gun to stagger opponents, and seize opportunities to melee them while they’re off balance. A well-timed kick can also provide an extra bit of stagger.
It’s worth noting that for the most daring among us, a maximum speed of 422 can be achieved, albeit at the cost of wielding only your fists, subpar components, and a health pool in the 7000s. Whether one considers this usable is a matter of personal preference, but I tend to lean towards more optimized fist-centric builds.
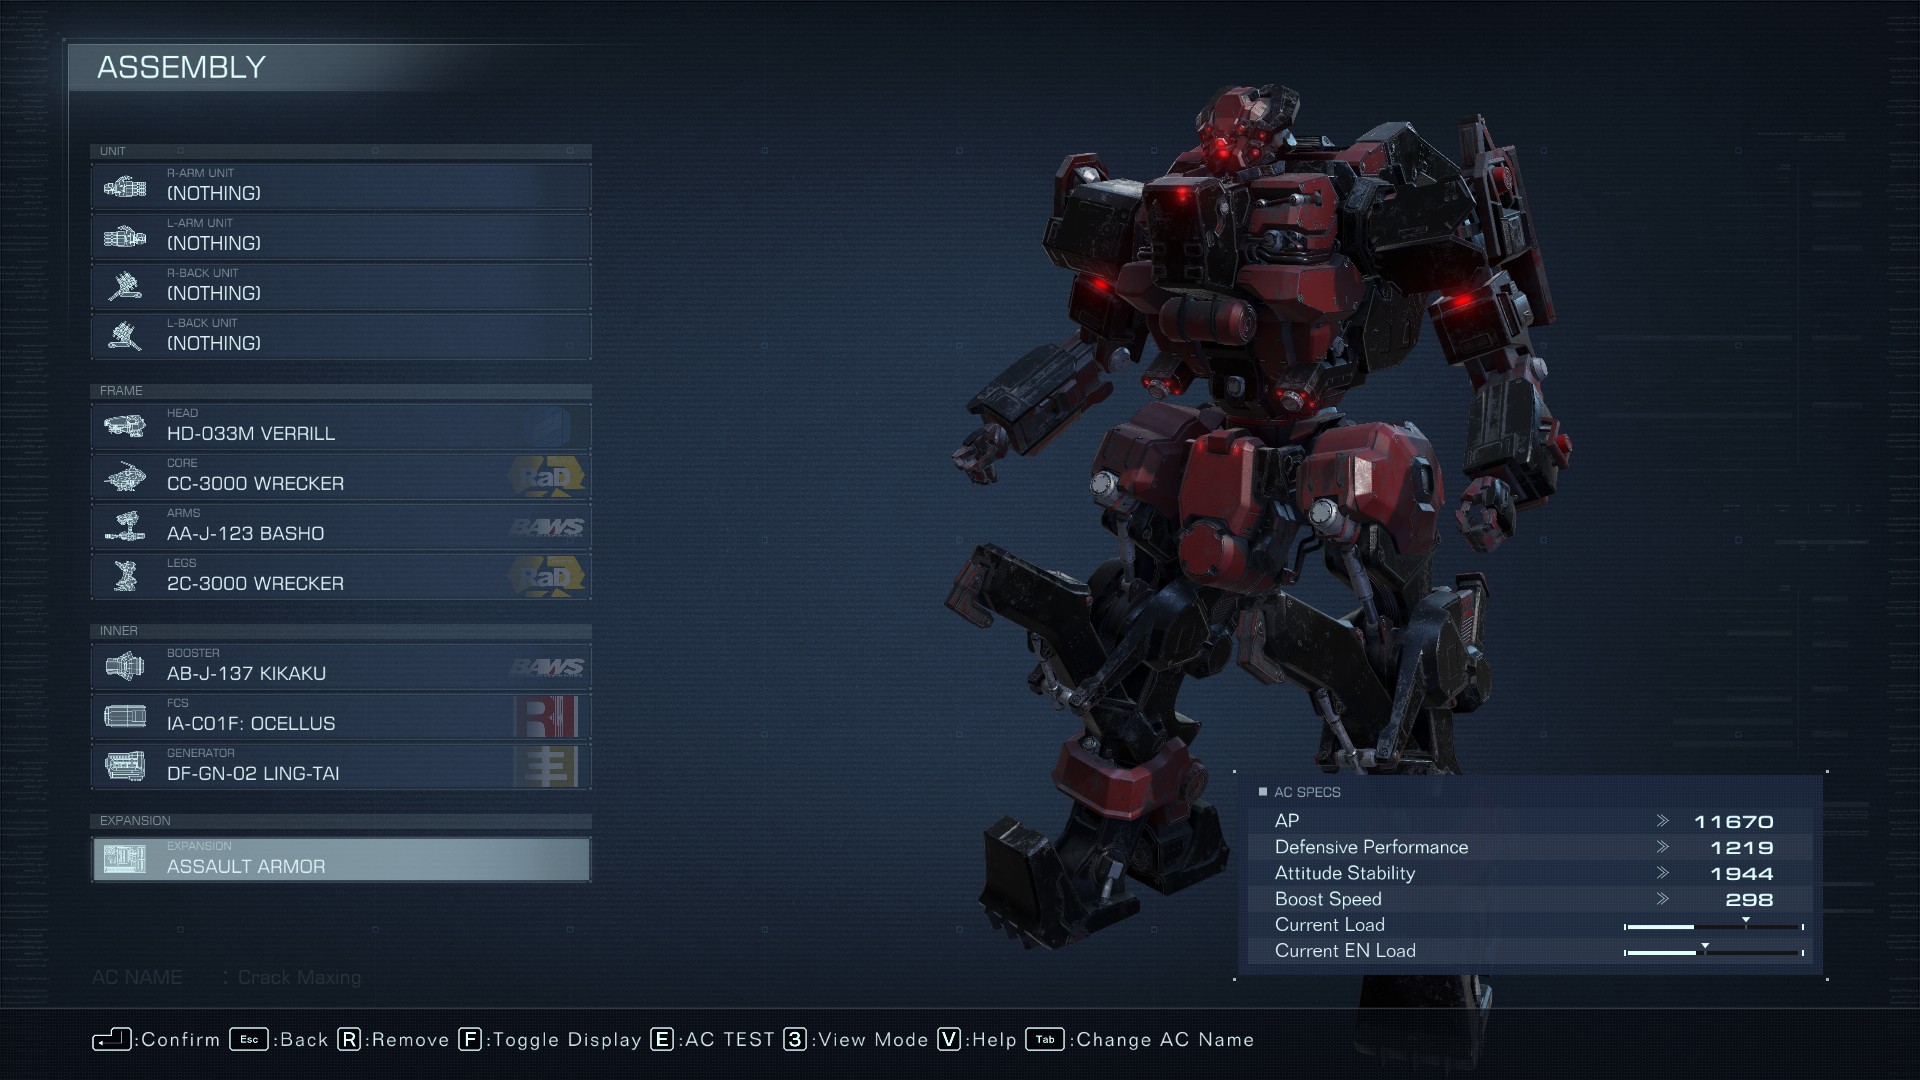
#2 621 on Crack
Let’s talk about fist-centric builds – a seemingly audacious choice that, contrary to popular belief, can prove surprisingly effective with the right approach, as exemplified by “621 on Crack.” The key to optimizing such a build lies in meticulous component selection. Firstly, prioritize arms with the highest melee stat. Second, choose boosters like the Kikaku boosters, renowned for their superior lunge capabilities during melee attacks. Lastly, ensure sufficient stability to prevent stagger when lunging toward your targets.
In terms of tactics, precision in your punches is paramount. While wild button mashing can be tempting, it’s essential to manage your fist’s heat levels, preventing vulnerability during combat. Additionally, some adversaries exhibit unique dodge patterns, necessitating brief pauses between your strikes. Regarding the assault armor, it’s a judgment call – use it either to clear your stagger bar or as a last-ditch effort to stagger an opponent. However, I must forewarn you, if you intend to complete the entire game with this build, brace yourself for challenging encounters, particularly against formidable foes like the Cleaner, whose high resistance outside of their weak spot can prove immensely difficult to overcome.
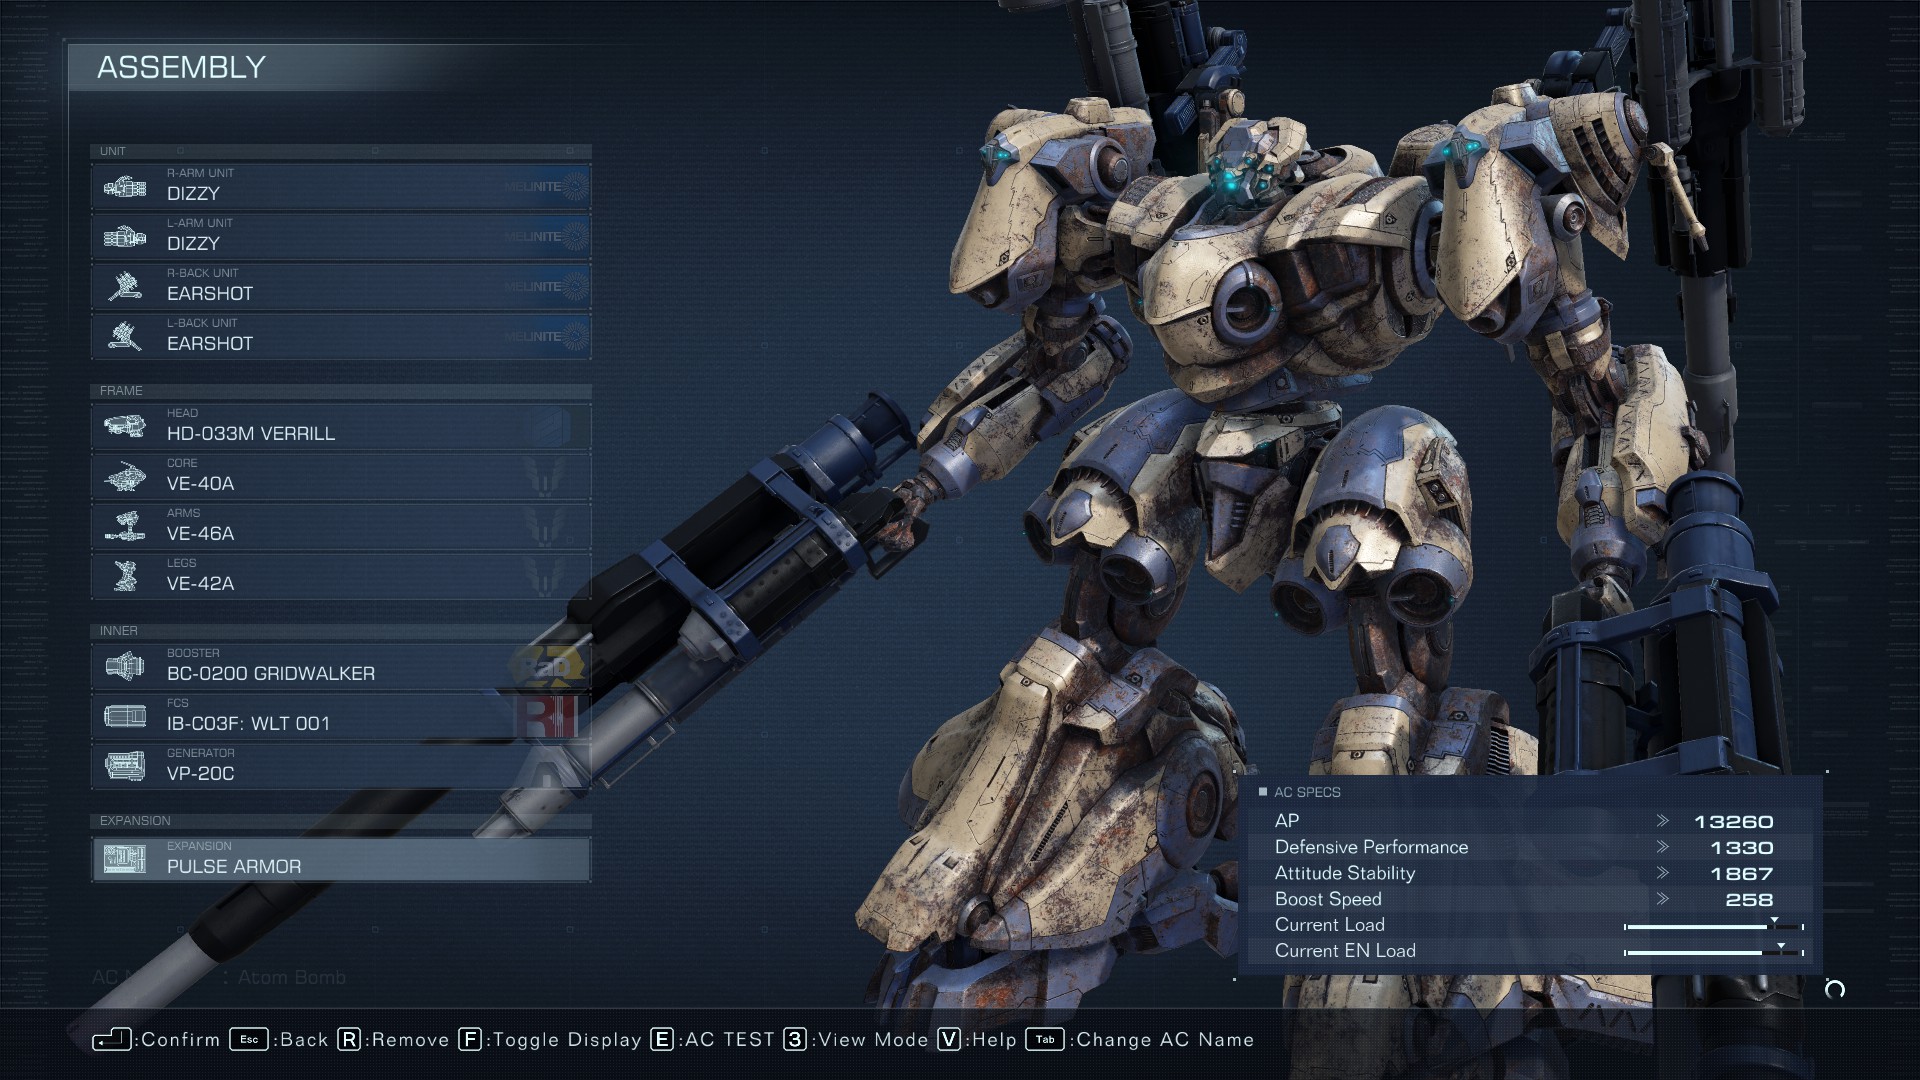
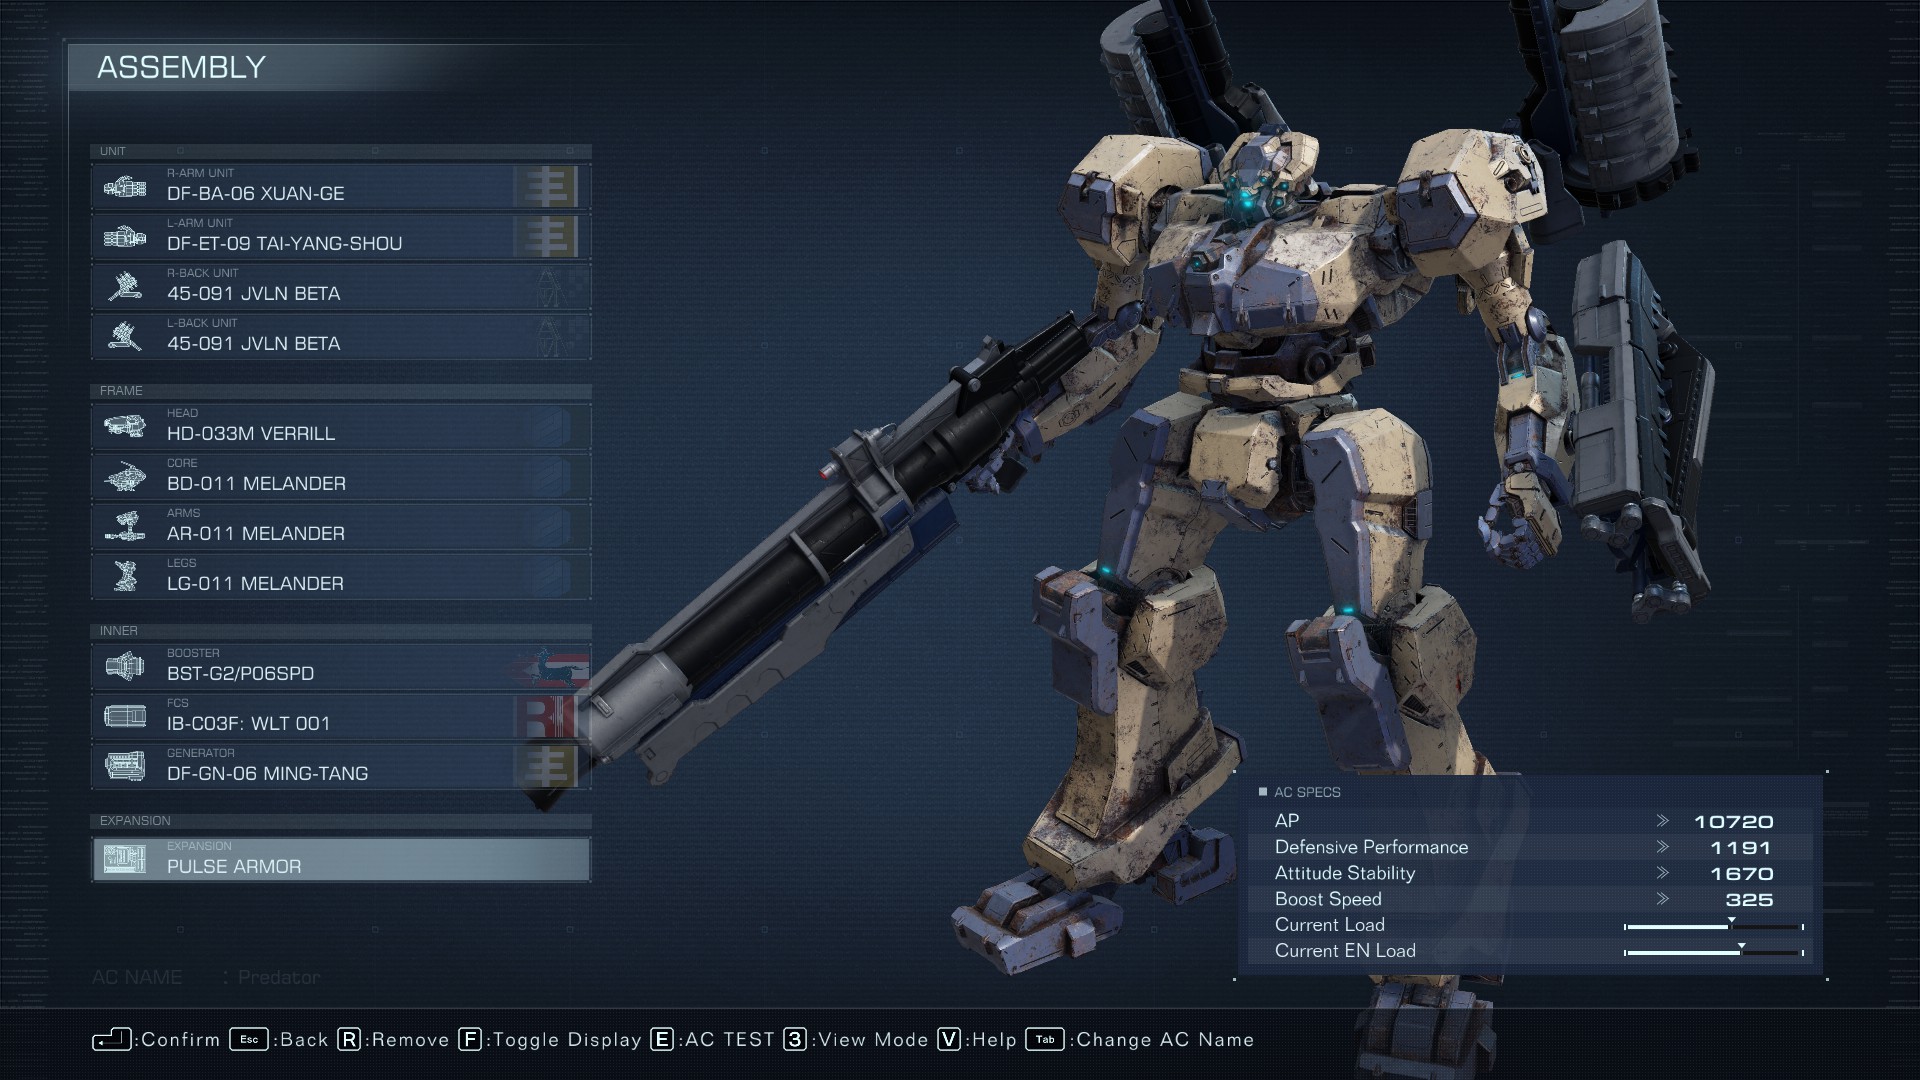
#3 Atom Bomber
Transitioning to a more substantial build, we delve into the realm of heavy artillery. The “Atom Bomber” specializes in unleashing explosive devastation, employing substantial weaponry that necessitates robust components to bear its weight.
Regarding tactics, there are several considerations. First and foremost, ascending to a higher altitude is crucial. Even if your shots miss, the massive area of effect of these cannons means that detonating them near your target can still yield significant damage. This is why we utilize the Gridwalker boosters to enhance mobility. The build excels against most ACs, offering a high degree of control. Challenges primarily arise when confronting tanky adversaries, where the protracted reload times hinder stagger capability and, consequently, the ability to deal meaningful damage. When facing such foes, adopt a patient approach, spacing out your shots to preserve the enemy’s stagger bar. Lastly, for those accustomed to lighter builds, it’s worth noting that sometimes, tanking incoming fire to guarantee your own shots can be a viable and recommended strategy.
#4 Two Energy Rifles One AC
Although this build enjoys superior equipment compared to some others, it imposes an exceptional test of your piloting skills. It relies exclusively on laser projectiles, particularly the small energy rifle. Why this choice, you may ask? Simply put, it aligns best with this build, given the limitation of two weapon slots. These rifles possess a sufficiently low charge time, allowing you to fire one while charging the other. In contrast, the medium energy rifle, while similar, involves a slight delay between shots, which outweighs any marginal stat advantages. The heavy energy rifle, on the other hand, overheats after a single charged shot, significantly extending the interval between shots.
In terms of tactics, focus on charging your weapons, firing them in tandem to overwhelm your opponent with firepower. It’s worth noting that you can charge one weapon while another is in the firing animation, ensuring a continuous barrage. Given the prolonged animations, occasionally incorporate dodges, taking advantage of the Reverse Joint legs’ generous boost distance to minimize incoming damage. Lastly, the Pulse Dome complements this long-range build. Maintain a distance of approximately 200 meters or more (up to 260) from your target, allowing the Pulse Dome to absorb substantial damage, especially against heavier-hitting adversaries.

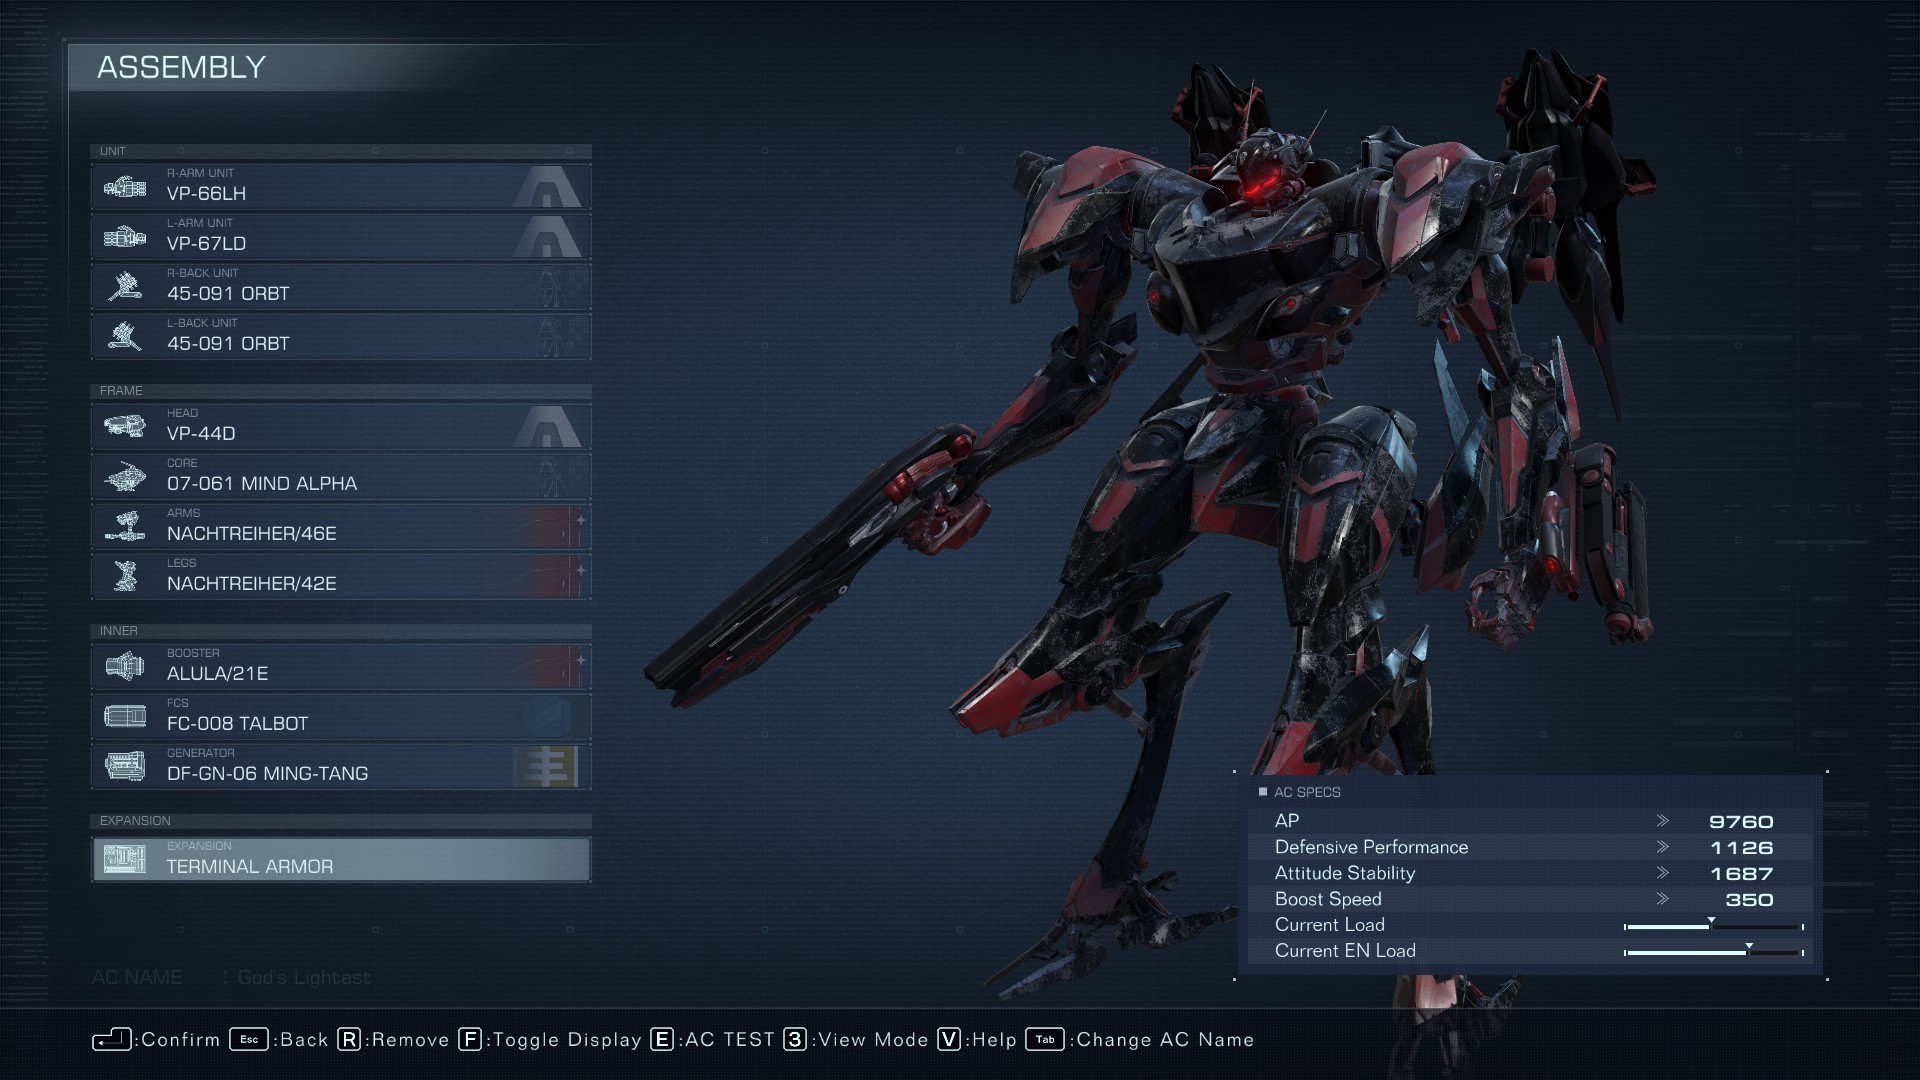
#5 God’s Lightest Energy Build
Despite its misleading title, this is not the lightest energy build but rather a fusion of light energy projectiles with a laser dagger. Positioned between the Mach 11 build and the previous energy rifle build, it combines laser projectiles with lightweight components, making the pilot vulnerable to instant death. However, it is not as minimalistic in terms of equipment, ensuring a certain level of viability.
Tactics for this build align closely with those of the Mach 11 build. However, there are a couple of differences to note. The charged attack of the energy handgun delivers decent damage and stagger, making it a valuable tool for staggering opponents and creating opportunities for melee attacks. Additionally, be mindful of the melee drones, as returning them early can prevent overheating, a crucial consideration to ensure they don’t overheat just as you’re about to stagger a boss.
#6 Bulletstorm
One might assume that achieving maximum dakka involves miniguns, but that assumption would be incorrect. Enter the “Bulletstorm,” armed with four SMGs that can flawlessly alternate fire, ensuring a constant stream of bullets and minimal overheating issues, which can plague miniguns.
Tactics for this build are exceptionally straightforward – maintain close proximity to your target, within 160 meters, and continuously hold down the trigger. As soon as you exhaust one set of SMGs, swiftly switch to the next. The recent buff to these SMGs has substantially increased their ammo capacity, and thus, ammo depletion is rarely an issue in most missions.
#7 Saturation Bombardment
Dubbed the little sibling of the Atom Bomber, this build prioritizes explosive weapons with short cooldowns, avoiding missiles due to their lack of substantial explosions. Surprisingly, this approach proves more effective than its larger counterpart, excelling in both hitting and staggering ACs.
This build’s relative strength renders an in-depth discussion of tactics unnecessary. Essentially, the “melee” weapon serves as a handy opener due to its rapid cooldown, while the tiny bazooka is best employed when the enemy is already staggered, given its subpar spread.
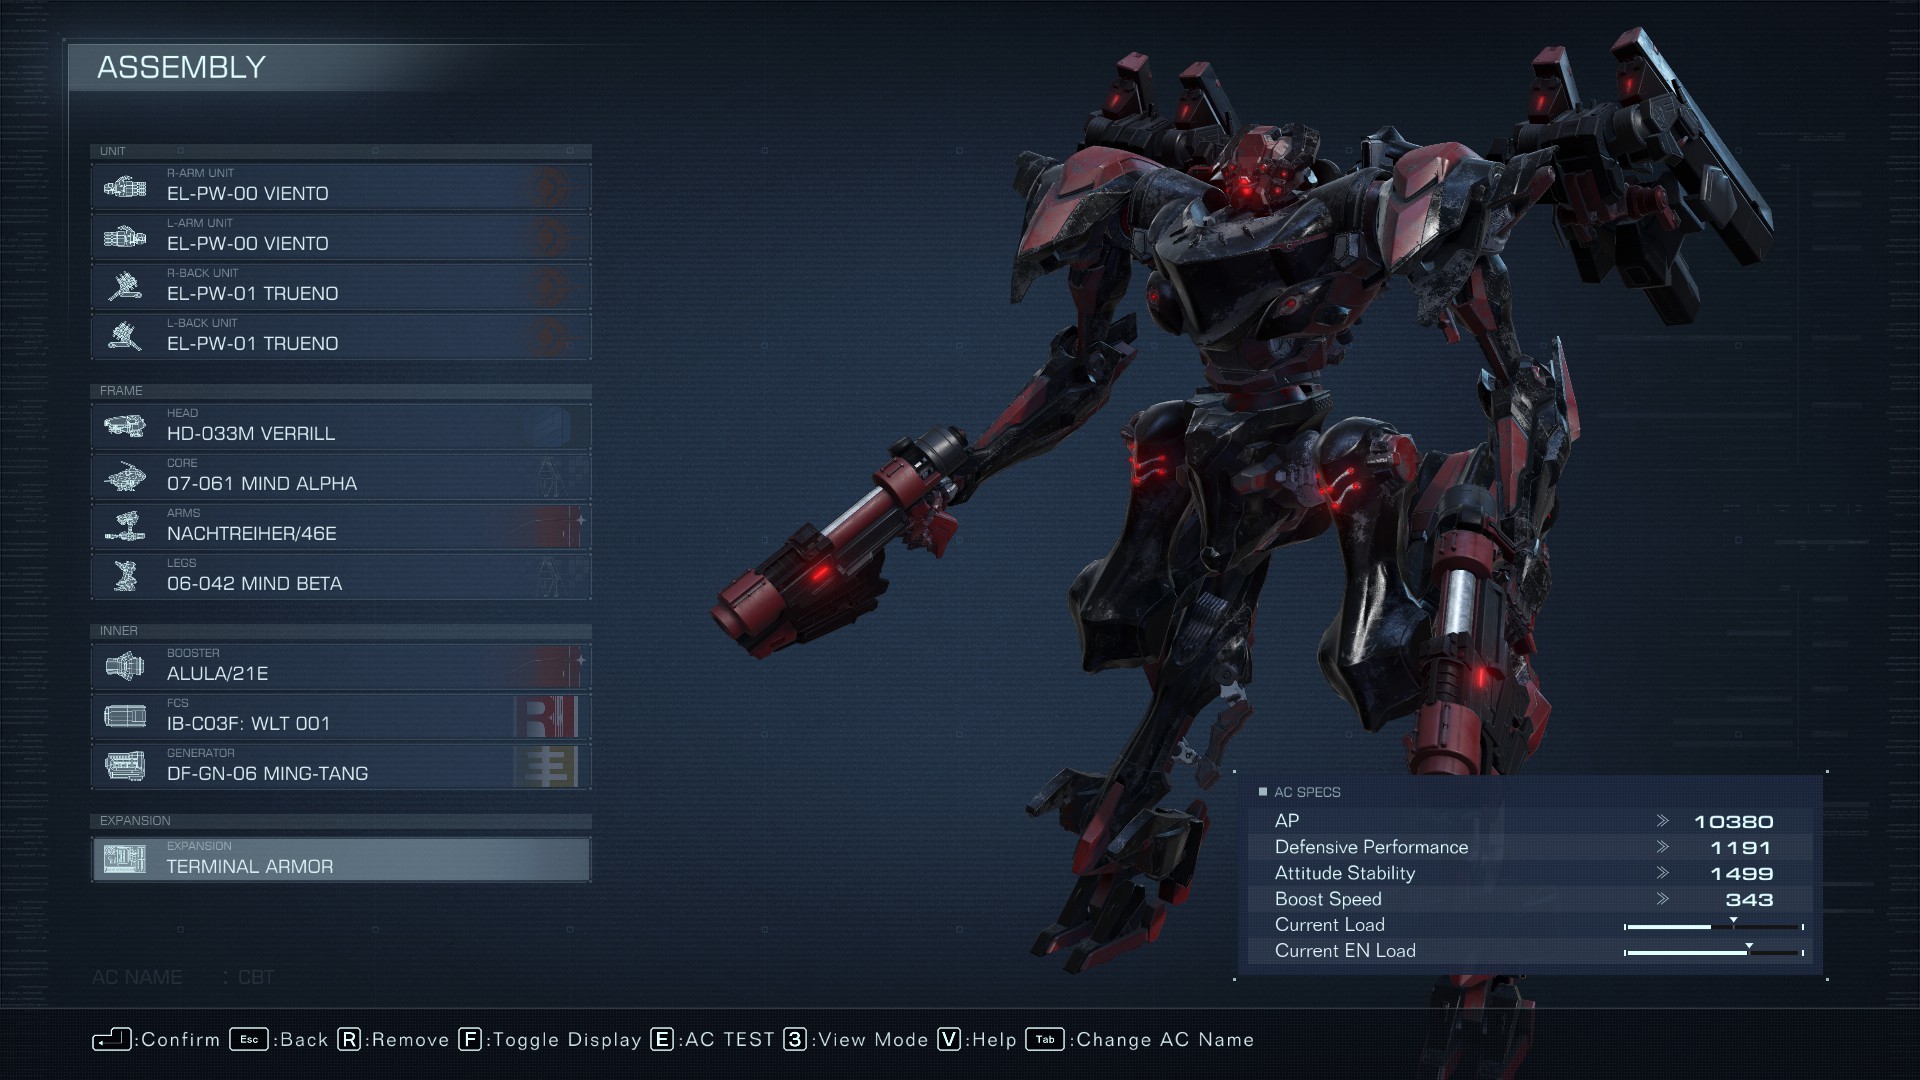
#8 CBT
To say that this build, dubbed the “CBT,” is challenging would be an understatement. It was conceived as an exploration of the most demanding and theoretically enjoyable gimmick build, but I must issue a stark warning: this is not a build for the faint of heart. If you seek my recommendation, I would advise against using it. Nevertheless, it excels against larger bosses; the true challenge lies in encounters with nimble foes capable of dodging your needle projectiles with ease. In such situations, luck may play a significant role, as these projectiles are notoriously easy to evade.
There are no specific tactics to discuss, for there is only CBT.
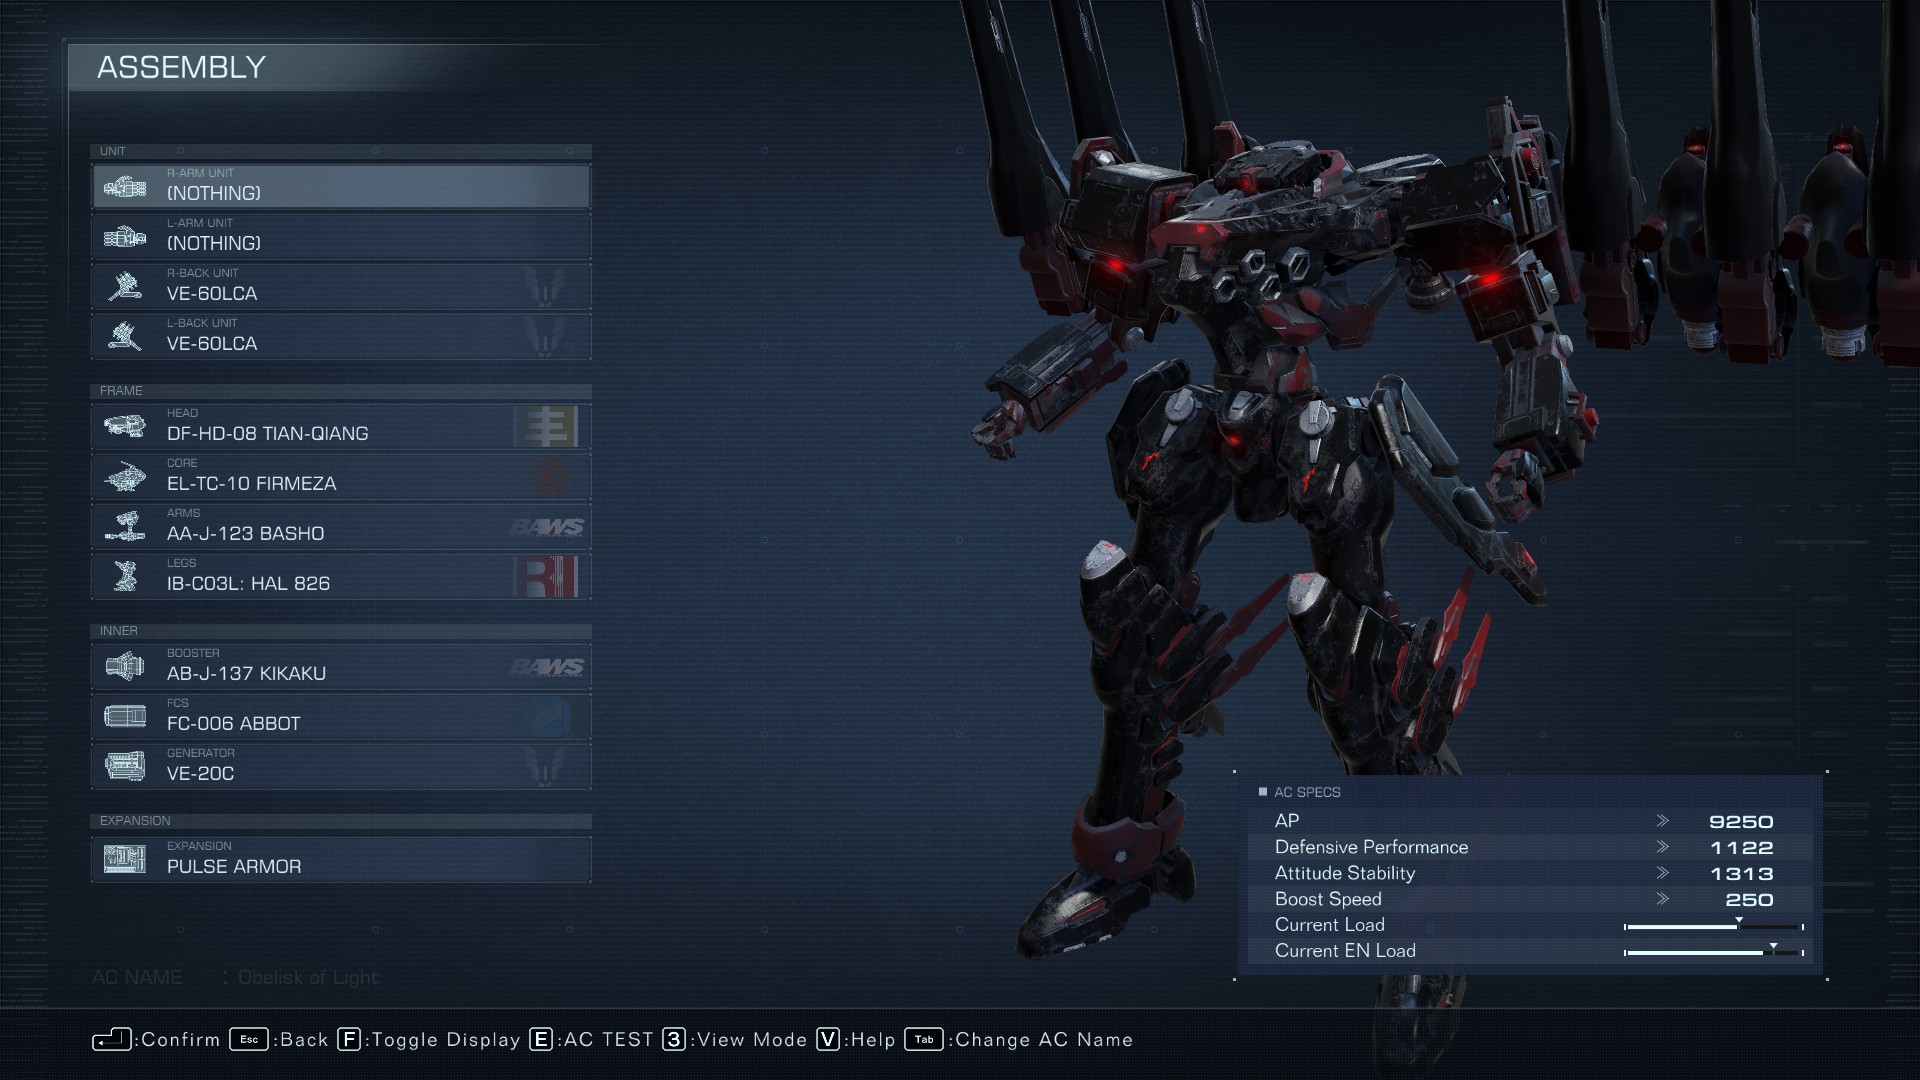
#9 Broadsides and Fists
This creation represents the culmination of my madness, an incredibly absurd yet functional build. Initially conceived as an experiment to mount six energy cannons on a bipedal mech, it evolved into something more. The cannons consume a significant portion of weight and energy capacity, leaving room for partial fist components, resulting in this amalgamation.
Tactics for this build revolve around utilizing the fist section to stagger your adversary while preserving your broadside charge until the right moment. Exercise caution to monitor the charge on the broadside, as certain factors, such as being staggered yourself, can disrupt the charging process.
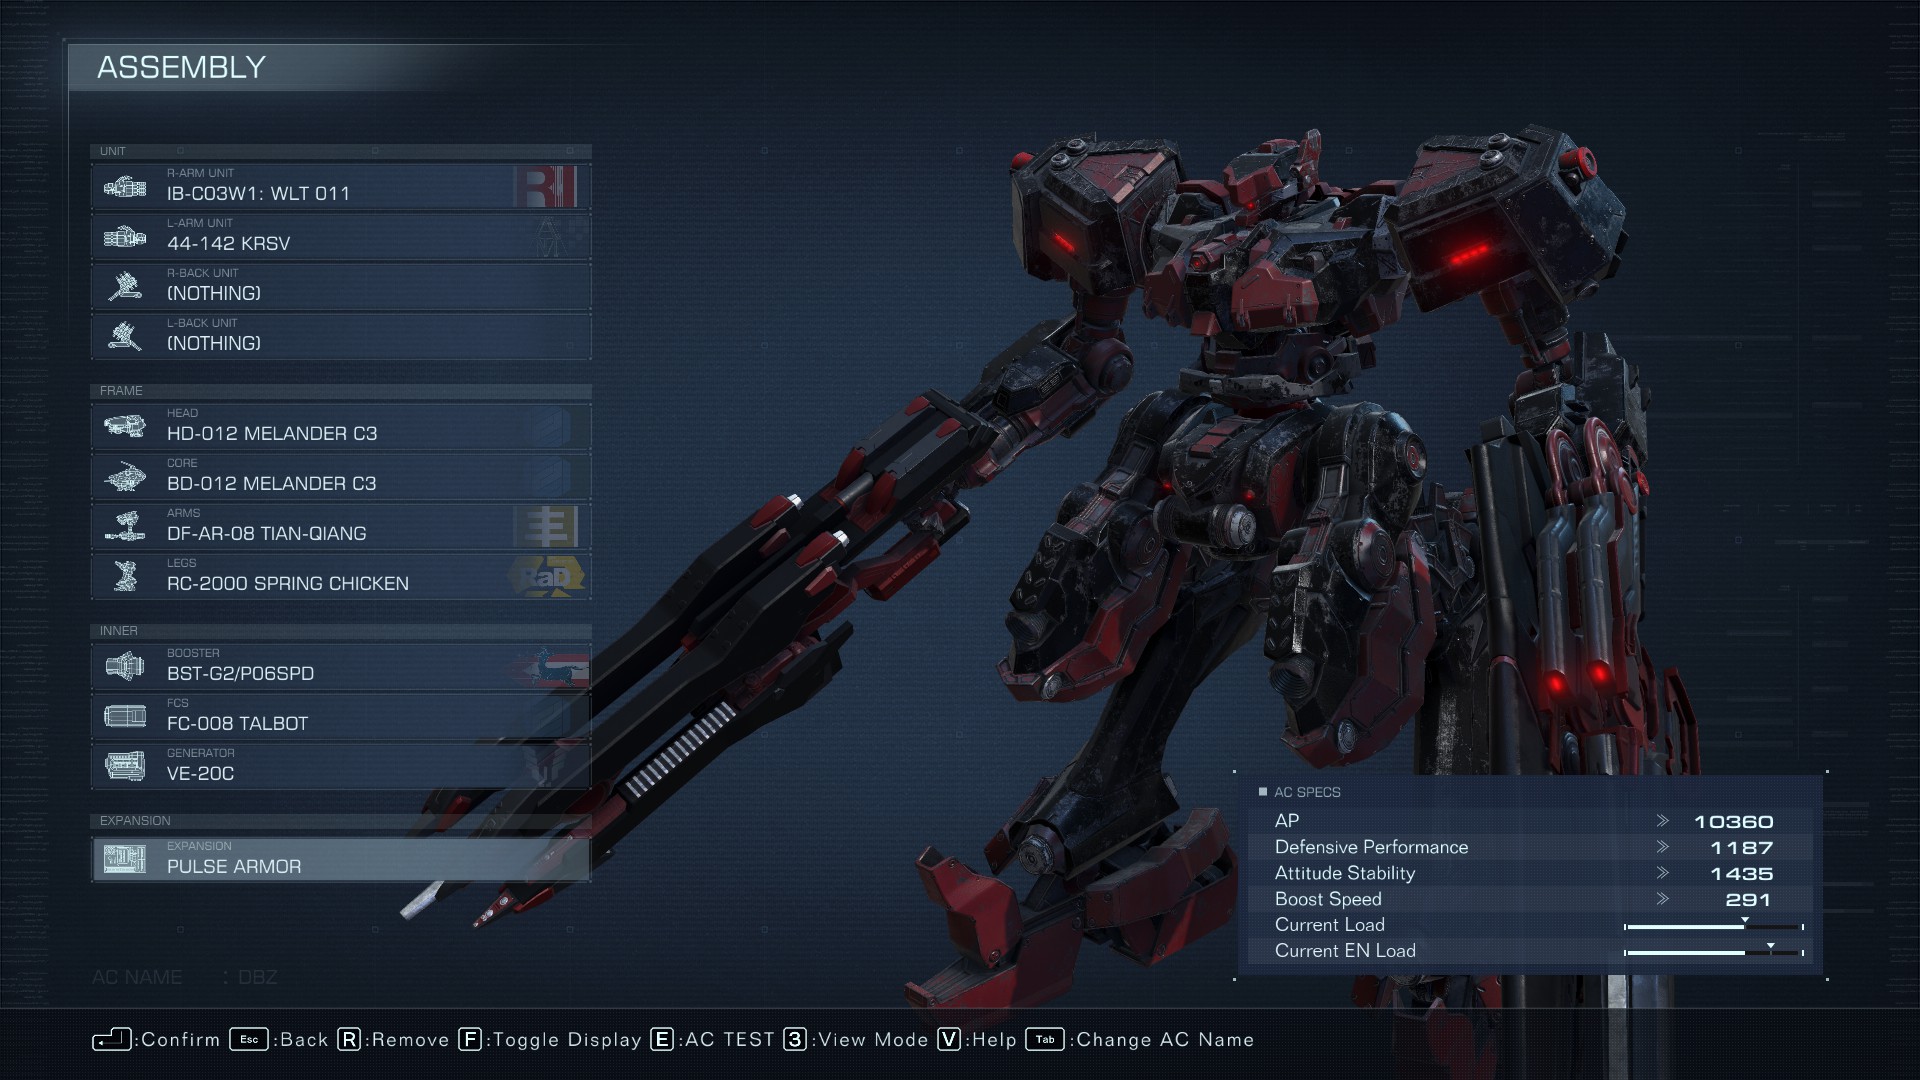
#10 Anime Protagonist
Fulfill your dreams of wielding DBZ-level beams with the “Anime Protagonist” build. This configuration offers a choice between the Coral Rifle for unleashing powerful energy beams or the Karasawa for devastating energy attacks (though not as potent as the six-cannon broadside). These weapons require precise timing and diligent charge management.
Expanding upon earlier advice, I recommend charging the Karasawa to its third stage while charging the Coral Rifle only to its second stage. While the Coral Rifle can be charged to stage three, I advise doing so only against colossal adversaries that cannot easily evade its wrath.
That's everything we are sharing today for this Armored Core VI: Fires Of Rubicon guide. This guide was originally created and written by Malnux the Restless. In case we fail to update this guide, you can find the latest update by following this link.
