- Title: The Guild 3
- Release Date:
- Developer:
- Publisher:
Information about The Guild 3 is still incomplete. Please help us fill the details of the game using this contact form.
This guide will be showing you how to easily make money in The Guild 3 using a single character, low capital, and doing some regular quest.
Preparation
Unlocking trade ports
- Send surplus family members to Trade Missions (costing less than 3k gold each) until you exhaust the available ports. This action will unlock multiple markets in the Port building.
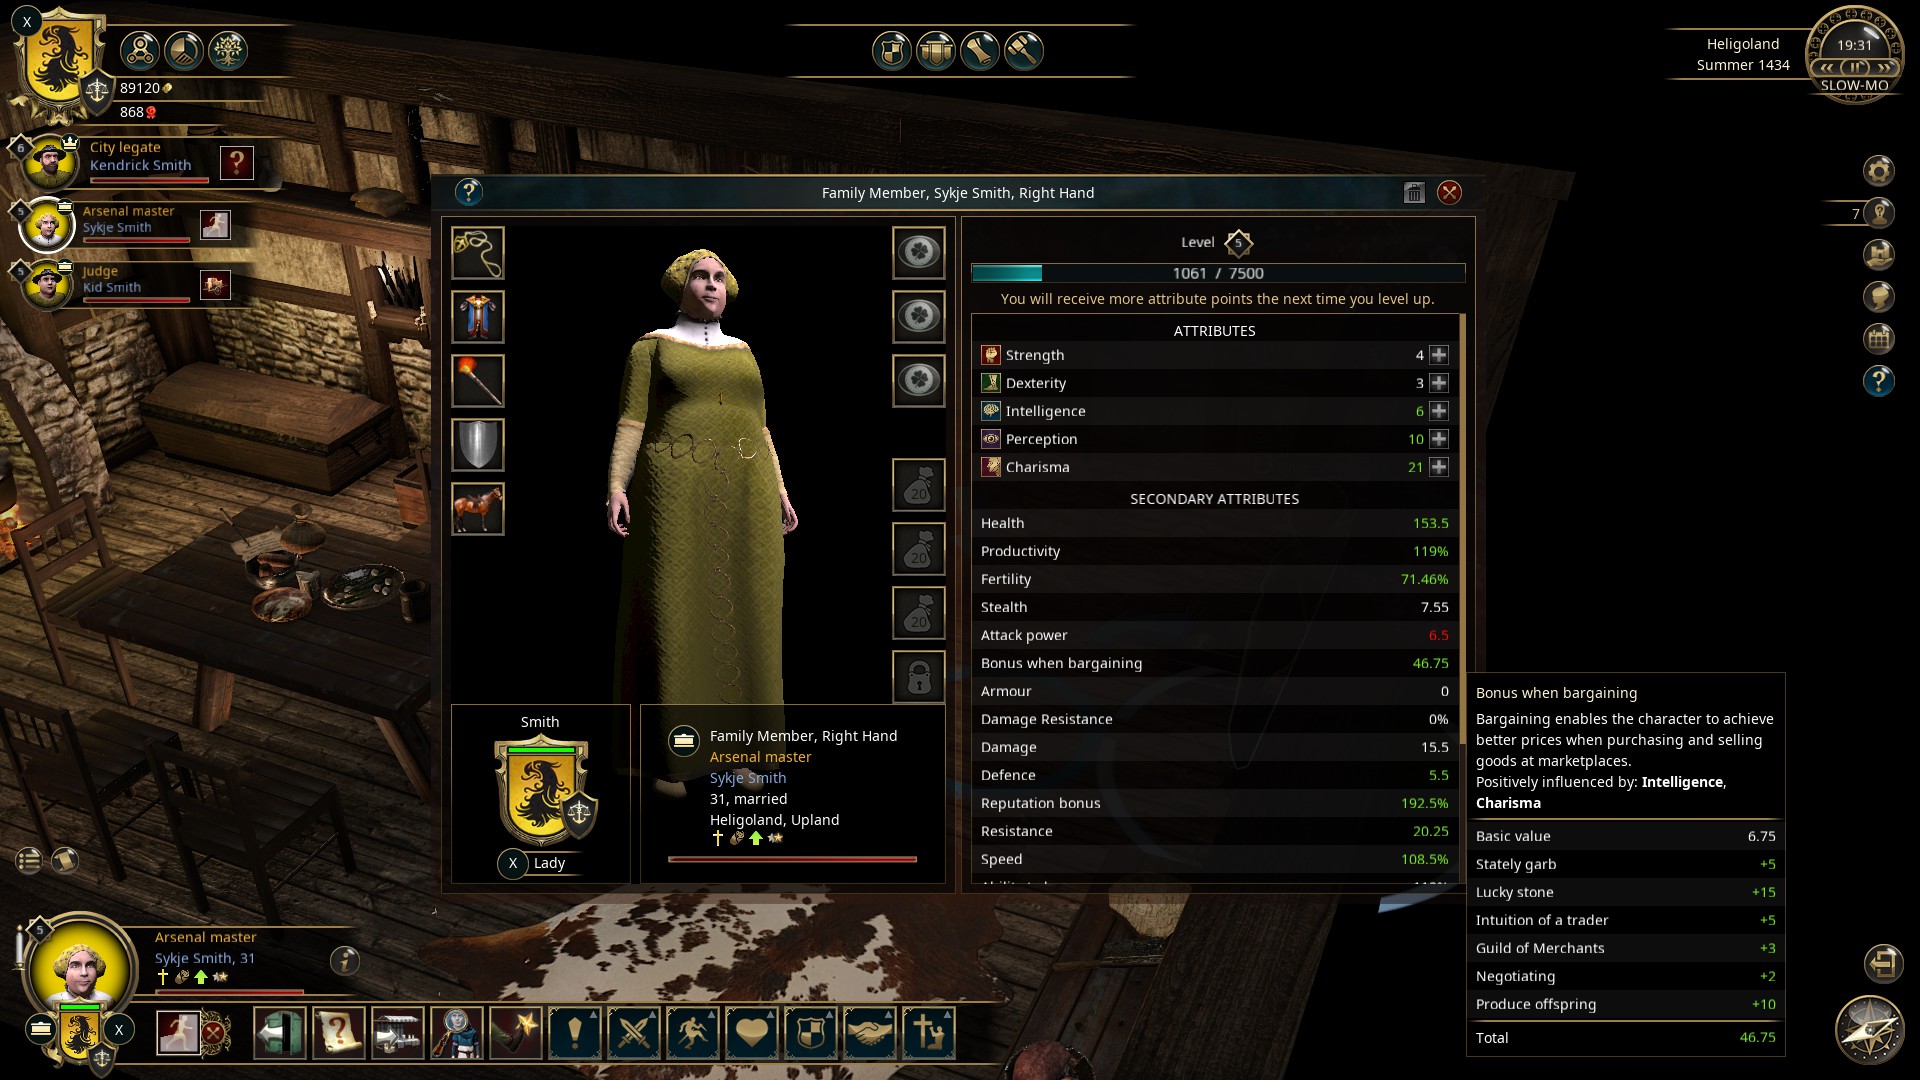
Trading character
- Dedicate a specific character to trading and maximize their Bonus to Bargaining.
- Consider using a pregnant woman character, as they receive a significant +10 bonus to bargaining.
- Invest skill points in Charisma to enhance your character’s bargaining capabilities.
- Train Charisma, which provides a temporary +1 bonus (note that this bonus doesn’t stack with itself).
- Equip your trading character with Free Citizen Clothes for a modest Charisma boost or Stately Garb for raw charisma (though slightly weaker) or Nobleman Clothes for a more potent but costly option.
- Utilize items like Money Bags, Slide Rules, Lucky Stones, or any items that grant bonuses to bargaining.
- If feasible, invest in social influence upgrades, provided you have the necessary titles and influence.
Always conduct buying and selling transactions with your dedicated trading character. You’ll notice that they are offered better prices, even before purchasing or selling items. Ensure transactions are made directly from and to their inventory, not via henchmen.
Example:
Trade opportunity
Keep an eye out for the “Long-distance trade opportunity” quest. This quest will specify a port that either sells goods or buys them at a favorable price. Send your trader character to that port to capitalize on the opportunity.
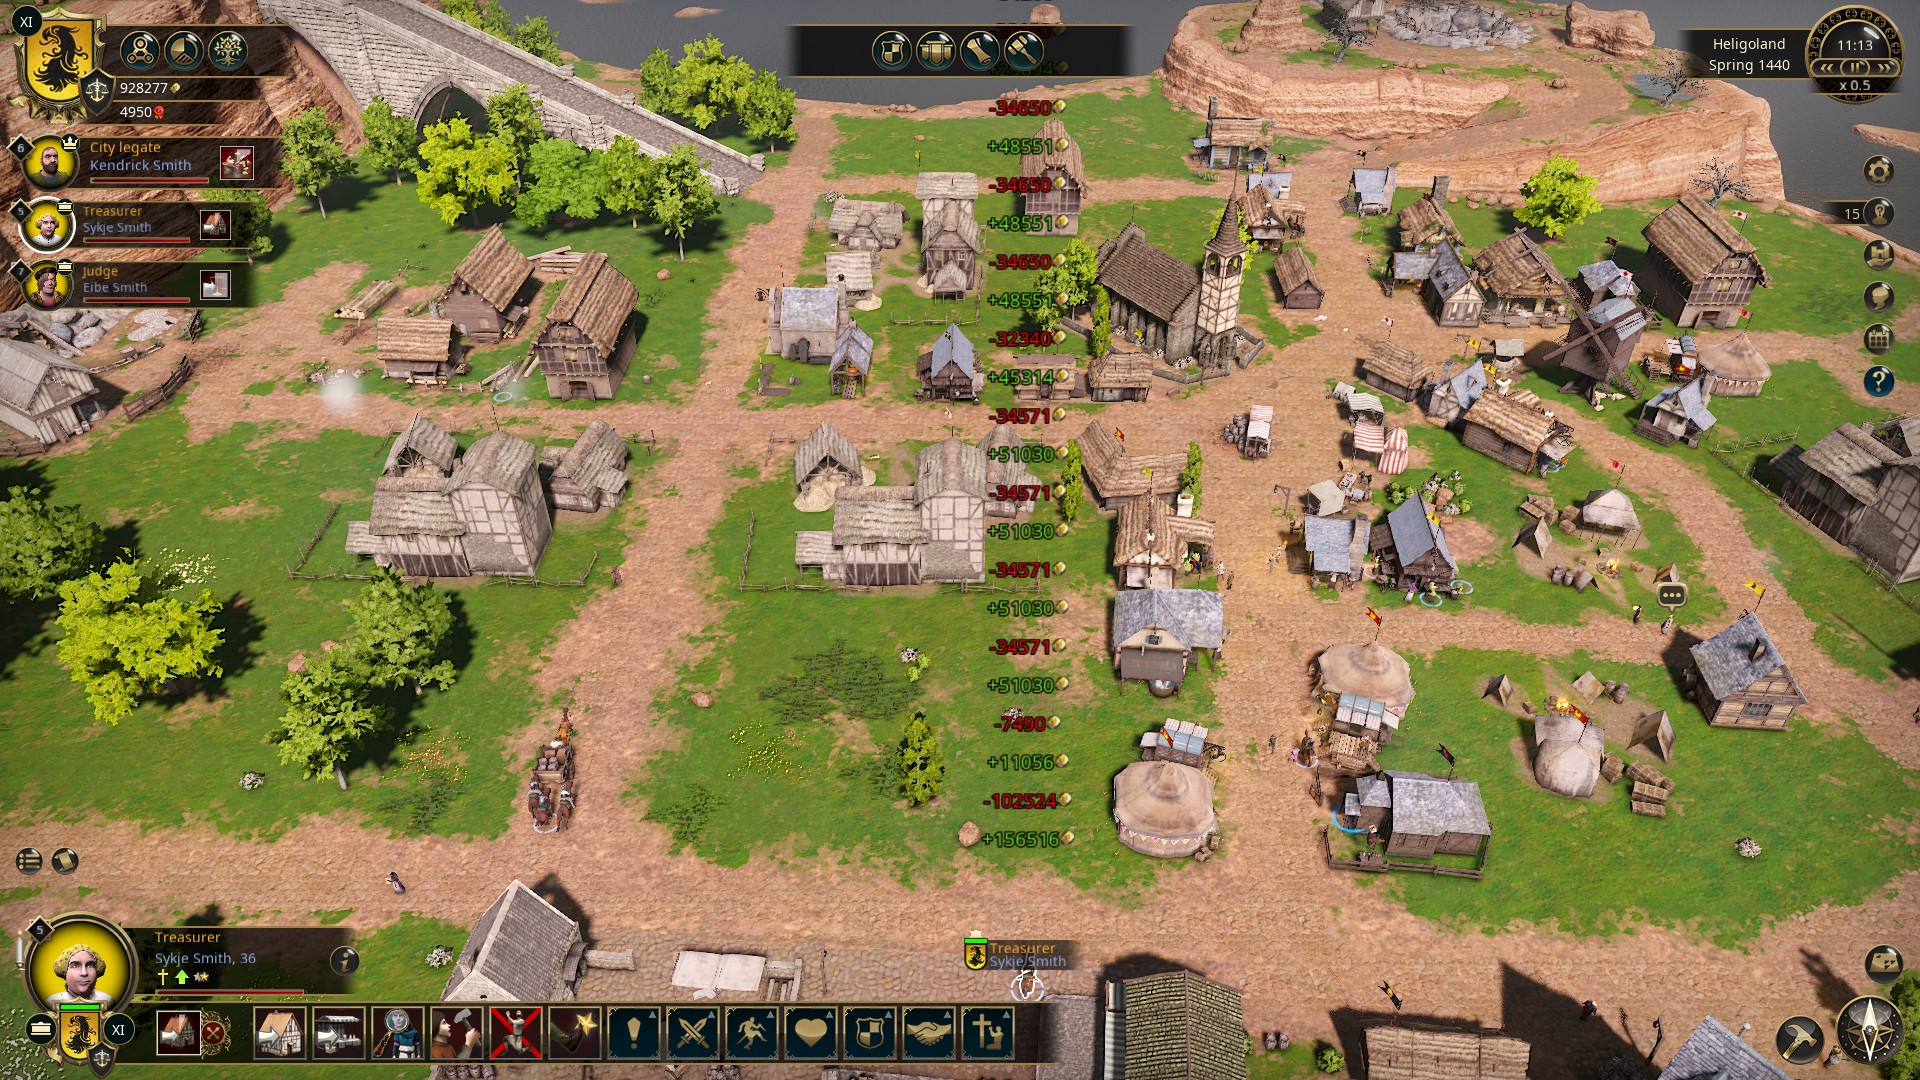
The Heist Trade
To maximize your profits during “The Heist Trade” quest event with your trader character at a port, follow these steps:
Adjust Time Settings:
- Optionally, set the game to slow motion. This will ensure that time doesn’t pass too quickly, allowing you to make the most of the trading opportunities.
Select the Quest Category:
- Choose the quest category that currently offers better prices, whether it’s Trinkets or Luxury items. This selection will depend on market conditions at the time.
Market Exploration:
- Switch between different markets within the port and look for items with a good buy price in one market and a favorable sell price in another market.
Buy and Sell Strategically:
- Purchase items at a lower price in the market where they are cheaper.
- Immediately sell these items to the market where they offer a better buying price.
- This quick buying and selling process allows you to make a profit.
Stock Refresh:
- If you sell all your items quickly, wait a bit, and the stocks in the markets will partially refresh. This can be advantageous for continuing your trading activities.
Prioritize Cheaper Items:
- Start by prioritizing cheaper items so you can buy a sufficient quantity of them when starting.
- Then, consider the price difference when trading costly items to avoid damaging their market value by trading in small quantities. Slow motion can be particularly helpful in this regard.
Alternate Selling to Markets:
- As an alternative strategy, consider selling to a market if it offers a good price. This approach can affect market dynamics, making certain items extremely cheap, which you can then purchase and sell elsewhere for a profit.
Leverage Bargaining Bonus:
- If your trading character has a good Bonus to Bargaining, you may even buy and sell at the same price and still make a profit due to their bargaining skills.
This is how the result should look like:
That's everything we are sharing today for this The Guild 3 guide. This guide was originally created and written by KubaFKubaF. In case we fail to update this guide, you can find the latest update by following this link.