- Title: SPACE ACCIDENT
- Release Date:
- Developer:
- Publisher:
Information about SPACE ACCIDENT is still incomplete. Please help us fill the details of the game using this contact form.
This guide is intended to provide assistance via a set of progressive hints to help you progress if you get stuck – it is not a detailed walkthrough. The point here is to help you solve the puzzles yourself – after all, that is likely why you bought the game!
Thanks again to the developers – hoping for more just like Space Accident perhaps in an outpost or space station, or even an expanded version of Space Accident. I happen to love button/cube/pressure plate/laser redirection puzzle adventure games!
Settings and Gameplay Mechanics Notes
No spoilers here – just some hopefully helpful setup and gameplay mechanics info:
SETTINGSThe settings can only be adjusted after you start and are in a game. Once you have a game going, press the escape (ESC) key to enter setup mode.
The action key for interacting with buttons and carrying objects is mapped to F by default which can be awkward. Recommend changing to left mouse button or something you don’t mind holding while you walk with an object.
You may wish to adjust the mouse sensitivity downward to prevent visual whiplash and the field of view upward to be able to provide more perspective when viewing rooms where you will have many laser redirection spheres and beams crisscrossing.
THERE ARE NO MANUAL SAVES – game saves only occur when you finish an area/level. This can be frustrating in areas where there is a lot of setup required or many steps to accomplish a goal and you have to step away from the game – you will need to start over from the beginning of the level.
THERE IS ONLY ONE GAME SAVE STREAM – you can either continue a current game from where you left it or restart from the beginning – you cannot choose to start again at area 2 if you have progressed to area 4, and only one person can play at a time. If you have two players in the house, one will need to finish before the other can start a game.
NO RUNNING ALLOWED – you can move only at one speed but it is a good pace – if you press the jump key while walking, you will jump a fair distance. File that away for future reference…
BUTTONS – there is no mouse aiming reticle (red dot, cross, etc.) so you need to get close to a button and press the action key until it responds. Some buttons need to be activated – they will look dark until they are.BARRIER FORCE FIELD TYPES – blue barrier fields prohibit personnel (you) from passing through, but objects and lasers can; yellow prohibits lasers from passing but objects and personnel can; and green prohibits objects from passing but lasers and personnel can.
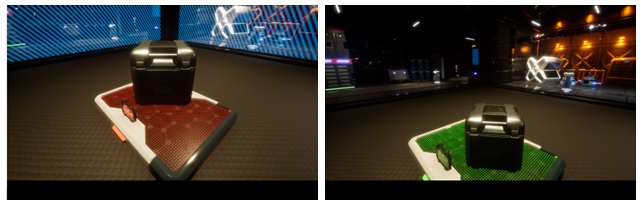
PRACTICE PLACING/ROTATING THE LASER REDIRECTION SPHERES – as mentioned in the guidance note when you first encounter the laser redirection spheres, they are rotated via the mouse scroll wheel (if you don’t have one on your mouse, this is going to be an issue). Once you encounter the spheres in the first area, you will note they are enclosed in a framework – this framework can block the beam from entering the sphere – my advice is to practice placing and rotating them.
There is another interesting attribute that may be useful that I will defer for the moment.
NOTE ON STEERING THE SPHERES – if two spheres are close to each other and you are close to both of them, even if you are pointed at only one sphere, both spheres will rotate with scroll wheel inputs which can be an issue – just move yourself so you are close to only one sphere to move only the one you want.
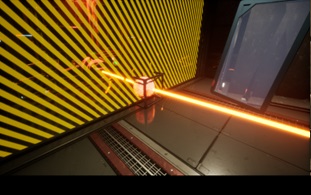
AREA 1 – ESCAPE THE STORAGE ROOM WHERE YOU HAVE BEEN IMPRISONED
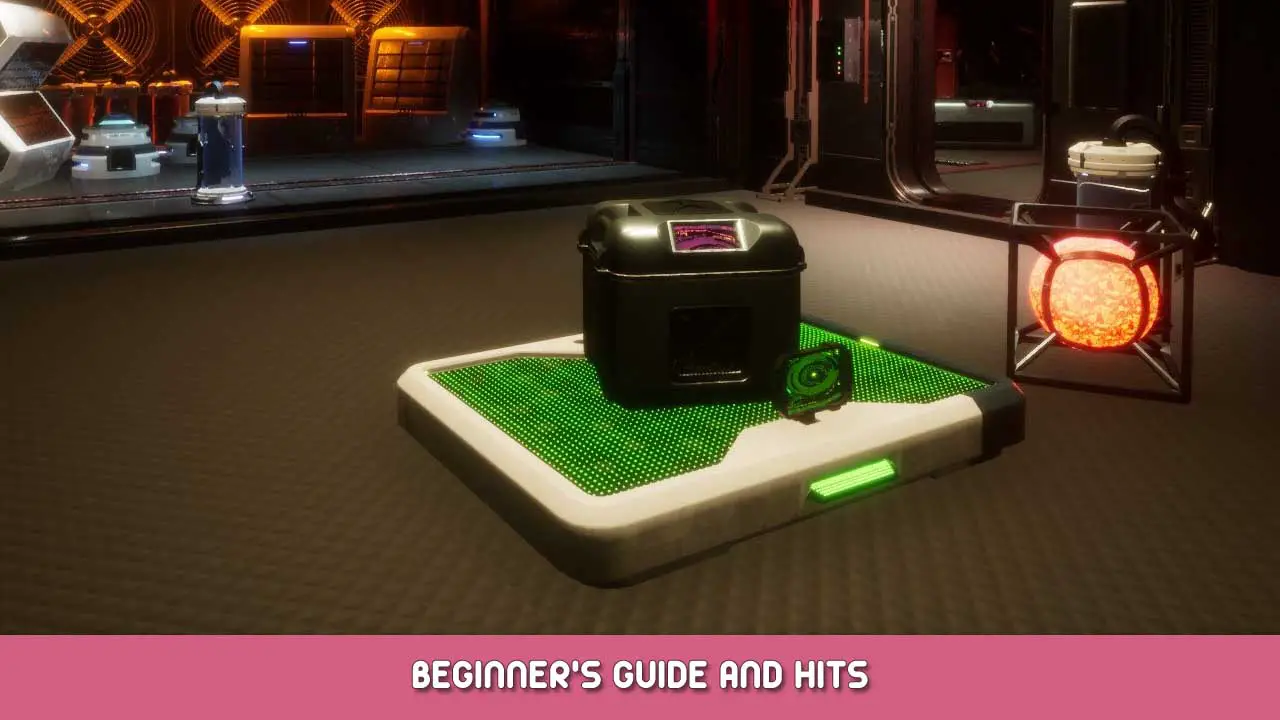
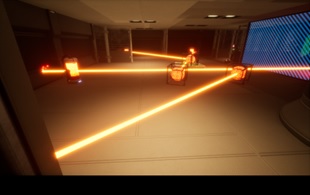
In the first area, your mission is to get past the blue personnel barrier field protecting a passageway tunnel. This first area is where you will become familiar with the physics of the game – pressure plate switches like Portal or Talos Principle or ReThink, switches, lasers and laser redirector spheres (hereafter just spheres). You will also encounter the various barrier fields – blue prohibits personnel (you) from passing, but objects and lasers can; yellow prohibits lasers from passing but objects and personnel can; and green prohibits objects from passing but lasers and personnel can.
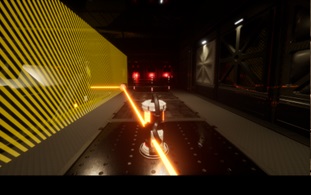
NOT SURE WHAT TO DO NEXT?To open the blue barrier field to the passageway, turn on the three energy lamp cylinders in order to activate the switch to change the field protecting the second laser – pass through yellow laser barrier field, press the switch to activate second laser, then back out and deactivate the outer switch to change the yellow barrier field back to blue. You will see a laser activated panel protected by a yellow anti-laser barrier (and you at some point will be told if you can hit it with a laser, you can go further). Hit it with a laser and proceed through the passageway.HOW DO I ACTIVATE THE LASER ACTIVATED SWITCH PROTECTED BY THE YELLOW LASER BARRIER FIELD?Go back to the room with the first laser and turn it off in order to turn off the yellow laser barrier field protecting the panel so you can aim the second, higher elevation laser at it. First move at least one laser redirection cube to the main area to use in redirecting the second beam to the panel.
You don’t have to put the sphere on a cube to position it – you can just hold it.
AREA 2 – CREW QUARTERS, LASER LAMP POST ROOMS, AND BLOCKED PASSAGEWAYS
Proceed down the tunnels and pass through the green anti-object barrier field (which keeps you from bringing the cube or redirection spheres from the first area into the new area). You find yourself in a room with a pressure plate switch that changes a personnel barrier into an object barrier. So you don’t need me to tell you that we need to find an object to put on the plate.
WHERE IS AN OBJECT I CAN PLACE ON THE PLATE?
Under the cube, read the diary entry that advances the story a bit. “Andy my dear friend, I cannot take this anymore. It’s beyond my control. There’s one last chance. I’m going to do something terrible but we have to come back home. I hope you find this not before… Don’t get caught by the alarm! Get to the engines!
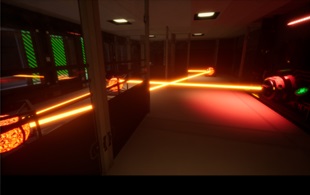
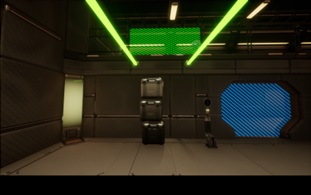
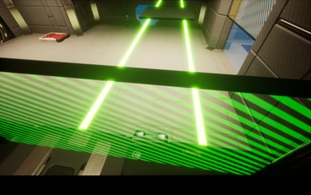
HOW DO I POSITION THE LASER SPHERES TO LIGHT THE LASER LAMP POSTS AND OPEN THE LOCKED DOORWAY?So this is arguably the main fun of the game: positioning the lasers! So give it a try – you can do it!!HINT 1 – So positioning these spheres can be tricky. Remember the ability to split the beam. Next is to position the spheres to activate all the laser lamp cylinders to open the locked door. You will need to make use of the beam splitting technique.
HINT 2 – One possible solution.
OK, I AM IN THE NEXT ROOM BUT AM STUMPED – HOW DO I OPEN THE SLIDING DOOR PROTECTED BY THE GREEN BARRIER FIELD?
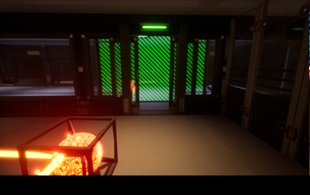
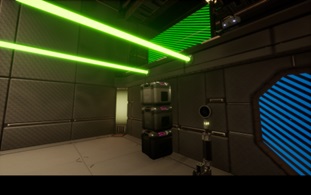
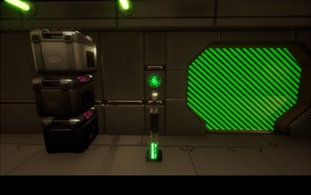
HINT 1 – The pressure plate switch and nearby laser lamp post can keep the door open from this side. You can find what you need on this side to do that. Once you do, you can harvest spheres from the previous room that you need to activate the laser lamp posts to open the sliding door.
SOLUTION – Here’s a positioning guide:
I OPENED THE SLIDING DOOR BUT AM STUCK IN THE NEXT ROOM WITH THE PRESSURE PLATE – I NEED AN OBJECT TO PUT ON THE PRESSURE PLATE OUT HERE BUT THERE ISN’T ONE AND I CAN’T PASS OBJECTS THROUGH THE GREEN FIELD!HINT 1 – Explore the passageways beyond the room you are in with the pressure plate. Note the color of the barriers at the end of the passageways. What does that tell you?
HINT 2 – Can you think of a way to get an object to the other side of the blue barrier so that you can pull it through?
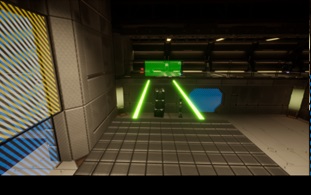
HINT 3 – Only the two laser lamp posts near the next door and the far room need to be turned on to open the sliding door protected by the green object barrier, so that means you can take the cube back through the laser lamp room and position it on the other side of the blue barrier field in the passageway for you to grab on the other side.
HINT 4 – Use one of the spheres to activate the pressure plate keeping the door to the laser lamp post room open (along with the laser lamp post nearest it). Carry the cube back through the previous rooms and position right beside the blue barrier field. Retrace your steps and use the spheres to open the sliding door protected by the green barrier and go into the passageway and pick up the cube and use it on the pressure plate, which will change the barrier field in one end of the passageway from blue to green, allowing you to proceed.
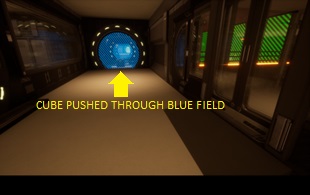
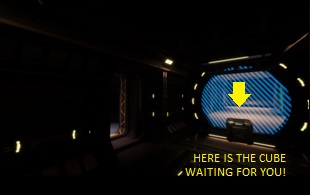 And here is the cube waiting for you so you can put it on the pressure plate and proceed…In the passageway you will find another diary entry but this one seems to be dated before the one in the crew stateroom – Day 181 – from happier times – 10 days before Thomas finds out the dark secret.
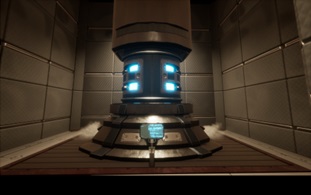
AREA 3 – REACTIVATING THE REACTOR TO POWER THE DRIVES
Explore where you can and see what you can solve. You have access to the main bay, you see a cargo mover hovering atop guide beams, there is a pressure plate, some barrier fields on the right and left of the lower bay (from perspective of looking at the reactor), a blue and yellow barrier field in front of the reactor, and passageways to the upper right and left levels, but only the upper right permits entry, and here you will find the control panel for the cargo mover.
CAN’T FIND AN OBJECT TO PUT ON THE PRESSURE PLATE IN THE MAIN BAY
HINT 1 – Are you sure? Take a close look at what is just beyond the blue barrier blocking the entrance to the right side (facing the reactor) upper passageway.
HINT 2 – There is a cube within reach just beyond the blue barrier – blue stops people but not objects. Once done you can activate the pressure plate to activate the barrier field switch and find some cubes to allow you to progress.
HOW DO I CROSS TO THE OTHER UPPER PASSAGEWAY?
HINT 1 – There may be another way to do this but here’s my way – involves using the platform as a stepping stone to jump across the gap.
HINT 2 – Stack the three cubes you have on top of each other just under the gap in the upper railing on the right side (facing the reactor). Now go set the slider to 43%, then jump from the upper left side to the platform, then from the platform to the right side and you will land atop the cubes and be able to climb up. You need to be walking when hitting the jump key to get maximum distance, and wait until the last possible moment to jump.

 Once across, locate the sphere at the bottom of the stairs and put it on the pressure plate to activate the field change button for the right side lower barrier field.
At this point you should be able to pass cubes through to harvest the set of laser redirection spheres. Note that when you put a cube on the pressure plate inside the hallway, the right side blue barrier field turns off permitting access to the upper passageway and the laser switch is activated.
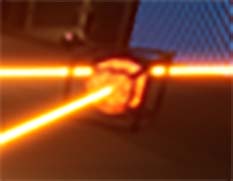
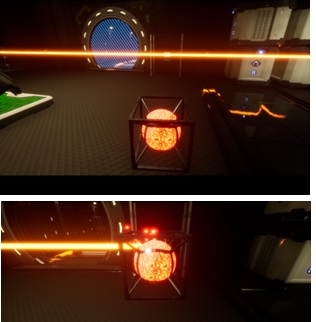
OK, I’VE POSITIONED THE SPHERES TO ACTIVATE THE LASER LAMP POSTS AND TURNED OFF THE BLUE FIELD BUT I DON’T KNOW HOW TO ACTIVATE THE REACTORHINT – You will kick yourself for this one if you need this hint – just press the red panel with your mouse and the reactor will energize.
So now just go back through the passageways and find a blue barrier is gone and you can now pass to the engine room…
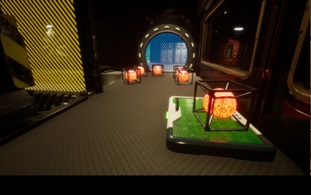
AREA 4 – ACTIVATING THE ENGINES IN THE ENGINE ROOM
Follow the passageways until you are in the anterooms to the engine room. Explore. You should have enough expertise to harvest the objects that can be found here.
HOW DO I COLLECT THE OBJECTS?HINT – You can use the cube from the first anteroom and pass it through the blue barrier to enable you to use the pressure plate in the sphere storage room to pass the laser redirection spheres out of the storage room. Move them all into the engine room.
HINT 2 – While there actually is a way to position the laser redirection spheres including the one on the pressure plate to activate all the laser lamp posts (I’ve done it), there is a MUCH easier way. Really think about the yellow field before you reveal more hints.
HINT 3 – Ok, you are stumped, fair enough. As I said: think about the yellow field. Laser beams can’t pass, but what can?
HINT 4 – What if you place the laser redirection sphere in the yellow laser barrier?
HINT 5 – Ok, here’s how you do it – place the sphere midway in the yellow barrier and rotate to activate the last laser lamp post:
AREA 5 – CHANGING COURSE BACK TO EARTH
Beautiful bridge rendering!
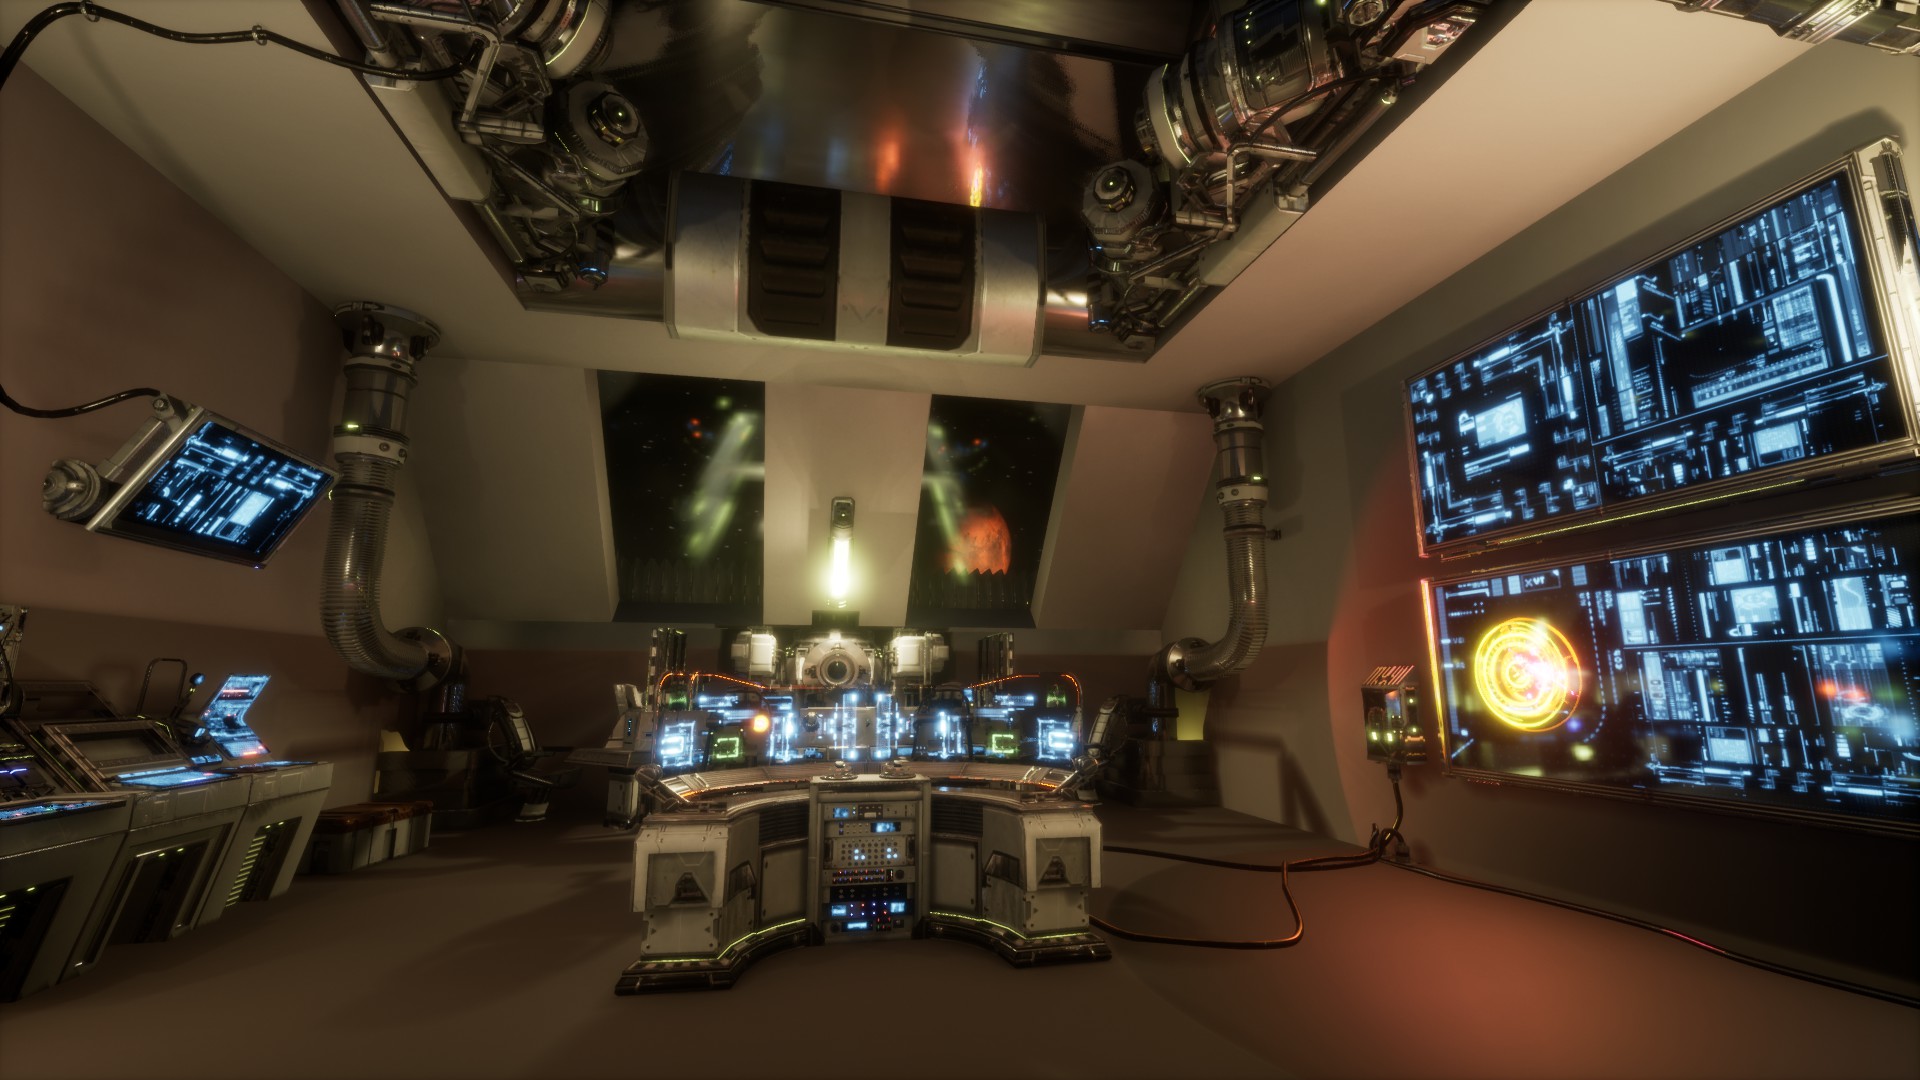
Ok, ready for the last challenge? This is truly a tough one…
NOT! Just press the button in the panel in front of you and the ship will change course to slingshot around Mars and back to Earth.
Not sure about you but this was kind of a let down after the complex puzzles that came before. But hopefully, there is an expanded edition or more games to come!
That's everything we are sharing today for this SPACE ACCIDENT guide. This guide was originally created and written by navycommander. In case we fail to update this guide, you can find the latest update by following this link.