Here’s a bunch of maps displaying the places you can play in the game. These maps come with details about the layouts, checkpoints, bosses, NPCs, and loot. Be careful, though—there are plenty of hints that might spoil some surprises in the game.
Disclaimer
Here are maps covering almost all the game areas, showing the world’s layout along with NPC, boss, and treasure locations. They’re pretty straightforward, but if you have questions, criticisms, or just want to share your thoughts, feel free to leave a comment below.
I made these maps last year when the game was only on Epic and at patch 1.0.1.0. They might be a bit outdated compared to the Steam version now. I plan to update them soon, including a map for the new Heart of Altarstone area. However, for now, these maps still offer lots of helpful information, as the 2.0 update didn’t change much in the existing areas.
Pardoner’s Vale
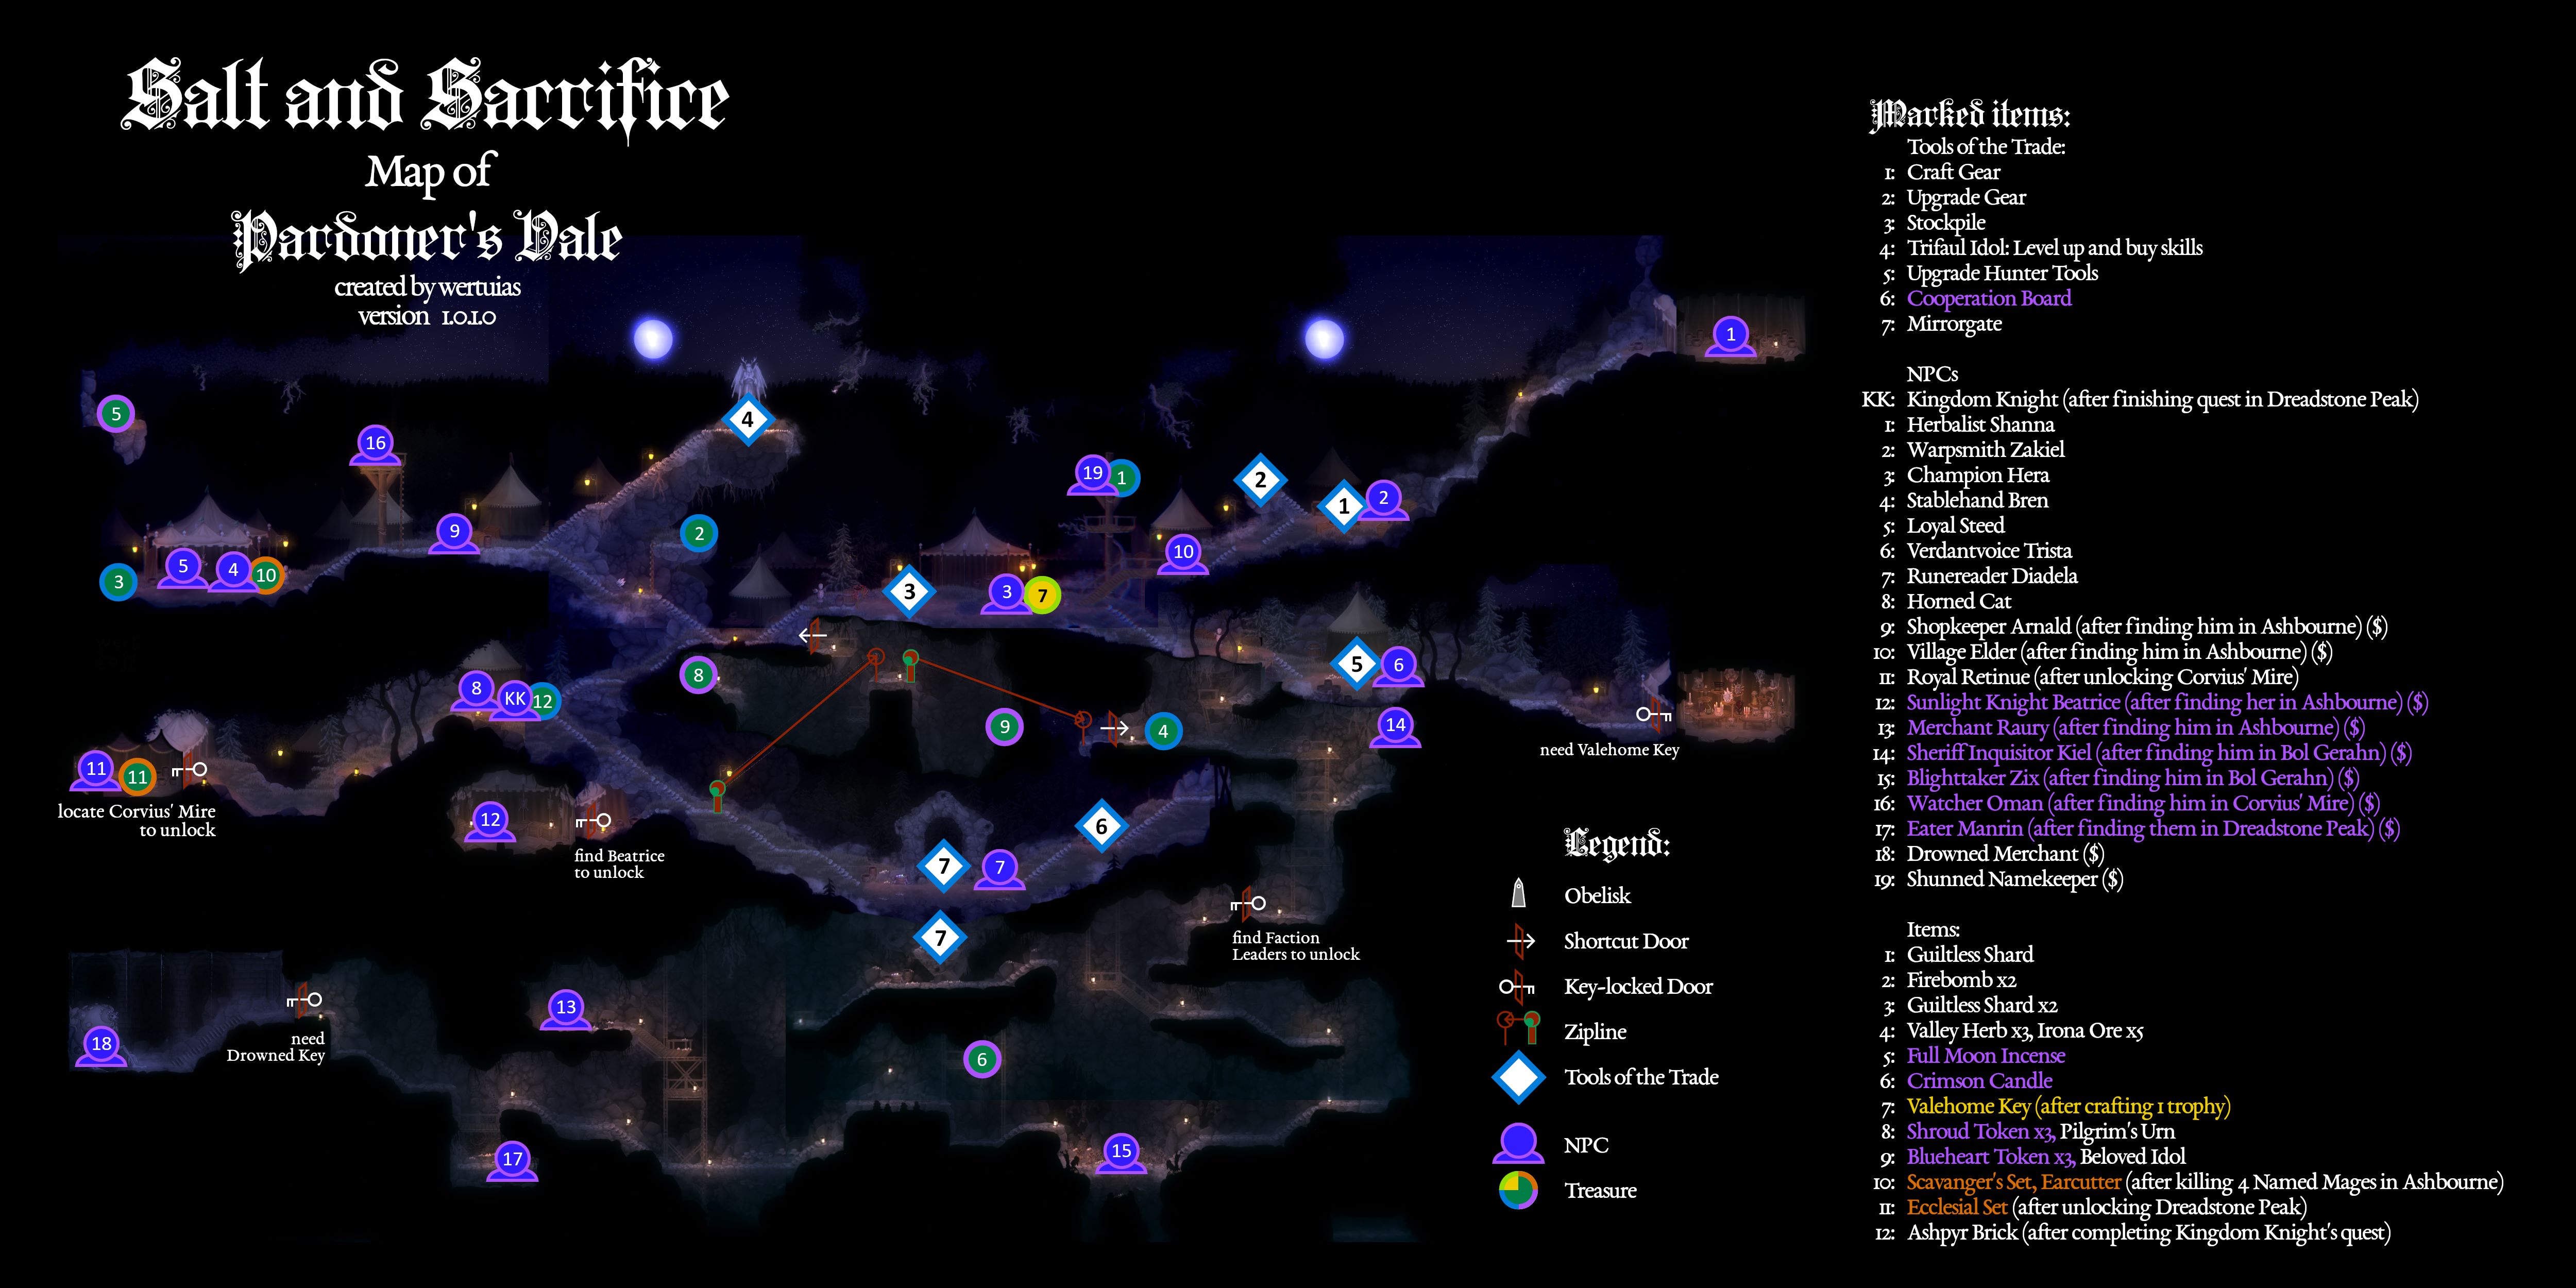
Pardoner’s Vale acts as the central hub in the game. You can come back here by using an Obelisk or by quitting to the main menu and loading back in. To travel to different worlds or start a specific Mage Hunt, use the Bucket O’ Runes next to the Mirrorgate.
Ashbourne Village
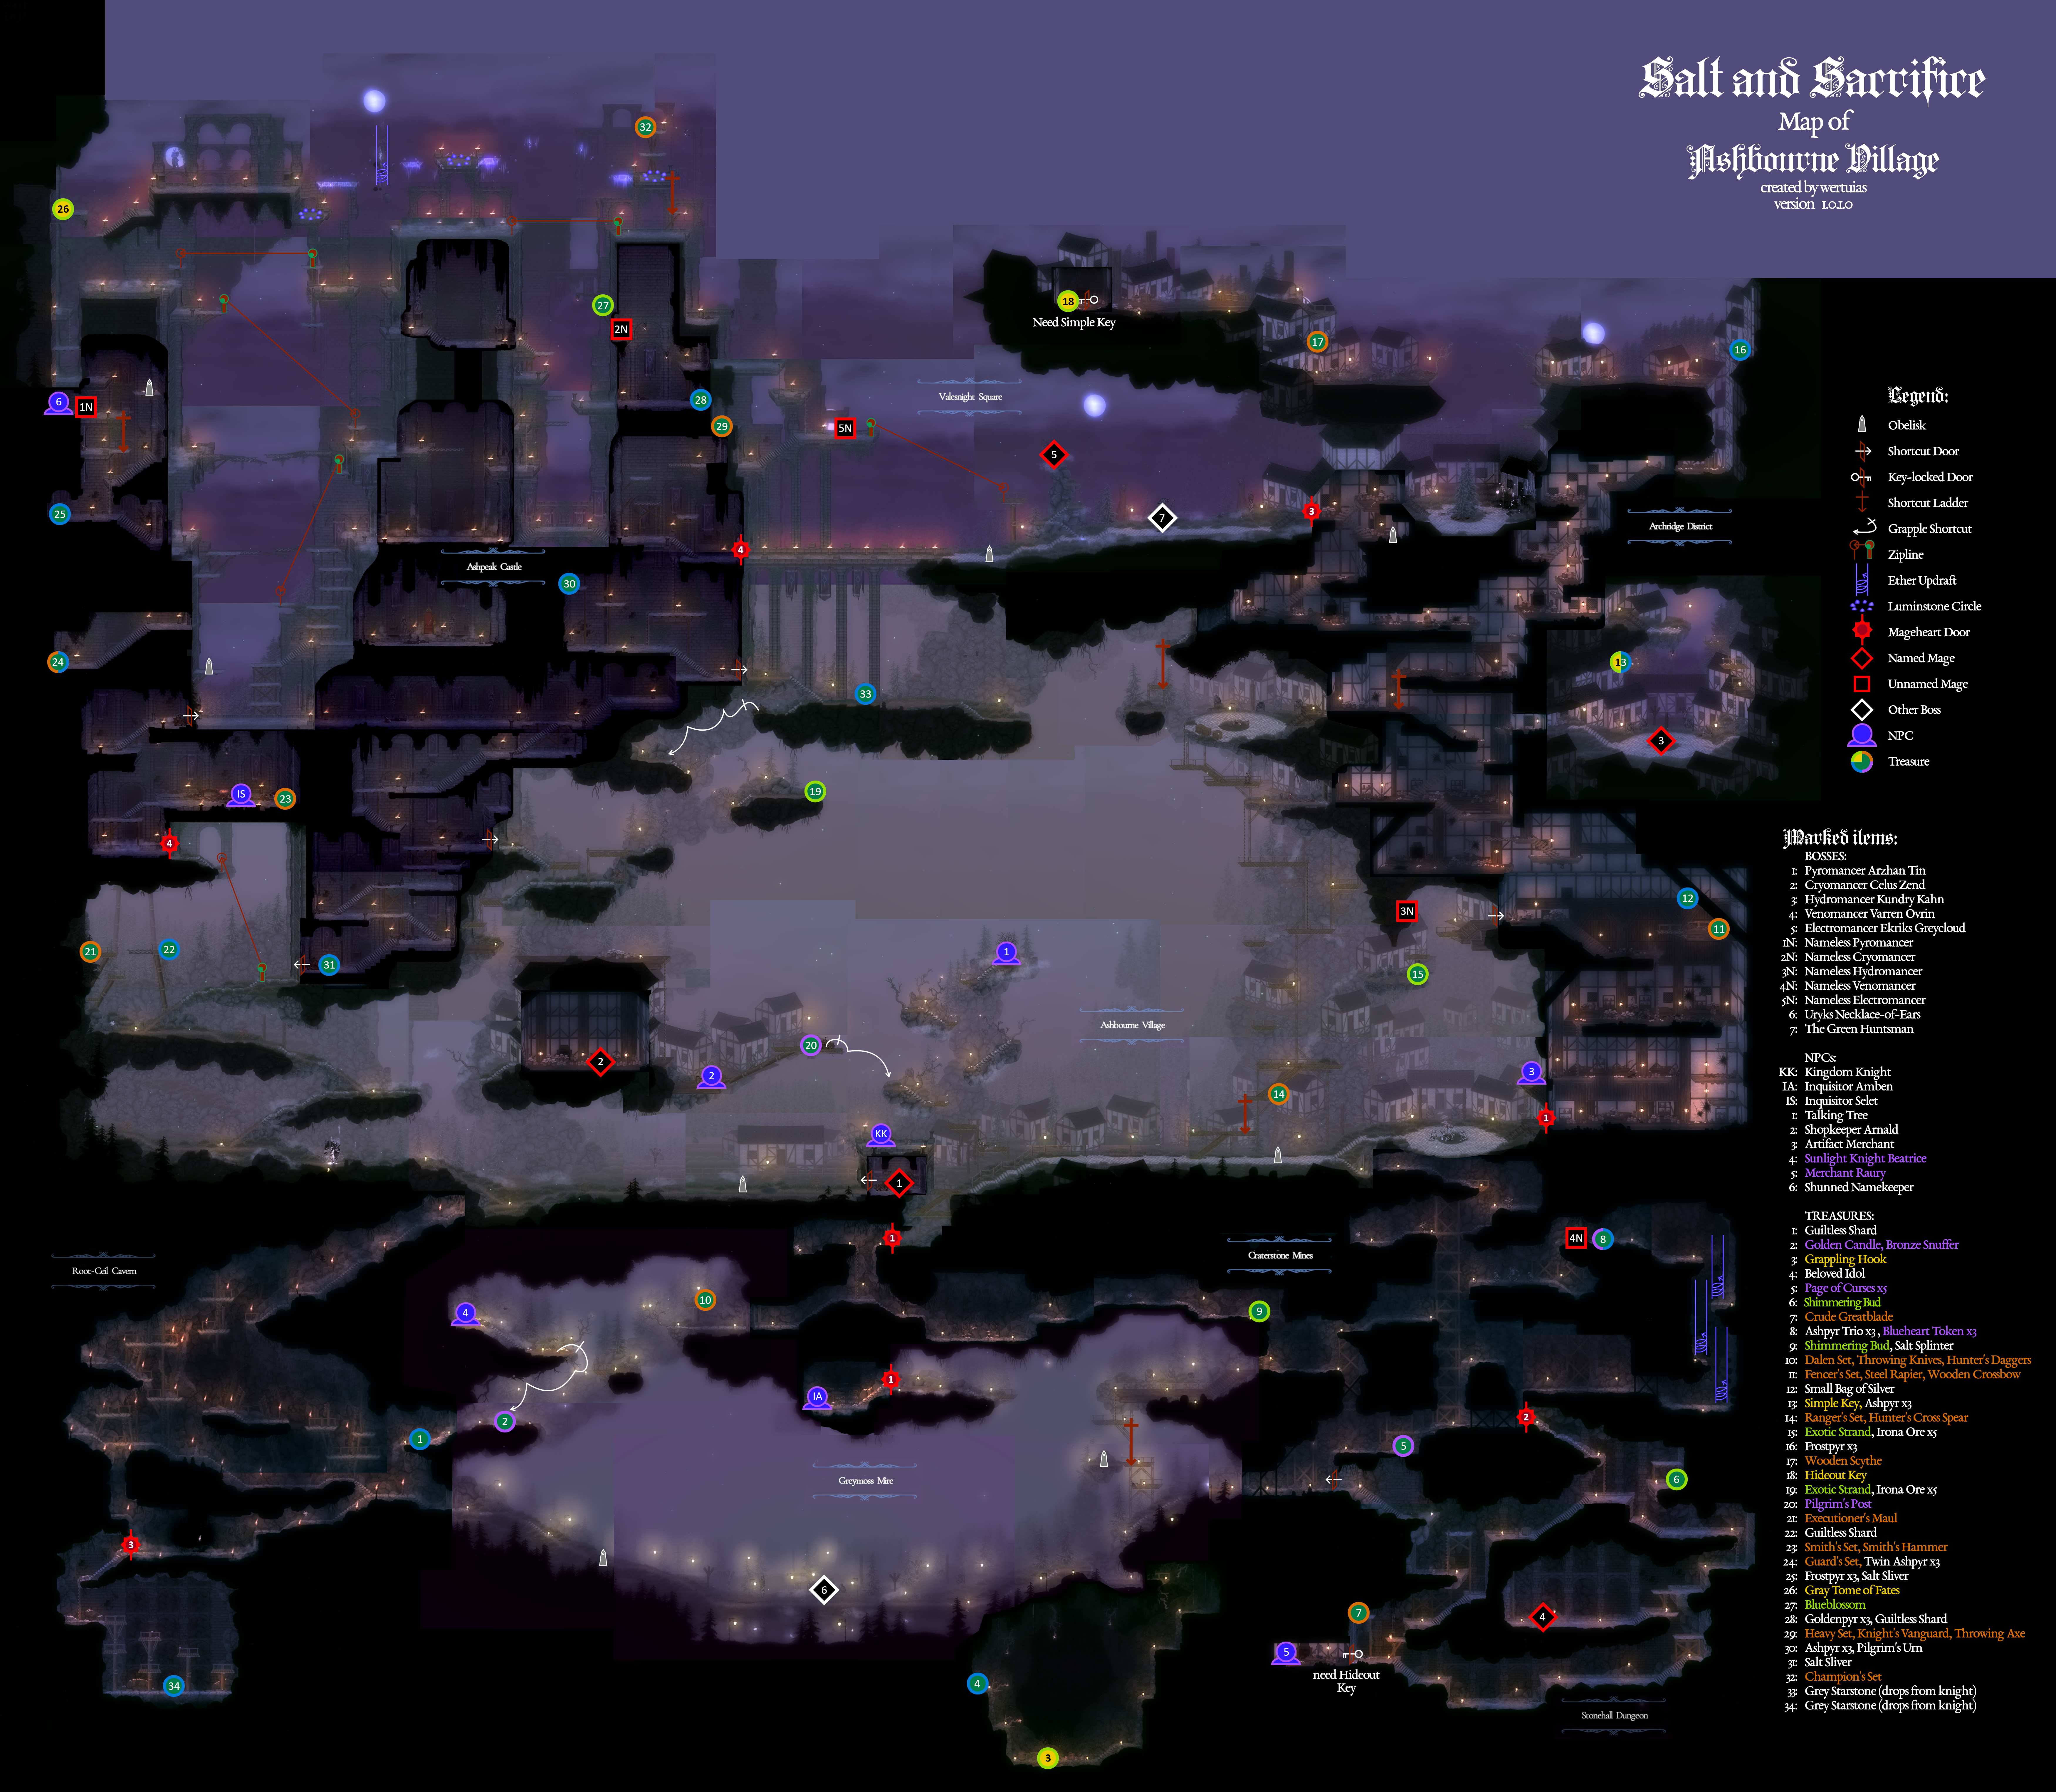
To finish this zone, you need to take down at least one Mage and then have a chat with the tree located at the center of the map. At the start, most of the zone is off-limits, but you should come back later once you’ve gathered more Inquisitor’s Tools.
Bol Gerahn
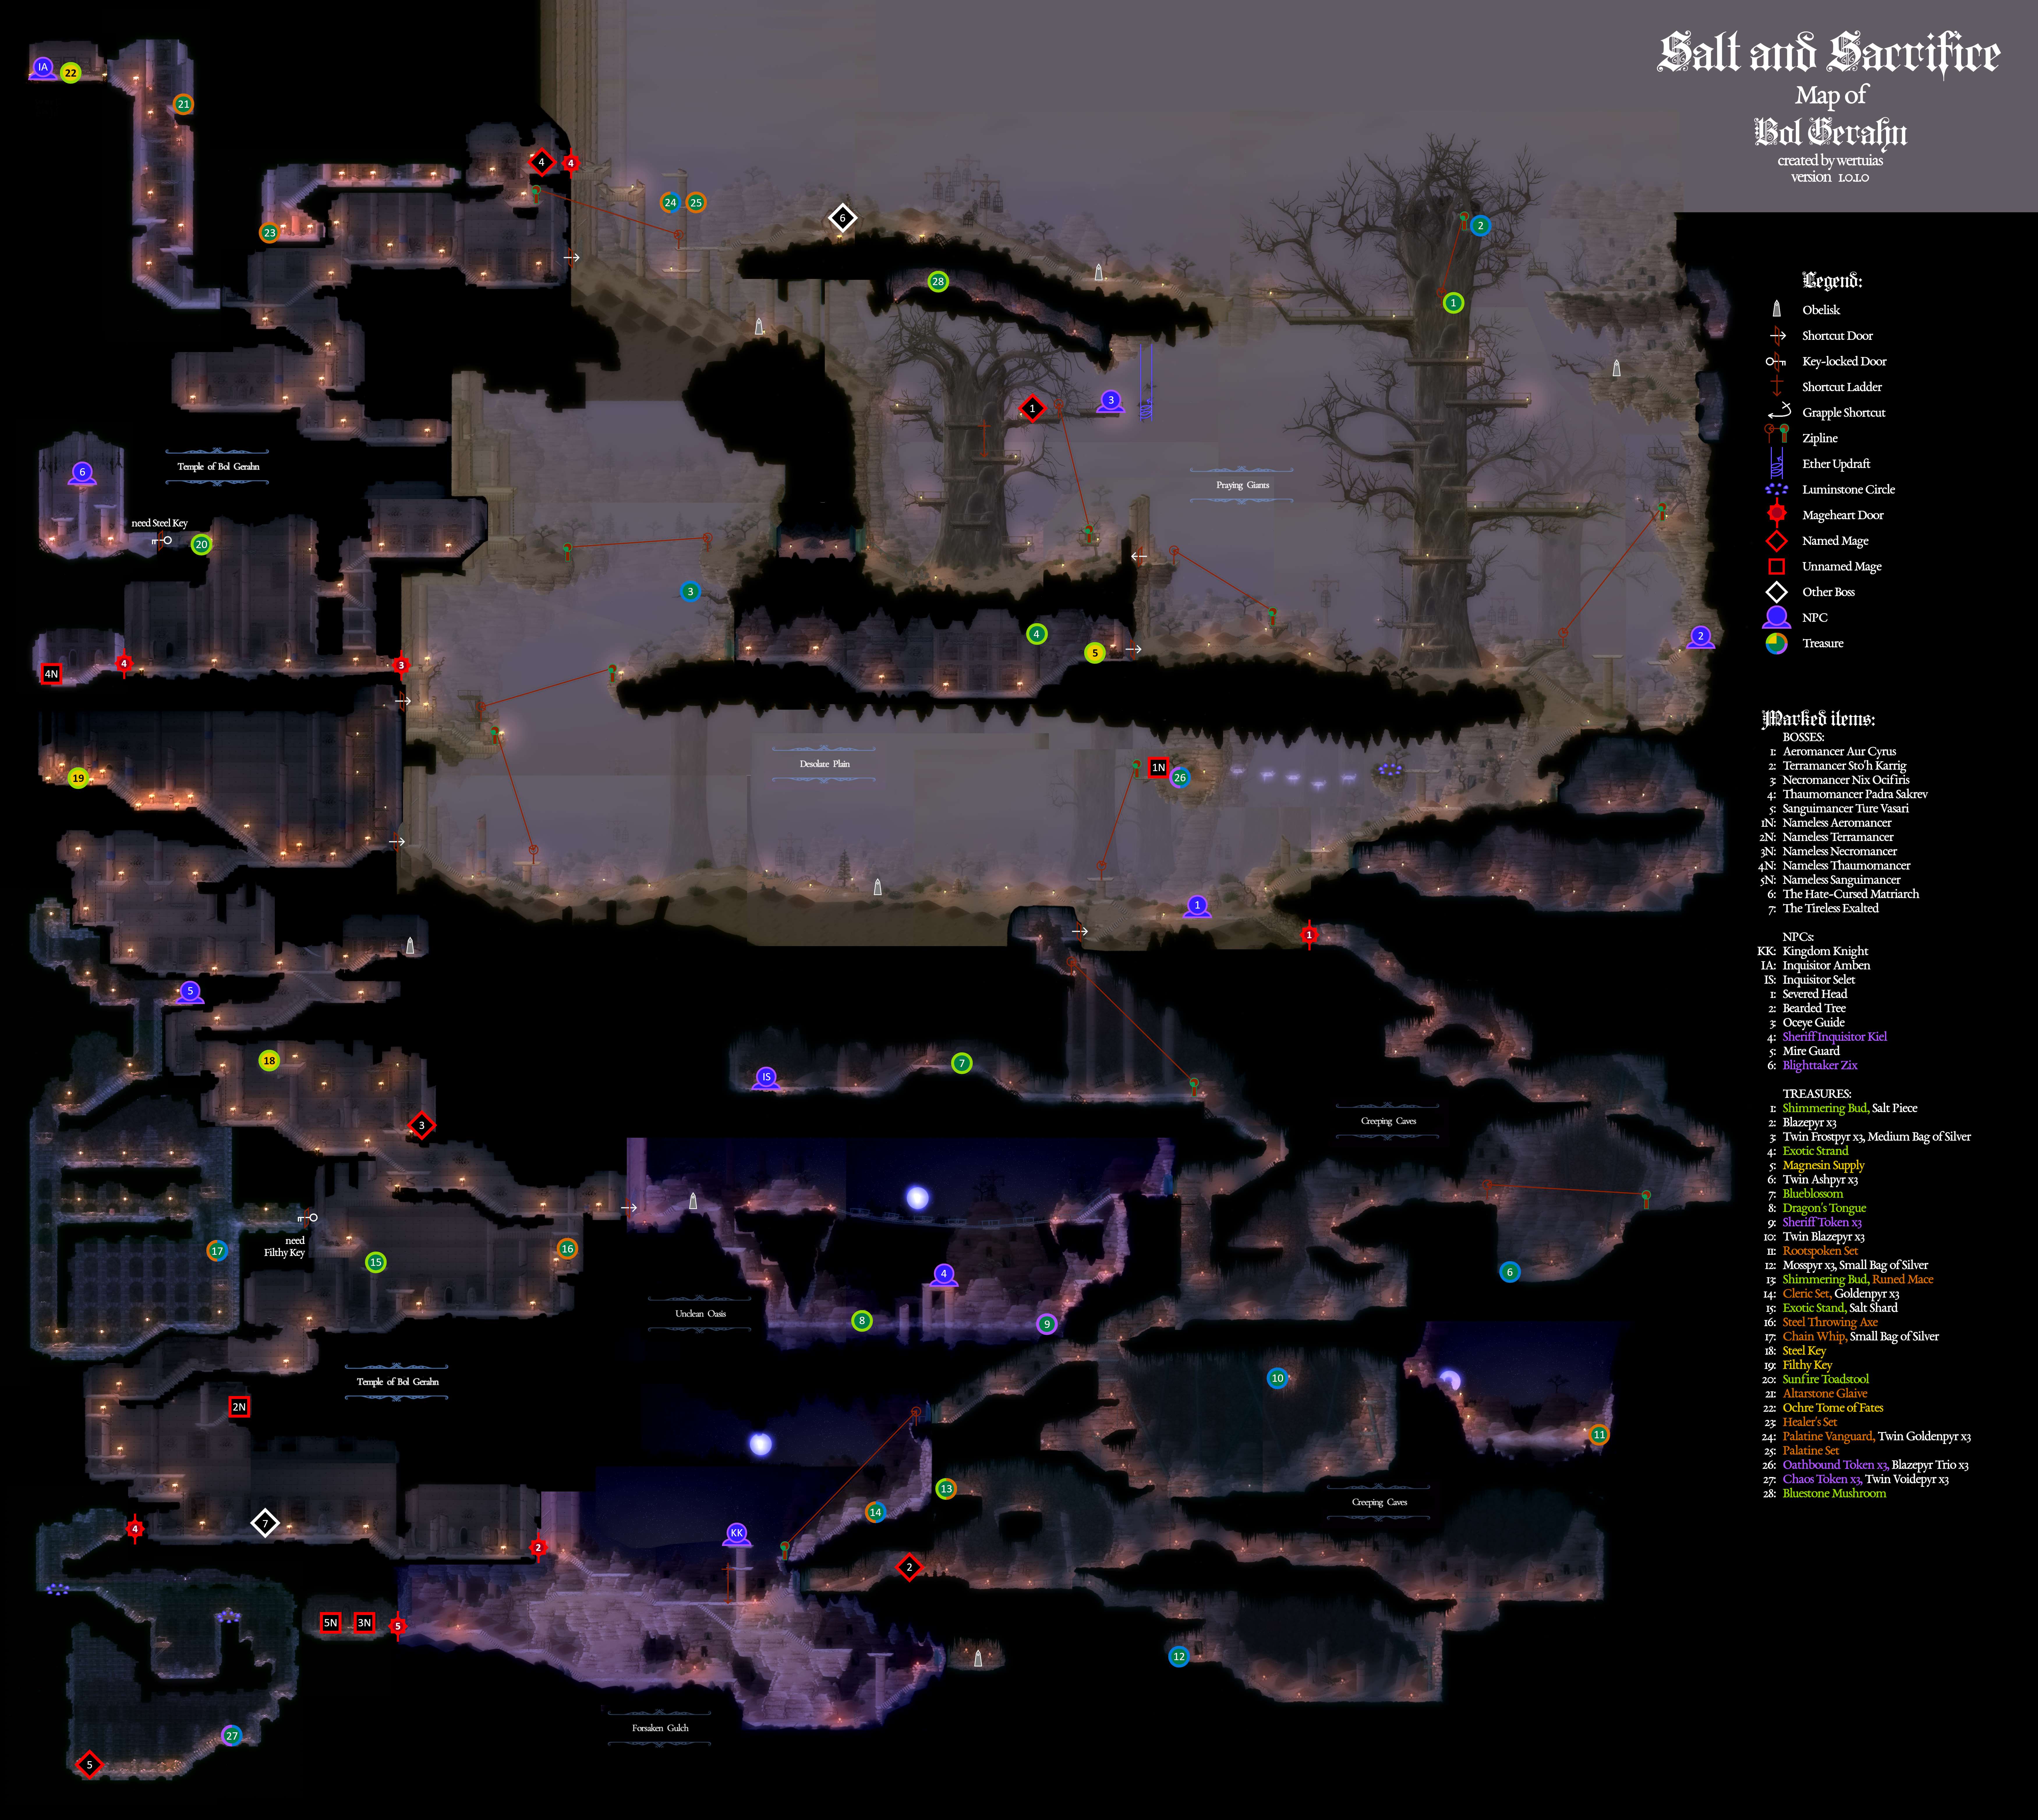
To complete this zone, have a chat with the Mire Guard found in the sewers on the left side of the map.
Corvius’ Mire
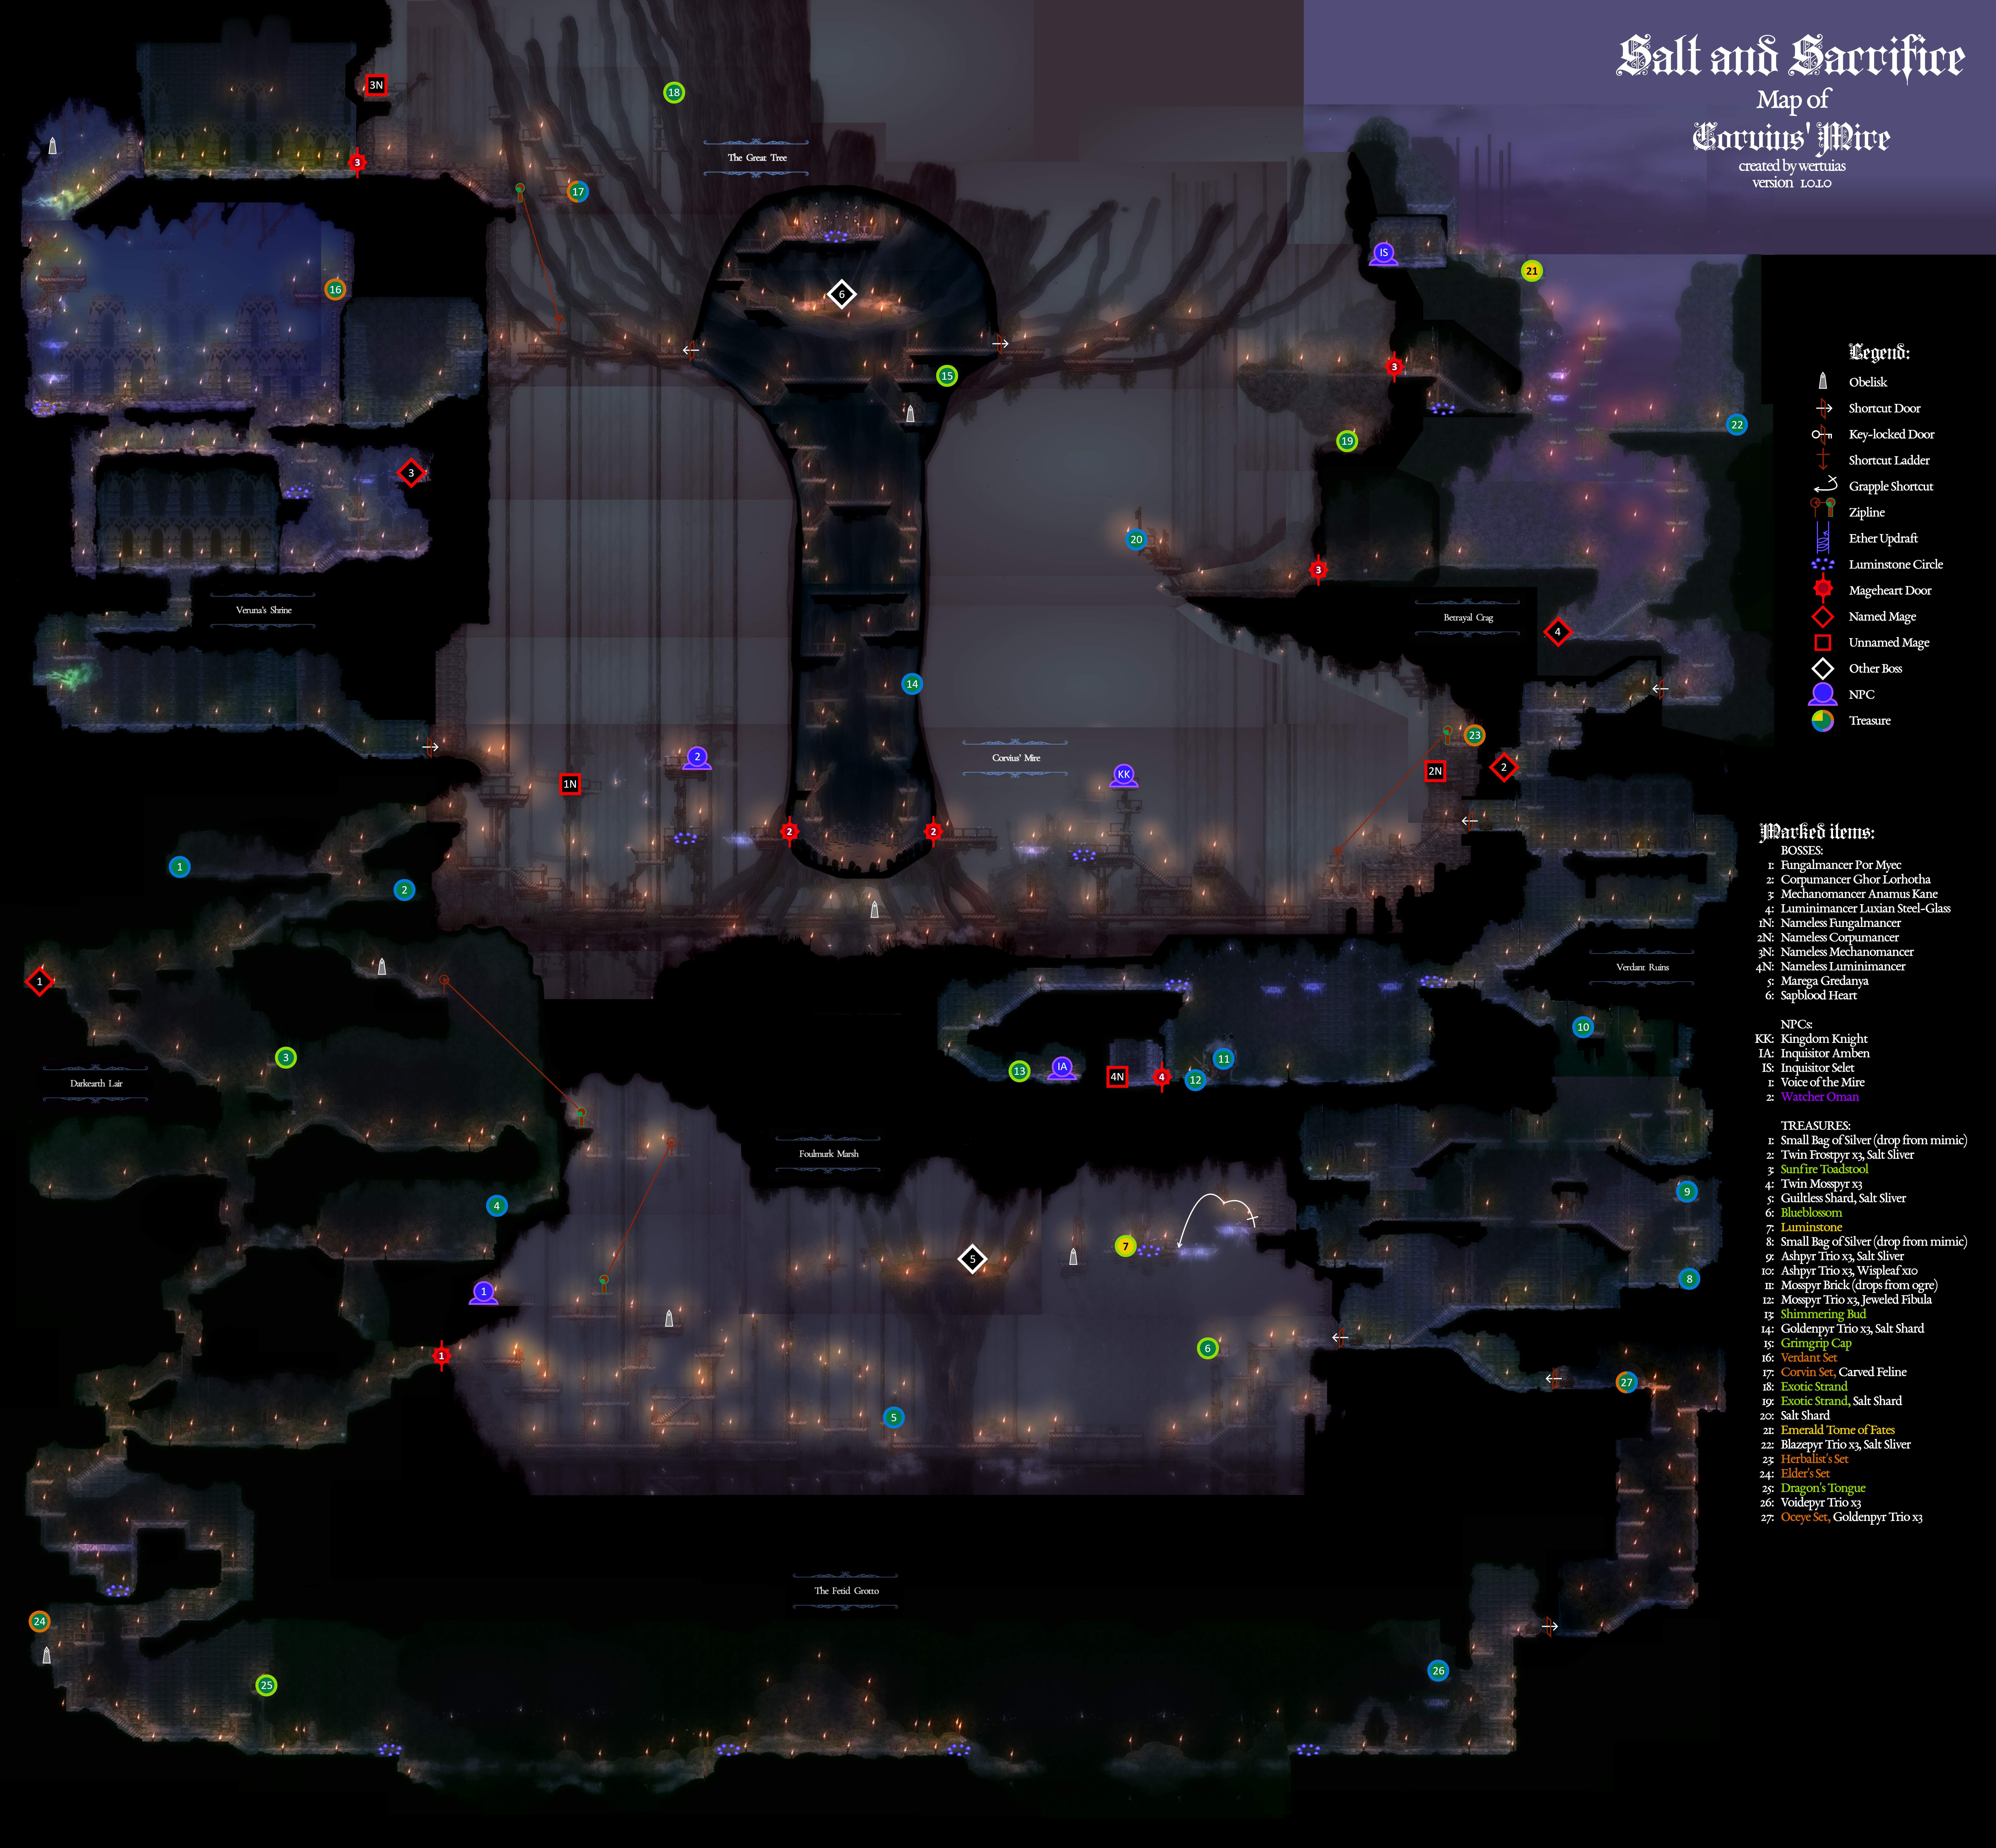
To complete this area, activate the Luminestone Circle located in the crown of the Great Tree.
Dreadstone Peak
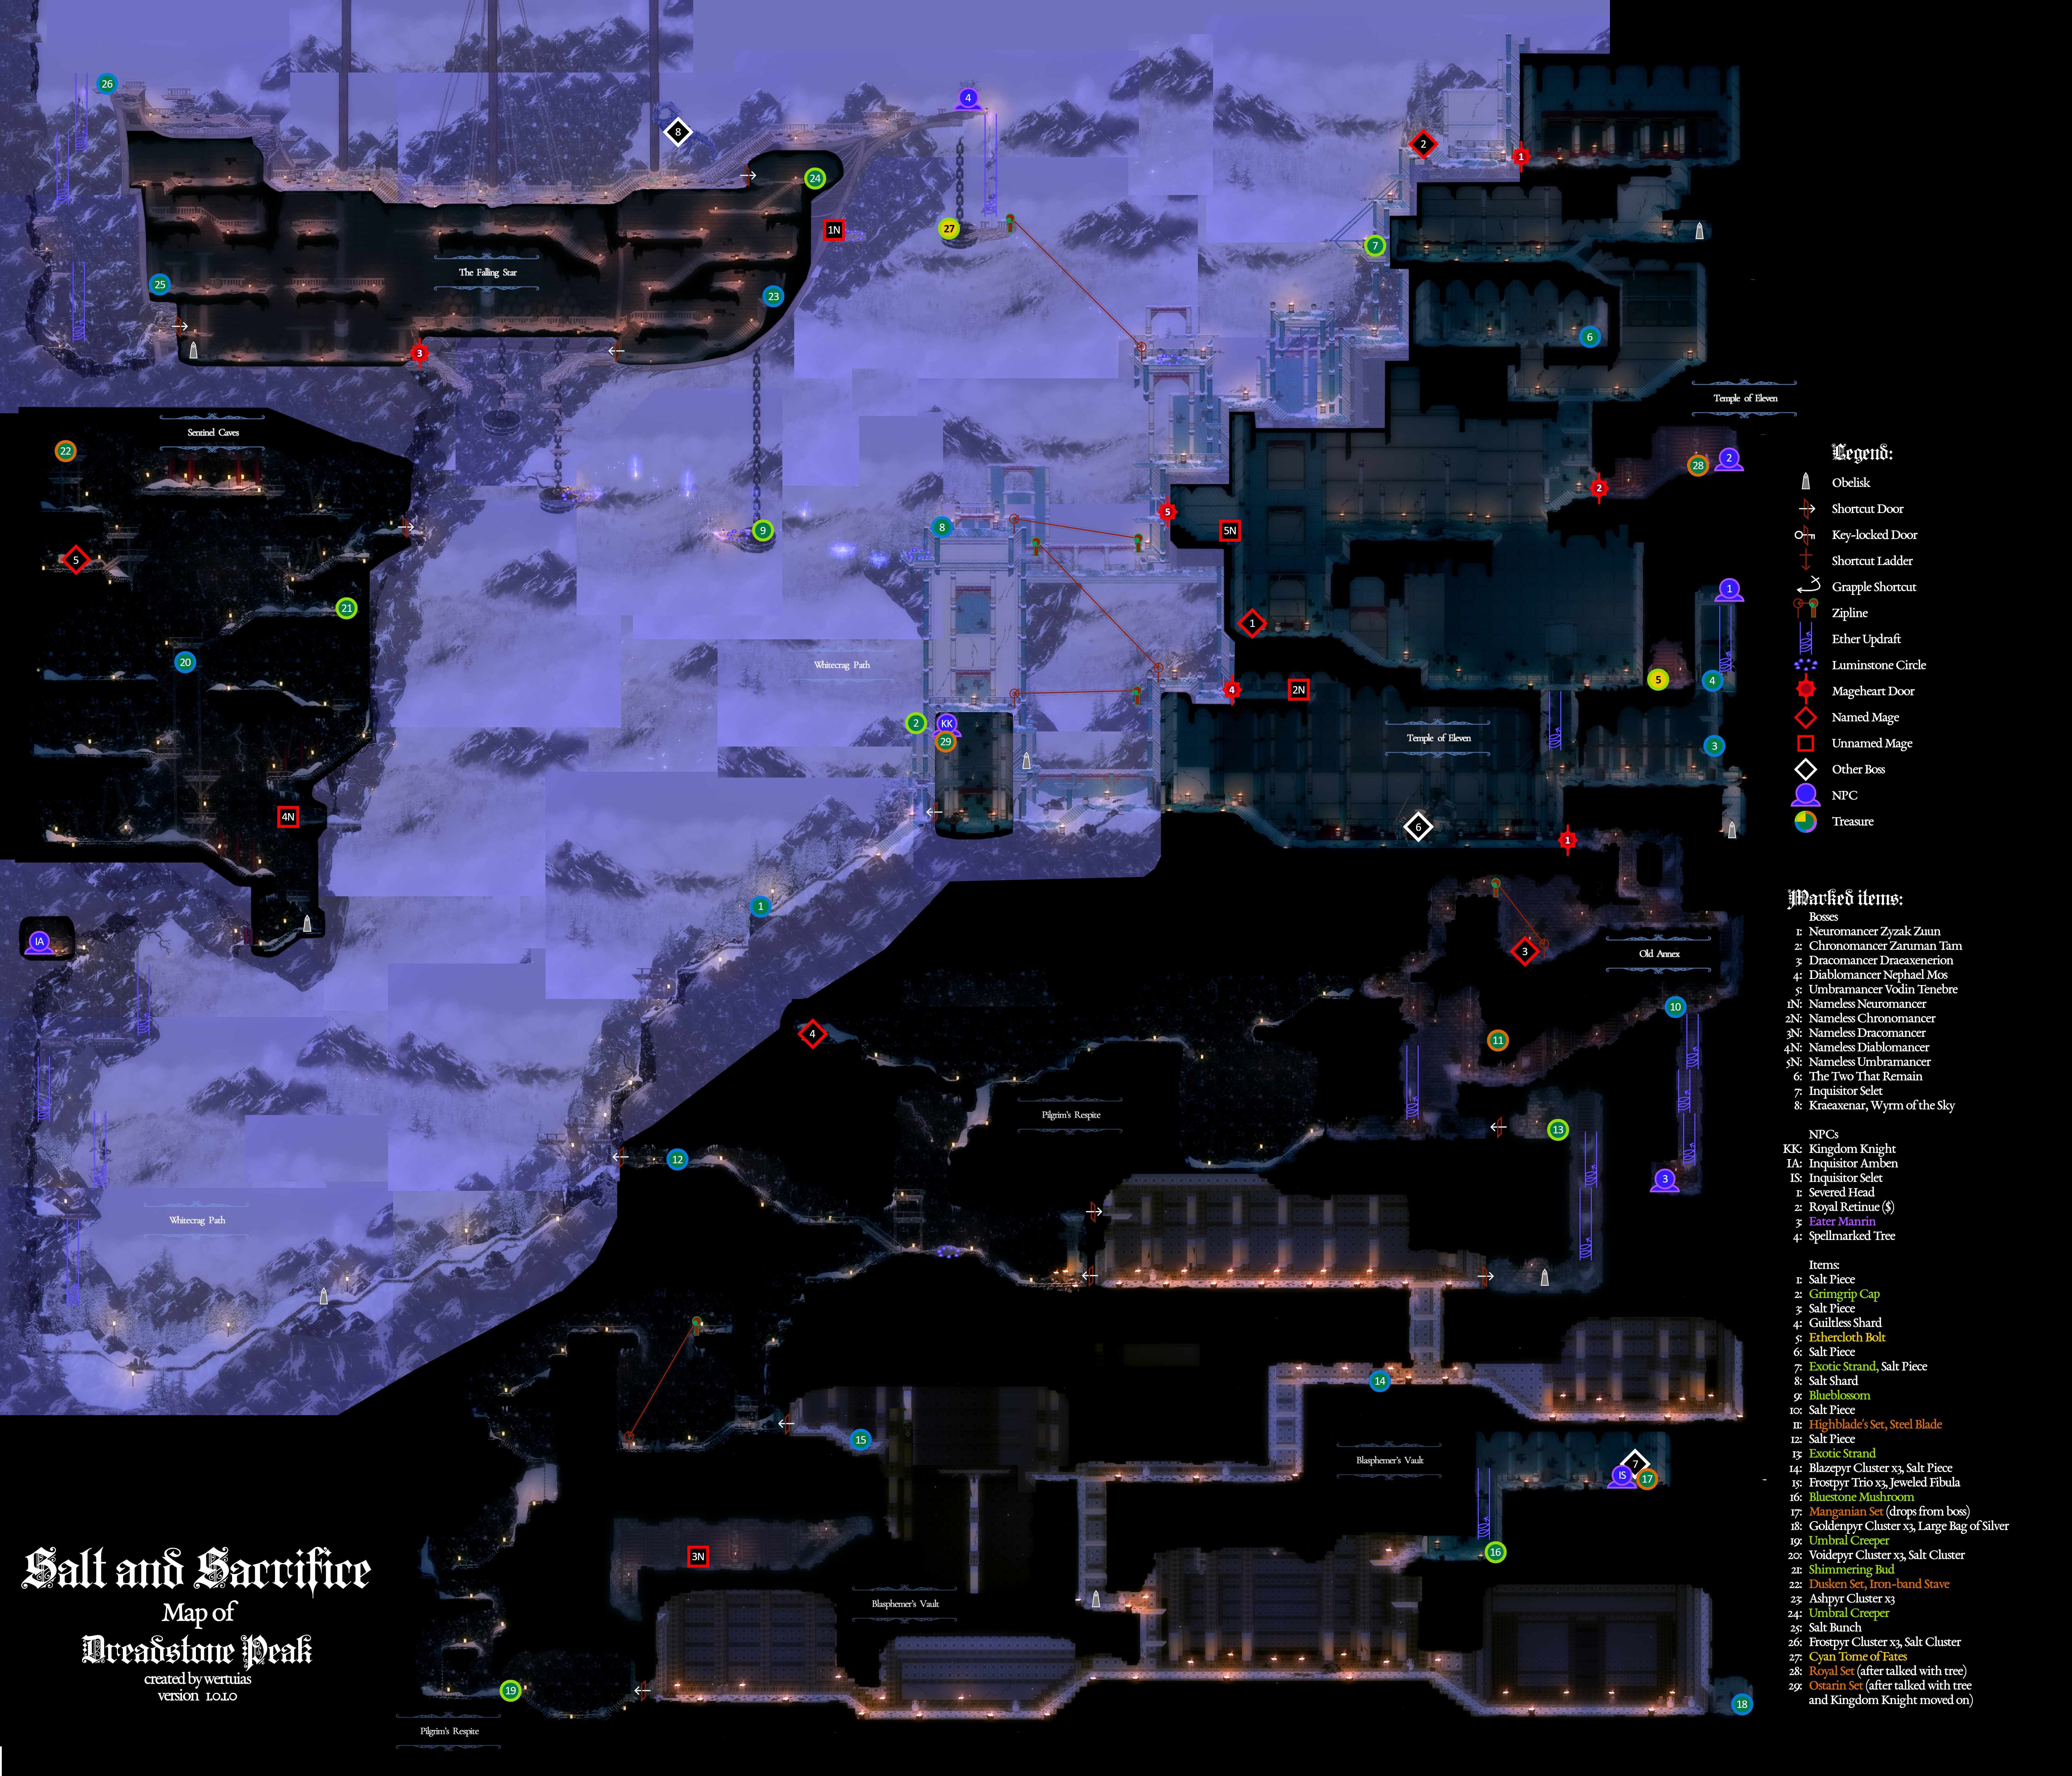
To finish this zone, defeat three Named Mages to gain access to the Falling Star. After that, take down Kraeaxenar and have a chat with the Spellmarked Tree on the ship’s prow.
The Elder Copse
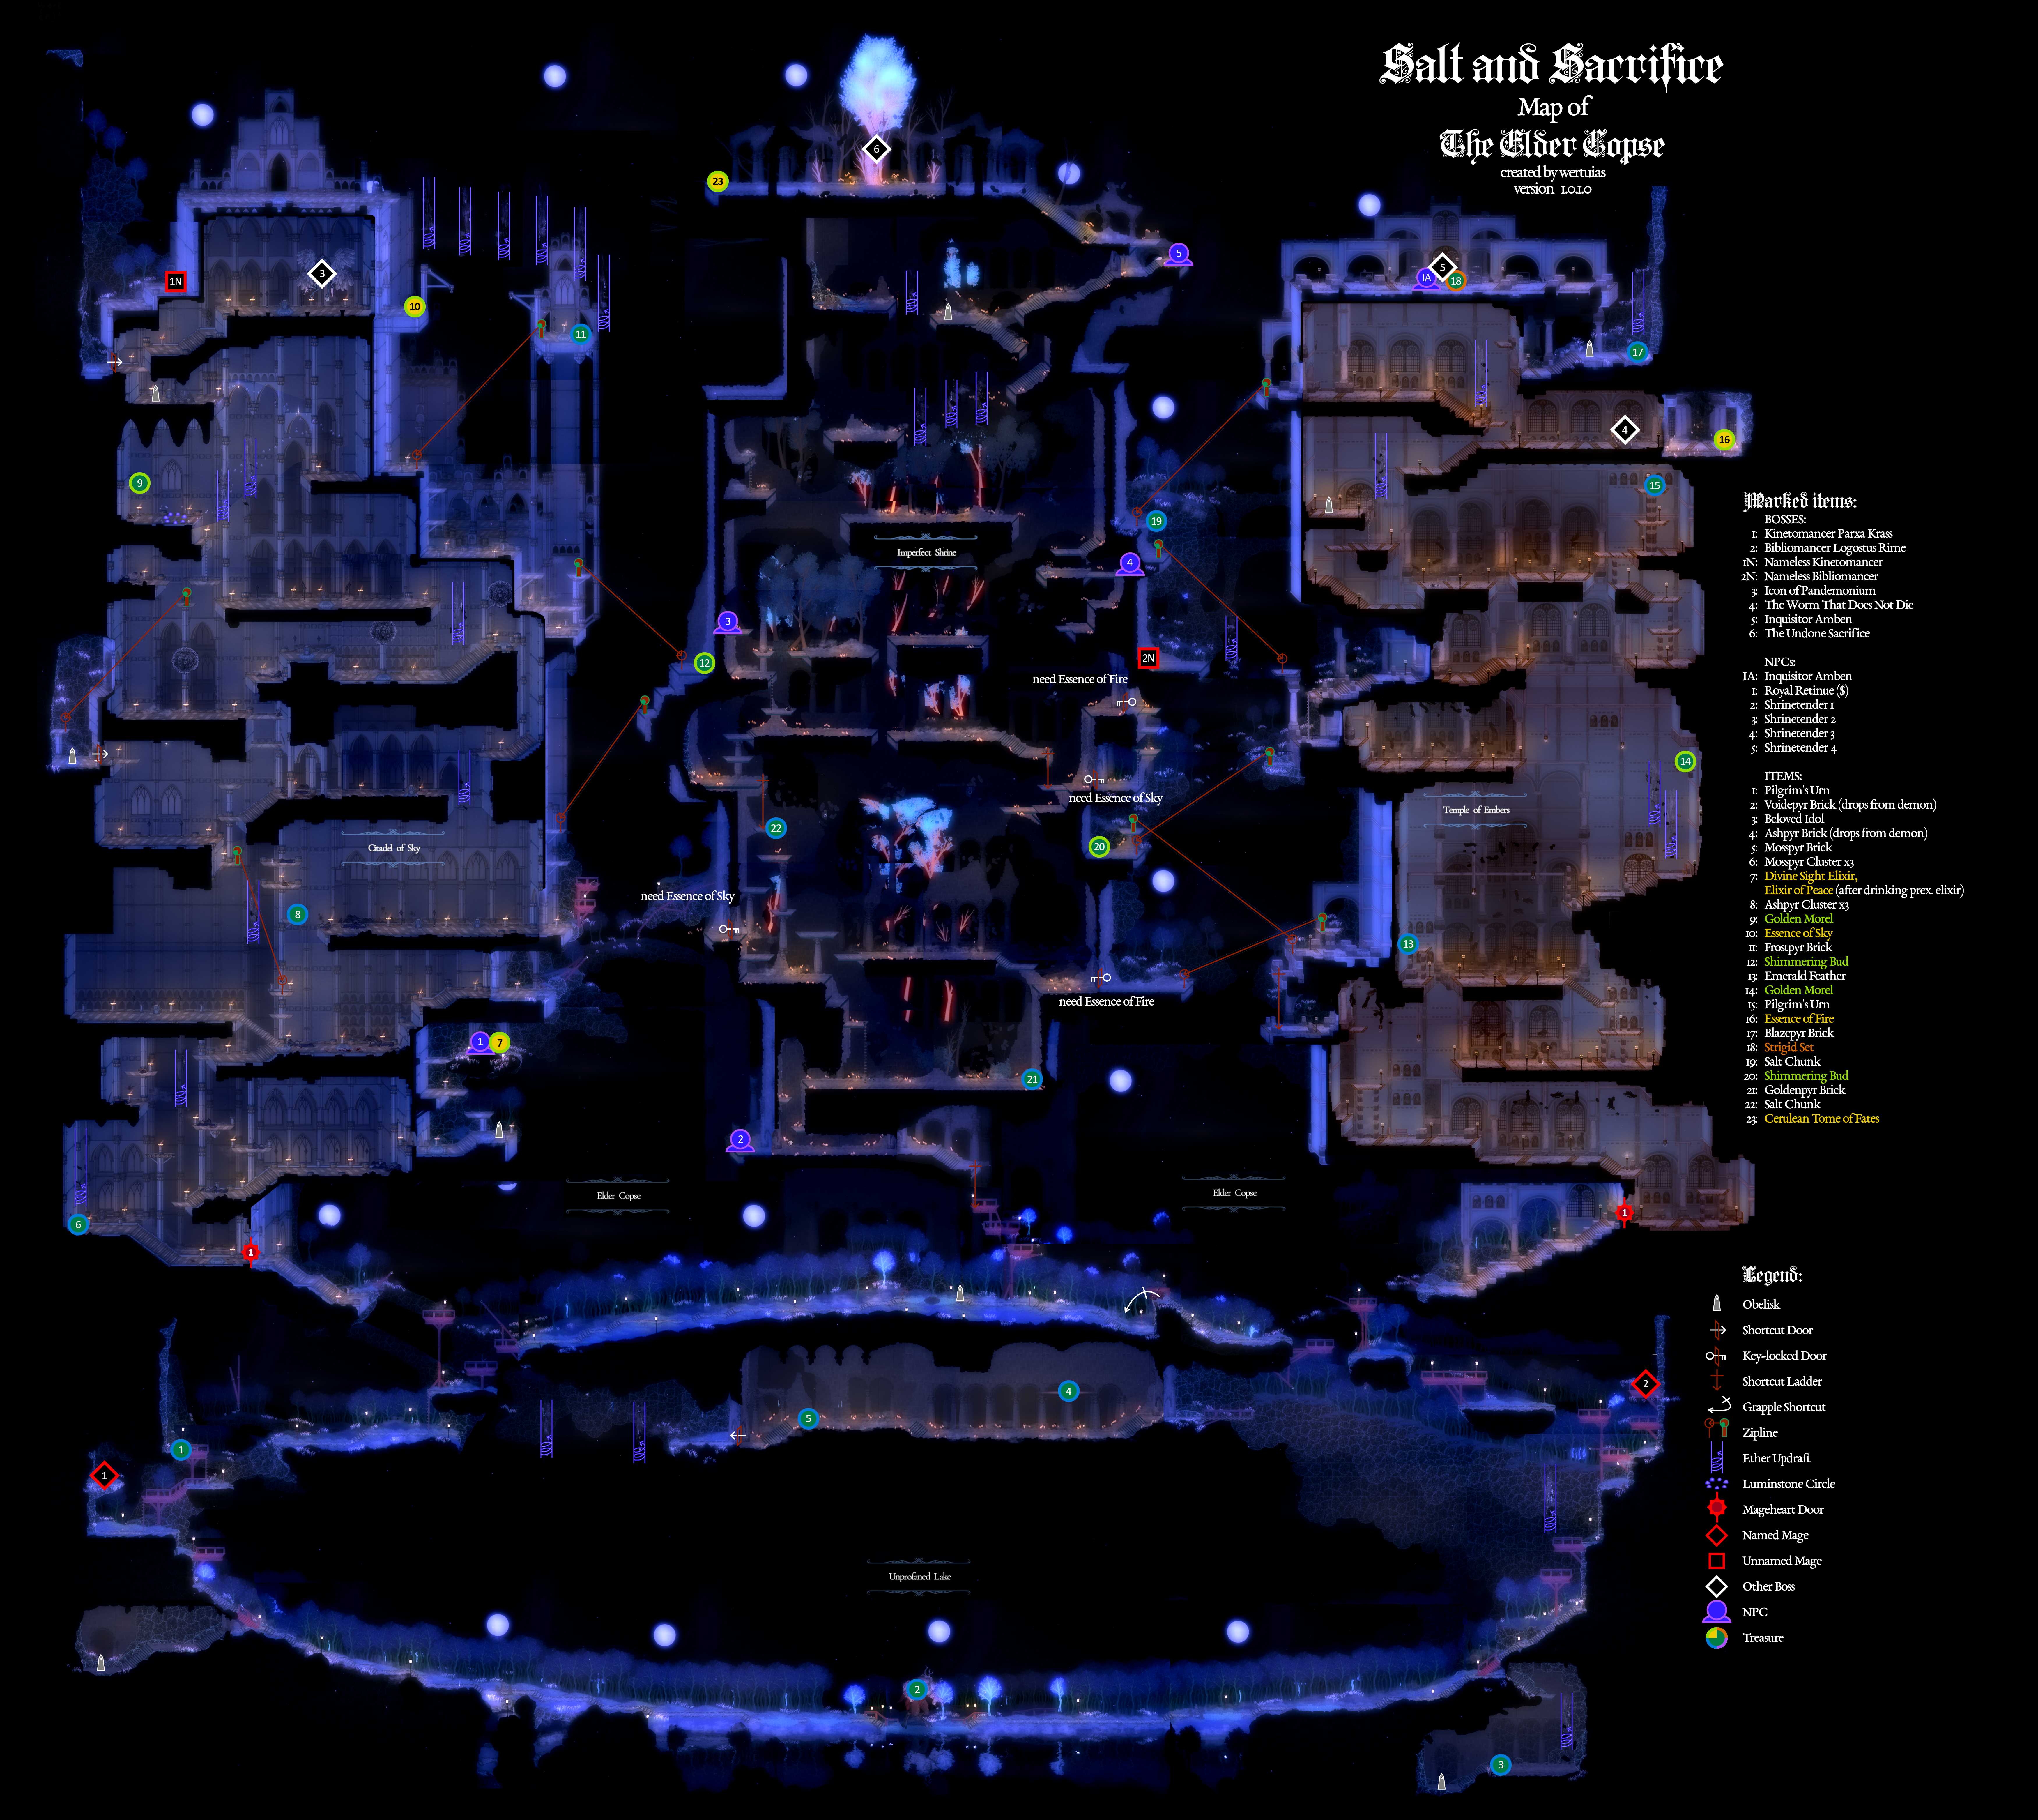
This is the last primary zone in the game. Be cautious about defeating the final boss, The Nameless Sacrifice, as it will push you into New Game+. So, perhaps hold off on that until you’ve thoroughly explored everything else.
By the way, did you notice that the trident symbol on the loading screens is, in fact, a stylized representation of this area?
Hallowed Hill
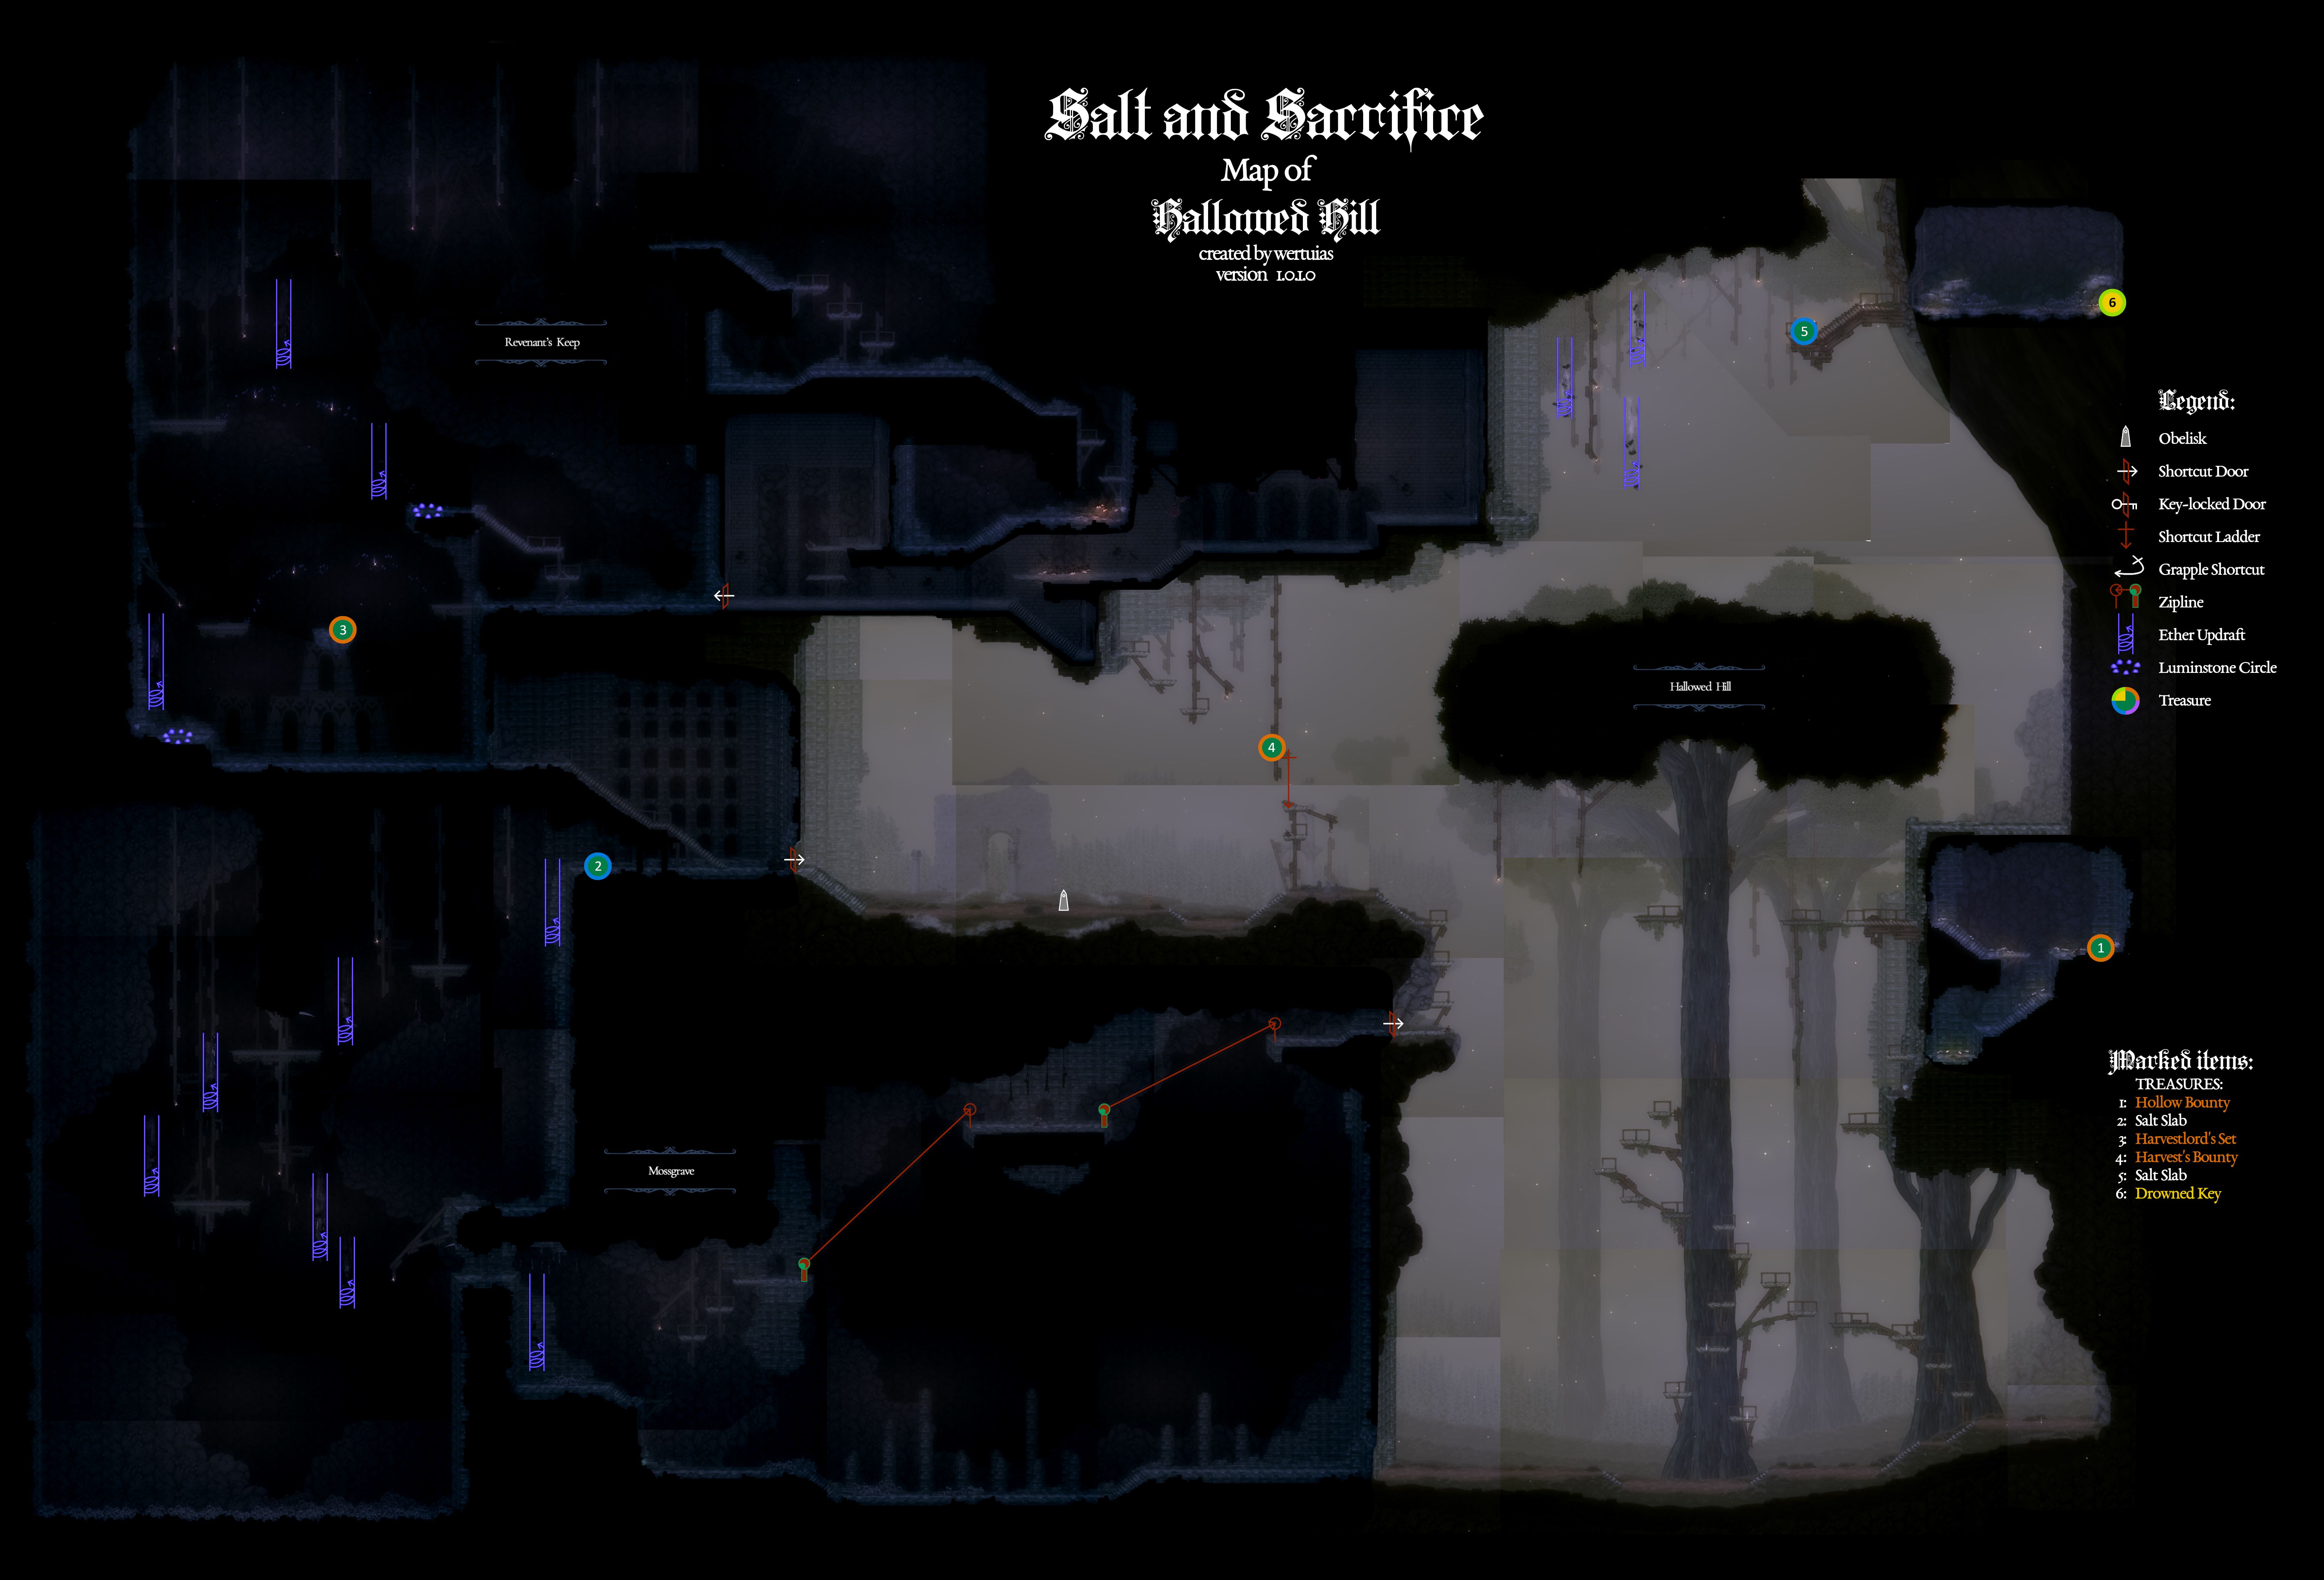
To get into this area, you need to manually enter a sequence of runes into the Mirrorgate. The sequence is unveiled in The Elder Copse, hidden away in a cave above the Unprofaned Lake.
That's everything we are sharing today for this Salt and Sacrifice guide. This guide was originally created and written by wertuias12. In case we fail to update this guide, you can find the latest update by following this link.