

- Title: Protolife
- Release Date:
- Developer:
- Publisher:
Information about Protolife is still incomplete. Please help us fill the details of the game using this contact form.
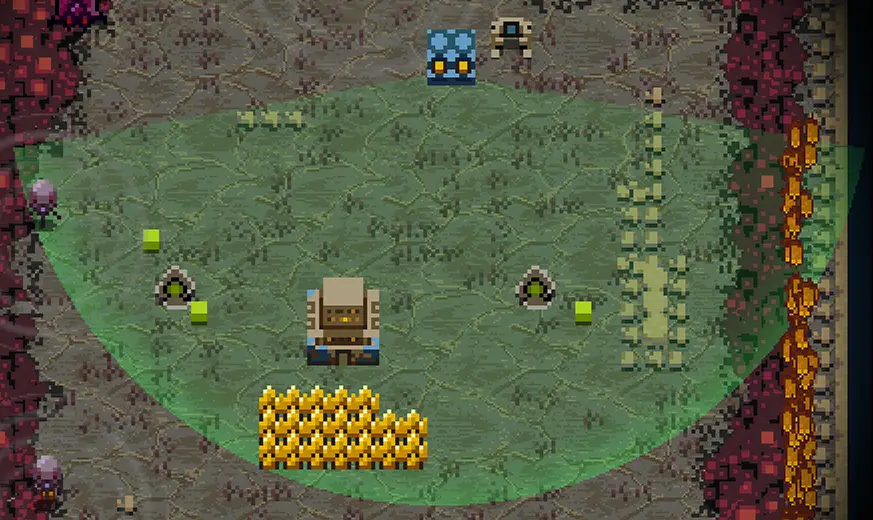
Experiment mode (unlocked after the campaign) will allow you to make your own custom towers. This is very cool! I’ve spent a lot of hours tinkering with them and now I’m sharing all my favorites with the community, enjoy!
Introduction
After completing the main campaign, you unlock Experiments mode, which allows you to play procedurally generated levels with randomized objectives. Doing so earns you Research points which you can use to purchase “blocks” that you can then use to make your very own custom towers to use within Experiments.
I’ve played about 30 hours of Experiments at the time of writing this, and this guide is simply me sharing the custom towers I’ve designed through lots of testing and iterations.
Speed & Adaptability
Crystals are most efficient when creating four at a time with the FARM_BIG schematic. However, shuffling around crystals is a huge waste of time, so rather than making a funky shape, the best practice in my opinion is attempt to design towers that can utilize the “four crystal” shape and convert that into a tower immediately. For very strong towers, ideally either two sets of the FARM_BIG schematic right next to each other, or designed so that you can simply bring a few crystals over to steadily increase it’s power, but without having a complicated design that confuses you or wastes your time.
Tiers (Upgradable)
I HIGHLY advise you to make towers of varying levels of quality that are just slightly larger variations of the previous versions. This allows you to steadily add blocks and crystals, increasing their strength. Tier 1,Tier 2, Tier 3, etc.
Try to keep the designs very simple, and ideally, just slight variations between completely different types.
Similar Designs
Have towers of similar shape, maybe one block difference. This allows you to move one or two blocks to completely change a tower’s function. (I.E. changing from fire to electric, or resource gathering into siege, etc.) This is invaluable when needing to quickly adapt, or simply being efficient with your resource deployment because you can move a single block on a tower to change it’s function between waves, then change it back into the appropriate defense.
Alternatively: maybe the difference is one is a narrow, far range tower for shooting down a corridor, meanwhile the other has greater Sector so it can destroy Infection surrounding you. Either way, make these tower types upgradable using the same kind of logic system. Left is ranged, right is wide. Whatever system works for you. The point is that the system you’ve designed is easy to remember and consistent across the Tier system you’ve engineered.
Advanced: Efficiency
n the base game, some of the towers are pretty inefficient block-to-value ratio. However, because we have access to a tower editor, we can actually make improvements to those base designs to be more economical and spend less resources to accomplish the same thing and give us a slight edge (This picture on the right is an example, using one less block to accomplish the exact same thing. This is a minor one, but it’s easy to immediately understand the concept.)

When engineering towers, note that typically the regular blocks (Sector/Range/etc) are not as efficient as higher tier counterparts (Sector2, Range2, etc), so try to use the higher quality ones whenever possible.
It might actually be advantageous to specifically NOT use a low tier block, EVEN if you have 1 energy remaining in your schematic. The reason for this is that sometimes the detriment is not worth the cost, for example, losing some Sector (width) because you wanted a slight improvement to range at the very end of your design. Being a little less efficient energy-wise can sometimes give you a more balanced tower overall.
~ The opposite can also be true in specific situations. Yes, Sector1 is a bad block. HOWEVER, on some towers, like the Resource node, Sector1 cannot reduce Projectile Speed because there is no Projectile Speed on that particular tower type. Thus: no disadvantage.
Discharger Towers
Dischargers are my overall favorite.
+ Defend against projectiles.
+ Instant travel time, which means they don’t waste any potential shots unlike most towers.
+ Attack over walls.
+ Increasing Range will reduce Sector, but Discharge starts with 360 degrees, so this hardly matters. Careful tower placement can easily place blind spots where it doesn’t matter. This makes Dischargers extremely efficient for a high range tower option where you don’t have to worry about the deficit of Range M2.
– Doesn’t destroy infection (unless they hit an enemy while possessing the Flamebomb mod to burn the ground).
– Doesn’t attack buildings.
– Some enemies are immune to electric damage.
Note: Having a “high damage” discharge can be inefficient. It’s better to focus on attack speed. My testing feels like Burst and Buckshot mods are bad for this tower type, but Splash is good.
Zap Tiny
1 Discharger
3 Plasma Generator
TX1 tower (X shaped zappy tower) has 1 block that’s pointless. This is cheaper and easier to make. Use it.
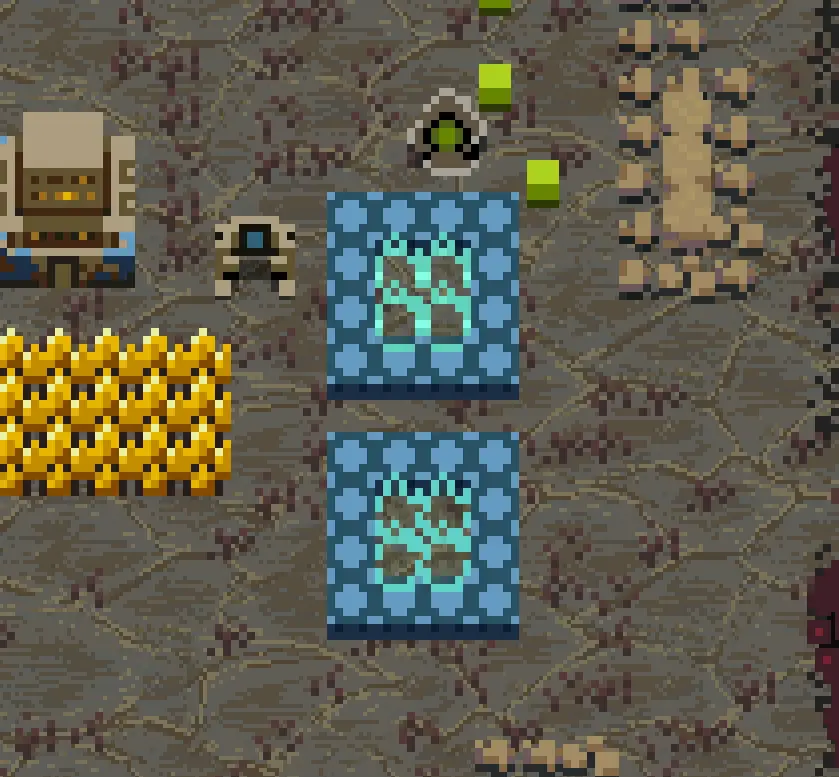
Zap Crystals
1 Discharger
1 Crystal Generator

This is the EXACT same efficiency as the previous tower I just showed (3 blocks = 1 crystal when using FARM_BIG). The REASON this is a SUPER SMART schematic to make is that whenever you have two crystals that aren’t forming a stronger tower, they’ll automatically defend themselves. This is particularly nice when you go into enemy territory and use FARM_BIG to make 4 crystals, but don’t have time to wait for it to finish and turn them into a proper tower. By engineering a simple Discharge schematic using two crystals, they can now defend themselves against projectiles and curious slimes, automatically!
~ To clarify: Do NOT rely on this “tower”. The block-to-value ratio is terribly inefficient. The ONLY reason to have this schematic is to give some added security when you’re working towards something. It’s literally just free defensive power while you’re doing your normal things.
Zap 5
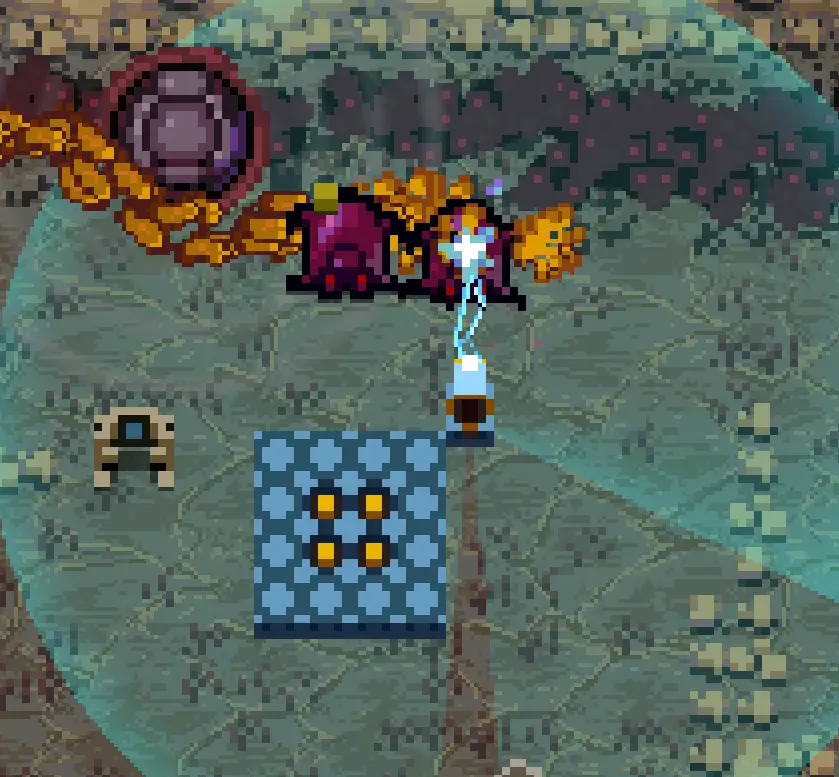
1 Discharger
4 Crystal Generator M2
1 Range M2
7 Firerate M2
2 Damage M2
2 Splash
+ Amazing early game.
+ High splash, making floods of Worms easy-mode.
+ Crystal can be moved to a different corner to change focus point.
+ Crystal being offset like that is actually advantageous, I can often make it poke around a corner while primary cluster of the tower blocks are out of the way. I love placing this right next to my base and moving the crystal back and forth depending on where enemies are coming from.
+ Medium attack speed, decent damage.
– 1 Armor Penetration, meaning mid-tier and end-game enemies will murder you.
– Throwing so many resources at this tower at the beginning can be costly on some missions, especially when you need to deal with infection too.
~ Note: You can use Boost towers to grant Armor Penetration and slight damage increase, instantly making one or two of these towers relevant again. This is great, because Zap 5 is AMAZING for early waves and rather than scrapping it entirely, if you like it, you can keep using it.
Zap 9
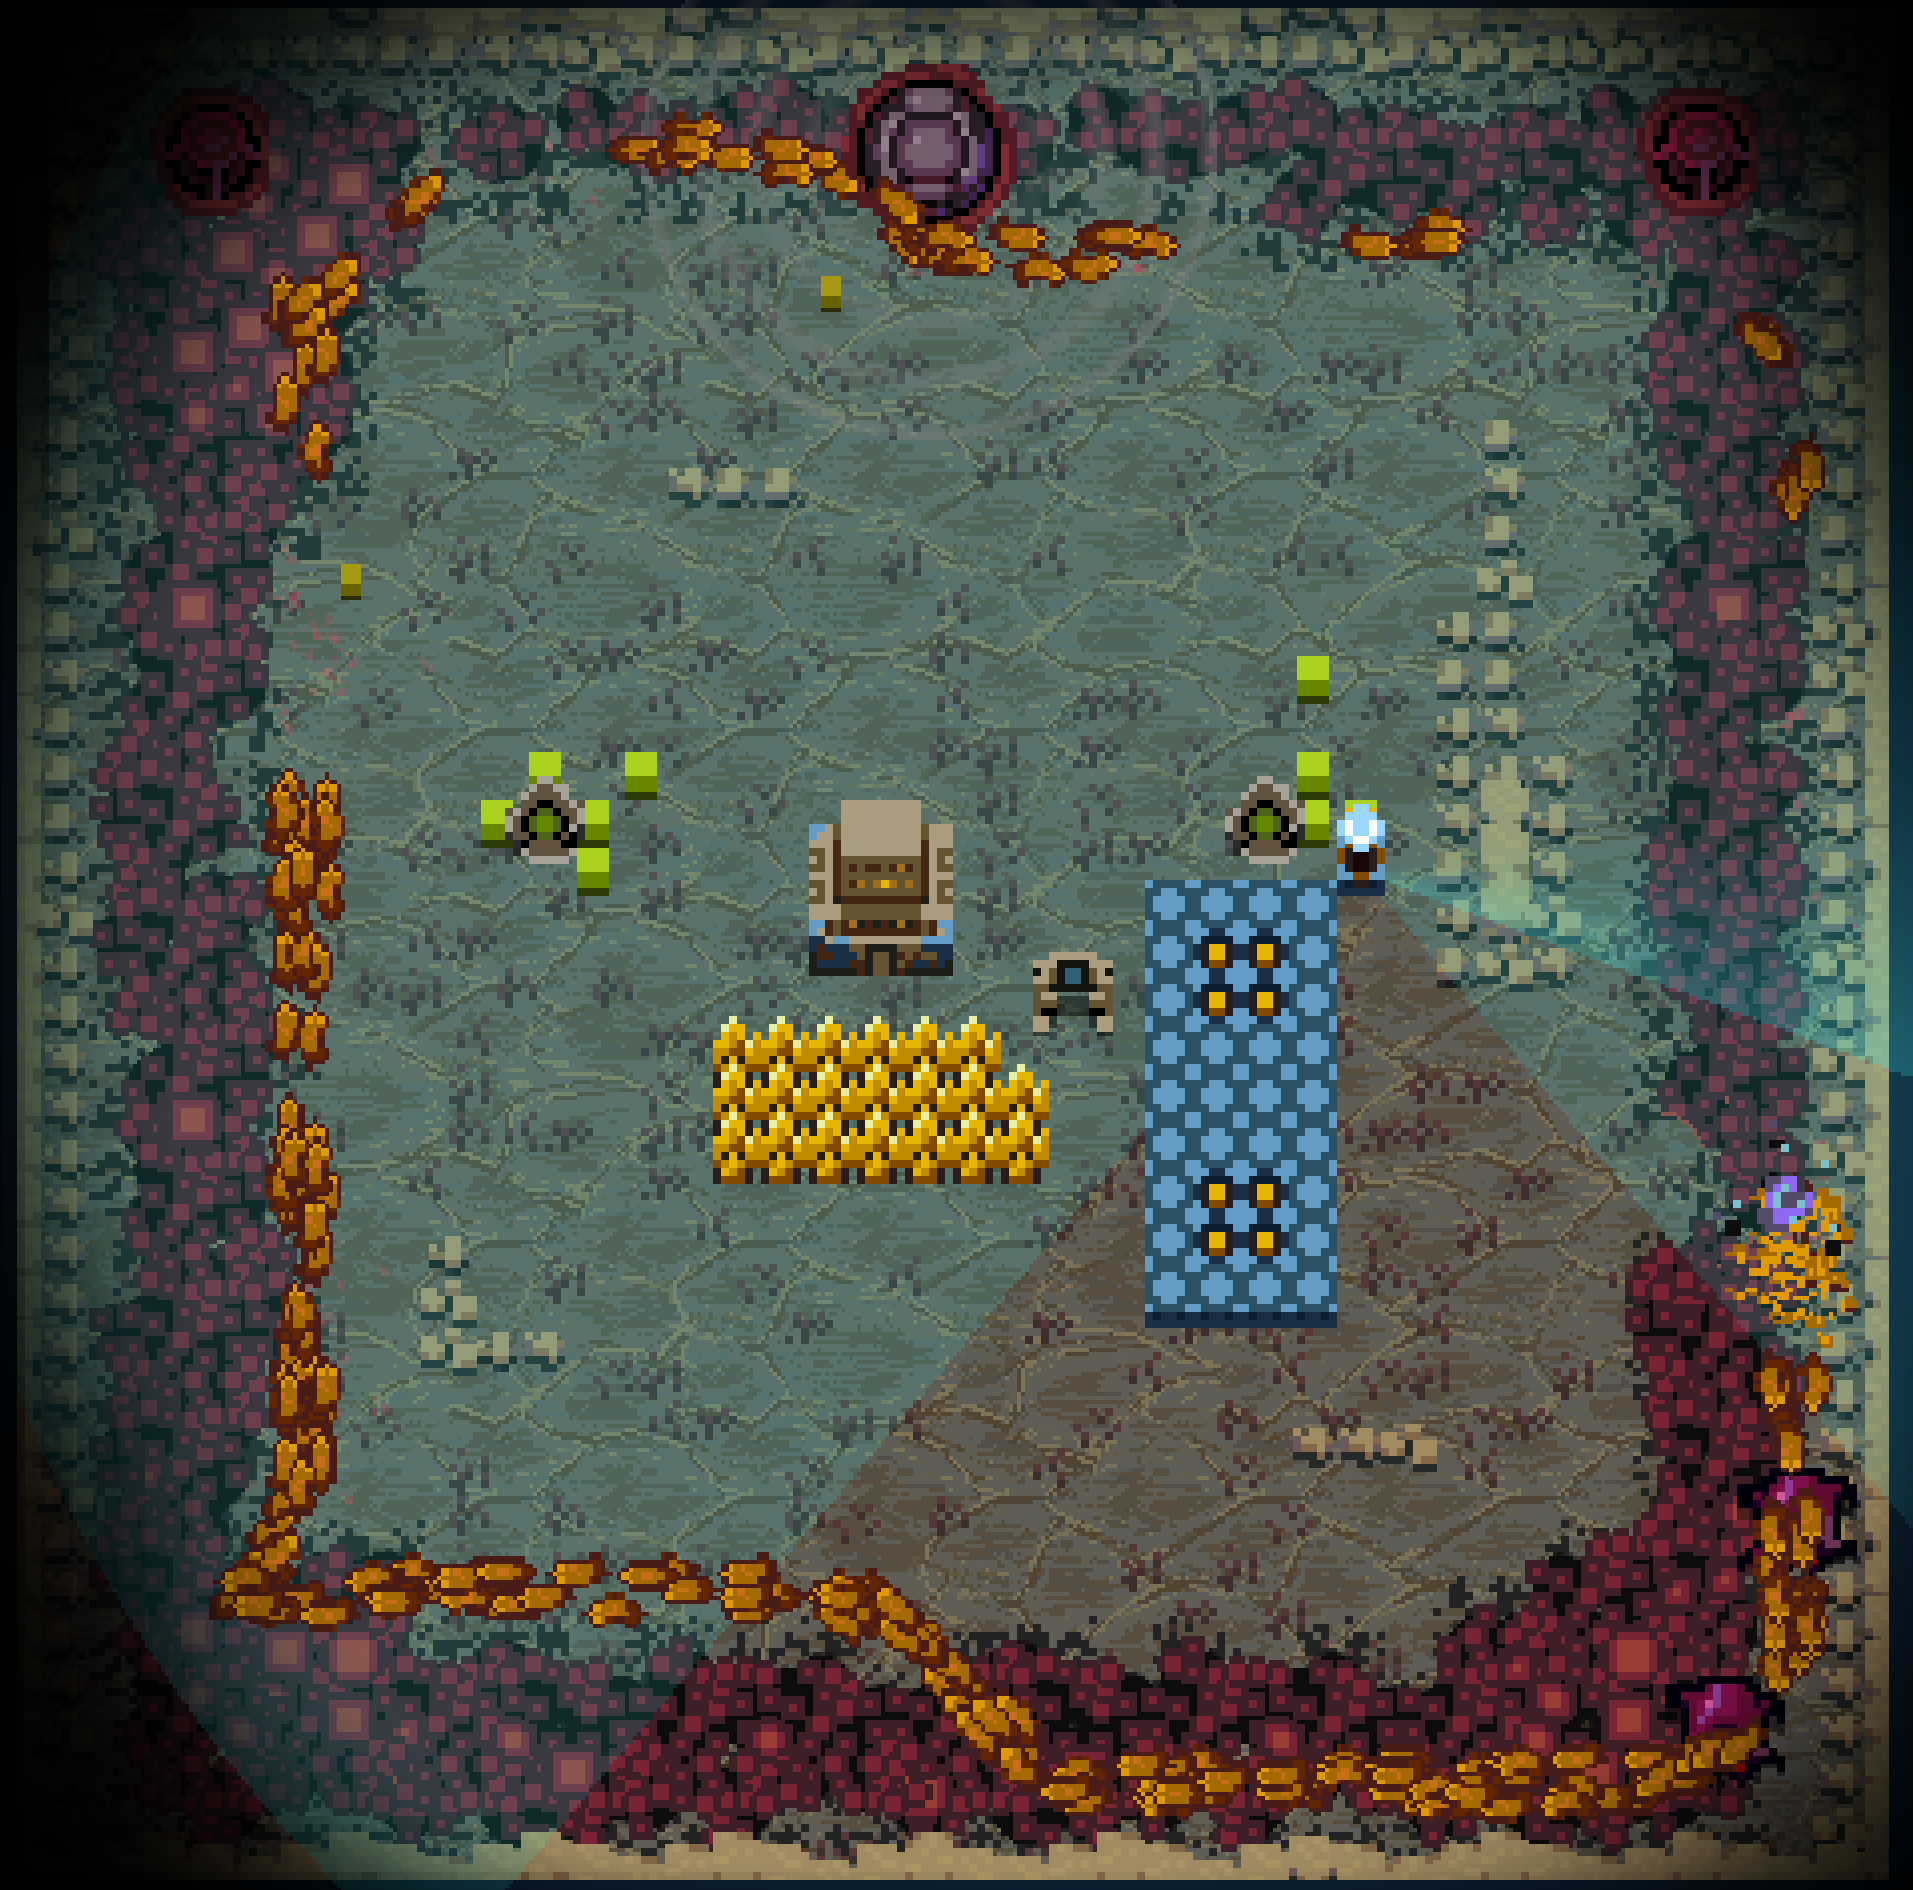
1 Discharger
8 Crystal Generator M2
2 Damage M2
2 Splash
2 AP
11 Range M2
10 Firerate M2
1 Sector (note, this is a regular, non-M2 version, which reduces projectile speed. But, because Discharge towers are instant, there’s no downside, making this an efficient choice to utilize that single leftover energy point.)
This tower kind of trivializes the game. With this defending you, you can easily run forward making T1 towers to take out infection, then bring a single crystal along to make T2 or T3 towers to take out buildings one at a time.
+ Amazing damage, attack speed, range, splash, armor penetration.
+ Destroys projectiles.
+ Blind spot is negligable.
+ Easily upgraded from Zap 5. Simply build another FARM_BIG nearby, then fill in between them.
– VERY expensive!
– Some enemies are immune to electric. If you’re reliant on this and the battlefield suddenly changes, you may not be able to change things up quickly enough.
~ Note: Build two FARM_BIG near each other with one block distance between them. After they finish, fill everything in, then add a crystal to the corner you prefer.
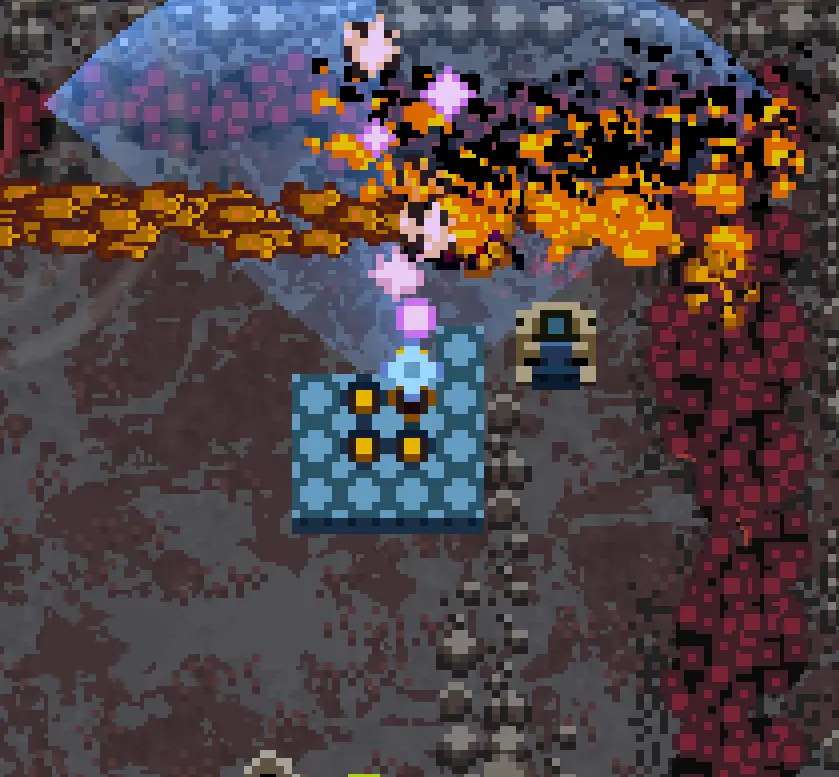
Zap 9b

Exact same as previous tower. The only difference is that I setup the schematic on it’s side so that the “forward-facing” Discharger was pointing a different direction and the crystal is NEXT to the corner rather than actually being ON the corner. The result is that I can move the crystal over one slot to change the orientation of it’s blindspot.
~ Note: I found this was a practical enough adaptation for my needs, but if you wanted to get really elaborate, you could make two more schematics, doing the same thing with them facing the other side so that you can place crystals in ANY corner. It would make it feel more natural during gameplay because currently only the “clockwise” corner works.
Zap 9/8 musings…
Currently, I have these setup as two sets of 2×2 crystals near each other. This means it can either be these massive Zap towers, OR I can remove a single block and poof, they transform into Mortar 4 + Boost Range. Pretty handy for destroying infestation between waves.
Alternatively, I’ve debated about changing this schematic to make the crystals 2×4 instead so they’re all together, which would make this tower convertible between this type and, say, a BF 8 Fast or Flame 6 Burn. Technically, I guess I could make ANOTHER two schematics of this giant one to move back and forth, but I haven’t encountered a situation where that’s super important… Plus, if I really wanted to rely on something like that, I have this next schematic:
Zap 6 Single

1 Discharger
5 Crystal Generator M2
1 Damage M2
2 AP
8 Range M2
8 Firerate M2
+ Medium damage, very fast speed, max armor penetration.
+ Very good range.
+ Excellent versus “tough” enemies. Nice when combined with a decent Flamethrower tower which takes out the weaklings.
– SINGLE TARGET ONLY.
– Will target whatever’s closest, so it might focus on weak guys which you don’t want it to do.
– If you HAVE to have a Flamethrower or something similar to widdle down the trash mobs… why not just make a better tower that also has splash…?
I designed this to be a mid-game boss-killer tower, such as a cost-effective option to murder Tumors. I find in practice, it’s too niche to be practical. Use it if you like, I tend to lean towards other towers that are usable in more situations…
~ Note: If you have a bunch of “single target towers” you CAN use a Boost tower which specifically grants Splash, turning this into an AMAZING tower instantly! Remember, it attacks VERY FAST and it does a TON of single target damage. So… if that massive damage is spread out instead……
~ This tower is honestly pretty cost effective early, so you can use it till mid-game, then either convert it or support it to get you through end-game. It’s not worthless, it just has a different role.
Flamethrower Towers
Remember that the goal is to have towers that are adaptable. Similar shaped, where you can move a single block to change their function or add blocks to steadily improve them as resources become available. Flamethrowers are probably the most important tower type that can really take advantage of this mentaltiy.
Flame 4 DMG
1 Flamethrower
3 Crystal Generator M2
3 Damage M2
3 Firerate M2
1 AP
2 Range M2
Beefy upgrade from default flamethrowers. Great for early waves if you expect to have some tougher enemies.
+ 6.5 damage with max Armor Penetration to wreck harder enemies, with decent attack speed.
– Low range.
– Medium attack speed.
– Some enemies are fire immune.
– Once you get bigger clusters of enemies, can focus fire off to one side a bit, thus letting enemies get past and obliterating you.
– Bad versus enemies with repulse fields.
Flame 4 Sniper

1 Flamethrower
3 Crystal Generator M2
1 AP
6 Range M2
+ DESTROYS infection!
+ Armor Penetration means it will destroy most buildings!
+ Max speed projectiles mean it can bypass repulse fields, destroying buildings and enemies that flamethrowers are normally terrible against!
+ Flamethrowers by default have a lot of spread, and each “projectile” in its burst does not do individual damage. In other words, having a wide spread means you can hit more total enemies. What this does is shotgun a HUGE swath of area, setting enemies and infection aflame. This takes great advantage of the Flamethrowers default perks.
– Narrow width, only good for narrow corridors.
– Gets distracted by buildings behind taller walls, so it shoots at them aimlessly. This can potentially make them completely worthless in certain positions/situations.
– Low damage. Will kill up through mid-tier enemies easily, however, reliant on burn over time to kill them before they reach you.
– Slow compared to other potential towers.
~ Note: I like to use the Sniper variant to destroy infection, but then as enemies start getting closer (or they have a beefy guy that Sniper can’t quite take out), I’ll move the front block over to the opposite side to change it to the DMG variant instead temporarily, then change it back.
Flame 4 Infestation Clear

1 Flamethrower
3 Crystal Generator M2
1 AP
3 Range M2
5 Sector M2
+ VERY WIDE RANGE that’s easily turned around by moving a few blocks.
+ Range is slightly higher than most low-tier Flamethrowers.
+ Chews through infestation
+ Max armor penetration will destroy ALL buildings
~ Does “okay” versus repulse field buildings/enemies. Sometimes works, sometimes doesn’t…
– Low damage. Reliant on damage over time. Will not kill tougher enemies.
– Not the best value for defense.
~ Kinda hard to see from the picture… there’s a single block in front of the crystals…
I designed this tower for those tiny maps where you start completely surrounded by infestation right next to your core. I can plop down one of these to quickly take care of infection in all directions, but once a monster pops out of a destroyed building or waves come, move a single block to change it to the Damage variant Flamethrower, then after they’re dead, switch it to something else.
Kind of a niche use. GREAT value for what it’s made for. Kinda terrible for traditional defense though, so don’t rely on it for that…
Flame 6 BURN

1 Flamethrower
1 Flamebomb
4 Crystal Generator M2
1 Damage M2
2 Firerate M2
7 Range M2
Basically an upgraded Sniper version. Add 2 crystals to the front and one more regular block.
+ Decent range & sector.
+ The direct damage is somewhat low, but unlike other flamethrower variants, it sets the ground on fire. Because the spread is so huge at farther distances, this means it’s very efficient at setting EVERYTHING on fire, and not just a small area like most tower types would do.
+ Turns a narrow corridor into a killing field all by itself.
+ AMAZING value for the amount of resources used.
~ Somewhat reliant on damage over time. Usually not an issue.
~ I think it’s not technically “pierce” but it sure feels like it…
– I subtracted the AP (armor penetration) modifier for greater range, meaning this will not kill some of the hardest enemies & buildings. Buildings are the biggest concern, but you can just walk forward with a single crystal and blow them up with a T2 Plasma tower. Otherwise, if it really bothers you, consider maybe swapping out a Range M2 for an AP block instead to guarantee you can use this tower against heavily armored units.
Plasma Towers
The most basic towers. They’re very fast, but have a lot of disadvantages early on without a lot of investment. Because they attack so quickly though, they’re quite good at applying status effects through mods.
Generally speaking, Plasma is better suited to smaller early-game towers, and the base game already comes with a bunch of those.
+ Very fast attack speed.
+ Fast projectile travel speed.
+ Decent versus infection.
– Low damage.
– No armor penetration. Bad against buildings by default.
– Blocked by walls.
– Blocked by repulse fields. (unless you can get fast enough projectile speed.)
Plasma 4

2 Plasma Gun
4 Crystal Generator M2
2 Damage M2
8 Firerate M2
1 Splash
2 AP
+ Good value.
+ Great damage for early-mid game.
+ Great sector, good at clearing out infection or having weird firing angles.
+ Destroys armored enemies and buildings.
+ Little bit of Splash is great against swarms and infection.
+ Double cannons means lots of economical firepower.
– Relatively short range.
– Still tends to shoot at walls pointlessly.
– Still struggles against repulse fields.
Positioning can be tricky, but this is a solid defense for the most part. You might need to suicide into repulse field jellyfish.
My favorite use for this is when I have a Mortar 4, but enemies suddenly get too close, I can add a single block to the corner, blow them up with this, then remove the block again to convert it back to Mortar 4.
Plasma Gun is kind of fun to “machine gun” enemies, however, they tend to miss a lot, especially once you start throwing in tons of projectiles. There’s this funny balance of attack speed vs number of projectiles. The problem with having “too many” plasma guns is that, yes, you have more potential damage, but they all fire at the same target (if we’re talking about designing one massive tower with tons of Plasma Guns on it, they ALWAYS fire at the same thing), meaning the first couple shots hit them, the all the rest go flying past pointlessly, meanwhile enemies still come at you from the side. The goal is to kill things quickly, not waste potential shots. That being said, more projectiles (more plasma guns attached) is more economical on paper, but fewer shots with faster attack speed is far more reliable. Additionally, projectile travel time is a consideration, because you can miss for the simple reason that enemies are moving simultaneously.
Plasma excels at cheap towers at close range. Beyond that, they’re more of a “spray and pray” kind of playstyle which I personally find a little unreliable. I would rather have less projectiles that do splash instead of more projectiles that end up being wasted.
In it’s defense though, Plasma is pretty good for Pierce, Splash, Freeze and Flamebomb. Additionally, don’t underestimate having tons of projectiles with far range and a little bit of pierce or splash, then adding in a Boost tower that increases range, damage and armor penetration. Suddenly, all those crappy Tier 1 and Tier 2 projectiles will chew through hoards of enemies like a rabid beast. Mmmmm, yummy!
Mortar Towers
Pros and Cons
+ Great alternative to Missile towers.
+ Shoots over walls.
+ Great versus infection and buildings.
+ Potentially decent damage, but hard to utilize well.
+ Makes interesting use of Splash mod.
– Projectiles are slow and will miss most enemies.
– Will focus on enemies, meaning most shots are often completely wasted. Not good to rely on these for combat.
~ Nuance about that though, when combined with another tower applying Freeze to slow them (such as a long range splash damage Discharge which has instant attacks), can make Mortars take full advantage of their damage and DESTROY enemy waves which are now slowed to stay within range of their blast radius.
– Mortar has terrible projectile speed, meaning it will often attack the same target more than once, even though the first shot will take care of it. The Buckshot Mod is pretty terrible on most tower types, but on Mortar, it’s actually pretty good. The reason is because we want FAST projectiles, but LESS attack speed so they’re not wasting potential shots. Achieving that balance is tricky.
Mortar 4

1 Mortar
4 Crystal Generator M2
1 Buckshot Mod
2 AP
5 Firerate M2
5 Range M2
+ VERY GOOD value-per-block spent. Really takes advantages of the best qualities of Mortar.
+ Decent projectile speed, splash, etc.
+ Attacks over walls.
+ VERY GOOD at destroying buildings and infection!
– Low damage.
– Focus fires front enemies, which it often misses.
– Somewhat unreliable for defense.
Kind of a niche tower, but has quickly become my go-to answer to many problems. Simply convert any of your “4 crystal clusters” into this between waves, placing this 2 front blocks on whatever side you want to clear infection from, then change it back before the next wave arrives. This tower is so easy to swap in and out AND… if you can get one behind enemy lines, it’s just *chef kiss*! This tower is seriously fast, usable, doesn’t take too much room or resources… It’s a really nice balance, even late game.
This is probably the most practical option on most maps to clear out infection and buildings. The problem is it’s… basically absolute trash when it comes to fighting enemies. It can soften up big clusters of Worms, but there’s better options for that and it’s unpredictable, making it unreliable for that.
~ Note: If you have a couple of these, throw in a range Boost tower to double their effective range.
Mortar 8

1 Mortar
8 Crystal Generator M2
1 Buckshot Mod
2 AP
3 Splash
9 Firerate M2
8 Range M2
+ AMAZING value-per-block spent. FANTASTIC version of Mortar.
+ Excellent balance of projectile speed, multiple projectiles, and amazing splash comes together to create a devastating siege weapon!
+ Attacks over walls.
+ Huge range and sector!
+ DESTROYS buildings and infection! Seriously, one of the best towers you can possibly make for that!
+ TONS of projectiles and MASSIVE SPLASH for each one! Which means that even though it attacks with a delay and enemies “get out of range” of where the projectile lands, the radius is so huge that they still take damage. Some enemies still squeeze past though, and this still has the problem of focus-firing the closest enemy, meaning it wastes a lot of potential damage it could be dealing. Still though, HUGE improvement over the 4 crystal version!
~ If combined with a Freezing splash Discharge which targets the front, the two make an amazing team. However, it might be a better allocation of resources to simply use a different tower for your main defense that’s better suited to killing enemies.
– Damage is relatively low overall.
~ Combined with a Boost tower which increases its damage, it CAN kill big enemies (they move slow anyway, so combined with the splash…) However, as usual, it’s more efficient to simply swap this tower out for something more appropriate that can do a better job at that.
Niche siege tower. Designed to destroy infection and buildings. Purely offense, NOT INTENDED FOR DEFENSE (it CAN be used for that, it’s just better suited at another task). Remember, the splash, range and sector are all out of this world, BUT it doesn’t do very much damage. The problem is: it can kill big guys by hitting them repeatedly, but it’s slow, so if there’s a big line of beefy guys mixed with little ones, you’ll keep targeting the front swarms and only hit one or two big guys with the edge of your splash, so the big dudes slowly make progress until they walk right into your tower and destroy everything… Don’t get me wrong, this thing is AWESOME, BUT it has a specific purpose. The best use of this tower is to convert something large, like a Flame 6 or a BF 8 (which you use for defense), Mortar between waves to push back infection and destroy pesky buildings, then change it back to defend.
If you CAN manage to build one of these far head in enemy territory… oh… my… goodness…!
As another alternative, if you REALLY want to use this for defense because you like it so much and you’re too lazy to keep swapping it back and forth, consider adding in a support tower with Damage M2 and Firerate M2, or Engineer a sniper flamethrower with Freeze and Pierce to slow down the front stuff, forcing them to clump together.
I spent a lot of time tinkering with this to find a good combination of mods. Mortar is okay by itself. This makes it ABSOLUTELY AMAZING! Seriously, the value-per-resource-spent is insane! It’s also very hard not to burst out laughing as soon as it starts doing it’s thing. It murders everything so good.
BF Cannons
Most powerful overall tower type. Hard to pull off though.
+ Zaps (for 1 damage?) every 0.3 seconds or so. DESTROYS waves of small units and infection!
+ Primary projectile deals 20 damage on contact, consuming the projectile.
+ Attacks over walls.
+ Max AP by default! Kills all harder enemies and buildings.
+ Ignores repulse fields.
+ Projectiles will travel even further than their “activation range”.
+ Good versus: buildings, swarms, tough, infection. Basically everything…
– VERY slow fire rate.
– VERY slow projectile speed.
– EXPENSIVE.
– Even though this does very well against swarms, it’s still only zapping “one guy at a time” meaning that it can get overwhelmed quite easily if there’s too many. The big projectile will explode on contact, so if there’s too many guys, it will be consumed very quickly.
~ Additionally, you want faster projectile speed, but if the projectile speed is TOO fast, it’ll contact and break prematurely, lowering it’s total damage potential. Finding that balance is tricky.
– Mods like Flamebomb and Freeze are pretty bad on this tower type. I believe it only applies those effects on projectile explosion, NOT on the zappy-zappy. It also takes too long for the projectile to reach them for damage-over-time to make sense, you’d be better off applying that to any other tower type and using that debuff tower in conjunction with this one, slowing them down so that these slow-moving projectiles can actually make contact (as opposed to missing if the enemies are moving to the side a bit) and one-shot them.
BF Cannons are some of the best towers in the game! The problem is they’re painfully slow, outrageously expensive, and just kind of awkward by default… Designing them in a way that makes them PRACTICAL is the challenge!
Remember that each modification you use is percentage based and have detrimental returns. This means even a few blocks of Firerate or Sector make a big difference, meanwhile, focusing too hard on any one thing is inefficient.
BF 6

1 BF Cannon
5 Crystal Generator M2
3 Firerate M2
4 Sector M2
Designed this to be a transitional tower so it would shoot while I was still in the middle of trying to build something. Turned out to be pretty solid and ended up using it in general.
+ Great value-per-resource.
+ Wide range is FANTASTIC to clear out around your base early on.
+ Will target buildings ASAP, clearing all nearby infection at the same time.
+ Even though projectiles are slow, it should kill most stuff through mid-game.
~ This is a very real contender for Flame 6 Burn. This is better against big guys, while that’s better against large swarms.
BF 8 Fast

1 BF Cannon
7 Crystal Generator M2
11 Firerate M2
1 Range M2
2 Sector M2
+ VERY fast attack speed!
+ Decent sector.
+ Probably one of the most powerful towers you will ever encounter. Can easily take 5+ Tumors (bosses) simultaneously. So as long as everything is funneled to the correct choke point, you can defend pretty much anything.
– Expensive.
– Range could be nicer (especially for a tower this expensive).
~ Note: Adding a range Boost tower can make this even more amazing!
~ Note: This schematic has 1 energy leftover, which COULD be spent on an M1 variant block, however, the deficits added are not worth the opportunity cost in my opinion.
BF 8 Wide

1 BF Cannon
7 Crystal Generator M2
9 Firerate M2
1 Pierce
4 Sector M2
Variant of previous tower. Wider, slower.
Pierce makes it skip first few enemies before exploding. This allows it to traverse infection a bit further before it explodes, allowing it to reach buildings in fewer shots. Additionally, Pierce makes projectiles travel faster by a flat amount, which is very smart for BF Cannon type’s incredibly slow projectile speed.
This is a nice balance of stats that excels at clearing out around your base. It can be swapped between with the previous version, even in the middle of enemy waves. I’m a little wary about using it for combat because of the Pierce (it doesn’t explode on initial contact, meaning I can’t rely on it to take out big guys as readily). However, because it has max armor penetration, unless they’re immune to electric damage, piercing through them with constant zappy-time can be pretty good damage too!
Resource Gatherers
Resource 2
1 Resource Harvestor
1 Crystal Generator M2
2 Range M2
+ More efficient resource harvestor.
+ Can also be used to gather resources across walls far out of reach.
(FARM_BIG turns 12 blocks into 4 crystals. So 1 crystal = 3 blocks. The default harvestor schematic in game is 1 crystal and 10 blocks. This schematic I just shared with you is 2 crystals and 2 blocks. So 13 vs 8 block total cost. This one costs 40% less! Never use the default one again.)
Resource 4

1 Resource Harvestor
3 Crystal Generator M2
6 Range M2
1 Sector M2
1 Sector M1
INSANE RANGE resource gatherer! Kinda innefficient allocation of resources though…
There are two situations where this tower is god tier!:
+ Gather Blocks far outside your defense OR across walls. Sometimes there are resource nodes in the Infection far out of reach, but there’s still a little patch of land where it’ll still produce one resource block at a time. If you’re stuck in your base and starving for resources for an extended period of time, this can eventually easily pay for itself.
+ Play smart: Convert one of your defense towers into this temporarily between waves to suck up Half Blocks in dangerous territory!
~ Note: I designed this to focus on range, but you CAN make one with Firerate M2 to increase it’s collection speed. Generally speaking, there’s detrimental returns on all modifiers you place in a schematic, so swapping out some of the excessive number of Range M2 for even 1 or 2 Firerate M2 is a much better value-per-resource spent. I personally think the default speed is fast enough, but the main reason you’d want to consider faster speed would be to pickup the yellow “half blocks” that enemies drop in your killing field. But you also have some dead time between waves where it can “catch up” anyway, so I don’t think it matters… And if you’re really far enough in a Survival mission where those half blocks are piling up, you probably have the resources to build another one of these, they’re super cheap… Anyway, use whichever balance of stats works better for you.
Boost Linkers
Boost towers allow you to grant raw stats to other towers within the area of effect. Unfortunately, it does pass it on at reduced efficiency.
Boost Linker: 8 range, 75% efficiency. Costs 6 energy.
Boost Linker M2: 10 range, 50% efficiency. Costs 8 energy.
Note the efficiency change. Personally, I don’t think the added range is worth it. Honestly, you can BARELY fit another tower in there, yet you lose 33.3% of that towers potential compared to a regular Boost Linker, which costs less energy anyway, meaning you can have even more buffs? Personal preference, I recommend M1 over M2.
As usual, I want to make towers that ideally use a similar shape (4 crystals) to other towers so I can make a slight modification to change a towers function. This way I can quickly add range, damage, sector, or change it to an offense tower temporarily, or change it to a resource gatherer to suck up stuff across a wall and then change it back.
I will often have a defense consisting of three “blocks of four crystals” that I can easily convert between different types of towers depending on the situation. Sometimes, adding another “damage tower” is not the correct choice. And ideally, if I really do have that many crystals on field, being able to boost 2 towers at 75% efficiency is actually quite huge and probably more cost effective than alternatives!
NOTE: Most buffs have some downside too, like boosting Sector will also reduce projectile speed, or boosting Range will reduce Sector. Because of this, I like to add a little of the opposite to compensate for what it’s removing. Personal preference, but I like my towers acting “the way I expect them to”.
NOTE: Even if only one block of a tower is within range, it will still be affected.
Boost Range
1 Boost Linker
4 Crystal Generator M2
2 Sector M2 (angle -3.75)
9 Range M2 (range +13.5, projectile speed +12)
Range and Firerate are my two favorite stats to increase. Range also increases projectile speed, which is USUALLY a good thing in most circumstances, but not always.
NOTE: Towers’ range cannot be boosted beyond 30. Take that into consideration when deciding whether you want to use a Boost like this or how you’re designing your other towers in general if you are planning to incorporate this into your strategy.
Boost Sector

1 Boost Linker
4 Crystal Generator M2
3 Range M2 (+4.5 range)
8 Sector M2 (+108.75 degrees, -1.5 projectile speed)
I use this sometimes at the beginning of a mission when I’m surrounded by infection. Pretty effective for when I build several “long range” towers surrounding me, I can convert one of them into this to significantly widen the attack range of everything else temporarily. Additionally, it can be really cool for making a Mortar tower temporarily able to shoot in a wider field temporarily and take out a priority building.
Boost Damage Armor
1 Boost Linker
4 Crystal Generator M2
5 Damage M2 (+7.5 damage) (probably excessive?)
4 Firerate M2 (-11% reload, +44% burst delay sec)
4 AP (+3 armor penetration)
I don’t use this much. It can make basic Tier 1 towers insanely powerful. So if you really like that playstyle of building a bunch of low tier stuff in front and boosting it from behind, something like this could work for you. Just make sure you have something with splash/pierce.
~ THIS makes massive bullet strategies like a really beefy multi-Plasma Gun tower VERY strong! Still have to worry about repulse fields though.
~ Note: I think a boost like this is particularly powerful for towers that have low damage by default but good mods (like freeze, burning) which can ONLY be on the primary tower and cannot be gifted through boosts, or focuses on stats other than damage and armor penetration (splash, range, attack speed, total projectiles). Imagine having a crappy zappy tower with amazing range and 5 splash, but low damage and attack speed. Have several of those, which start dropping off in effectiveness mid-game, then throw this booster tower behind them, buffing multiple of them at once. Viola. Instant death machine with all those other insane perks they already had and setting GIANT swaths of ground on fire, slowing enemies. It’s a good time.
Variants
Alternative ideas for you: Boosting Splash, Pierce, or adding Buckshot, or Burst are also viable.
Because there’s detrimental returns on all buffs, it’s usually smarter to have a little bit of different things rather than focus too hard (like I did >_>) but something like +2 Pierce +2 Splash can be an amazing buff for a defense consisting of T2 plasma for example.
Honestly, making most of your towers “just shy” of max potential, then having a boost tower that gives a little bit of everything (range, sector, splash, firerate) might be smarter overall. I just like the idea of designing towers that are VERY solid at a particular task so I am guaranteed they work for what I’m intending them for. But, if you’re intention is to have towers that are good through mid-game and then boost them to bring them up to end-game potential, then that’s totally viable too.
My methodology here is that I want towers I can swap in and out to counter specific situations. Oh no! There’s a tower firing at me? Quickly change this to a mortar! I suddenly have armored enemies? Switch it to an armor penetration tower OR change my support structure from resource gathering to Armor Penetration / Damage Boost tower temporarily. The flexibility of my designs is what makes my defenses so effective.
I generally focus on individual towers or upgrading them to higher tiers rather than boosting, but there’s probably greater potential here to explore. Especially if you can design some really good value-per-block small towers to go along with it, it could make boosting them significantly more powerful.
(example: 1 + 5 dmg suddenly makes them ABSOLUTELY INSANE!)
That's everything we are sharing today for this Protolife guide. This guide was originally created and written by Ttv/CalebSimpson. In case we fail to update this guide, you can find the latest update by following this link.