After much trouble of my own, this is a guide to fully set up a Zomboid PC server, install mods, configure your server, AND merge your base from your single-player world.
Server installation
First, we will want to download SteamCMD, a developer app made by Steam. This can be done by visiting this link.
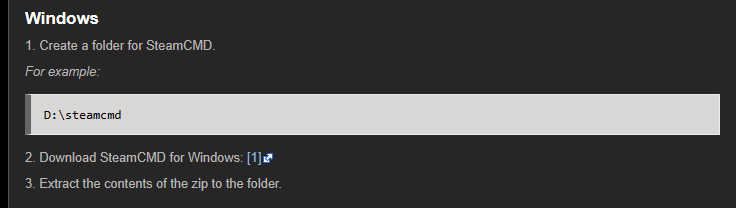
Next, scroll down to the Windows tab and click the [1] icon in the corner:
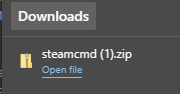
This should download a file called steamcmd.zip, like so:
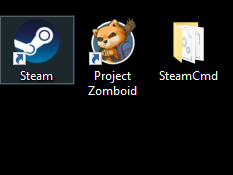
Most guides recommend making a folder in Program Files (x86), but personally, I like to make a folder on my desktop called steamCMD and extract the zipped file into that folder for easier access. To unzip, right-click the file and click “Extract All,” then choose the folder of your choice:
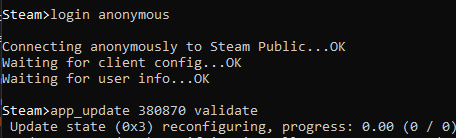
Once extracted, we want to click on the “SteamCMD” icon in this folder. It will bring up a command prompt, and it may take a second to update. First, type “login anonymous” (without parentheses) and press Enter on your keyboard. Next, type “AppUpdate 380870 validate” (without parentheses). This step WILL take a minute or two to load:
Congratulations, you have installed the server.
Port Forwarding & Networking
Now that you have installed the server, it’s time to allow it through the firewall.
IMPORTANT: Please take note if you have a dual router setup, you will need to forward the ports from the first router IP to the second, and then from the second again to the PC IP address.
First, log in to your router and find the port forwarding tab:

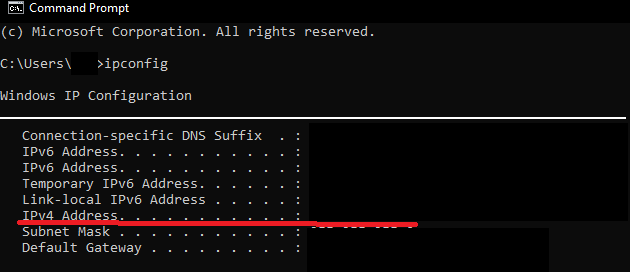
Next, open the command prompt of the PC you will be hosting on and type “ipconfig” (without parentheses). Find the line of text that says IPv4 address and copy/remember this address:
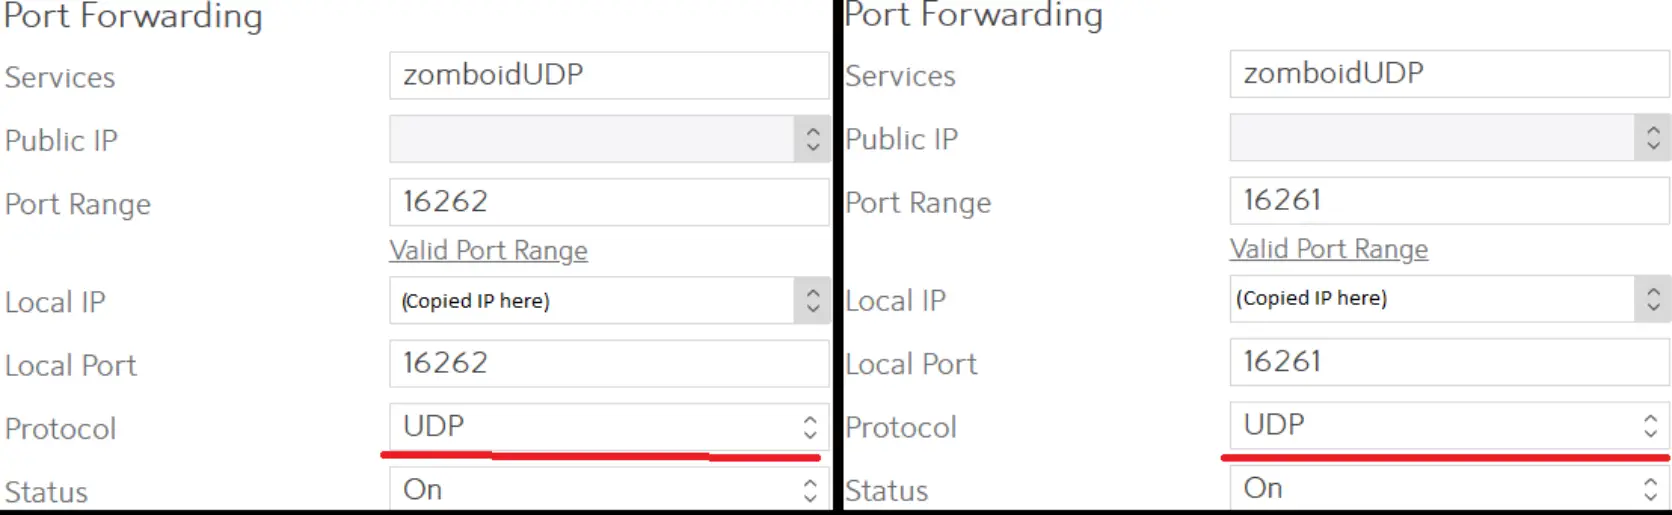
Then, add the port range and your PC IP address to the Local IP or IP address box. Add the following and ensure the protocol is set to the right UDP or TCP settings:
Save/apply these to your router settings. Next, we will allow these through the firewall.
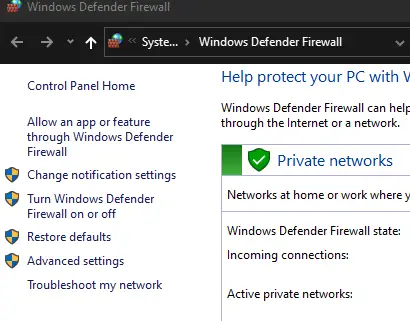
First, find the Windows Defender Firewall program and open it. Click on “Advanced settings” on the upper left side of the screen:
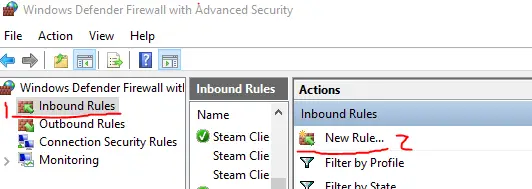
Next, click on “Inbound Rules” and then click “New Rule”:
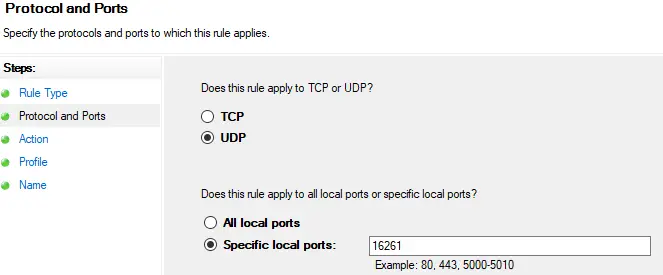
Select “Port” on the new screen, then click Next. Ensure it is set to “UDP” and “Specific Local Ports” and type “16261”:
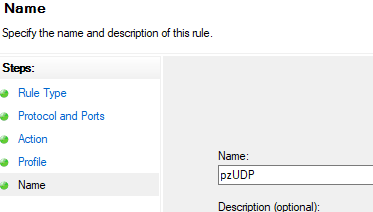
Click Next, ensure the “Allow the connection” box is checked, and then click Next again, ensuring all three boxes are checked, and then click Next again. You should arrive on a “Name” page like so. Name this “pzUDP” and click Finish:
IMPORTANT: Repeat the same process with port 16262!
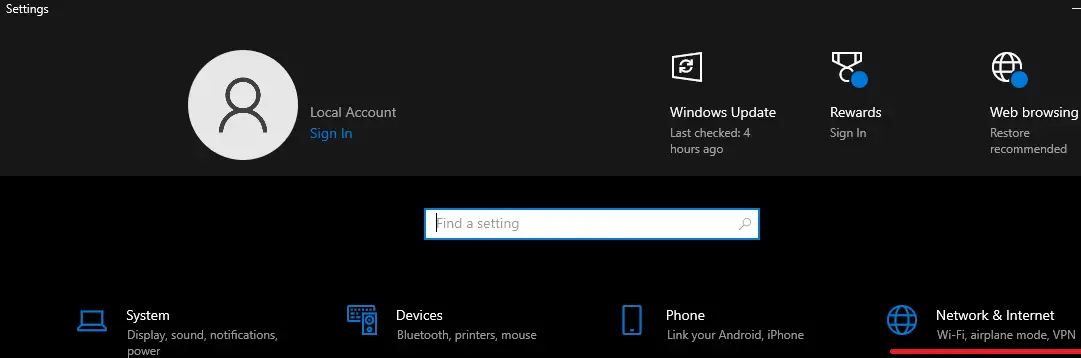
Finally, open Settings on your device and head to the “Network and Internet” tab:
A network status tab should appear. Click on “Properties.” You should see a tab that says “Network Profile.” Set the connection to private:
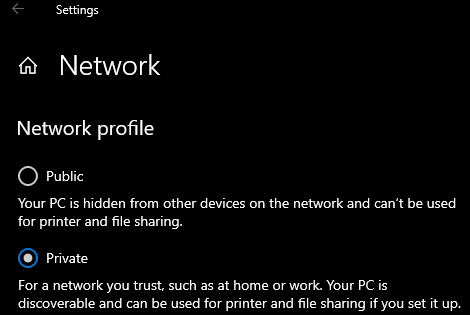
IMPORTANT: Do this for BOTH the host device and the playing device on the same network.
Now is a good idea to restart your computer as well.
Congratulations, you have allowed Zomboid and Steam ports through your firewall.
Test running the new server
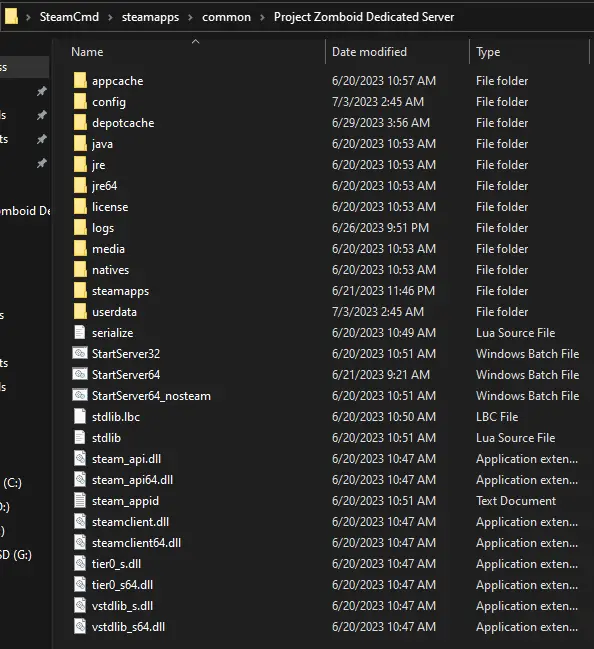
Now that port forwarding is set up, we will start the Project Zomboid server for the first time. Navigate back to your SteamCMD folder. Click on “steamapps,” then “common,” then “Project Zomboid dedicated server.” You should see a screen like this:
Click on the file titled “StartServer64.” This will begin the first server startup. It will open up a command prompt and load for a while. The first time around, it will prompt you for an admin password. Type this in and be sure to remember it! You will need this password for the admin account login. The server will start up.
Boot up Zomboid on your chosen device.
IMPORTANT: If the device is on the same network, use the earlier copied IP from Step 2. If you are on another network, go to the PC you are hosting on and visit this [site] to locate the IPv4. This will be what you will give others/friends/yourself to connect from different networks.
Type the information in the following boxes:
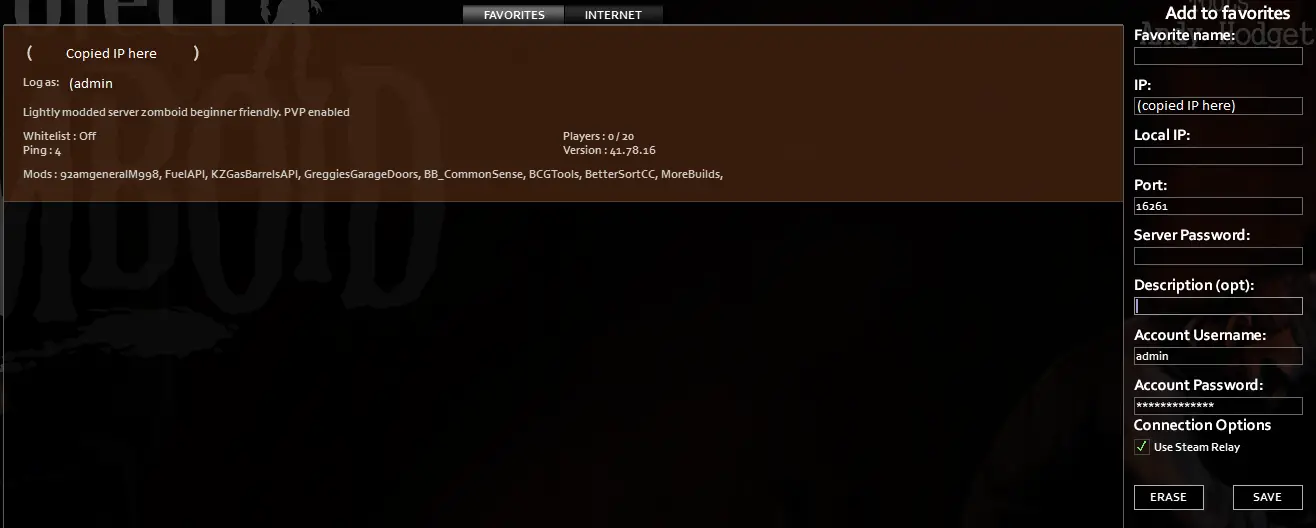
If you are able to view the server and log in as admin, the server connection is set up.
Congratulations, you now have a running Zomboid server.
Server Settings & Adding Mods to the server
If you wish to add mods to the server or edit the base configuration, first you will need to use a file reader. The built-in Windows Notepad works fine, but personally, I use Visual Studio Code.
Next, find your Zomboid server file. This can be found at C:\Users(your-own-username)\Zomboid\Server or by pressing WindowsKey+R and typing in the following: %userprofile%/zomboid and then clicking on the “server” folder:
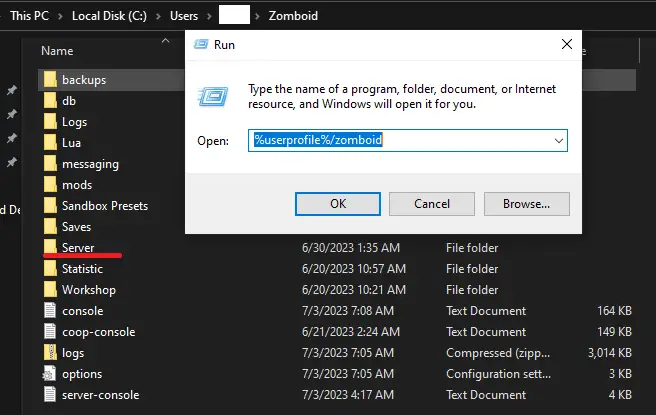
You should be greeted by three files: servertest, servertest_sandboxvars, and servertest_spawnregions:

Right-click on servertest and choose to open it with your text editor of choice (e.g., Visual Studio Code). Make sure to “trust” the tab if using Visual Studio Code. Then you can edit and save the configurations. Here you can view server settings such as Ports, Mods, Max Players, Server Passwords, enabling the server to be seen publicly or not, etc. Each line is very self-explanatory, making things easy to understand. In this step, we will be adding mods. First, locate the “mods=” line:


Here you will need to go to the mods workshop page and find the MOD ID, which is usually towards the bottom of the workshop mod page. In this example, we use @BitBraven’s Common Sense mod:
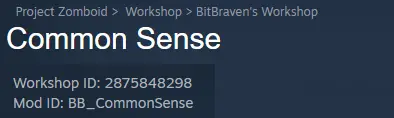
Copy the mod ID line and paste it into the mods= line, and put a semicolon directly after. Next, we are going to do the same process, except this time with the “Workshop Items” line:

This time, copy the workshop ID number and insert a semicolon directly after.
Finally, click File and then Save. This will update the files for the next time the server is opened and will install the mods.
Moving Single-player Data
If you are new to Project Zomboid hosting and want to merge your single-player base with your multiplayer server, first, you will need to locate the chunk in which your base is stored. This can be done by going to the Project Zomboid Map website and locating your base. Click on the “Map Coordinates” tab and move your cursor around, which will give you the coordinates:
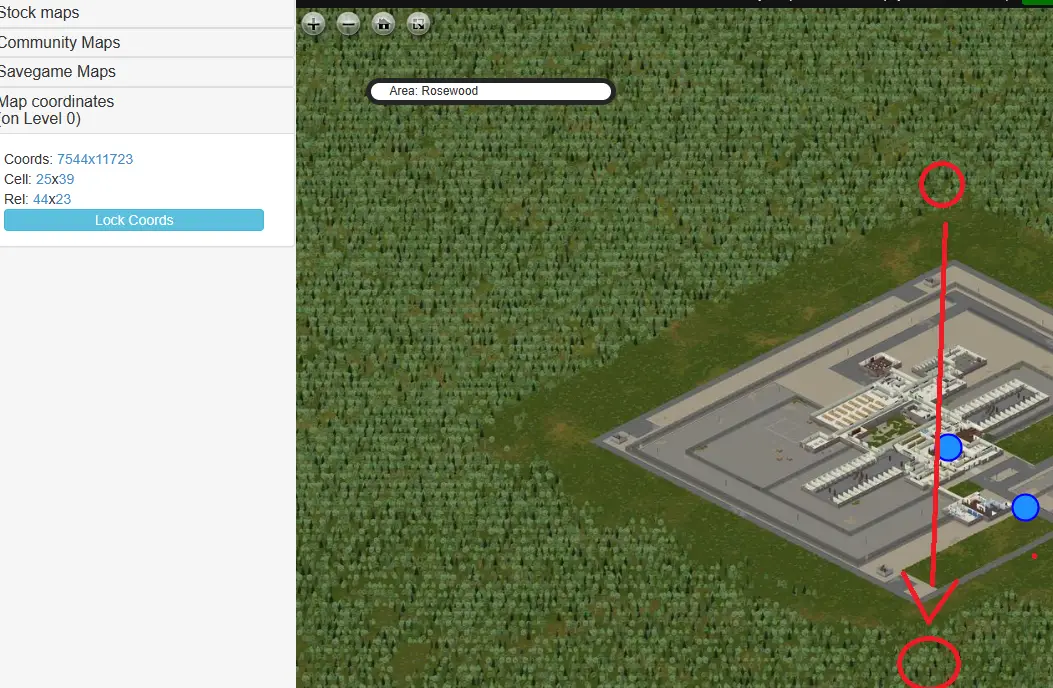
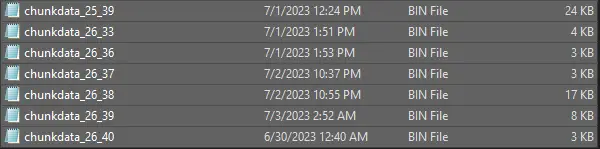
These coordinates will correspond with both chunk data and map files in the folder C:\Users(username)\Zomboid\Saves(builder/sandbox/whatever)(date). In this example, using the coordinates from the prison, we want to start in the upper corner and go down to the lower corner. Looking at the “cell” on the map, it starts with 25×39 and ends with 26×40. Using these, we will locate the chunk data files:
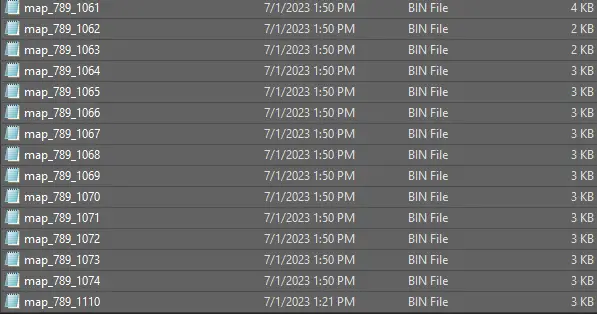
We will do something similar with the map files as well. As we can see in the example, the coordinates are 7544×11723. We will shave off one number on each side, so we can picture 754×1172. Do this for the lower corner as well, and we will get 789×1198. Then we will once again find that range of map files. You will need to copy ALL files from this range. It can be a lot, depending on the size of the base. If you do not have a vanilla game building base, do your best to estimate the coordinates of the base using the map. In my example, I do not have these exact files as the area has not been loaded, FYI. But if you have visited them, they will be there:
If you want to also keep the storage contents and vehicle data, they will be in the same file folder. Find the “WorldDictionary” BIN file, as well as the “Vehicles” DB file, and copy these.
Next, go to your folder C:\Users(username)\Zomboid\Saves\Multiplayer (servername) and paste all of the data here, choosing to replace the current existing files if the option appears. Upon the next server bootup, the structures, vehicles, and storage should be placed.
I strongly advise you to create a folder to store all this data together, so you can copy it all over at once.
If you wish to merge a whole world, copy EVERYTHING. This can take some time, however.
Congratulations, you have now merged your map data from single player to multiplayer.
That's everything we are sharing today for this Project Zomboid guide. This guide was originally created and written by Major Spellbound. In case we fail to update this guide, you can find the latest update by following this link.