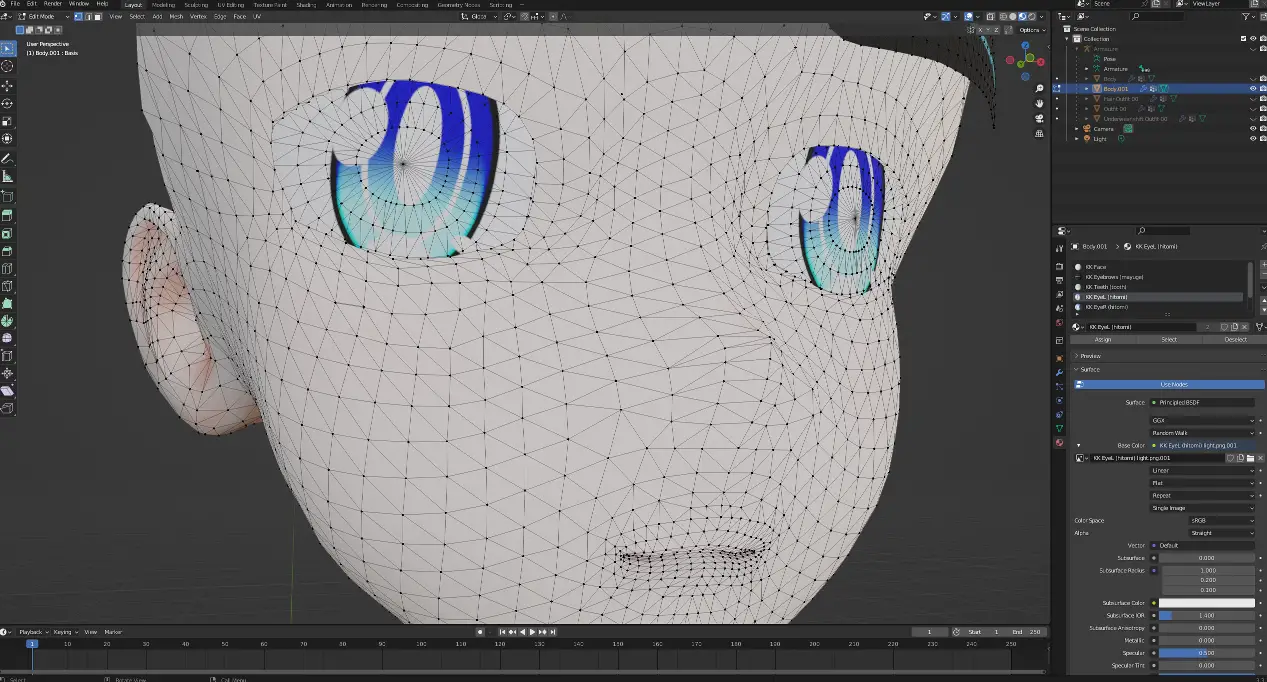
A step-by-step guide for how to build a model replacement mod for Outlast.
Introduction
There are a lot of moving pieces required to make a custom character mod. The general steps are:
- Acquire a desired character model.
- This model must not possess any transparency. Any transparent portions will look like a black texture ingame. Delete any such portions to make the model usable.
- Extract the contents of OLGame.upk.
- Find a skeleton of the character model of the person you wish to replace.\
- Rig your custom model to work with the target skeleton. Every vertex of the custom model must be weighted to the skeleton, or the model will not work.
- Construct a custom upk holding materials disguised as the real materials held within Outlast.
- Create child materials in your own upk extending off these disguised materials. These child materials use your custom model textures.
- Add about 6 materials before the materials your model actually uses. This is to make sure the material replace the game sometimes does will not make your model look weird.
- Import the model into your own upk, alongside your materials. Setup the materials on your model.
- Utilize a custom unreal script to replace the target model with yours. This unreal script will extend off of OLGame.
- Alter the config to use your custom script instead of OLGame.
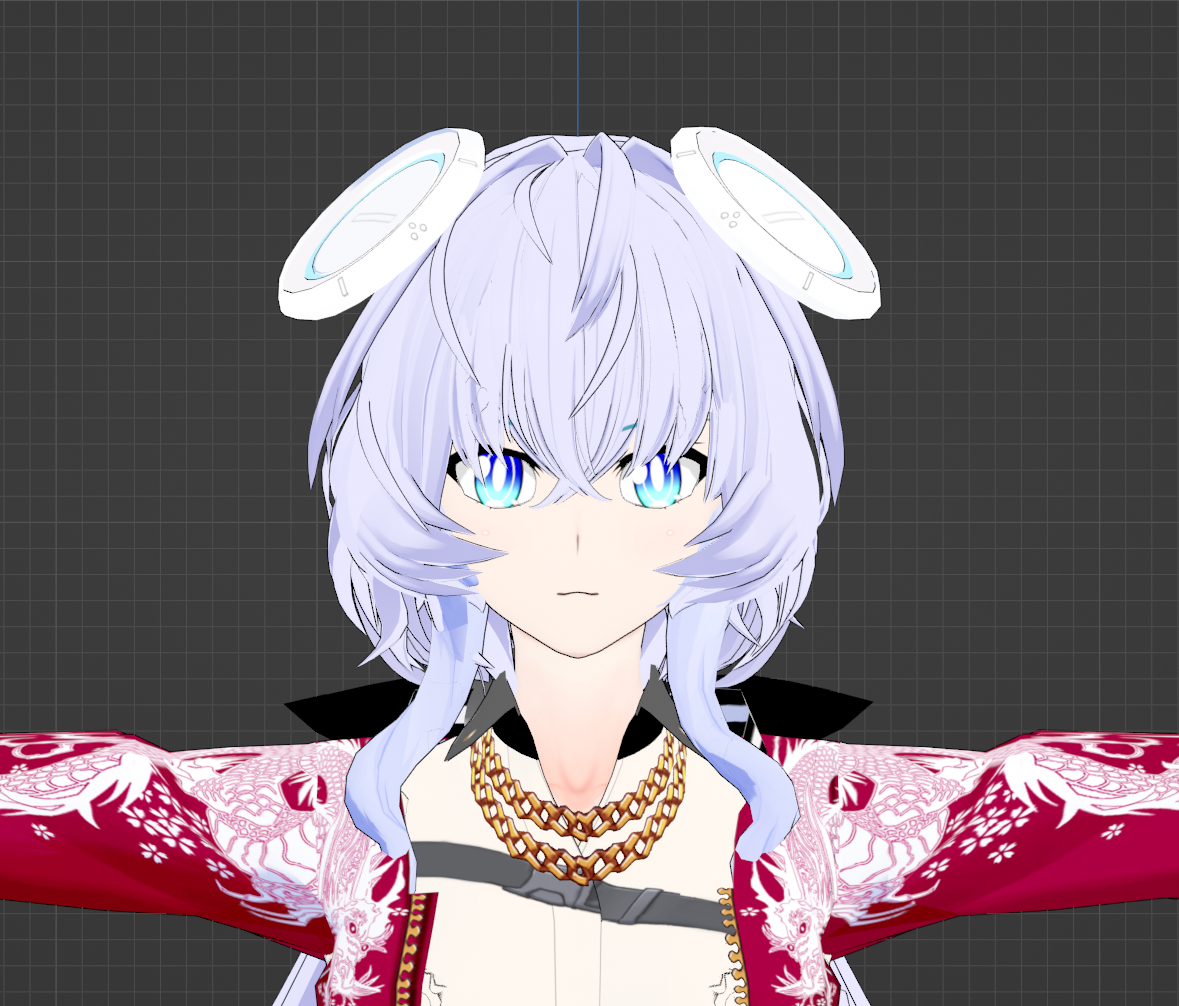
I will be porting this fresh custom model into Outlast:
Task 1: Compile the default Outlast scripts.
This section deals with the setup of being able to compile a model replacement script for Outlast. You will require two similar items:
- A real UDK Editor 2015 installation.
- A modded UDK Editor 2015 installation for building scripts.
Getting a real UDK Editor 2015 instance is very easy. Go here, download, and install the February 2015 Unreal Development Kit somewhere. If you are asked, installing preforce is not necessary.
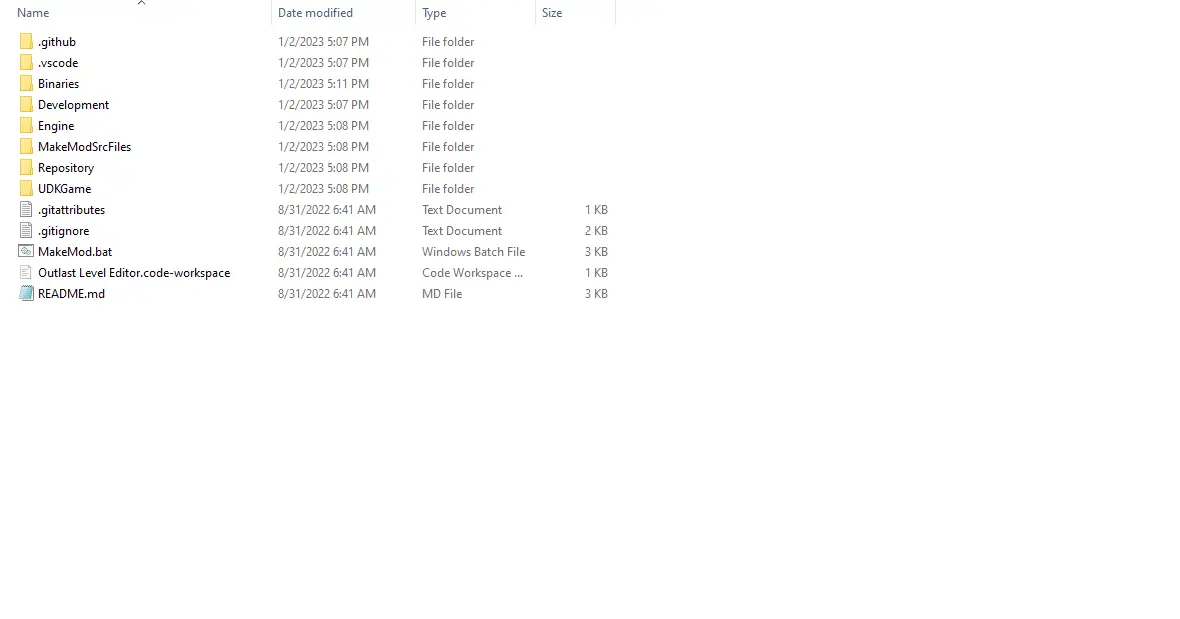
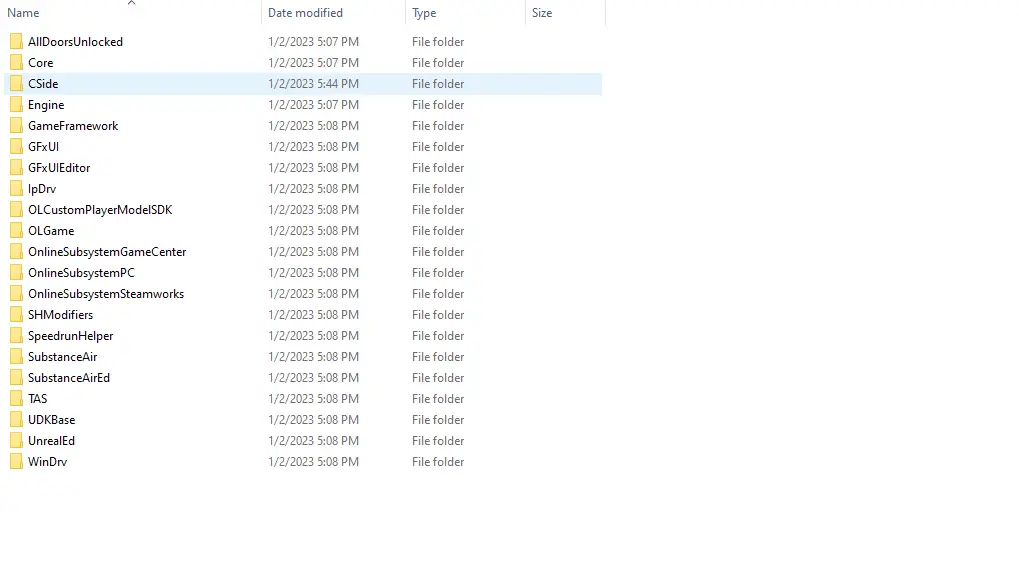
Now visit Github. Go to Code -> Download ZIP. Put all of the contents within Outlast-Level-Editor-main into a location of your choice – this is the location of the modded instance. Now copy the Binaries folder from your real UDK instance, and put it inside the modded instance folder. When done, your modded instance should look like this:
You could compile the default scripts right now, but some of them are completely broken. This will cause trouble with compilation. What we need to do next is delete the scripts we won’t be using, and add the one we will use.
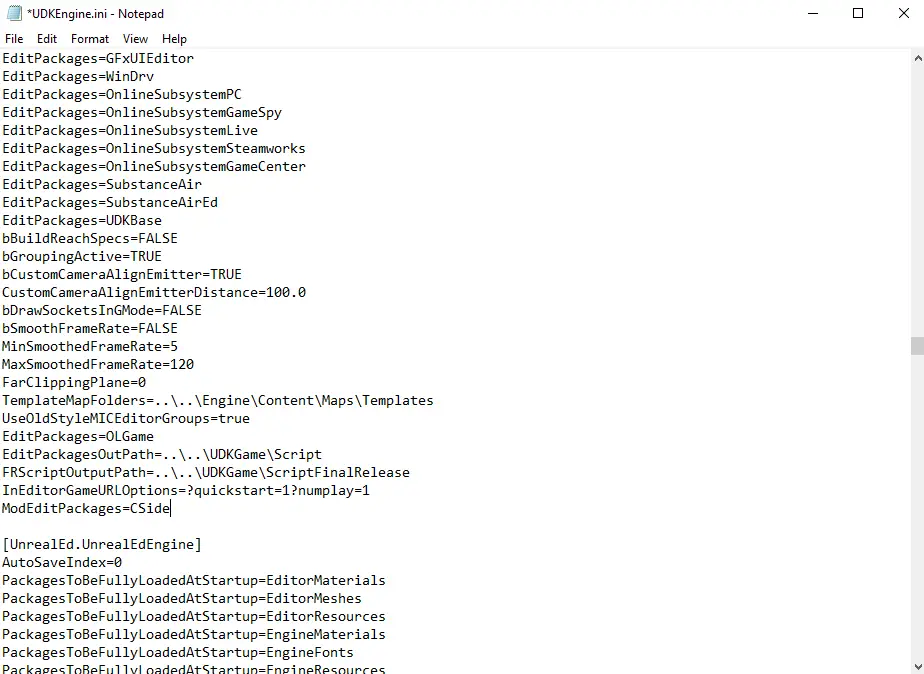
- In the modded instance, go to UDKGame/Config, and open UDKEngine.ini.
- Go to the line containing [UnrealEd.UnrealEdEngine].
- You will see a list of “ModEditPackages=[PackageName]” just above that line. Delete them.
- Put in your own ModEditPackage, naming it after what you want the mod to be called. I will be calling mine CSide.
- When done, that part of the text file will look like the following:
Now enter Development/Src, and create a new folder named after the ModEditPackage name. In my case, the folder is named CSide. Then, enter this folder and make a folder called Classes. Classes is where we will be placing our script.
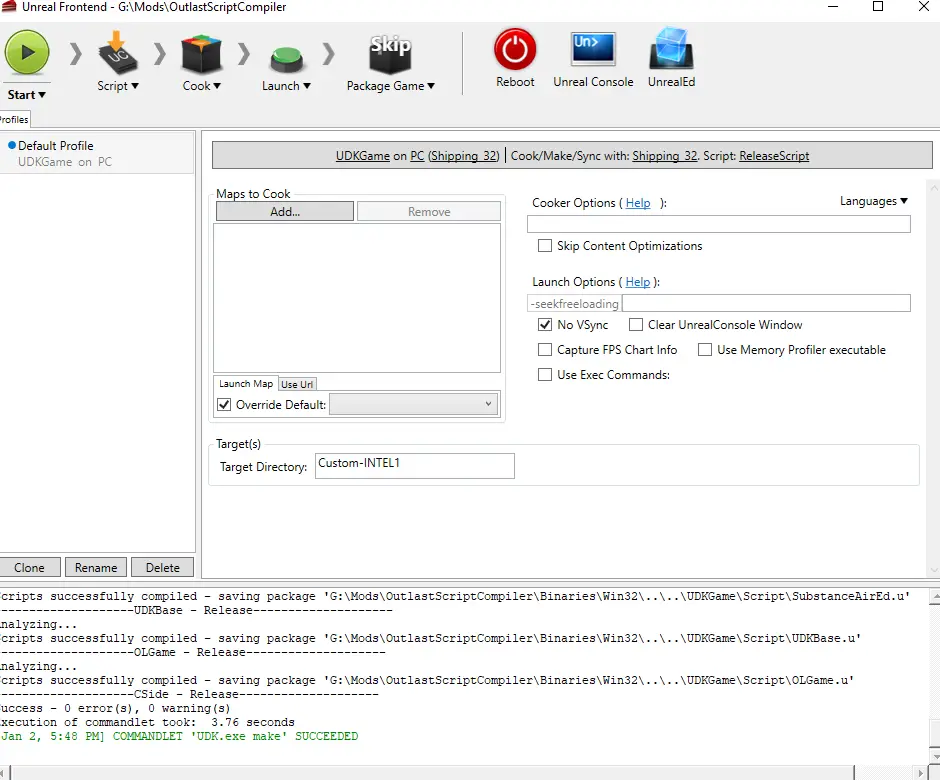
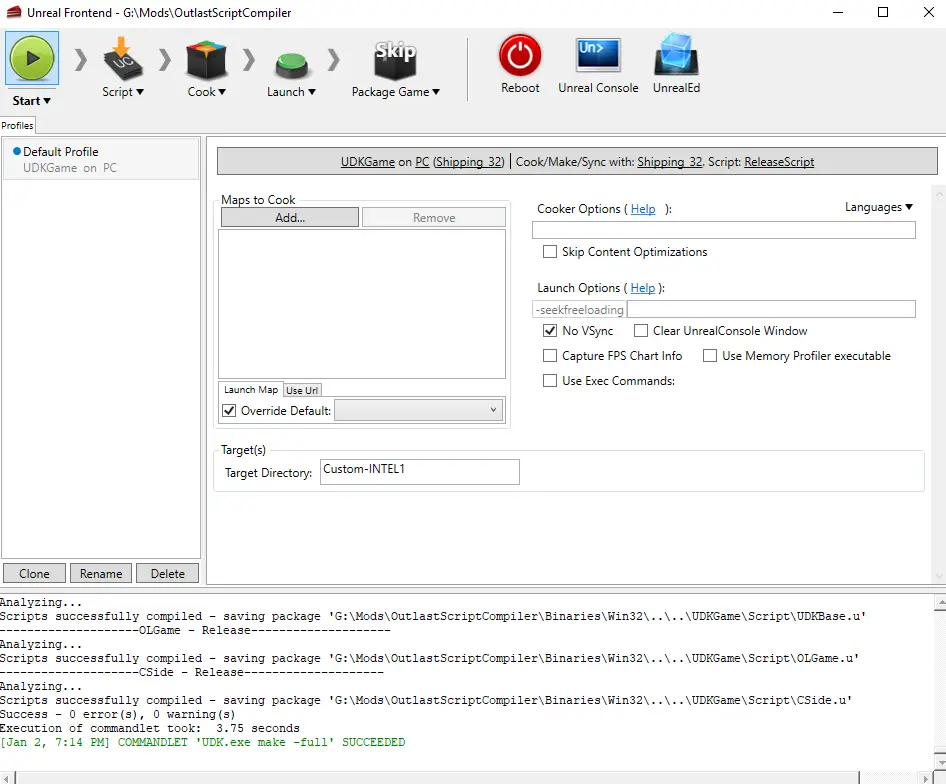
Now enter Binaries and launch UnrealFrontend.exe. Do Script -> Compile Scripts. It should compile with no issues.
If you get the message “Success – 0 error(s), 0 warning(s)” like me, then you have completed this section.
Task 2: Launch the game with a custom game script.
This section instructs you on how to load the game with a custom script class. In essence, we are going to tell the game to use our custom script class instead of the default OLGame class. This is critical for any customization to happen in Outlast.
For this section, our custom script class will only do what the default game does. However, to confirm the game is using the custom script class, we are going to make it fail to find the custom script class first.
Begin by going to where you installed Outlast. Go to OLGame/Config. There are two files you need to change here.
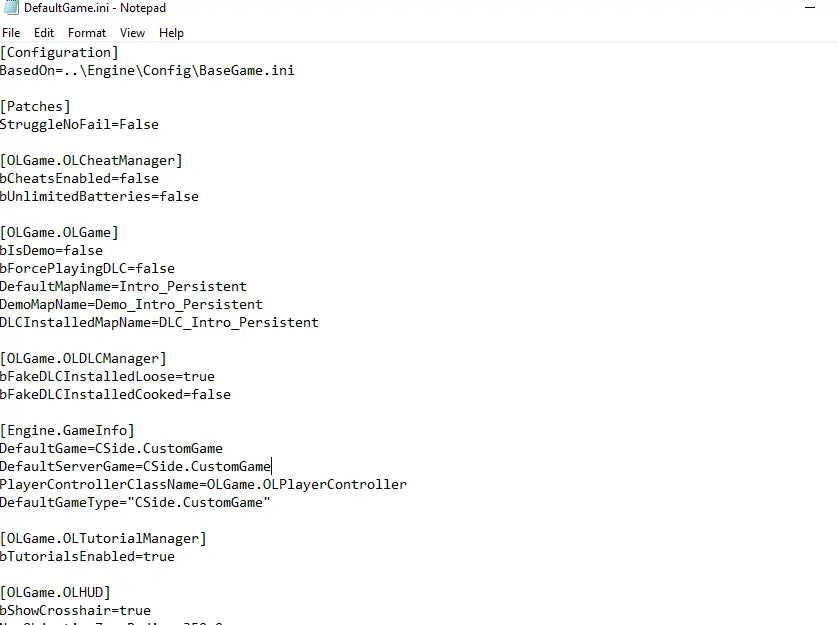
Recall the ModEditPackage name you used before, and that I am using CSide as my ModEditPackage name. I will refer to the ModEditPackage name as [MEPN]. Open DefaultGame.ini. Go down to [Engine.GameInfo], and replace the contents with the following:
–
DefaultGame=[MEPN].CustomGame
DefaultServerGame=[MEPN].CustomGame
PlayerControllerClassName=OLGame.OLPlayerController
DefaultGameType=”[MEPN].CustomGame”
–
For my name of CSide, it looks like this:
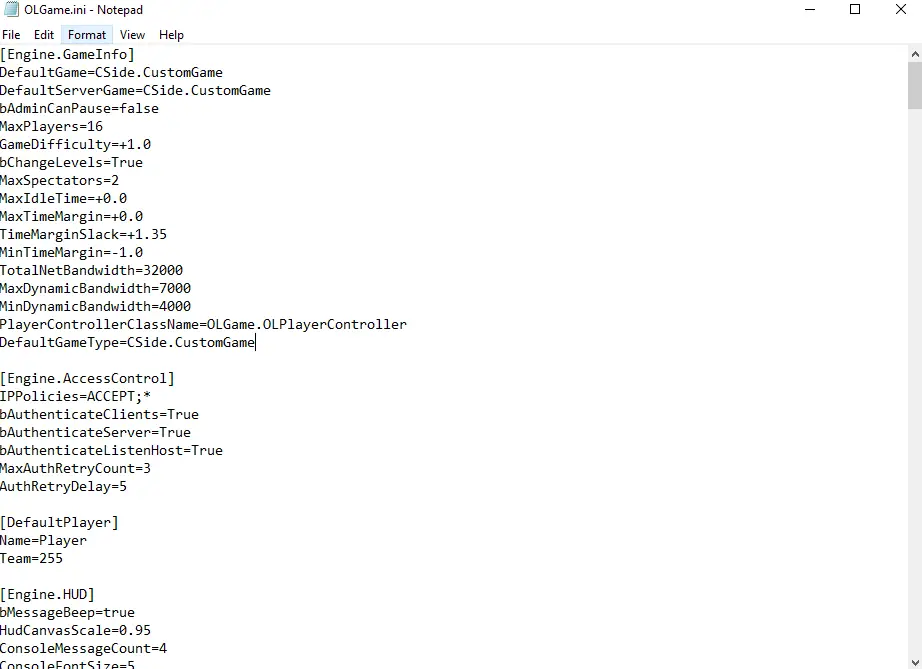
Now open OLGame.ini. Right at the top is [Engine.GameInfo]. Like before, edit DefaultGame, DefaultServerGame, and DefaultGameType, except DefaultGameType doesn’t use quotes this time.
For my name of CSide, it looks like this:
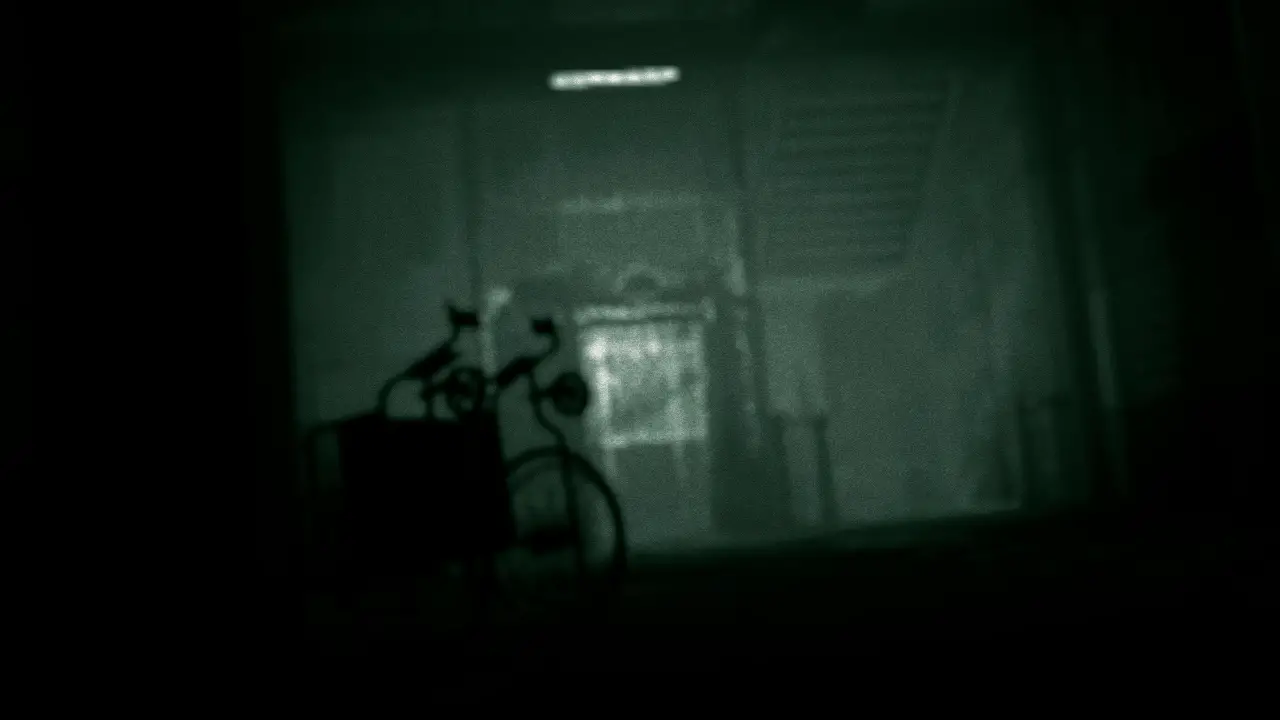
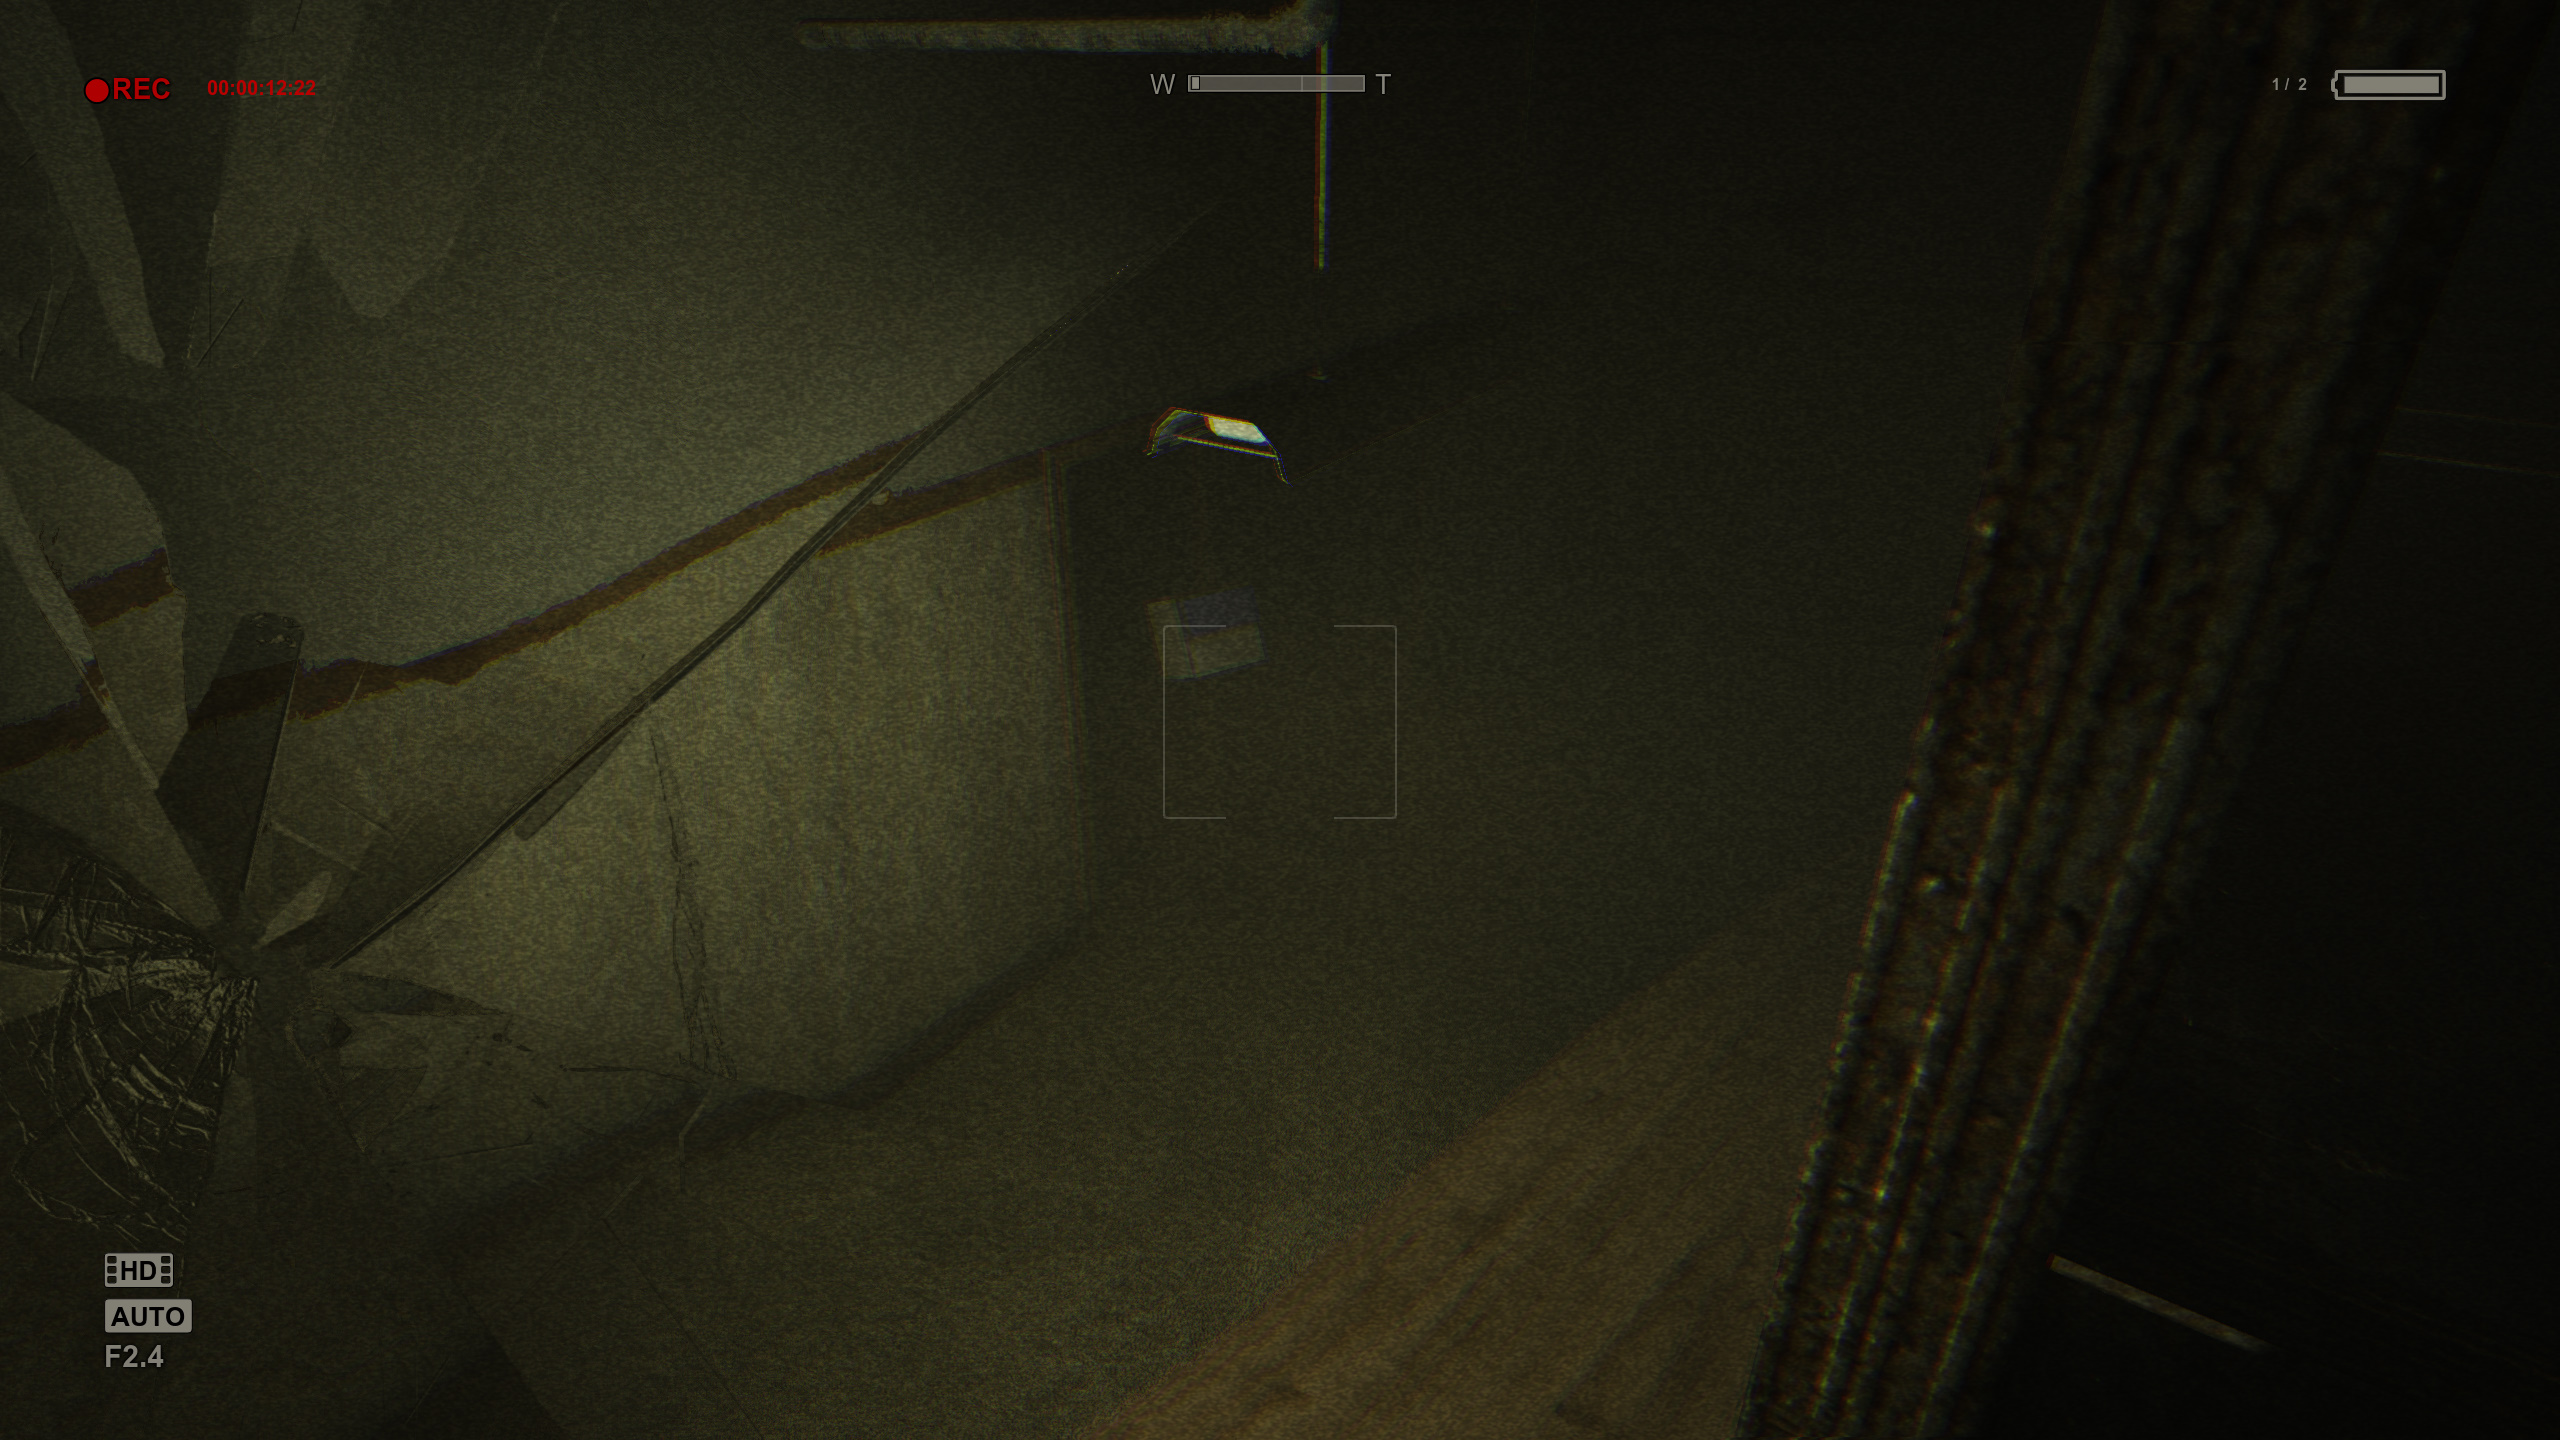
Launch the game. If it did the failure we’re looking for, you should reach what should be the main menu and see a video in the background, but there will be no actual menu whatsoever. It will look like this:
Now we need to create this CustomGame script class. Grab a copy of one from over here.
CustomGame.uc is the source file of the script. It will do nothing until compiled. Therefore, take CustomGame.uc and put it inside Development/Src/[MEPN]/Classes back in your Modded UDK instance. As my ModEditPackage name is CSide, I would put CustomGame.uc at Development/Src/CSide/Classes.
Now open the uc file and edit line 2, such that it says Config([MEPN]). In my case, my ModEditPackage name is CSide, so that line would say Config(CSide).
Return to UnrealFrontend and have it compile scripts.
You should see it say that the compilation succeeded. It should also inform you that it saved a package somewhere.
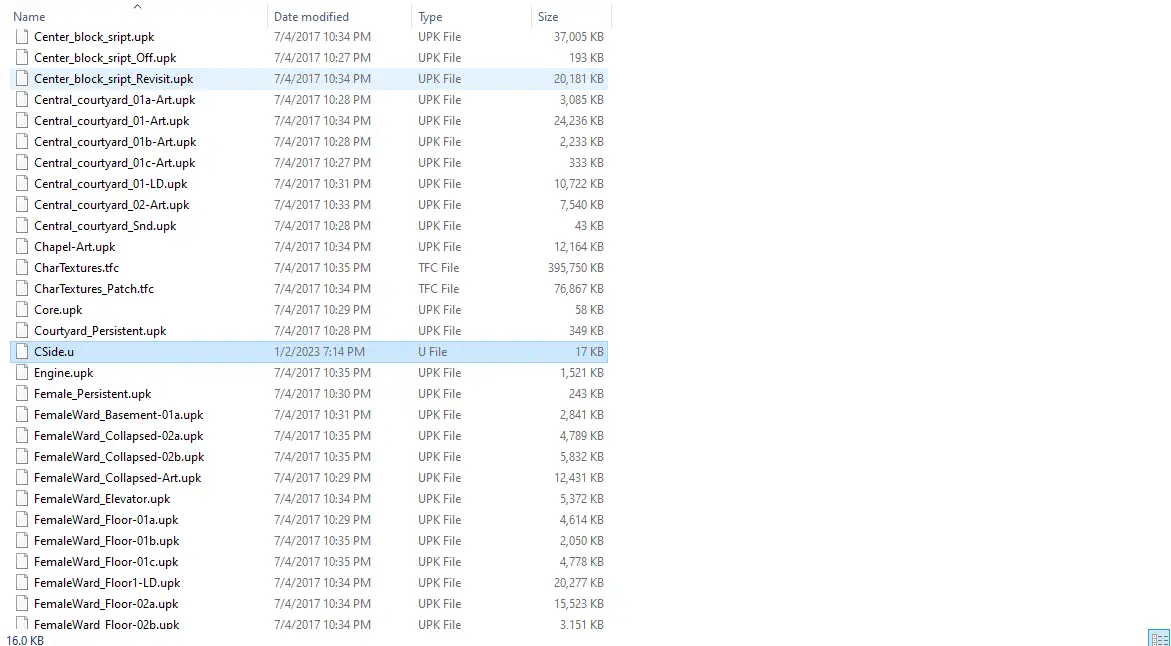
This package is our compiled script, usable by Outlast. You can find it at UDKGame/Script, called [MEPN].u. In my case, it is called CSide.u.
Return to the Outlast game folder. Enter OLGame/CookedPCConsole. Copy [MEPN].u into this folder, like thus:
Launch the game again. If the main menu appears without any trouble, you have completed this section successfully.
Task 3: Acquire a character skeleton from the game.
Now that we have a custom game class working, we can get to work on actually getting a model into the game. There are several things you need to proceed.
- Get UModel/UE Viewer
- Get Blender
- Get a plugin to import psk files into Blender, and install the plugin. For example, this is a good option
To extract the game’s character models from Outlast, launch UModel/UE Viewer. Tell it the game files are located in [Outlast game folder]/OLGame/CookedPCConsole. Have it extract meshes and animations from OLGame.upk – that is all we need to continue. Have it extract the contents to whatever location you like.
Enter the folder with the extracted items. Take note that there are essentially four skeletons of interest known to Outlast:
- Hero skeleton. This is the skeleton used by the player.
- Medium Skeleton. This is the skeleton used by nearly all NPCs in the game, such as Trager and Frank.
- Large skeleton. This is the skeleton used by Chris, Groom, and the Walrider.
- Billy’s skeleton. This is a unique, modded version of the Medium skeleton only used by Billy. Only use this one if you’ve gained some experience in rigging character models.
An instance of the medium skeleton is in 02_Priest/Pawn/Priest-01.psk.
An instance of the large skeleton is in 02_Soldier/Pawn/Soldier-03.psk.
Make sure you choose the right skeleton. A model rigged to the Large skeleton will T-Pose if you try to use it on a Medium skeleton character.
For this guide, I will ultimately be replacing Chris Walker with the girl mentioned at the start of the guide, so I will be using the Large skeleton.
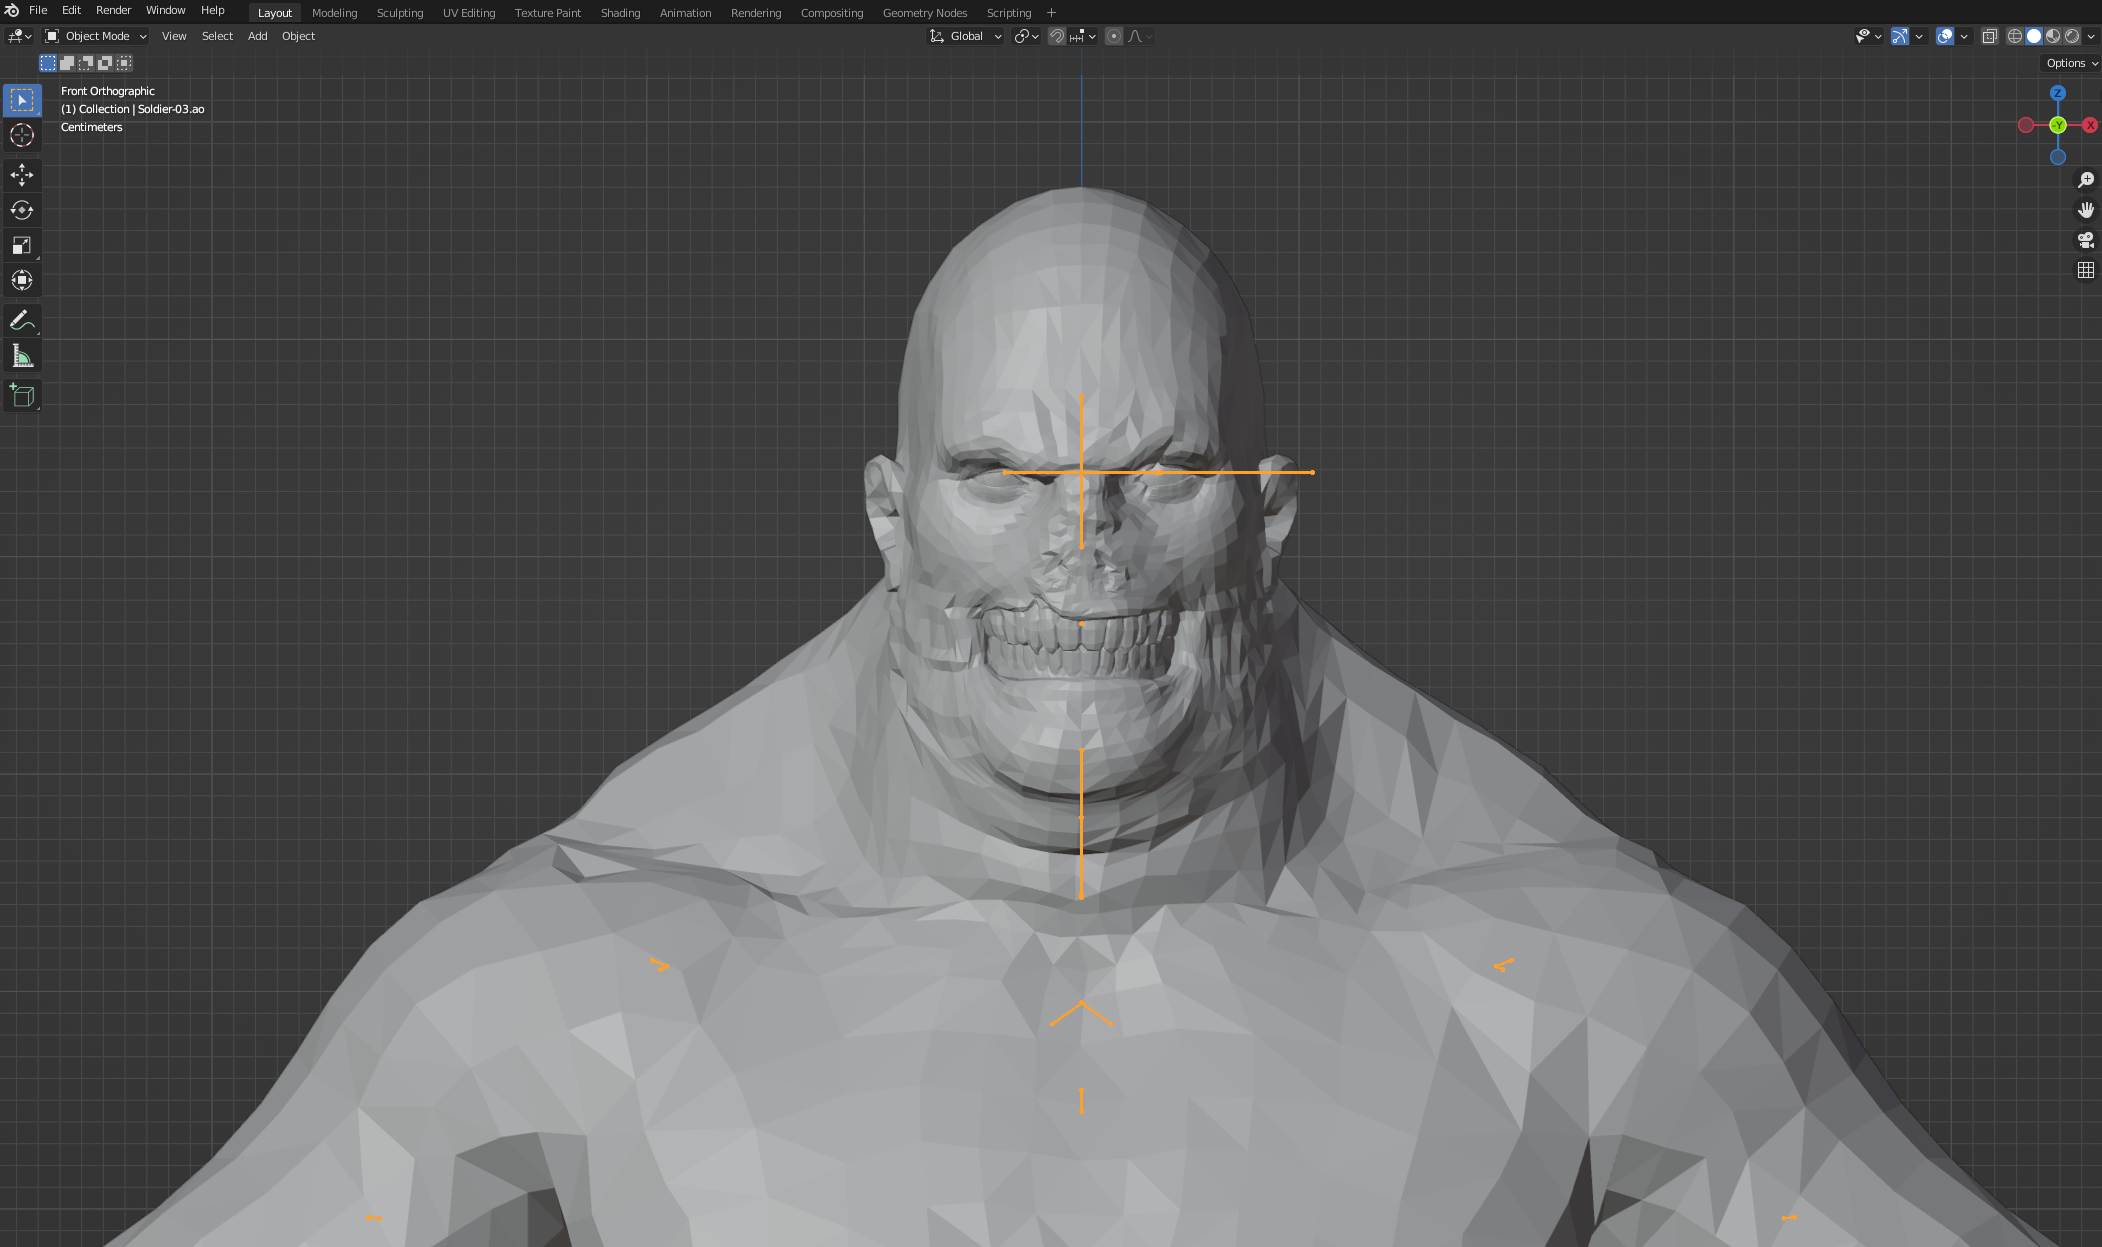
Once you have decided, open Blender. Make sure the psk import plugin is installed. Then do File -> Import -> Skeleton Mesh (.psk). Import the psk that holds the skeleton you’re looking for. As I want the Large skeleton, I will import 02_Soldier/Pawn/Soldier-03.psk.
You should then see something like this:
The model will be messed up, but that’s fine – all we really need is the skeleton. Save this somewhere as a blend file – we’ll need the skeleton and model as a reference for rigging later.
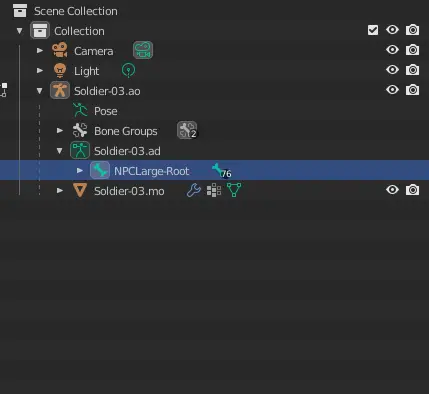
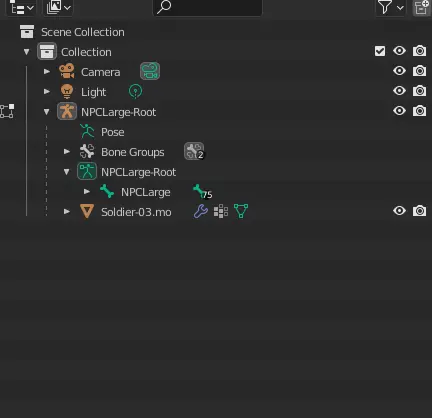
Now we need to fix up the skeleton. Click the dropdown arrow to the left of the skeleton (Soldier-03.ao in my case), and then click the dropdown arrow next to Soldier-3.ad. You should see NPCLarge-Root or NPCMedium-Root in there, like this:
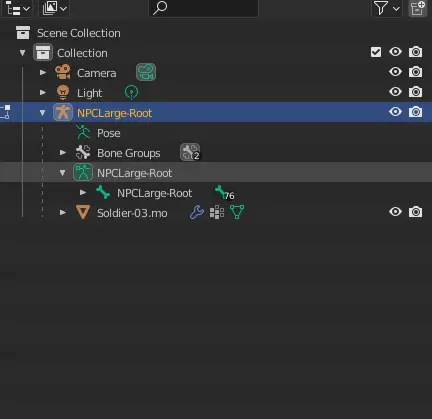
You must now copy out the name in there, overwriting the name in the location for Soldier-03.ao and Soldier-03.ad, like this:
Then you must enter Edit Mode, and click on the item that was originally NPCLarge-Root, and press the Delete key. Blender will ask if you want to Delete Bones or Dissolve Bones. Choose to just delete the Bones. This will cause NPCLarge to move up, which looks like this:
That should be it for this section. If you now hold a model and skeleton extracted from the game, can see it in blender, and the skeleton has been renamed to NPCLarge-Root or NPCMedium-Root properly, then you have successfully completed this section.
Task 4: Replace a character model with an untextured cube.
For this next task, we are going to actually replace a character model for the first time in the guide. We will replace the character model with the simplest model possible – a single untextured cube.
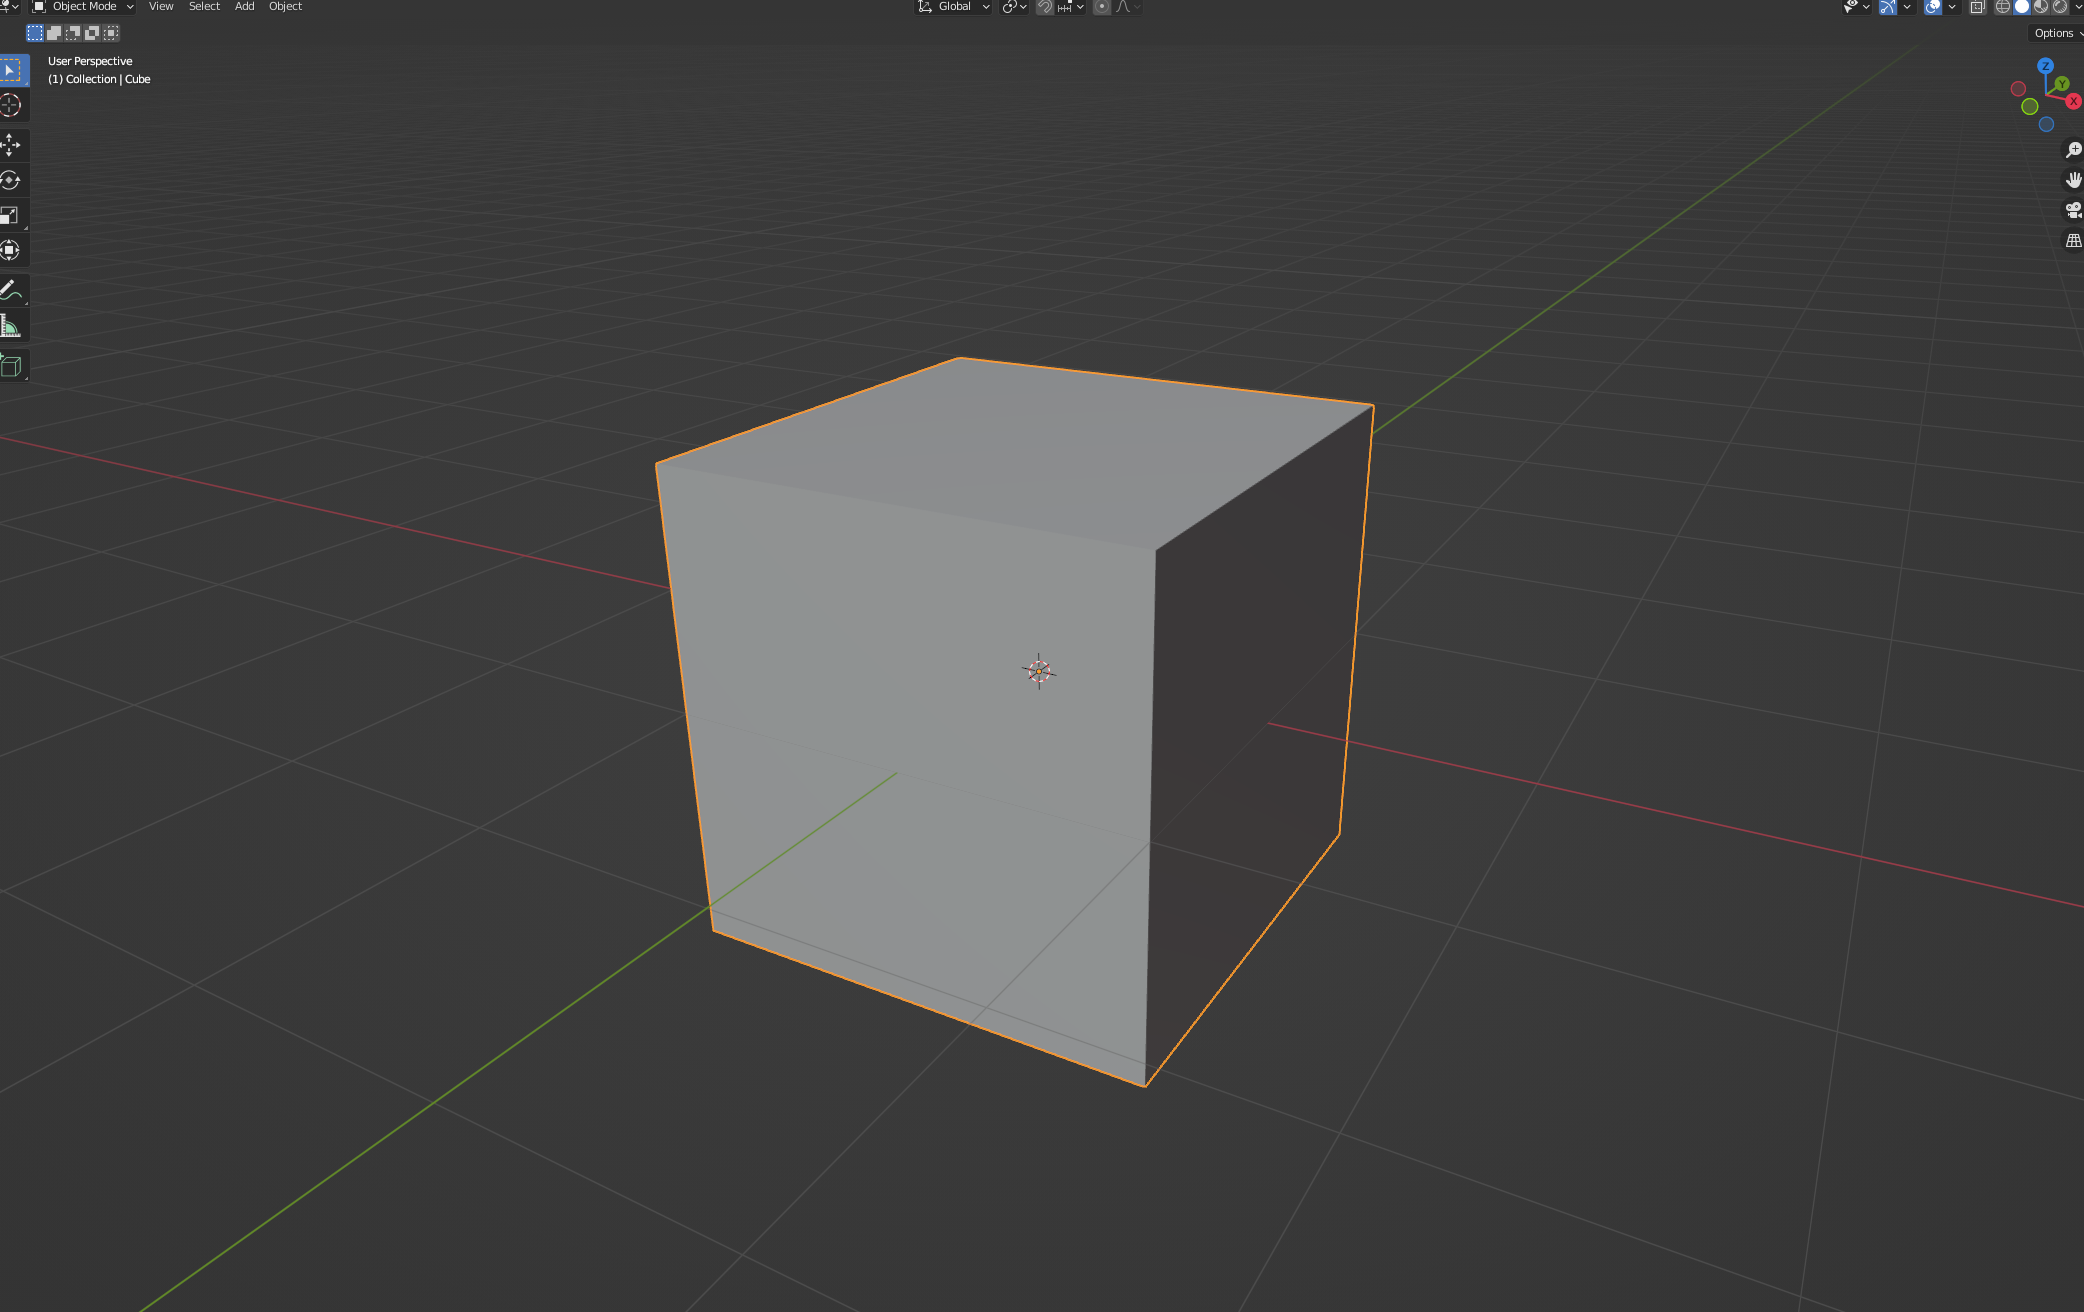
Begin by opening Blender. A single cube should appear. If one does not, do Modelling -> Add -> Cube.
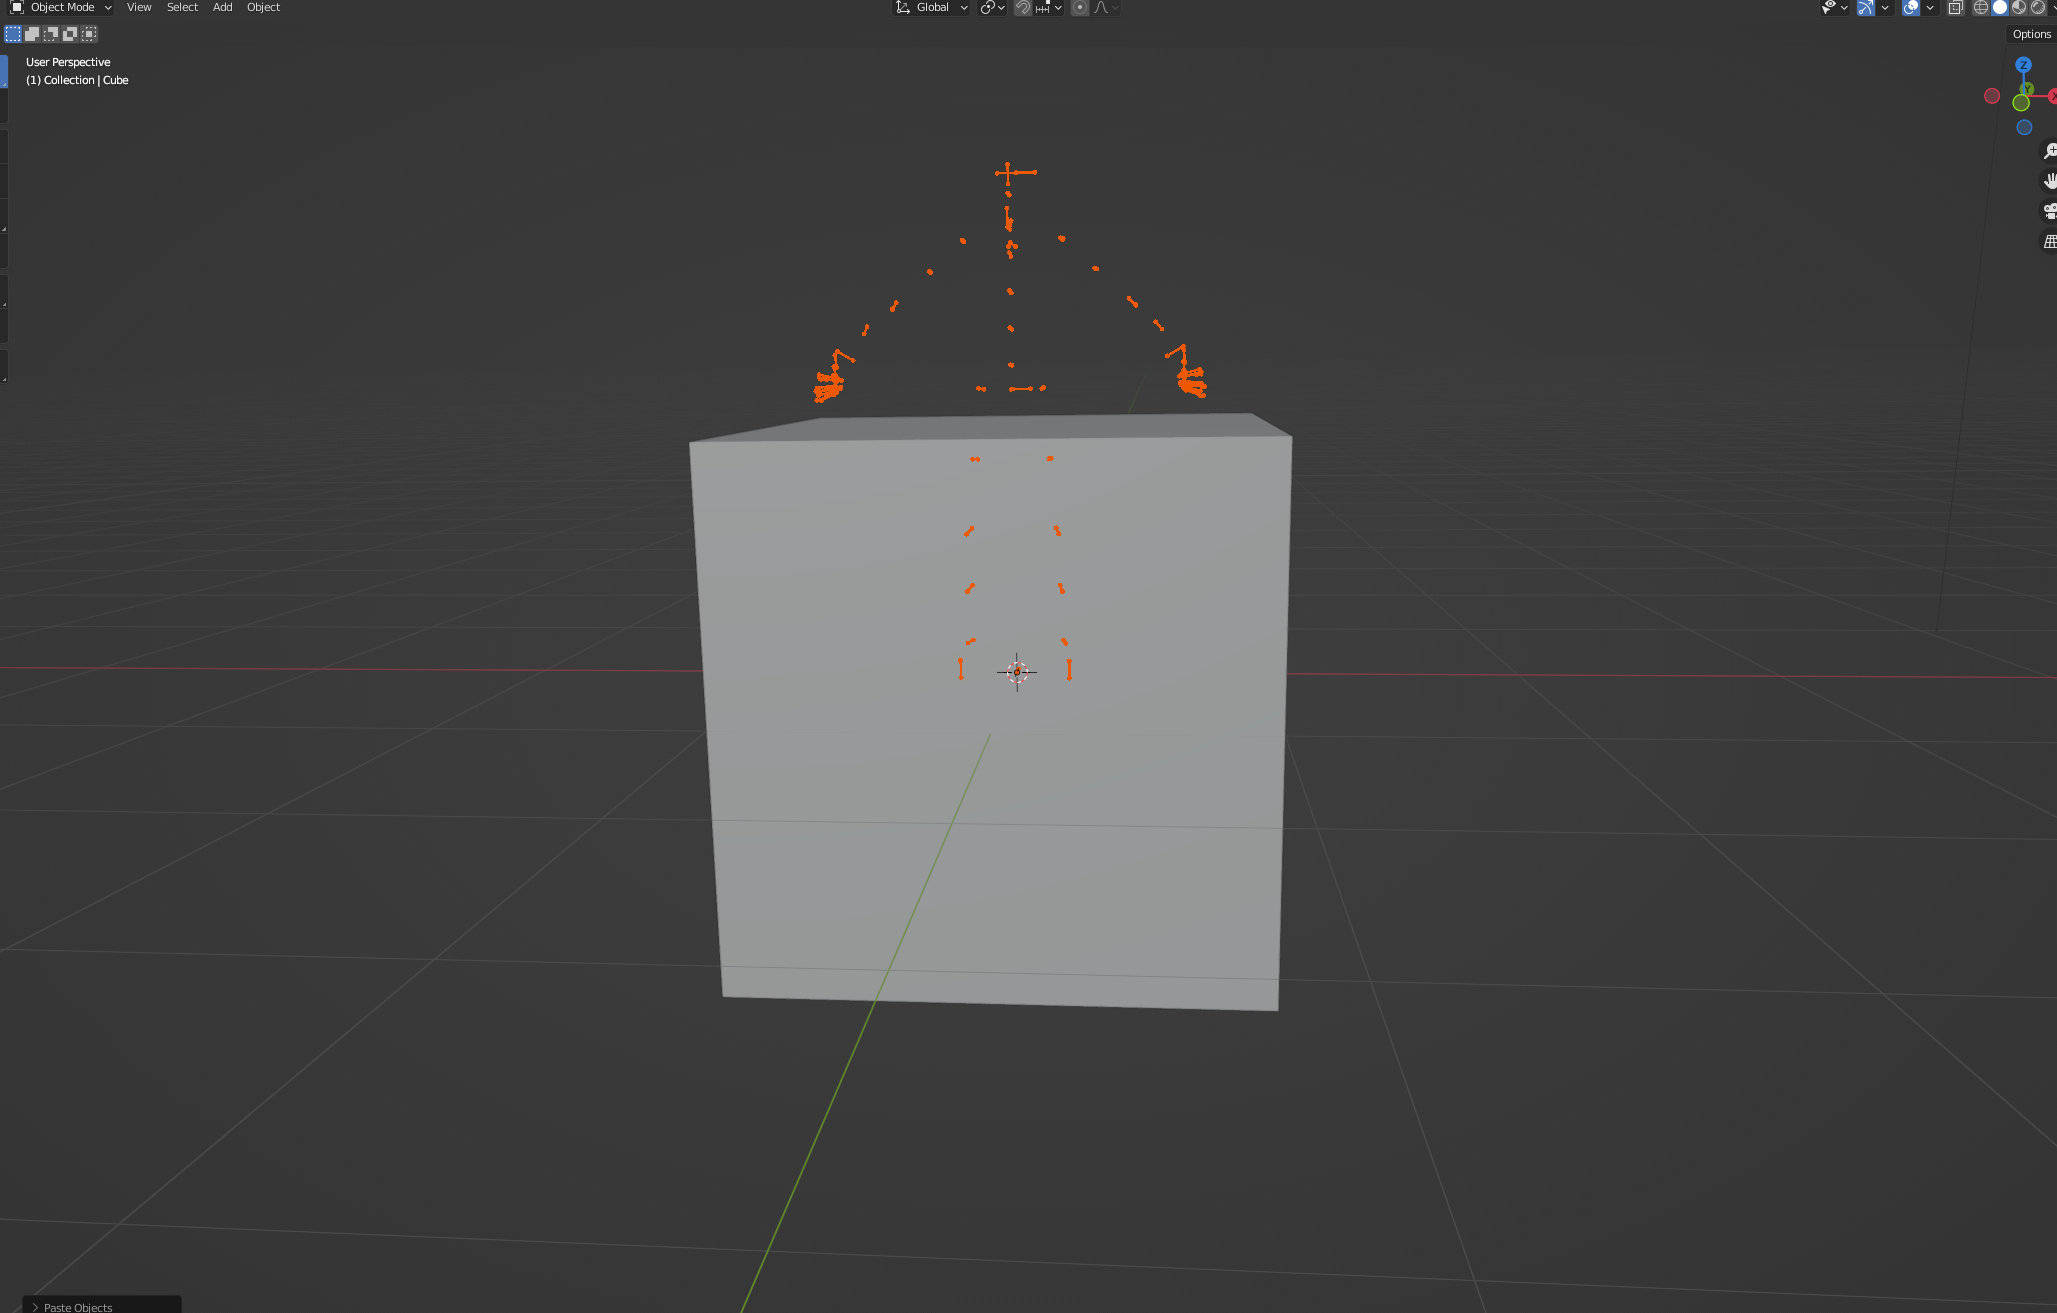
Return to the project with the extracted game model. In Object Mode, click on NPCLarge-Root. The dots and lines on the model should light up as an orange color. Copy, and then go back to the project with the cube. Click somewhere on the scene other than the cube to deselect it, making it lose the orange outline, and then paste. The skeleton should appear slightly above the cube.
Now, get acquainted with how Blender handles transformation.
- G will move an object.
- R will rotate an object.
- S will scale an object.
- Pressing X, Y, or Z will lock the transformation to an axis after you press G, R, or S.
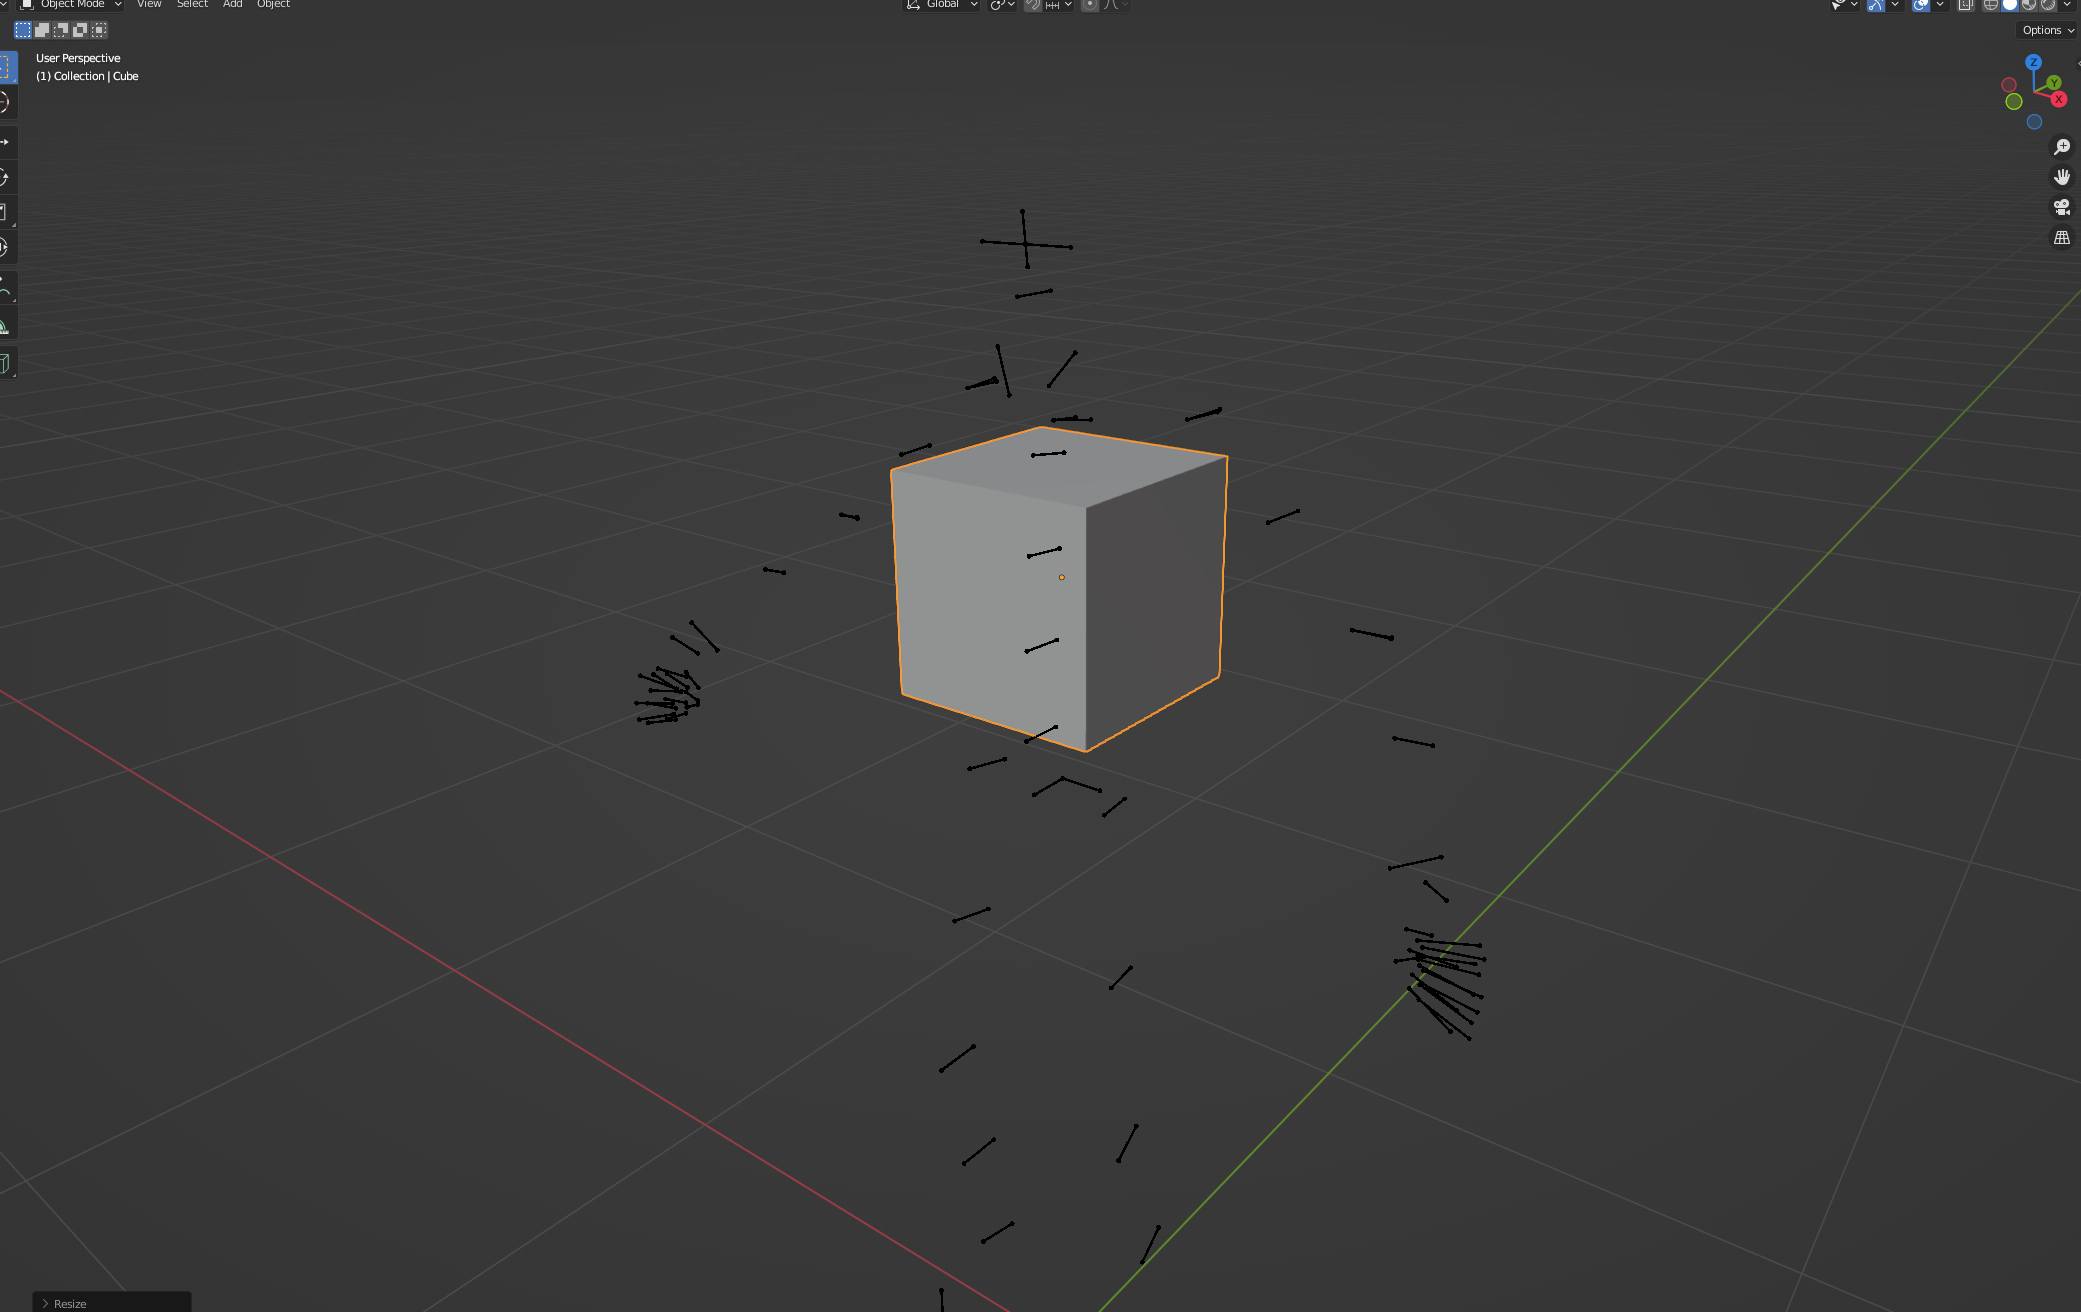
Click on the Cube again, and try to transform it such that it is near the skeleton’s chest. However, under no circumstances should you
evertransform the skeleton. If you do, the animations will look weird, and you definitely don’t want that. Eventually, you should end up with something like this:
Now it is time to rig the cube to the skeleton. Since all we want is to get this cube into the game, this will be a very fast and simple procedure.
- In Object Mode, click the Cube, and then click on NPCLarge-Root.
- Do Ctrl+P. Blender will ask you how you want to combine the cube to the skeleton.
- Choose “With Empty Groups”.
- The Cube is now associated with the skeleton. However, if you tried to use it now, the UDK Editor would crash since at least one vertex is not weighted.
- You need to assign all the vertices of the cube to one of the bones. Click the dropdown by NPCLarge-Root, and click on the Cube again.
- Click on the green triangle on the right side menu in order to open up the list of vertex groups.
- Switch to Edit Mode. With the Cube still selected, press A to select all of the cube’s vertices.
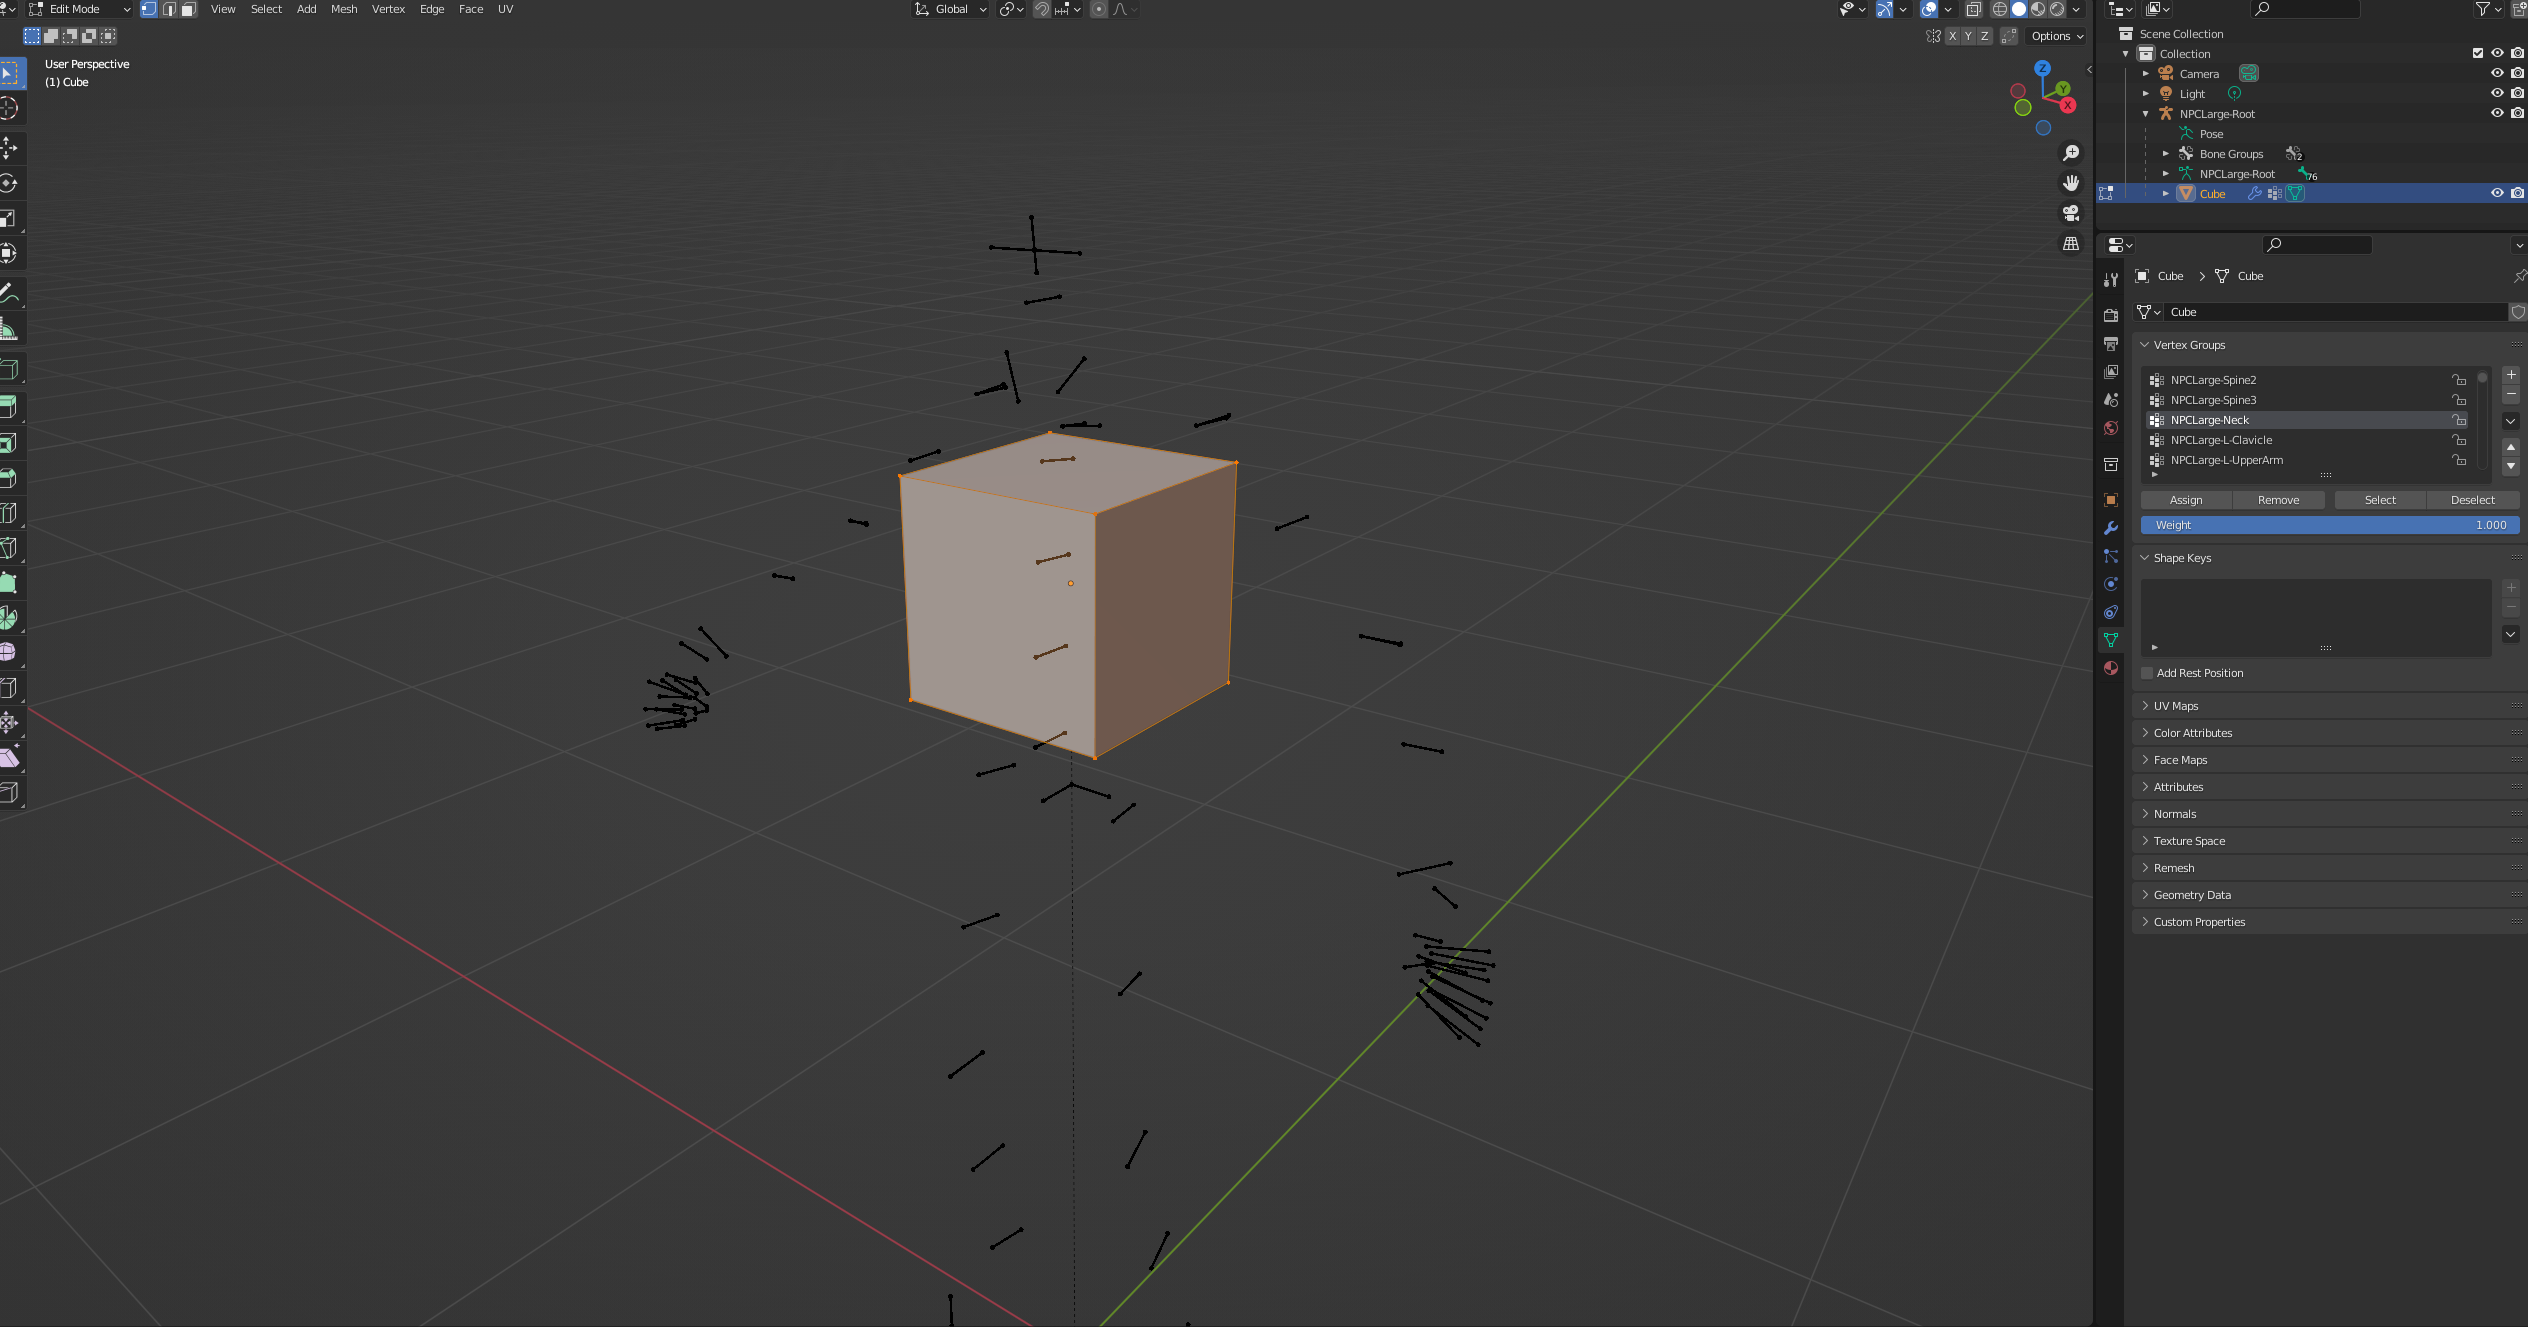
- Choose a vertex group to assign the vertices to. In this example, I will assign them all to NPCLarge-Neck.
- Ensure that Weight is set to 1.000, and then click Assign.
At this point, the screen should look like this:
We must now confirm that the vertices have all been assigned. To do this, click off the cube to deselect the vertices, and then hit Select while the NPCLarge-Neck vertex group is still selected. If the entire cube lights up with orange, then the vertices are assigned.
It is now time to export the cube into an fbx.
- Select both the Cube and NPCLarge-Root, so both the Cube and skeleton are lit up.
- Do File -> Export -> FBX.
- Choose to limit to Selected Objects. Open Geometry and change Smoothing to Face. Then open Armature and uncheck Add Leaf Bones.
- Choose a good name for this exported model. It will be the model you want to import into Outlast eventually, so name it and save it as the finished product. In my case, I will call my model horizon.fbx.
With a fbx created, it must now be packed into a upk file.
- Open the real UDK Editor installed all the way back in the first section.
- Click New in the bottom left corner.
- This package is going to be where your custom models are going to go. Choose a suitable name in the Package field; I’m calling mine CSide_Models. Choose any name you want in the Name field, it won’t matter in a few minutes.

- Save the package inside the location recommended by UDK, which should be in UDKGame/Content.
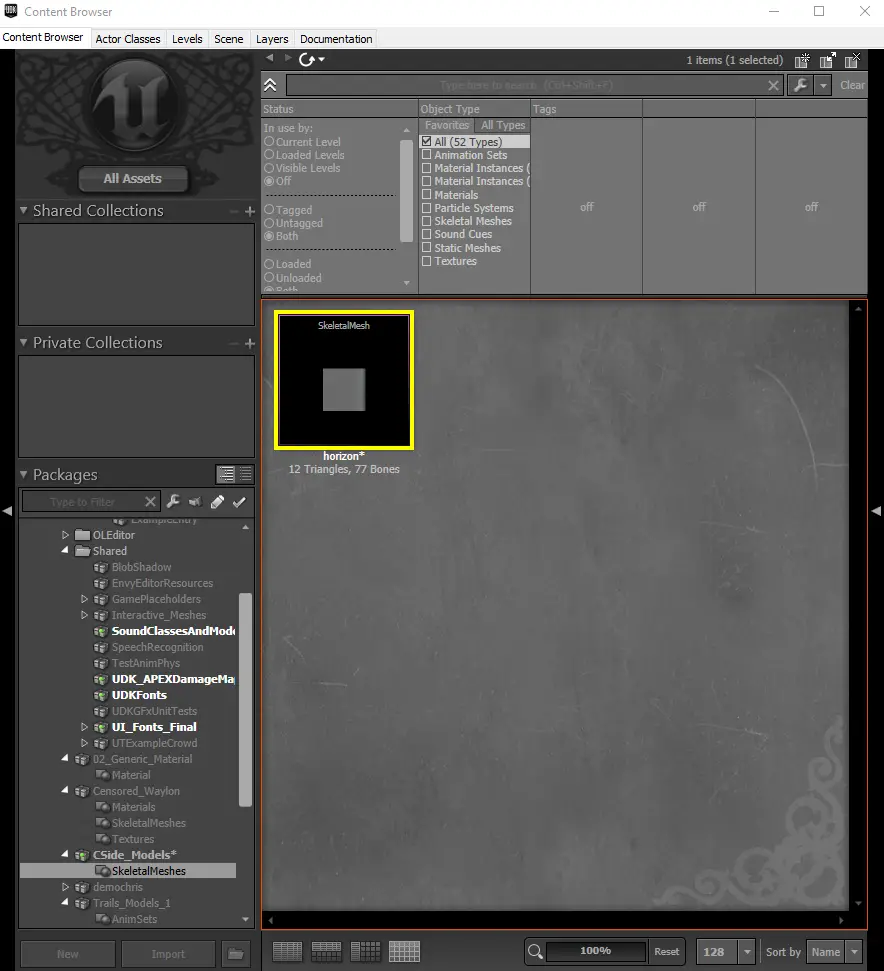
- Scroll up and click on your package. Right click on the panel containing the item the editor forced you to create, and choose Import. Choose to import the fbx model you just exported.
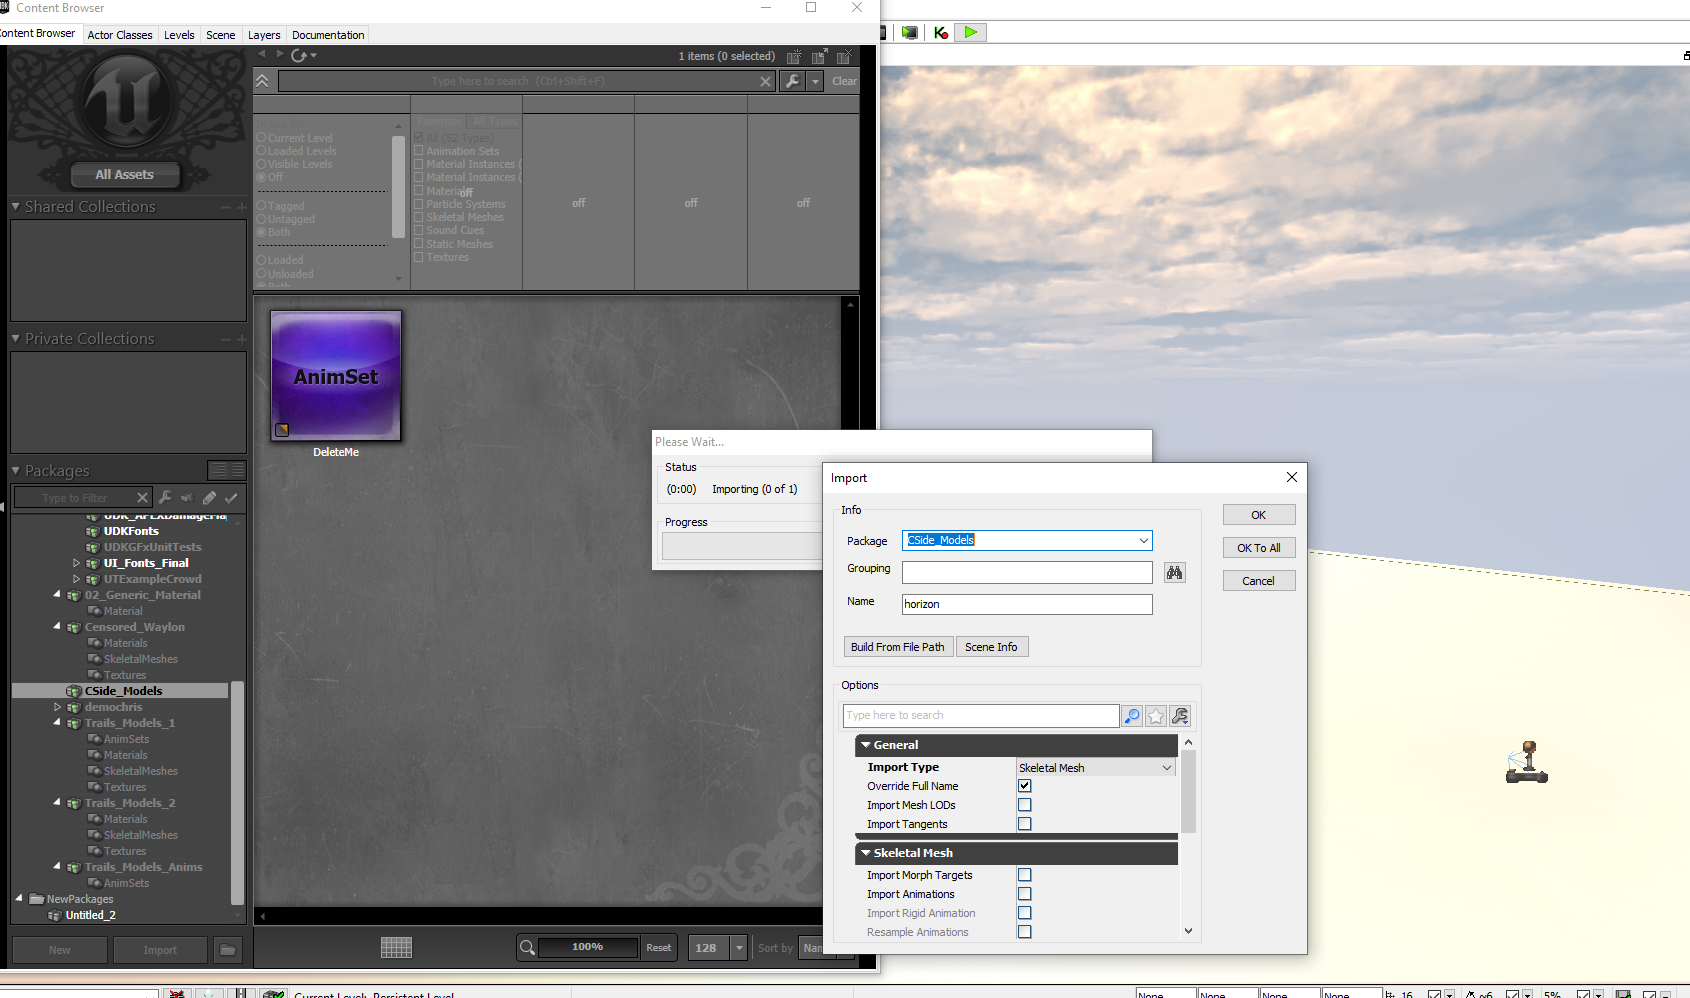
- The Import Type should be of type Skeletal Mesh. If it is static mesh, then you didn’t select both the Cube and Skeleton on creating the fbx.
- Set Grouping to “SkeletalMeshes”. Leave the rest of the settings alone, and click OK.
- It will complain about the FBX being out of date. Ignore this warning.
You will now see the Cube, as a SkeletalMesh, successfully packed into the upk file. Save immediately. My model is named horizon.
Now click on your package again in the left list and click on the item you were forced to make earlier. Delete it by right clicking on it and hit Delete. Then Save again.
Now that we have a upk containing our cube, we must alter the script from before, telling it where the cube is.
- Right click on the package in UDK Editor and choose Explore. This will open a window with the package selected.
- Copy the upk into the counterpart location in [Script Compiler location]/UDKGame/Content

- Open CustomGame.uc. I recommend using Visual Studio Code for this, set to C++ when viewing the file.
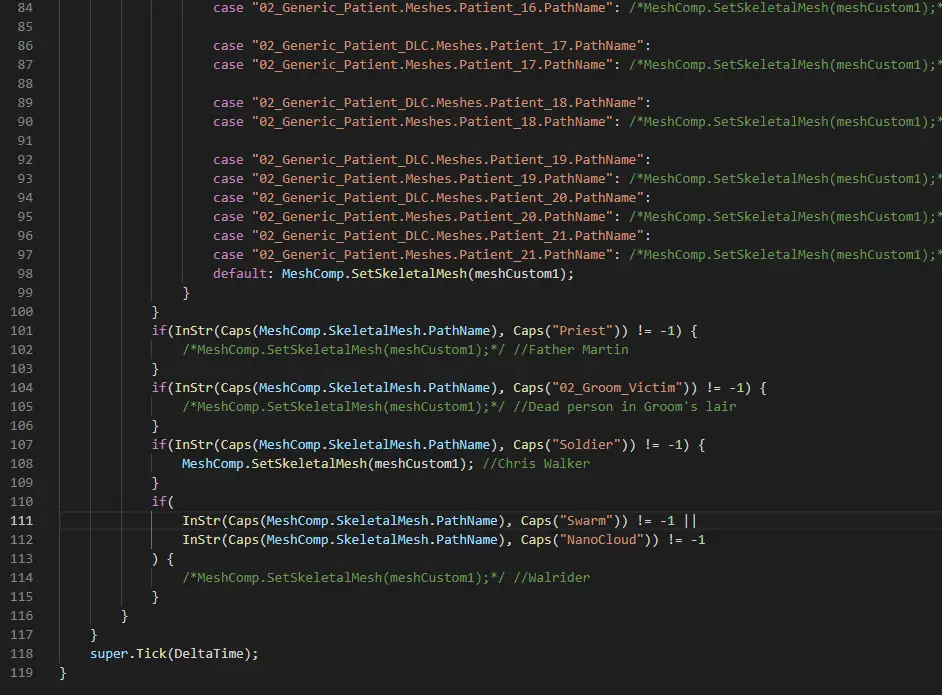
- Look for the character you wish to replace. As I want to replace Chris Walker, I will go down to the bottom, where “//Chris Walker” is.
- Remove the /* and */ symbols to enable replacement of the model. Put the symbols back to disable. For example, to enable replacement of Chris Walker:
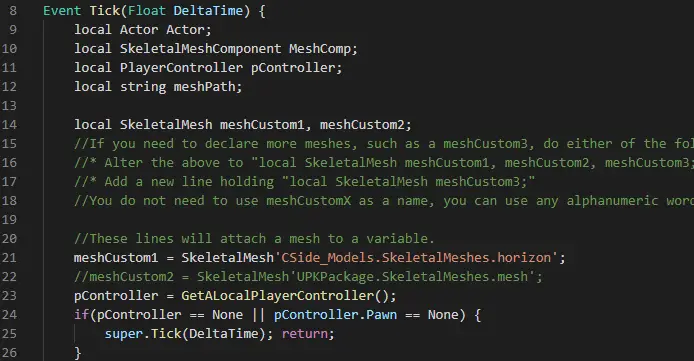
- Head up to the line that has “//meshCustom1 = SkeletalMesh’UPKPackage.SkeletalMeshes.mesh’;”.
- Edit this line to be meshCustom1 = SkeletalMesh'[Model_Package].SkeletalMeshes.[ModelName]’;. For example, since my Model_Package is CSide_Models, and my model name is horizon, then I would put:
- Return to UnrealFrontend. Compile the scripts, and place both your upk and newly compiled u file inside OLGame/CookedPCConsole, like this:

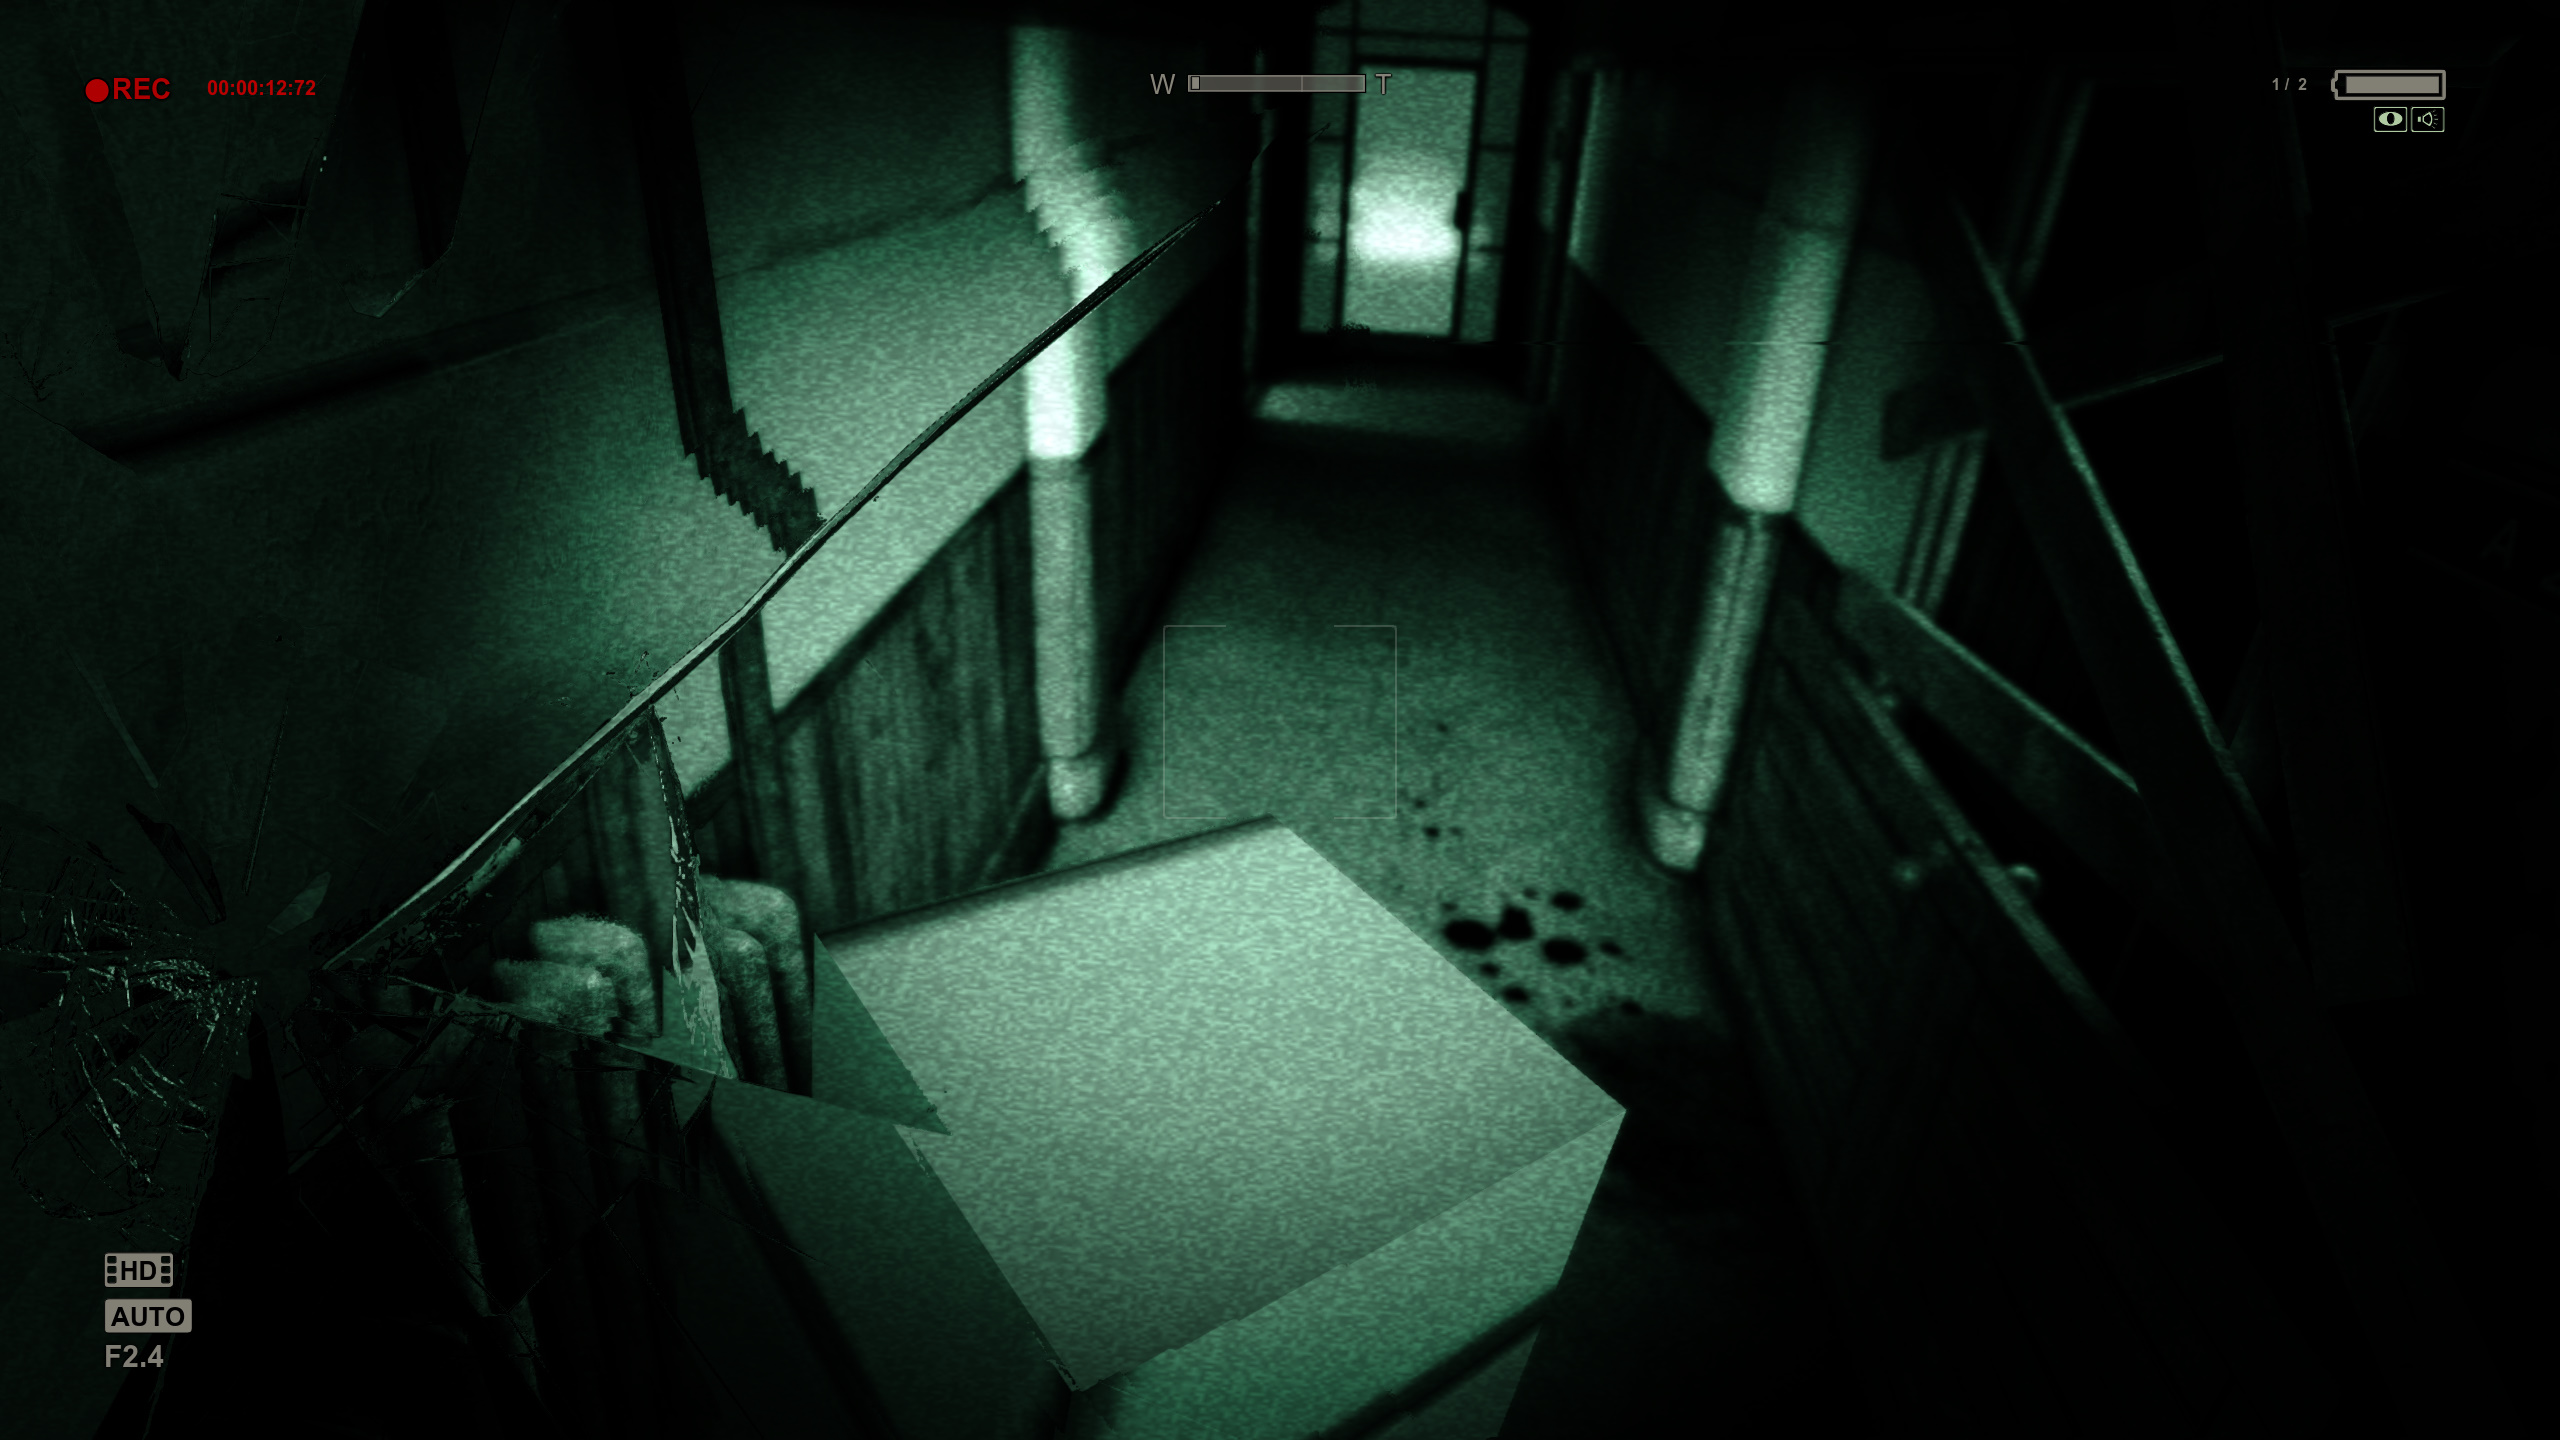
At this point, we have completed replacing Chris Walker with a cube. Launch the game, and load up the Return to the Administration Block chapter. Instead of Chris Walker, you should see a cube floating around. If you do, you have successfully completed this section.
Task 5: Rig your character model, and have it appear ingame untextured.
First, you need to import the model you want to use into blender. Then, you need to set the materials to use its textures; click on a part of the model in Object Mode, and then click the red sphere on the right side panel – this will open the materials for that object. On the Base Color option, click the circle within a square button, and then choose to use an Image Texture. Load the image texture (also known as a diffuse texture). If you have normal or specular textures to further enhance the model’s materials, leave them along for now. For example, this shows this character’s eye’s material set with a texture:
Rigging takes a lot of time. I cannot complete this section just yet.
That's everything we are sharing today for this Outlast guide. This guide was originally created and written by ph0ne (greatijedi). In case we fail to update this guide, you can find the latest update by following this link.
