Welcome to this guide tailored for seasoned players in the late stages of the game. My aim here is to present a fresh and profitable take on the conventional runaway mould farms, allowing you to amass more nanites in less time.
Introduction
Have you found yourself stuck with boundless units but always running short on nanites? Are the costs of unlocking all companion slots or upgrading a C-class ship or multitool to S-class daunting?
Perhaps you’re resolute in your refusal to reduce nanite requirements in the custom difficulty settings. Or maybe, your ultimate goal is to completely stock your freighter and all its storage units with runaway mould, claiming the title of the galaxy’s foremost nanite proprietor at the Anomaly.
If you’ve answered YES to any of these questions, then this runaway mould farming guide is tailor-made for you! Within these pages, I’ll introduce an intriguing twist to the runaway mould farming venture that has the potential to significantly boost your nanite earnings after a lengthy grinding session.
Preparation
As mentioned in the guide’s thumbnail, the primary audience for this guide consists of advanced players seeking a swift and dependable method for acquiring clusters of nanites without investing excessive time or effort once the entire farm setup is in place. However, it’s entirely feasible to embark on this venture as early as the mid-game stage when resources, recipes, and blueprints become more accessible, provided you commit to it as a long-term investment.
Here are the absolute essentials for setting up the most basic configuration:
- An irradiated planet featuring curious deposits and occasional storms.
- Access to a complete range of fundamental base components, including the entire metal building part tree, for unrestricted basic base construction.
- Access to large and medium refiners, along with the necessary resources to craft them, or alternatively, access to the freighter refiner room module.
- Access to base teleport modules and the means to power them.
While not mandatory, the following elements are highly recommended:
- The patience to search for an irradiated planet with extreme weather and curious deposits.
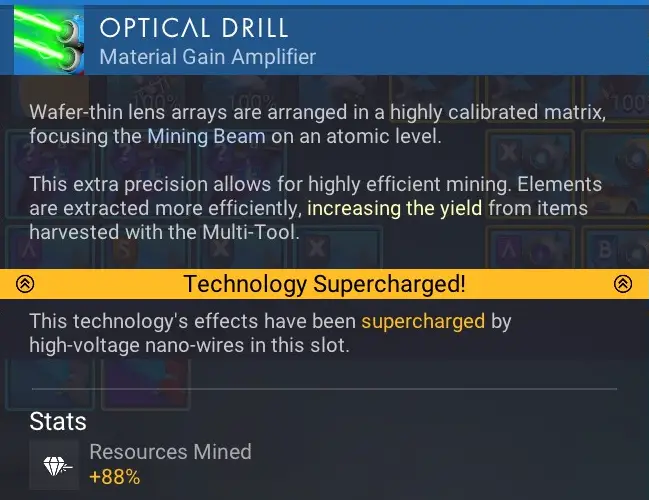
- A potent S-class multitool, with the optical drill module installed in a supercharged slot; additional S-class mining beam modules are preferable to expedite mining.
- Robust hazard protection, particularly radiation resistance, as well as a supply of sodium or ion batteries for recharging.
- Access to save beacons to mark key locations in your farming operation.
How to find curious deposits
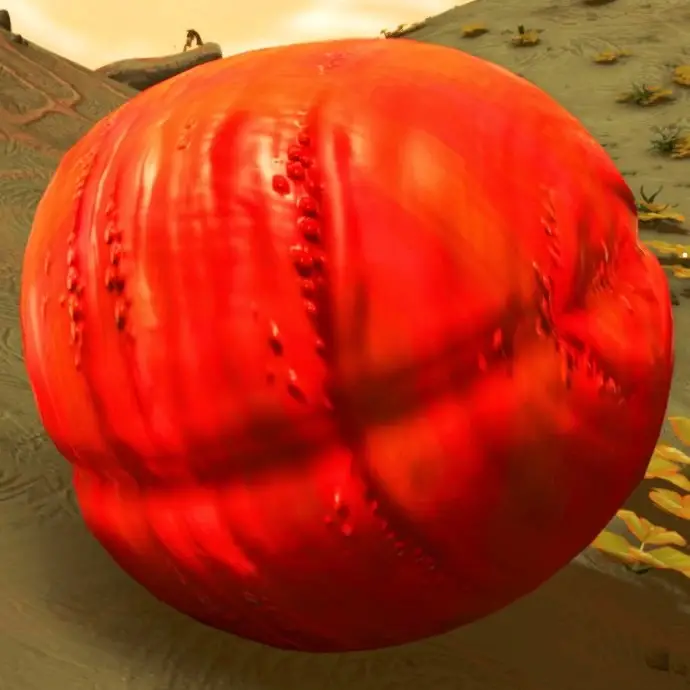
Prior to commencing runaway mould farming, the essential prerequisite is locating a system that boasts curious deposits. These intriguing deposits are sizable spherical formations with an organic appearance, serving as the foundation for your farming endeavor.
It’s important to note that not all curious deposits will share the same appearance, and their color palettes can vary significantly. Some planets will have deposits that blend seamlessly with the terrain, while others will feature deposits that are much more conspicuous, like the example shown.
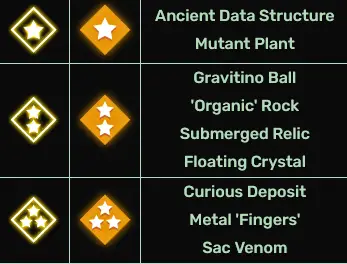
Curious deposits represent a unique system resource that can be introduced into any system you visit. Here is a comprehensive list of the resource pool from which potential resources can be generated. It’s worth emphasizing that each system will generate only ONE resource from each of these pools:
To determine if the system you’re visiting has curious deposits, a straightforward approach is to land on any planet within the system, hop into an exocraft equipped with a scanning module, and explore the terrain while scanning for the item associated with the 3-star icon. If you don’t come across curious deposits during your scans, you can easily move on to the next system. This method offers a practical way to assess the presence of curious deposits in a system, and if they aren’t there, you can continue your search elsewhere.
Finding the right planet
In this particular setup, we’ll be focusing on utilizing an irradiated planet. The most efficient way to locate an irradiated planet with curious deposits is by jumping between systems and employing the method mentioned earlier to search for these deposits. Ideally, you’ll want to explore systems with multiple planets and moons to increase your chances. To identify irradiated planets, here’s a helpful list of planetary prefixes that appear when scanning a planet from space, indicating a radiation planet:
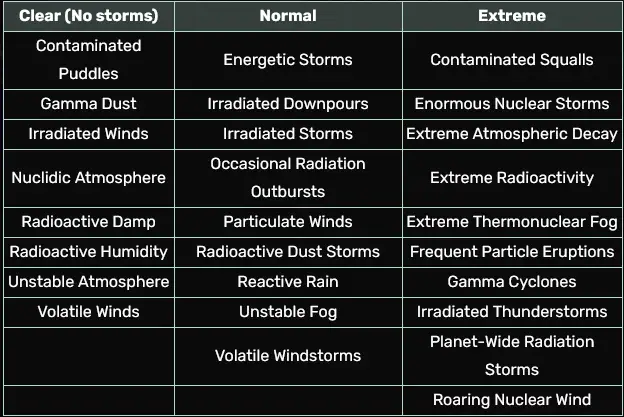
However, not all irradiated planets are the same. Some are calm and devoid of storms, while others are tumultuous and seem to experience back-to-back storms. So, how can you differentiate between them? A reliable approach is to locate an extreme radiation planet. These planets consistently experience storms, and their frequency is relatively high. You can recognize an extreme planet by scanning it from space and checking if its stellar metal is “activated,” such as “activated copper.”
Nevertheless, extreme weather planets also exhibit variations in storm frequency based on the intensity of the weather on the planet. You can gauge the weather’s intensity by landing and inspecting the small box in the lower right-hand corner of your screen, which displays weather strength, sentinel activity, flora, and fauna. Below is a list ranking the names based on overall weather intensity, with the least intense ones at the top and the most intense ones at the bottom:
Why opt for a radiation planet with storms when setting up your runaway mould farm? Well, allow me to explain. Radiation planets have a unique attribute linked to their storms known as “Localised Ionic Collisions.”
This attribute is likely self-explanatory, and you can probably see the connection to runaway mould farming.
For the purpose of this guide on runaway mould farming, we’ll certainly want to avoid storm-less planets, as they won’t provide the storms necessary to benefit from the Localised Ionic Collisions buff on your mining laser. However, based on the list, we can determine that the irradiated planet with the most frequent storms will have “Roaring Nuclear Wind” as its weather status. If you’re eager to maximize the efficiency of this farming setup and possess exceptional patience, aim to find an extreme weather irradiated planet with “Roaring Nuclear Wind” that also features curious deposits.
Finding the right deposit clusters
Whether you’ve opted for a regular planet and plan to farm exclusively during storms or gone all out by selecting an extreme planet with the intention of farming until you reach a million nanites, the next crucial step is locating the curious deposits themselves.
However, it’s not just about finding any deposit spot. While you can technically use any location where you discover these deposits, it’s highly advisable to secure not just one, but TWO deposit spots. Furthermore, it’s recommended that each spot contains approximately 20 curious deposits, with some flexibility in this number. Additionally, these spots should be reasonably distant from each other on a planetary scale, although they don’t need to be on opposite sides of the planet. A separation of about 5 to 10 minutes of travel time is adequate.
But why would you want more than one deposit? If you weren’t aware, nearly all plants, rocks, or resources of any kind will respawn in the same location and configuration as before after you move a certain distance away from them. We will leverage this game mechanic to our advantage to maximize the potential of runaway mould farming. For this specific setup, it’s advisable to stick with just two deposit spots, as we’ll be using base teleport modules to warp between them. Having more deposit spots would be redundant.
Constructing your twin bases.
The design and structure of your bases are ultimately a matter of personal choice, but if you don’t intend to refine everything on your freighter, it’s essential to have one of your planetside bases as the primary refining area and the other as the base for teleportation to trigger the curious deposit respawn and continue farming runaway mould. Below, I’ll provide some explained examples of the setup I’ve created. It’s a practical and straightforward design that gets the job done:
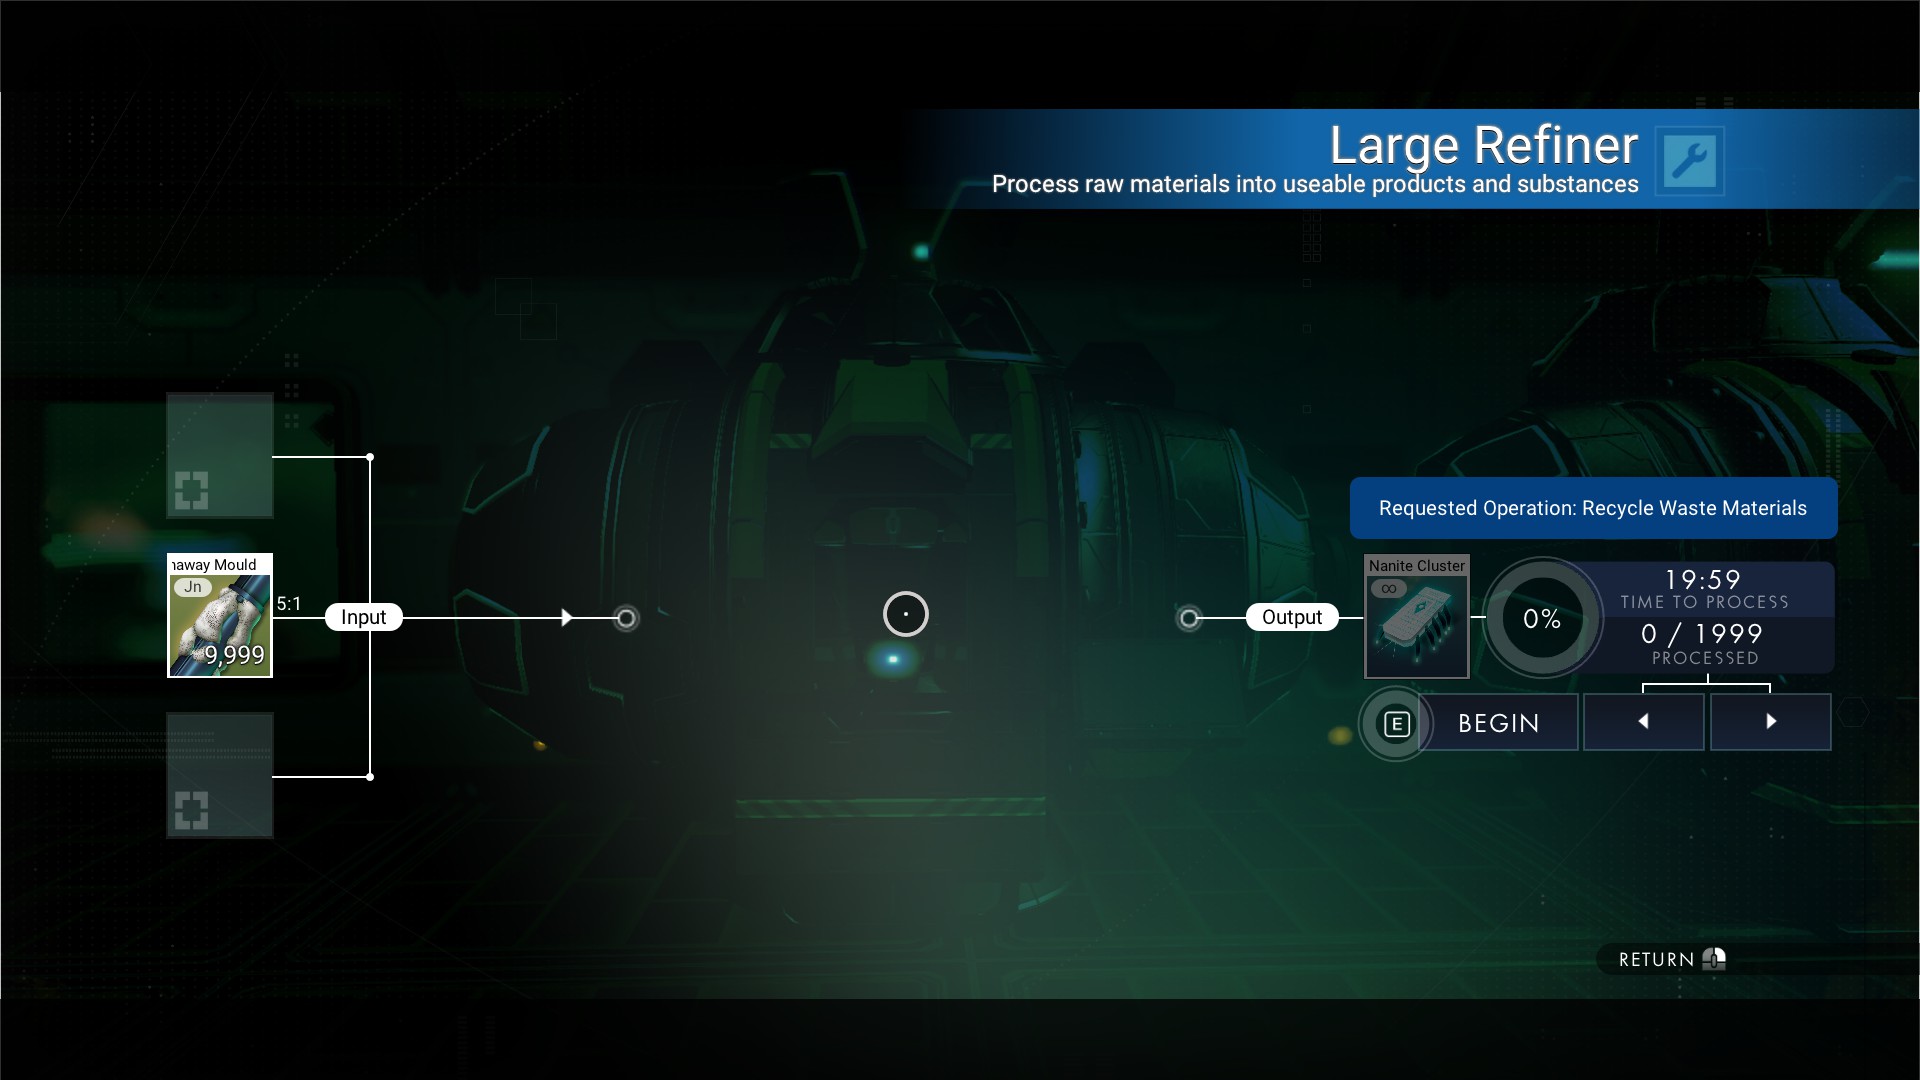
To begin, we’ll utilize large and medium refiners because they don’t require any power or fuel from your base or inventory, unlike personal or portable refiners. Next, you’ll need to determine how much runaway mould you want to refine on average at any given time. As an arbitrary example, let’s say you want to farm until you can refine 100,000 nanites at once. The refiners can process 9,999 runaway mould at a time over 20 minutes, resulting in 1,999 nanites using the following recipe:
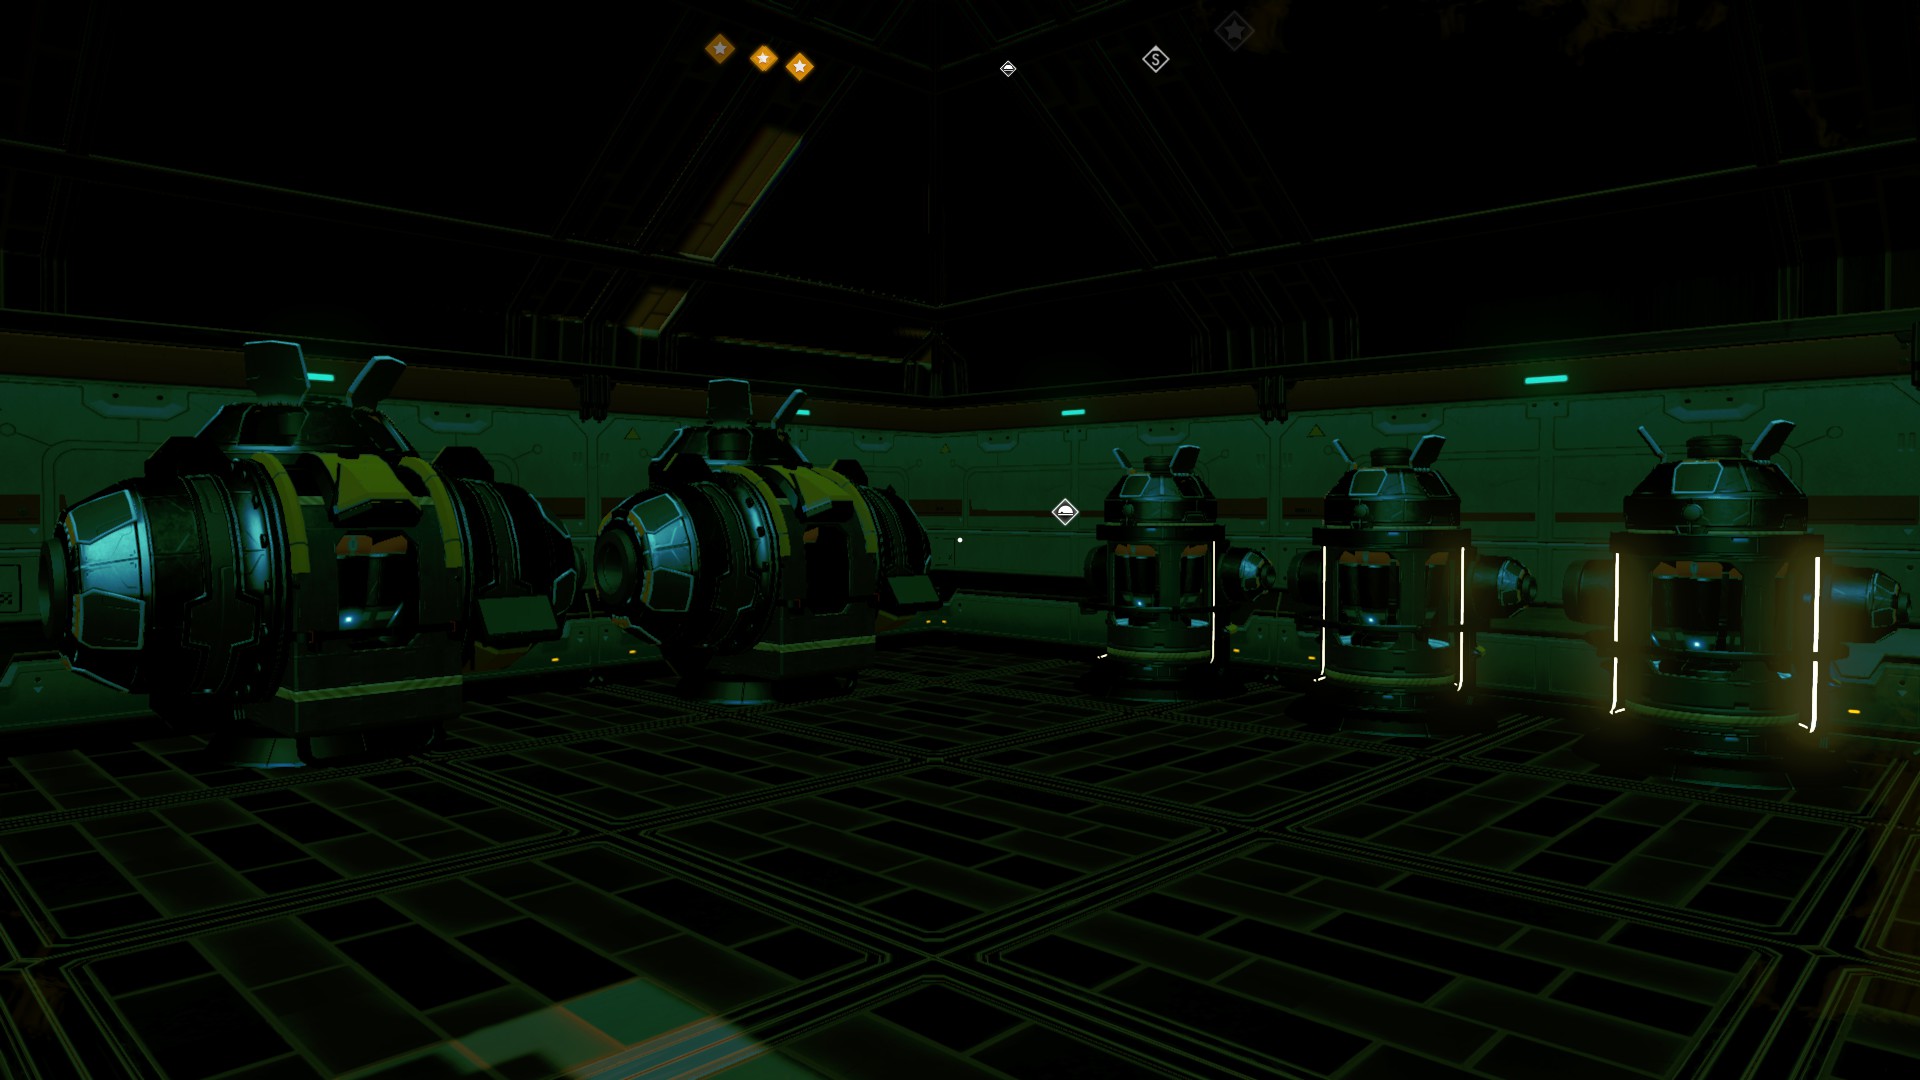
Based on straightforward calculations, it was determined that 50 refiners would be required. For this specific setup, you used 20 large refiners and 30 medium refiners, organizing them into sets of 5 as follows:
The challenge arises when you attempt to place more than 2 large refiners or 3 medium refiners within a certain proximity. You’ll encounter a message that prevents you from doing so, like the one shown:
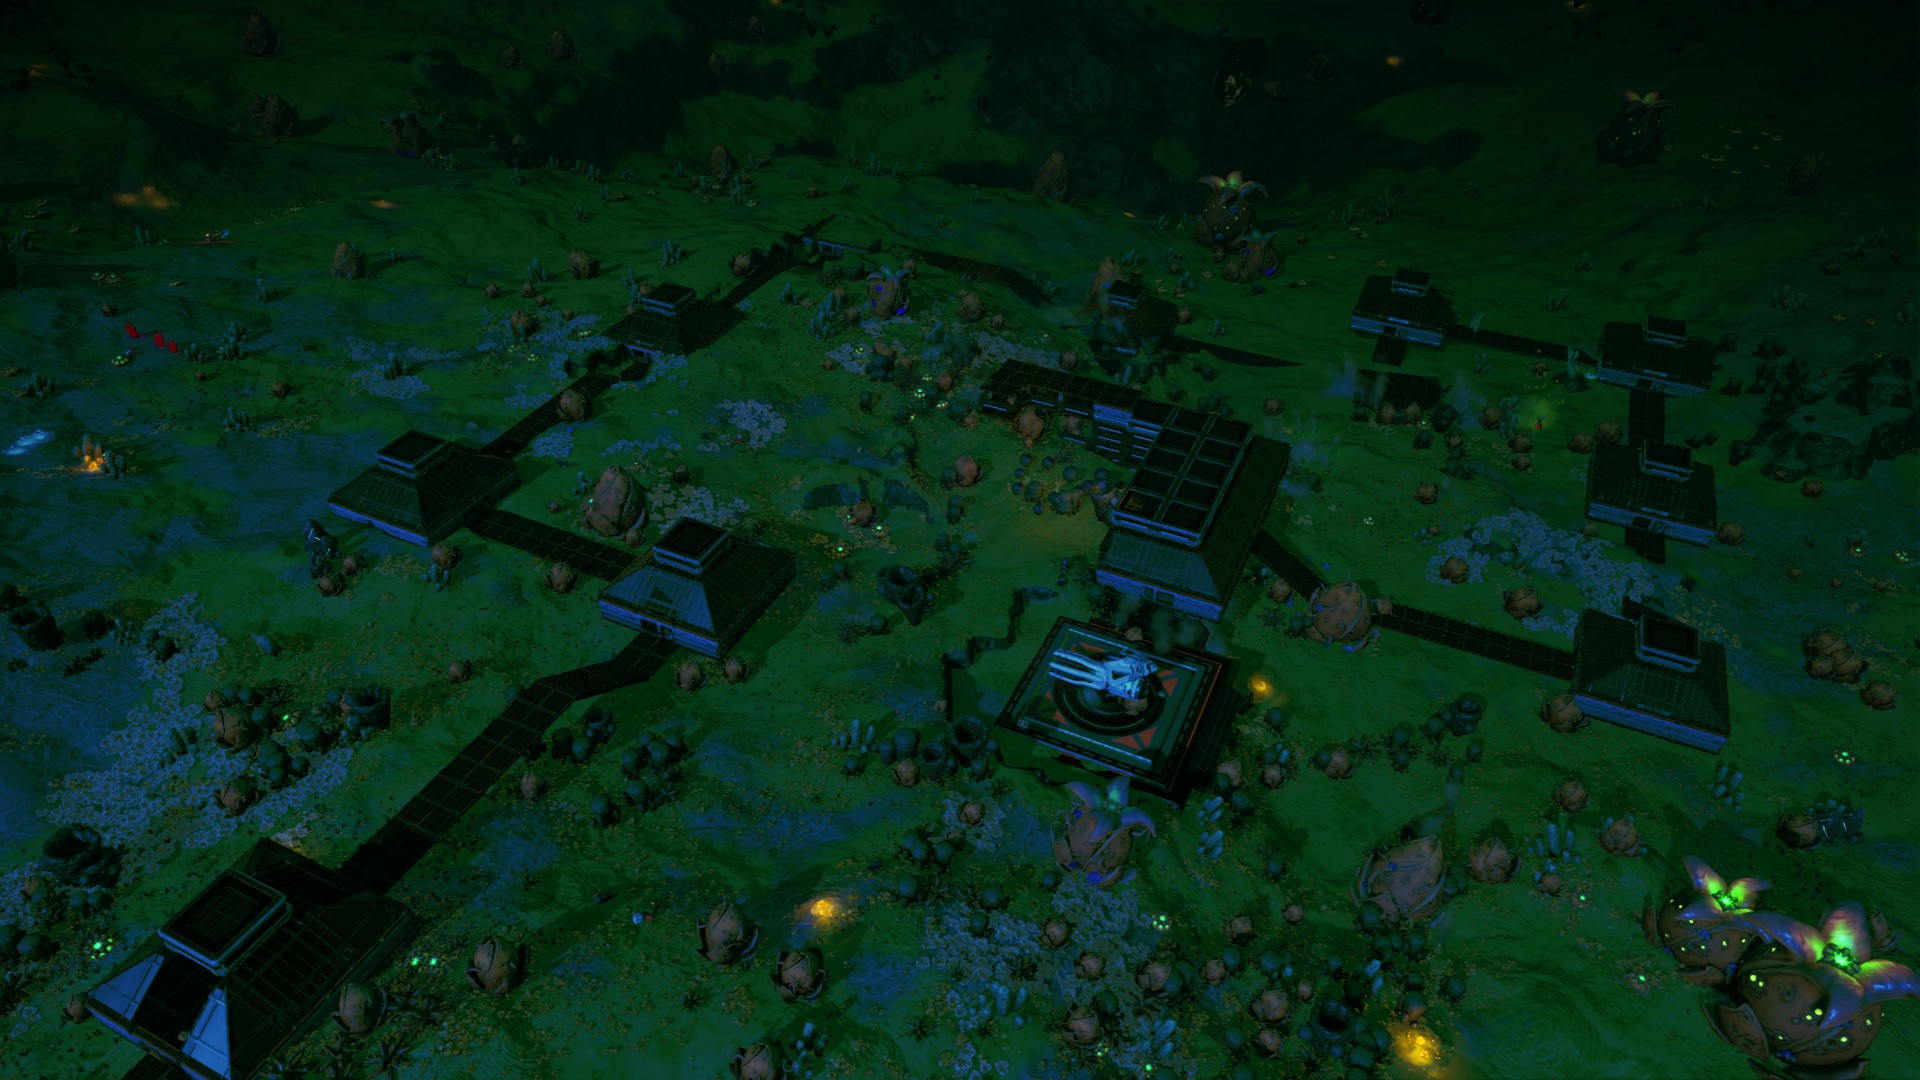
However, there’s a straightforward way to work around this limitation. “The local area” isn’t linked to your entire base; it’s quite literally just the immediate vicinity. In the end, all you need to do is walk a short distance away from the nearest refiners and construct more. The end result of this process was the creation of a string of 10 buildings, shielded from the external weather, each containing a set of 5 refiners, as depicted:
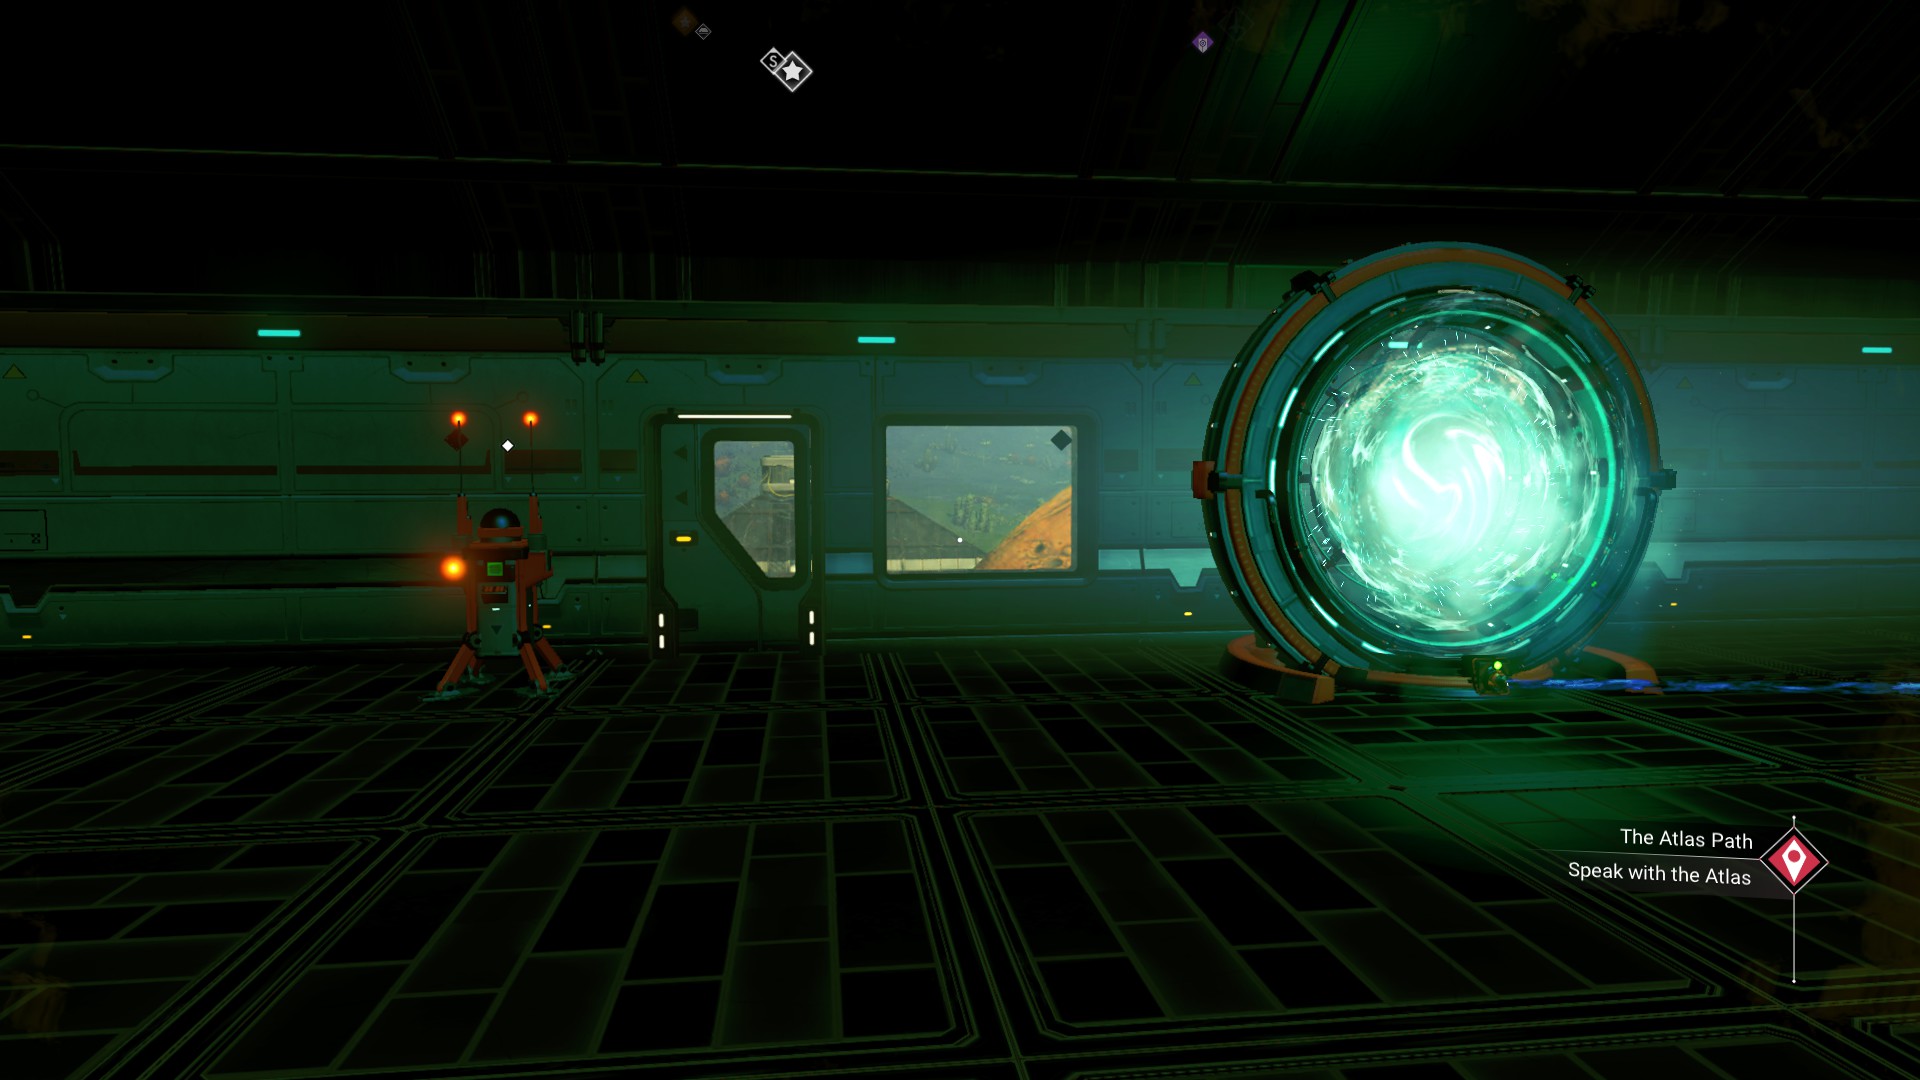
The appearance of your other base isn’t of paramount importance. You can have additional refiners there if you wish to farm the mould you harvest from that location as well. However, its primary purpose is to allow you to continually farm mould and ensure that the other mould location respawns. This way, you can easily switch between the two and farm continuously. I highly recommend connecting the two bases with a base teleport module and having a save station nearby for both convenience and precaution. No Man’s Sky is not renowned for its stability.
Hazard pay
At this point, everything should be set up and ready to go! You have located your curious deposits on the irradiated planet, and your bases are configured for refining.
However, there’s a crucial point you absolutely need to be aware of: to benefit from the Localised Ionic Collisions, you must be out in the storm itself. If you’re indoors or otherwise sheltered from the weather effects, it WILL NOT WORK.
This is why I recommended investing in radiation defense or other robust hazard protection modules at the beginning of the guide. Make sure you have an ample supply of resources to recharge them since you’ll be facing the storms to harvest your runaway mould. While you can retreat to a nearby structure to recharge your hazard shielding, it’s much more convenient and efficient to use sodium or ion batteries.
But the effort is undoubtedly worthwhile. Just ensure that you have your Optical Drill slotted into a supercharged slot to maximize your harvesting from the curious deposits. You’ll receive a remarkable bonus:
If you remain skeptical about the significant difference the Localised Ionic Collisions buff from radiation storms makes, here’s a quick comparison between the two scenarios. Both have the supercharged Optical Drill, but one lacks the Localised Ionic Collisions buff, while the other is during a storm with the buff active:
The contrast is striking; you receive over 2.5 times as much runaway mould per curious deposit when farming during a storm. And if you’re on an extreme planet, you’ll encounter these highly profitable storms quite frequently, allowing you to amass incredible amounts of nanites.
Lastly, as a final tip, try not to leave the system while refining the runaway mould. Many players have reported their resources disappearing from their refiners if they stray too far, such as going to a different system.
Conclusion
In conclusion, you now have all the information you need to create your ideal irradiated mould farm! Happy farming. If you have any questions or feel that I’ve overlooked something, please feel free to ask in the comments below.
That's everything we are sharing today for this No Man's Sky guide. This guide was originally created and written by Monolyth. In case we fail to update this guide, you can find the latest update by following this link.
