
This guide is all about defeating every boss in Night Raider. I’ll walk you through each boss battle step-by-step, covering what you need to take them down, the loot you can snag from them, and any other crucial details.
DISCLAIMER: WATCH OUT! THIS GUIDE IS FULL OF SPOILERS. IF YOU WANT TO AVOID SPOILERS, TURN BACK NOW!
This guide aims at helping players navigate through Veteran mode, but it’s also useful for Novice mode up to Hard difficulty. Remember, Heroic and Hellish difficulties are exclusive to Veteran mode. If you initially chose Novice mode, you might want to reset your save because Novice mode offers higher drop rates.
Let’s delve into the main bosses. There are a total of 4 main bosses, which I’ll discuss in detail shortly. Additionally, I’ll touch on 2 mini-bosses scattered around the map after the main boss sections.
Main Bosses
When you kick off the game, you’ll likely begin in easy difficulty to ease into the gameplay. While exploring this mode, keep an eye out for documents. They’re often tucked away in safes or available for purchase from the black marketer for 90000 GP. Quick tip: the black marketer only peddles documents for normal difficulty in the current version. For higher difficulties, you’ll have to hunt them down in safes or snatch them after boss battles.

These papers are one-time-use, meaning once you reach a difficulty level as tough as normal or higher, they disappear. If you beat the boss at the current difficulty, they’ll drop papers suitable for that level or one level tougher.
Also, lockboxes might hold papers for the current difficulty or one level tougher.
Before confronting any bosses, make sure to bring bulletproof inserts to replenish your armor and first aid kits for healing. Remember, while your armor is intact, you won’t suffer debuffs like bleeding, so keeping it intact is crucial.
Starting by taking down the bosses before scavenging other places is strongly advised. This ensures you can reclaim the used papers and get a clearer picture of your remaining resources after their defeat.
Normal Difficulty Boss
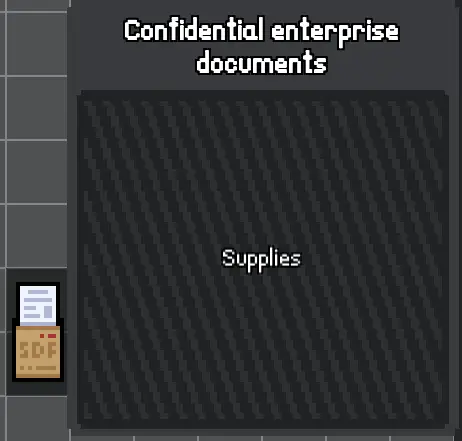
To tackle the first boss, you’ll need to snag those Confidential enterprise documents to access normal difficulty. Keep in mind, though, once you enter normal mode, those documents will be history.
Now, if you’re like me and rocking higher-level armor, it’s wise to stick with it. Crafting new armor from scratch is a time sink and a resource drain.
For boss takedowns, I suggest the AR-T2. It’s a solid choice. When it comes to handling the regular zombies, go for the LMT-M990. Load up about 6 stacks of normal 5.56mm ammo and roughly 5 stacks of buckshot. Buckshot is your budget-friendly option for the regular undead, while the 5.56mm packs a bigger punch, especially for boss battles. Save that premium ammo for the big showdown.
Don’t forget to pack bulletproof inserts to keep your armor intact and some first aid kits to patch up those health points. Safety first, folks!

Once you step into the fray, take a peek at your map. You’ll notice a fresh addition labeled “Factory,” highlighted in yellow font. That’s your boss’s stomping grounds right there.

As you make your grand entrance into the factory, keep a keen eye on the lobby. It’s your designated battleground for luring the boss into a more manageable fight. And hey, don’t go squandering that precious stamina now. You’ll want to save it up for dodging those boss charges.
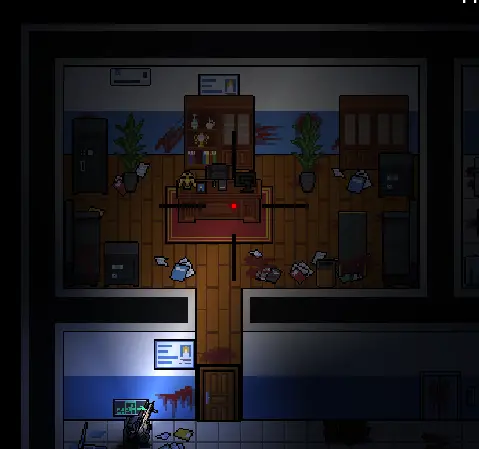
Continue your ascent through the factory until you hit the central room, where the big bad boss usually hangs out.

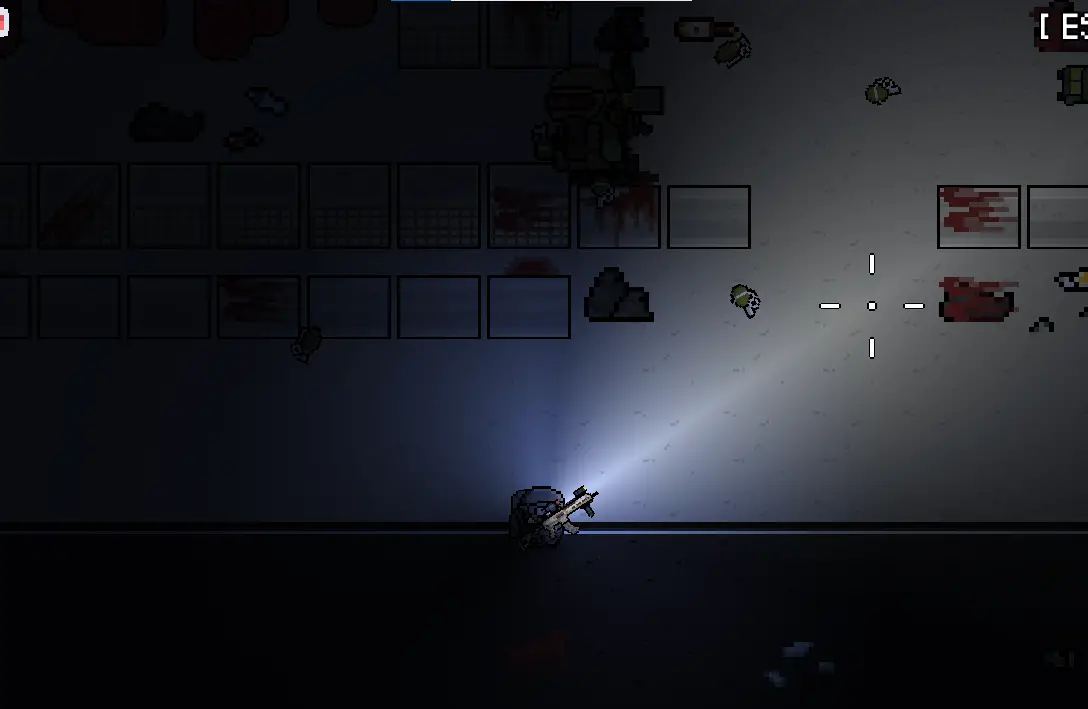
The boss only has one attack: charging straight at you really fast, and he does it every 3 seconds. He only charges when he sees you and doesn’t change direction once he starts. When he hears your shots, get ready to dodge or run because he’ll charge as soon as you’re in his sightline. The best strategy is to lure him to the lobby of the Factory entrance where you have more room to dodge because it’s an open space.
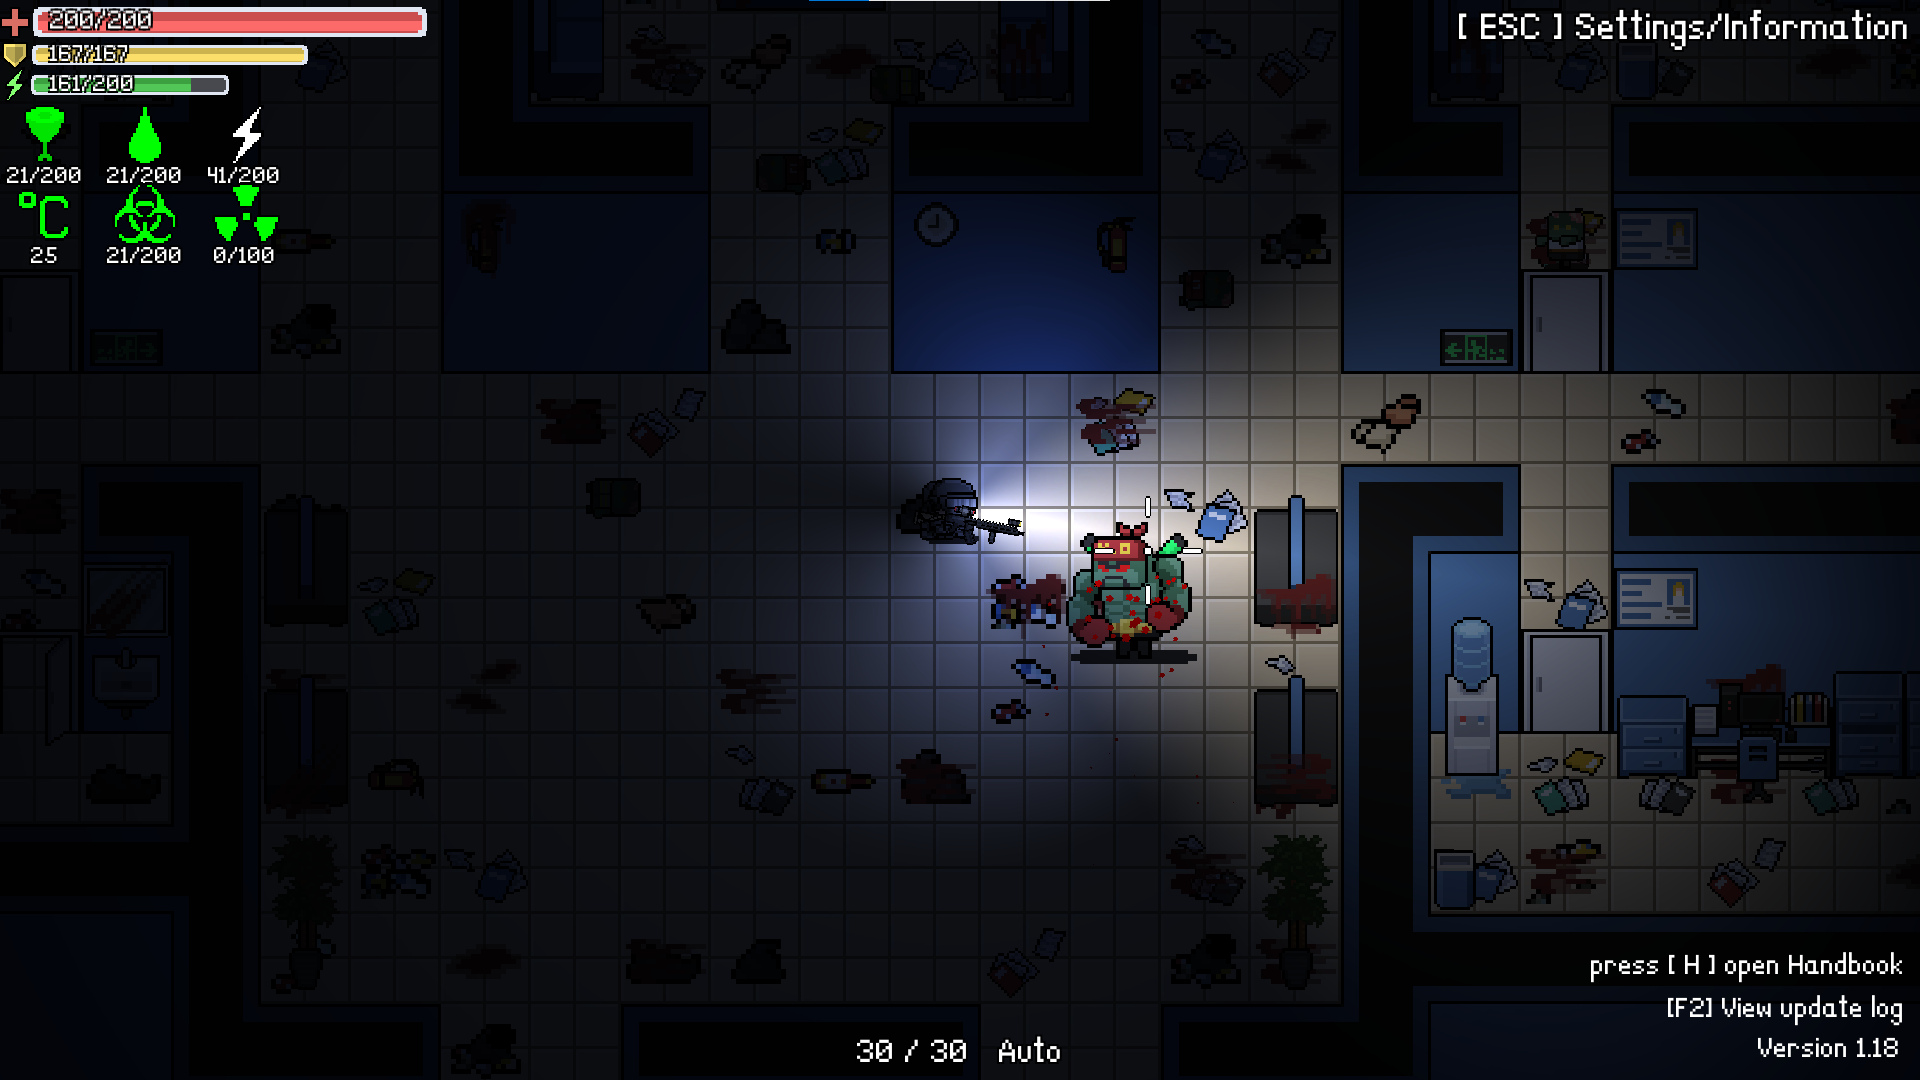
Once you figure out the timing of his charges, dodging his attacks becomes easy, and you can defeat him without taking any hits. It usually only takes one stack of 5.56mm ammo to kill him. Below are his possible drops: he always drops one of two document types and might drop an Induction IC Card (White) that unlocks certain doors in the factory containing medical loot. Personally, I usually ignore them since it’s more efficient to search for medical loot at the Hospital.


The boss’s drop rate for documents on Hard difficulty ranges from 20% to 50%. Unfortunately, I was quite unlucky and had to defeat the boss 10 times to obtain the documents needed for the Hard difficulty guide. However, keep in mind that this is just my personal experience with the drop rate.
Hard Difficulty Boss
To access Hard difficulty, you’ll need Classified Military Documents, as shown in the image below. Remember, these are one-time use only.

In this mode, your opponents will be tougher. Your armor will outclass what’s available to you, and for your primary weapon, I suggest the ACPR, which you can get from defeating the mini-boss at the supermarket in Normal Difficulty. It outperforms the AR-T2 in every aspect.
For your secondary, I’ve selected the SVB-Dr, a commonly found DMR that excels at long-range shooting. Alternatively, you can opt for the Mk-SR, which is superior but exclusive to Hard difficulty.

When you start the game, go towards the Military Base, which is highlighted in yellow on the map. There are two ways to get in: from above or below. I usually go in from below. Be careful when you reach the entrance because going inside triggers the appearance of 4 zombies around you. If you use loud weapons to kill them, the boss will start moving towards your location.
After dealing with the zombies, aim upwards and start shooting because the boss is on his way. It’s important to move back outside a bit; you can’t let the boss get too close. The boss has two main types of attacks.
One attack is dropping a C4 explosive where he stands. Getting hit by this causes a lot of damage and might lead to instant death.
The other attack involves him throwing grenades in all directions. While these grenades don’t deal as much damage as the C4, they still inflict high damage, so it’s crucial to dodge them.
It’s a good idea to keep your distance from him to steer clear of his C4 explosives and have an easier time avoiding his grenades.
The top-notch approach is to snipe him from far away, but getting your hands on a sniper scope can be tough. So, a solid strategy is to stick to a medium to long distance where you can just about see him and keep shooting while sidestepping his grenades.
The boss is heavily armored, making armor-piercing (AP) ammo very effective against him. Additionally, he’s got a hefty amount of health points. Typically, it takes somewhere between one and two stacks of 5.56mm TB ammo to take him down. Just be cautious after defeating him because he might set off a C4 explosive, and you definitely don’t want to get caught in that blast right after victory.
After you defeat the boss, you can expect to find the items shown in the image below.

The black keycard on the right is specifically designed to unlock the barracks in the military base, where you’ll discover a treasure trove of valuable loot. Inside these barracks, you’ll stumble upon an abundance of weapons, attachments, and ammunition.
You’ll find two barracks in total, conveniently located on the left and right sides. They stand out with their distinctive black doors, making them easy to spot amidst the military base’s surroundings.

You can buy the black keycard from the black marketer for 350,000 GP, but it’s rare for him to have it in stock. However, it’s worth it because the loot inside can fetch a high price if you have space to carry it all.
Having two black keycards for both barracks makes this raid highly profitable.
Additionally, consider bringing car keys and expensive car keys to open the military trucks outside the base. They often contain valuable weapons, military backpacks, and weapon cases.
Heroic Difficulty Boss
To access Heroic difficulty, you’ll need the Survivor Base Intelligence File. It’s a one-time-use item, as explained earlier.

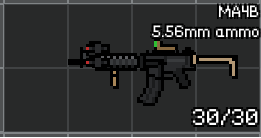
I switched out the APCR with the MA4B for your primary weapon because it’s a superior assault rifle. The secondary weapon remains unchanged, but you can swap it with the Mk-SR found in Hard difficulty, which outperforms the SVB-Dr.

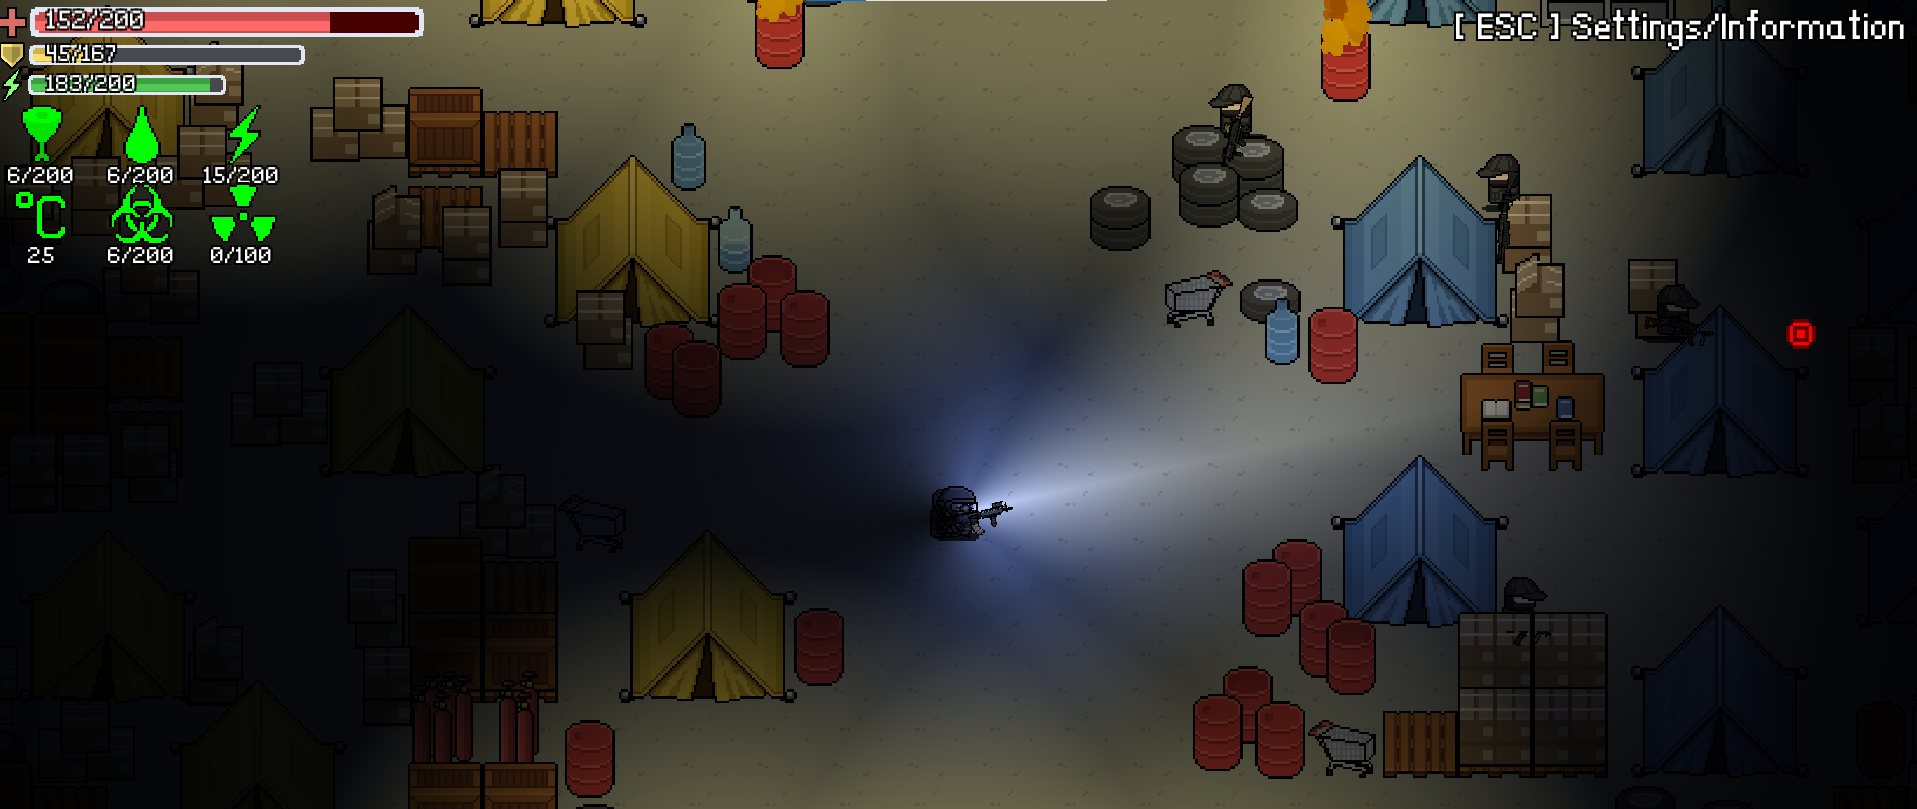
This boss fight is a bit different from the ones you’ve encountered before. Instead of facing off against some monstrous creature, you’re up against a human adversary this time around. When you first enter the map, you’ll be making your way toward the Survivor Camp, which is highlighted in yellow font on your map.
Upon reaching the camp, you’ll come across human NPCs who won’t hesitate to shoot at you on sight. There are typically two guards stationed at the camp entrance, and they might shift positions due to zombies spawning nearby.
While these regular NPCs don’t pack a heavy punch, it’s still wise to take them out from a distance, preferably with a sniper rifle. The camp itself will be teeming with human NPCs, but they’re generally manageable. A smart move is to draw them out of the base by attracting their attention with gunfire, then picking them off from afar once they’re outside.
Inside the base, you’ll encounter a General-like NPC wielding a revolver, serving as the boss for this difficulty level. He’s tougher than regular NPCs but not overly daunting. Upon defeat, he drops the following items.

If you catch the boss’s eye, he’ll summon 2 Spec Ops NPCs who can swiftly deal significant damage if you’re not cautious.
To handle the Spec Ops NPCs effectively, it’s wise to maintain distance and snipe them from afar.
They’re formidable adversaries, so evade close encounters and prioritize eliminating them swiftly. Don’t forget to equip your bulletproofs to mitigate damage.

Dealing with them can be tough, but it’s worth it because they drop 2 K-418’s, which outshine the MA4B.
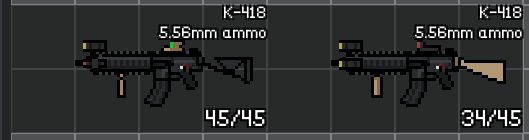
To prevent the boss from summoning the Spec Ops, you can snipe the boss from a distance. However, doing so means you won’t be able to grab the K-418’s they leave behind.
Once you’ve cleared out all the NPCs, you’re free to loot the entire base. You’ll find loot from various buildings like medical facilities, restaurants, tool stores, gun stores, clothing shops, and more.
Hellish Difficulty Boss
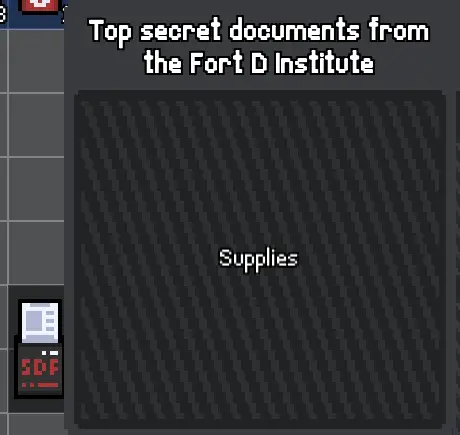
To tackle the Hellish difficulty, you’ll need Top Secret documents from the Fort D Institute. These are essential for progressing through the challenge.
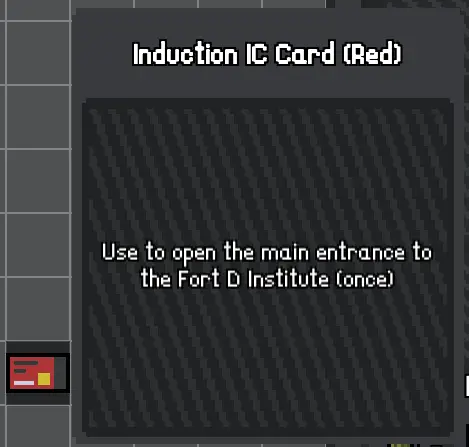
Additionally, to access the boss’s building, you’ll require an Induction IC Card (Red). These cards are rare finds in safes on heroic and hellish difficulties, or you can purchase them from the black market for 500,000GP. You’ll need at least one card to confront the boss, but if you want to unlock all the loot inside the laboratory, you’ll need three. However, keep in mind that the loot mostly consists of chemicals for crafting purposes.
For weaponry, I suggest using the K-418 as your primary weapon. It deals significant damage, which is crucial for defeating the boss. You can obtain this weapon in Heroic difficulty. As for your secondary weapon, opt for a DMR (Designated Marksman Rifle) capable of swiftly dealing damage from long distances. Inside the D Laboratory, you’ll encounter soldiers who can inflict heavy damage, so conserving your health and armor is vital. The Mk-SR is among your best options and can be found in earlier difficulties.

To tackle this boss effectively, you’ll want to ensure you have enough ammunition in your inventory. I suggest a minimum of 10 stacks of ammo, but it’s safer to bring at least 12 stacks. For a balanced loadout, consider packing 12 stacks of 5.56mm TB ammo and 6 stacks of 7.62mm TB ammo. Additionally, incorporating HP ammo is wise due to its 30% damage boost. While this type of ammo can be acquired from the black market, it’s worth noting it can be pricey.
Preparing for contingencies is crucial, so I always assemble an emergency kit stocked with extra ammo, first aid kits, and bulletproof insets. This ensures I’m equipped to handle unforeseen circumstances such as running low on ammo or needing to restore health and armor. It’s better to err on the side of caution. I suggest bringing anywhere from 5 to 10 stacks of Bulletproof Insets and 2 to 3 stacks of first aid kits specifically for this boss encounter. However, the exact amount of emergency supplies you pack is ultimately up to your discretion.


If you wanna deal with those pesky soldiers from afar in the base, getting a scope is a must. They pack a punch, so you wanna keep your distance.
Scopes aren’t exactly lying around everywhere. You’ll mostly find them on Heroic and Hard modes.
Stick that scope on your Mk-SR when you’re gearing up for the raid. It’ll give you the edge you need.
When you’re diving into Hellish difficulty, don’t dilly-dally. Head straight for the boss. Dealing with a zombie swarm while fighting the boss? Not a fun combo. And to get into D Laboratory, make sure you’ve got that Induction IC Card (Red) handy.
When you step through the red door, you’ll see winding hallways wrapping around the boss room. Inside these corridors, you’ll encounter soldiers. Remember, these guys pack a punch, so it’s wise to take them out from afar. If they’re not in a good spot for sniping, you can grab their attention by firing some shots. Expect roughly 10 soldiers scattered throughout the entire laboratory.

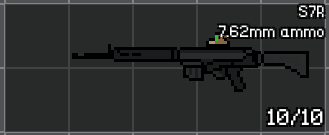
The soldiers you defeat will reliably drop either MA4B’s or S7R’s, which can fetch a pretty penny if you’ve got room in your inventory for them.

Just above your initial skirmish with the soldiers, there’s an office space with two desks. It’s a good idea to search them for wooden keys. While you could bring your own, these desks often hold wooden keys, saving you the trouble.


The wooden key is essential for unlocking a room packed with valuable loot as you progress deeper into the laboratory.
After navigating past the soldiers, you’ll eventually reach the boss room.
Inside the boss chamber, you’ll encounter zombies. It’s crucial to fully replenish your armor and health before entering and keep a close eye on your remaining ammo. You’ll need roughly four stacks of TB ammo just for the boss fight.
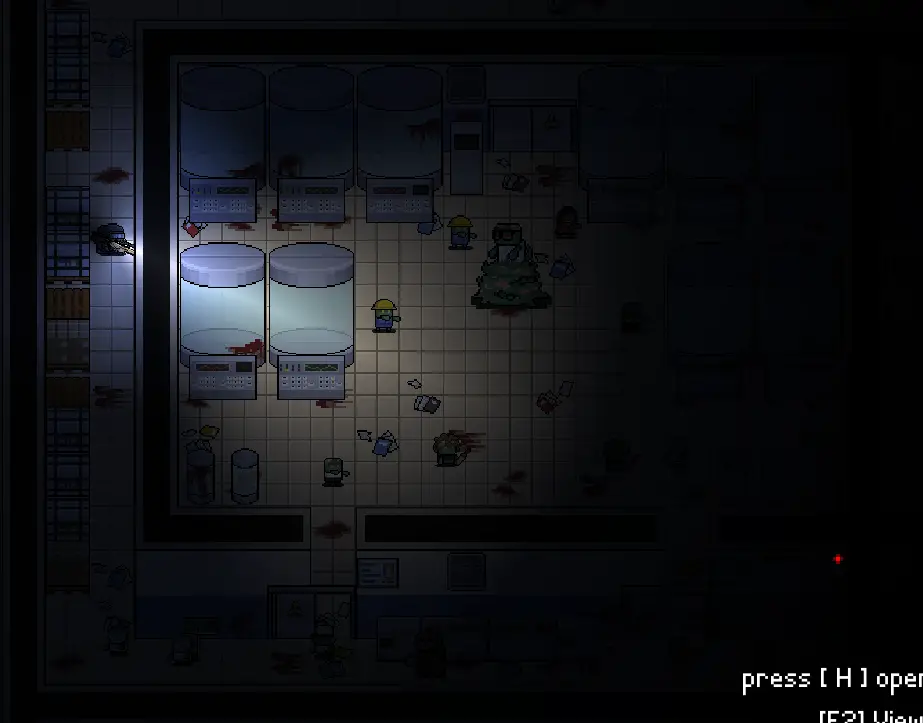
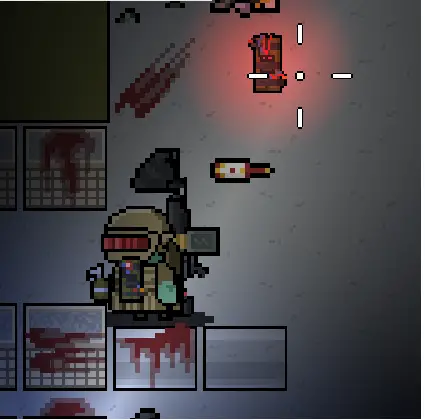
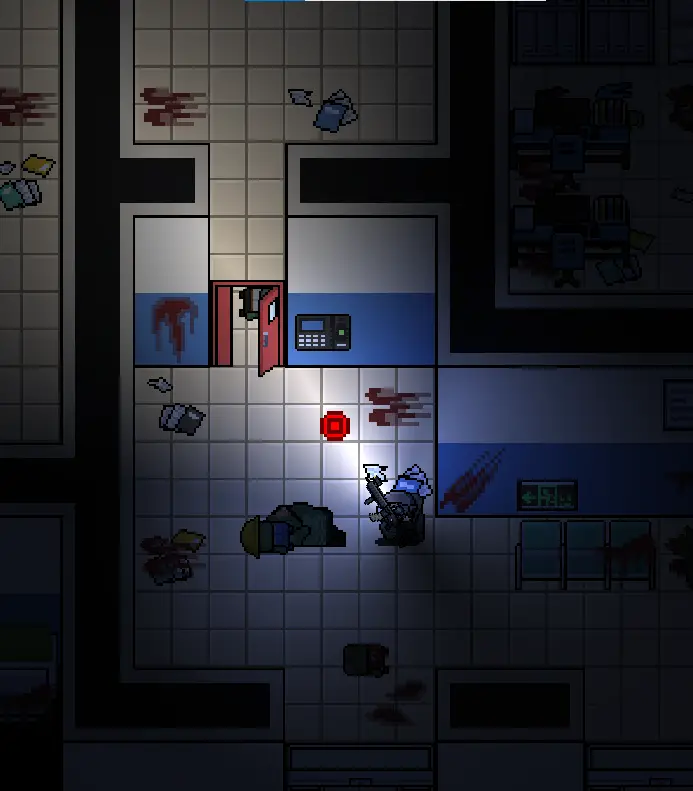
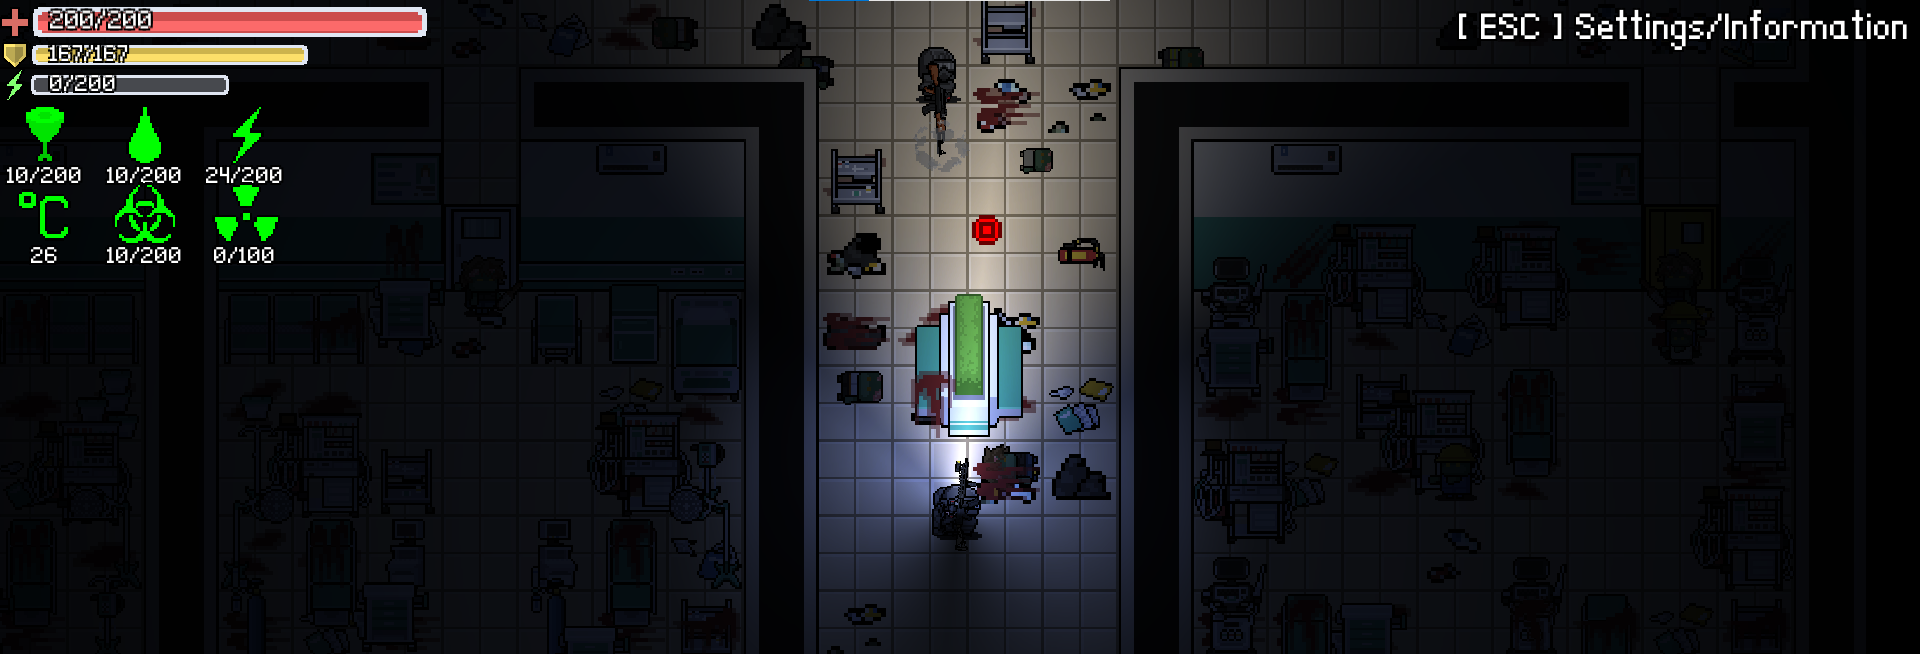
When facing the boss, he’ll unleash slow-moving poison balls as his primary attack. These pack a serious punch, so dodging them is a must. Additionally, he’ll summon zombies throughout the battle. The zombies appear at his location and can be of any type, including the heavily armored variant. If his attack hits anything, it’ll leave a toxic layer on the ground, causing damage if stepped on. And yes, I bravely took a direct hit just to capture that screenshot.


A top-notch strategy involves entering the boss’s chamber and adeptly dodging his attacks, taking advantage of the spacious layout for swift maneuvering.
Utilize your K-418 to dish out substantial damage quickly. Keep in mind that the boss boasts formidable durability, so be prepared for a lengthy battle. Bringing along HP ammo allows you to boost your damage output by 30%, making it a valuable asset.
Upon defeating the boss, you’ll always snag a document from either Heroic or Hellish difficulties, along with a diamond. While there’s a chance for the boss to drop an Induction IC Card (Red), luck wasn’t on my side during my encounter. Now, you’re free to explore the remaining map or loot the laboratory itself. Just keep a keen eye on your ammo reserves, health, and armor. Zombie waves on Hellish difficulty can be particularly challenging and resource-intensive.
In Hellish difficulty, you may stumble upon superior weapons like the MK-84 and the GSR28, which outshine those found in Heroic mode.
That wraps up the main bosses for the current version of the game. Congratulations on reaching this milestone!
But don’t close the guide just yet—there are still mini-bosses awaiting your defeat.
Mini-Bosses
On normal difficulty, you’ll start encountering two mini-bosses at certain spots. These guys are human, and they’ve got some sweet loot on them, unique or rare weapons that suit the current difficulty level. What’s cool is, the weapons they drop change up depending on how tough things are. Keep an eye out for them at both the Hospital and the Supermarket.
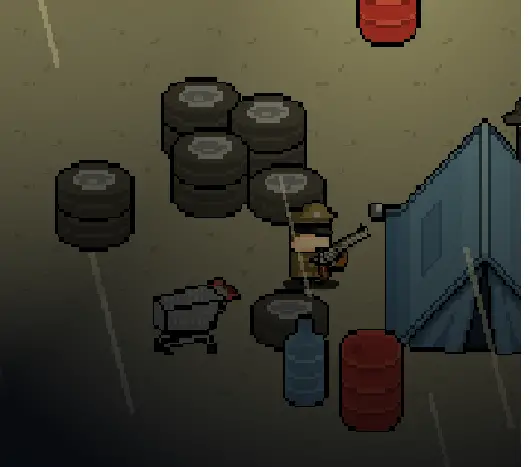
Supermarket Boss
In the Supermarket, head up to the upper area to find the boss. Easy to spot with his helmet sporting white stripes. He’s usually got some backup with him, other humans itching to take you down on sight. But don’t sweat it; he’s manageable. Depending on the difficulty, here’s what you’ll snag from him:

- Normal difficulty: APCR

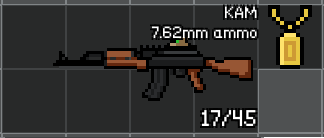
- Hard difficulty: KAM
- Heroic difficulty: MA4B
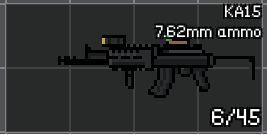
- Hellish difficulty: KA15
Hospital Boss
Up in the upper section of the hospital, that’s where you’ll find the boss. He’s a lone ranger, ready to take you down on sight.
Here’s what you can expect to get from him, depending on how tough things are:
- Normal Difficulty: KAM, with a chance for a yellow keycard.

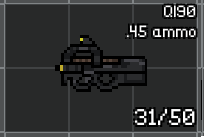
- Hard Difficulty: QI90, with a chance for a yellow keycard.
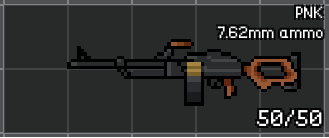
- Heroic Difficulty: PNK, with a chance for a yellow keycard.
- Hellish Difficulty: LMG250, with a chance for a yellow keycard.
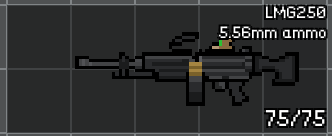
On the Hellish Difficulty he will drop a LMG250
Now, let’s talk about the LMG250. This bad boy is a beast. It’s chambered in 5.56mm, which means it packs a punch. Attach an ammo box, and you can carry up to 150 rounds, and slap on a bipod for almost no recoil. It’s got more damage and fire rate than your regular 5.56mm rifles. But, and here’s the catch, it needs frequent repairs.
That's everything we are sharing today for this Night Raider guide. This guide was originally created and written by Alfastriker. In case we fail to update this guide, you can find the latest update by following this link.