
- Title: Left 4 Dead 2
- Release Date:
- Developer:
- Publisher:
Information about Left 4 Dead 2 is still incomplete. Please help us fill the details of the game using this contact form.
In this guide, I will teach you how to enable the command console, bind it to a key, bind other commands and other useful commands. This guide is still in development, eventually, I will add more content and screenshots.
Enabling Command Console
You can enable the command console from the Steam app
To do that you have to follow the following steps:
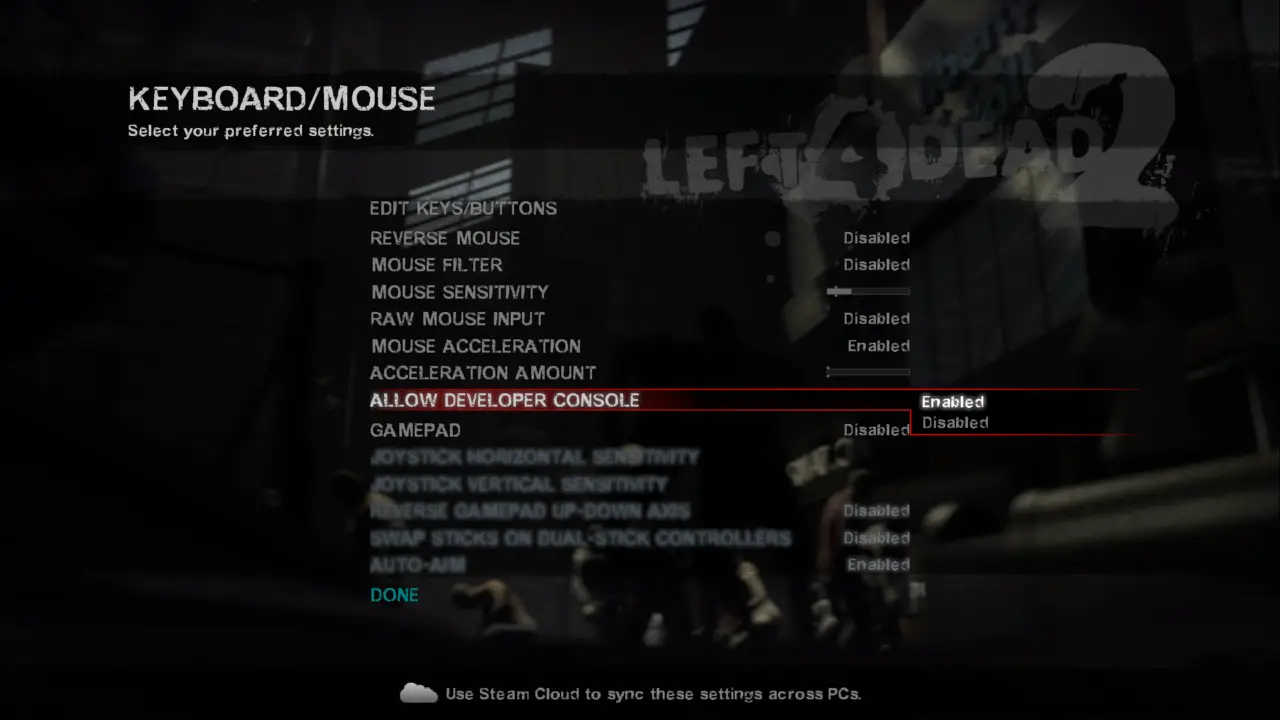
- Start the game, go to Options, from Options go to Keyboard/Mouse
- In this menu click on Allow Developer Console y make sure it’s set to Enabled. Once you have done that close the game.
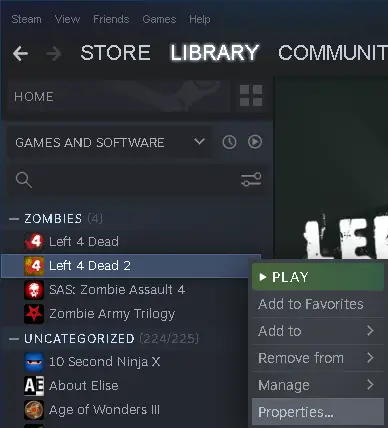
- Open your Steam App.
- Find Left 4 Dead 2 game.
- Right click on the game and open Properties.
- Once we are in the Properties window we have to make sure that on the left side we have General selected, if that is the case, on the right side we have multiple options, between them Launch Options.
- Under Launch Options we have a box where we can write, there we will type this: -console
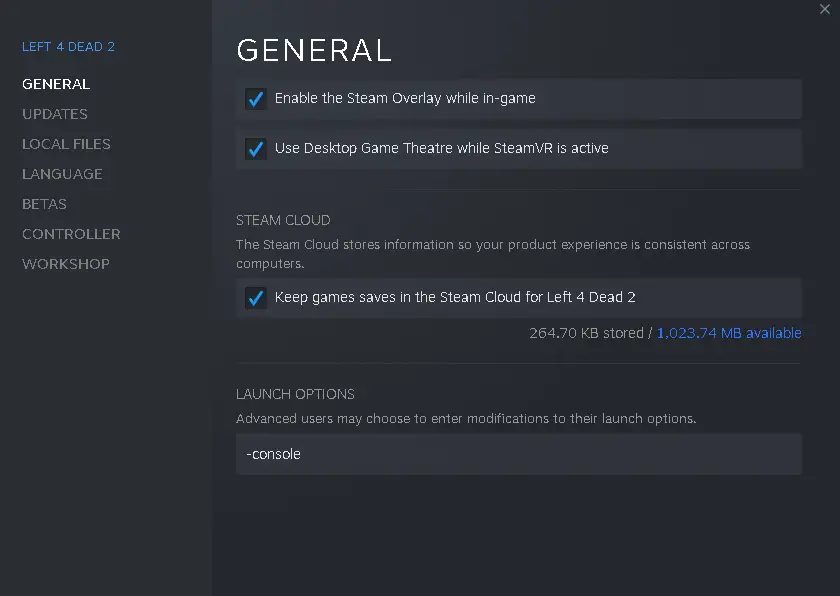
- After typing it we can close this window and open the game. As a personal recommendation I would add the “-novid” parameter after “-console” with a space between both, this will automatically skip the game intro every time we launch it. The launch options would look like this: -console -novid
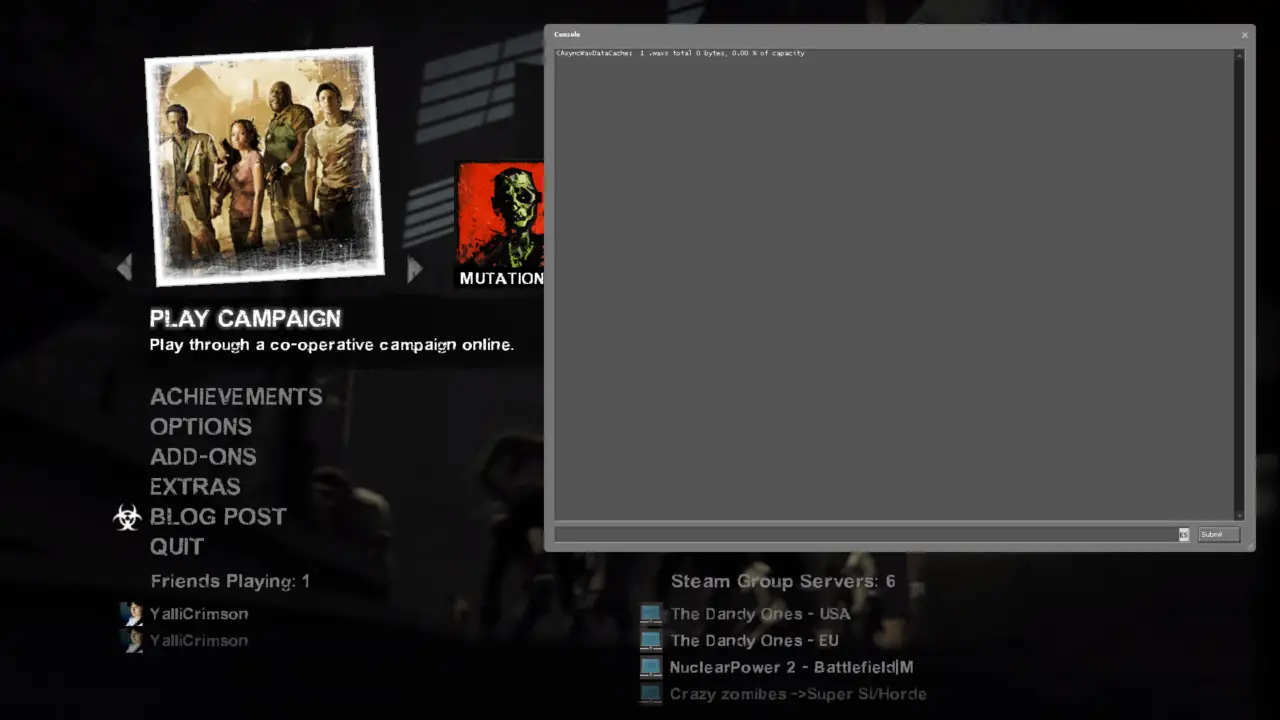
After following these steps and opening the game the main screen would look like this (don’t worry if inside the console window you see some text).
Binding – Explanation and Binding Console
What is binding?
Binding is assigning an action, ability, or function to a key. For example, the spacebar is binded to the jumping action.
How can I bind a key?
Roughly we can consider three ways to bind a key but in this guide, I will teach you just one way.
- From the Keyboard/Mouse menu we can access Edit Keys/Buttons. Here are the most basic actions like moving, jumping, and shooting.
- From the Console. Using this method you can have a great flexibility when assigning functions to your keys, its the method I’m going to explain in this guide since the previous category allows you to bind simple actions and the next category is very similar to the console.
- From the autoexec. Left 4 Dead 2 uses a file called autoexec.cfg where you can assign options, parameters, and binds. This file is executed every time the game is started and runs the commands written in it.
Binding from the console
To bind a key is necessary to type some things in the console following a structure, don’t worry is very easy to understand. I will show you the structure and explain it.
bind “X” “Y”
- bind: When typing this in the console it “understands” that you want to bind.
- X: The X is the first parameter, it equals the key that you want to assign an action.
- Y: The Y is the second parameter, it equals the action you want to be assigned.
Let’s say that I don’t have any key assigned to jump and I want to do it from the developer console, it would be like this:
- bind “space” “+jump”
The quote marks are not strictly necessary, however, I recommend you to use them.
Simple bind like this shouldnt give you any problem if you dont use them, but if your intention is making something more complicated it could cause you problems. The bind function knows how to differentiate between parameters X and Y because of the space between them, if there are more spaces…. it could be a problem. It’s no bother getting used to the safe way and will prevent you from future problems.
How can I bind the console to a key?
To do this we will follow the structure I explained previously. Think about the key you would like to use for this, i recommend you a function key (F1-F12). In this example i will use the key F11:
- bind “f11” “toggleconsole”
After typing this command and pressing Enter you will assign a key to open the console. Try it!
If you are in the main menu and the console doesn’t show up make sure you don’t have selected any of the first options like “Play Campaign”, move the mouse so it selects any other thing except the first row, and press your key bind again.
How do I know if a key has a keybind?
To know if a key has any keybind assigned we will use the same structure we used previously but this time without the second parameter. For example, if I want to know if there’s anything binded to my key “F11”:
- bind “f11”
- This time after entering the command in the console it will not just show what we just wrote, it will also return your text. This text will have this format:
- “X” = “Y”
- X is the key we are checking
- Y is the keybind corresponding to that key, if there are only quotation marks there’s nothing bound. It can also return you the text “is not bound”
- Now I will add a screenshot with both possibilities, a key with a keybind and another without one
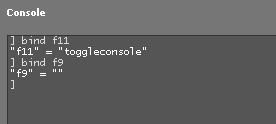
How do I delete a keybind?
You have two options, the first one is following once again the structure I showed you before to bind a key but this time the second parameter where do you write the action that you want to bind is left empty.
- bind “f11” “”
The second and better option is using the unbind command, it would be the following structure.
- unbind “f11”
Binding – Useful keybinds
There’s a great variety of possible keybinds and their utility depends both on your necessities and your playstyle. I will show you some and explain why they could be useful but I will not get into too many details about how they work.
Example of how to bind at the end of each section.
Disconnect
You can use it in different situations like:
- Quickly disconnecting from a game without needing to go the menu pressing Escape.
- If you join the wrong game you can press this keybind to exit without needing to wait for the loading screen.
- Exiting the game while you are loading into the next chapter. You get to the safe zone and load for the next part but… you don’t want to play anymore. Press the keybind and exit without needing to wait for the loading screen.
Command:
- bind “f5” “disconnect”
Sending messages to the chat
Yes, you can send messages from the console. And if you bind it you can save some previous seconds!
- Letting your team know you need healing.
- Warning about a witch or tank.
- Saying something funny.
- Being cocky after crowning a witch (nobody likes cocky people )
Do not use it to spam, just like nobody likes cocky people nobody likes spammers. You will annoy the rest of the players and they will kick you out of the game.
Command:
- bind “f6” “say Taaaank! Burn it!”
Steam group servers
In some steam group servers, you can type messages in the chat that can give you access to some interesting features. For example, changing your skin, your voice, or buying items.
Let’s assume you want to bind the function of buying in that server, I will also assume that you open the buy menu with the “!buy” message, this gives us three methods to bind it. Yes, three!
The first method is the same as the previous point, typing in the chat with the “say” command.
- bind “f5” “say !buy”
The second one is almost identical but… did you know you can use the store without the other players seeing your message? Instead of an exclamation mark, you will use a slash.
- bind “f5” “say /buy”
The third method is a little bit different, instead of typing in the chat we will use a different command, you can replace the “buy” from this example for almost any other, for example, “lmc” or “view”
- bind “f5” “sm_buy”
Useful Commands
With the command console, we have a great variety of commands we can activate or adjust depending on your personal preference. You can adjust or enable them from the console, in this guide I will cover some of them.
Crosshair
The crosshair is that thing that you see in the middle of your screen that you use to aim.
By default, it changes depending on the weapon you are using, if you are moving or jumping. You can make it always be the same size, it will not improve the precision of your weapon but it will help you to know where the center of your screen is.
- cl_crosshair_dynamic 0
- The default value is 1
You also can change the colour, the color is assigned following RGB codes. You can search online the RGB values of your desired colour.
- cl_crosshair_red
- cl_crosshair_green
- cl_crosshair_blue
Performance
Using the following command you can see the performance of your game, not just the FPS but also information like your ping to the server or your lerps. Yes, with the TAB you can also see your ping but there you don’t see the exact value and it refreshes after a certain time which will not always show you the real value.
- net_graph 1
You can also change the position where it appears.
- net_graphpos X
Change X for a number between 1 and 4 then keep the one you like the most.
Is the information too big? You can change the size with the following command, the default value is 1.
- net_graphproportionalfont 0
Muting a player’s voice chat
Sometimes you can have the bad luck of finding a player that uses his microphone to play annoying sounds, music or just to insult people. Dont worry there is a command to mute a player. You just need to follow two steps.
Knowing the player’s ID.
- To know his id you have to type the following command: voice_show_mute
- This will show you a list with all the players connected to the server, in front of their name they will have a number, this is the ID number you need.
Using the mute command.
- The following command will mute a person, you must replace the X with his ID: voice_mute X
Votes
Yes, you can make votes from the pause menu and select a vote but that is not always the case since in some servers there are disabled options. You can use the command console to make a vote from there.
- callvote ChangeDifficulty Normal
- callvote RestartGame
- callvote Kick <Nombre/ID>
- callvote ChangeMission
- callvote ReturnToLobby
Server browser
Left 4 Dead 2 has another method to find games that is not the conventional way from the main menu, from there you can see a list of all the online servers with or without players. You can also add some filters to search based on the map, quality of connection, ubication, and anti-cheat. You can even add servers to your favorites list!
To access this browser use the following command.
- openserverbrowser
Point of View
Also known as FOV (Field of View)
When adjusting this parameter you can change how much you can see vertically and horizontally, recently was added a command to edit this.
- fov_desired X
- Change X for a value between 75 and 120, you can add decimals. The default value is 90.
You can also change how much of your character you can see on your screen. While you are playing you can see part of your weapon and your character’s arm, you can adjust this.
- cl_viewmodelfovsurvivor X
- Change X for a value between 35 and 140. The default value is 51.
- I don’t recommend getting to or going past those “limits” since if it is too low you will barely see your weapon or not at all. Too high and you will reach a point where the image flips upside down. Personally, I prefer the value of 70 or 90.
That's everything we are sharing today for this Left 4 Dead 2 guide. This guide was originally created and written by McPorrow. In case we fail to update this guide, you can find the latest update by following this link.