This guide will show you some of the most useful House Flipper 2 tips and tricks that I have learned while playing the game. Note that these tips are based on my experience, which may be different from your end.
General Tips
- When embarking on quests, keep in mind that quest areas typically match different rooms, but exceptions exist. In outdoor settings or stairwells, the boundaries of a quest area might not be immediately apparent, especially in user-generated quests. Hence, pay close attention and scrutinize your surroundings diligently.
- Before delving into house flipping endeavors, it’s highly advisable to complete all email missions. Doing so maximizes the benefits of most perks. Some perks lack upgrade paths and can be accessed once you accumulate the required points, rather than sequentially.
- Tackling Flipper Sense to its maximum potential proves to be the most challenging. Therefore, allocate your initial perk point to Well Deserved Rest. This ability, allowing you to bypass nighttime by resting in a bed, significantly facilitates lot renovation. While unnecessary in default email quests due to the absence of a day/night cycle, it becomes a game-changer when refurbishing purchasable properties or engaging in player-made quests with the cycle activated.
- Positioned on the right side of the perk screen, the Reset to Defaults button serves a crucial function. It refunds your perk points, enabling you to reallocate them according to your evolving strategy.
- Adopting a strategy of completing all essential tasks within a specific area or room before advancing to the next yields greater efficiency than alternating between tasks across different areas. For instance, completing trash collection throughout all areas before commencing cleaning is less efficient than completing all tasks in one area before moving on.
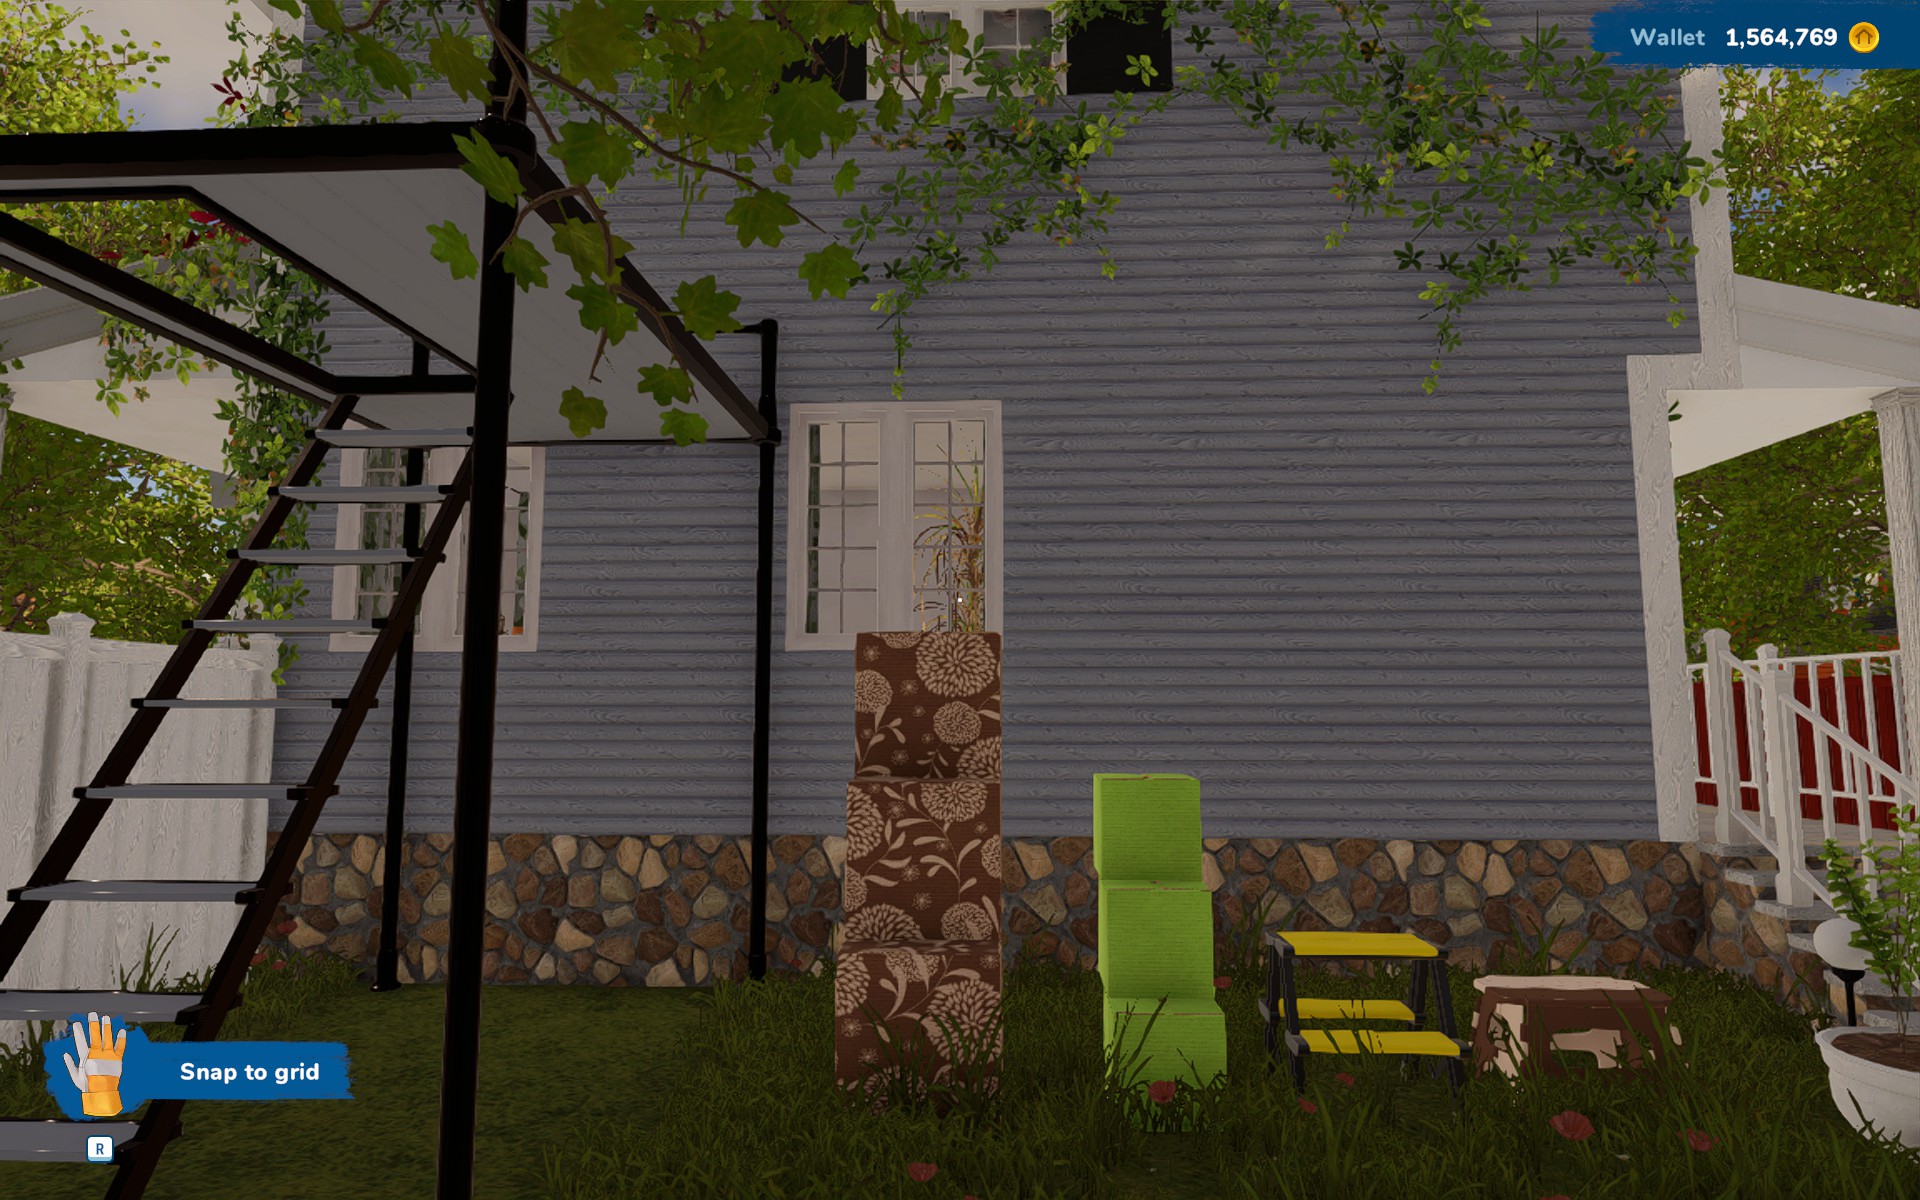
- Utilizing the larger Batha boxes can serve as an alternative to using a stepladder. By stacking three of them atop each other, resembling a set of steps, they offer a viable solution. The green default ones are priced at 19 gold each, while those adorned with brown flowers command a price of 45 gold each. These boxes are versatile, suitable for both indoor and outdoor use, and can be utilized individually or in combination. Moreover, they retain their full value when sold. For reference, here’s a visual comparison of their sizes.
- The stepladder proves its worth when organizing items within hanging cupboards. Compact and equipped with two steps, it offers practicality at a lower cost compared to a step stool.
- Maximizing the property’s value requires attention to both outer walls and porches. Ensure worn surface finishes are replaced, and consider adding seating to vacant balconies and terraces.
- Thoroughly explore every door you encounter to avoid overlooking potential spaces like attics, basements, and garages that can be converted into livable areas. Additional bedrooms and bathrooms significantly enhance the property’s appeal and value.
- Navigate the Store interface efficiently using the Filter and Sort button located at the bottom right. Additionally, utilize the tabs at the top to categorize items based on their function. Employing a combination of sorting and filtering streamlines the search process for items, enhancing overall convenience.
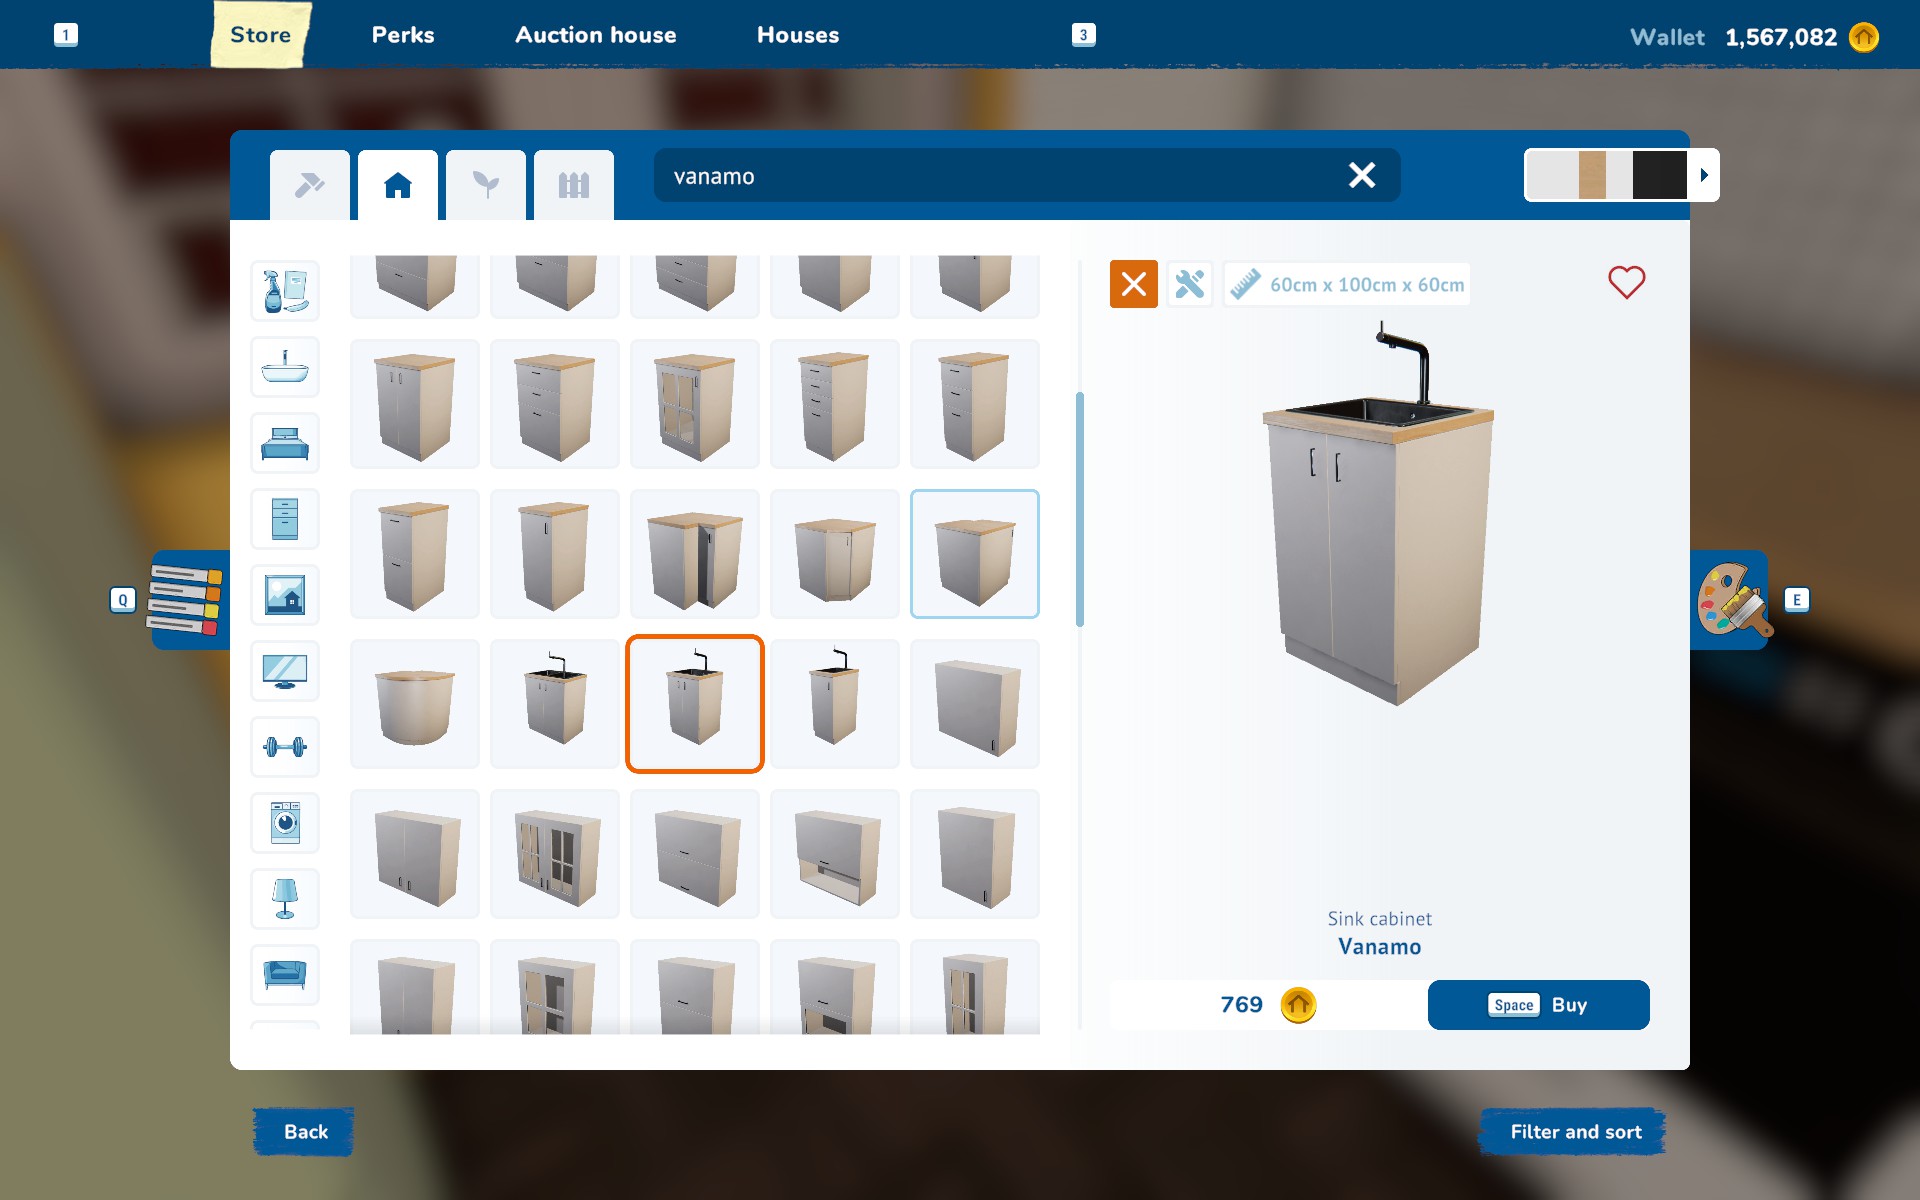
- On the Store interface, there’s a little square above the item preview, marked with an “i”. When you click it, it changes into a cross, and voila! You get the measurements of the item in centimeters. Pretty neat, huh? Check out the image for a visual.
- Sometimes, if by chance the cabinet worktops happen to be at the same height as the windowsill behind them, it could lead to some awkward collisions. To dodge that issue, simply take out the windowsill. Easy fix!
Collecting Trash and Selling Items
- To keep your PC running smoothly while playing, start by tidying up the digital clutter. Trash collection should top your to-do list. Why? Because the more trash that needs rendering on your screen, the heavier the load on your PC’s performance.
- Bins are pretty flexible. Even when they’re lying on their side, they’ll still gladly accept your trash. Talk about convenient cleanup!
- Need to declutter and make some cash? The trash bag isn’t just for rubbish; it’s a secret selling tool for small items like tableware, towels, newspapers, and more. Plus, it won’t fill up as you sell, so go ahead and clear out that inventory without a worry!
- Don’t let the great outdoors dictate your cleaning routine. You can use the outdoor bin indoors too. No need for a fitness regimen of back-and-forth bin runs; just drag one inside or grab an extra to save yourself the marathon.
- When wielding the Flipper tool, its colors tell you its mission. In Sell mode, items glow a sunny yellow outline. Switch to Edit mode, and you’ll see a serene blue glow. Easy peasy!
- Looking to keep the pot but not the plant? Target your actions carefully. Plant pots come as a package deal with their green inhabitants, so aim your clicks wisely if you want to keep the pot for your own decor.
- Don’t stress about perfect placement. If your furniture is in top-notch condition and the clutter isn’t strewn about like confetti, you can leave it be. Buyers will still pony up the cash, no rearranging necessary.
Demolition and Building
- When it comes to demolition and building, the Strong Hit reigns supreme, but don’t overlook the value of the Precise Hit. It’s particularly handy for avoiding accidentally knocking down nearby walls.
- Patching up an irregular hole in the wall? Take it one step at a time. Divide the gap into smaller rectangles and brick up each one separately for a smoother finish.
- Sometimes, when you’re sealing up a hole in a vertical wall, the tool decides to go horizontal instead. If you’re unsure, take a stroll to the other side of the wall to ensure there are no surprises sticking out.
- Planning to add a new door or window? Make sure the other side of the wall is clear of debris or objects. Otherwise, your plans might hit a snag.
- Thinking of rearranging your doors or windows? It’s easier to start fresh. Brick up the existing opening and then insert your new door or window. Trying to match sizes can be a headache, so why not make things simpler?
Cleaning and Flipper Sense
- Want to clean like a pro? Here’s the scoop: Start with Flipper Sense to spot those pesky stains, give them a spritz, then get to scrubbing. The magic? Spraying keeps the stains visible, so cleaning becomes a breeze. No more guesswork, just efficient cleaning. Plus, it’s twice as fast!
- Oops, forgot to spray? No worries, but be prepared for a do-over. Some stains might require a double dose of cleaning if you skip the spray. The first round makes them vanish, leaving only Flipper Sense to sniff them out again.
- Don’t overlook your windows! Flipper Sense isn’t just for stains; it’s your window-washing wingman too. It highlights dirt on those panes, making it a cinch to pinpoint which ones need your attention. Easy-peasy cleaning, coming right up!
Walls, Floors, and Ceilings
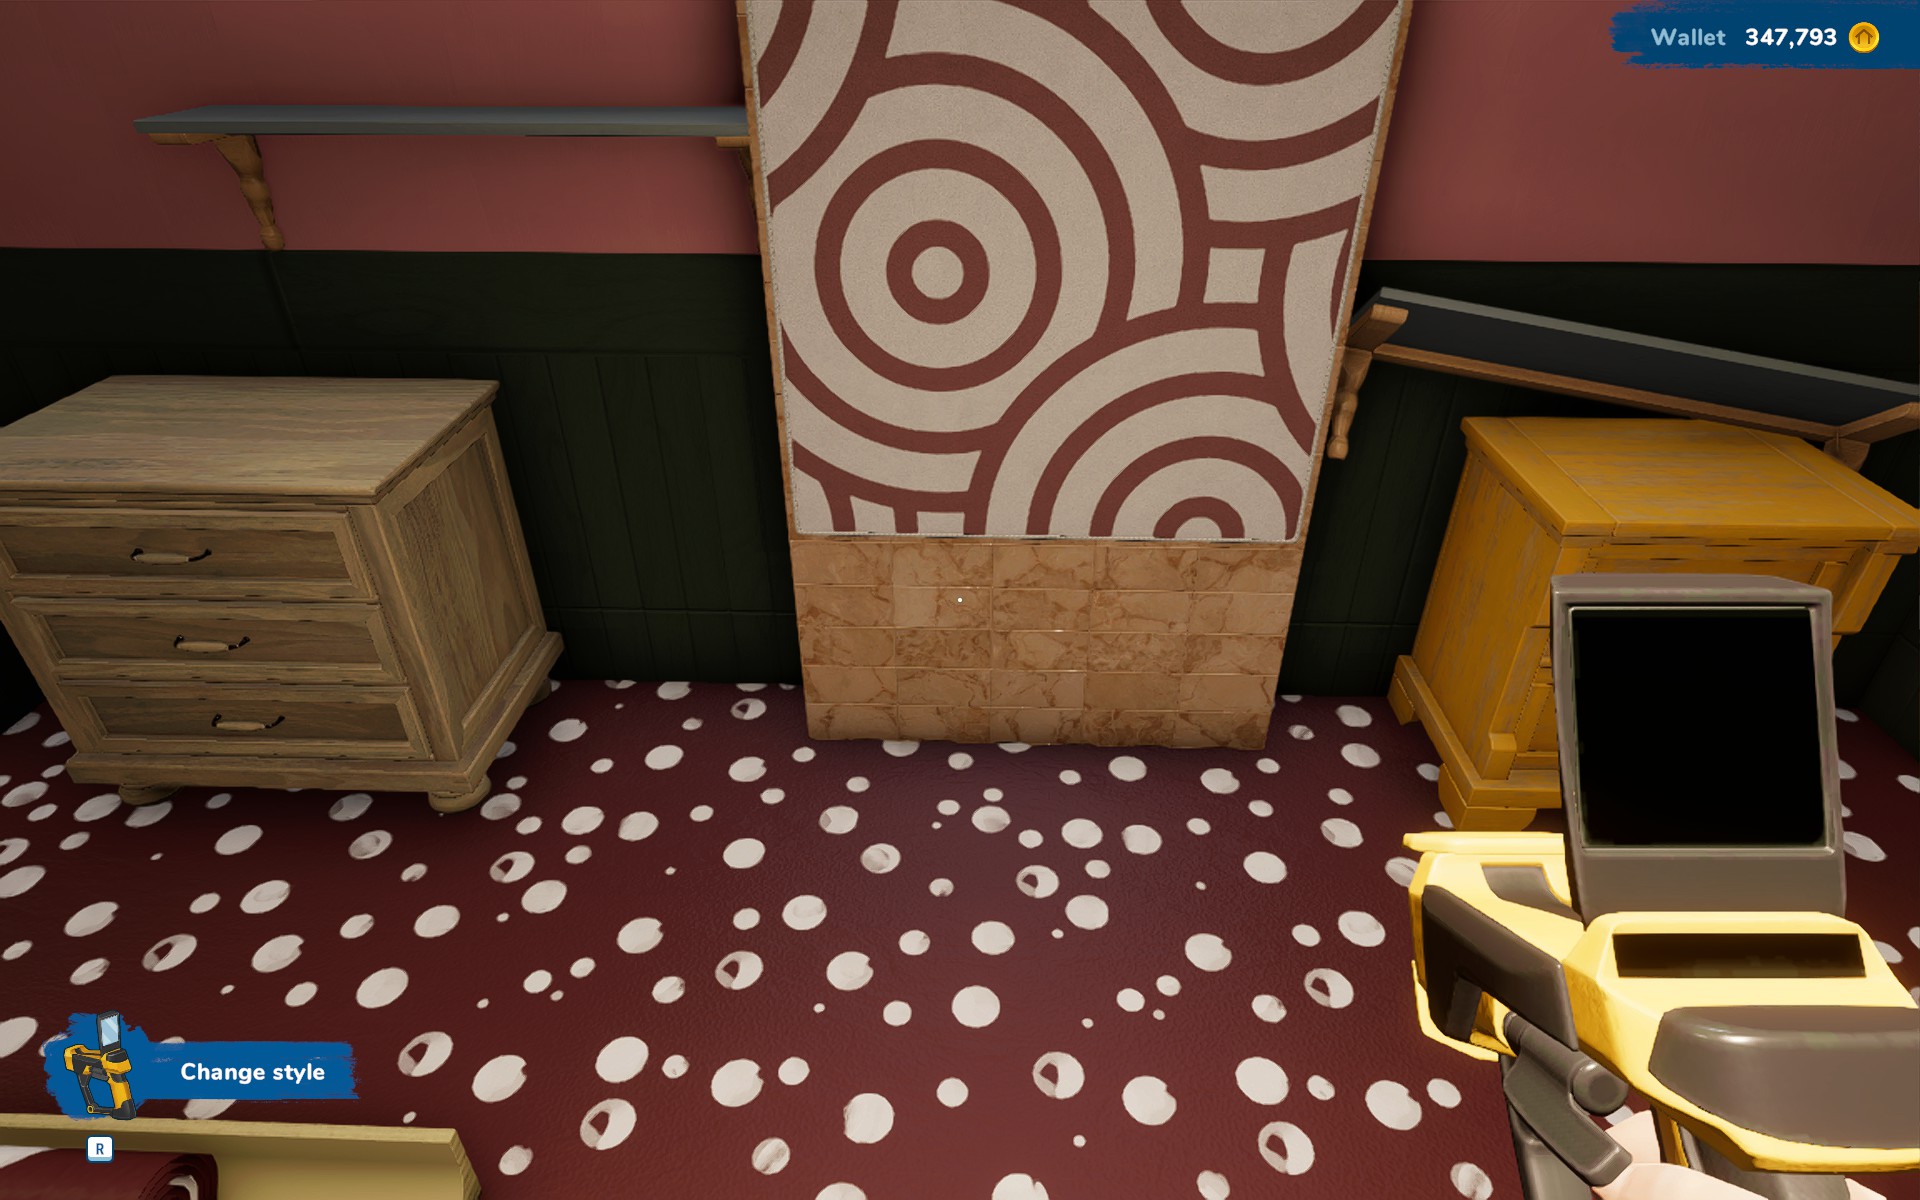
- When you unlock the Freestyle painting perk, it’s still handy to select areas for painting, especially when mixing different finishes on one wall, like tiling the bottom and painting the top.
- Use a small roller for area selection, as it’s impossible with the large one. Ignore the red highlight glitch if it appears in the selected area; click anyway.
- Painting with WASD keys is often faster than using the mouse, especially around windows. While painting around windows is optional, many players prefer doing it. Ceilings are a bit trickier and are best painted using the mouse.
- In Copy mode, point and click on walls or floors with the flipper tool to visit the store page for the item with the same options selected, making it easy to buy more of the same finish.
- If using the flipper tool in Copy mode doesn’t change the cursor to a square, it means the finish isn’t available in the store and needs replacing.
- Surface finishes other than paint are applied in squares, using only the required material to cover highlighted squares. Buying one pack at a time saves material, avoiding unnecessary purchases. The default size is a 3×3 grid, but squares can also be arranged vertically or horizontally, up to 5 squares at a time.
- Use the flipper tool in Edit mode to point at paint cans or boxes to visit the editing page. This allows choosing a different shade of the same color or different options for surface finishes without buying new cans or boxes.
- Walls, floors, and ceilings function similarly. Therefore, wallpapering the floor and using a rug instead of a picture are possible. Additionally, placing ceiling spotlights on a wall, particularly in rooms with sloping ceilings, is useful.
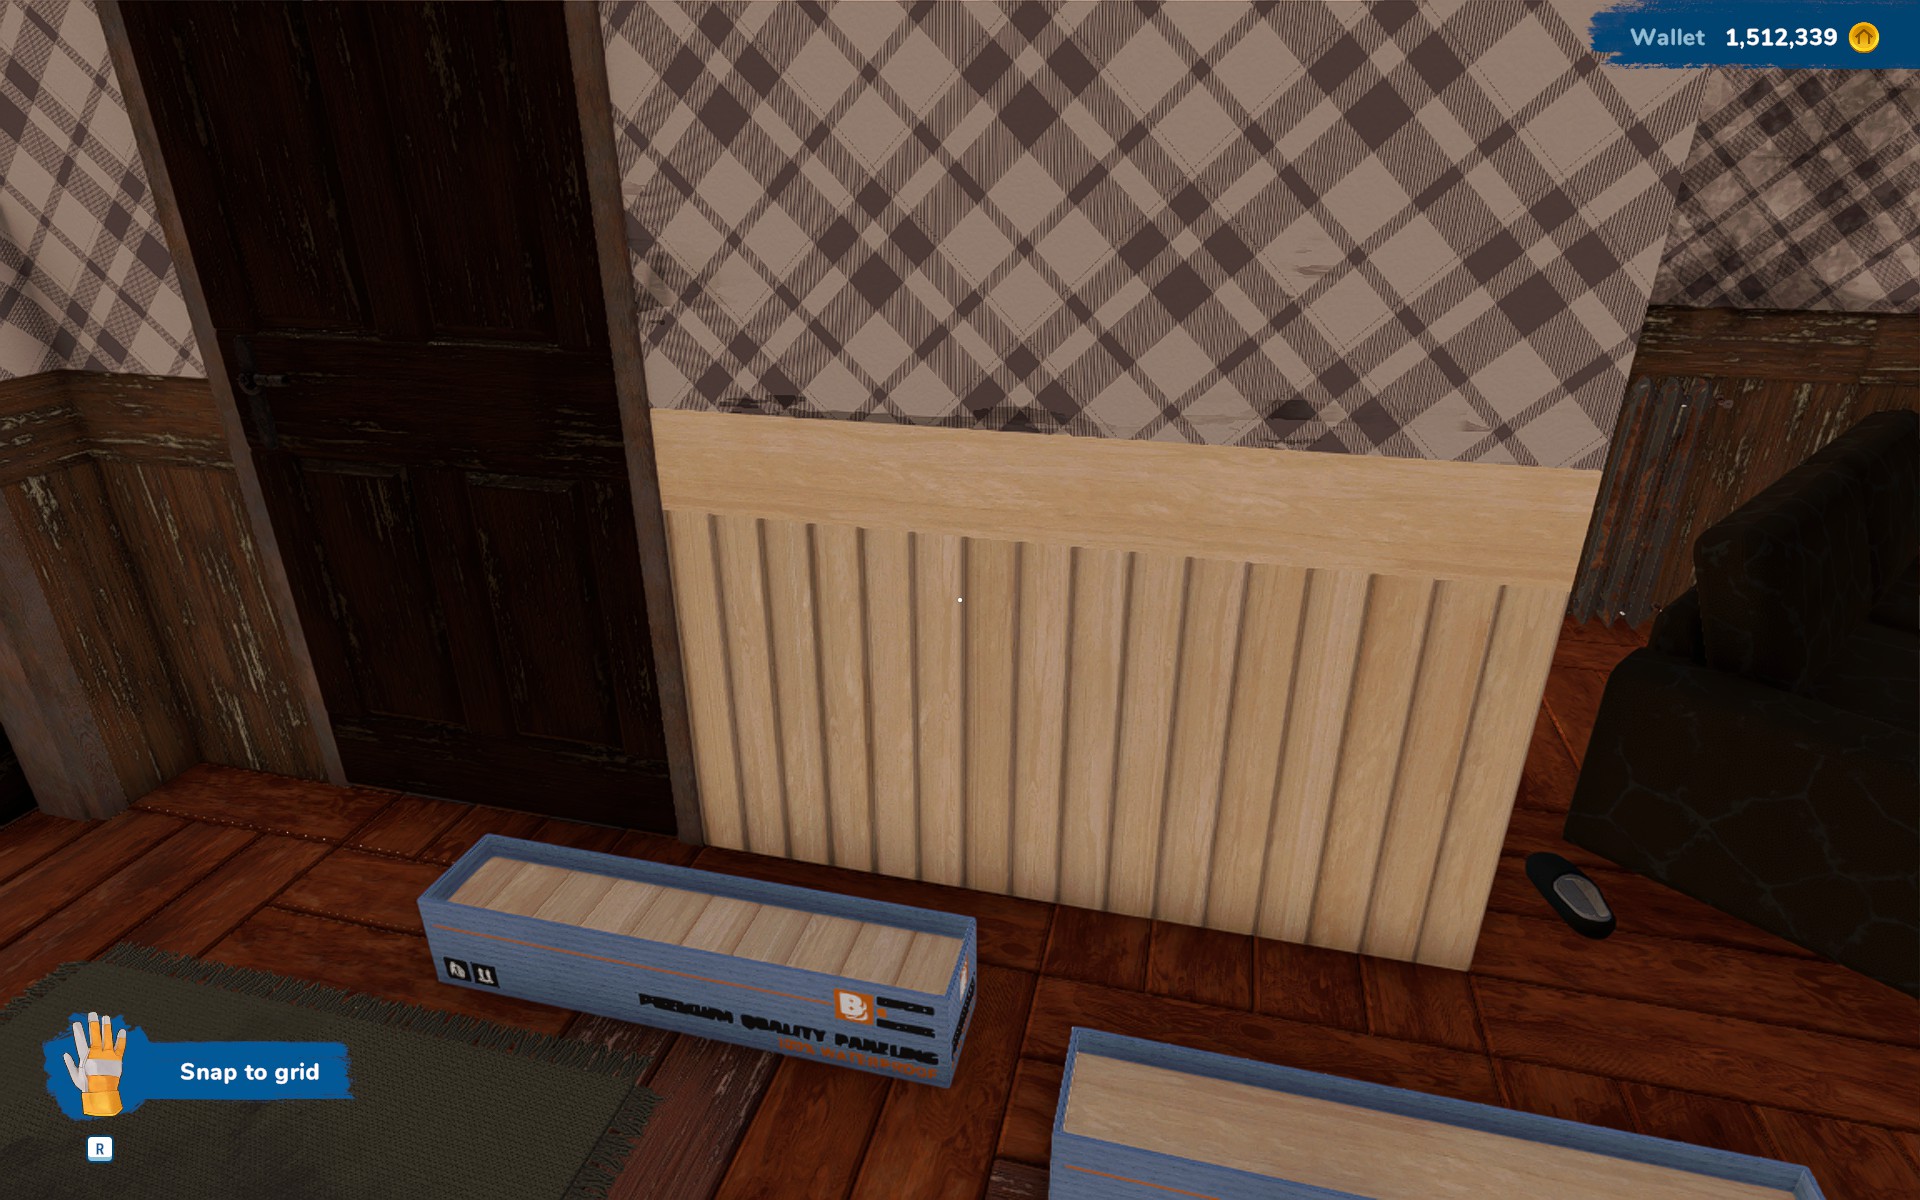
- When replacing paneling to create a vertical or horizontal border, opt for paneling with no cut, as shown in the screenshot. This type of paneling is also handy for surfacing beams and pillars.
- Some surface finishes, such as pillars, fences, and railings, are applied using the flipper tool’s Edit function. Others can be surfaced or painted normally or by employing a “highlight, click, and hold” method.
- By utilizing a variety of application methods and tools like stepladders, boxes, or scaffolding, it’s possible to fully resurface or paint the exterior of the property. Don’t stress too much if you miss a few challenging-to-reach spots; as long as the surfaces are renovated, the buyers will still be willing to pay a good price.
The Edit Item Screen
- When you first enter a property, use the flipper tool’s Edit mode to assess a few pieces of furniture in each room and gauge their price category: cheap, mid-range, or expensive. Aim to replace items with ones roughly in the same category to balance profits. It’s okay to mix a couple of items from different categories, but avoid extreme mismatches.
- To keep an item, switch your selling tool to Edit mode and attempt to change its color and/or texture. If damage is an extra layer that can’t be removed, it’s best to sell the item. Sometimes editing can restore it to a like-new condition.
- If damage on a kept item can’t be edited away, click the Go to Store button at the bottom right corner of the Edit screen to visit that item’s page with default options selected.
- In rare cases where damage on a door or window can’t be edited away, the Edit tool still helps by providing the model’s name and window size, facilitating quick replacement with a newer version of the same item.
- Purchase the item first and edit it afterward, as it’s much easier than editing it in the store.
- Before editing an item, adjust the camera to prevent the Edit screen from obscuring the part you’re trying to edit. This can be challenging, especially for cabinet handles.
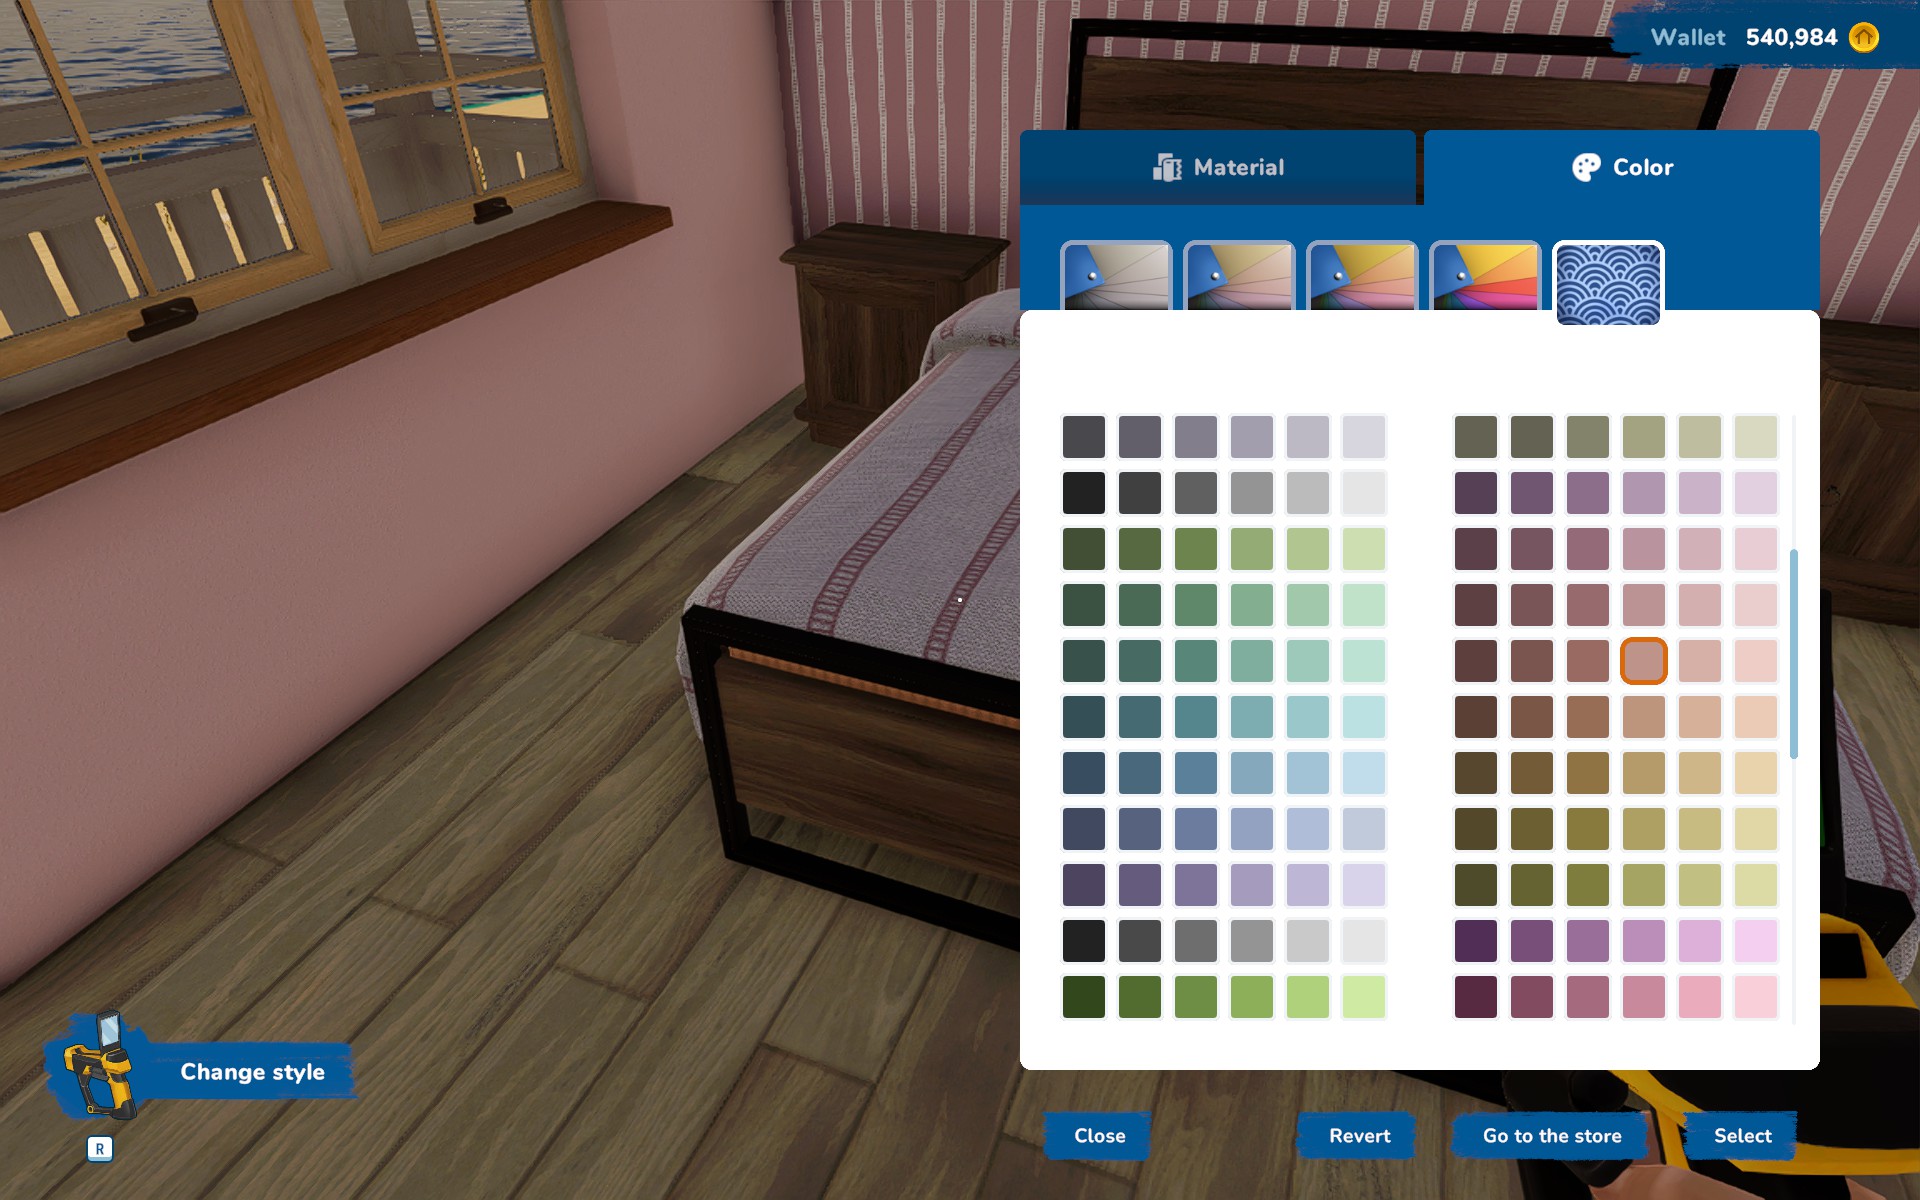
- Paint is categorized into Faded and Vibrant colors, while fabrics have Drab, Faded, Rich, and Vibrant options. However, matching colors is never an issue. Each paint category likely corresponds to a combination of two fabric categories.
- When editing the background color for patterns, such as on sofas and duvet covers, colors are not separated into categories. You have to scroll to find the exact color you need. This could change in a future update, but for now, it’s how it works.
- The Edit screen for every item includes presets in the drop-down menu at the top right. These presets are handy for setting material combinations, ensuring your bathroom cabinet is painted wood, for instance. Alternatively, you can use presets as they are, like when you want a plain white light switch.
- On the Edit screen, you often see two squares for each parameter of the item—either color and texture/material or two colors. These squares combine, so try editing both to achieve the desired color and texture combination.
- Enjoy editing handle styles and orientations, stair railing style and position, the presence of window sills and muntin bars, and especially the cut pattern, size, and rotation of surface finishes like tiles and paneling.
- When using the “edit, copy, paste” technique, it works best when the items are from the same range or type. For instance, if the bedside cabinet is from the same range as the wardrobe, colors usually copy exactly. Copying a style to another item of the same type is also precise. However, if items are from different ranges or types, not everything may copy exactly, requiring additional editing.
- When using the “edit, copy, paste” technique on kitchen cabinets, edit a symmetrical one, such as one with drawers, to avoid unintended handle orientations copying over.
- On the Edit screen for a television, you can change the channel among other things. There are four channels to choose from.
- On the Edit screen for a picture frame, you can change its size and choose a different picture, among other options. You can select any picture available in the game or on your PC.
Lighting and Wiring
- Existing lights in properties come pre-connected, but those bought in the store are not. Remember to connect them using the Wiring mode—it could impact the sale price!
- Moving an existing light switch to a different position or dropping it on the floor during demolition does not disconnect it.
- Using the Duplicate mode on a light also duplicates its connection to a specific switch.
- The Edit screen for any light allows you to select color temperature and brightness for the lighting, which works wonders for setting the atmosphere!
That's everything we are sharing today for this House Flipper 2 guide. This guide was originally created and written by tatiana. In case we fail to update this guide, you can find the latest update by following this link.
