This detailed guide explains how to use a wingman effectively, including their execution of various instructions, skill with various weapon systems, and limits assigned to the A.I.
Wingman Basic
It is essential to acknowledge that the Wingman A.I. is still a work in progress, and while their intelligence may currently be limited, they diligently abide by your commands.
Issuing Commands
Presently, there are two methods to issue orders to your wingman:
- Employing bindable keys, which can be configured in the Control Settings menu. It should be noted that as the number of commands increases, this method will eventually be phased out due to its limited capacity.
- Utilizing the Command Menu, accessed by holding down either the “Cycle Left MFD Page” or “Cycle Right MFD Page” buttons for at least one second.
The Command Menu facilitates the issuance of orders to your wingman through a collapsible menu system akin to a folder arrangement found in Windows. Moreover, it is designed not only to control a single wingman but also to manage multiple flights and individual aircraft within those flights.
To interact with the Command Menu, you have two options: defining keyboard/joystick inputs or employing the built-in joypad system. The Command Menu is governed by five controls, namely:
- Command Menu Toggle – enables toggling the Command Menu on or off.
- Command Menu Up – moves the selected option upward.
- Command Menu Down – moves the selected option downward.
- Command Menu Select – selects the highlighted option.
- Command Menu Back – closes the currently selected option.
For Joypad users, the Command Menu can be accessed by holding either the Cycle Left MFD button or Cycle Right MFD button until it appears in the top left corner of the screen. Once open, the MFD buttons 1, 2, 3 & 4, typically assigned to the D-Pad, can be used as follows:
- D-Pad Up – Command Menu Up
- D-Pad Down – Command Menu Down
- D-Pad Right – Command Menu Select
- D-Pad Left – Command Menu Back
To close the Command Menu, simply click the Cycle Left MFD or Cycle Right MFD button.
NOTE: While the Command Menu is active, joypad users cannot interact with the selected MFD functions, such as moving the targeting camera. HOTAS users can circumvent this limitation by using the “Direct Access” controls.
Utilizing the Command Menu
To open the Command Menu, press either the “Command Menu Toggle” button or hold the Cycle Left MFD or Cycle Right MFD button until it appears in the top left corner of the screen.
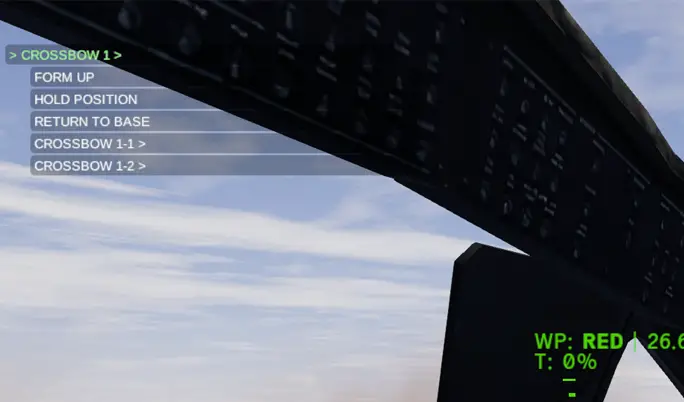
Upon its initial appearance, the menu will display a list of all flights currently engaged in the mission.
NOTE: Any option ending with a “>” signifies an expanding option that, when selected, provides additional choices. In contrast, options lacking the “>” symbol will execute a specific order upon selection.

To issue commands, use the Command Menu Up/Down buttons to pick the desired Flight, followed by the Command Menu pick button.
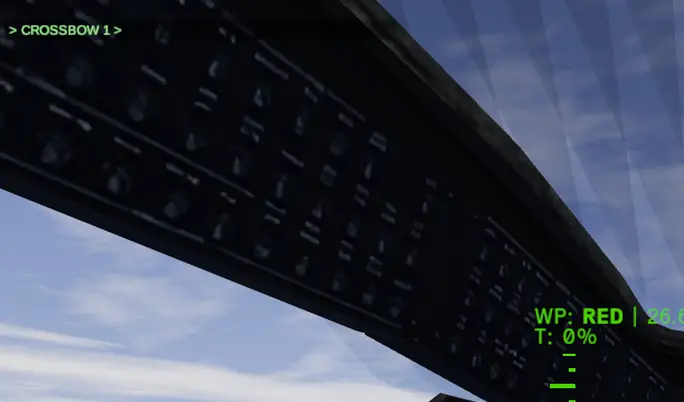
Currently, each mission has only one flight, in this case CROSSBOW 1, but there will eventually be up to three.
When you select the flight, you will be presented with more options.

Flight Wide orders are on the first list of orders. e.g. Orders to be issued to all planes on the flight. These are usually simple directives like “Move” or “Hold Position.”
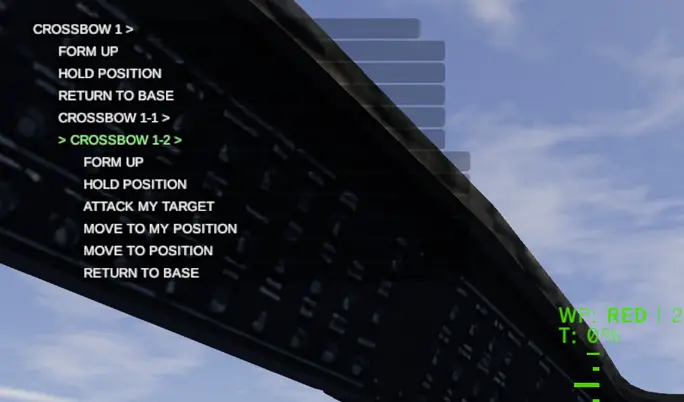
All of the aircraft in the specified flight will be listed below these flight instructions. By selecting these choices, you will be able to give orders to specific aircraft within the selected flight.
Currently, there are only two aircraft in each flight (and you are always the lead aircraft – in this case, CROSSBOW 1-1), but there will eventually be up to four aircraft per flight.
Currently, your wingman is always FlightName 1-2 – in this case, CROSSBOW 1-2. Selecting this option will provide you with particular orders that can only be issued to that aircraft.

To send an order, simply highlight it and use the Command Menu Select control. Your wingman should reply to the order and carry it out.
Simply use the Command Menu Back control to close an option.
Finally, use the Command Menu Toggle control or click the Cycle Left MFD or Cycle Right MFD buttons to close the Command Menu.
Wingman Order Behaviours
The following section delineates the operational procedures for each designated order:
Form Up
This order possesses the flexibility to be directed either to the entire flight unit or to individual aircraft within the flight. By doing so, it prompts the wingmen to realign themselves into the prescribed formation, with the default configuration being the “V” formation, while other formations may be accessible subsequently.
Once given, the wingmen will steadfastly maintain their positions within the formation and duly follow the lead of the formation’s designated leader. During high-speed maneuvers, the wingmen will naturally disperse and ascend to ensure a safe operational distance.
Hold Position
This order mandates the wingman to maintain their present position and altitude, persisting in this state until further directives are issued.
Move to Position
This command instructs the wingman to relocate to the specified location, as designated by the targeting pod. For this order to be acknowledged, the targeting pod must be in a locked state. Upon reaching the destination, the wingman will enter a low hover, seeking to conceal themselves as effectively as possible.
Move to My Position
Instructs the wingman to precisely align with the position and altitude of the issuing pilot. It is imperative for the pilot to have shifted their location before the wingman’s arrival.
Attack My Target
This directive authorizes the wingman to engage the currently selected target. The wingman will make prudent decisions concerning weapon selection, considering factors such as ammunition availability and target range.
Attack My Designator
By issuing this order, the wingman is instructed to synchronize their weaponry with the laser designator code of the issuing pilot. Consequently, any launched weapon will home in on the target designated by the pilot’s laser designator. If the weapon incorporates a telemetry link (e.g., Hellfire), the pilot’s HUD will display pertinent information, including time to impact, as if the weapon were launched by the pilot themselves.
Go Weapons Free
This order grants the wingman permission to engage and neutralize any and all targets within their range. Prioritization is given to the highest threat targets, particularly anti-air units, starting with those in closest proximity and progressively moving outwards based on available weaponry and respective ranges.
Go SEAD
Instructs the wingman to engage and eliminate exclusively the enemy air defenses up to the maximum range of their weapons. In such cases, the wingman will consistently prioritize the closest threats.
Go CAS
Instructs the wingman to engage and destroy enemy ground units in close proximity. The wingman will actively search for targets within 2km, 4km, and 6km ranges, respectively. However, it is crucial to note that enemy air defenses are not prioritized under this mode, although the wingman will retaliate against them if they fall within the current engagement range.
RTB (Return to Base)
This essential order directs the wingman to promptly navigate back to the base and proceed with landing operations.
Wingman Weapon Behaviours
Wingmen are authorized solely to employ Laser and/or Radar guided munitions. Equipping them with unguided weapons like rockets or gun pods is not permitted. Nevertheless, they can utilize turreted weapons.
Weapon Selection System
Your wingman will engage in a rather intricate decision-making process to determine the most suitable weapon for a given target. This decision will consider factors such as the weapon’s power versus the target’s armor, available ammunition, range, and weapon cost.
If possible, they will prefer using the least expensive weapon with the highest amount of current ammo for the task at hand.
Your wingman will continue firing at the target until it is successfully destroyed, regardless of the weapon being used.
Each weapon exhibits slightly different usage behaviors…
Turreted Cannon
Your wingman will select this weapon when engaging a lightly armored target within a range of 2km. The closer they are to the target, the more likely they are to choose the cannon over any other guided weapon.
If your wingman has no other weapon available or if the target is too close to employ guided weapons (e.g., less than 1km), they will use this weapon to attack heavily armored targets.
Laser Guided Weapons
Your wingman will opt for this weapon when targeting heavily armored foes or when the target is beyond a range of 2km.
To use this weapon, your wingman will need a direct Line of Sight to the target and will elevate their altitude until they have a full view of the target. They will not climb beyond 150m above the ground unless they are already higher than this altitude when you issue the attack order.
Once the weapon is launched, your wingman will maintain Line of Sight until the target is hit and destroyed.
Radar Guided Weapons
Your wingman will select this weapon when engaging heavily armored targets or when the target is beyond a range of 2km. Unlike the Laser Guided Weapons, your wingman does not require direct Line of Sight for this weapon and can fire it from behind cover.
To make use of available cover, your wingman will initially lower their altitude to a low hover. If necessary to clear any cover directly in front of them, they will briefly raise their altitude before launching the missile and subsequently return to their previous altitude.
Wingman Tactics
In the context of aerial combat, it is crucial to understand that the role of your wingman is to provide support rather than taking over the entire mission. To ensure the effective utilization of your wingman, consider the following guidelines, presented at a level 7 formality:
- Safeguard the well-being of your wingman by strategically positioning them behind cover while you assess the surroundings. If you discover that they are within the range of air defenses, promptly relocate them to a safer position.
- Employ the “Attack My Target” or “Attack My Designator” commands to swiftly direct your wingman’s attention to specific targets. Utilizing “Attack My Designator” again after your wingman fires their missile will enable them to engage in ripple fire.
- Be mindful of your wingman’s field of vision, particularly when using Laser-guided weapons, as they require a clear line of sight to engage targets. Depending on the situation, your wingman might need to gain altitude to target objects concealed behind terrain features such as hills.
- If your wingman reports that no further targets are visible, but the Threat Display indicates otherwise, it indicates that they lack a clear line of sight to those targets. In such cases, repositioning them to higher ground is necessary.
It is important to note that wingmen are limited to a maximum climb of 150 meters above the terrain height in their attempts to achieve a line of sight.
- Employ the “Go SEAD” command to instruct your wingman to neutralize enemy air defenses, thus providing cover for your mission, allowing you to focus on critical targets.
- When operating in “Go Weapons Free,” “Go SEAD,” or “Go CAS” modes, your wingman’s spotting ability receives a boost, and they will mark potential targets on your Threat Display if they have not already been identified.
- To constrain your wingman’s engagement range to their immediate vicinity, make use of the “Go CAS” command.
That's everything we are sharing today for this Helicopter Gunship DEX guide. This guide was originally created and written by Jimmy Arcade. In case we fail to update this guide, you can find the latest update by following this link.

