An all-inclusive guide to applying patches on your uniforms using the new system implemented in V1033
Introduction
As of version 1033 (and its testing grounds) operators will now be able to add and show off patches in the customization menu, in this guide i will walk you through using the system and adding your own patches for those extra tacticool points.
Adding custom patches
Probably the reason you’re here, it’s a bit complicated but here’s how you do it:
1. Select an image you want on your patch, it can either be the entire patch or something you want in the middle
2. Ensure that the image is exactly 512×256 in resolution size and that the file extension is .PNG, if your image is not that exact resolution you can use an image editing tool such as GIMP or Photoshop, you can also apply transparency border if your image becomes too squished or blown up from changing it’s size.
3. Go to your Ground Branch folder, you can do this by right-clicking Ground Branch in your library, going to Manage and clicking Browse Local Files, once you’re there go into GroundBranch/Content/GroundBranch/Patches/ and create a new folder named Custom.
4. After doing all of the above, place your .PNG file in the folder and you’re done.
These patches will be seen by anyone who has the same image in their patches folders and they can be added while in-game with no issue, so if your friend is a degenerate he will definitely see those tits you put on your helmet.
Applying patches
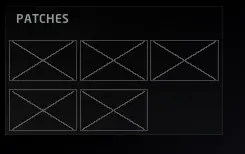
In order to apply patches to your character you need to, of course, be in the customization menu accessible by pressing the interaction key on your locker. Once inside the menu, you can see the patch slots in the bottom left of your screen, right below the Facial Hair option.
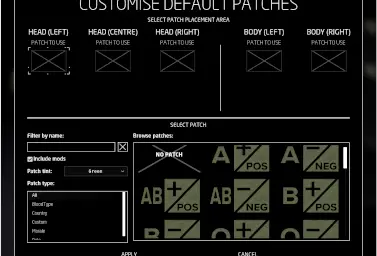
Clicking on it will open the Customize Default Patches (CDP) menu where the magic happens.
Pressing the crossed-out rectangles or the respective emblem in the HEAD (LEFT), HEAD(RIGHT), HEAD (CENTRE), BODY(LEFT) or BODY(RIGHT) slots will show all of your current available patches in the bottom of the CDP menu, pressing a patch will apply it to its respective part of your kit.
Here you can also search for that one perfect patch by filtering it out by its name or by the folder you put your patch in standing in as it’s type.
You can also select the TINT of all patches, what this will do is apply a colored overlay onto your patch in order for it to better fit in on certain camo types.
BE AWARE. Patches will only work if implemented correctly into the game and applied on SELECT clothing items that support them.
You cannot currently apply patches to your chest rigs.
Items that currently support patches
Every item not mentioned here is fully incompatible with patches. You can apply patches to all sides of the item unless otherwise specified.
HEAD
- Ball cap (ONLY SUPPORTS CENTRE)
- Ball cap (reverse) (ONLY SUPPORTS CENTRE)
- Helmet (AF) (ONLY SUPPORTS LEFT AND RIGHT)
- Helmet (AF/Cover) (ONLY SUPPORTS CENTRE)
- Helmet (HC) (ONLY SUPPORTS LEFT AND RIGHT)
- Helmet (HC/Cover) (ONLY SUPPORTS LEFT AND RIGHT)
- Helmet (MICH) (ONLY SUPPORTS LEFT AND RIGHT)
- Helmet (MICH/Cover) (ONLY SUPPORTS LEFT AND RIGHT)
BODY
- ACU Coat
- ACU Coat (Rolled)
- Combat Shirt
- Combat Shirt (Rolled)
- Combat Shirt (Zipped)
- Combat Shirt (Zipped/Rolled)
- Fleece Hoodie
That's everything we are sharing today for this GROUND BRANCH guide. This guide was originally created and written by Desmond. In case we fail to update this guide, you can find the latest update by following this link.


