- Título: Quemador de bits
- Fecha de lanzamiento:
- Revelador:
- Editor:
Information about Bitburner is still incomplete. Por favor ayúdanos a completar los detalles del juego usando esto formulario de contacto.
Requisitos
Lista de verificación
- Play Bitburner ver. 2.2.1 from Steam
- Have some basic knowledge of what the game is about
- Some scripting knowledge
Aparte de eso, there isn’t much to this. Should be able to accomplish this without external programs or help, except for this guide, con un poco de suerte.
Instrucciones
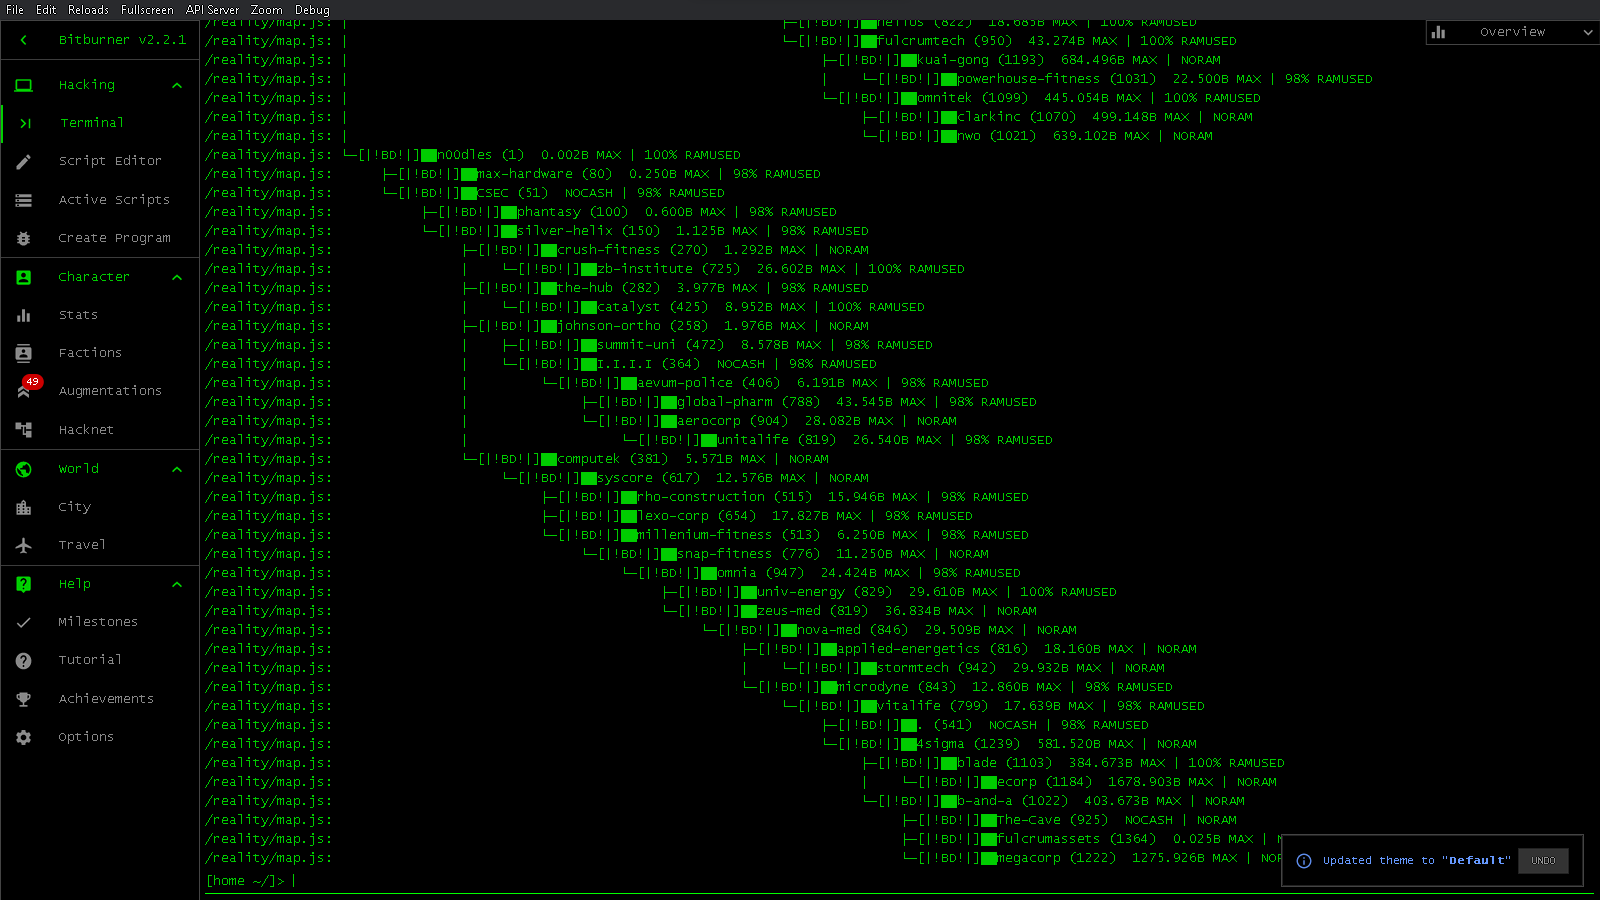
Primero, you want to click «Depurar» at the top and then click «Activar» to start the editor.
Como esto…
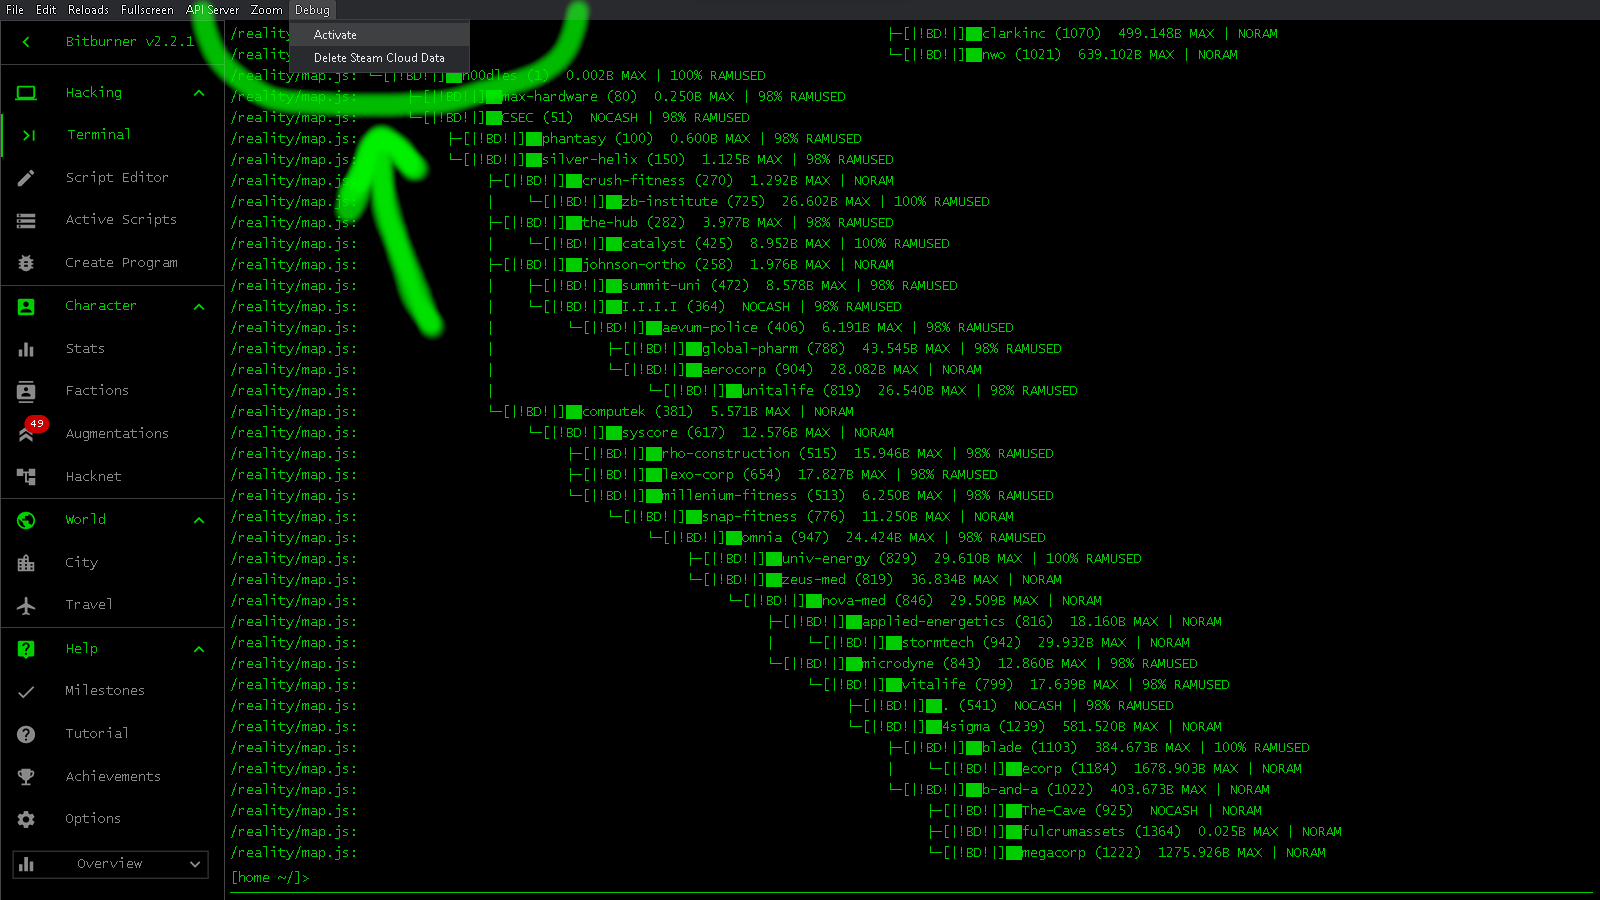
Then you want to make sure you’re looking at the right interface so that it is easier to find what we are trying to change.
Como esto…
Ahora, we want to find the «dist» folder and inside there should be «main.bundle.js». You will have to click on it to open. We are also going to click on the blue «Pretty-print» button to make it easier to search and see what we want.
Como esto…

Since we found the file and opened it, we can now get down to finding and temporarily changing it to our favor. You want to make sure you have the right section selected and press «CTRL+F» to show a search box. Ingresar «Cannot load» into the search box and search. It should come up with one result. You’ll want to click on the line number just before the «cambiar» line to set a breakpoint. The line number should be highlighted and on the right side it should show the break that you have just set.
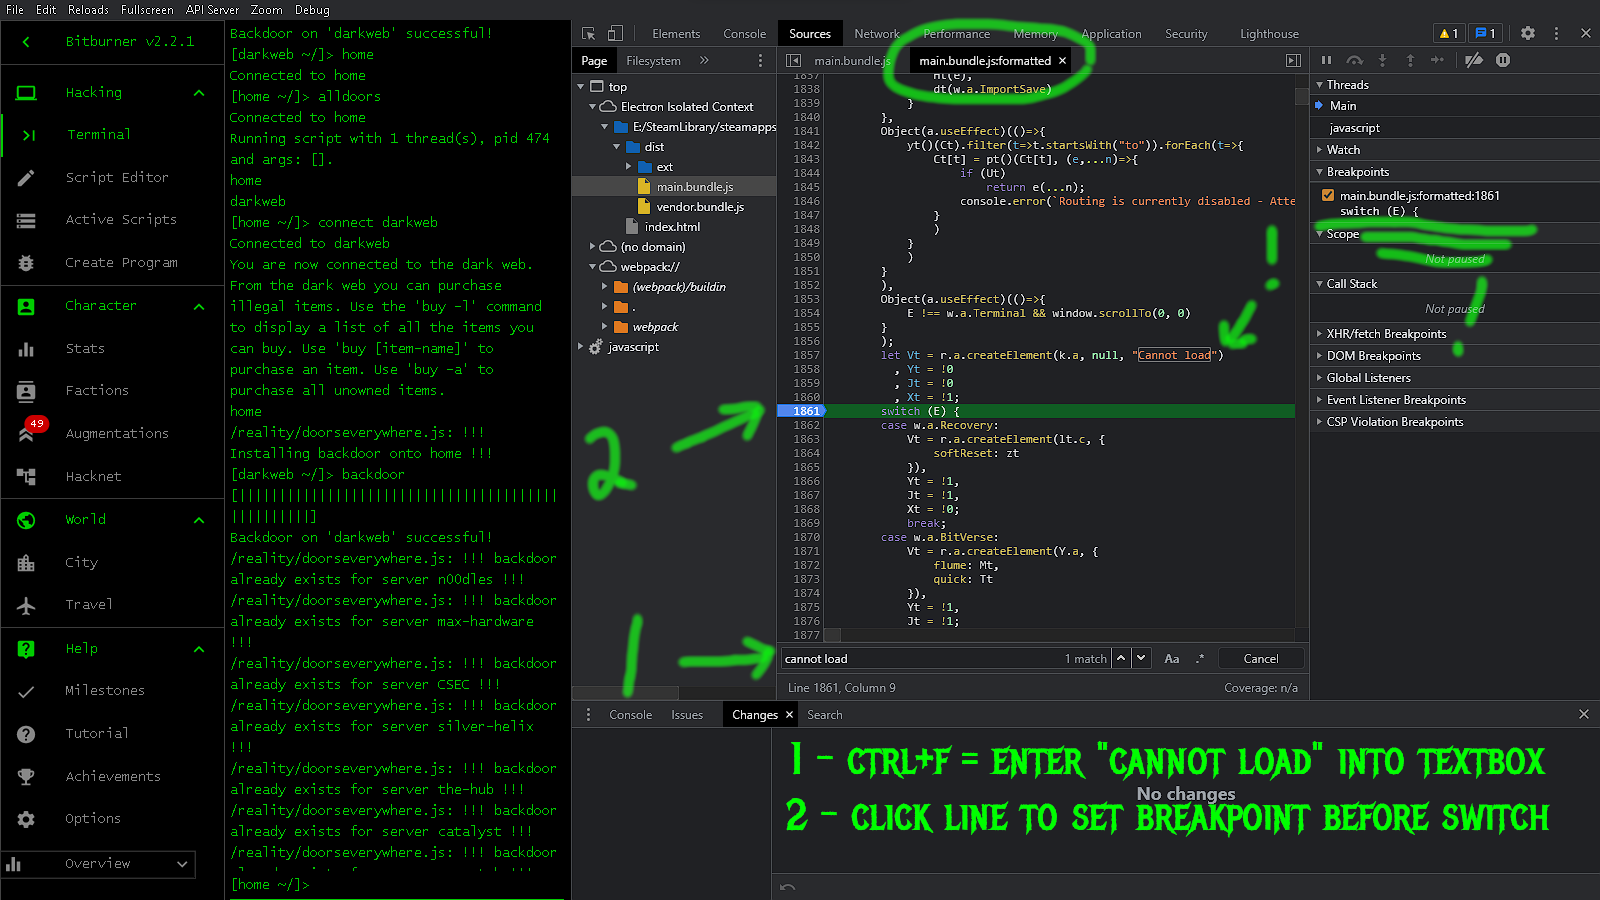
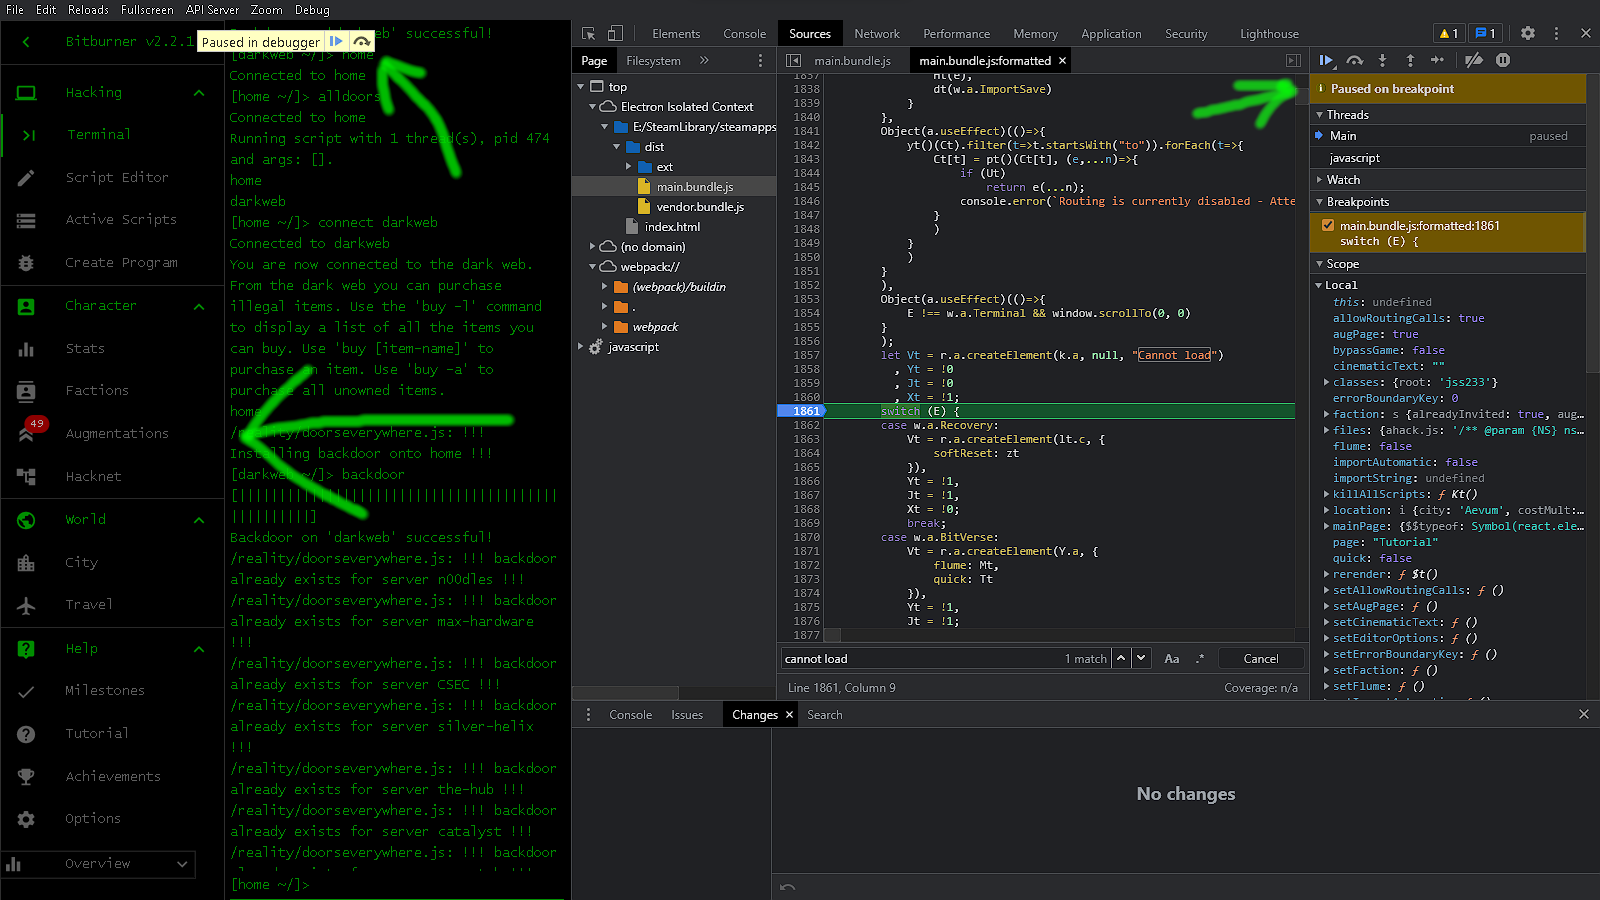
Click on any in-game menu item that normally changes the main window. This should pause the game at the breakpoint that you just set. It also populates and highlights items where it stopped.
Como esto…
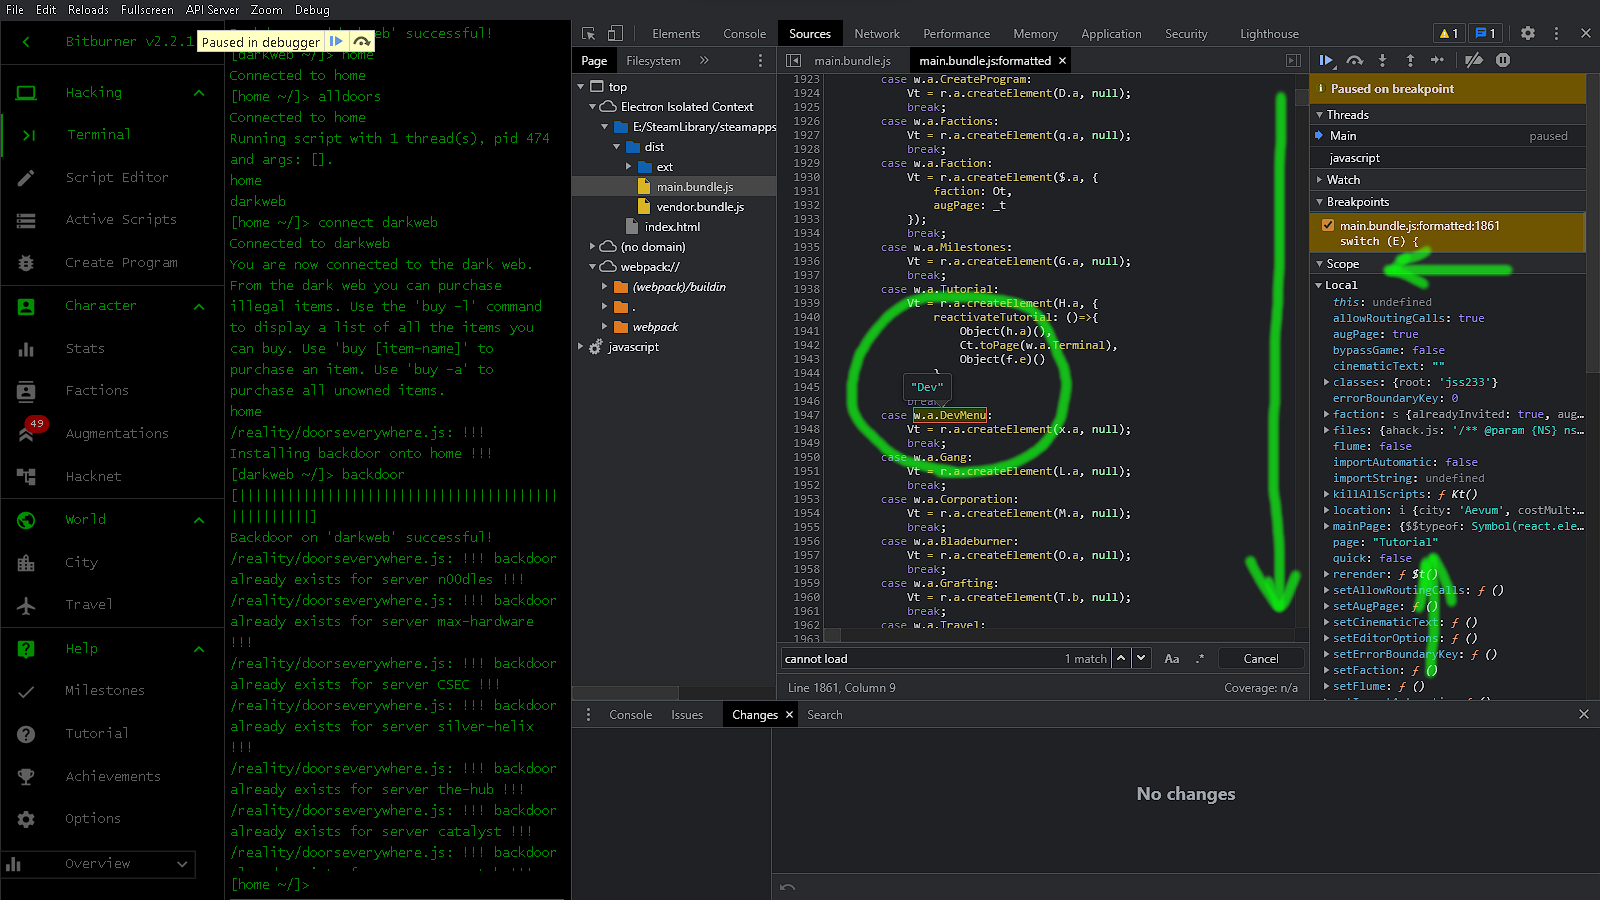
Now we are going to explore a few things real quick so, we know what’s going on. We stopped the game during a transition, right before loading an option from the menu. Scroll down and mouse over the texts after «caso»s. Mine start with «w.a.» and when I mouse over them they show a label. If we take note of these labels, we can jump into any menu item, even if they have no button. The one we want for this guide is «DevMenu» and it shows the label ‘»desarrollador»'.
Como esto…
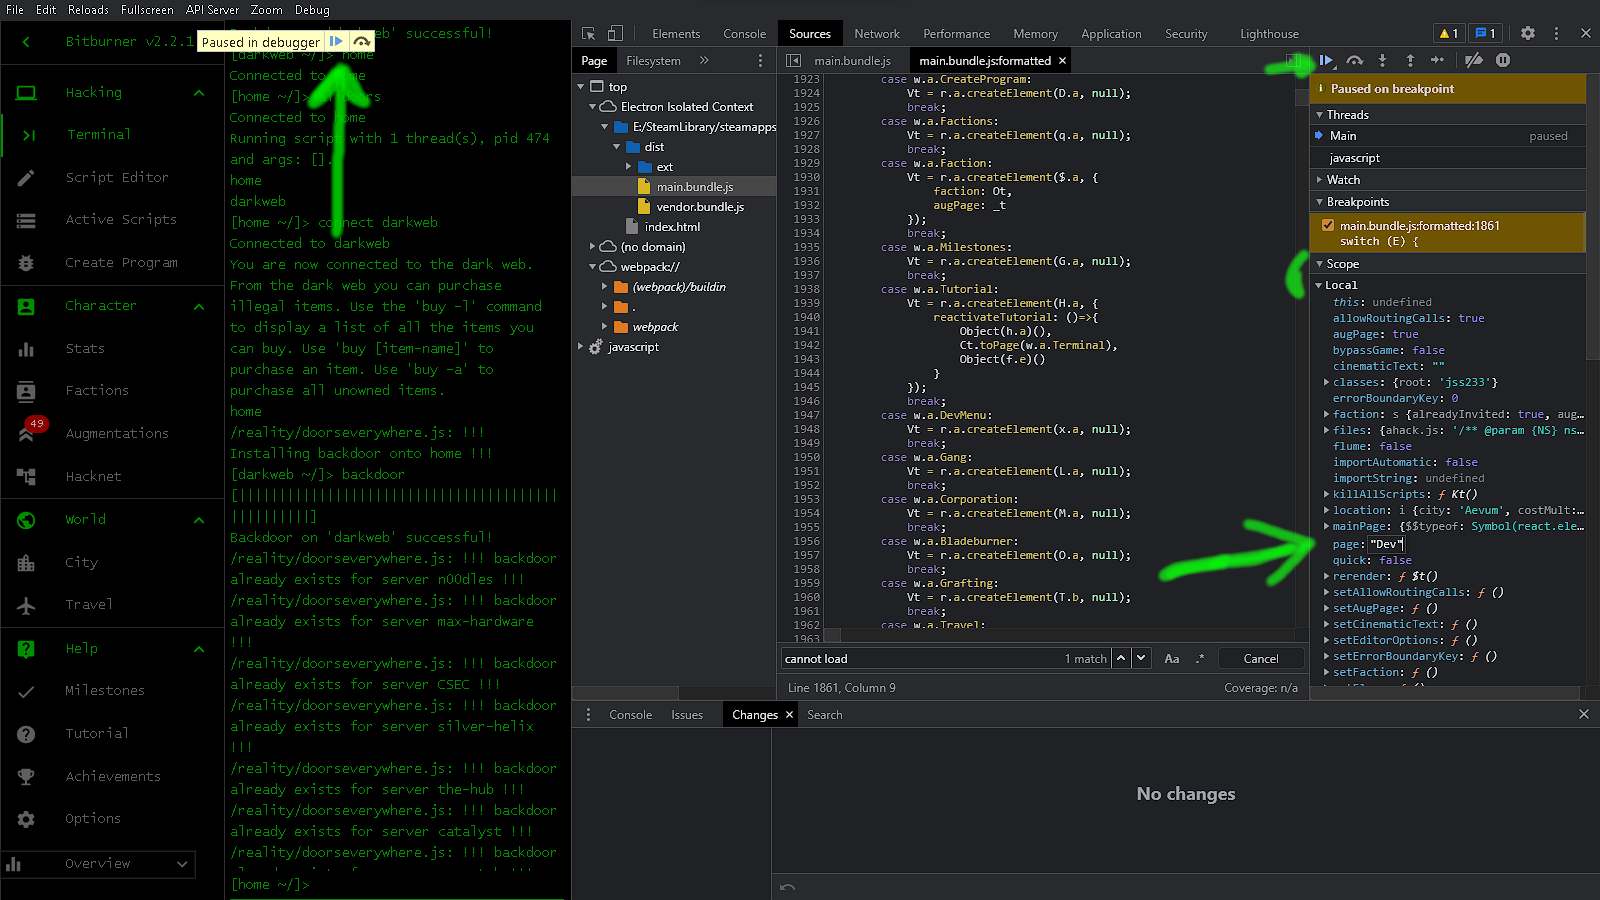
We will take this newly obtained knowledge and put it to work in the «Alcance» viewer. Bajo «Local» Debería haber un «página:» item that shows what menu item we clicked to go to. We are going to change that to route us to the «desarrollador» página.
After we change that value, we’ll un-pause the game by clicking the play button. We can now also close the debugger. Our changes aren’t saved and it shouldn’t pause again unless we go back to «Pretty-print».
You should now be in the «Development Menu».
Good Luck and Have Fun
SWYgeW91IHdhbnQgbW9yZSwgbGV0IG1lIGtub3cuDQpHb29kIEx1Y2shIGFuZCBIYXZlIEZ1biENCkJlIHNhZmUgb3V0IHRoZXJlIQ0KSSBrbm93IGl0IHNlZW1zIGxpa2UgSSdtIHllbGxpbmcgYWxvdCBidXQsIEkgaG9wZSBldmVyeW9uZSBpcyBiZWluZyBnb29kIHRvIHRoZW1zZWx2ZXMgYW5kIG90aGVycy4NCllvdSBjYW4gZmluZCBtZSBvbiBTdGVhbSwgVHdpdGNoLCBhbmQgRGlzY29yZC4gSXQncyBqdXN0IHJhcmUgYmVjYXVzZSBJJ20gcHJldHR5IGJ1c3kgYW5kIHdoZW4gSSBkbyBnZXQgdG8gcGxheSwgSSB1c3VhbGx5IGhhdmUgdG8gbW9kIHRoZSBnYW1lIGZvciB0aW1lLg0KDQpHb29kIGpvYiBvbiBmaWd1cmluZyBvdXQgdGhpcyBtZXNzYWdlLiBTZWUgeW91IG9uIHRoZSBvdGhlciBzaWRlLg0KDQpUYWtlIENhcmUsDQo9UnVuZSgpL1x8PD0
Eso es todo lo que estamos compartiendo hoy para este Quemador de bits guía. Esta guía fue originalmente creada y escrita por RuneOak. En caso de que no actualicemos esta guía, puede encontrar la última actualización siguiendo este enlace.