
Explore how to easily modify Baldur’s Gate 3 on your Steam Deck with the help of the Vortex guide. This guide ensures effortless management and installation of mods, enhancing your gaming adventure. It’s designed for Steam Deck users and can be easily applied to any Linux system.
Discover the straightforward process of modding Baldur’s Gate 3 on your Steam Deck or Linux device using the Vortex Mod Manager through Lutris. This user-friendly and detailed guide is created to make modding accessible even for those who are new to the process.
If you’re a big noob, don’t worry! This guide simplifies the steps, allowing you to effortlessly mod Baldur’s Gate 3 on your Steam Deck or Linux system.
Step 1: Install Lutris and Vortex
- Begin by launching the Discover Store on your Steam Deck.
- Install Lutris to pave the way for seamless modding.
- Enhance your modding experience by installing ProtonTricks.
- Head over to NexusMods and download the most recent version of Vortex Mod Organizer to take your modding capabilities to the next level.
Step 2: Configure Lutris for Vortex
- Open Lutris to begin the setup.
- Navigate to the main Index and click on the plus sign. Opt for adding a locally installed game and name it “vortex” to designate it as the Mod Organizer.
- Choose Wine as the runner type in order to enable the execution of Windows applications on your Linux system.
- In the Game Options tab, locate the section for the executable and select the Vortex installer executable file.
- Obtain the Wine prefix from Baldur’s Gate 3 with the help of ProtonTricks. This Wine prefix represents the Windows environment of the game. It’s crucial to install Vortex into this prefix to access the appdata folder.
- Within ProtonTricks, choose Baldur’s Gate, and take note of the game ID (e.g., 1086940).
- Navigate to the path (Steam/steamapps/compatdata/1086940/pfx/), where “1086940” is the game ID of Baldur’s Gate 3. Copy the entire file path leading to the prefix. Note: (I haven’t pasted the complete file path here to keep the guide concise; you need to copy the full file path, and it should end with /pfx/.)
Step 3: Configure Lutris with Baldur’s Gate 3 Wine Prefix
- Return to Lutris and paste the Baldur’s Gate 3 Wine prefix into the Wine Prefix option, which can be found in the Game Options.
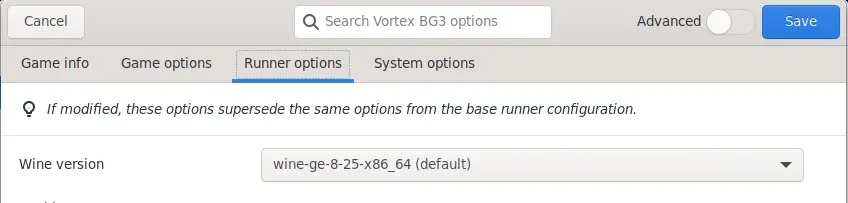
- In the Runner Options tab, choose wine-ge-8-25-x86_64 as the Wine version.
- Click on the save button in the upper right corner to save the changes you’ve made. Now, you’re ready to proceed with running the Vortex installer.
- If you don’t have the required wine version (wine-ge-8-25-x86_64), you can download it using protonup-qt. Access it through the lutrisflatpak option when you open protonup.
Note: The windows appdata folder is where Baldur’s Gate 3 mods are stored and is located within the Wine prefix of Baldur’s Gate 3. This unique setup is why Vortex needs to be installed in the Wine prefix of Baldur’s Gate 3. Unlike other games, Baldur’s Gate 3 has its mods folder inside its Steam game directory.

Step 4: Install Vortex
- Run Vortex on Lutris to kick off the installation.
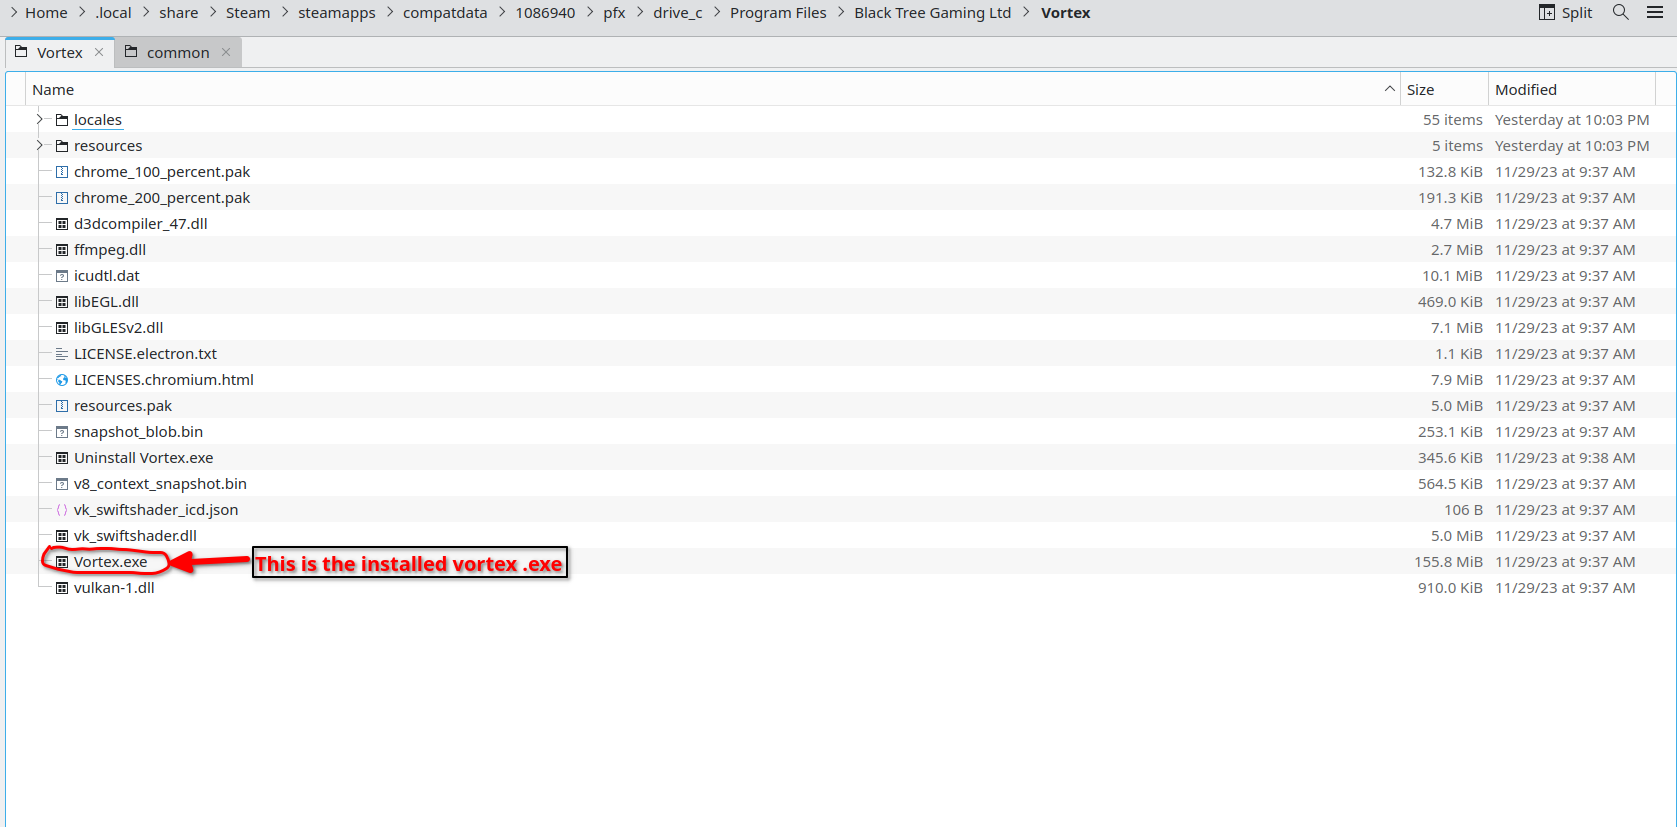
- Follow the prompts during the Vortex installation, ensuring it is installed in the default path (drive_c/Program Files/Black Tree Gaming Ltd/Vortex/).
- Unselect the “Run Vortex after installation” option and exit the installer.
- In Lutris, select the Vortex app, right-click, and choose configure. Adjust the executable to the newly installed Vortex. The Vortex executable can be found at (drive_c/Program Files/Black Tree Gaming Ltd/Vortex/). Don’t forget to save your changes after updating the executable.
P.S: The installed Vortex executable is named vortex.exe.
Step 5: Prepare Steam Game Folder
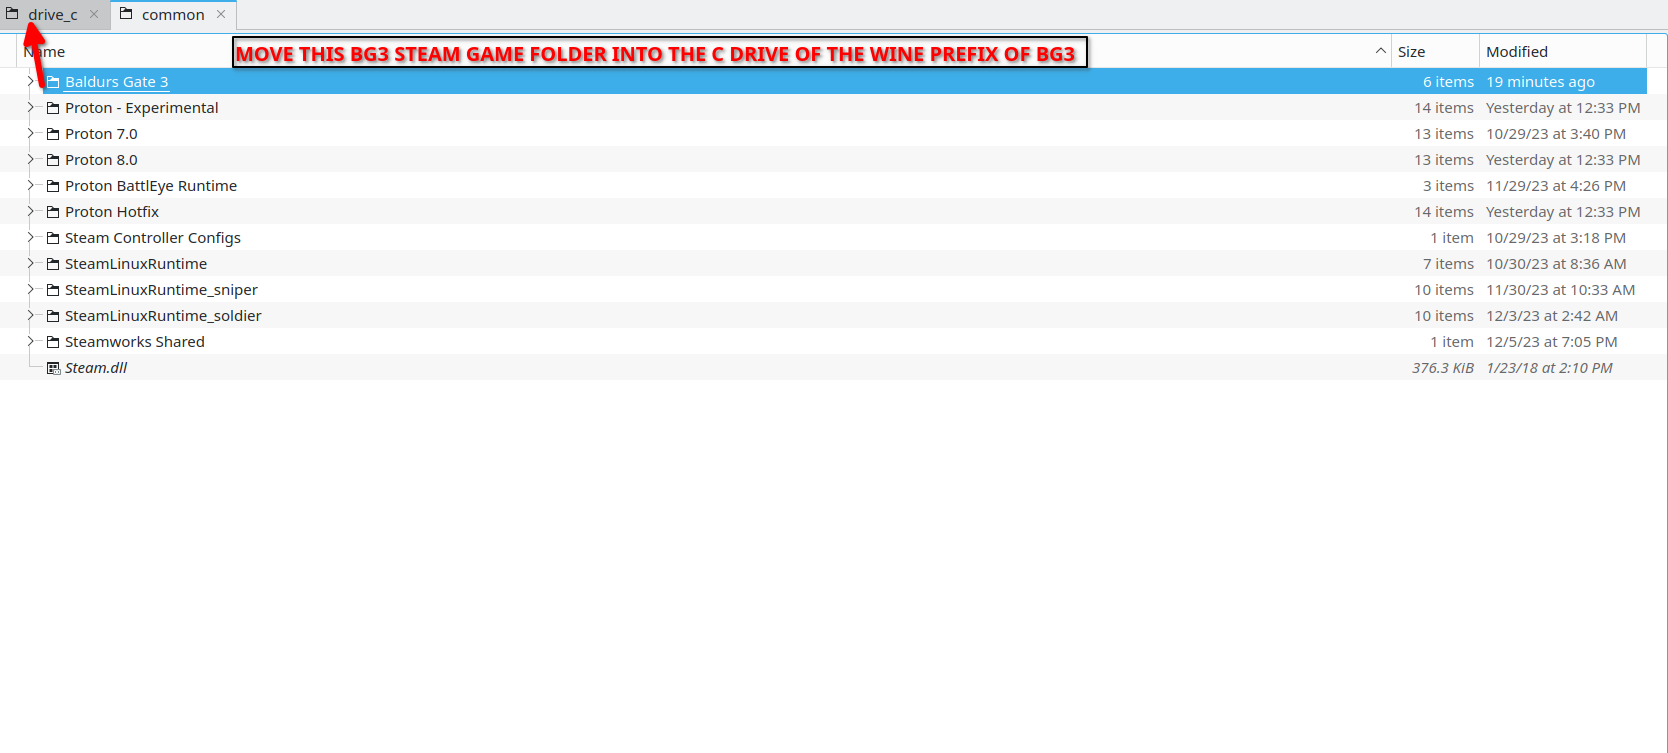
Ensure a smooth modding experience by moving the Steam game folder into the C drive of the Baldur’s Gate 3 Wine prefix. Follow this essential step every time you open the installed Vortex to ensure proper verification by the launcher. Here’s how to do it:
- Browse the installed game files and locate the entire Baldur’s Gate 3 folder within the Steam game folder. This Steam game folder is typically found at (Steam/steamapps/common/).
- Move the Baldur’s Gate 3 folder into the C drive of the Baldur’s Gate 3 Wine prefix. The destination path should be (1086940/pfx/drive_c/).
By completing this step, you’re ensuring that the Steam game folder is present in the required location for Vortex to verify the game installation with the launcher. Without this crucial step, Vortex won’t be able to mod your Baldur’s Gate 3 effectively.
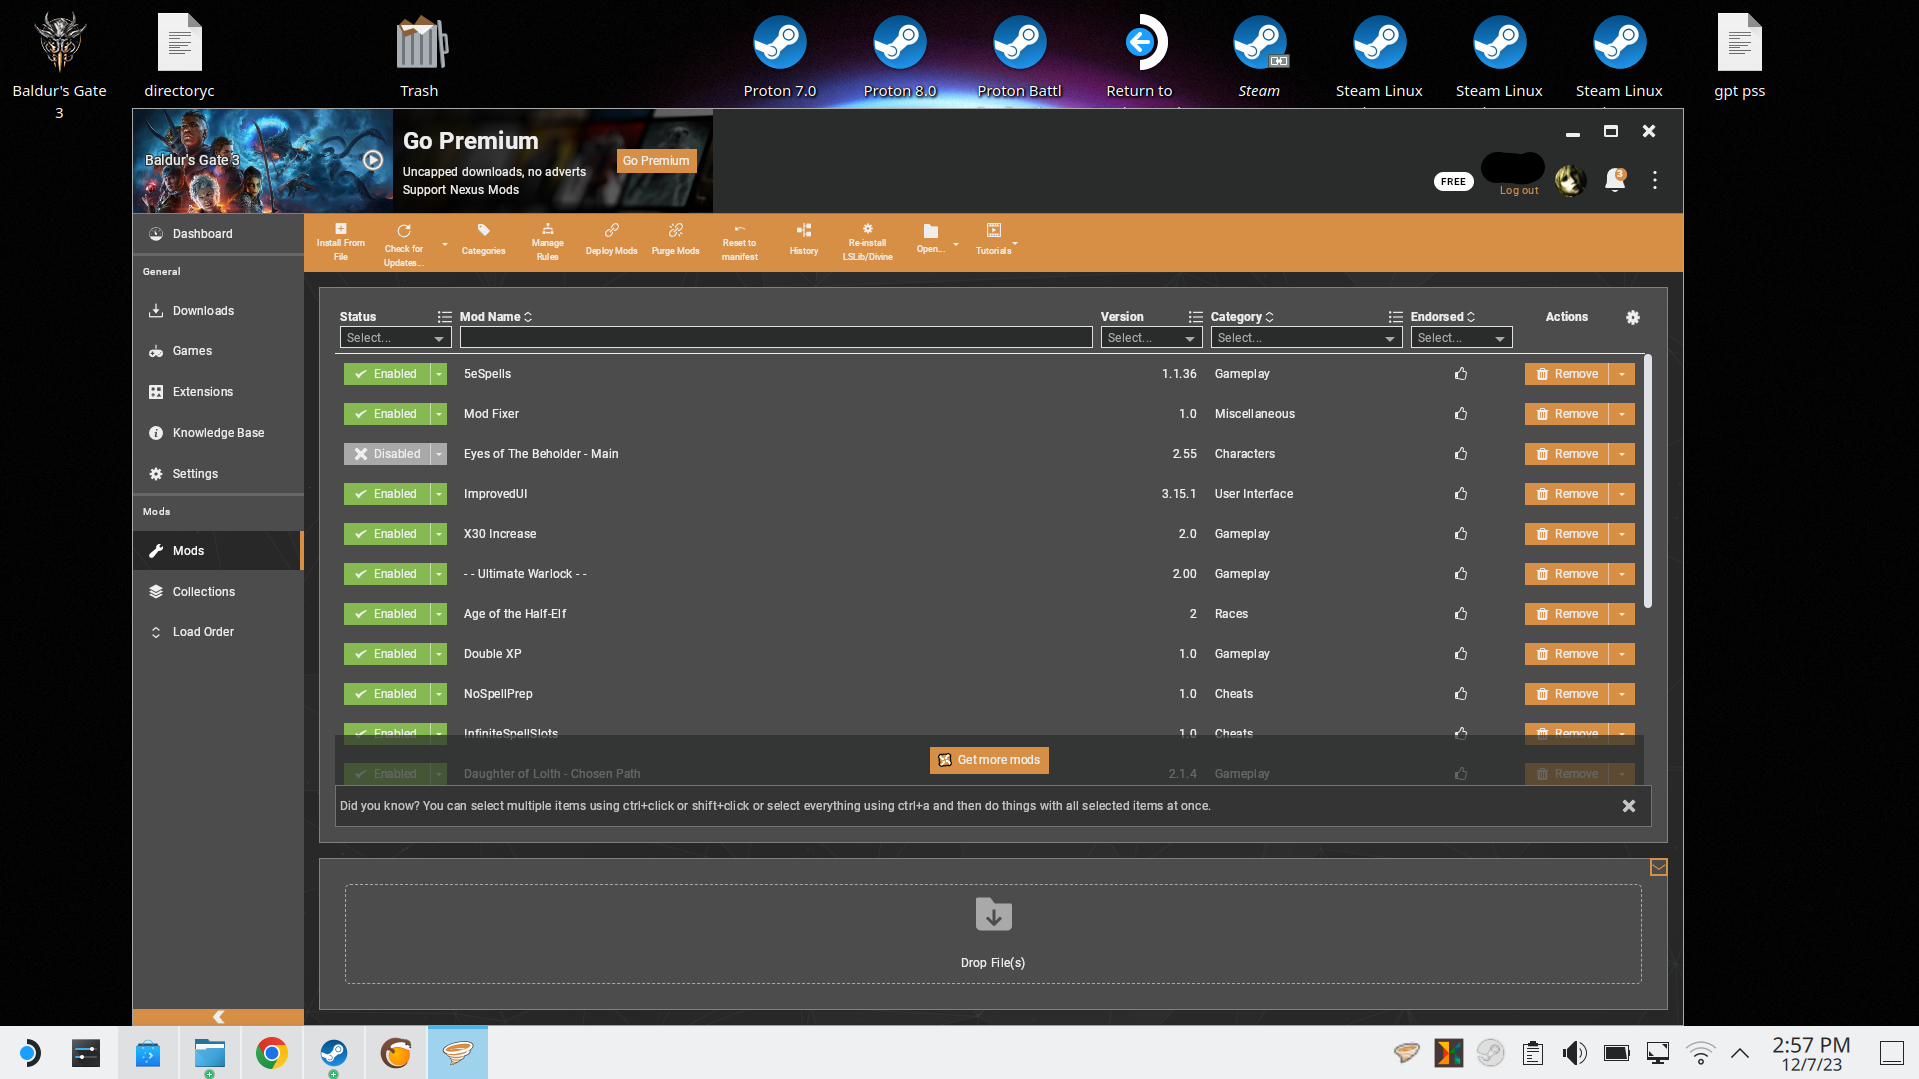
Step 6: Mod Baldur’s Gate 3
- Open Vortex through Lutris and check the bell icon for any .NET version notifications. If prompted, install the required version.
- Navigate to the Games tab and search for Baldur’s Gate 3. Specify the directory as the Steam game folder located inside the C drive of the Wine prefix.
- Install mods directly from Nexus using Chrome. Drag and drop the .zip files onto the Mods tab in Vortex.
- IMPORTANT: Avoid installing mods through Vortex’s built-in web browser to prevent potential crashes. Use Nexus on Chrome for all your mod installations.
- Keep an eye on the bell icon in Vortex. If it notifies you that the necessary extension for Baldur’s Gate 3 modding (lslib/Divine Tool) is not installed, click on Install, and Vortex will take care of it for you.
- After completing the modding process, close Vortex, and move back the Steam game folder to steamapps. This step is crucial to run the game. Remember, every time you run Vortex, you need to move back that folder to the C drive. This ensures that Vortex recognizes the game installation with its launcher. Failure to do this will result in the mods tab not showing, and you won’t be able to mod the game until you place the folder back on the C Drive.
NOTE AND WARNING:
It’s crucial to be aware that a significant portion of BG 3 mods, approximately 90%, requires ModFixer and ScriptExtender. Failure to install these two components before adding mods may result in breaking your game. Before proceeding, ensure these are installed.
Furthermore, not all mods are compatible with Proton or Linux due to limitations or missing Windows DLLs. Exercise caution when adding mods to your game. It’s advisable to install mods one by one or in small batches, such as two or three at most.
After installing mods, always load your game to ensure nothing is broken. Test by going to camp and initiating battles to verify that everything is functioning as intended and the mods have not caused any issues. This cautious approach helps prevent potential problems and ensures a stable gaming experience.
That's everything we are sharing today for this Baldur's Gate 3 guide. This guide was originally created and written by THE MOONMAN. In case we fail to update this guide, you can find the latest update by following this link.