- Title: The Dungeon Of Naheulbeuk: The Amulet Of Chaos
- Release Date:
- Developer:
- Publisher:
Information about The Dungeon Of Naheulbeuk: The Amulet Of Chaos is still incomplete. Please help us fill the details of the game using this contact form.
This is a step-by-step walkthrough and strategy guide to every phase of the Dungeon of Naheulbeuk, written after playing through the game in its entirety many times at each difficulty setting. It contains a screenshot of a recommended approach to each battle, in order, along with critical game tips and skill recommendations.
Introduction
This walkthrough is intended to show you all the fights, in order, and give you a recommended strategy for the ones that are not easy. I am also providing critical recommendations that will make the game much easier. I’ve played through the game many times on every difficulty setting. I am not including maps showing locations of special features because other guides have done that already. What is lacking is a step-by-step that shows the sequence through the chapters, to guarantee you don’t miss anything.
When you begin, go into Settings right away and uncheck “Retain the random seed.” This allows you to replay fights and load saved games but get a different result the next time, after you reload. You can use this to work through combat in steps, if you’d like. You can also increase the number of rounds your characters lie unconscious before they die (“K.O.s duration in turns” — increasing this number makes the game easier). Getting through the tougher difficulty settings can be frustrating, otherwise, because RNG is ridiculously unfavorable sometimes.
Most screenshots are from EPIC GEST setting, which means most fights are straightforward but a few are rather difficult. The BALLAD mode is not very difficult, even in the worst fights, assuming you make good decisions along the way. Play that mode if you’re just trying to have fun. The TALE is absurdly easy unless you’re not picking the right skills. You can avoid NIGHTMARE difficulty unless watching your characters roll critical fails and miss attacks all the time is fun for you.
Note that this walkthrough assumes you choose the Priestess as your final party member; you’re crazy not to, for reasons mentioned later.
Glossary of Terms
I use a lot of RPG terms and abbreviations. Here is a quick glossary if you’re coming to this without a ton of RPG experience.
Mob: An enemy.
Add: A reinforcement enemy who appears later in combat.
Melee: A character or opponent who attacks up close (e.g., with a sword).
Ranged: A character or opponent who attacks from far away (e.g., with a bow or a spell).
Tank:A character whose job is primarily to survive and draw damage away from other less-armored (squishier) characters (like ranged characters). In the Dungeon of Naheulbeuk, the Dwarf is your main tank, and the Ogre is your backup tank.
Buff: A skill which gives enemies or players some kind of passive benefit. Most buffs have a duration and then expire.
Debuff: A skill which gives players or enemies some kind of penalty. Debuffs have a duration, normally, then expire.
RNG: Random number generation. It refers to the luck-factor in the game. RNG plays a big part in this game. A few good/bad rolls can determine a battle (too much, in my opinion, but that’s how the devs designed it). You can choose to mitigate RNG by saving the game, then loading your save and trying again. The game itself offers you the chance to replay a fight if you lose (which is essentially the same idea).
AOE: An attack that damages multiple opponents at once (rather than a single opponent).
Crowd-control (CC): These are abilities that stun, knock over, and freeze you or your opponents, leaving them (or you) unable to attack for at least a full round. They are arguably the most important skills for your party. Secondarily, there are abilities that immobilize and scare opponents that have some (lesser) utility for CC.
General Tips
You will be picking up gear throughout the game, either from loot chests or as a drop from combat. Pop open your inventory and equip any upgrades on a regular basis. Gear comes in four levels (grades) in the main game (prior to the DLC expansions) which you can determine based on the background color for the icon. Dark gray is the most common kind of item. Red is better, then light gray, then finally yellow, which is epic.
There are vendors in key locations, noted in the guide, who will sell you item upgrades, and in some cases, epic items. This is the primary purpose for your gold later in the game. The Shop (in the basement) offers different item selections in later chapters.
When evaluating upgrades, generally speaking, choose a higher-grade item over a lower. For comparable item grades, I recommend choosing offensive stats to defensive for all characters except possibly the Dwarf. Items that confer a bonus to movement are highly preferable (there is at least one case in the game where a common item with a movement bonus is better than a light gray item without). Items that convey precision are also valuable. Precision means you miss less often.
Use CC to prevent enemies from attacking.Some skills give you the ability to knock down, stun, and freeze enemies. This should be your primary strategy in almost every fight: crowd control. Learn to watch the queue of attacks at the top of your screen during combat, and CC enemies before they have a chance to attack.
Finish enemies off.Use AOE attacks to reduce health pools in a group with the plan to finish them off individually. Single-target and burn down enemies until they are gone, whenever possible. Better to finish an enemy off than wound a new one. Enemies with even a little health can attack and hurt you.
Your enemies have this same strategy — they know which of your characters they are most likely to take out with an attack, and they will make every effort to take out that character. Once one of your characters is wounded, it’s a primary target of any mobs that can reach it.
Push enemies back from other characters. The Ogre has an attack (Kadoula Opog) that pushes an opponent away from him; the Wizardess has a similar ability called Namzar’s Slap. The Dwarf eventually gets one called Get Tae F@$. These can all be used to trigger an attack of opportunity. Opponents who exit the three spaces directly in front of one of your characters are subject to an attack of opportunity. This is a free attack that happens out of sequence and doesn’t cost an action point. So if (for example) an enemy is in front of the Ogre and the Ogre pushes it backward, the characters to each side will get a free (standard) opportunity attack, assuming they are facing the mob. This strategy (using the support of other characters who do melee damage when pushing back an opponent) is something you should try to use as much as possible. It’s the only way, early in the game, to one-shot melee mobs. (Abilities that scare enemies can similarly be used to trigger an attack of opportunity. A scared mob will run away uncontrollably. Normally, enemies in front of your characters will deliberately not subject themselves to an attack of opportunity unless they have a lot of health.) Other than when you face opponents who use AOE attacks, you want to stay close together to gain the benefits of support, opportunity attacks, and healing.
Face your characters toward mobs (especially in melee range)(leave them facing that way at the end of the turn). You are more likely to dodge or parry an attack if you’re facing toward them. If you can sneak behind an opponent to attack without engaging sprint or being subject to an attack of opportunity, try to do so.
Keep ranged characters away from the front lines. If you’re doing it correctly, the Elf, Wizardess, and Priestess should rarely or never take melee damage.
Delaying your turnallows you to put a character at the end of the initiative queue (i.e., to suspend their attack until after your enemies attack). This is something you will use in a majority of the fights, except for the Ranger (who needs to buff the group at the start). Many of your opponents start from a long way off; if you can’t reach them, delay your turn and allow them to move closer. Delaying your healers means they can assess damage at the end of the round.
Overwatchis primarily useful when you aren’t in range of your opponents but don’t want to waste a turn. The same can be said of Defensive Stance, which has very limited value. Overwatch can sometimes turn out to be powerful but shouldn’t be used as a primary strategy. Enemies can detect overwatch and will try to avoid coming into range.
Consumables are not very helpful in combat (other than the Thief carrying a bomb), though keeping a health potion on your belt is a smart move. This is because rounds in combat are precious; you will nearly always want to use a round to attack, and most consumables don’t help with that. The devs tried to make consumables more interesting in the Futon DLC, but even then, they’re items of last resort, except for healing potions. NOTE TO DEVS: More consumables that don’t expend an action point.
As you level up, each of your characters will earn attribute points that can be assigned in any way you choose. Choose wisely.
Except for the Priestess, you should assign all initial attribute points to agility in the first two levels, then slowly start to distribute them to a secondary category (continuing to allocate some portion for agility as you level up, until the character’s precision is near or over 100 by level 10). Agility gives you precision as well as defensive stats (like dodge).
Aside from stacking agility early on for all characters except the Priestess (who gains precision from intelligence — stack that, instead, for her), focus on building critical stats for their role. The Dwarf is your main tank; you should make sure he allocates about half of his total points toward constitution. (Later in the game, you can allocate some of his points to strength.) The Barbarian and Ogre are the opposite; allocate primarily to strength, but put some toward constitution later. The Wizardess needs intellect; the Elf, Ranger, and Thief need strength, and the Priestess needs charisma.
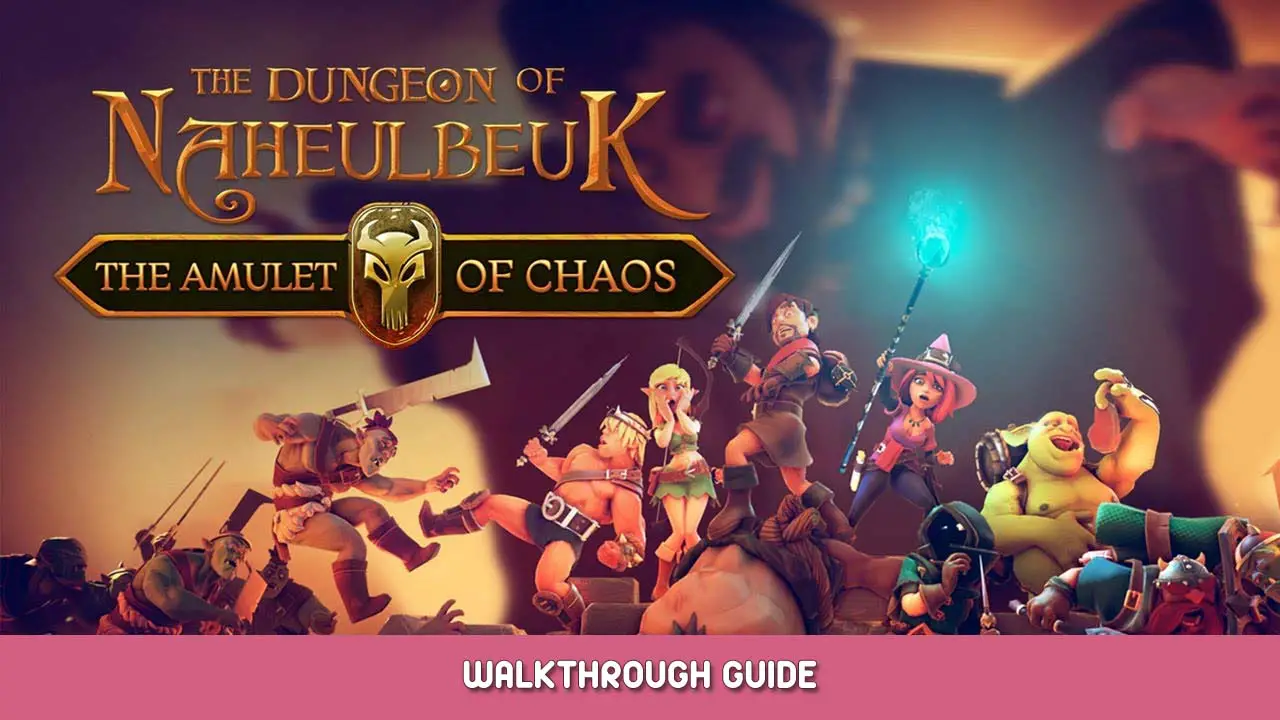
Skills: Ranger, Dwarf, Elf
The most important thing you can do to ensure success in the game is allocate skills optimally. Choose active skills that immobilize opponents as a top priority. Ignore active skills that give buffs, and instead choose skills that do damage or heal (the exception to this are a couple of the Ranger’s skills). Choose passive skills that give a constant bonus and that fit the attack style of the character. Ignore passive skills that are a benefit only in rare situations (like where a character is next to another character). Ignore passive skills that give you both a benefit and a handicap.
Here are specific recommendations. (I list the skills in order of priority because the fact that I chose a skill in a character’s chart doesn’t necessarily imply you should take it when it first becomes available.)
Active skills:
Tactic: Defensive Maneuver > Tactic: Protection:This is your opening buff for almost every fight in the game (with the exception of a couple that hinge on increased initial mobility). You’re not going to need or use Tactic: Charge but you can’t re-spec to reclaim that point.
First Aid: Take the level 2 version that cures knocked over and stunned effects.
Shield Bash: Take this all the way down, though bring along Loubet’s Anticipation to level 3 before you choose the level 5 version of this skill. This is an important skill to neutralize melee mobs. Normally you will have the Ranger hanging back but sometimes need him to stun a mob who gets close to your ranged characters.
Loubet’s Anticipation: Take this all the way to level 4. There are numerous fights where the movement and protection buffs are very handy. The Ranger is a utility player who manages to do decent damage later in the game, but early on he’s weak. He’s mostly a ranged class and backup healer, and provides important buffs.
Passive skills of note:
Ranger of Good:This is very useful. The Ranger can do a quick crowd-control at the beginning of a fight.
Archery Training:Despite advice given elsewhere, the Ranger works better when you prioritize him as a ranged player. He will still do decent melee damage later in the game, but earlier on he’s more valuable for his bow. If he dies, his buff will expire, so best to let him hang back.
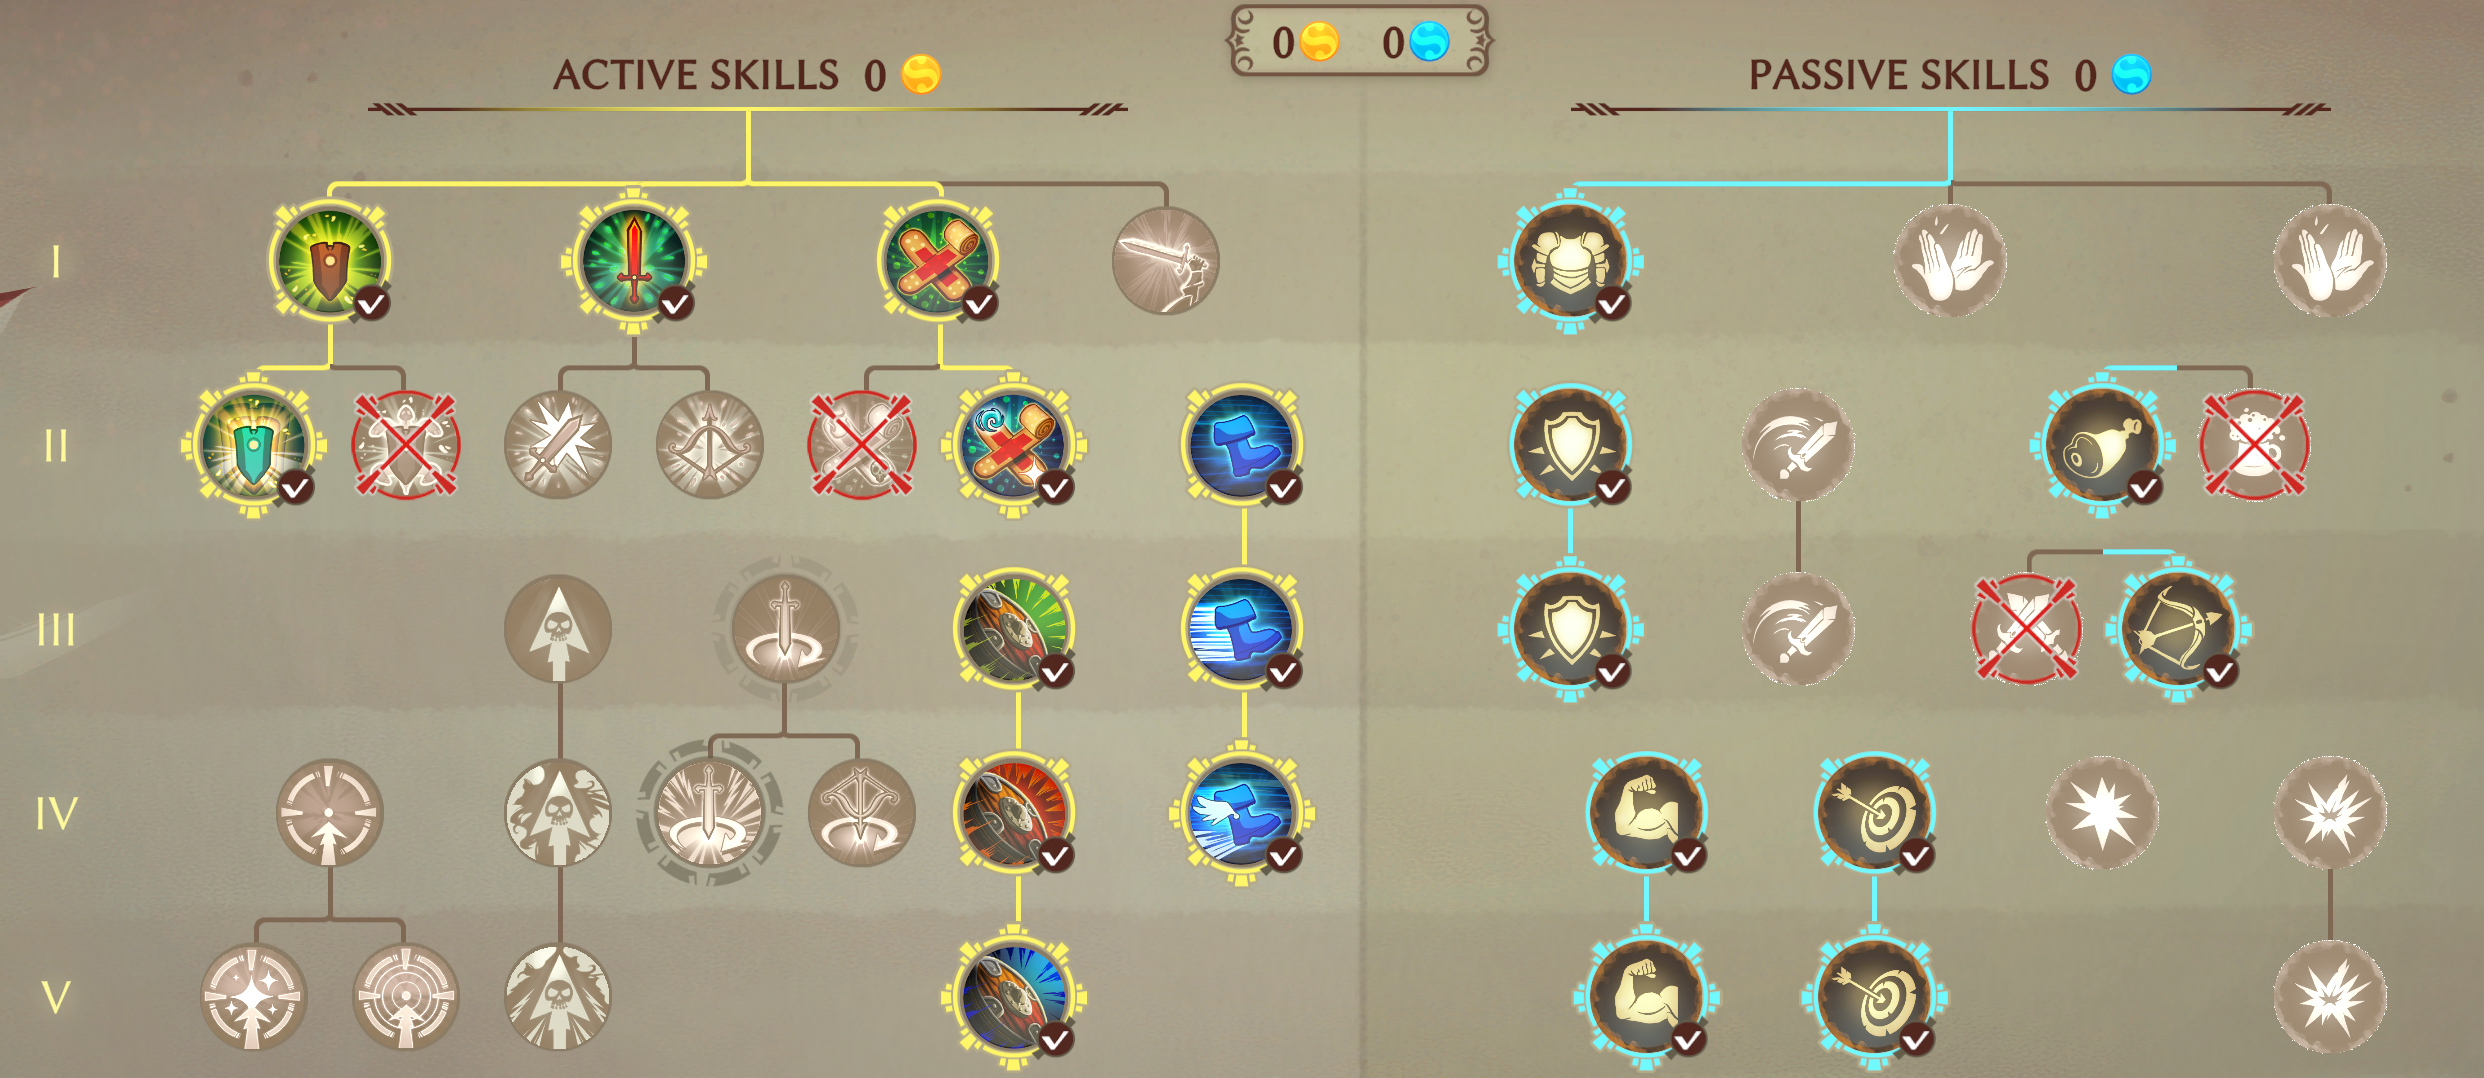
The Dwarf is your primary tank—i.e., he is great for distracting and absorbing enemy attacks while other characters focus on doing damage.
Active skills:
Yakak Charge:Essential skill. When you get the level 5 version, choose the one that hits more enemies. The one problem the Dwarf has is that he doesn’t do much AOE damage. This alleviates that, later in the game.
Gurdil’s Whirling Wallop: Pick the version at level 2 that has a chance to stun. This skill becomes more useful after the Ogre has the ability to throw the Dwarf into a group of mobs.
Thunderthigh Charge: This has some utility because it’s kind of a mini-ranged attack. You will find chances to back up and charge opponents once you get used to this skill.
Get Tae F@$:Useful when you have the level 4 version that stuns.
Dwarf Insult:This isn’t a critical skill but you have to choose something later on. When you’re forced to, pick this if you already have the other options above. It’s primarily useful when a mob is about to attack a ranged character; you distract them with this ability. Rarely used.
Passive skills of disrepute:
Despite advice given elsewhere, don’t put points into the skills that optimize trade. You will have more gold than you need in this game without that.

Prioritize keeping the Elf out of harm’s way. If she’s attacking with her sword, you’re doing something wrong.
Elven Ricochet: Choose the version at level 2 that won’t hit allies. (This ability isn’t very useful until you have that.)
Long Shot:Pick the version at level 2 that does more damage. Simply immobilizing opponents isn’t as useful (until, perhaps, the Lorax battle, late in the game).
One Shot, One Kill: Pick the version at level 5 that stuns the opponent.
Cheering Kiss:Great back-up healing ability. Pick through level 3, though don’t prioritize this over skills that do damage.
Stabilization: Choose only at the end of the game when you don’t have other options. Not very useful as it wastes a round when you could be launching an attack.
Passive skills of note:
Swift footed: Do not miss choosing this ability, and I’d choose it early in the game.
Elf Eyes: Choose this as soon as it’s available. Being able to escape melee adds without penalty who manage to force their way next to her is huge.
Skills: Thief, Barbarian, Ogre
The Thief starts as a weak character, but late in the game is an effective assassin.
Active skills:
Stealth: Cool thing of note is that it allows him to evade overwatch attacks.
Sneaky Strike: Take the version at level 2 that immobilizes an opponent.
Caltrops:Limited usefulness but you have to choose something. Take the version at level 2 that doesn’t break stealth.
Moodkeela’s Blinding Powder:Kind of like Caltrops. Limited usefulness but you need to take something.
Nervous Burst:The most important skill he has, allowing you to crit and one-shot almost any mob in the game. I pick the version at level 5 that gives four chained attacks.
Crippling Shot: Some limited value. Pick this at the end if you don’t have better options.
Passive skills of note:
Take This, Self-Care:Emphasize crit all the way (with skills and gear). Abilities that give him crit when he is at full health mean it’s important to avoid all damage at the start of the fight. Later in the game, you will send him out in stealth and use Nervous Burst to one-shot the most worrisome mob you’re facing.
Your primary melee damage dealer. Keep him in range of healers, though; he’s a little squishy.
Active skills:
Steel Barrage: I take the version that hits everyone in front of him (for more damage) rather than the one that misses allies. It’s generally not hard to set up this attack to avoid allies, and you need him to do max damage.
Yaaargh: Critical skill for one-shotting (or seriously hurting) mobs.
Rib Crusher: Some utility in this, but if you opt for Brutal Shot instead, you’re fine either way.
Ferocious Pounce: An amazing ability, it extends your effective range of movement immensely as well as being a terrific AOE attack. Pick the version at level 5 that gives a chance of stunning.
Crom’s Brawn: The version at level 4 has limited value (since mobs will move away before the attack completes, if they can), but picking this allows you to choose the version at level 5 that happens at the beginning of the next round. This becomes an essential tool to one-shot mobs later in the game. Just check the initiative queue to make sure the mob you’re targeting won’t have a chance to move before the attack goes off.
Passive skills of note:
Sword Training: You will find yourself occasionally using a bow, but not often.
Crom’s Strength / Agility: I usually go for the passive stats, but it might work out well to try Take This and gain crit. I will update if this looks viable during my next run-through.
Backup tank and strong melee damage dealer.
Active skills:
Kadoula Opag: Take the version at level 2 that knocks over the enemy.
Burps: You only need the level 1 version of this skill.
Gnolo: Pick the version at level 3 that does more damage.
Dwarf Throw: Pick this the earliest it’s offered. Then pick the version at level 4 that does more damage. Tremendous skill that does solid AOE damage and is the key to certain fights where you need the Dwarf at a distance, occupying enemies. Once you get it, you will always line the Dwarf up next to the Ogre (the skill isn’t available on your attack bar, otherwise).
Savage Tremors: Situationally very useful as a mini-AOE attack. Take the version at level 5 that knocks opponents over. Once you have this, keep an eye out for times when opponents stand in a line. It happens a lot.
Zogla Doulo: Only choose this if and when you need a reason to reach further down the chart. Rarely useful.
Passive skills of note:
Ogre Breach: You need this through level 2; there are many gear upgrades behind doors you must break down. Take this as a priority.
Diet plan: Choose movement as a priority.
Advanced Murderhoboing:Don’t take this until late in the game (e.g., level 8). The Ogre’s fists do more damage than any weapon he finds until you visit the temple.
Skills: Wizardess, Priestess
Your biggest damage dealer on the whole, once she builds her intelligence stat. Keep her out of range of melee mobs.
Active skills:
Wasaa’s Whirlwind: Solid AOE skill. Take the version at level 2 that stuns.
Namzar’s Slap: It’s important to be able to push melee mobs so that your front line can get attacks of opportunity (which is a way to quickly eliminate melee enemies). The version at level 2 that knocks over is useful, but don’t pick it until later in the game when you are forced to make a choice at this level in the chart.
Cure Minor Wounds:Useful healing spell, but you can safely take it only through level 2 and use your points for other things. (If the Wizardess is doing a lot of healing, you’re not using her to full potential.)
Ice Bolt: Absolutely essential skill. It takes an enemy out for two rounds with high dependability (unless they have strong magic resistance). The version at level 4 does impressive damage (pick the version that is single-target). The Fireball does better damage but it’s more important to freeze enemies than simply hurt them; you can’t reliably take them out in one attack round, later in the game. By freezing them, you can eliminate damage to your characters and still get rid of the enemy in due course.
Jaruk’s Death Snake: Great skill; it ignores obstacles in line-of-sight and, when used on a melee mob, causes them to run away (which exposes them to attacks of opportunity). So used correctly, you can eliminate a melee add instantly with this ability.
Hectic Hailstorm: Better AOE late in the game than Wassa’s Whirlwind, plus a chance of freezing opponents (which is valuable later in the game when enemies have high health).
Passive skills of note:
Astral Reach: I find more range to be more valuable than more damage; she does a lot of damage as it stands.
Don’t pick any passive skills that give you a benefit and also a penalty.
The Priestess is an essential utility character that you need so that the Wizardess and Elf are free to do damage. You won’t encounter her until chapter 2. After you get her, use a potion of oblivion (available in the tavern) and lose Youclidh’s Inner Peace. It’s a dumb buff. Keep in mind that the Priestess doesn’t gain precision from agility, like the other characters; she gains it from intelligence. That means she’s horrible at dodging attacks, so keep her the most isolated of all ranged characters.
Active skills:
Youclidh’s Recovery: Take the version at level 2 that cures crowd-control effects (like knocked over).
Youclidhian Detox Cure: Very useful to address status effects.
Youclidhian Lightning Chain: The version at level 1 is almost useless, but you need to pick it so that you can get the version at level 3 that ignores allies. That is a very useful damage spell on fights when enemies all group up standing next to one another.
Youclidh’s Laying on of Hands: Useful spell for melee heals.
Healing Wave: Essential spell. Take the version at level 5 that heals more but in a smaller area. The downside with the spell is that it will heal enemies as well as allies, but once you’re used to it, you can set up scenarios where your players are grouped and enemies are excluded. It turns out to be easier than you think and is a very valuable skill late in the game.
Youclidh Slap:Decent skill for inflicting damage, especially against mobs with high protection. Probably not worth taking down to level 5.
Passive skills of note:
Hands Off, You Pig:Take this the moment it’s available. Being able to escape melee adds without penalty who manage to push their way next to her is huge.
Chapter 1
The first four fights in the game are part of the in-game tutorial, so I won’t bother including them. Let the tutorial guide you if you need help learning how to fight.
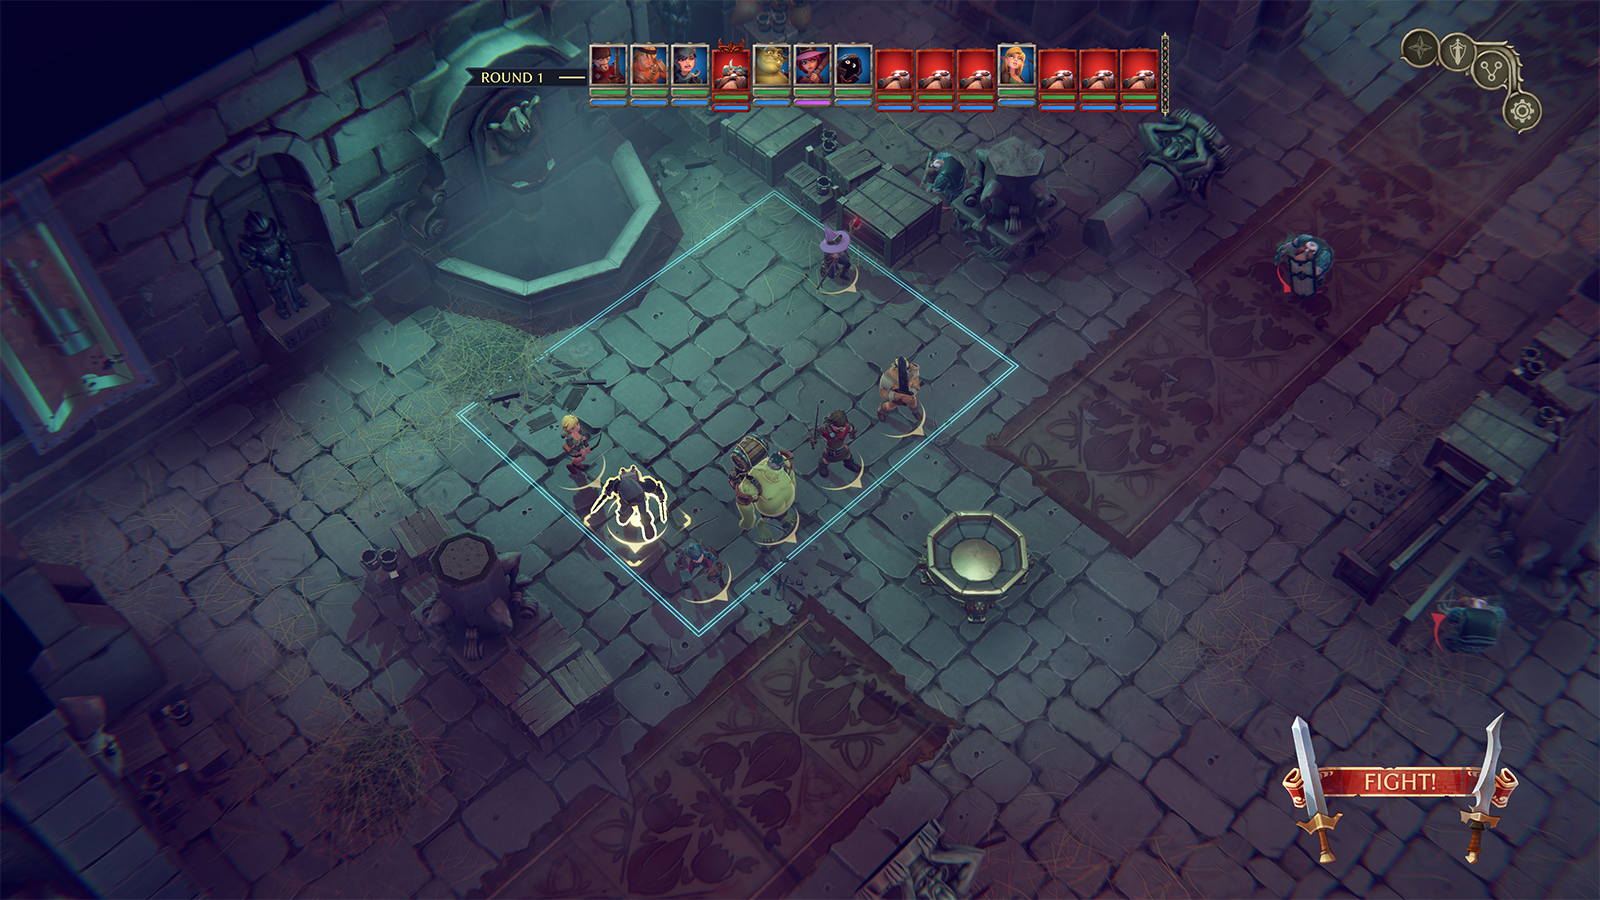
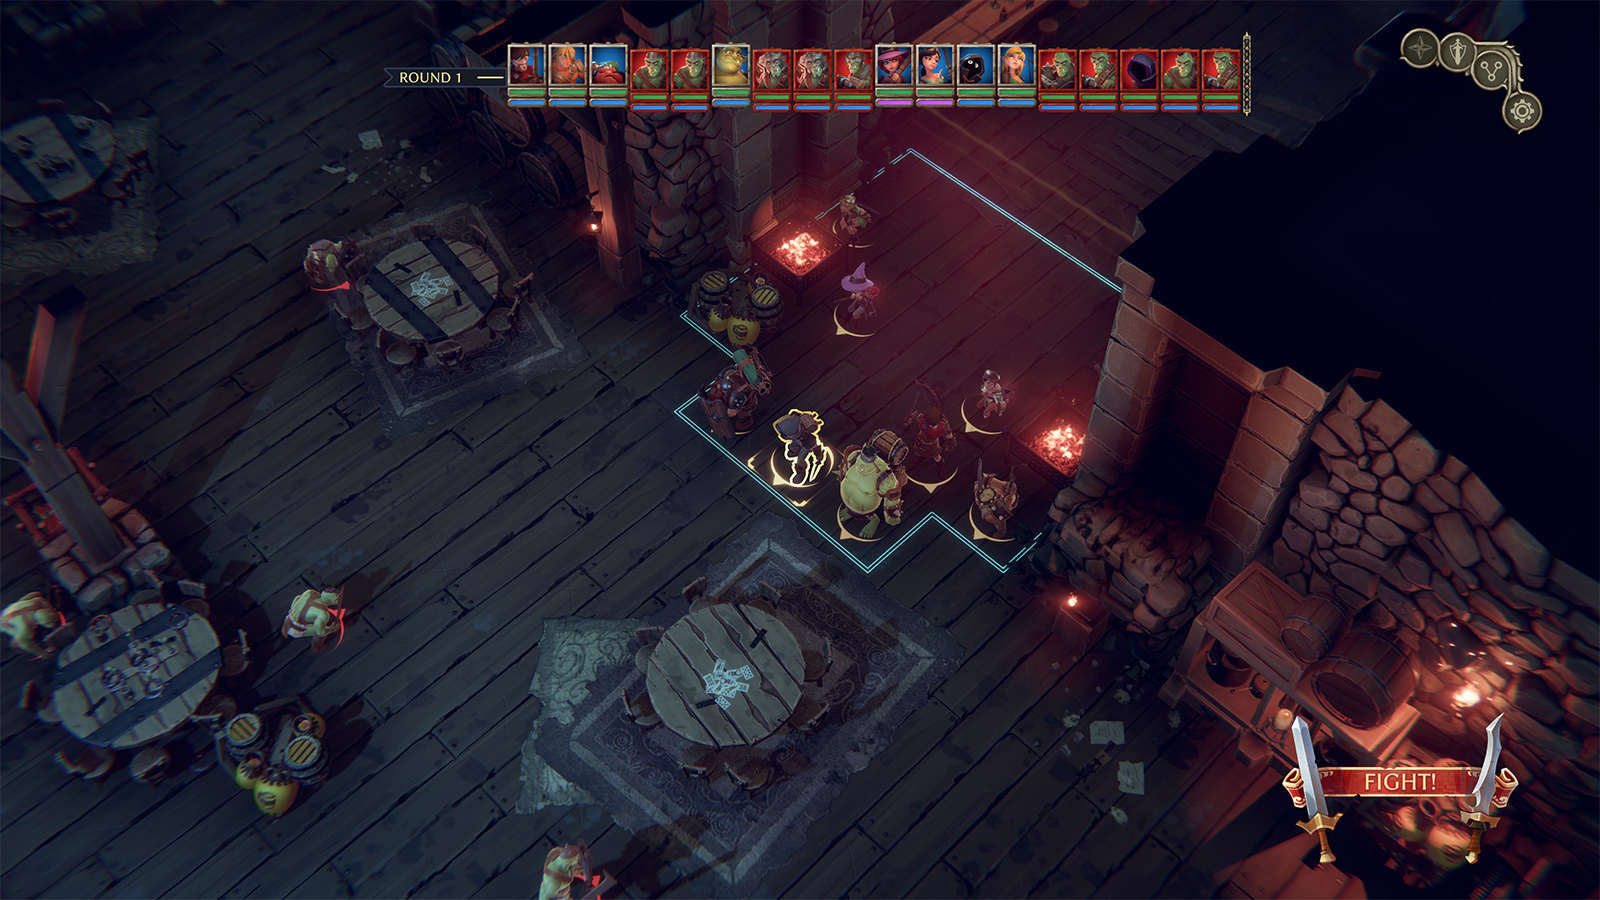
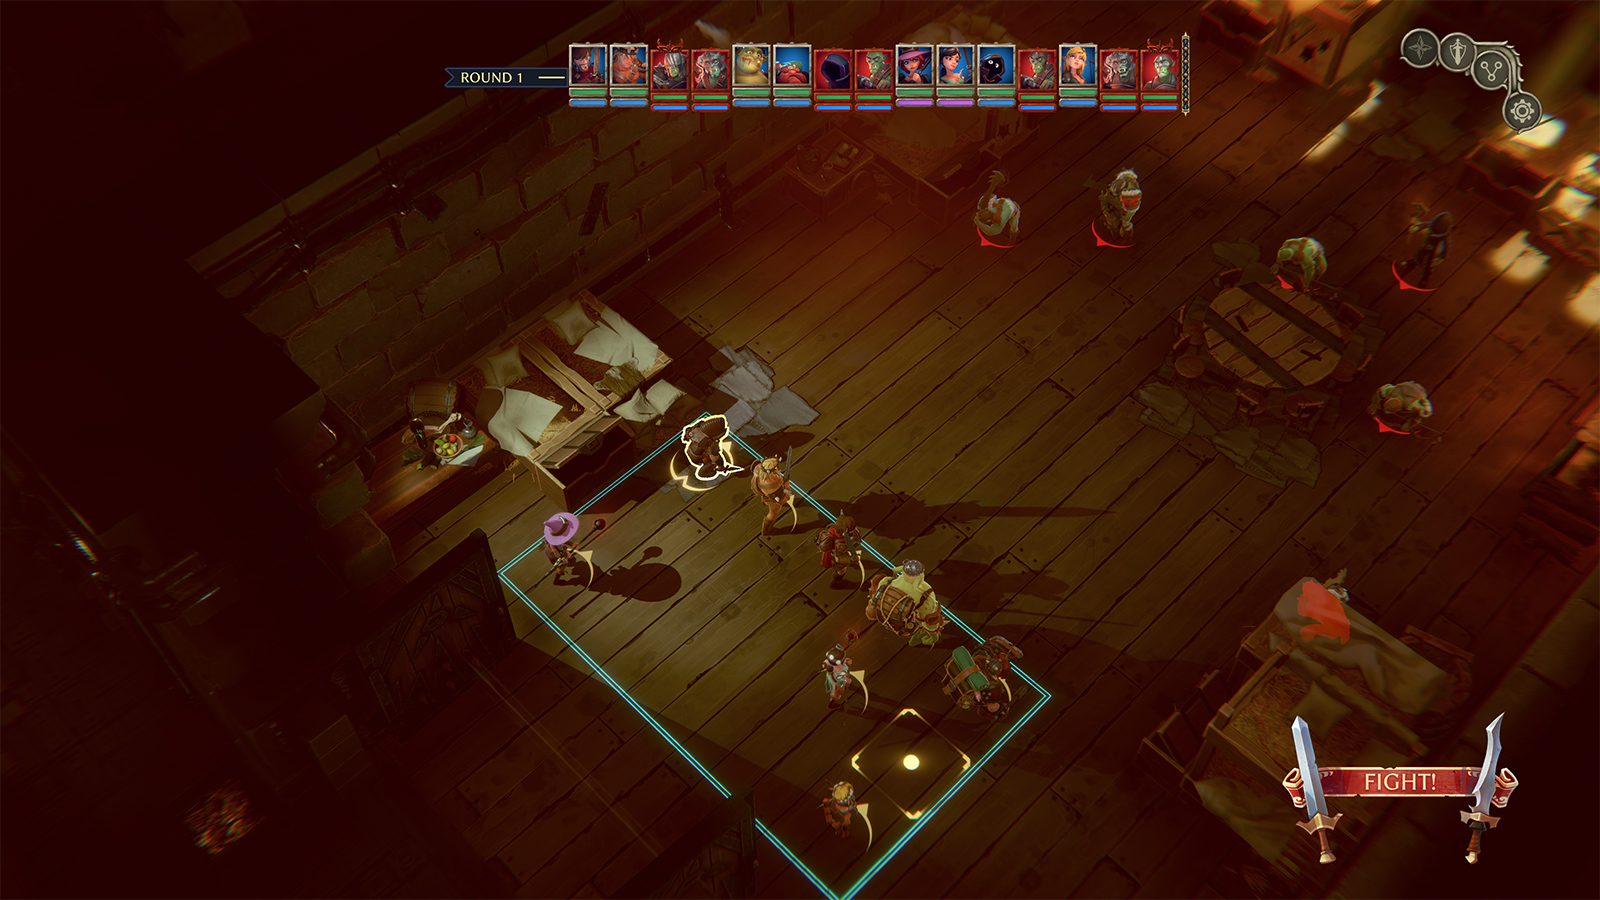
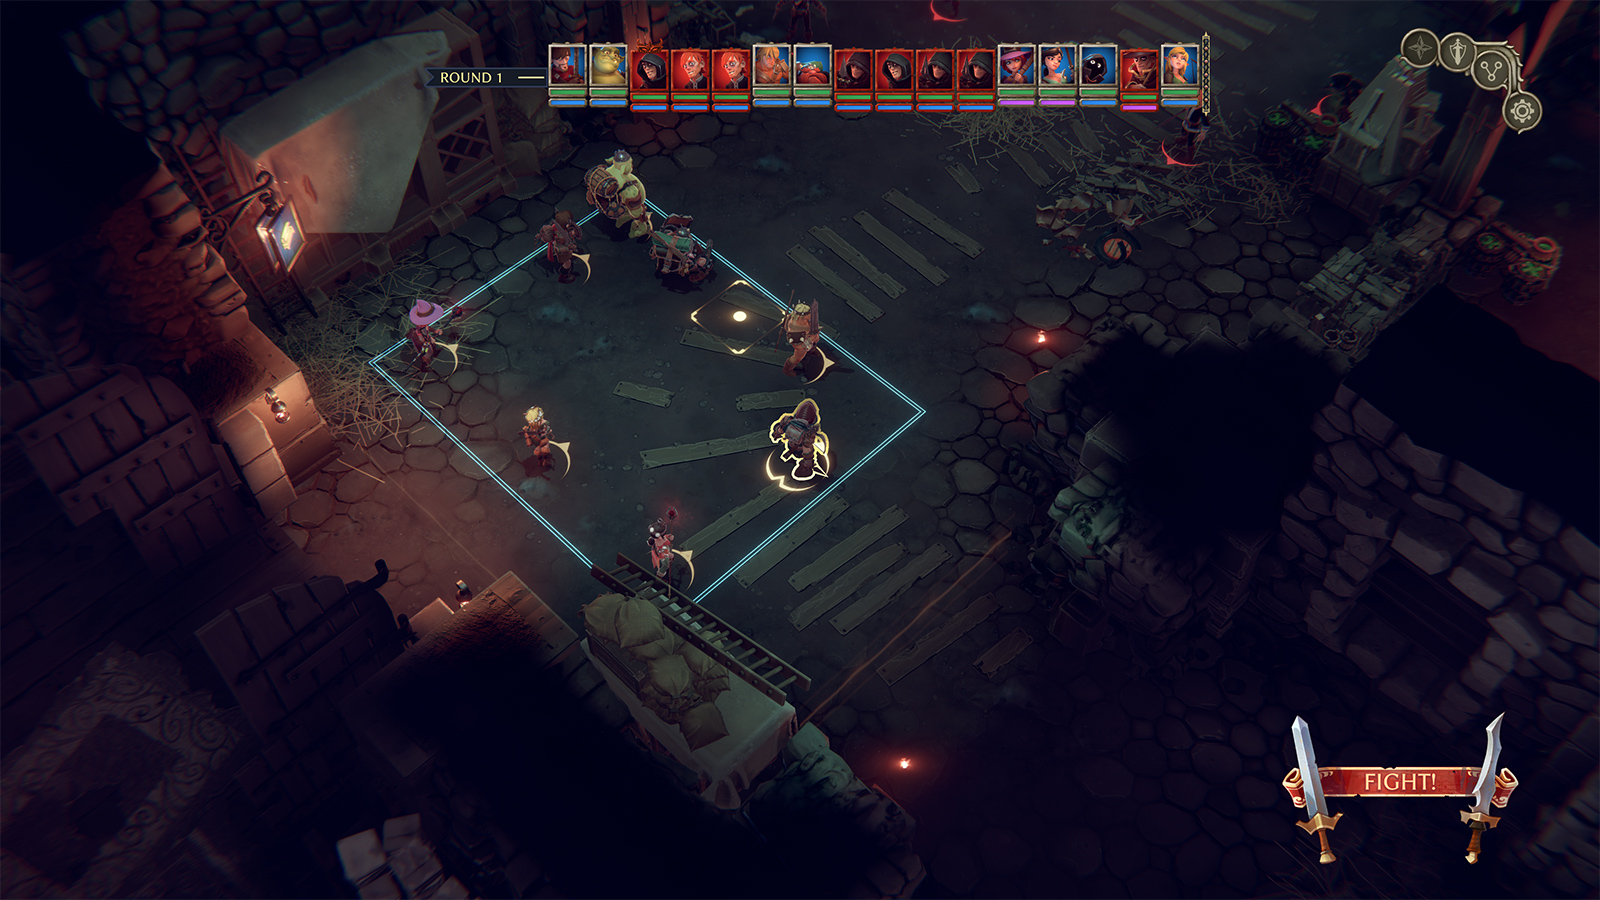
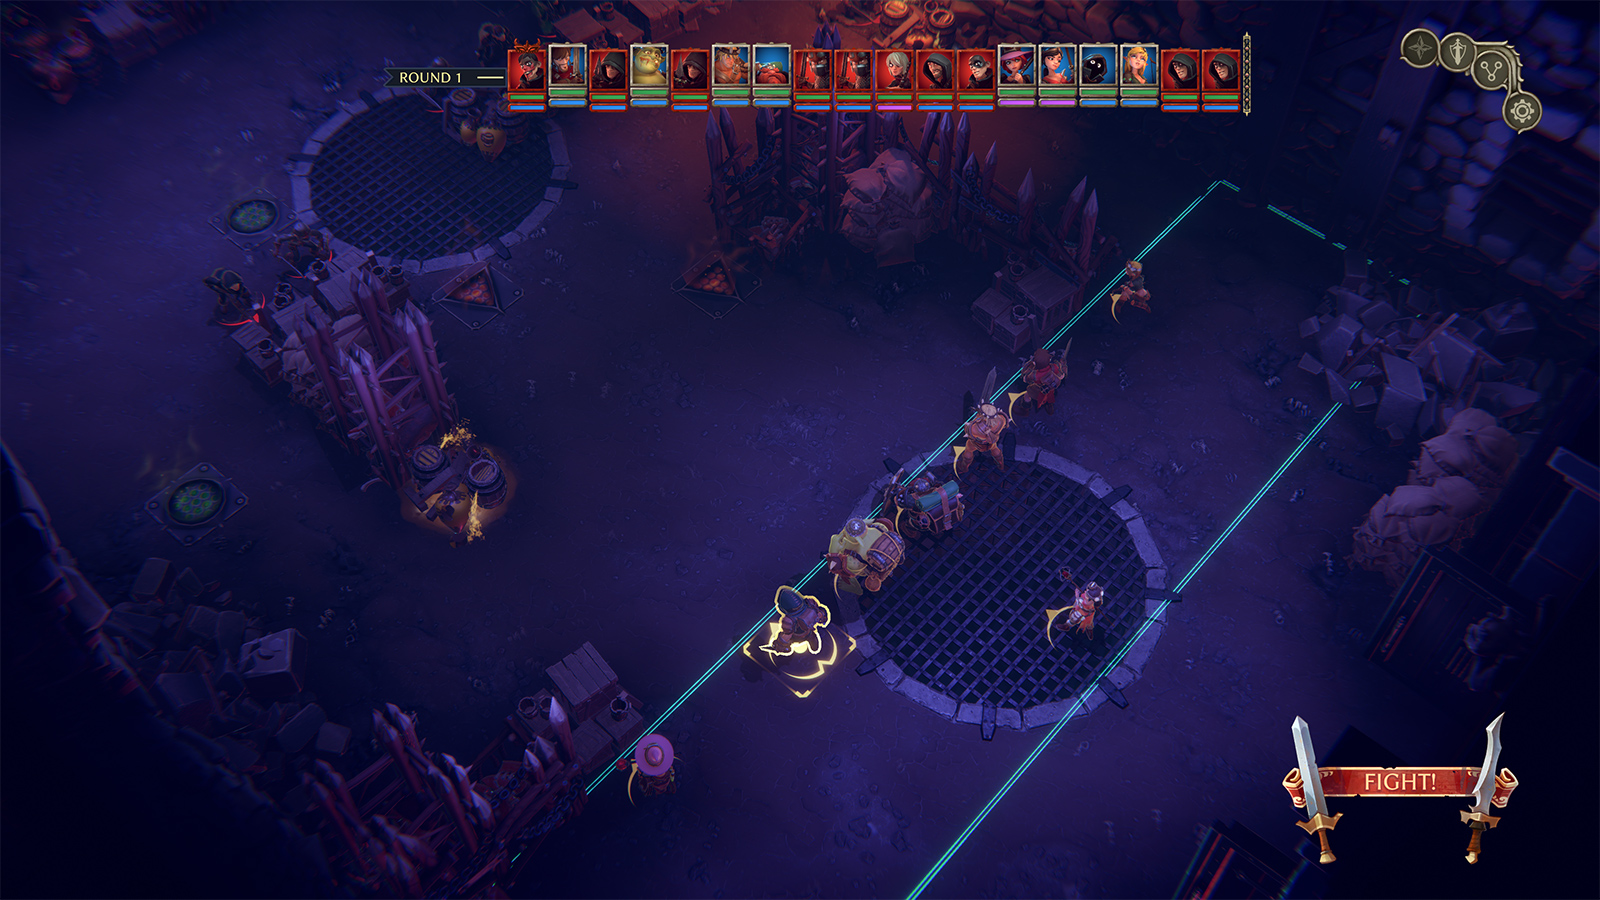
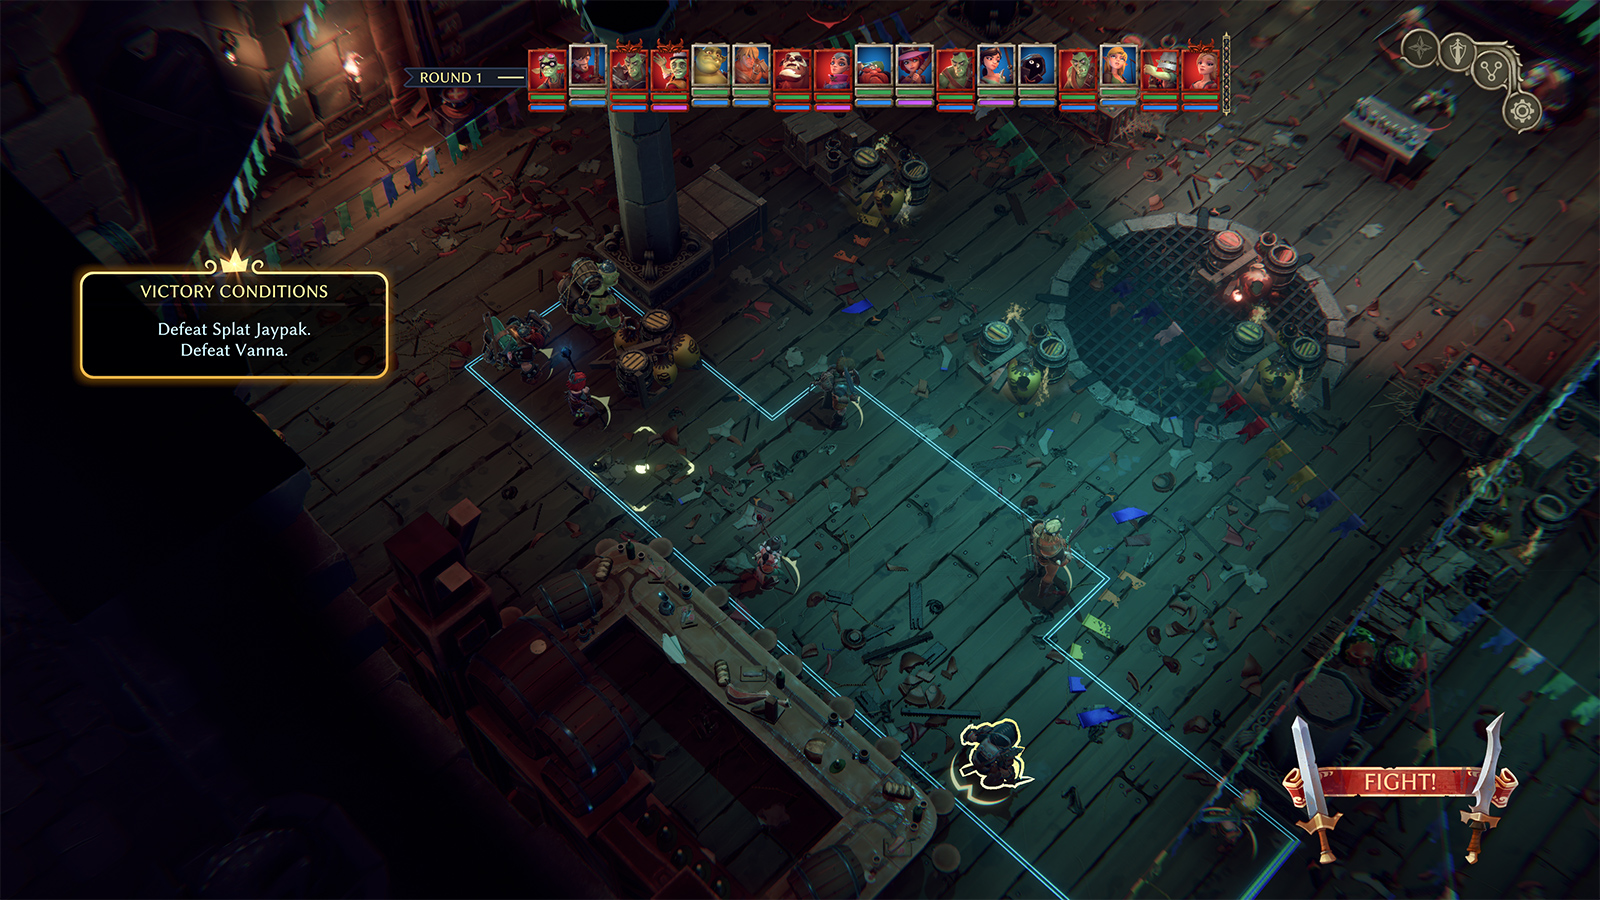
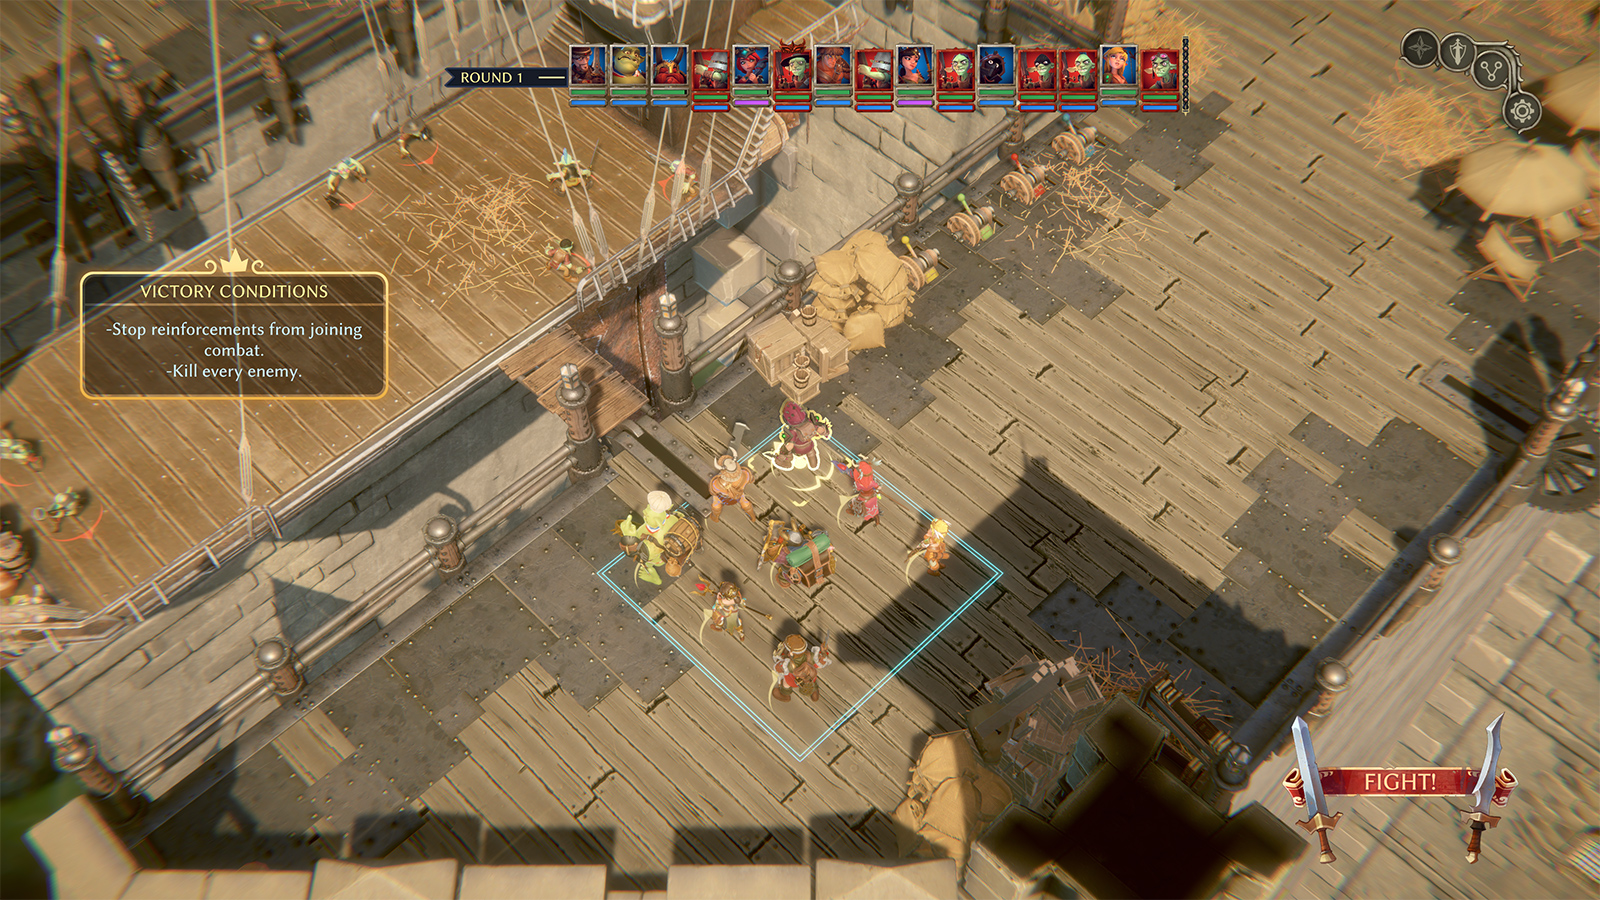
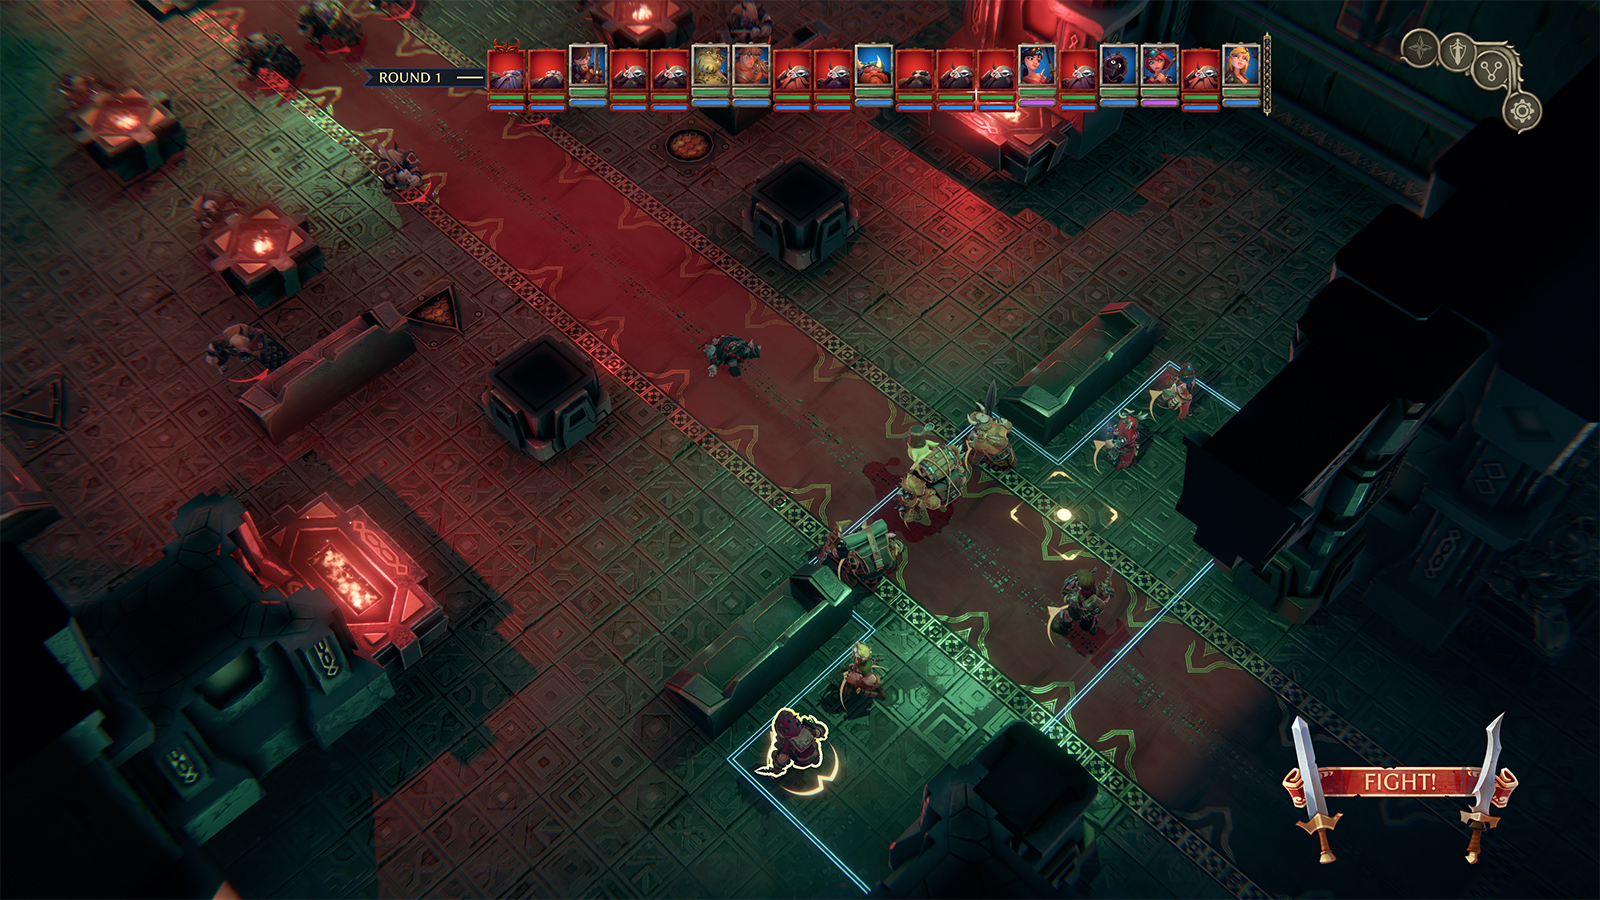
The fifth fight is at the end of chapter 1; if you’ve enabled the tutorial, the game lets you know you’re on your own for this battle (i.e., there is no assistance from the tutorial).

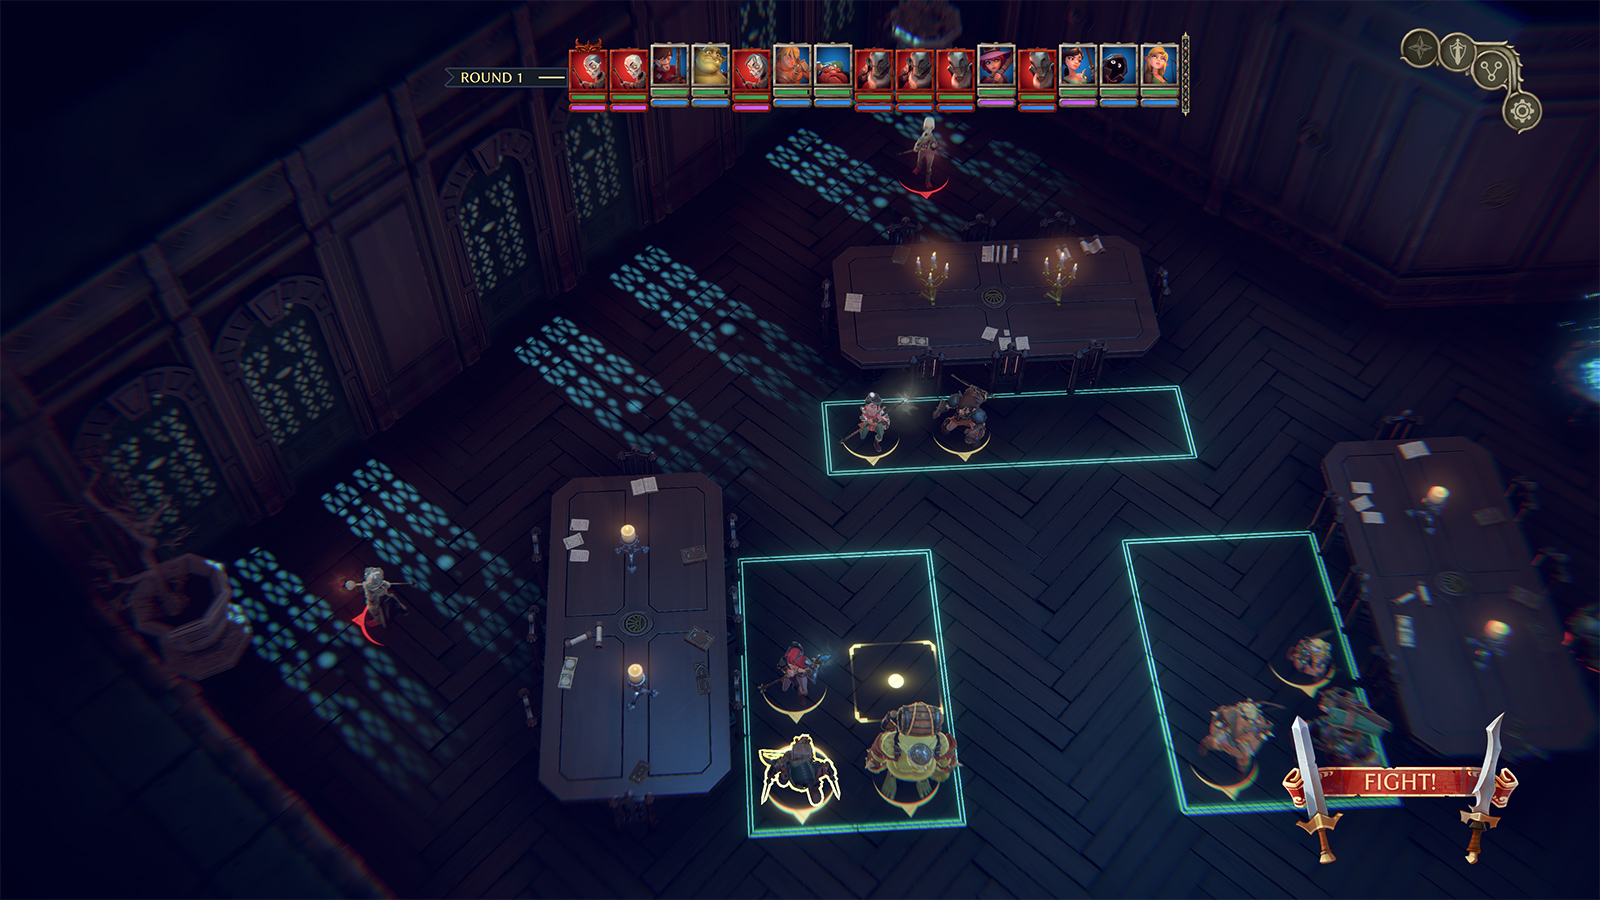
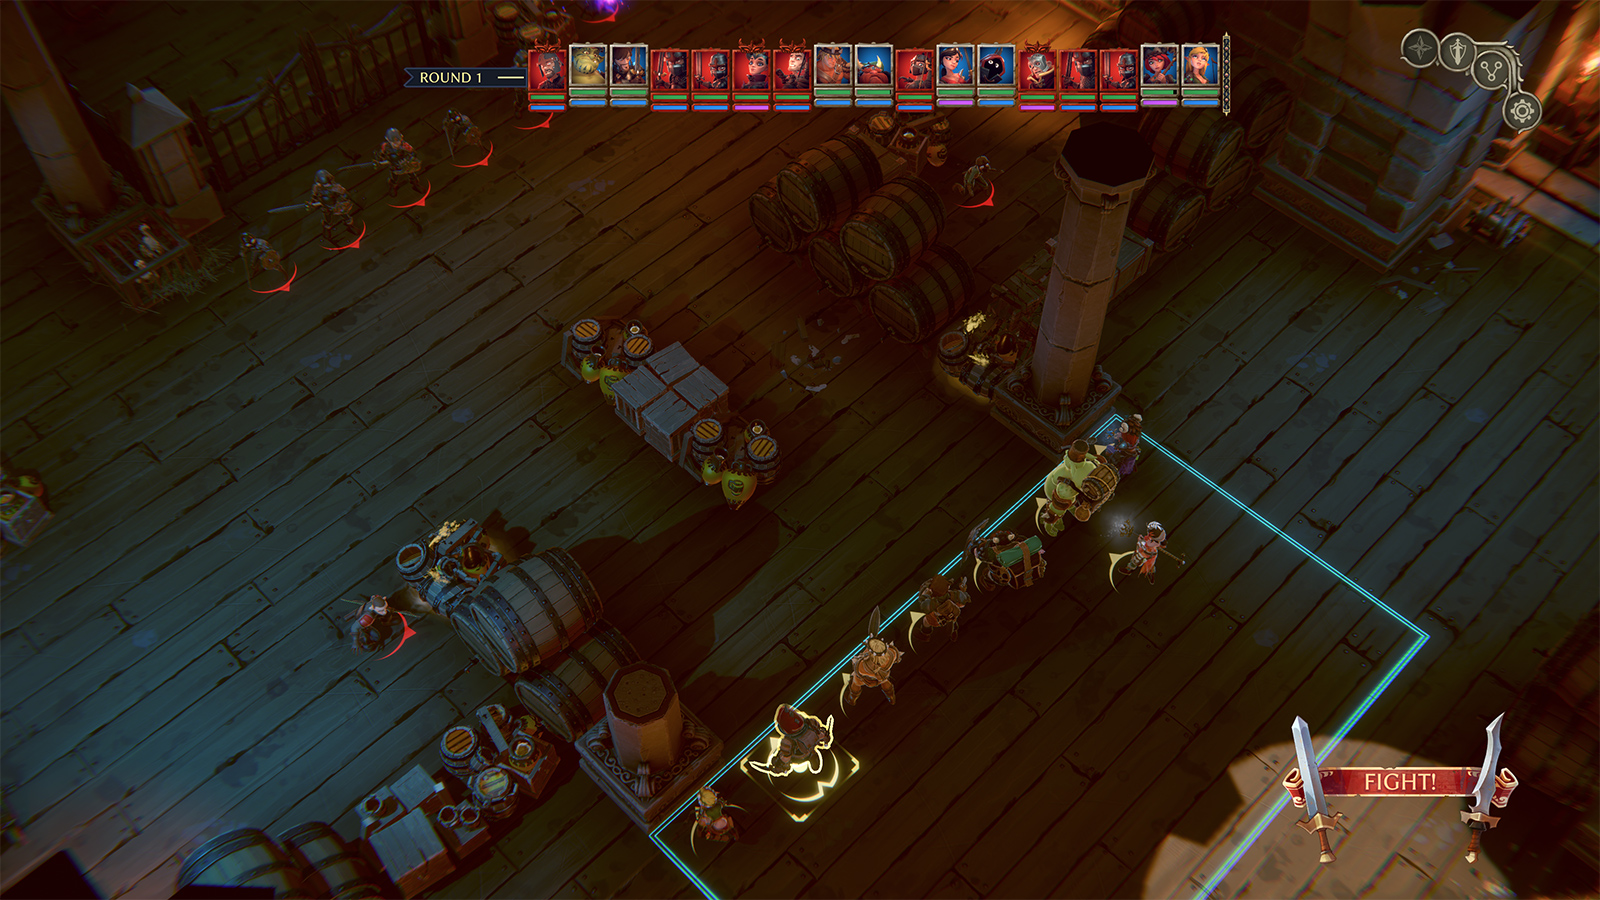
You’re in a fight with Splat Jaypack (i.e., Pat Sayjack) as your first “real” battle. Notice simply that you’re putting your “tankiest” characters in front and allowing the others to stand behind or take shelter. Reinforcements come from the left side of the room after a while, so you will want to move the Elf back from that side before they advance. Otherwise, a melee add will enter and rush over to attack her.
Note: In some battles, adds appear in a region highlighted with red lines, sometimes more than once. Usually (but not always), you can end the fight before they appear by defeating all the mobs currently in the battle. The red lines will disappear and the fight will end. Delay turns to let melee mobs reach your characters, then have the Ogre push one back to gain attacks of opportunity. Use the Wizardess to do an AOE attack on them.
After this fight, you will be able to walk to several different locations on the level that provide free loot. (A couple of them can be safely reached before this fight, in fact.) Pick up all the free gear you can, then move to the stairs and head up a floor, where you will be able to retrieve loot from even more locations prior to the next battle. Remember—when you level up, put all your points toward agility.
Chapter 2
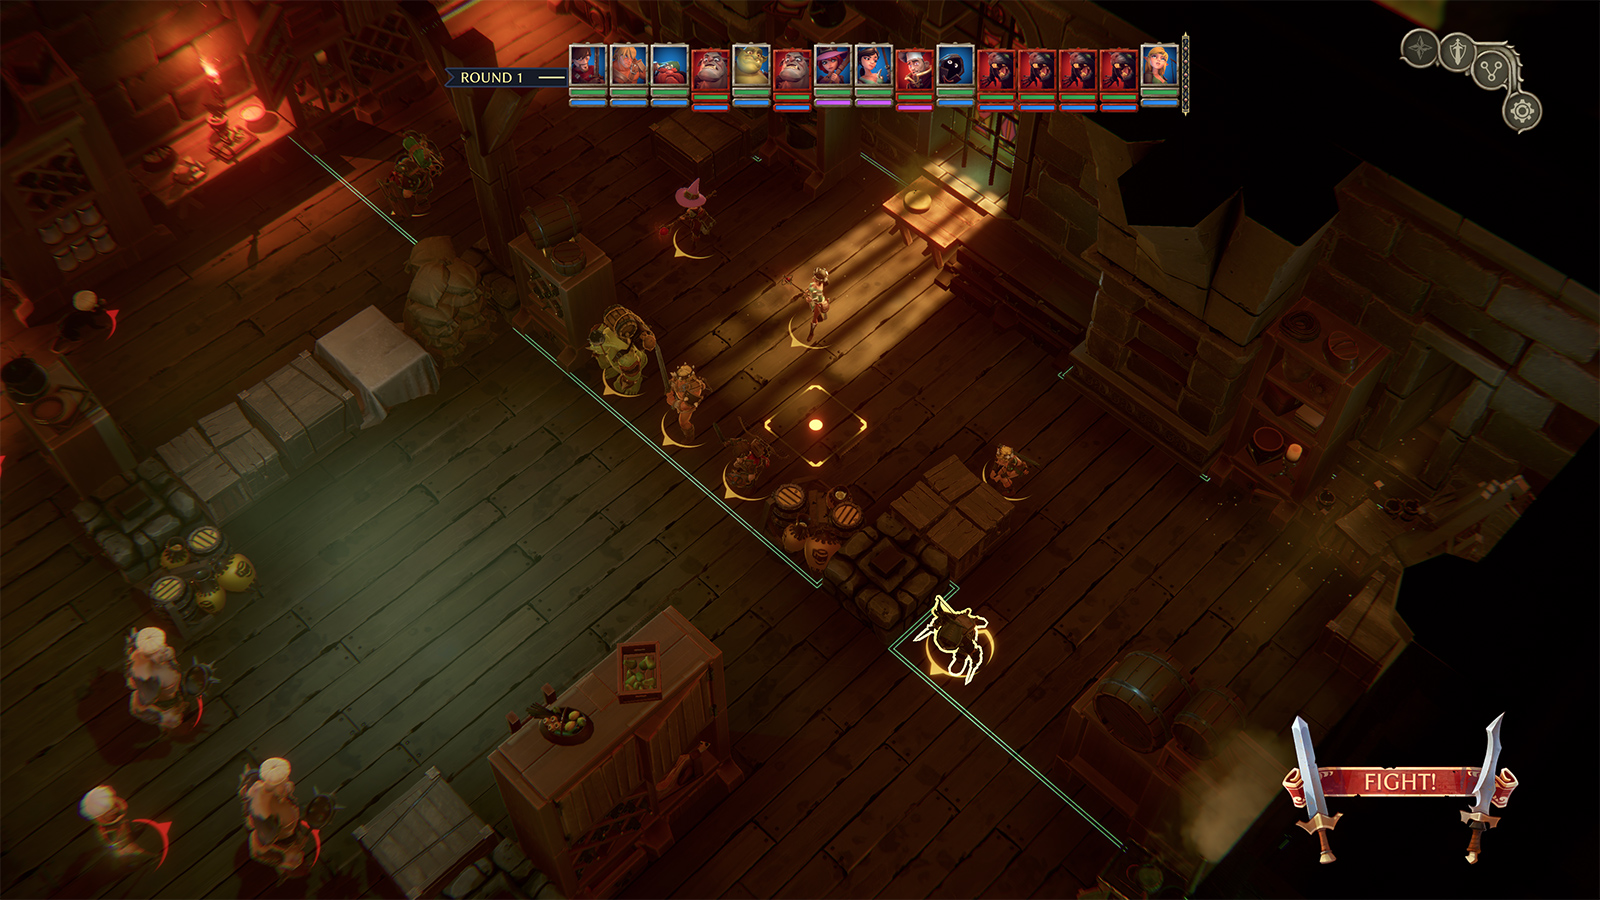
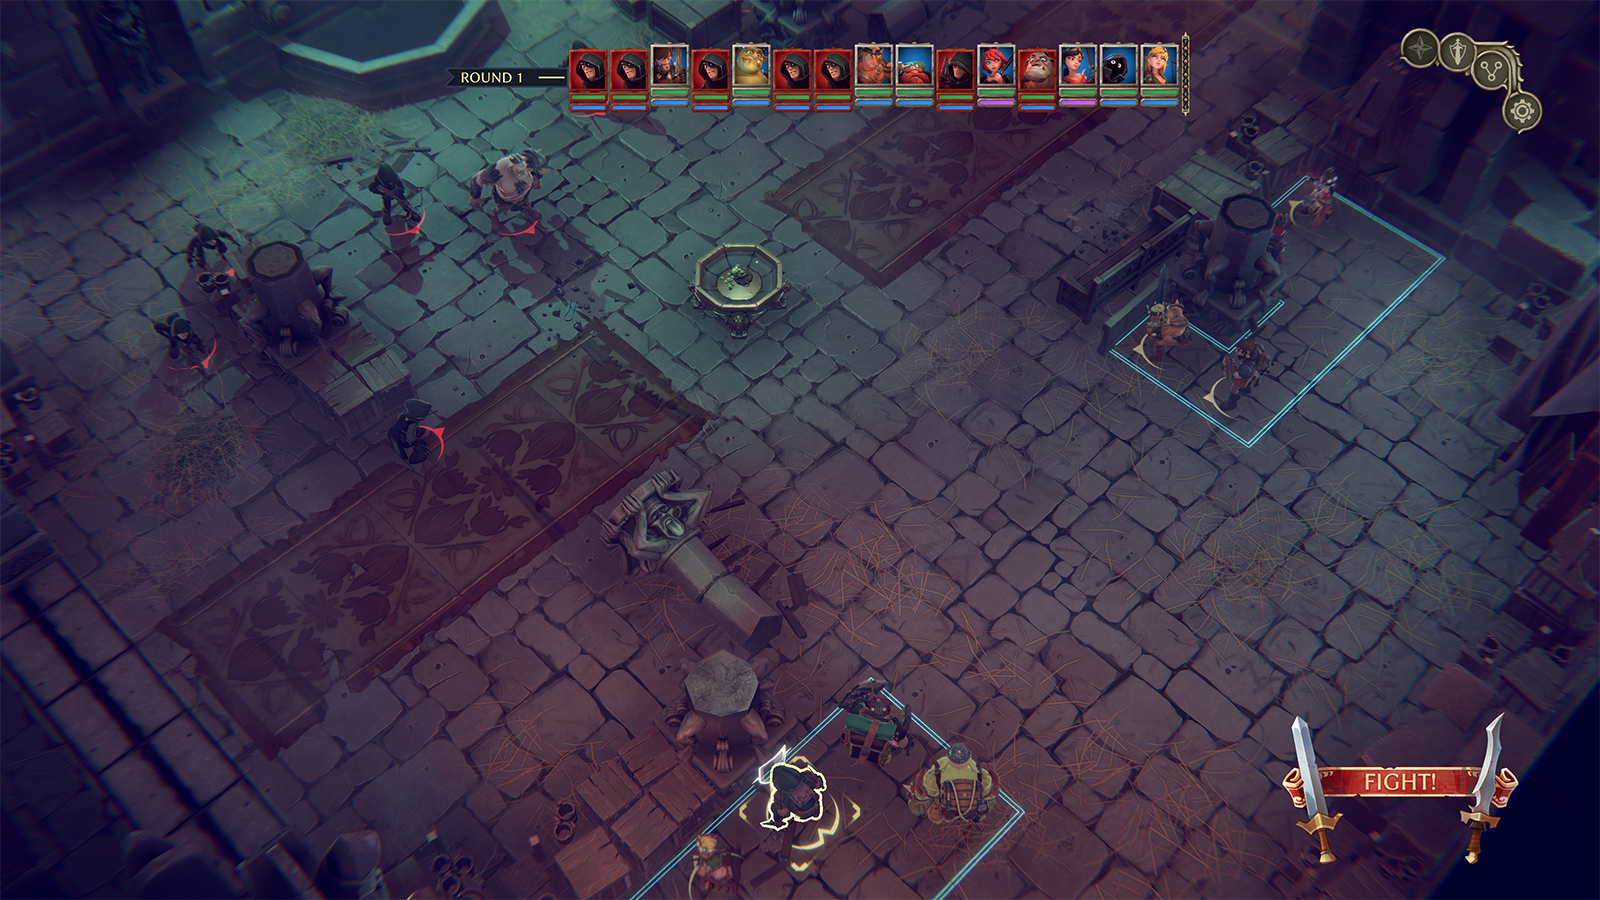
In this battle you’re missing the Dwarf, but you gain the Paladin, who does significant damage and doesn’t miss a lot. Use the Elf and Wizardess to take out the archer hiding behind the top set of crates. The primary strat for this fight is to delay your turn and let your opponents come to you. (Rushing out means you’re separating your characters, which means they can’t support each other in attack, and if you move too far you will lose the chance to get heals.) You can use the Ogre to push a melee opponent and get an attack of opportunity from the other characters in your front line.
After this fight there is more free loot in a room nearby, then you will probably need to visit the bartender in the tavern to rest. Anytime you have multiple injuries as well as loss of health points, it’s usually economical to rest to recover rather than use potions and bandages. Tip: You will have more than enough gold in this game to buy everything you want if you sell back all your unused gear.
After visiting the VIP room, go to the entry to the kitchen and pick up the Poultry Farming Tournament quest, if you didn’t get it earlier. The birds are all on this level (one by the latrine, one in the kitchen, one in the dormitory, two on the pathway to the co-op, one in the room behind the co-op, and one in the room north of the previous fight). There is no fighting to complete this quest, and with any luck you should have a couple additional characters level up. If the Ogre is one of them, you can use a skill point for the ability to break down wood doors, then return to the wood door on this level and break through it. Wait until you have the Thief to bypass the trap inside or else take the hit.
Once you break through, you should have all the books in the set The Barbarians, and can turn them in at the bookshelf in the co-op (on this same floor).
You’ll now be led to the basement by the Minstrel. After you sack the Shop, you’ll face another fight, below. (Alternatively, you can turn south when leaving the store and instead bash in the ogre door, which will provide loot for the Barbarian. Fox > Rabbit > Wolf > Goat > Boar > Deer > Elk. Ignore the bear, it’s not used in the puzzle.)
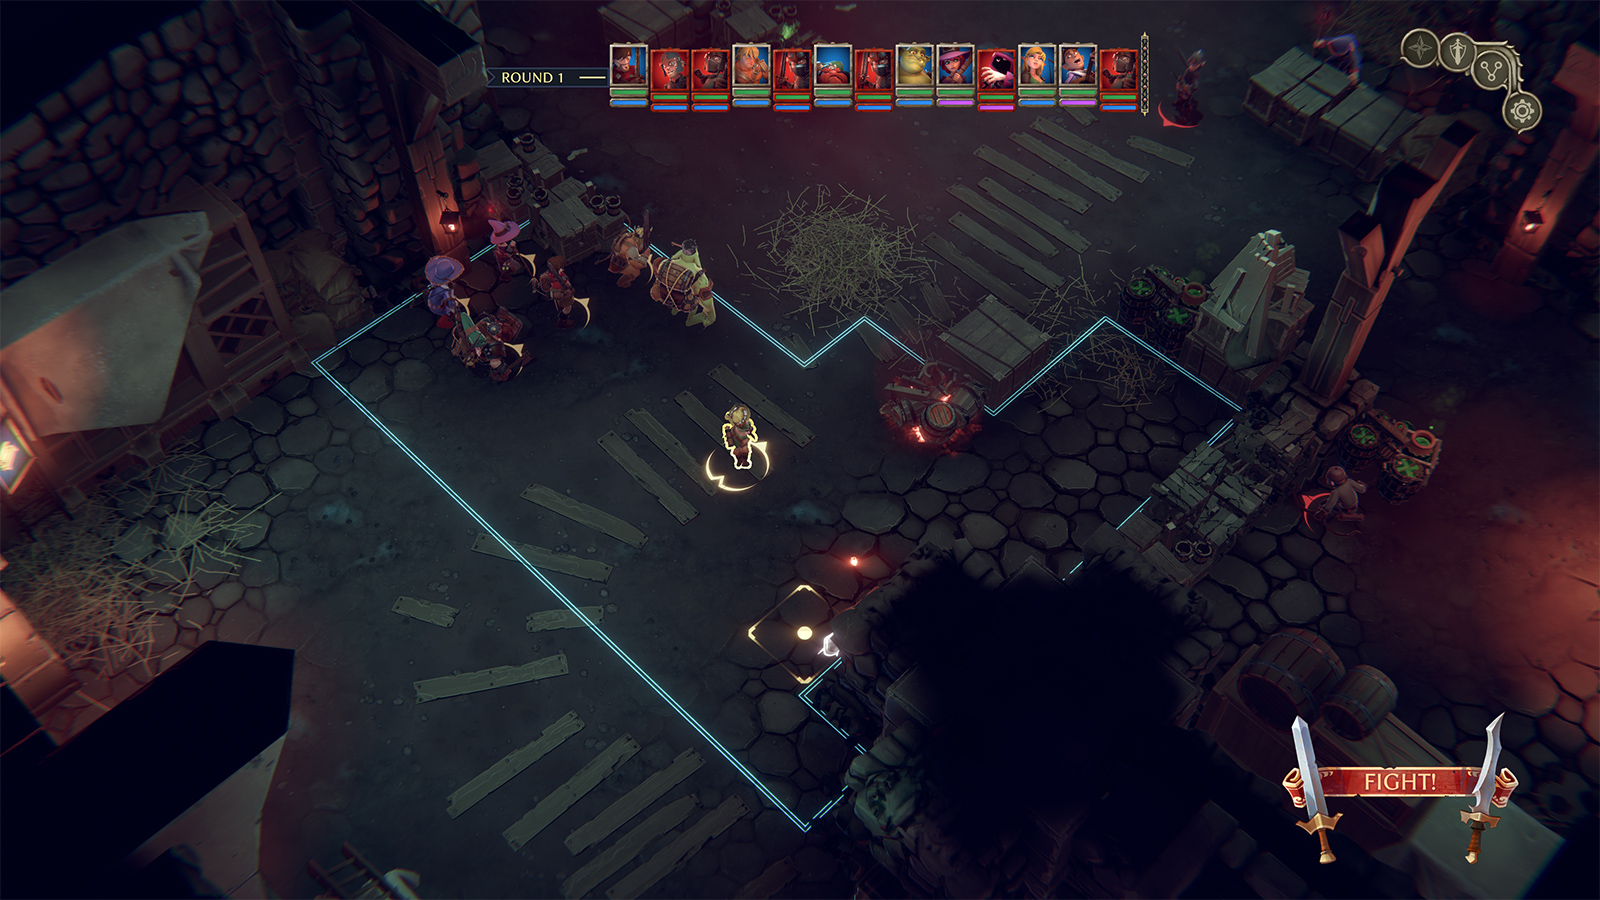
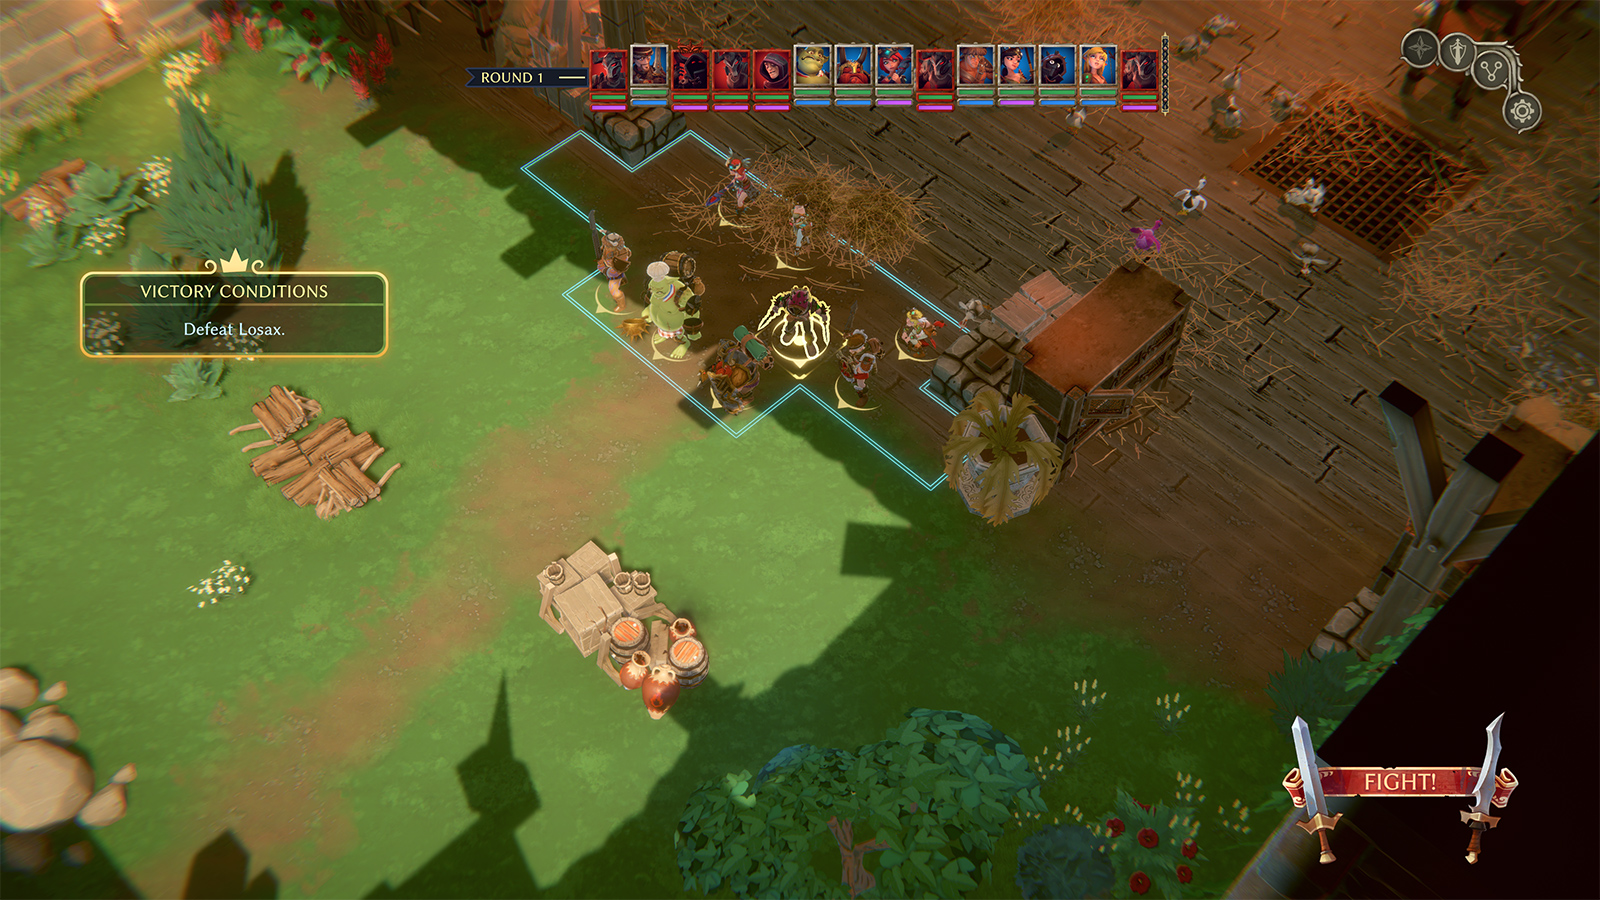
Stay away from the crates and straw in front of your group; the enemy will otherwise ignite them to do AOE damage to your group. (This can happen at any point in the fight, so best never to stand in that 3×3 region.) Later on, an enemy might throw a firebomb into the group, so after initial attacks you may wish to pull some of the squishier characters away from the front line and spread out a little (though not moving near the crates).
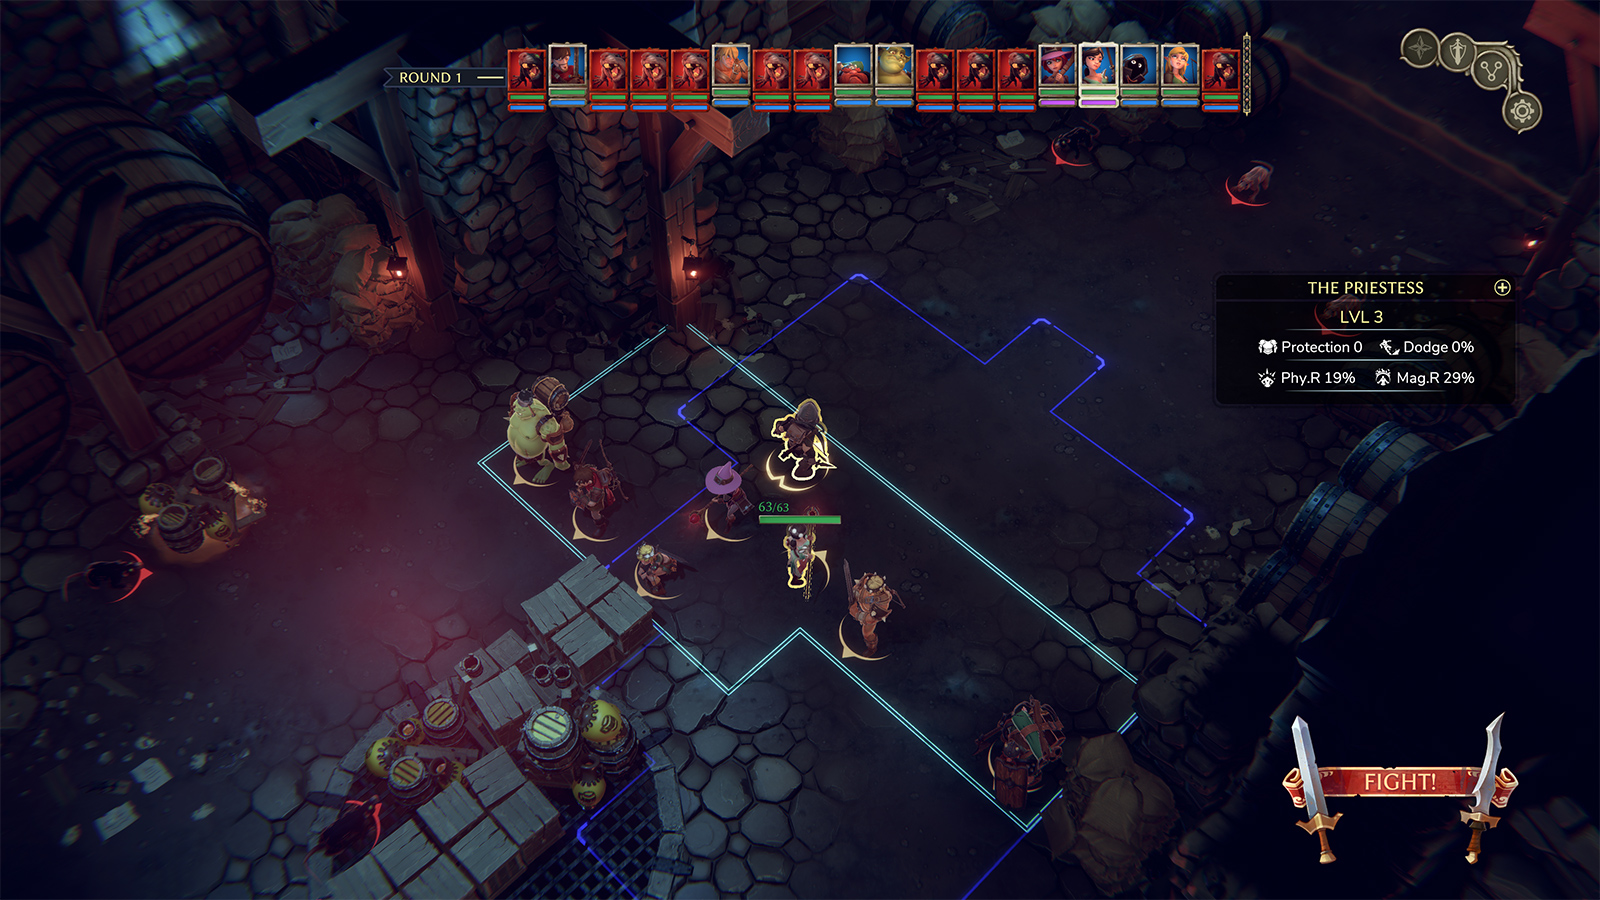
After gaining access to the VIP Room, you will be given the Priestess as a companion and will be sent after the Thief.
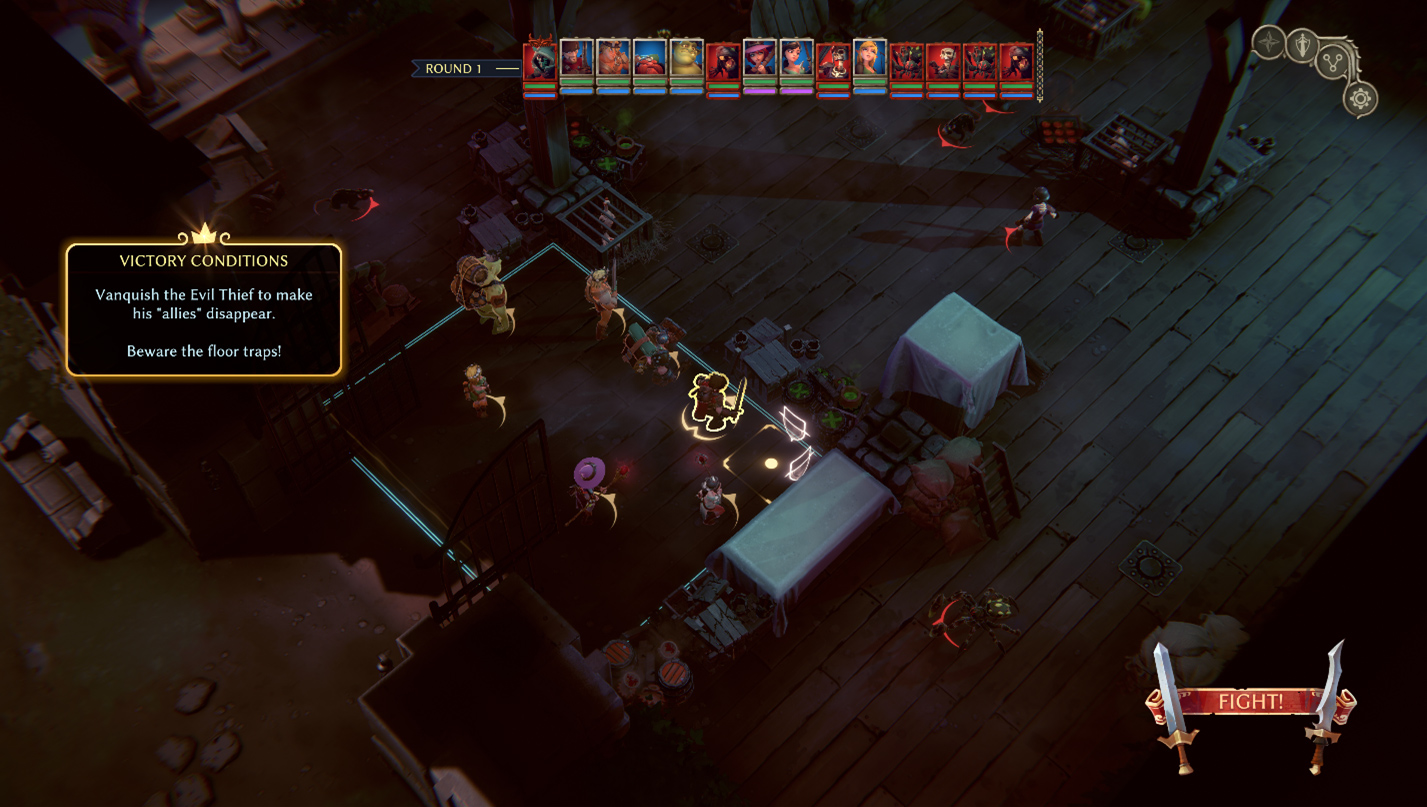
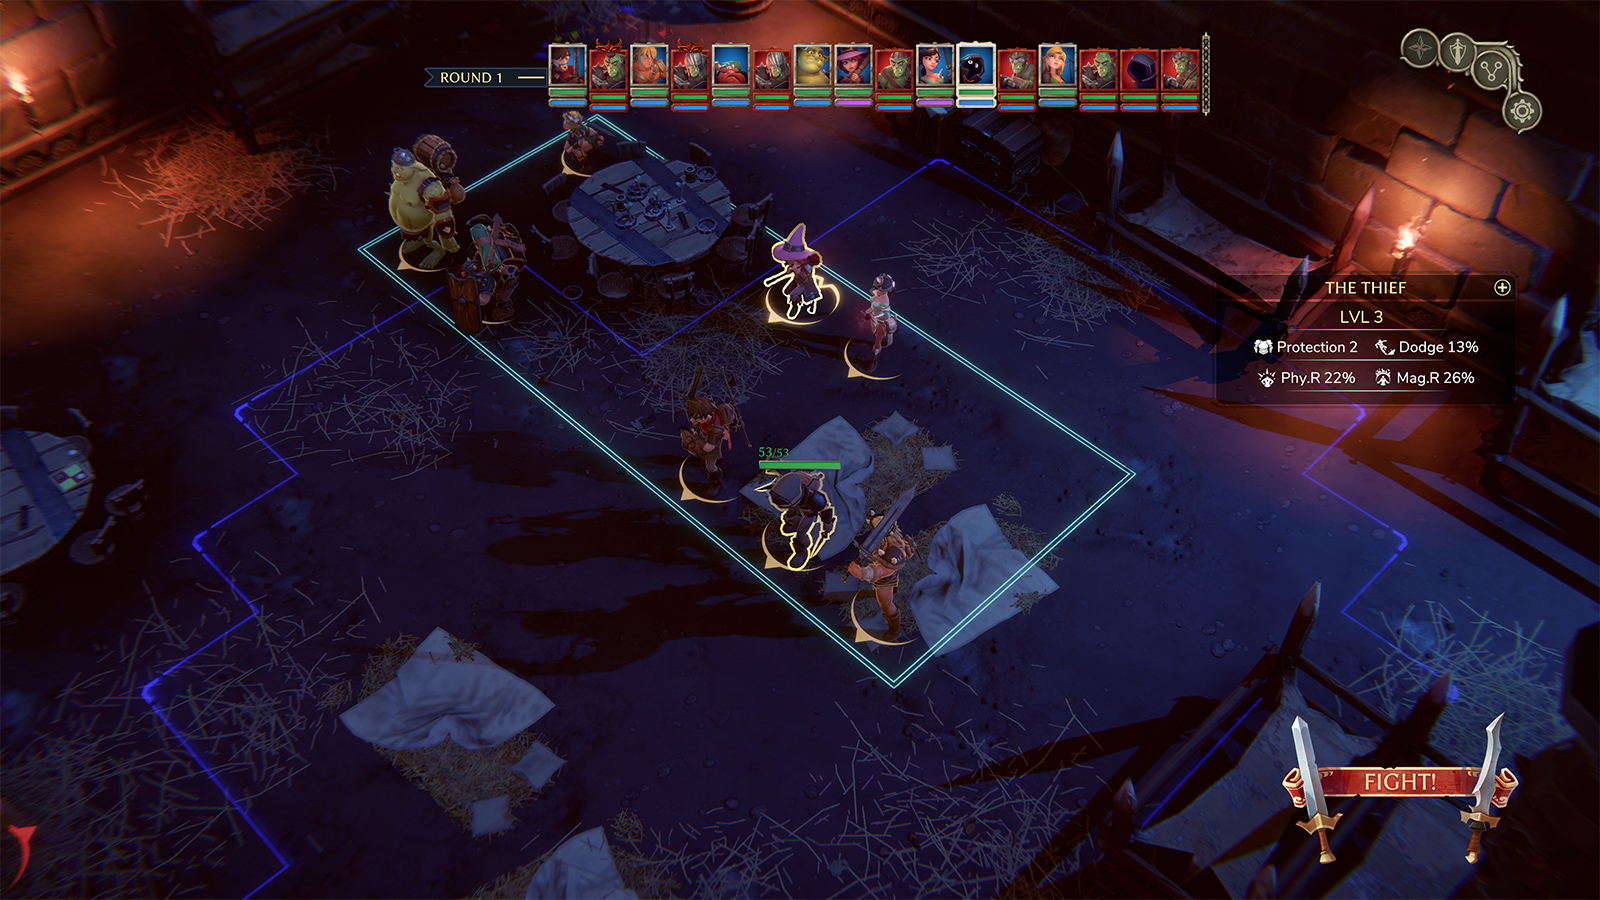
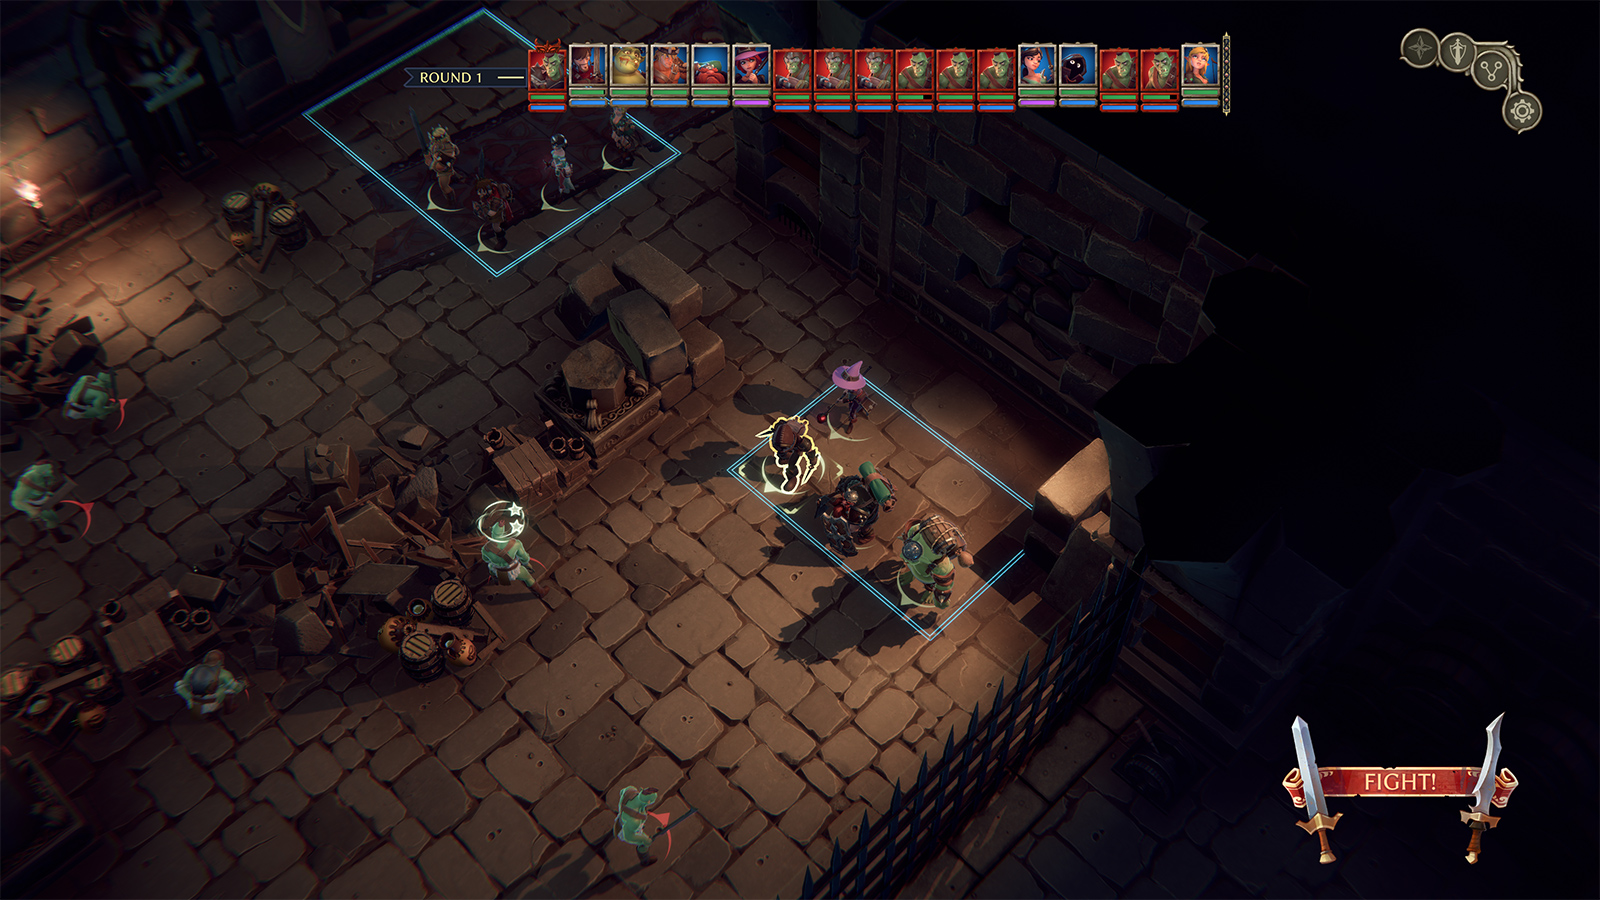
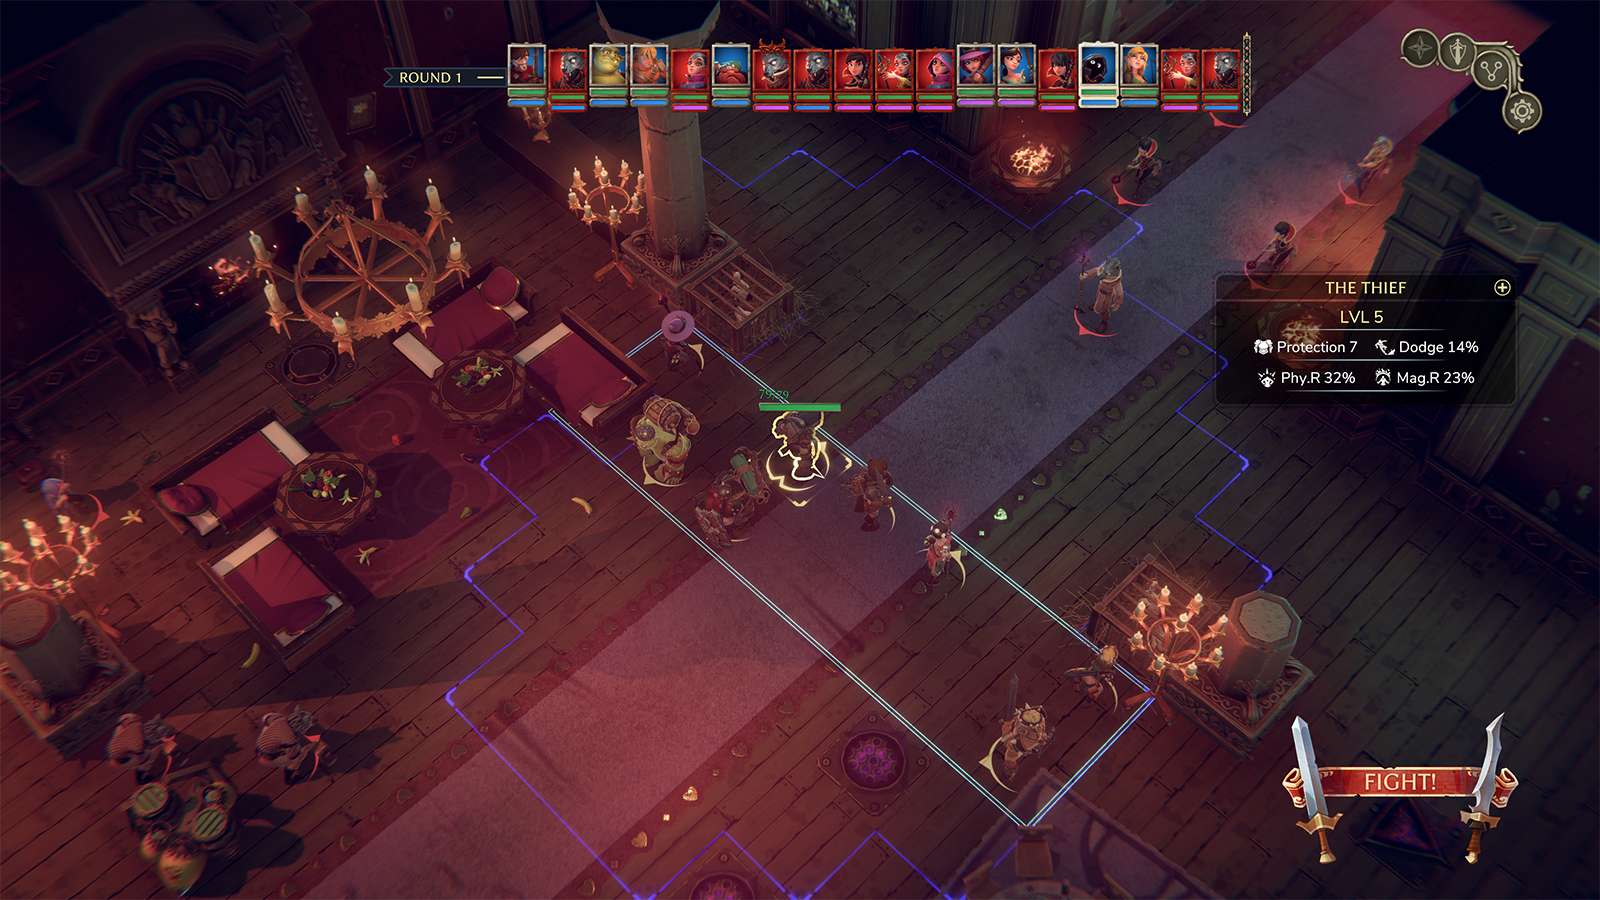
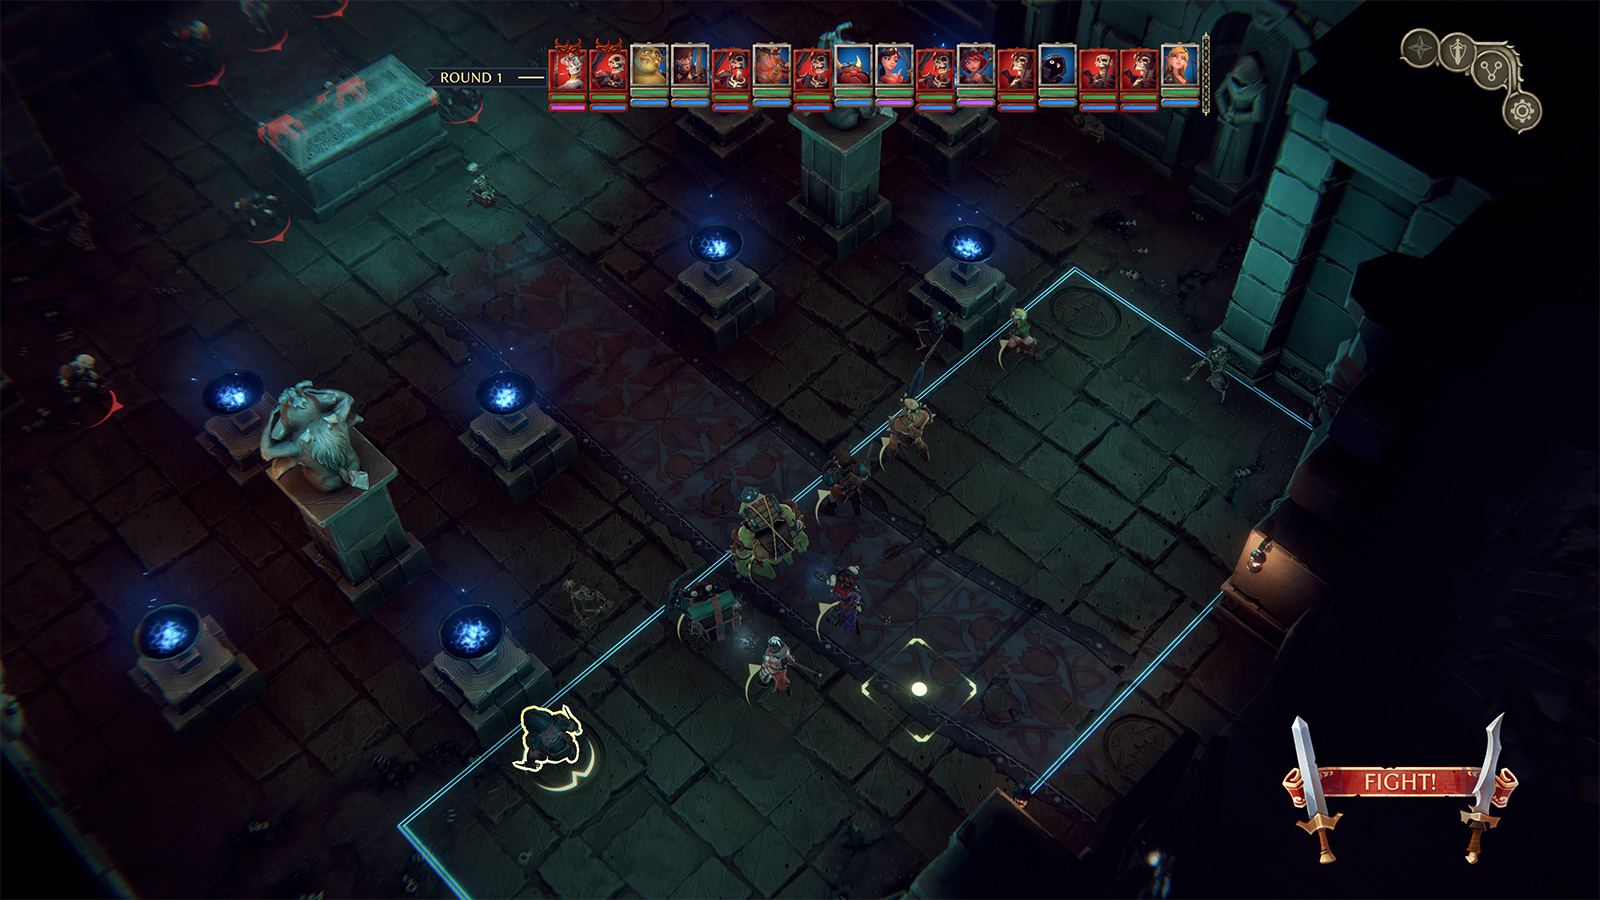
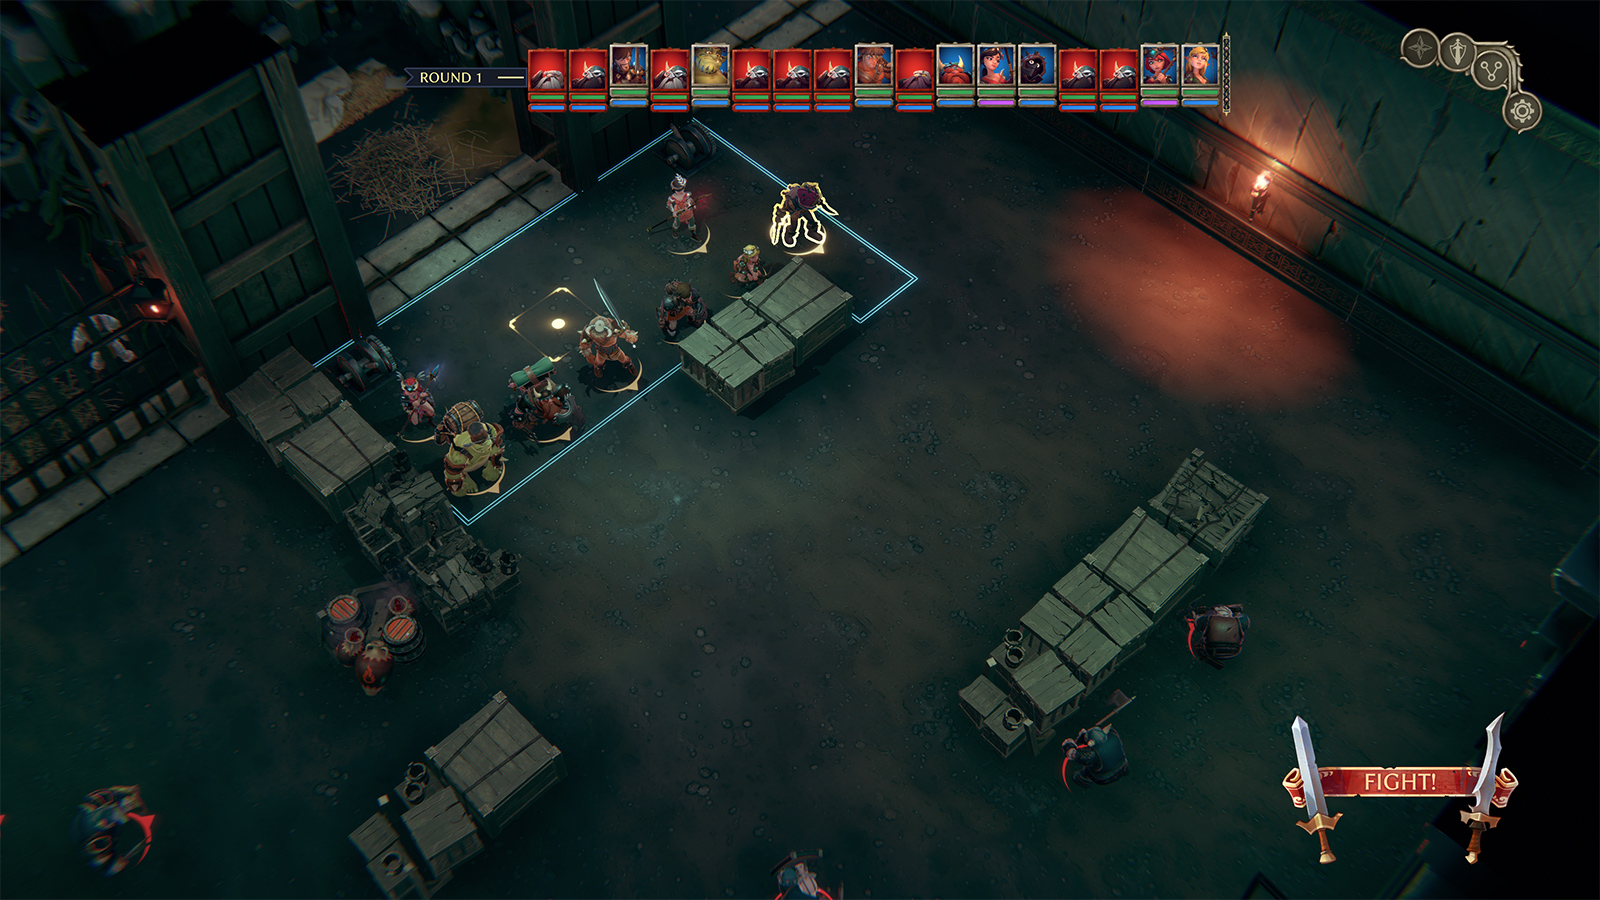
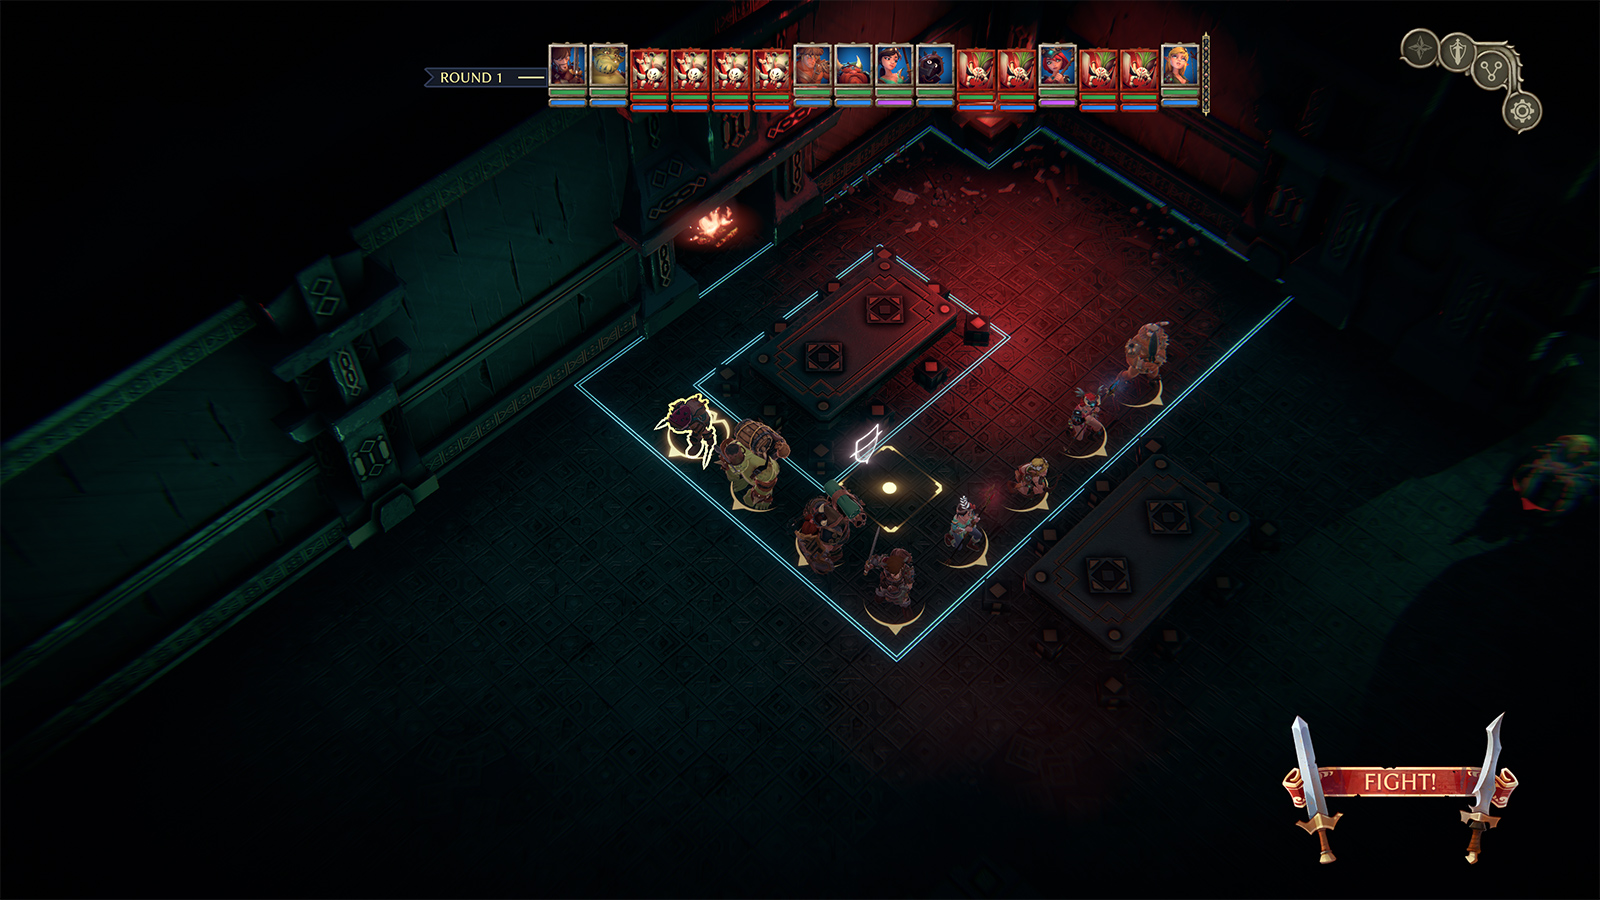
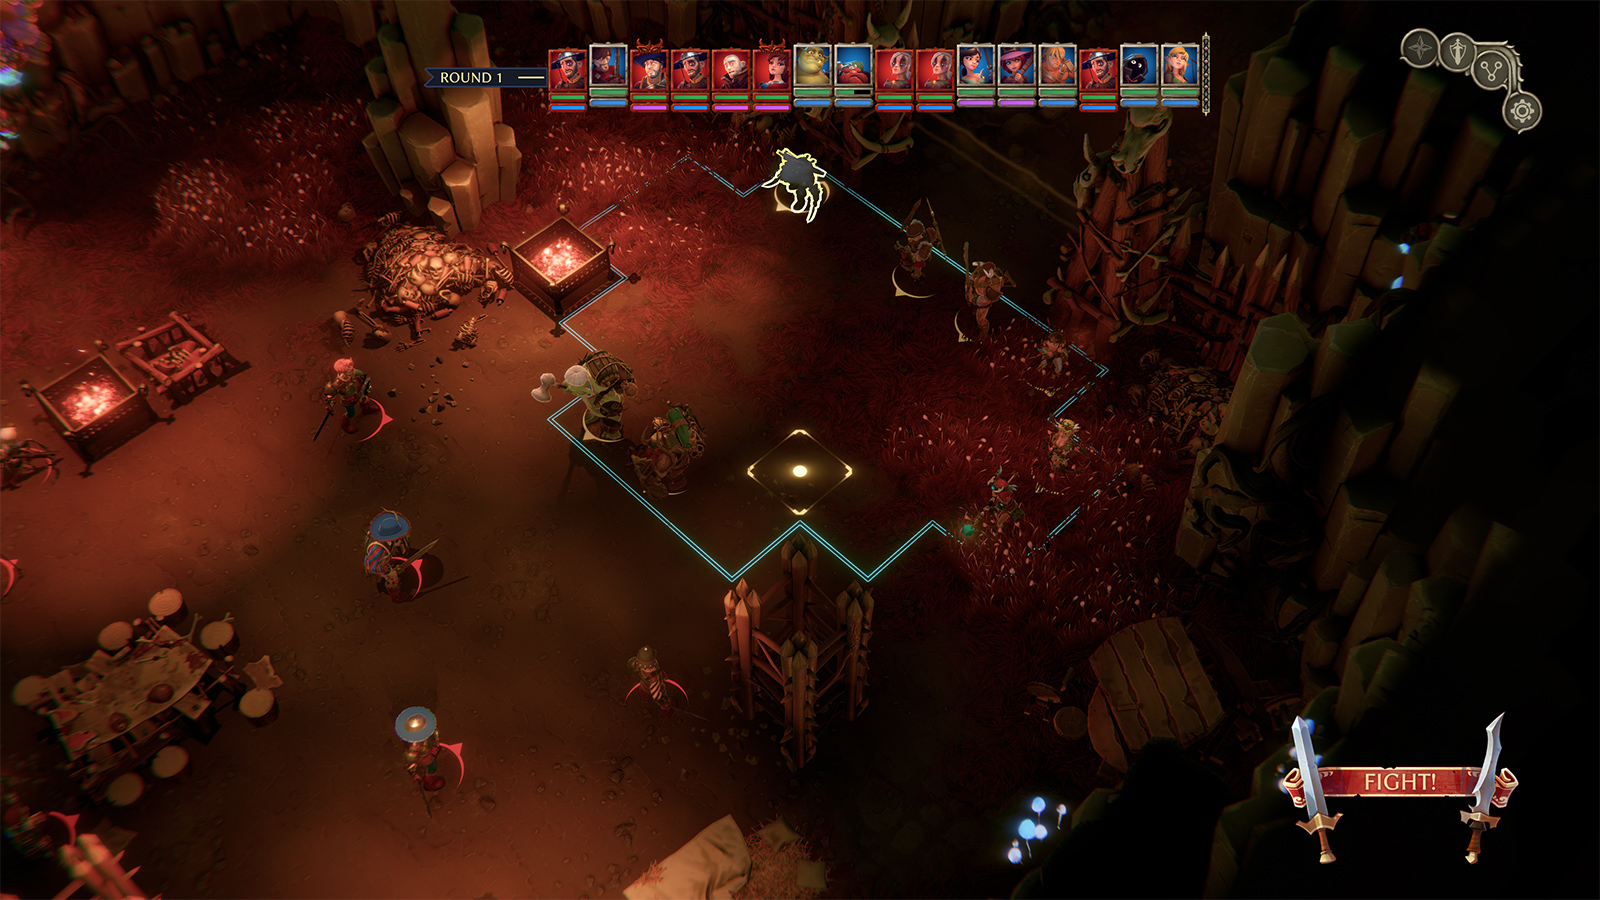
The fight vs. the Thief and his cohorts is the first one that is a challenge. I recommend delaying your turn and allowing enemies to move in close. Use your ranged to blow up the spider on the right. Keep your ranged in the back so that an enemy doesn’t try to break through the front line to reach them.
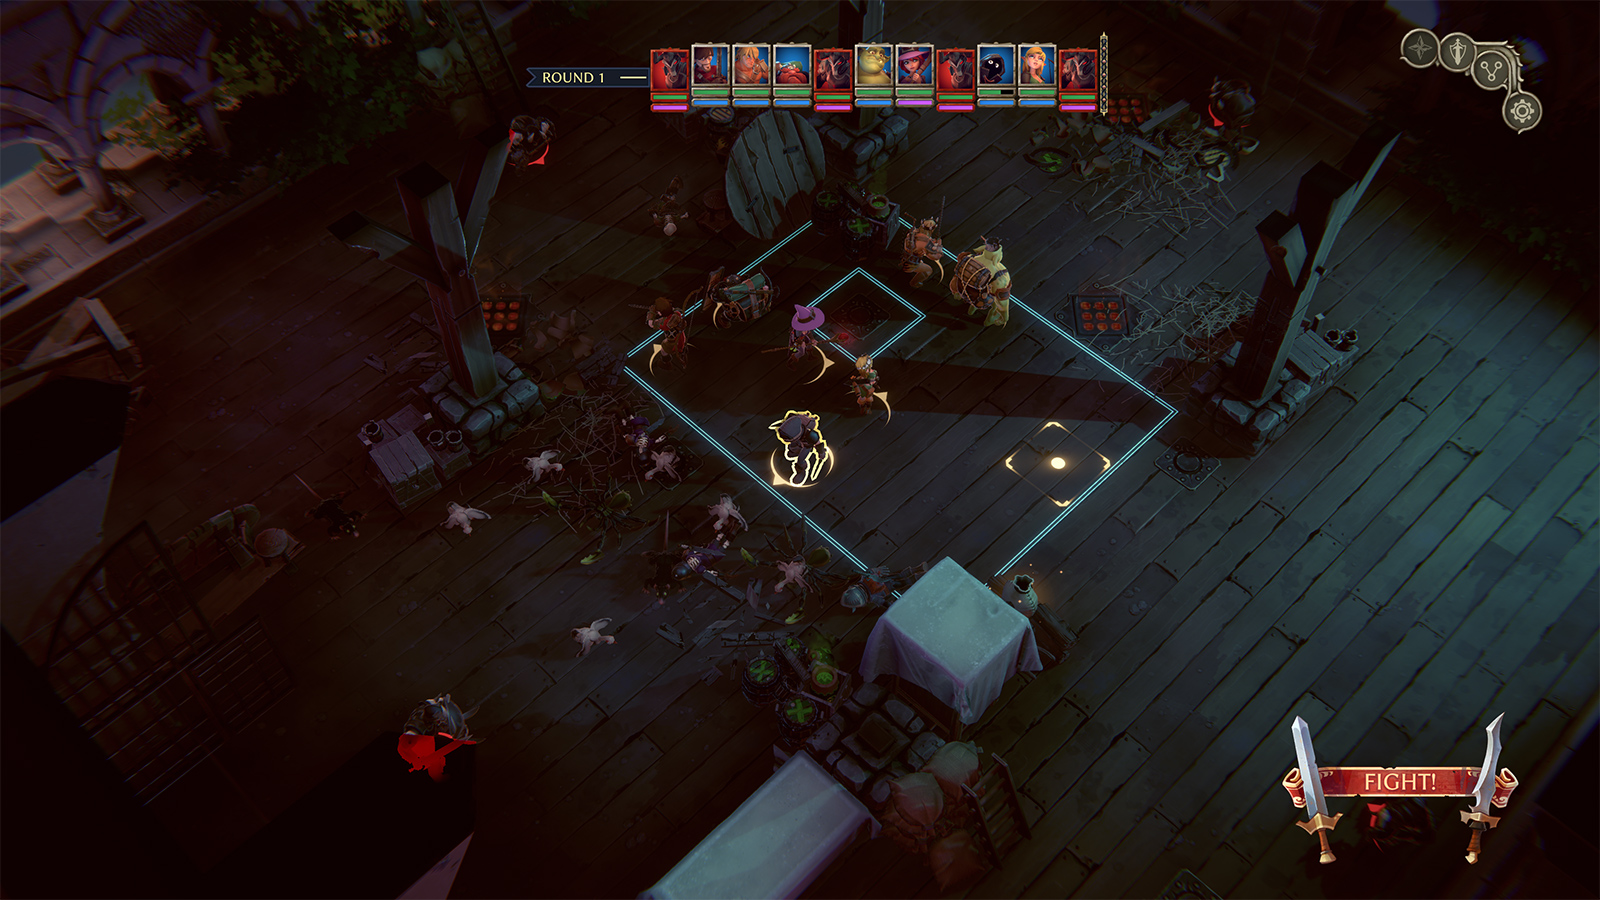
The next fight (which starts immediately after the previous) is even harder, especially in Epic Gest or Nightmare mode, where you get a fourth opponent. The enemies have high health and will risk an attack of opportunity to get behind you. Part of the strategy is in noticing the order in which the four opponents attack (clockwise, starting top-left) so that you can get ready for them round-robin. Once you respond to each, you can move characters away to prevent easy access to your ranged. (E.g., the Ogre knocks back the top-right opponent then shifts to intercept the lower-right opponent before he can reach the Elf.) Once one is dead (hopefully the top-right opponent) the ranged can move that way to steer clear of melee attacks.
Chapter 3
Pick the Priestess as your new party member and rest at the tavern. The Priestess is your dedicated healer and frees up the Wizardess and Elf to focus on damage. Buy an Elixir of Oblivion at the tavern and use it to reset the Priestess’s abilities. Put her initial points into intelligence (which improves her precision). Going forward, you will put most of the remainder into charisma, though keep some going into intelligence so that she’s at about 100 precision by level 10. Pick Lightning Chain and Detox Cure instead of Inner Peace.
At this point you have to decide if you’re going to do Midrantir or Lemunster’s quest first. I picked Midrantir; the fight in the kitchen is tough.
My opening move in this fight involves setting things up for a push from the Ogre and attacks of opportunity from the Ranger and Barbarian to quickly eliminate the melee mobs. (The mobs initially gather in the lower-right corner.) Delay the turn for a couple characters to set up that push.
Prior to this fight (or immediately after) you might wish to return to the shop and upgrade some of your gear. You should return to the shop and make smart purchases throughout the game (better items appear in later chapters); there is no reason to horde gold. It exists primarily to allow you to upgrade your gear.
You should have picked up the side quest for the Bottle of Chateau Les Louzeres; this is also completed in the basement. You can get the Binsc and Moo quest out of the way now (or after the rats, if you prefer). You pick it up right around where you finish the previous fight.
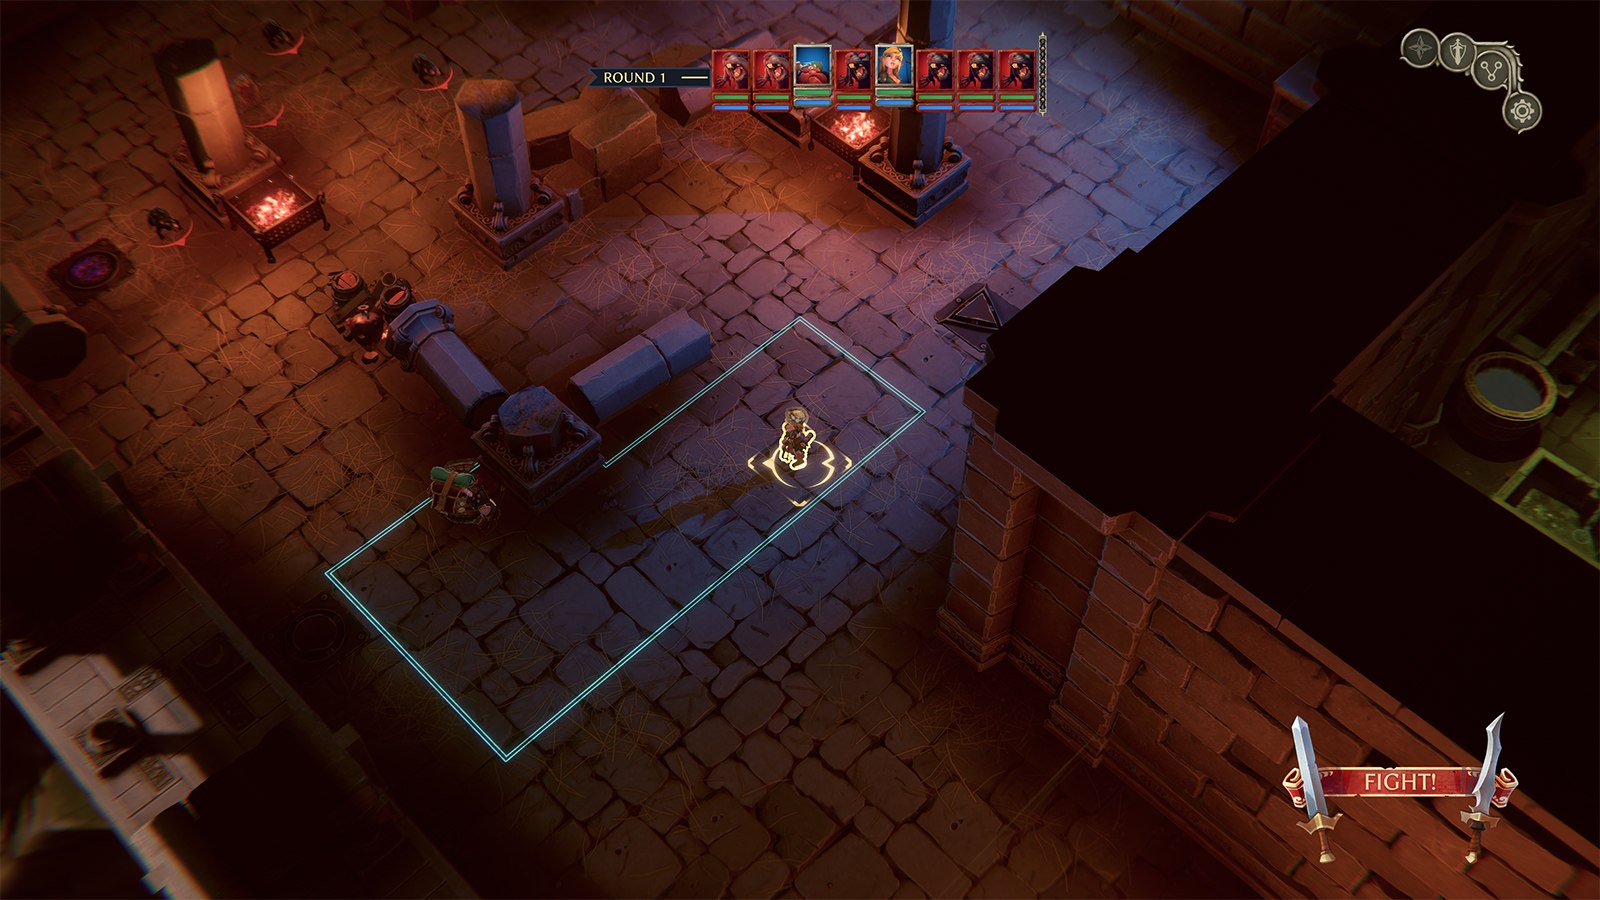
The fight in the Binsc and Moo quest is unique in that it only involves the Elf and Dwarf. Just be sure to keep the Elf at maximum range to dissuade the rats from running to her.
Rest at the tavern, if you need to, then return to the basement to complete the wine quest.
In fights like this one, it’s important to try and isolate the ranged characters. By placing a ranged behind a melee, you make it hard for a mob to slip past you (or else the mob is exposed to an attack of opportunity). The rats have the ability to run a long way and still attack. I placed the Ogre and Dwarf in the corners (rats will swarm to these points). The Thief will catch the rats coming from the top (he’s likely going to die, but the Barbarian can move to assist). Use your AOE and push attacks once the rats have come into melee range.
The Lemunster (kitchen fight) is next; it can be hard on tougher modes because the big mobs have physical resistance to pushes and a lot of health. Focus them down one at a time and try for stuns. Don’t move your characters out, except maybe the Dwarf on the top/left side. Let them stay put and hope for an attack of opportunity. The chef throws an AOE attack, so it can be useful to keep the ranged far back from your melee (farther even than in my starting layout).
Before you move on to the fourth floor for the main quest line, there are some side quests you can complete. On the first floor (Hall) there is a room south of the gardens with an interior door; if you tried this fight earlier it was probably difficult, but now shouldn’t be.
Delay your turn so that the mobs come to you. If you use the configuration pictured, mobs shouldn’t run around your melee to reach your ranged, initially (but they will later, so move ranged back after the first round of attacks).
You should now have all the books in A Brief History of Orcish Culture; these are turned in down in the basement (grants +1 impact to the party).
Now pick up the quest in the dormitory (floor 2), which sends you up against the Dlul cultists.

The cultists group up, making it convenient to use AOE attacks against them. Outside to the left is a lever that gives access to a chest (outside to the right).
Now go up the stairs (by the VIP room) to the fourth floor. You will emerge at an ice rink.
Don’t go on the ice; let the goblins (try to) come to you. The frozen goblins will eventually come to life, so kill them off when it’s convenient. Keep the ranged back; some of the goblins throw bombs that do AOE damage.
After this fight, make your way to the lift (disarming the trap along the way) so that you can use it to quickly return to the tavern.
In this fight, it’s important to keep your ranged back (move them even farther back after the first round of attack) and keep the Barbarian behind cover. Have melee delay turns until the goblins are standing in front of them. After this, push back and deal with any incursions behind the melee, and use crowd control when possible.
There are two traps on the way to the next fight. Let the Thief lead.
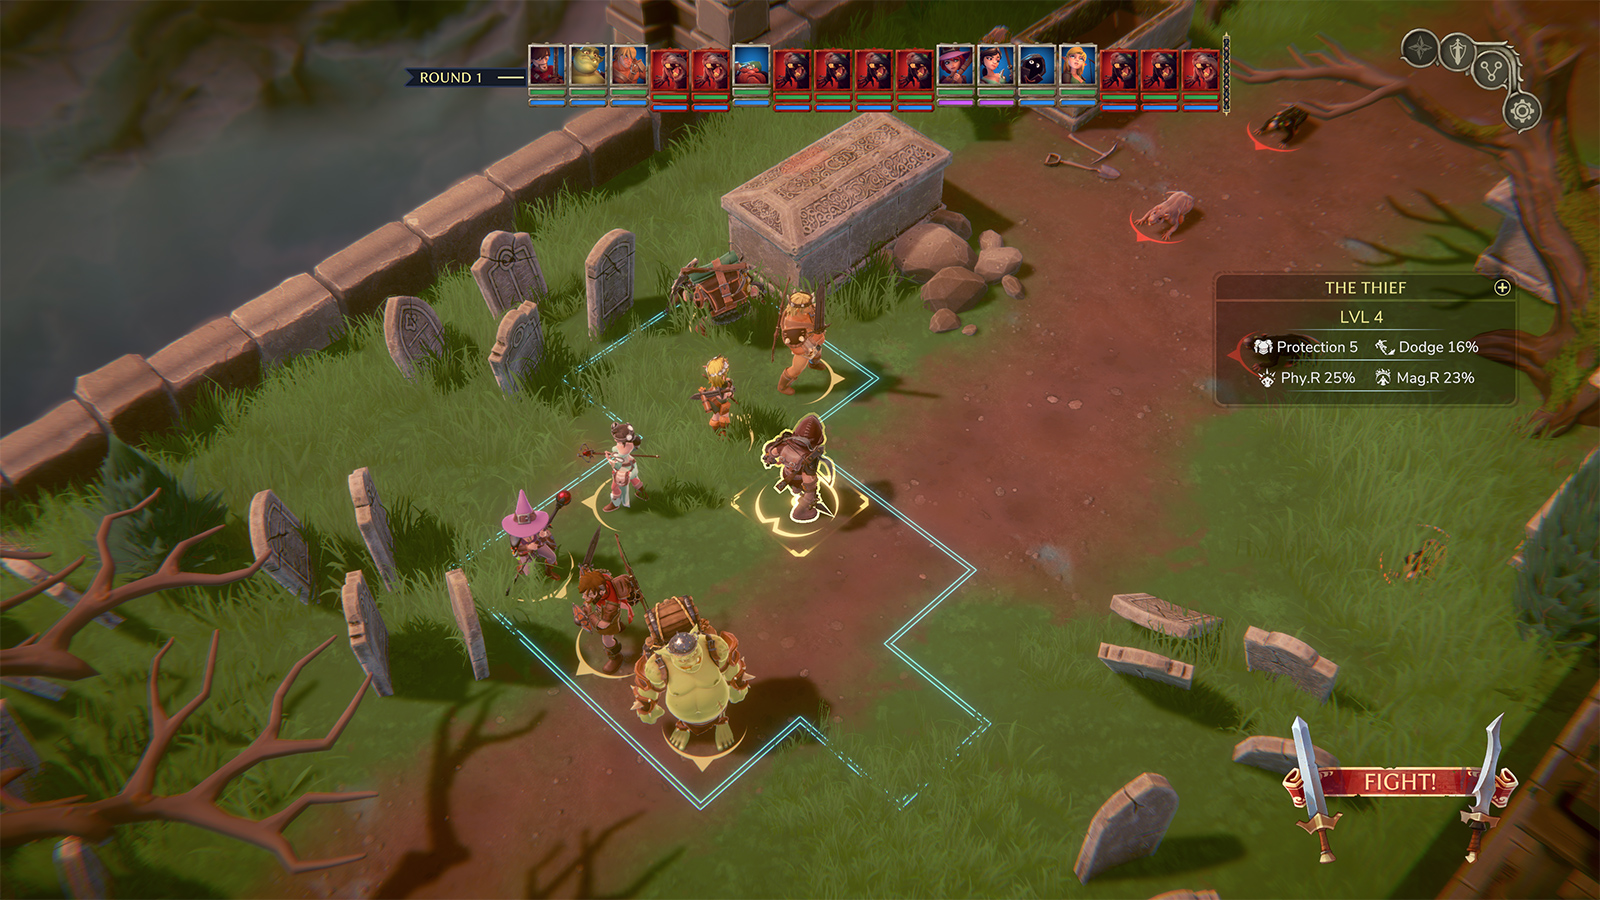
I spun the camera before taking this screenshot to give you a better angle. This fight is more difficult than the previous ones because of the big mobs. This configuration should allow you to escape the area attack they throw. Again, this is a fight where it’s not necessary to venture out into the room until near the end. Delay your turn and wait for the mobs to come close, then be prepared to heal (a lot).
After, head down to the south-east room on this floor and pick up the last volume of Anthropological Function of the Goblin (if you didn’t grab it before), then turn in the books in Reivax’s room before leaving this floor (+2 dodge for the party). To the east (on your way out) is a puzzle involving levers; the solution is green, blue, yellow, red, green.
Chapter 4 Part 1
After the last fight mentioned, you can complete the remaining quests up through the Demon of the Fifth Floor, then activate the lift on the fifth floor and return to the tavern without having to fight again. Pick up the quest Bear & Ale Stew Recipe in the tavern and finish it (the recipe is in the privy to the north-east). Pick up Absolute Expertise in the VIP Room from the vendor (if you didn’t previously) and The Magic Faucet from another guy there. You complete the Absolute Expertise quest in the basement. (If you don’t drink the antidote, you carry a -4 charisma penalty.)
The Faucet quest directs you to a fight in the south-east room on the fourth floor (where you picked up the last volume of Anthropological Function of the Goblin):
The fight is fairly easy; stay grouped until you have the melee mobs down, then move out to get the ranged mobs.
Heading back to the fifth floor, on the main quest line (Tuffluk Rituals), you will encounter a fight that splits your group:
This fight is pretty simple; let the mobs in the top section come to the Barbarian and get hacked to pieces. Once the front two mobs are gone, the Barbarian can handle the top section by himself (the other characters can move to the lower side). In the lower section, quickly kill the mob that is stunned, then create space between the other mob (who has a lot of health) and your group to give your ranged room to stand farther back.
After this fight, you’ll be overwhelmed in the next room and wake up on the first floor. The Pharmagician will give you a quest that will lead you into the garden. (Ignore the option to locate the Umbrella of Resistance–that’s a red herring.) Pick up the Organic Gardening (spider egg) quest while in the garden.
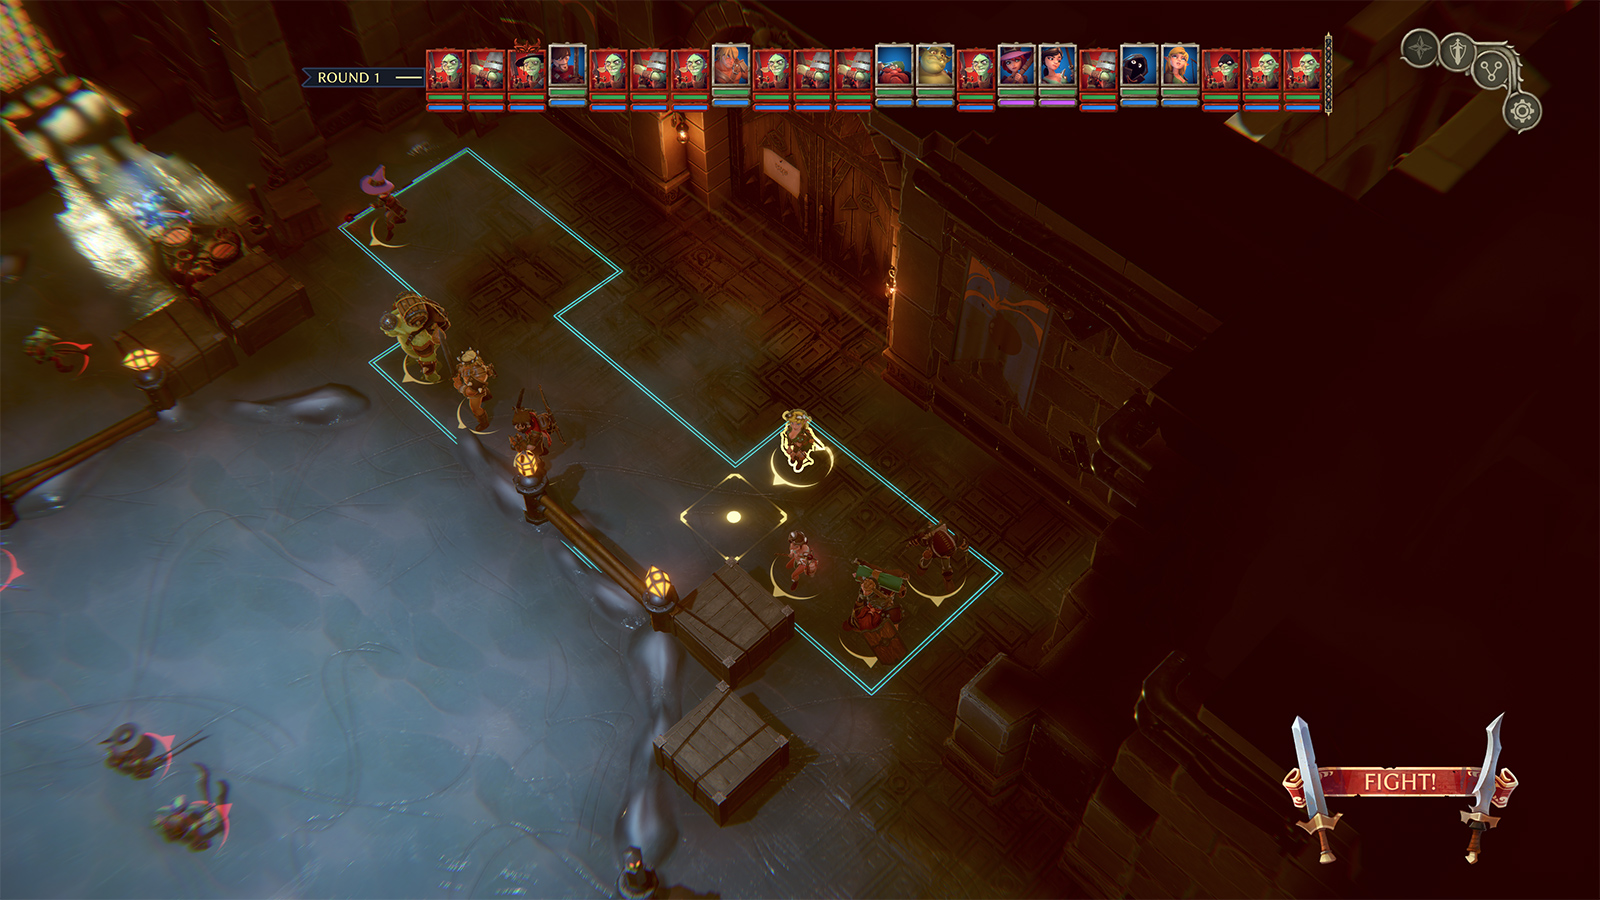
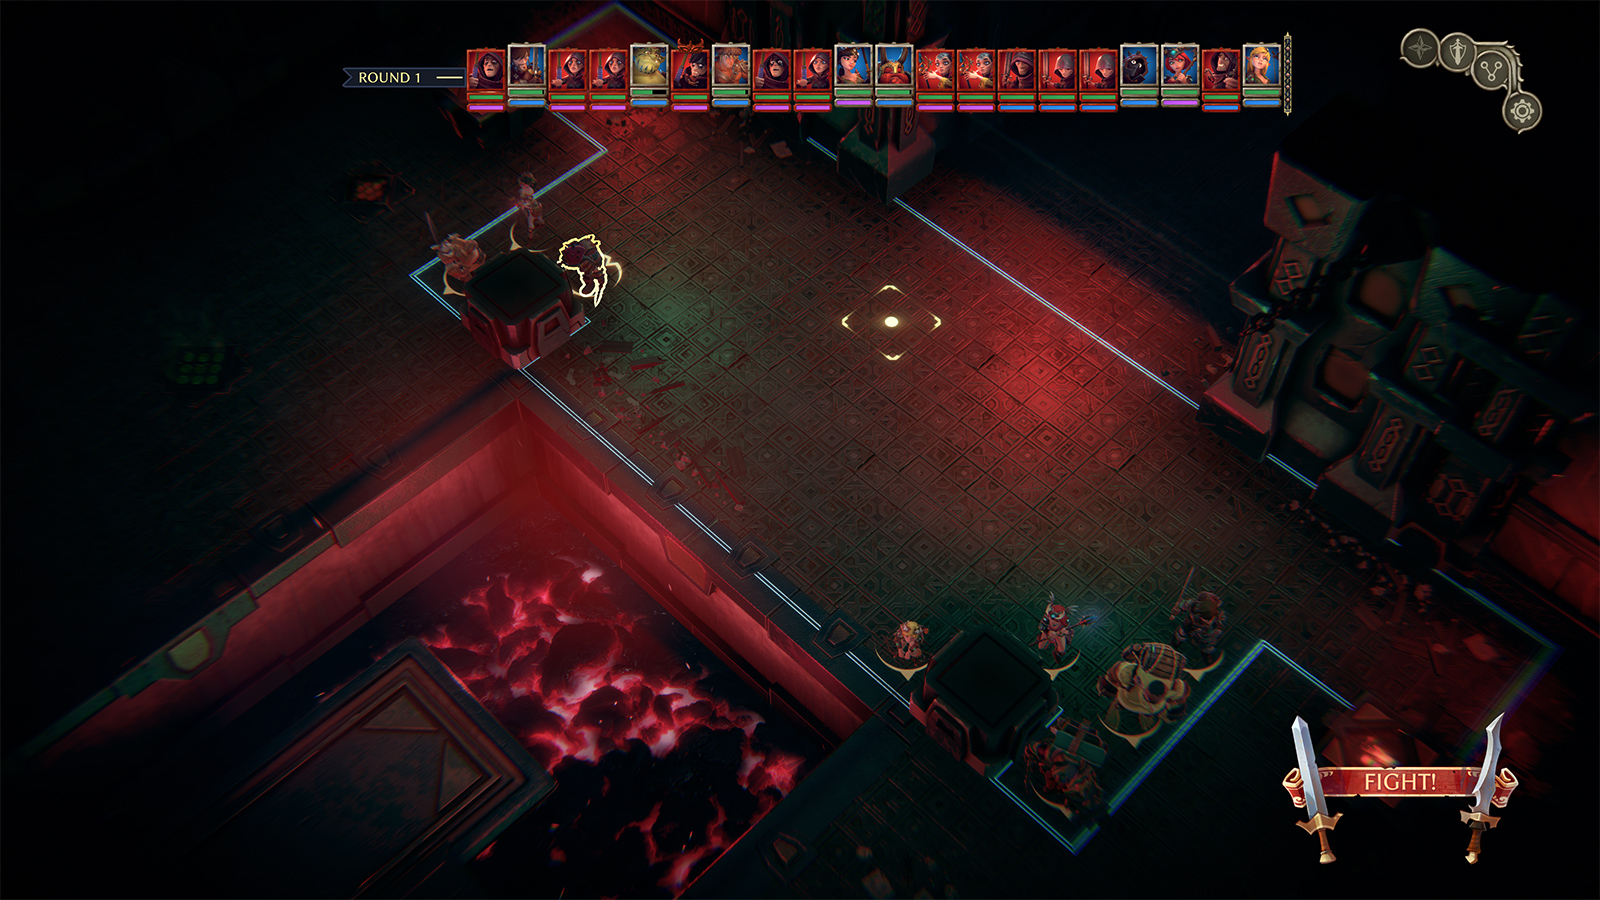
As you find your way back from the garden, the next fight will have you surrounded by rats.
It’s tricky because it’s hard to keep your ranged safe. The configuration shown was my best effort. The rats were drawn to the Ogre and the Dwarf, initially. Delay turns until the rats are on you. I then had the Wizardess nuke the group around the Ogre and move a little toward the lower-right (to avoid getting snuck up from behind).
You will be able to flip a switch in the garden that provides access to the crypt.
The fight in the crypt is difficult because the mobs often will use freezing arrows; you can bring a Local Warming Potion or two if you’d like. If they get lucky and freeze several of your characters, things can go downhill quickly.
Don’t heal after this fight; the Pharmagician will heal you when you complete the quest.
Immediately afterward, you will receive the quest for the Hysterical Preacher. Head back to the crypt and go downstairs to find him. He’ll give you the Priestess quest. Beyond him is a puzzle; turn the statues until they all face away from the closest wall to reveal a treasure.
At this point, both the Priestess quest and the Brave the Orktobearfest quests are pretty difficult, so I recommend going to the basement, taking the stairs down to the cave, and doing the spider eggs side quest (as well as other side quests in the caves). If you didn’t already, you pick up that quest in the gardens on the first floor (Hall). If the gate to the caves isn’t open, you need to throw the switch near Binsc and Moo.
When you next head down to the basement, you will trigger a fight (it correlates to the Priestess quest).
Stay spread out initially, they throw bombs. You will have several mobs that are in stealth, so get prepared to bump into them. (When mobs are in stealth mode, they will try to avoid detection and get behind the closest character. Standing in formation with few gaps prevents that.)
Now head down to the caves using the stairway to the south, then head north-east toward two fights with spiders. (You will bash in an ogre door to gain access.)

Have the Ranger take one step ahead at the end of his turn, as pictured, to discourage the spiders from running around him and attacking the Elf. This is a safe fight to test out some of the new skills you’ve recently acquired. The Ogre should hopefully have his Dwarf Throw skill, which can be used to attack the two spiders at the top-right, while he personally confronts the spider directly above him. Use the Wizardess’s Ice Bolt to freeze a spider that runs next to her. Have the Priestess use her Lightning Chain (which should now be limited to damaging enemies) on the spiders to the left.
The second spider fight (to the north) is harder due to the number of mobs.
This is a great one for Dwarf Throw—he can hit at least three spiders and tie them up, away from the group. Then use Gurdil’s Whirling Wallop when he’s surrounded.
Once you turn in the quest, head back to the caves. There’s a fight involving some rats to the west; you may as well fight them now.
Delay your turns (all except the Ranger) to let the rats move in, then use AOE attacks to bring them down. The lineup below hopefully allows every character (except the Ranger) to delay their turn without the rats reaching the ranged.
Head east and pick up the Matrimonial Marauding quest (from the lady standing to the east). The corpse to the north (that you passed on the way to the spiders) has the key to the door.
There are two fights in this area. The first has some enemies barricaded, and they use stealth. Throw the Dwarf toward the mobs to the upper left (try to hit three), then move the Ogre north behind the edge of the pile of crates.
In this second fight, expect some mobs to appear in stealth from the left side. This is one of the more difficult fights to this point. Kill as many at range as possible without spreading your forces out too much. You’re going to have to advance toward the enemy forces somewhat, while dealing with mobs who will try to sneak around and hit you from behind.
At this point, you can either return to the main quest line or else do the Priestess’s quest, which in my opinion is technically more difficult because bad RNG can ruin you. But let’s assume you tackle it first. Pick up the masks in the shop, if you haven’t already. Go to the room in the basement with the floor hatch (you need an egg to pass the riddle) and descend.
Chapter 4 Part 2
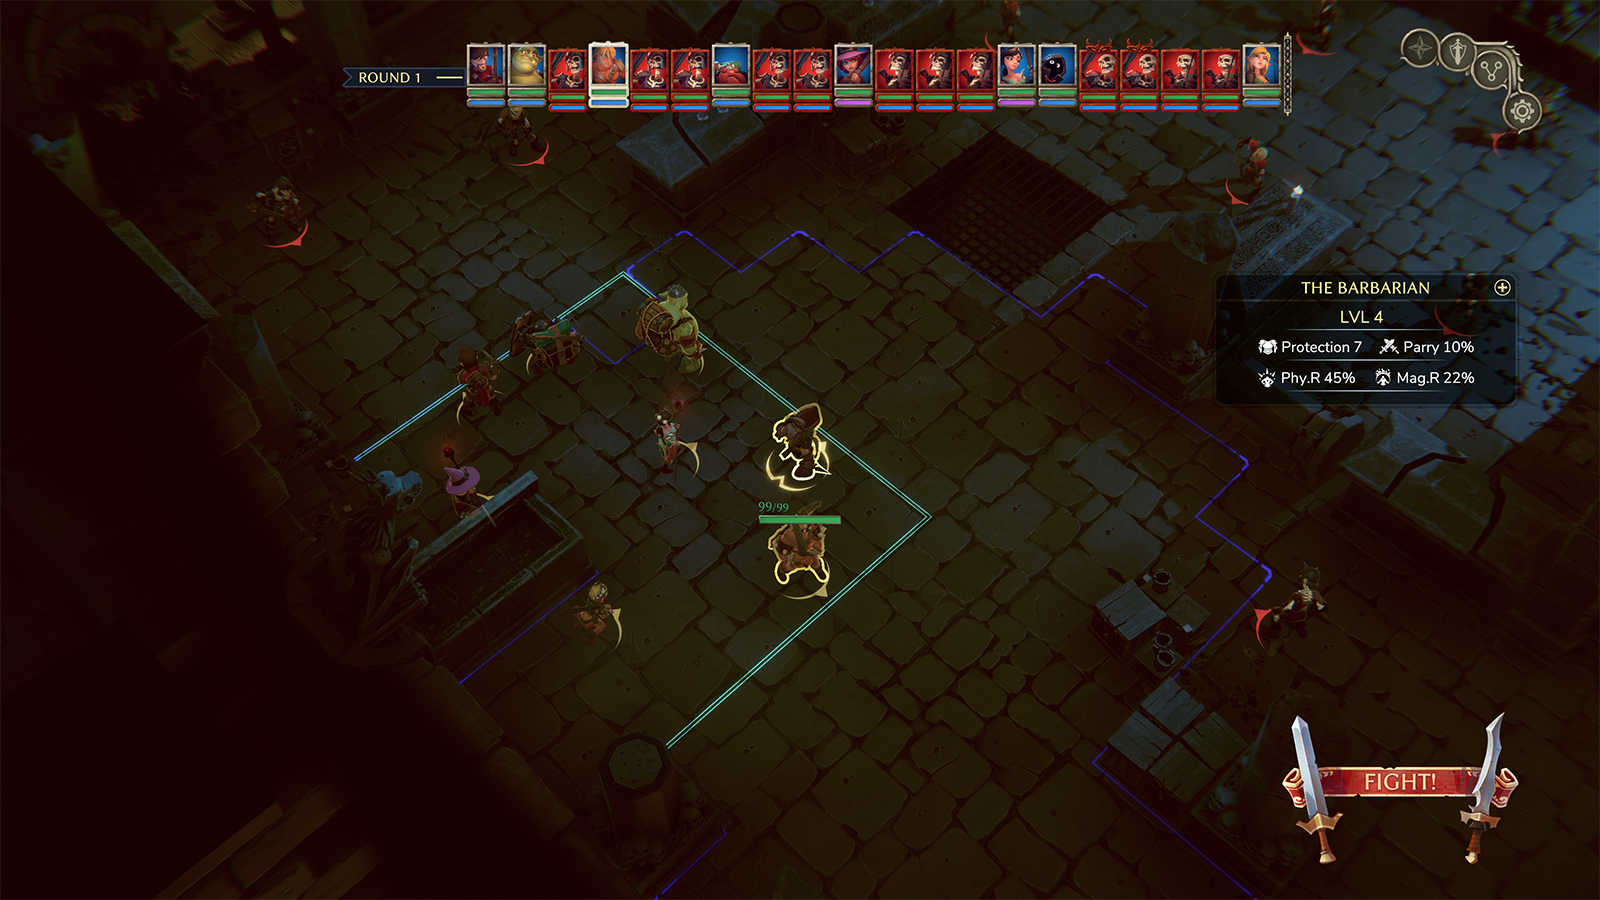
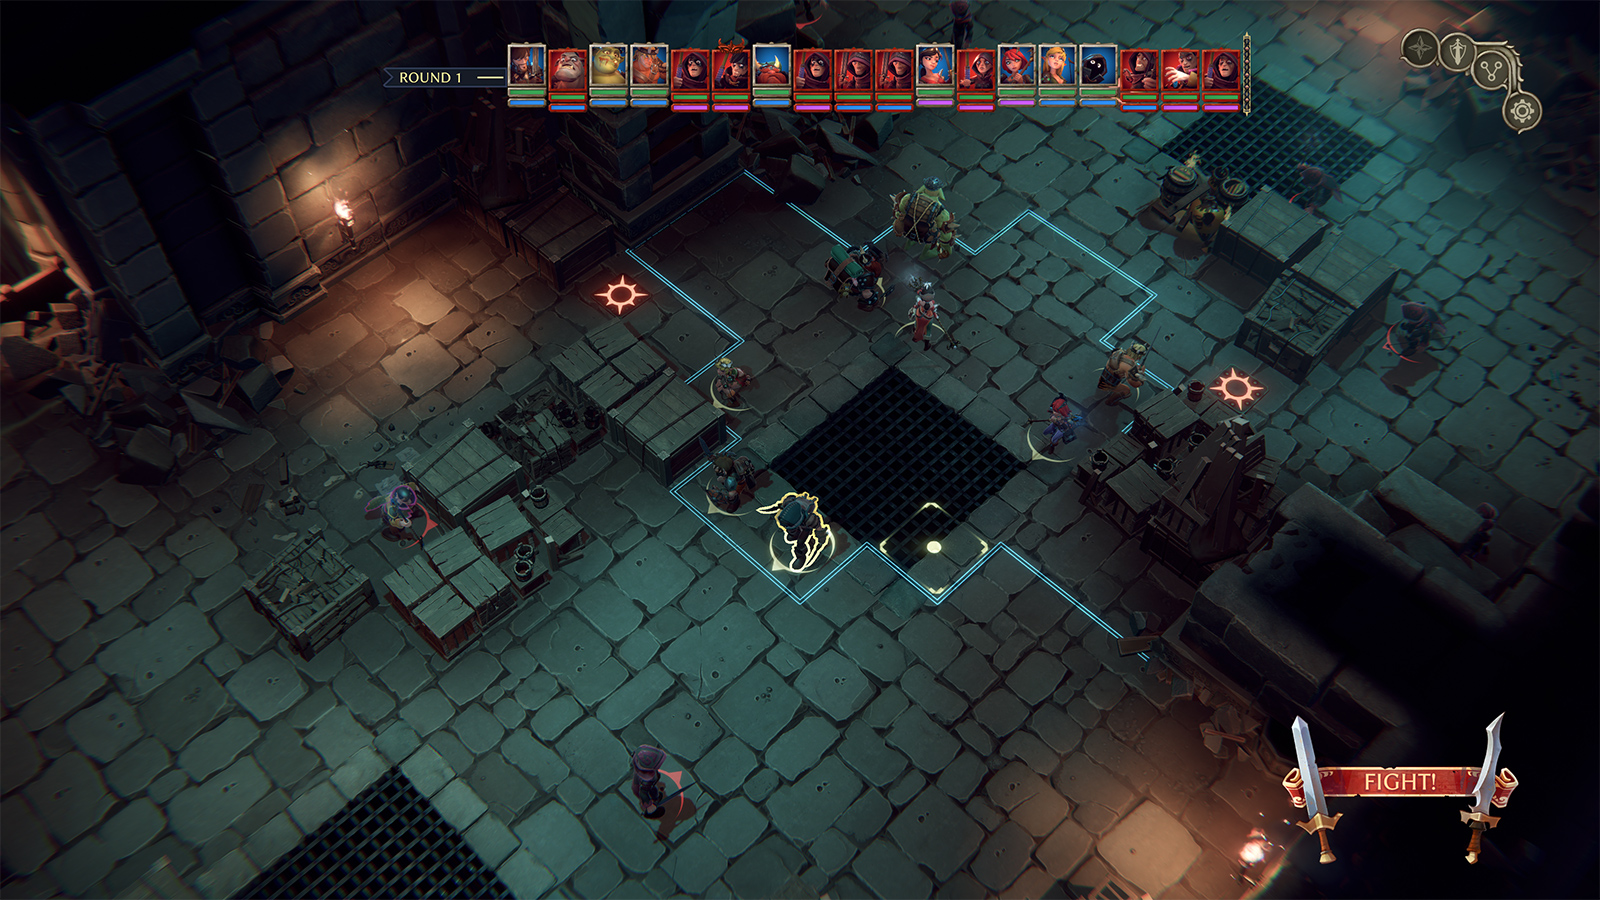
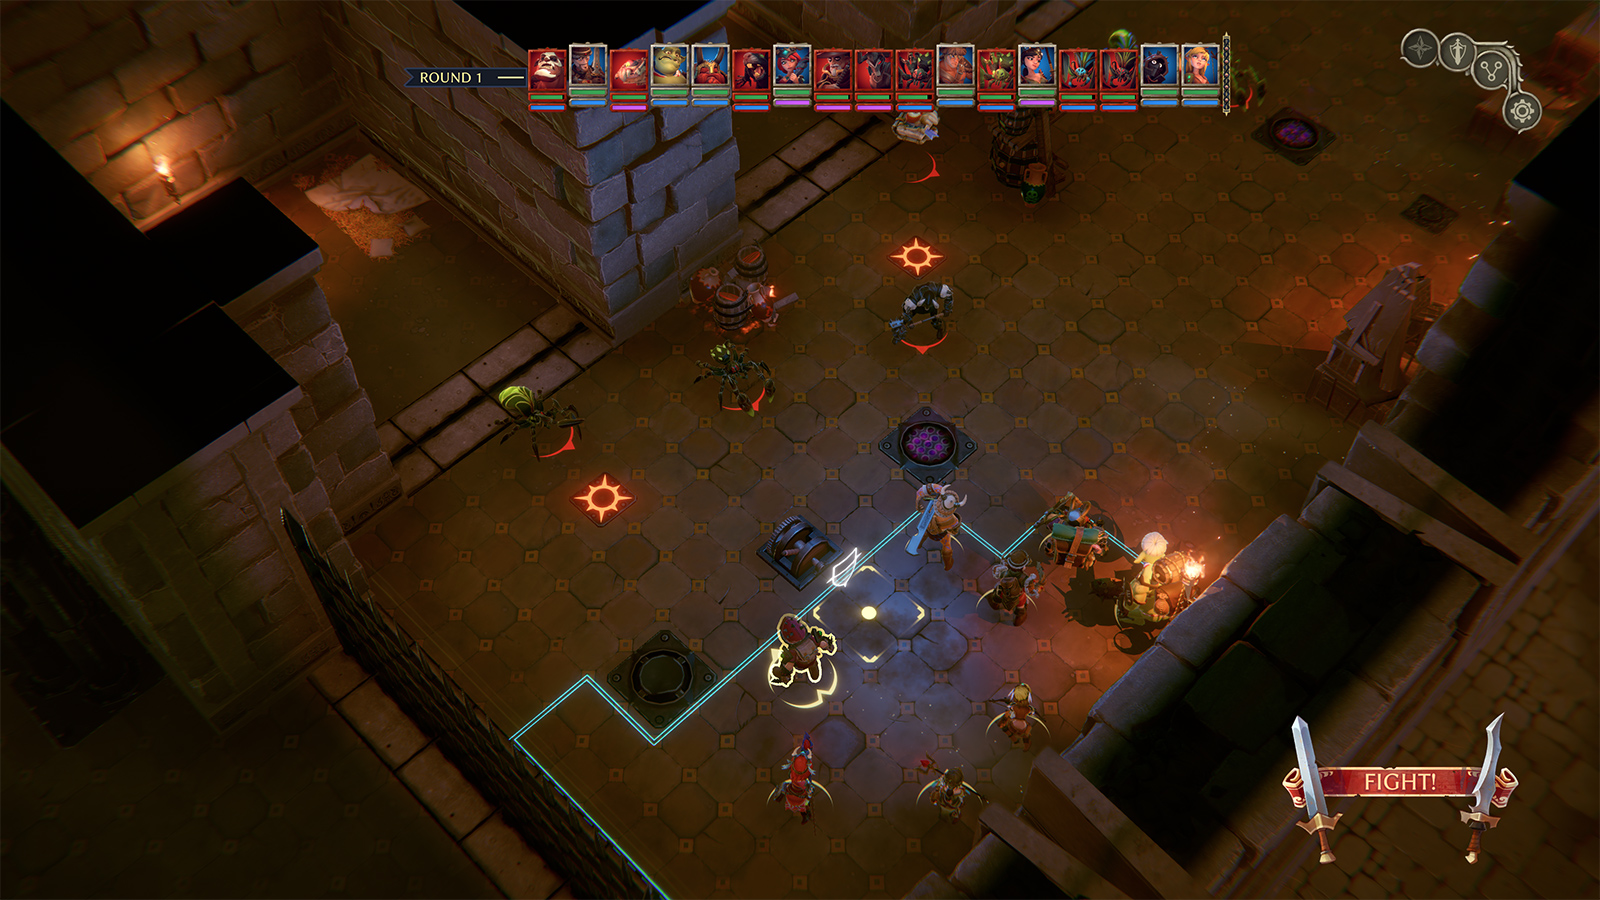
Have the Ogre push the first melee opponent back or (even better) use Dwarf Throw; try to maintain space between melee and ranged (fight the melee toward the bottom of the room). The Barbarian can close and hack up his opponent, then deal with the caster hiding by the table. At the top, the Ranger can close with the casters to draw their attention while your ranged hits them with AOE attacks. The most troublesome mob here is the Chosen Priestess because she will heal everyone; the best approach is to focus and kill ranged mobs one by one (since she stays out of range and is therefore hard to pin down). This fight is difficult because there are so many mobs active; you need to CC them and pick them off while healing your party from incoming damage. Like many fights in Naheulbeuk, the early phases are critical. Once you outnumber your opponents, the fight gets easier.
The Wizardess’s Whirlwind and Ice Bolt, the Dwarf’s Whirling Wallop and Yakak Charge, the Ogre’s Burps, the Thief’s Ice Bombs, and the Ranger’s Shield Bash are very useful tools to shut down mobs until you can kill them off. (The Thief’s Ice Bombs are useful throughout the game, while the other bombs become less useful due to weak damage.) This fight requires a little luck for an efficient outcome; the mobs can easily get on a roll if you miss some immobilizing attacks.
After this, it’s time to return to the main questline and brave the Orktobearfest.
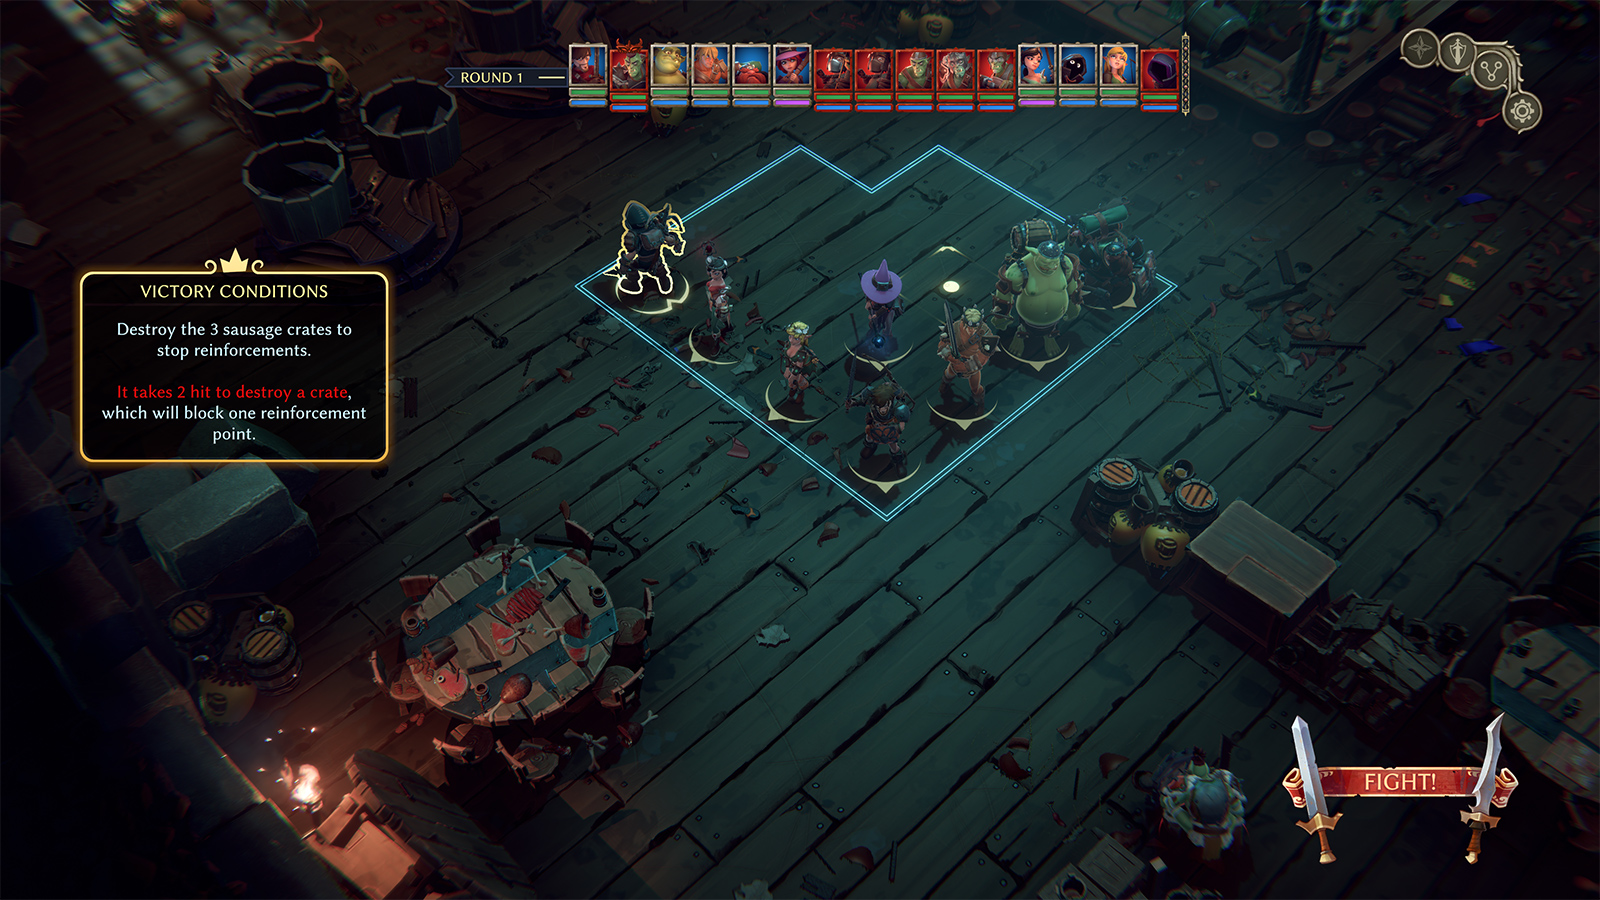
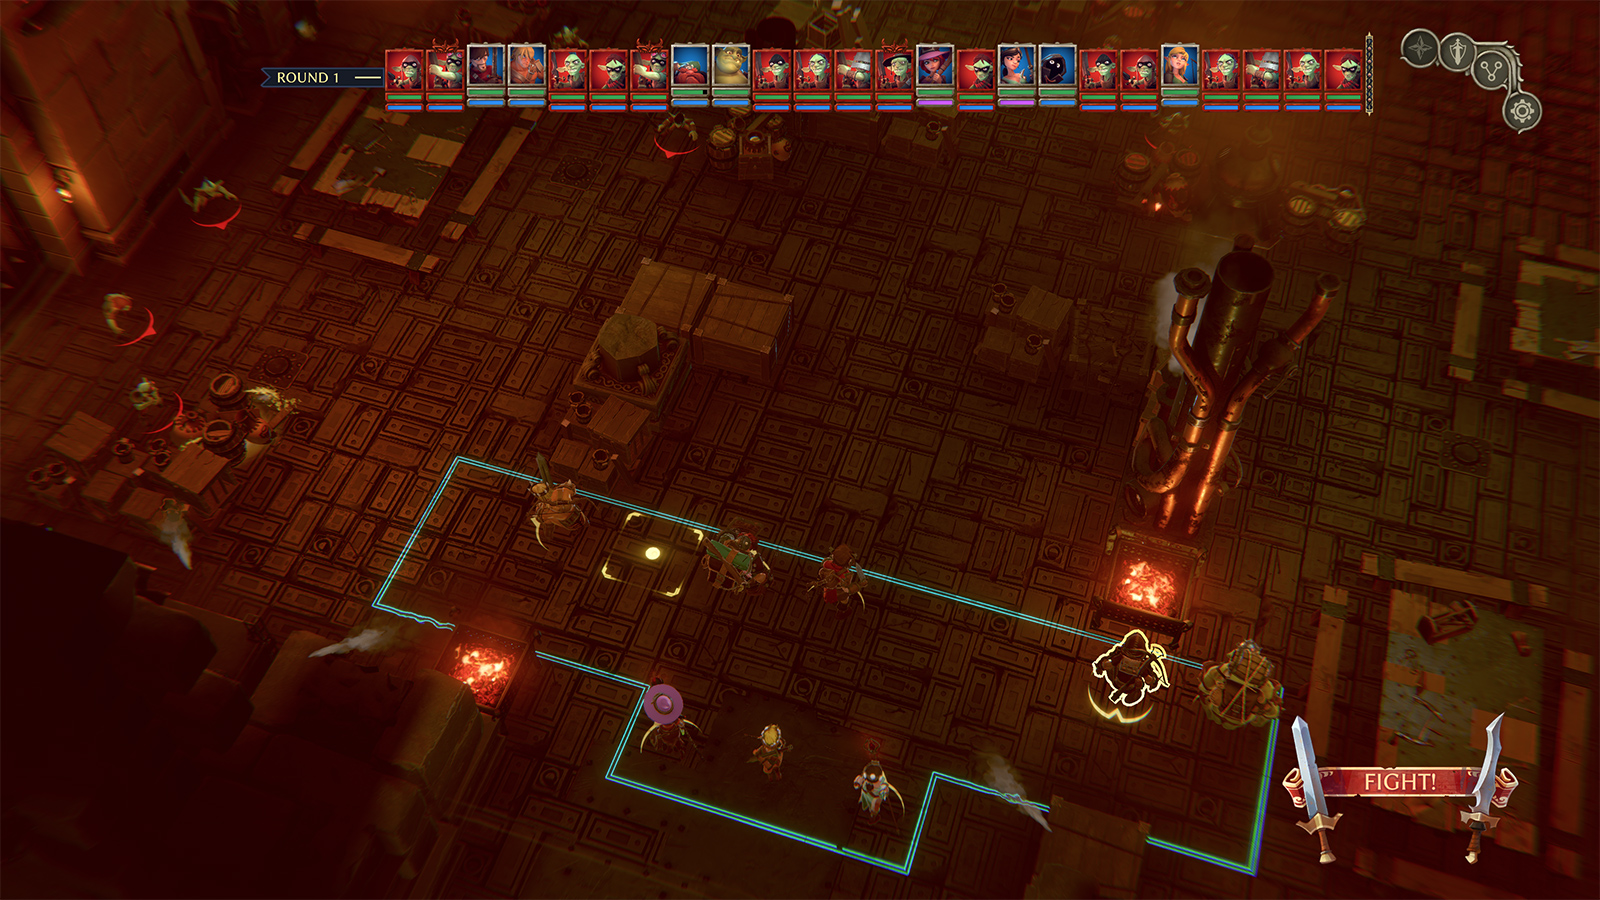
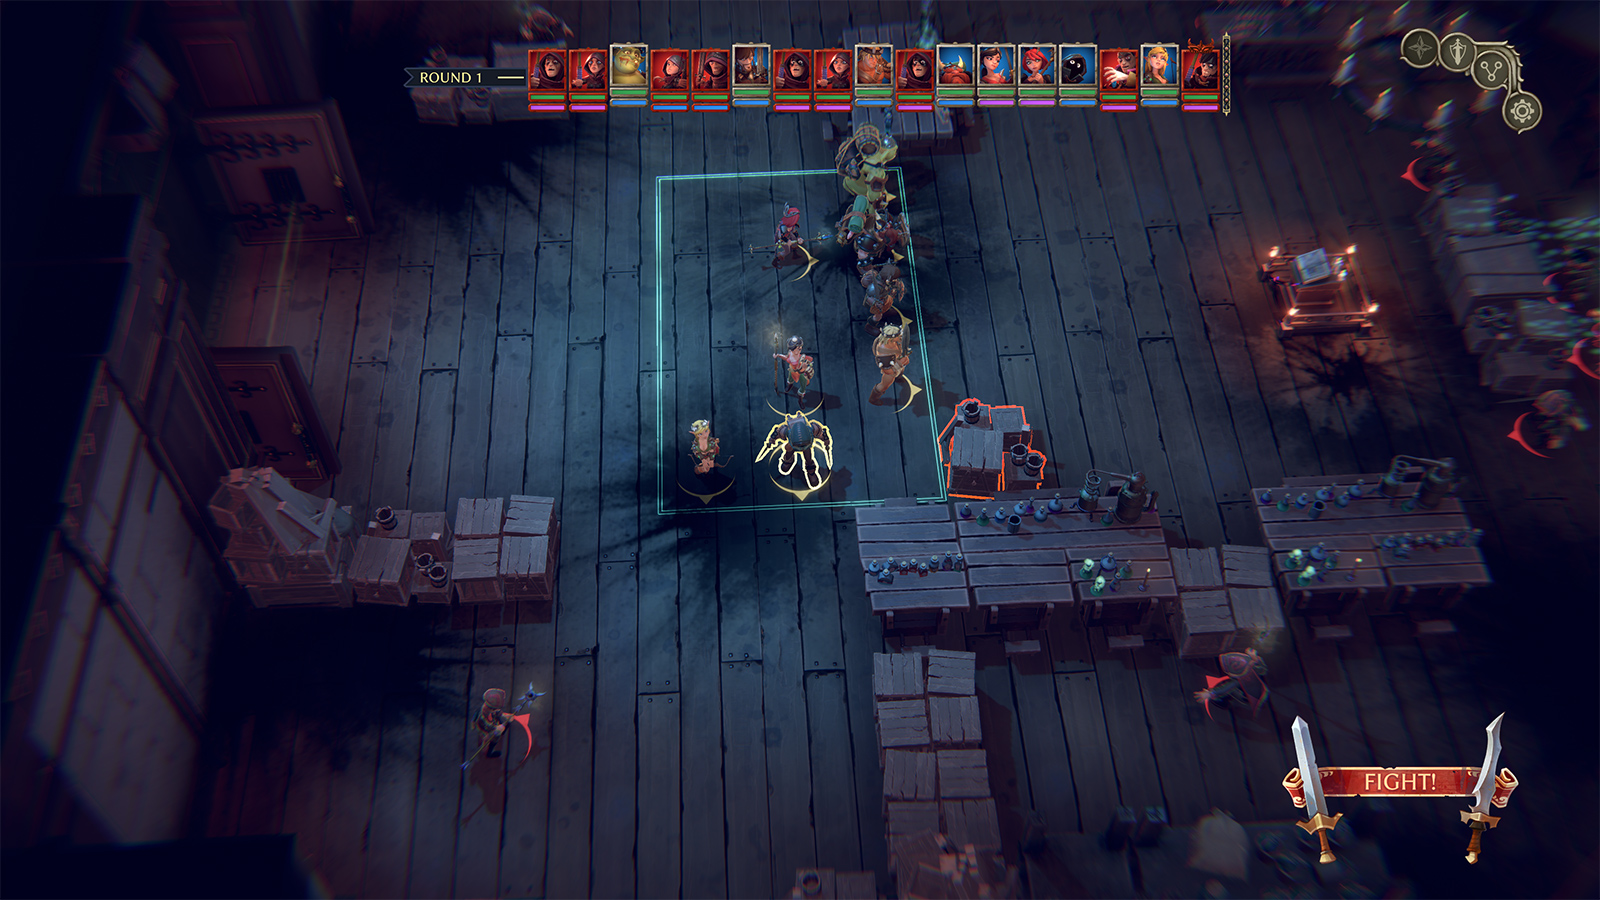
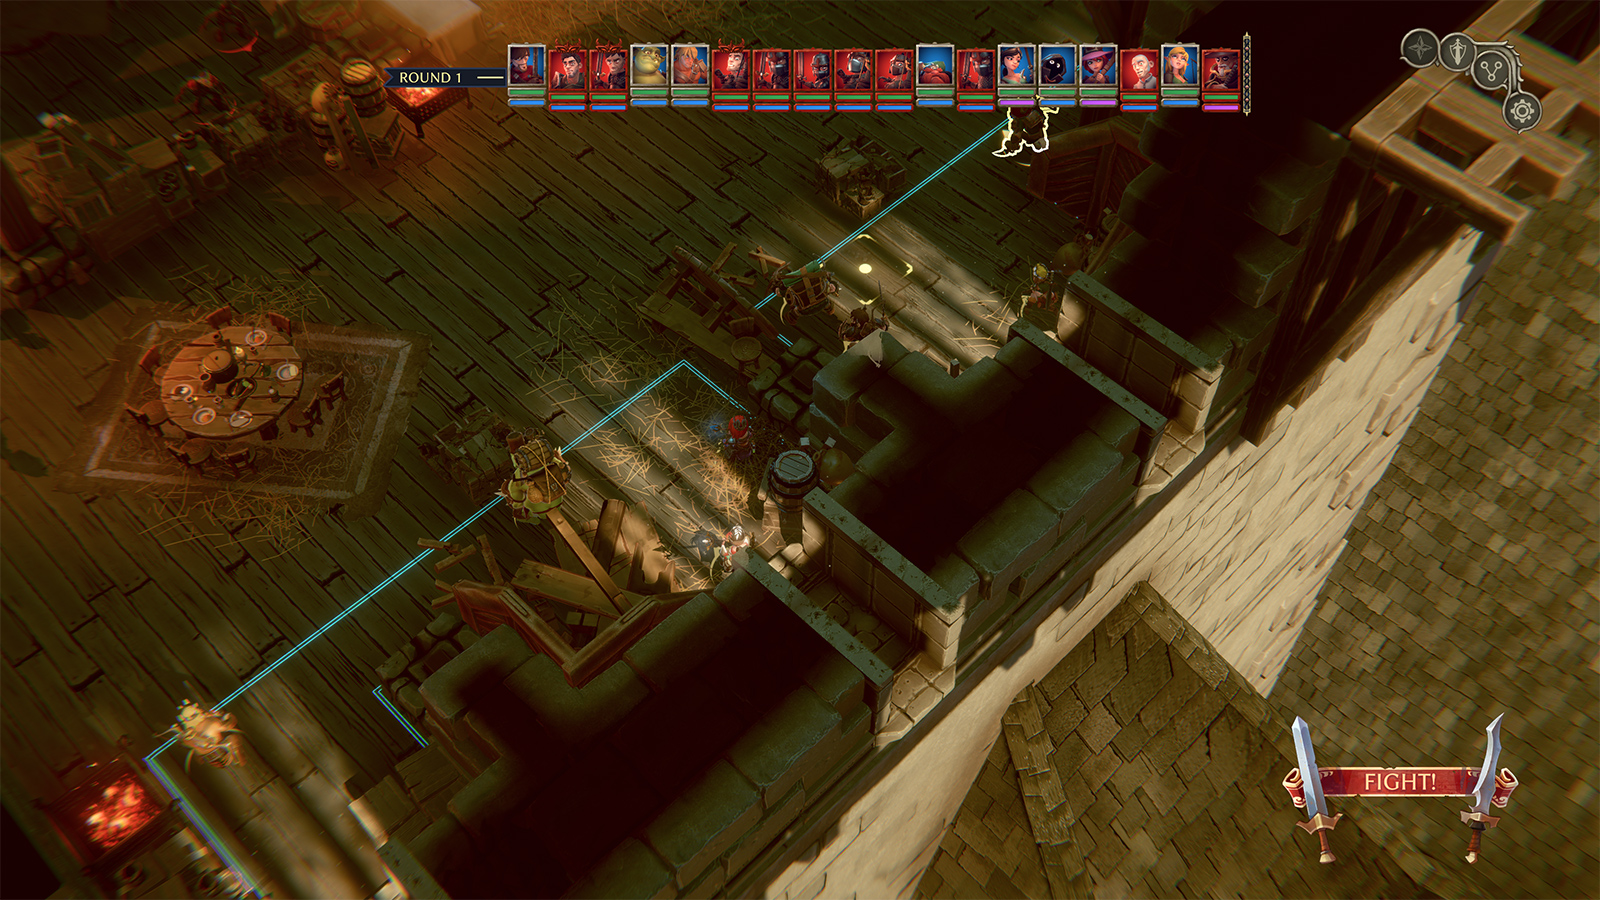
The primary twist to this fight is that you need to blow up three crates positioned around the perimeter of the room: one to the lower left, one to the lower right, and one near the top of the screen. It is imperative you get to the crates as quickly as possible; adds will join the fight in waves until the crate corresponding to each entry point is destroyed. The first crate to bring new adds is to the lower-left, then they proceed counter-clockwise. You can’t prevent the first set of adds in time, but you can stop the others. Make sure you give the Thief, Ranger, and Dwarf explosive bombs—that’s the quickest method to destroy a crate at range while leaving maximal firepower to deal with mobs. One bomb on each crate completely destroys it.
I send the Thief to the top crate, the Ranger to the bottom-left, and the Dwarf to the lower-right. (I have the Ogre throw him over the barricade and next to the crate. This requires that the Dwarf move first and draw closer to the crates so that the Ogre can come up from behind and chuck him over.) The reason I pick the Ranger to head toward the bottom-left crate is that he gets the first move and can get halfway there, even after Tactic: Protection. (You need the physical resistance from it to lower the chance of the Barbarian being knocked down by the big mob; you shouldn’t try to use Loubet’s Anticipation. It’s not really necessary.) The big mob won’t bother the Ranger if he stays to the left. The Thief can move and blow his crate in the first round; keep him to the left of the barrels. (If he gets targeted with a crippling shot before he starts, the Priestess must heal him so that he’s not delayed.) The Dwarf and Ranger will blow their crates in round 2. You will only get 2 adds this way (lower-left). As long as you follow this strat, it’s a pretty manageable fight (easier than the Priestess’s quest, described earlier).
To heal after this fight, continue south but move carefully; there is a bartender who offers rest. Once you pass the bartender a short bit, the next fight is triggered. (There are books you need along the way, both in the privy and in a shelf on the wall.)
This fight is also straightforward if you delay your turn and let the mobs come toward you (and if you have some good RNG on magical resistance). Use methods to push, stun, and freeze when possible.
Once you pick up the last volume of Ogrish Cuisine, you can drop it off in the kitchen next to the tavern (the Ogre gains +2 constitution).
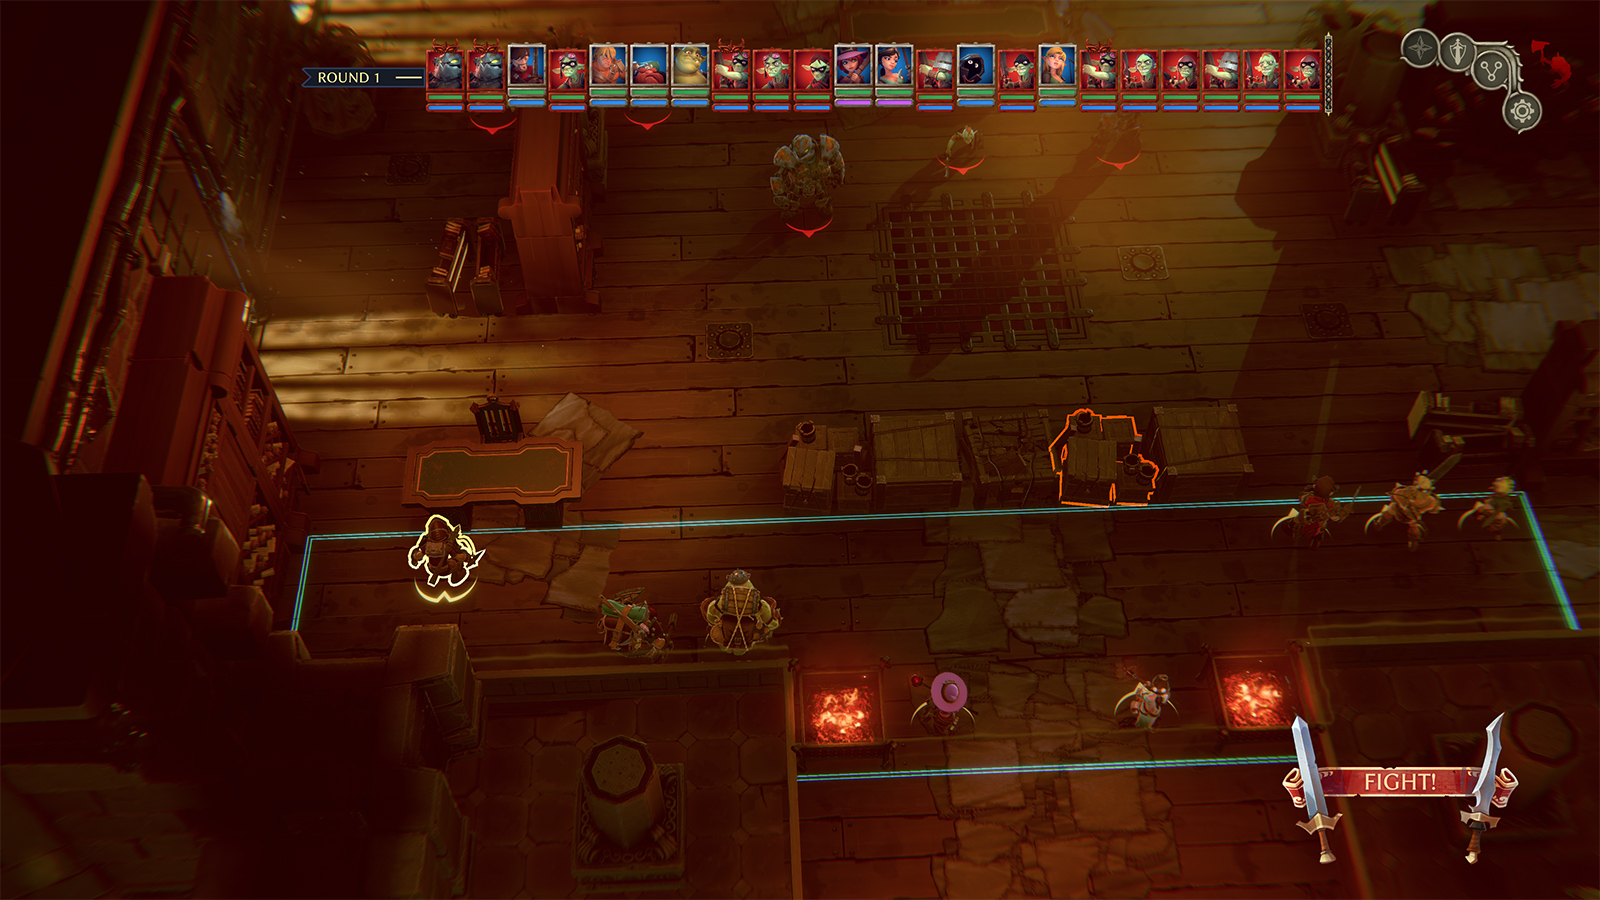
Careful on the way to the next (the third and last Orktobearfest) fight—you have to pass by three traps. (You can beat RNG by saving the game before you attempt to disarm each trap.)
This fight is more difficult. Vanna is the most irritating part—she charms one of your characters, who in turn attacks one of your other characters. It will likely be the Barbarian, who in turn will probably fire an arrow at the Elf. Cross your fingers it doesn’t kill her. Try to keep Vanna frozen/stunned/knocked out and focus on her until she’s dead. Then burn down the one big mob. Leave Jaypack for last; he’s too hard to pin down earlier in the fight. In higher difficulty modes, he can dodge almost everything.
This fight requires you attack with ranged but keep them distant from melee mobs; some of the mobs have high health and will ignore attacks of opportunity to reach your weaker characters. Splat throws long-range AOE attacks throughout the fight, so if you group your characters, he will continue to do damage to multiple targets. Try to keep characters spread out.
After the fight, be sure to hit the ogre door to the north.
In the tavern, before proceeding with the main quest line, you can pick up the side quest Co-Op Heist.
The fight is pretty simple; keep an eye out for a stealthy mob on the left side.
Now you’re back to the main questline. Before you enter the portal in the demon’s room on the Abandoned Floor, make sure you’ve opened the chest that’s behind the pillar, behind him.
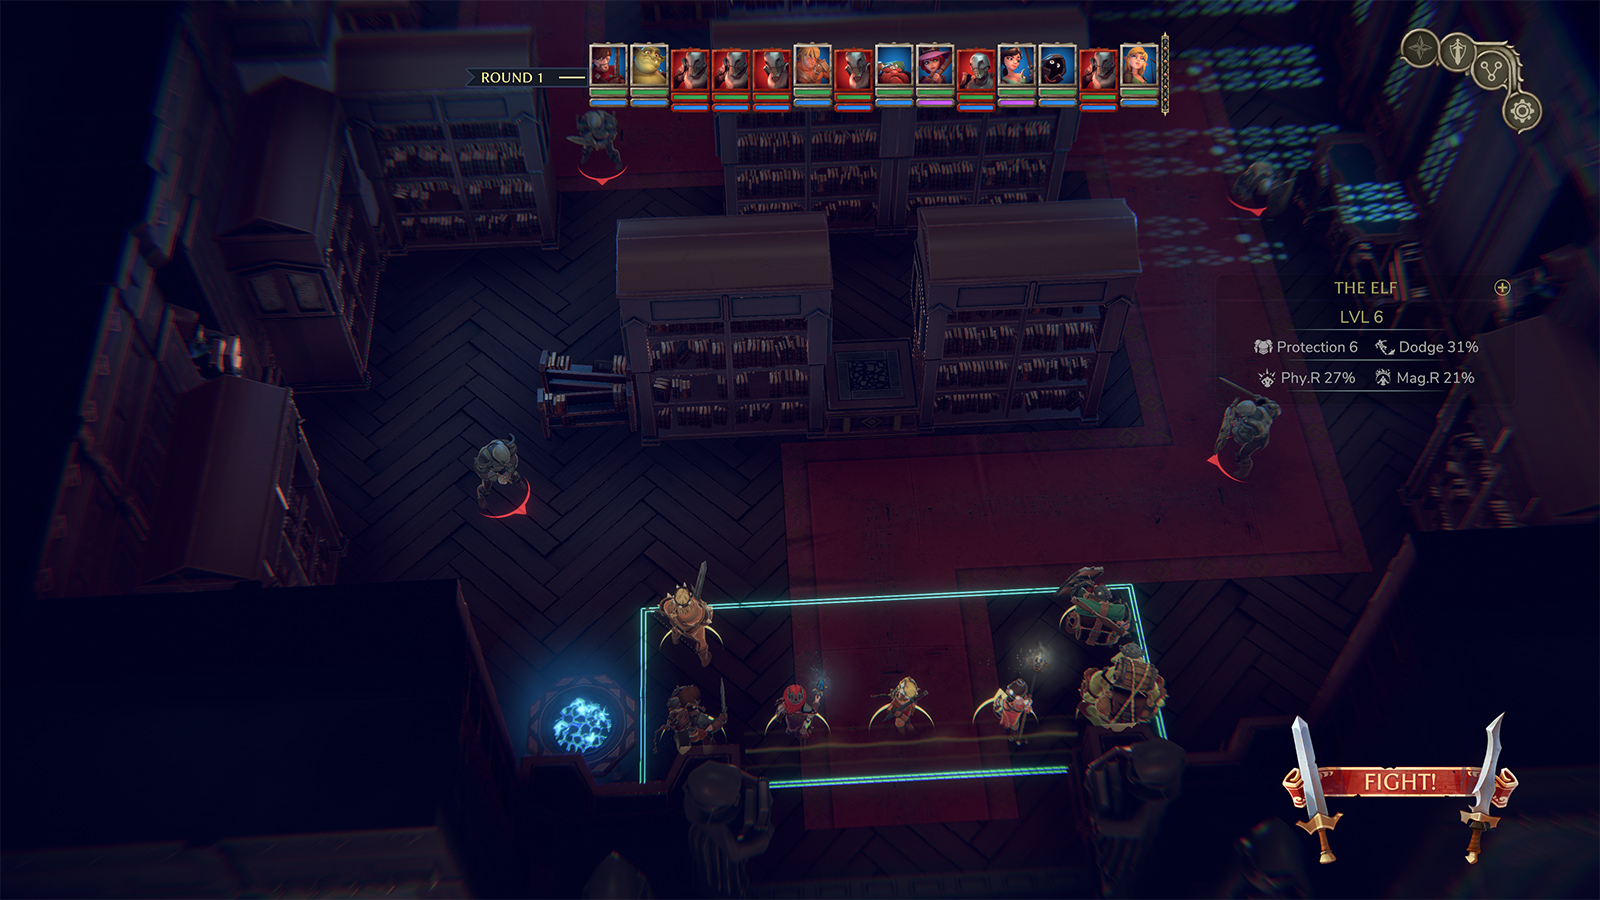
Chapter 5 – Library
Most of your characters will hit level six immediately after reaching the library. Visit the barman to the north-west to purchase some gear upgrades. (You can find most of this gear on this floor, but fights will be easier having it in advance. Just sell back what you don’t need later.) At this point, quality upgrades have a light gray color. Pick up the quest line and head east.
The fight against these mobs is fairly easy. Delay turns so that the melee come to you. Use AOE, then move up to the next series of crates to deal with the casters.
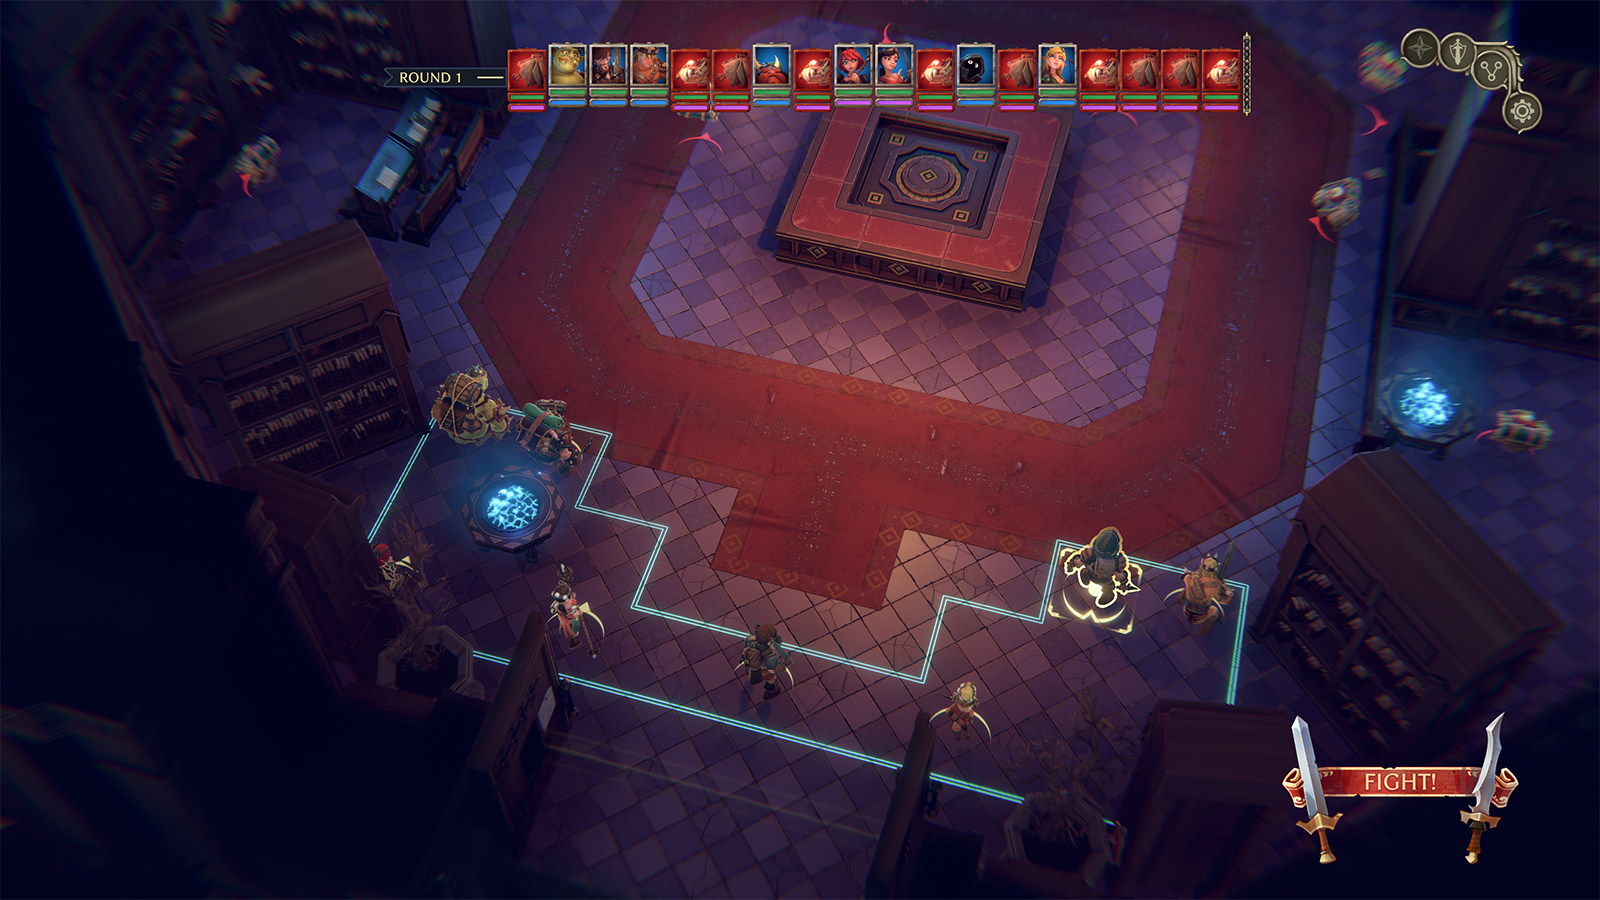
The next fight is to the west.
This fight uses fixed locations for your characters, which means you won’t be able to choose an optimum starting lineup. The primary challenge is keeping the melee mobs under control; stunning, knocking down, and freezing are critical because they have too much health to quickly eliminate them. Pull your ranged to the back after the initial round of attacks. Eventually, you will need to head to the bottom of the room and take out the skeleton archers.
Note about the library:The fights on this floor are badly tuned; it’s extremely easy to miss attacks if you’re playing Epic Gest or Gzor’s Nightmare modes, and the mobs have significant resistances that nullify many of your abilities. A lot of luck is involved. If you’re frustrated, you might wish to configure this to an easier mode through the remainder of the floor.
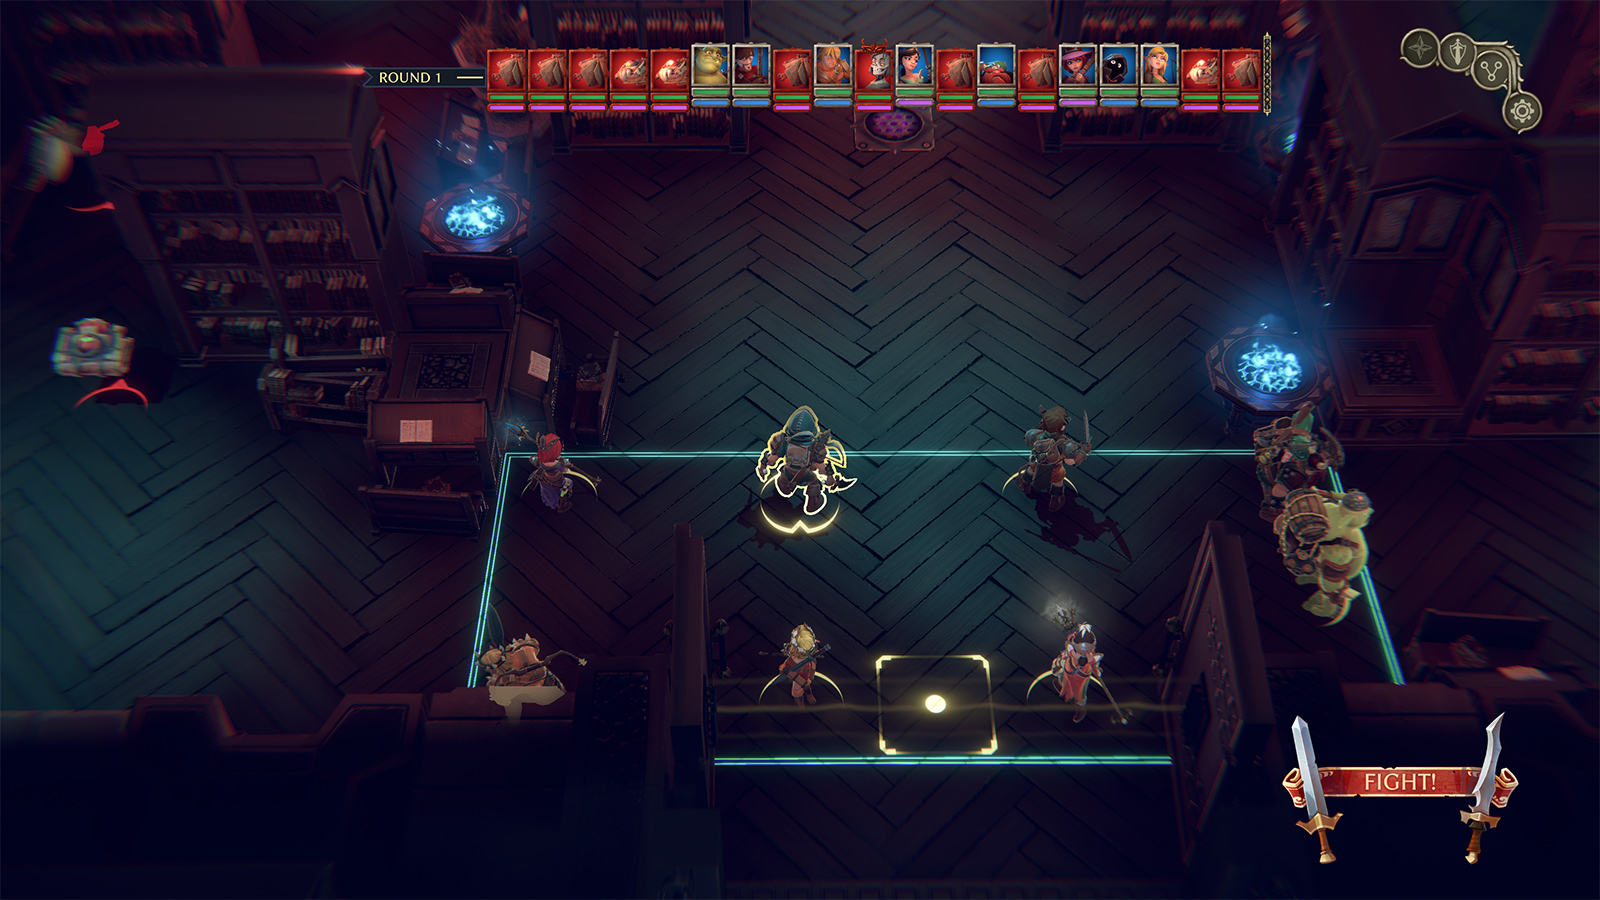
The next most likely fight you’ll tackle is the Book Worm quest (north-eastern part of the library).
In this quest, the Thief initially walks through the stacks in kind of a reverse-S formation, starting left, turning right, then heading along the right side behind the top-right bookcase. When he gets to the far back, combat starts, and the Thief is by himself at the opposite end of the room. You should run him all the way back to the group, down the right side, at the expense of an attack of opportunity. There is no benefit in having him die by himself at the far end of the room.
The challenge in this fight is keeping the melee mobs away from your ranged, but with some ability to freeze and stun mobs, it’s possible. They will try to run around and can survive attacks of opportunity due to high health to get at your ranged. The layout I use is pretty effective at minimizing this. The Elf can easily escape an attack of opportunity, at this point. Have the Dwarf do his Insult skill to distract any mobs next to your other ranged.
Back to the main quest line, you will head north and encounter some magical books. The books do a chained lightning spell (among other things), so make sure your characters are spread out (not standing adjacent to one another, horizontal/vertical/diagonal) throughout the fight.
The fight in the Borrowed Book Room is frustrating because they cast spells that raise your chance of a critical failure. Iznax is someone you will bump into in future fights as well; lock him down and kill him asap. He does heavy AOE damage. Besides this, just move your melee next to the casters and other ranged, and it will prevent them from casting spells.
The fight in the Cursed Books Room is the last fight on the main quest line. It requires that you not stand characters next to one another. The books do a chained AOE spell that will jump from character to character. (The books do other AOE attacks that cannot be as easily avoided, however.) The Archlich does a very painful AOE attack; try to freeze/stun and burn her down asap.
The last fight in the library is an optional quest, “Star Crossed Lovers,” available in the north-west part of the library. This is the hardest fight on the floor; if you save it until last, you will likely be level 7 and have additional attack capability. Like the previous fight, you want to target, freeze, and bring down the Archlich as soon as possible. I usually try to have the Wizardess chase her down and freeze her, then have her and the Elf burn her down as quickly as possible. I send the Thief out to assassinate one of the summoners, then have the Ranger stun and deal with the other.
Before you leave the library, turn in the books Cursed Knights for Dummies (south-west room – gives +2 physical resistance). You can’t return to the library after you depart.
Chapter 6
Returning from the library, you should now have all the books for the set Basic Spells for Basic Wizards, which you turn in a room near the tavern, as well as The Theory of Traps, which you turn in down in the basement.
Go back to the room of the first Orktobearfest battle (the one with the crates) and open the door to the west (you need to offer a Throwing Hen to pass the riddle). The puzzle for the braziers is to click the statues in this sequence: left, left; then: left, right, right, left; then finally: right, left, right, right, left, right. This will initiate the next fight.
This fight turns on targeting/controlling/killing the Dungeon Lich. The other mobs are not really a problem.
There is a chest protected by a trap in the next room.
The main questline The Dungeon Forge leads you to this fight. This is a rather difficult fight in EPIC GEST mode or higher because there are additional mobs. You need to try to lock down and eliminate the bad guy you met in the library, Iznax, because he can do significant AOE damage to your party. The fight itself forces you to split your group. I had the Ogre throw the Dwarf to the north-west (then move back to help the Thief and Ranger), the Barbarian Pounced to take the south-west, and each eliminated all opponents in their zone before moving back to join the rest of the party. This fight requires a lot of healing, as they will target any ranged characters they can reach with their spells. Keeping the Elf behind cover and the Priestess and Wizardess as far back as possible is recommended.
After this you will have access to a stairway to the prison floor.
Once you get to the prison, you have the opportunity to upgrade gear (via the Blacksmith, the Seamstress, and a couple free-loot locations) before you need to fight again. The quest line will take you right to the Blacksmith, and the Seamstress is nearby. You should buy all the gold (epic) gear upgrades you can find, from here on out. There is a side quest, Turn the Coat, given in the VIP room that is solved on this floor. You may as well take it; it doesn’t involve fighting.
As you’re moving around to pillage all the free loot locations, you will find a stairway to the roof.
If you go up to the rooftop next (before completing any other quest) and head west to the attic room, there is a fight here that (for whatever reason) isn’t active later. (If you complete anything else important on the prison level following the blacksmith, like talking to the jailer in the prison, this fight won’t trigger. The mobs are there but the fight doesn’t start. This might be a bug. It might also be caused by any player reaching level 8 before the fight starts.) You might want to head up and do it for the gear and the experience; it’s not hard. The mobs will blow the cover (the pile of crates) on the right side almost immediately so don’t hide behind it. The battle mage (upper-right) has a strong AOE to watch out for. Freeze him and eliminate him (and Robert the Anvil, lower-left) as a priority.
Once you’re done, there is some gear in this room and also in a chest in the yard to the north, to the left as you exit the door. Don’t head further north to explore this level yet. You might want to flip the switch to give yourself elevator access to this floor, though.
Now head back down to the prison. You have three different approaches you can take on the main quest line. You can help Barney get his drink and give it to him, untainted. You can help him get his drink and let the alchemist doctor it up (you just need to chat with her before you deliver it to him). Or, you can refuse to get his drink and knock him out.
If you decide to help Barney get his drink (whether or not you have the alchemist mess with it), you will face the fight below.
Fight 44
The Dwarf Throw and Ferocious Pounce makes this fight fairly simple. You can have the Thief stealth and assassinate the caster in the back-right corner. Once it’s over, you can retrieve Barney’s booze. On your way back to his room, if you want to skip the next fight, chat with the alchemist.
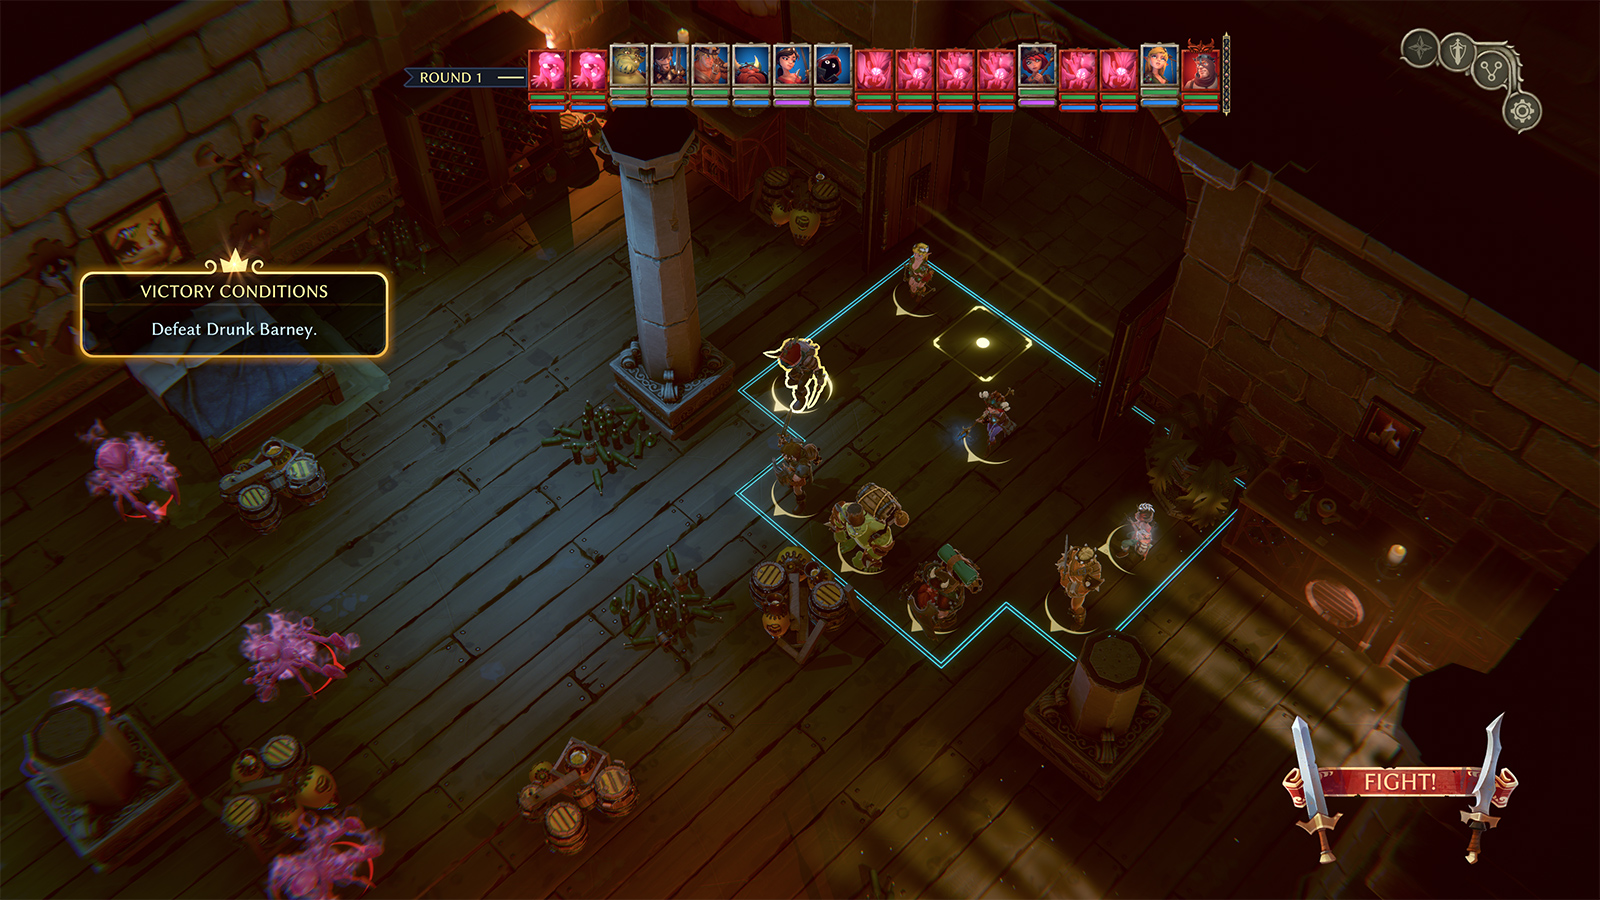
If you deliver the booze to Barney full-strength, you have to fight his pink hallucinations. Note that, once you defeat him, the mobs disappear and the battle is over. He’s the only serious threat in this battle; he can crit for an enormous amount and one-shot your characters. Every time you hit him, he pukes and does damage. So focus him down when you can.
If you decide not to help Barney get his drink, you face the following fight instead of either of the two previous ones. This is a harder fight, on the whole. (Either way, you will get the same gear drops.)
As before, the big threat is Barney. Focus him down (he’s immune to crowd control, at least on harder settings), otherwise he will one-shot members of your party.
You can now access the prison, free the dwarf prisoner, and get access to more free loot. At this point you should also have all the volumes to the Secrets of Chicken and can venture up the stairs to the rooftop to turn them in (the bookshelf is in the attic). You can also head directly to Urik’s Depths, if you want (down in the caves)—this is one part of the game that allows for nonlinear choices. But I recommend you head to the rooftop. There are two additional fights up here available in chapter 6; you should undertake them now, as later (chapter 8) they will provide little or no benefit.
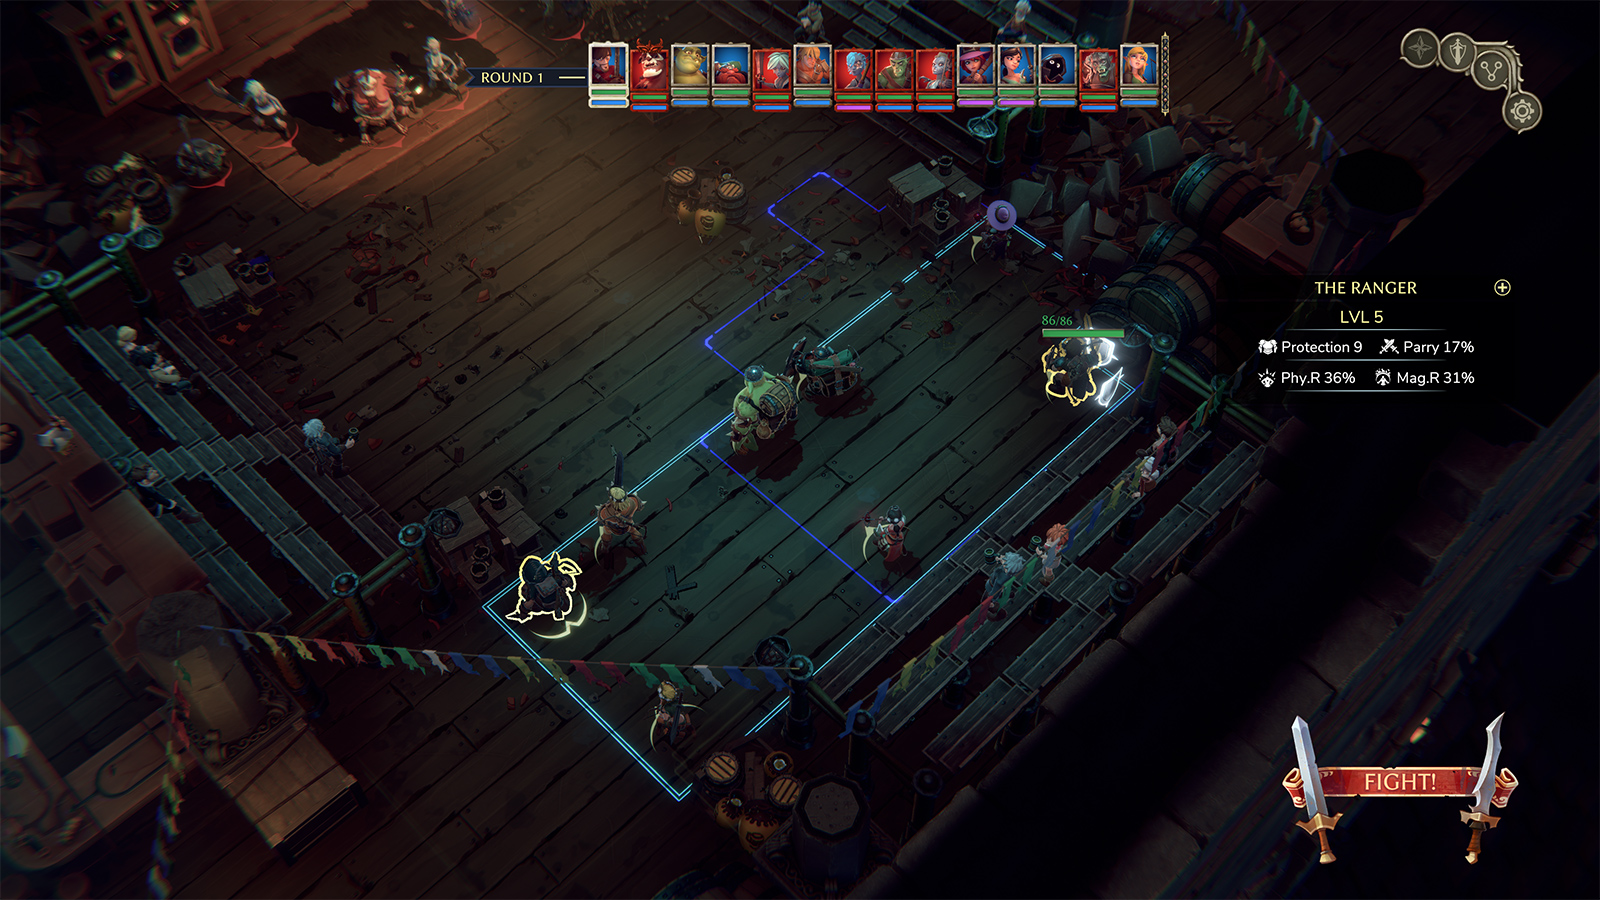
The first rooftop fight is inside a warehouse to the north. It’s a great opportunity to use Dwarf Throw (targeting the goblins that are grouped north of the party). You can also send the Barbarian to rush out to Ferocious Pounce on two opponents to the lower-left.
To the east, following this fight, is a door protected by a riddle (“The future”). A switch in a room off the courtyard area with the chickens will give you access to the chest.
Be wary of the trap to the west, on your way to the next fight.
To start the next fight you need to lower the walkway; use the levers as follows: red-red-green-yellow-blue-yellow.
Use Dwarf Throw and Ferocious Pounce and hurt almost all the goblins on deck in the first round.
You should now have all the books for History of Elves in Fangh and On Adventure, both of which you can turn in on the prison floor.
Chapter 7 – Urik’s Depths
Entering Urik’s Depths (down in the caves) will begin chapter 7.
After you’re commissioned by Narzatok, search all the rooms around the throne room. Two of them have epic gear in a chest. The other has a switch that starts a puzzle. When you flip it, it immediately relocates to one of the other adjacent rooms. Flip it again, which will send it to the dormitory room outside the dwarven tavern on this floor. Flip it again and it moves immediately north to the mining area. Flip it again and it moves to the blacksmith’s room. (You can’t open that door until after the next fight, though.)
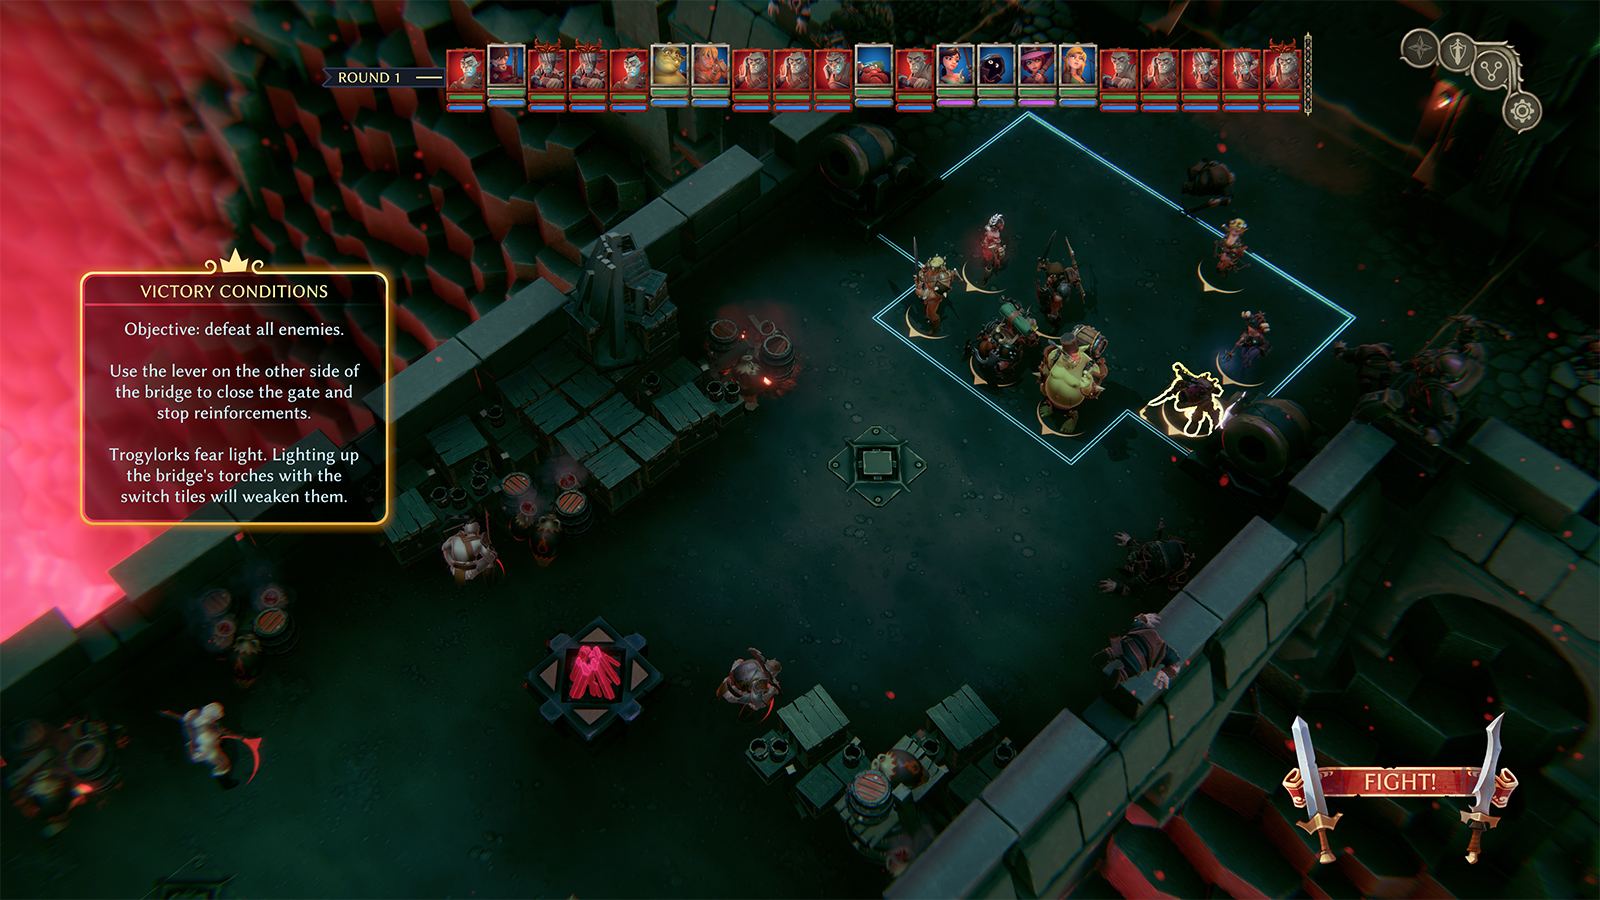
Your first battle will happen on a narrow bridge. The key is to send a character to the far end of the bridge and pull a level that will stop reinforcements from coming. You should send the Thief in stealth mode. If you’ve loaded him up with the proper gear, he should have a movement of 8 (which can be increased by the Ranger casting Loubet’s Anticipation at the beginning of the fight). This one is also a good one to use Dwarf Throw at the start; the orcs are bunched up in a group.
A side quest is available in the blacksmith’s room on this floor. Flip the teleporting switch while you’re in there (that sends it to a side room in the dwarven tavern). You don’t need to do this quest right now, but it will allow you to pick up the Dwarf’s epic weapon, which will help you in the fights that come next. So I recommend you do it now.
The fight is easy. Delay your turn and allow the melee mobs to line up, then use AOE attacks.
Turn the quest back in to the blacksmith, then go to the tavern on this floor. Flip the teleporting switch in the side room while you’re there. Talk to the dwarf who will offer you the follow up quest in the back of the tavern. He will give you a key that allows you to access the blacksmith’s back room. Grab the axe and return to the tavern. When you turn in the quest, don’t give him the axe.
When you return to the throne room, you will be sent to the dwarven prison (on this floor) to deal with Braztog. You can either choose to help Braztog or Narzatok (the king dwarf). Your choice will lead you through one of two possible collections of three fights.
Note: Before you head to the prison, you can complete the teleporting switch puzzle in the north-eastern room. Turn both the statues to the south and the door will open.
For this version, you start outside his cell, grouped up. Delay your turn and let the guards come close, then throw the Dwarf into their midst. Send the Thief to take out the ranged on the right side.
This layout is a little more awkward than the other because the mobs don’t group together tightly. But it provides a better opportunity for using overwatch.
You get a little more room to set up in this version of the fight than the other. Otherwise they are similar; Dwarf Throw is, again, a great strategy for occupying their forces at range.
.
In the third (throne room) fight, taking Braztog’s side will put you with 12 opponents, including Narzatok and two war golems. If you take Narzatok’s side, you will end up with 11 opponents, including Braztog. In this version, isolate and try to take out Narzatok.
I think the fight is a little easier in this second version, without the war golems. The dwarfs seemed to group up more and were therefore easier to take out. In this version, isolate and try to take out Braztog.
Before you enter the temple, go to the tavern on this floor and sell any gear you don’t need. You’re going to pick up more than you can carry inside the temple.
Chapter 7 Part 2 – Temple of the Big Anvil
When you enter the temple, you will have two fights against spiders (north-west and north-east). There are four statues on the floor, each of which must be turned to face the wall. This opens the door to the treasure room (which is accessible after the final fight on this floor). Two of the statues are guarded by spiders.
Note that there is a chest in the room for you to open after each of these spider fights, and there are two other chests in random corridors on the way to the final fight.
In between the fights with the spiders, there is a puzzle room, where you must align five collections of statues to open a passage. Here are the five puzzles and how you solve them. For each puzzle, spin the camera so that the statues are at the top of your screen, then imagine they’re numbered from left to right.
- Puzzle 1 (face statues to the south): Turn each of them twice (the order doesn’t matter).
- Puzzle 2 (face statues to the south): Turn statue 1 twice then statue 2 four times. (Each statue rotates the other when it is turned to the south.)
- Puzzle 3 (face statues to the south): Turn statue 2 three times, then turn statue 3 three times, then turn statue 1 once. (Statue 1 turns 1-4; statue 2 turns 2-4, statue 3 turns 3-4, statue 4 turns only itself.)
Once you align the third series of statues you will open the far door (permitting you to exit), or you can continue to solve the final two series to reach a chest with epic loot, but you will have to pass two traps prior to puzzle 4, so make sure the Thief is leading, at that point.
- Puzzle 4 (face statues to the west): You flip the switch in front of the statue for this puzzle. Flip switch 3 twice then switch 2 twice. (Switch 1 turns 1 & 2; switch 2 turns only 2; switch 3 turns 1 & 3.)
- Puzzle 5 (face statues to the north): Turn statue 2 twice then statue 4 twice. (Statue 1 only turns itself, statue 2 turns 1-3, statue 3 turns 1, 3 & 4, statue 4 turns 3-4. The switch resets the statues to their starting orientation.)
There is another trap on the way to the treasure chest after you solve puzzle 5.
Neither spider fight is particularly difficult though it is a challenge, in the second case, of keeping your ranged safe. At this point, the Elf and Priestess should both be able to skip an attack of opportunity, allowing them to move away from a melee threat. Use the Dwarf Throw to take out the mobs entering from the top-right.
The final fight splits your group around the forge. It poses difficulty in that there are two healers in the back who will undo partial damage, particular on the top side (where I’ve sent the Barbarian). If you delay your turn and allow the healers to go first, you can then do damage on two consecutive attacks (one delayed and one not) before they can heal. Do your best to eliminate the mobs entirely.
Your old friend Iznax is in the lower segment. As in his earlier fights, focus and take out Iznax as early as possible; his AOE attacks do a lot of damage. Delay your attack and they will congregate so that you can have the Ogre take a step forward then throw the Dwarf. Stun/freeze/knock down Iznax asap.
Once you complete this fight, you can reach the treasure room to the north. Don’t forget to get everything you need in one trip; you can’t return to the temple a second time.
At this point, you’ve completed Urik’s Depths and you should have solved the switch puzzle by now (once you’ve flipped and moved the switch through all its locations, you have to turn two statues south in the north-eastern room to gain access to a treasure room). You more likely solved this before you entered the temple, but if not, do it before you leave Urik’s Depths and turn in the Dwarven Strikes book series before you leave the floor and return to the caves.
Chapter 8
When you reach the surface, you will begin chapter 8 and will immediately trigger a fight:
In this one, Janos will use a wizard ability to switch places with one of your characters each time he’s attacked, so if necessary, leave him until last and instead focus down the other mobs. (He does summon melee adds, though, which is annoying and prolongs the fight a little bit.)
At this point you should check the shop in the basement and purchase any epic gear now for sale. You will be close to level 10 on all your characters.
On returning to the tavern, you will be sent in pursuit of Reivax, back on the goblin floor. This will trigger a fight in his quarters:
There are war golems in this fight as well as several casters. Use the Dwarf Throw to engage the golems to the south, and have the Barbarian jump on the casters to the west.
You will return to the tavern and be sent in pursuit of Mel Boots, who is down in the wine cellar waiting for you with his own evil party of adventures (i.e., his own barbarian-like creature, dwarf, wizardess, etc.).
This fight gives you a fixed position at the start. Cast Loubet’s Anticipation to give your group superior movement and precision from the outset. The Thief can either stealth and assassinate the archer or the Wizardess can freeze her. The Elf could use her “One Shot, One Kill” to stun the enemy wizardess. Move the Dwarf up (he will likely have initiative over the Ogre at this point) then have the Ogre catch up to him and throw him into the middle of the enemy party in the back. The Barbarian can also run up and pounce into the remainder of the enemies. Most of the items that drop will be sub-par compared to what you got in the temple, except for the epic sword for the Ranger. Now go through the door to the west and turn in the Tuffluk books while you’re here.
The next fight is a little silly; you are going to fight mythical chickens on the rooftop level. Use AOE abilities to get rid of the regular chickens then burn down the powerful ones. Note that you will not have a chance to return to the tavern between this fight and the next one.
This is a rather difficult fight (one of the most difficult if not the most difficult), as Losax spawns clones that you have to deal with; he does it automatically each time he moves. I had the Thief stealth and immobilize him using Caltrops, as often as possible. Losax starts with massive protection but it goes away over a couple rounds. He is immune to most effects but not immobilization or “scared.” You have to deal with his clones when they appear; too many running around makes the fight much harder. So burn down the other mobs asap, then whittle away at Losax’s massive health pool, immobilizing him when you can (you might even respec to get skills that immobilize or use Spider Bombs), taking out his clones as quickly as they appear. (This is a fight where there is a lot of damage going out and you’ll be happy to have solid healing from the Priestess. Make sure everyone has major health potions in their belt. This is usually the first time I have to use the Randomia gauge.)
Chapter 9
You will now have access to floor 3 (Zangdar’s apartment). The whole level is anticlimactic and there is actually very little to find or do. You need to visit the room to the south-east and point the pylons toward the center (the ones at the far ends point inward toward the two in the middle; the two pylons in the middle point directly at each other). From here, you can head west for a fight in the prison, then north to the library to battle some cursed books, then on to face Zangdar (north-east). You don’t need to do anything else on this level.
The prison fight is pretty easy; just stay off the power tiles.
Similarly, the cursed books in the library are easy. You start from a fixed position. Move to the east and use AOE attacks. When you’re done, you can turn in the last set of books in this room, which will replenish your Randomia gauge. If possible, don’t use it against Zangdar; it will prove useful in the Ruins of Limis.

Finally, you meet Zangdar. Be aware – when this fight ends, the game is over (i.e., you are taken instantly and automatically to the first DLC, the Ruins of Limis). So don’t start this fight unless you’re ready to exit the dungeon. You might, for example, want to load up on bandages for the next phase, if by chance you are low. To complete the wishing well quest in the DLC, it will help to have three epic pieces of junk in your inventory before you go (see below). You can find them in Limis, but then you won’t have the amulet from the wishing well in advance of many fights.
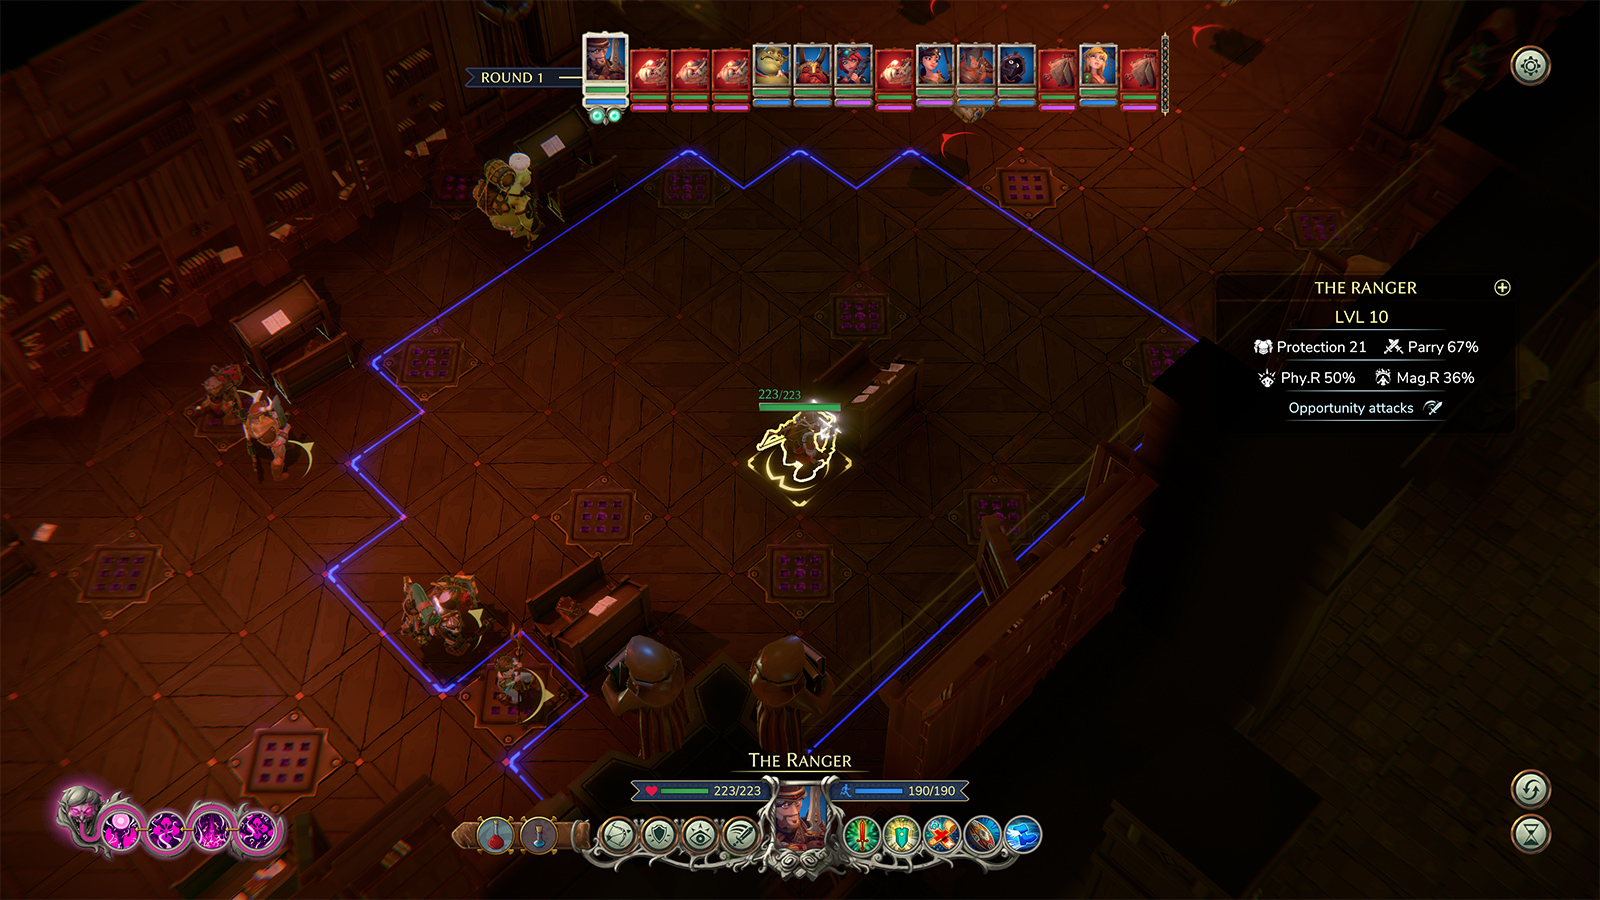
Zangdar, on his turn, will put up a shield if for any reason it is down. The shield cannot be damaged except by music. Your characters generate musical damage by standing next to one another (horizontally and vertically but not diagonally). The damage occurs the first time each character has a chance to attack. (It does not happen again if they delay their turn.) So there is no way to delay the musical damage. If you are not standing next to one another, you will do far less damage to his shield. Once his shield goes down, he is vulnerable to attack until the next time he has a turn (at which time he will put his shield back up and probably teleport to a new location). If by chance you can stun, freeze him, or knock him down (which is possible depending on the difficulty setting), he will not replace his shield until he has recovered.
Key to the fight:Estimate if you will blow his shield on a given round. You can usually tell if you’re getting close based on the graphic of his shield (it starts to fragment when it gets close). If so, delay all your turns. That way you will be able to attack with each character after the shield goes down and before he is able to restore it. The possible exception is the Priestess, who might need to heal your party. You can mostly ignore the adds that appear; save all your primary attacks for Zangdar, don’t waste them on adds. The second group of adds that comes in from the bottom left – he should be dead before they are able to engage you, or you’re doing this wrong (or are unlucky). If too many adds get into the room before he dies, you will be overwhelmed.
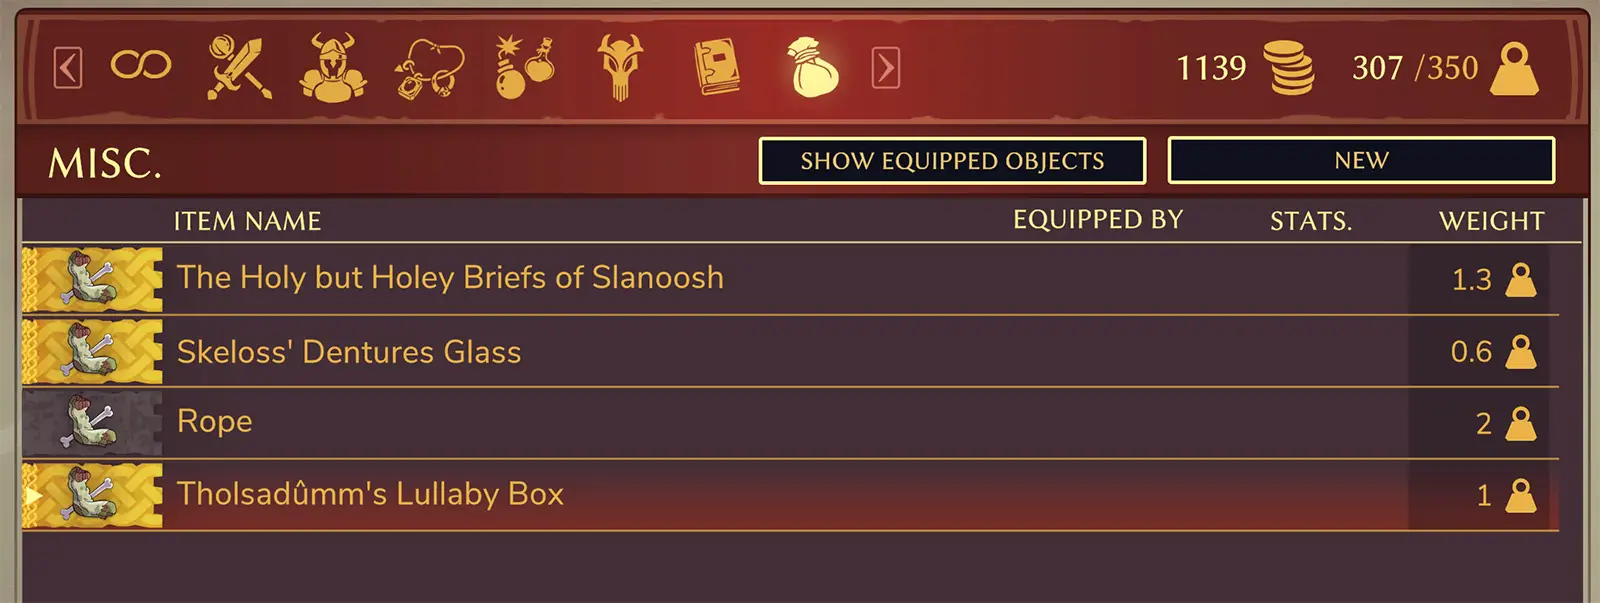
Example of epic junk that you can use in the Limis DLC:
Chapter 10 – Ruins of Limis (DLC)
The Ruins of Limis is the first DLC (expansion) for the Dungeon of Naheulbeuk. On the whole, it wasn’t well-received; the fights are badly tuned. Tavern mode, in the expansion, is as difficult as Epic Gest mode in the original game. If you’re playing to enjoy the game, you might want to set this a level below what you played in the original game.
The key to the first fight is to prioritize disabling the spawn locations for new opponents. I used Loubet’s Anticipation from the outset to give mobility. The Ranger went toward the leftmost statue (north-west), the Elf ran toward the far left statue (north-east), and the Ogre, after launching the Dwarf, went toward the closest statue to the right (south west). In the second round, the Ranger and Elf will both be able to disable their statue and the Ogre will break the cover (the pile of crates) and get next to his statue (and disable it on round 3). Once the Elf disables her statue, she will hug the east side and make her way toward the far right (south-east) statue and will disable it. In this way you will get the minimal number of new opponents spawning. The remaining characters should stay together where the fight starts and deal with the zombies clustered there (between the Dwarf, Barbarian, Wizard, and Priestess, you have numerous effective area attacks at your disposal). As long as you get the spawning points disabled quickly, this fight is not difficult. An epic crossbow drops from this fight.
From here you can proceed east, open the small gate and undertake the first riddle (Answer: The wind). The nearby chest contains the book
Understanding Necromancers 1/3.
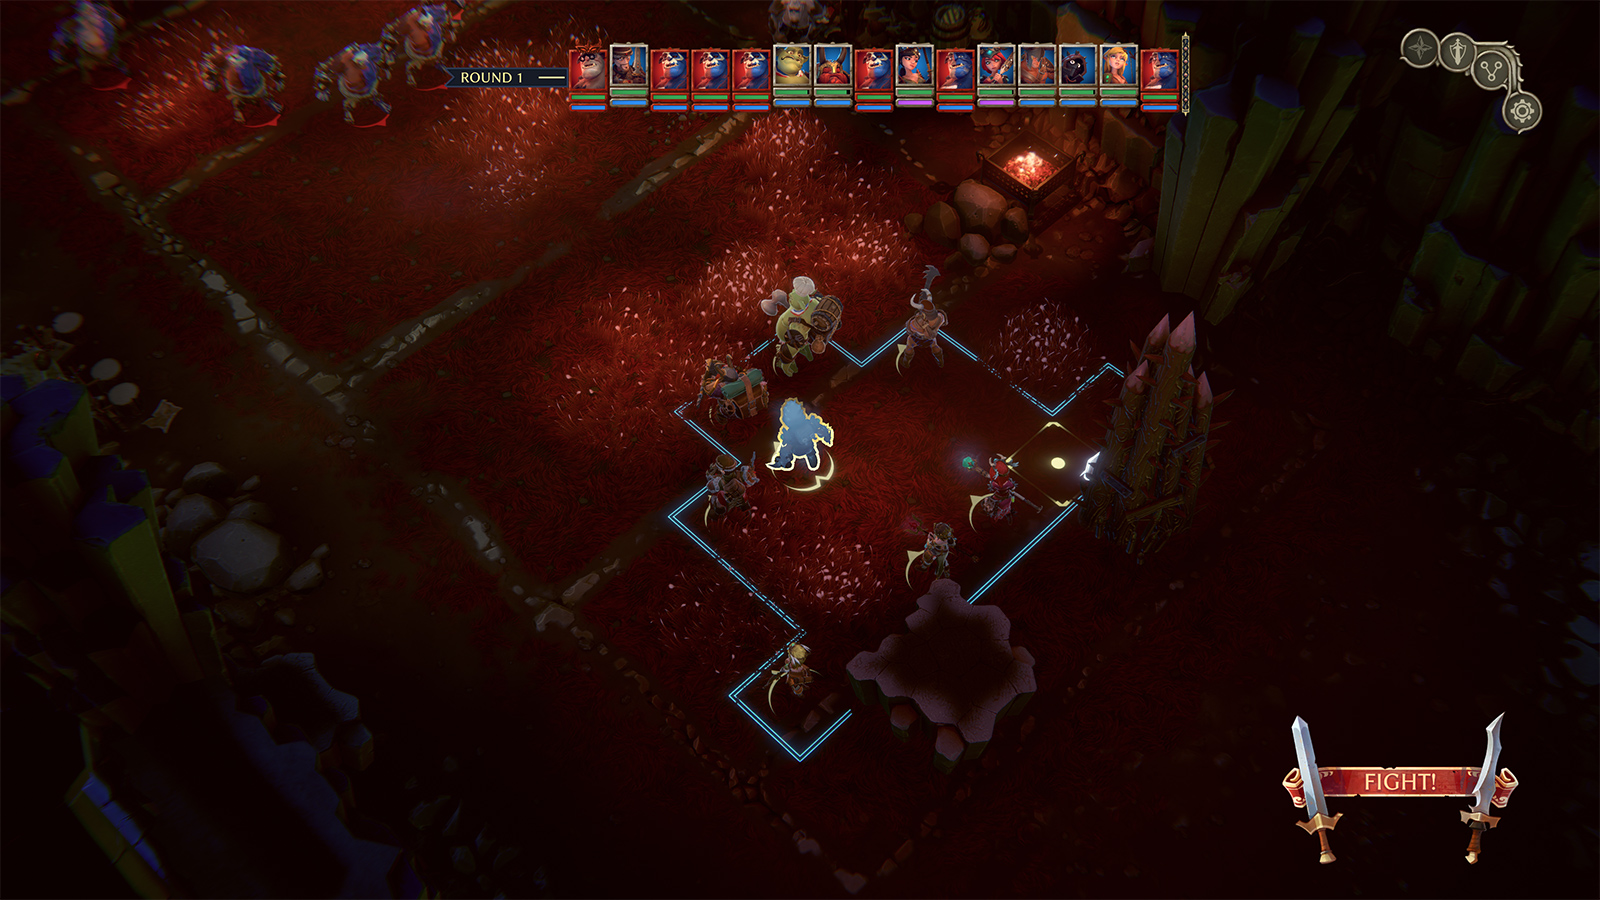
As you head north you will walk into a fight between vampires and necromancers. They’re fighting you as well as each other. Sometimes the best course is to stand back and let them kill each other off, but they will also send opponents toward your group. Look out for isolated mobs near you that don’t have the opposite faction nearby and instead target you. Use the Barbarian to Pounce on the mobs to the left and throw the Dwarf at the mobs clustering to the right, in the center of the battle.
- The Necromancers (who look like wizards) have skeletons and death knights.
- The Vampires have zombies and trolls.
The mobs usually target the weakest member (the one they are most likely to kill), so when you wound an opponent, it’s more likely the other side will finish the job for you. That means it’s sometimes to your advantage to hurt opponents in this fight without needing to kill them off.
Normally, at this point you will pick either the vampires or the necromancers (and your fights will be determined accordingly) but you can also choose to trigger the trap in the haunted tavern and head down to the underworld next. Then, head to the troll caves and undertake the other portions (leading into the underworld), then come back at the end to choose which faction you will support. (If you want the full experience of Limis, you should save a game before you choose and try both options. In that case, do the underworld first so you don’t have to do it twice.)
If you choose the necromancers or hold off choosing, there is loot in the necromancers’ camp to the north, inside the building: You can find the book
Vampire Hunting 1/3. There is also an ogre door and treasure room to the north-east (a switch outside gives access to a chest).
I will proceed as if you decided not to choose vampires or necromancers until the end (which is a perfectly sensible approach). Go instead to the haunted tavern (north of where you entered Limis).
Note: On the outside wall on the east of the haunted tavern is the second riddle with a mathematical puzzle. The answer is 30.
Enter the privy in the haunted tavern and click the toilet. You will emerge in the underground (the lower floor)–a basement that will incrementally fill with poison gas. You have about 3 rounds in each room and must then move to the next room or else take significant damage from the gas. The strategy is to attack and advance in the direction of the exit, but don’t let any character block the way for other characters to proceed and don’t let any character lag behind.
The final room holds a switch that stops the gas (ending the timer). I use Loubet’s Anticipation to increase movement at the door to the third room, then have a character (usually the Thief but you could do it with the Elf as well) sneak to the switch in the back of the final room to stop the timer before finishing off the remaining mobs. (Once you hit the switch, you have all the time you need, and no reinforcements will come.)
At the conclusion of this battle, you will pick up the book
Understanding Necromancers 2/3.
After the battle, you will be in the underground and have access to a chest behind an ogre door, as well as have access to a stairway that leads up to the wishing well. You will find a third riddle here (Answer: Echo). (When the third riddle is answered, a troll’s head will appear in the dish at the altar. Click to pick it up. If you missed one of the other riddles, the troll’s head will appear in whichever altar you complete the third riddle.)
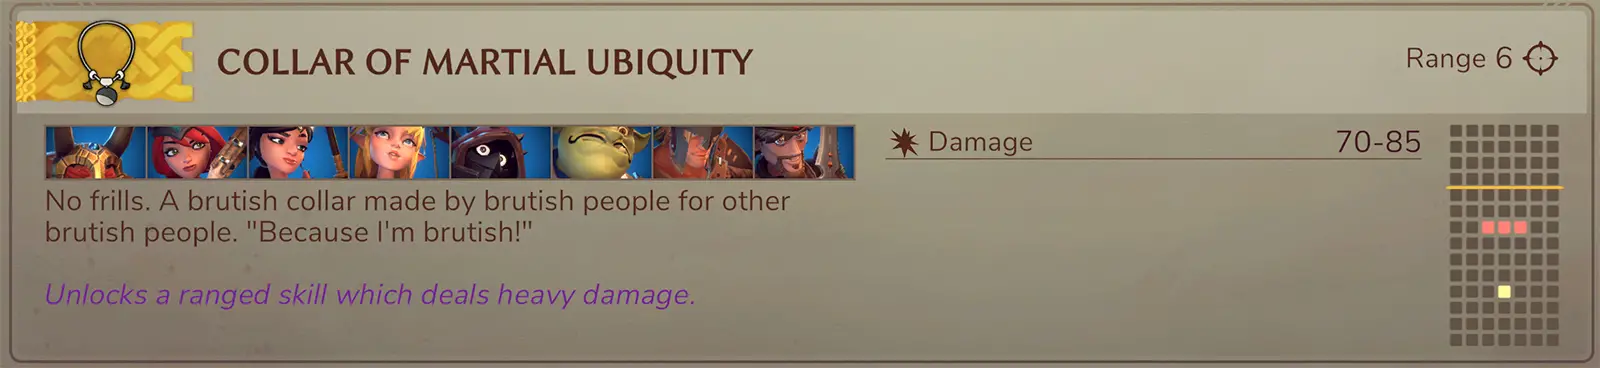
The wishing well requires that you give it three epic pieces of junk (see explanation earlier). There are three such pieces strewn around Limis, but it’s better if you bring them here from the original game. It will then allow you to pick one of four epic amulets (each can be used by any character, but the choice is associated with one of your characters):
The Elf’s choice:
The Barbarian’s choice:
The Ogre’s choice:
The Wizardess’s choice:
The Collar of Martial Ubiquity is a strong area damage effect that always hits and does dependably high damage. It uses no astral points. It’s therefore the best call, though the Amulet of Social Distancing has utility for push attacks (i.e., attacks where you are pushing an enemy and triggering attacks of opportunity). You only get one choice from the well and can’t change it afterward.
Look for a loot chest in the south part of the gated area with the wishing well.
Travel south through the entry gate to the wishing well and rotate the statue outside the tavern. The ghosts in the tavern will now be visible. You will be able to pick up the quest for the troll parts from one of the ghosts inside.
After this, you can head to the troll caves (the entrance is on the south-east corner of the floor).
Ruins of Limis – Underworld
The primary concern in this fight is the mobs’ ridiculously high health and double slapping attack. Keep your ranged as far away as possible throughout the fight and not grouped up. The mobs will ignore attacks of opportunity to reach your ranged. Use crowd control skills and focus the trolls down individually.
You will receive the troll torso as reward on this fight.
You will then be able to travel north and go down a stairway to the underworld. (It’s part of the level you were at earlier, but a gate prevented you from reaching this section.) Head south to the casket puzzle. Pick up the eight junk items and deliver each to the corresponding epitaph:
- Here lies Heub – His only fear was getting bored with the afterlife. Each of his friends deposited a gift in his grave, to keep him busy. (Porn Scroll)
- Here lies Arsene – Gentleman thief, always had a joke at hand and a sharp tongue. Neither of which helped him when he got hanged. (Rope)
- Here lies Ming – Outcast artist, his love of pots was only matched by his hatred for other containers. Even after his demise, none of his friends understood the difference. (Bronze Vase)
- Here lies Grumpf the Toothless – Used to collect his opponent’s teeth for his own benefit. A longtime friend of the Fanghian Dentists Federation. (Orc toothbrush)
- Here lies Yoraz the Head Slicer – His last hunt ended with a draw. (Bear trophy)
- Here lies Marcel – A novelist who died too young, suffered from writer’s block up until his suicide note. (Dry inkpot)
- Here lies Mirilla – Used to bronze, perpetual third place in every equestrian beauty pageant in Folonariel. She spent her last years peacefully knitting souvenirs for her friends. (Pony socks)
- Here lies Jaap – A brilliant taxidermist, always on the lookout for new subjects. His last work shocked everyone, especially the mortician. (Stuffed crow)
This will give you access to a chest that contains the book
Vampire Hunting 3/3as well as a bucket that holds a troll arm.
Head back to the north for the last fight in the underground.
This fight is difficult in that Dietrich Kane and Professor Van Hasling have wicked AOE attacks. You can keep Dietrich from using his with the formation pictured, which will cause him instead to face off against the Ogre and Dwarf. Clumps of characters will draw AOE attacks, so stay spread out throughout the fight.
This fight will give you the book
Vampire Hunting 2/3.
Heading west, you will be able to open the gate that leads back to where you staged the underground battle, beneath the wishing well. You should return to the Haunted Tavern and turn in the quest, which will give you a ring that can summon an undead troll to fight for you. (The troll is basically an additional character you can summon and control in combat. It has poor initiative and mediocre stats, but it has some value as a distraction.)
At this point, you’ve completed everything in the DLC except the fights pertaining to the choice of siding with the vampires or necromancers. So find your way back to the surface.
Ruins of Limis – Necromancers
If you choose to side with the necromancers:
You might want to use an elixir of oblivion on selected characters and re-spec the Ranger, Barbarian, and Ogre; they each have abilities you probably didn’t take the first time through that ignore protection. Some of the vampires have ridiculously high protection.
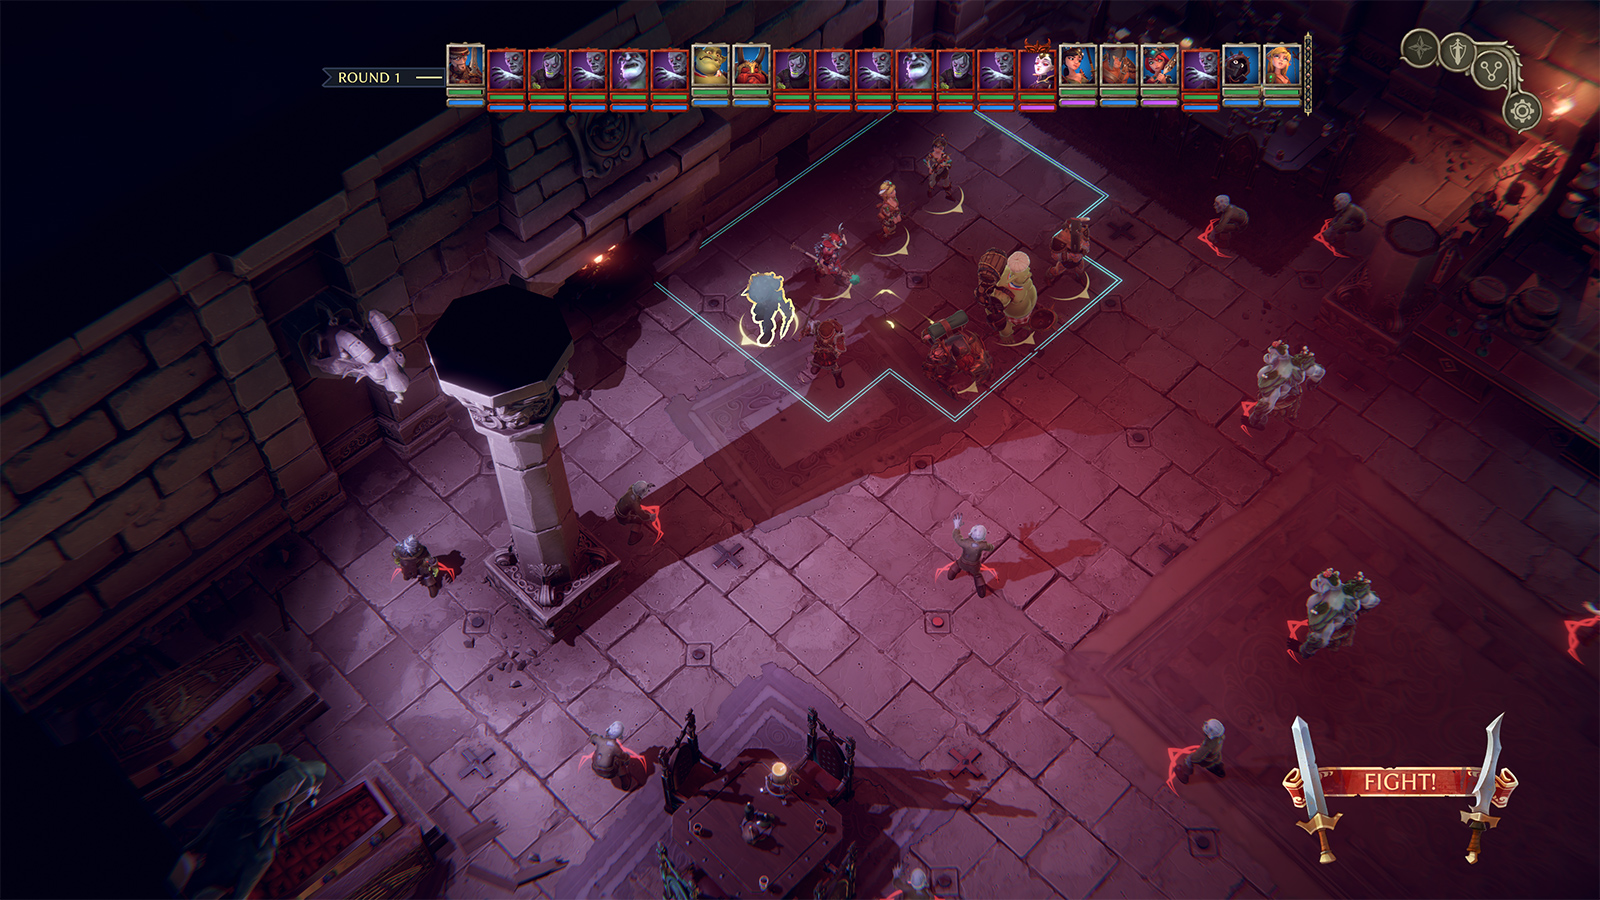
This fight is a challenge in that most of the mobs have large health and will rush by (and take an attack of opportunity) in order to reach your squishier characters. Keep this in mind and keep your ranged at a distance when possible. Your opponents group up early in the fight, making some of your large AOE attacks fruitful.
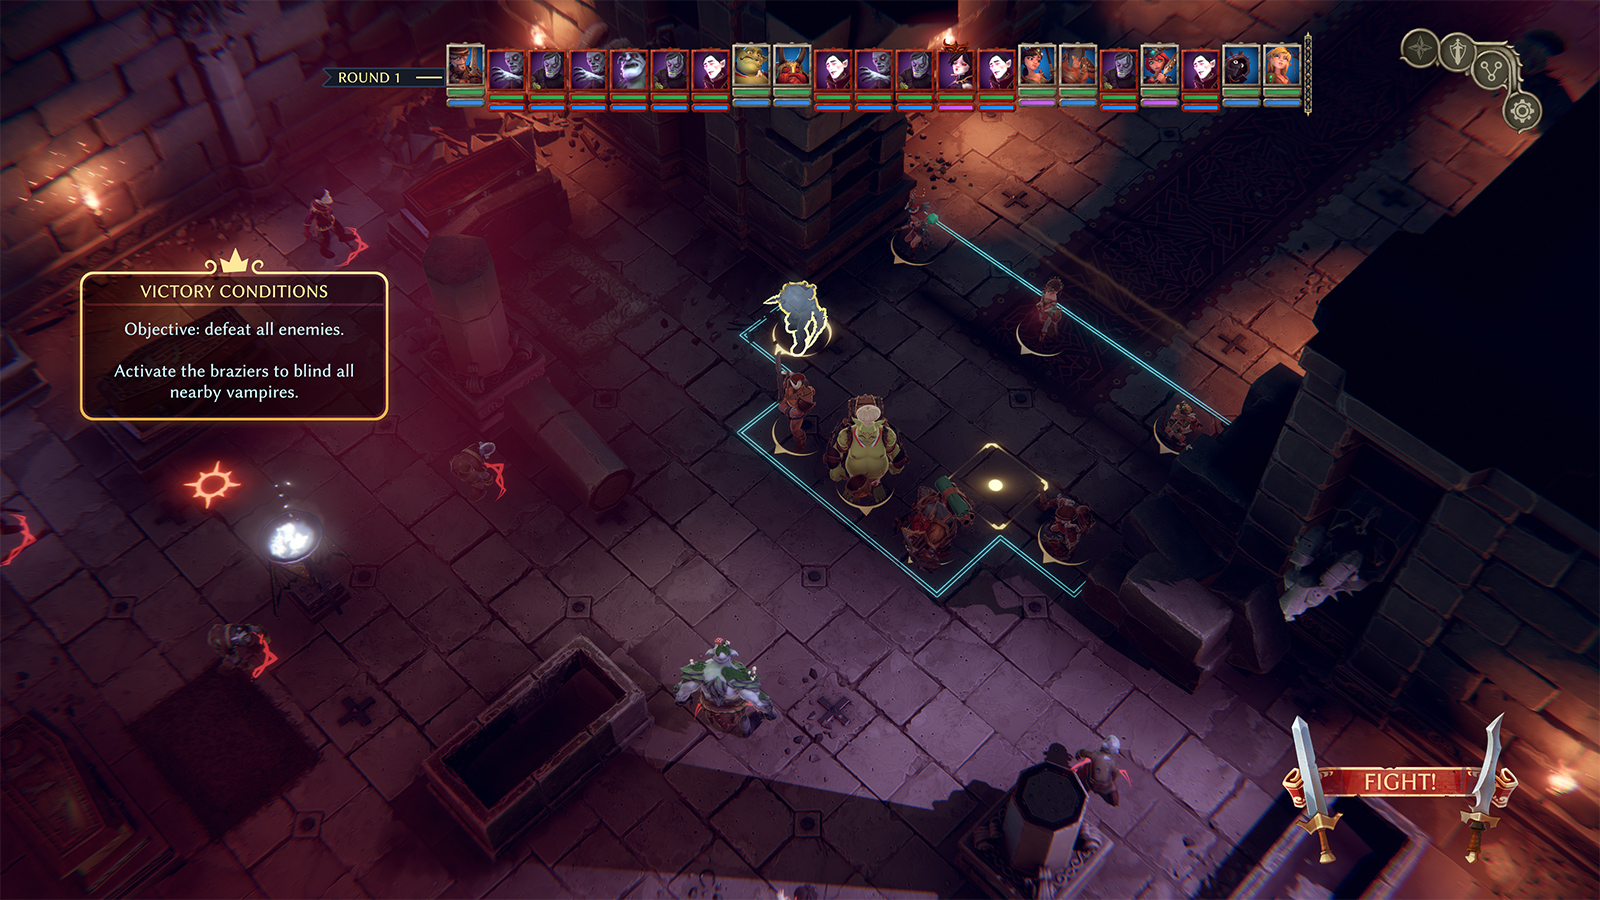
The second fight is even harder, with mobs that stealth and attempt to go behind your ranged characters. Expect several to come in along the left side (as depicted in this screenshot). You can use an area attack to expose them. Don’t spread out much until the very end of the fight. Muire has protection 40, as do some of the other lesser vampires. You will need attacks that ignore protection or do massive damage to take them out.
The library has the book
Understanding Necromancers 3/3in a chest.
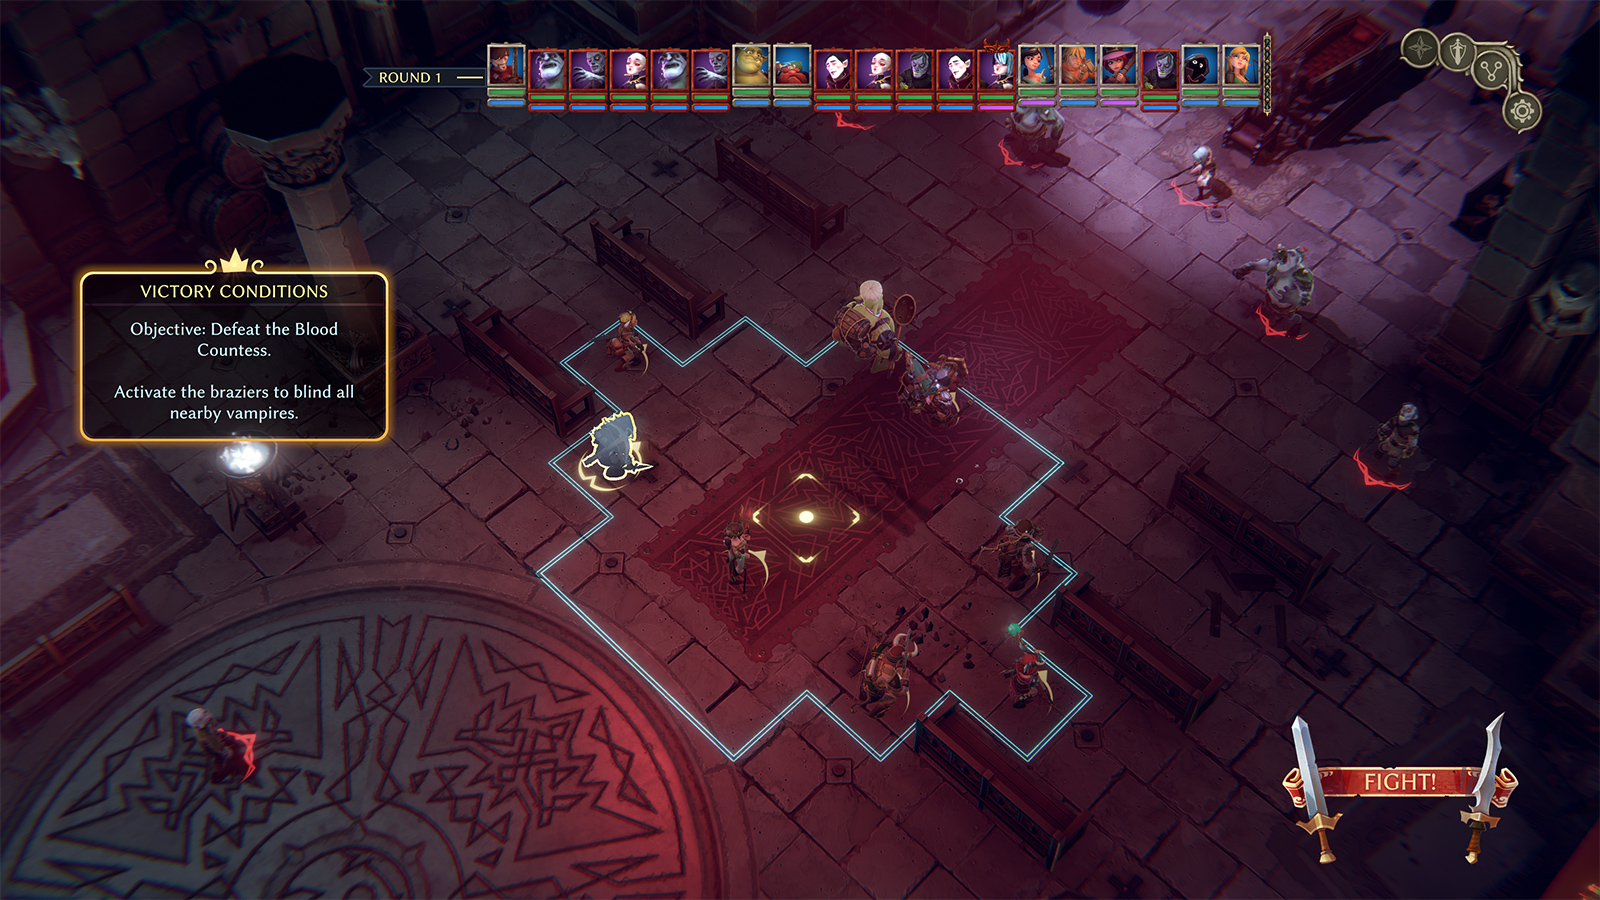
This fight is all about controlling Karmilla until she’s dead. Stun her, then knock her down, then freeze her. Her AOE attacks are ridiculously powerful and she has massive protection, so normal attacks do very little damage to her. Use the Barbarian’s two-turn “Crom’s Brawn” attack, the Elf’s One Shot, and the Priestess’s Youclidh Slap to get through her protection. (I even hold on to the Thief’s Dagger of Betrayal from early in the original game, since it ignores protection.) Focus on the mobs at the top of the screen first; the ones behind you take an extra round to get close. (Launch the Dwarf at them to keep them busy.)
Keeping your group spread out initially means there is less opportunity for them to set up a line-attack, and they will instead match up melee-style.
A second, alternative layout that uses Loubet’s Anticipation in the first round is pictured below. This allows select characters to reach Karmilla at the very beginning.
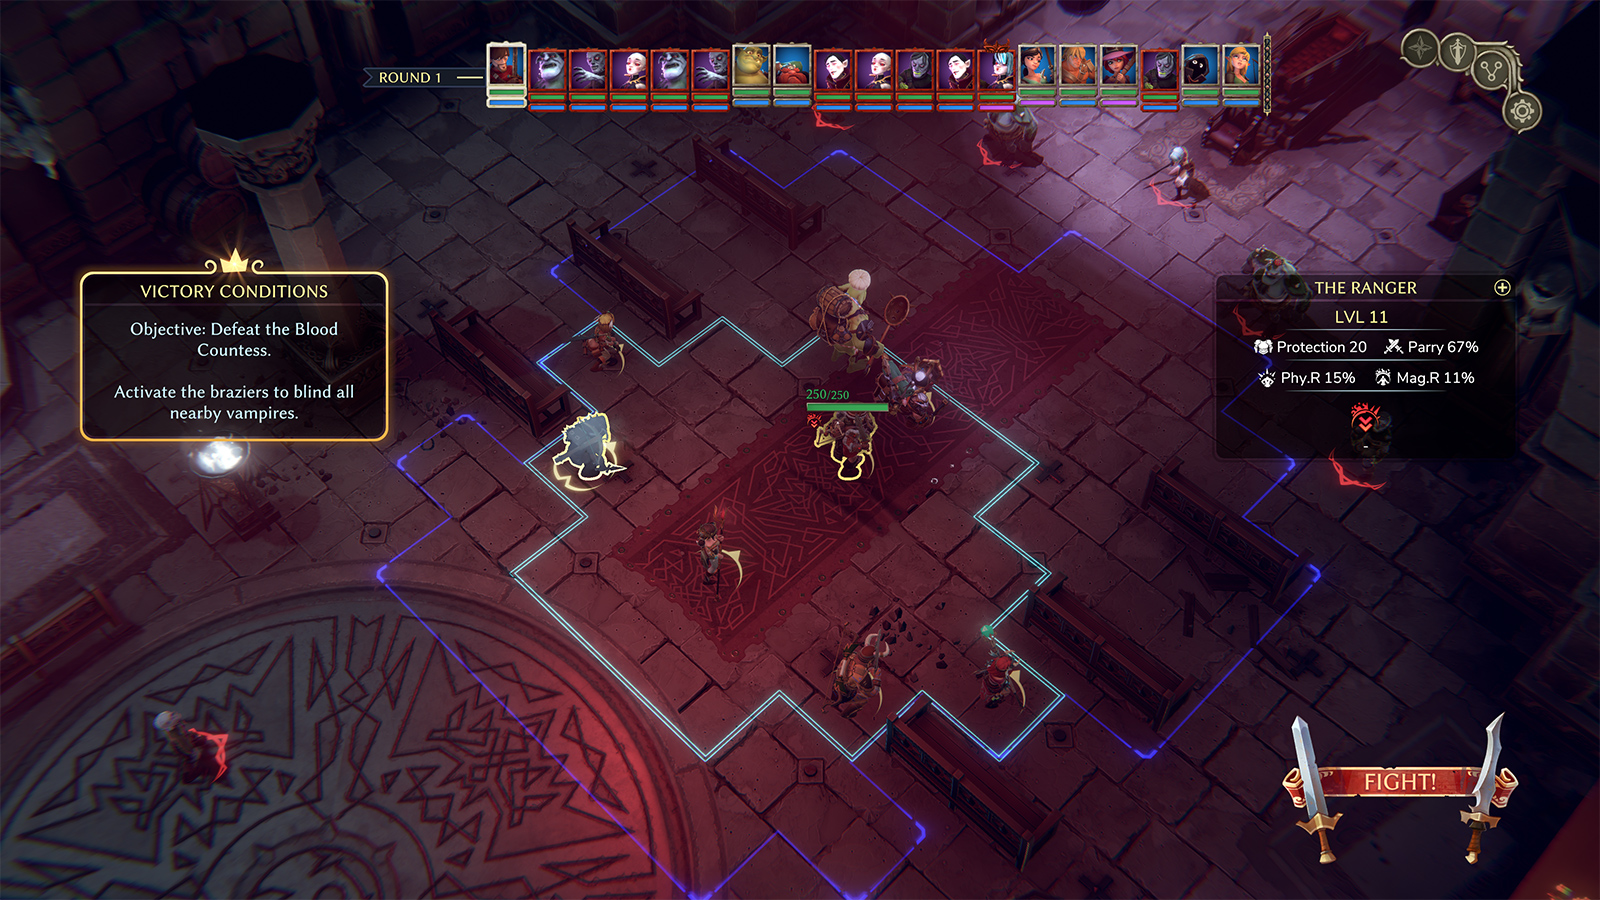
Once you complete this fight, you can turn in the original quest and end the expansion any time you’re ready (entering the troll caves and doing the underground portion is optional).
Ruins of Limis – Vampires
If you choose to side with the vampires, you will have access to their area under the crypt and that means you can enter the library and retrieve the book
Understanding Necromancers 3/3from a chest.
On the whole, I think the necromancers are harder to defeat than the vampires due to the rate at which they summon new undead adds through the fights. It’s frustrating but I’ll explain how to mitigate it.
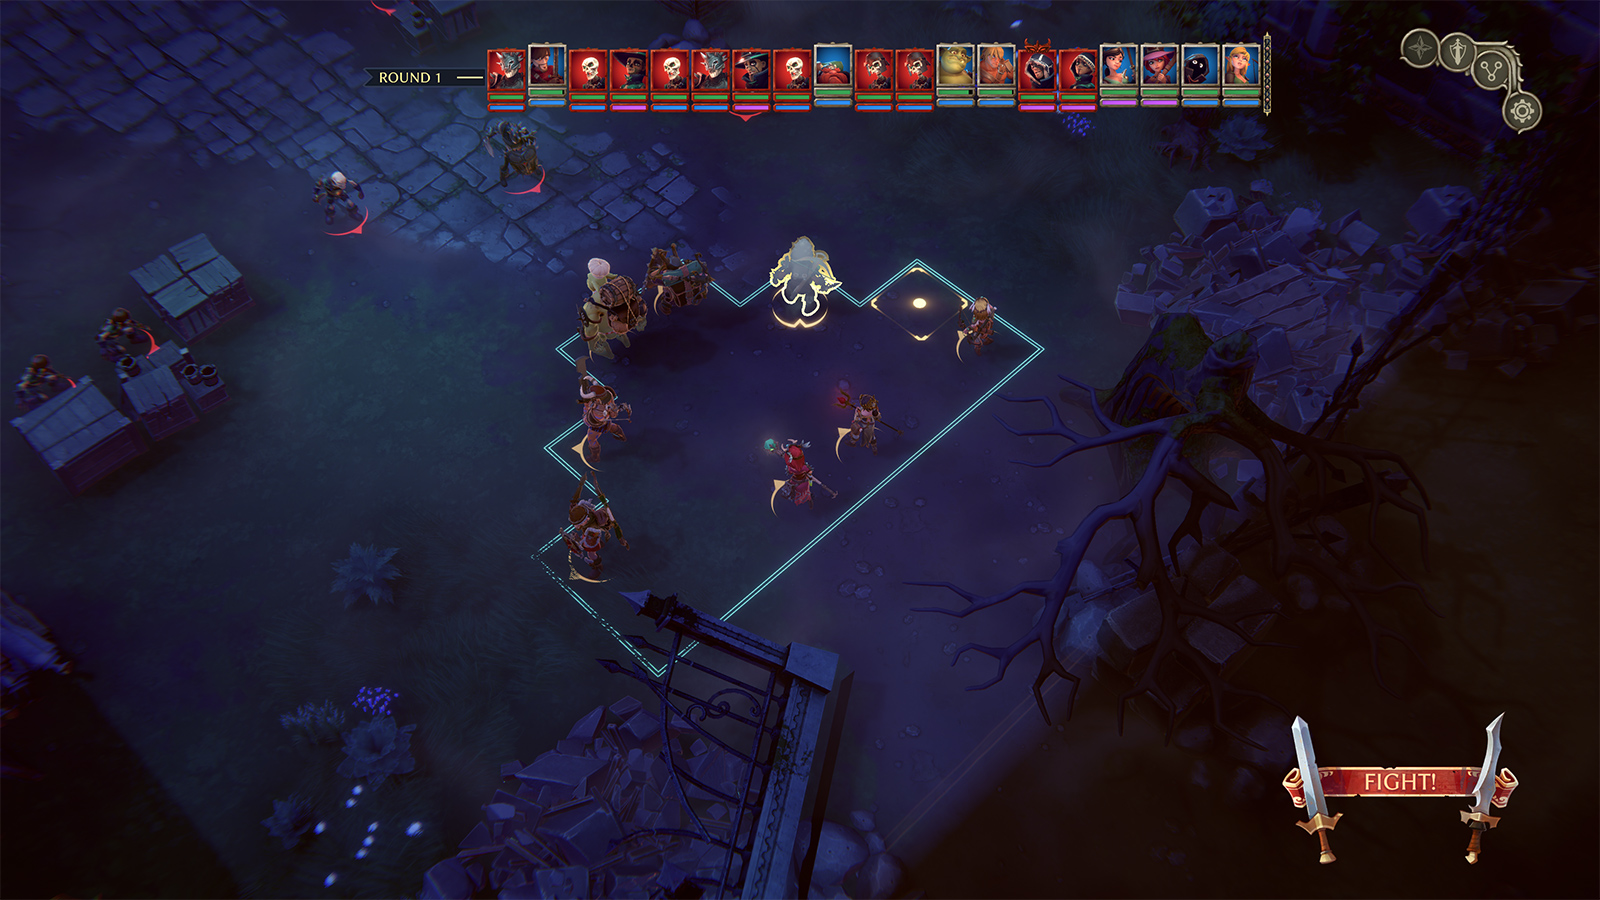
The first necro fight is all about controlling the summoners, who are in the back-left corner (off the edge of this screen, upper-left): Casper the Necromancer and Skeleton Assembler, to be exact. The Necromancer Motivators make things harder but aren’t as deadly. I moved the Elf, Wizardess, and Barbarian down toward them after a few rounds, then kept them frozen and stunned until they were gone. After that, the fight is manageable. Don’t wait too long to deal with them, or you’ll be overwhelmed.

The second necromancer fight is difficult because there are so many summoners hanging out in the back. Keep the party spread out initially. By round 3 or 4, you need to reach the summoners and begin to crowd-control and eliminate them, to stop them from bringing in reinforcements. Don’t remain too long near the starting area; you need to advance or you will be overwhelmed. (This fight is badly tuned and a source of fans’ complaints due to the summoning. You almost can’t make a wrong move here and expect to win, so proceed carefully. You might need to revert to saved games during combat.) It’s not too hard to crowd-control and eliminate Eliphas early on, which is helpful.
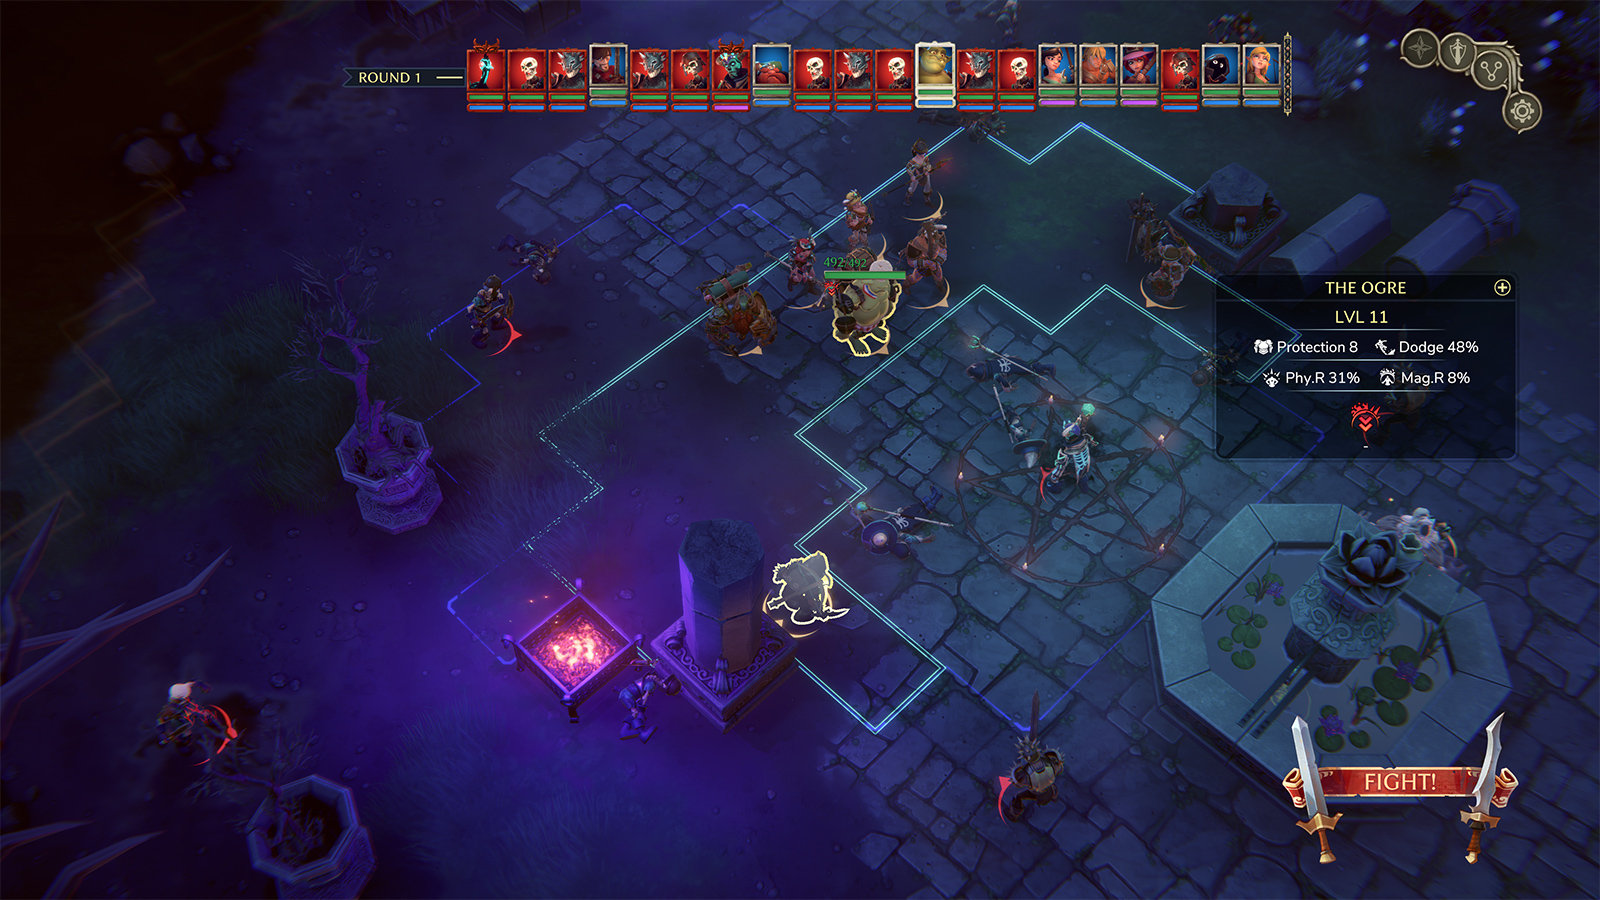
In the last fight, you can begin more tightly grouped but some of the mobs shoot arrows that will chain-freeze your group, so spread out during/after the initial round. This fight has fewer summoners (they don’t appear until later in the fight from a zone on the top-left) but it has more powerful melee with AOE attacks, so as much as possible, you will want to single them out and eliminate them, one after another. When the summoners appear at the entry zone, you need to crowd-control the group of them and burn them down before they can start summoning. You should leave Eliphas for last; he can’t be killed unless the blue chicken (which stealths around the lower-right perimeter) is killed first. That’s usually not feasible until most of the other mobs are cleared out. This is another badly tuned and frustrating fight.
Once you complete this fight, you can turn in the original quest and end the expansion any time you’re ready (entering the troll caves and doing the underground portion is optional).
Back to the Futon (DLC)
Coming soon. I’m going to replay it a couple more times before posting about it.
That's everything we are sharing today for this The Dungeon Of Naheulbeuk: The Amulet Of Chaos guide. This guide was originally created and written by TheInternetGuru. In case we fail to update this guide, you can find the latest update by following this link.