
- Title: The Callisto Protocol
- Release Date:
- Developer:
- Publisher:
Information about The Callisto Protocol is still incomplete. Please help us fill the details of the game using this contact form.
A collection of fixes and tweaks to reduce the stuttering in Callisto Protocol.
Introduction
Another game suffering from the dreaded lack of pre-compiled shaders. Luckily this game is running on Unreal so there are things that can be done on our end to help mitigate the issue until an official patch drops. Be warned, your mileage may vary.
These tweaks are not a magic bullet, but they’ve significantly reduced the frequency and duration of stutters when they do occur. I will also be updating this guide with additional tweaks as I am made aware of them.
Before We Begin
First off here are my system specs for reference:
- CPU: AMD R7 5800x
- RAM: 2x16GB DDR4-3200
- Boot Drive: 1TB PCIe3 NVMe (Game is installed on this drive)
- GPU: EVGA Nvidia RTX3070 FTW3
- OS: Windows 10 Pro Version 21H2 (OS Build 19044.2251)
- Primary Display: 144hz 1440p G-Sync.
This game is performance-heavy, to say the least. My framerate is all over the place but generally stays between 65 and 120(where I have it capped) at 1440p.
System Optimizations
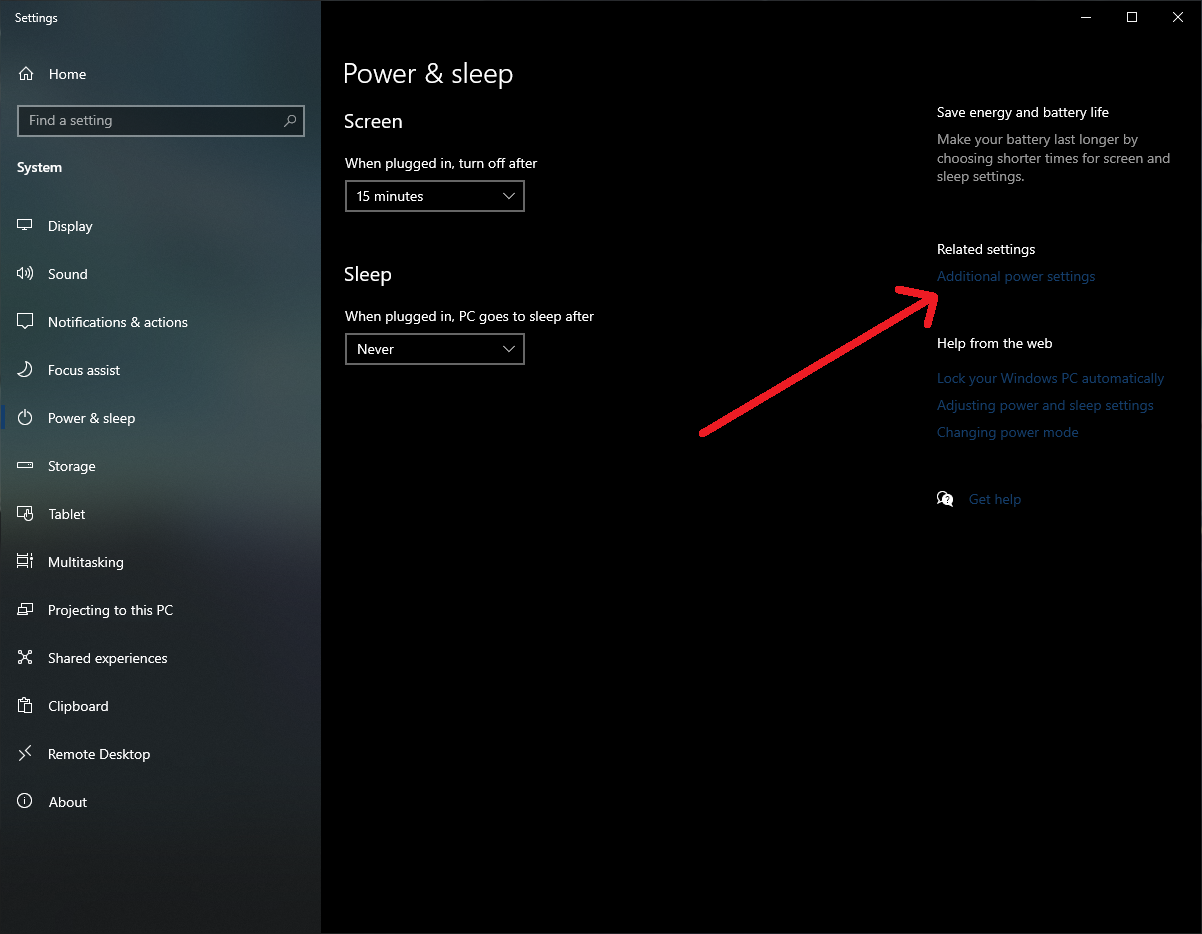
- Set the System Power Plan to High Performance:
- Hold down the Windows Key and press X then click on Power Options.
- Click ‘Additional power settings.
- Ensure the ‘High performance’ option is selected.

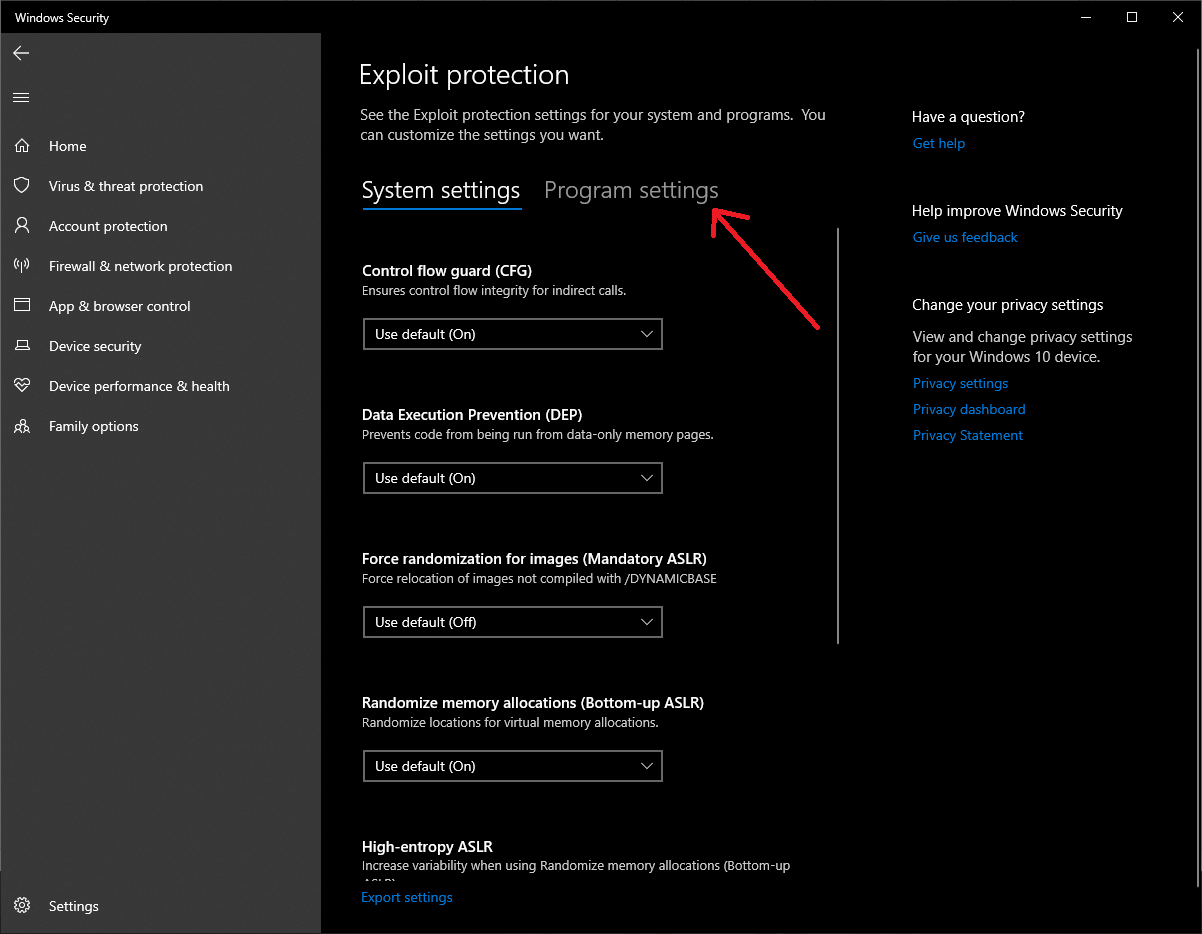
- Exploit Protection Exceptions for Game Executable:Explanation: This has been a common tweak (at least on Windows 10) for DirectX12 titles going as far back as Control (to my knowledge, and possibly farther) to help with stuttering and other performance issues, I’ve found it’s helped with both Callisto Protocol and Elden Ring.
- Open the Start Menu and search for ‘Exploit protection’ and open it.
- Click on ‘Program Settings’
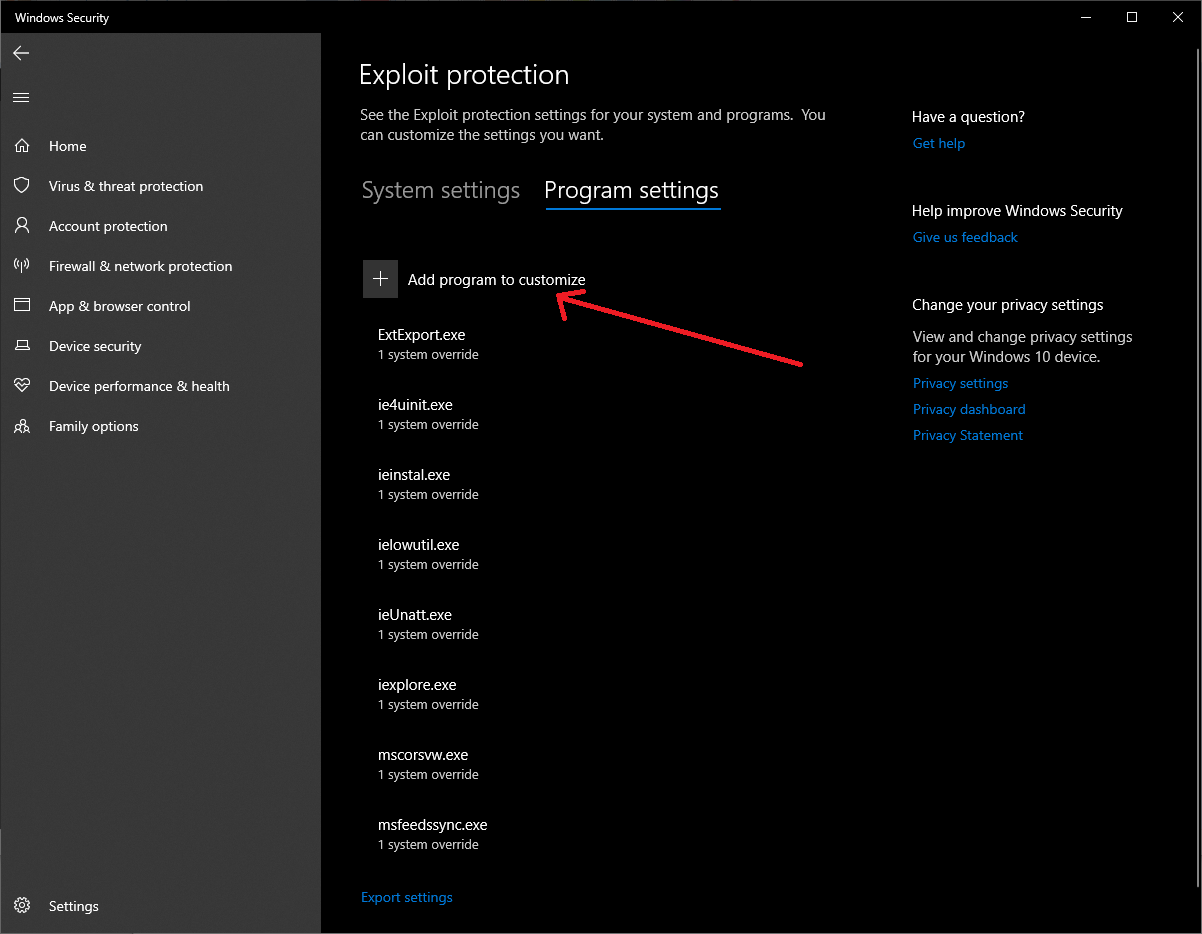
- Click ‘Add program to customize’ then ‘Choose exact file path’
- You’re going to want to find and select
TheCallistoProtocol.exe
the default location is:
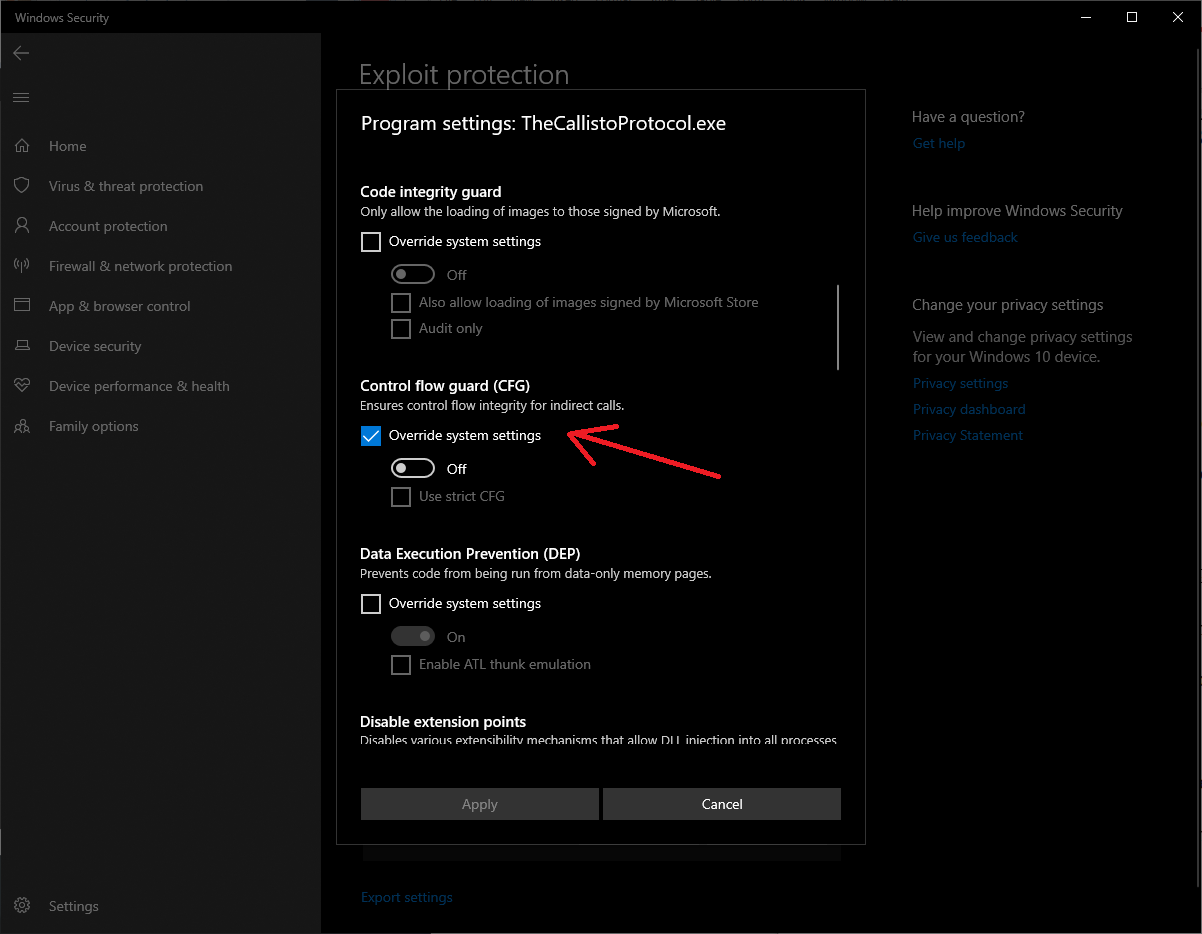
C:\Program Files (x86)\Steam\steamapps\common\The Callisto Protocol - Scroll down to ‘Control flow guard (CFG)’ and check the box ‘Override system settings’ and set it to off. Click Apply. You will need to reboot the computer before this change takes effect.
- Driver Tweaks: (This is Nvidia only, I don’t have an AMD card. AMD users will have to figure out how to do it on their hardware.)
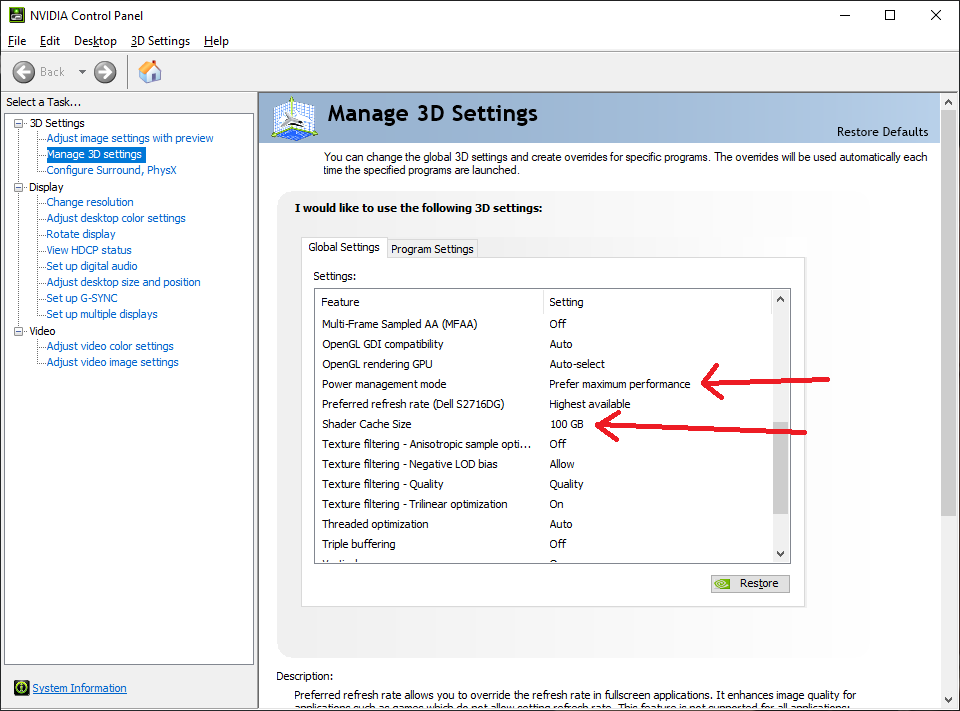
- Open the Nvidia Control Panel and go to ‘Manage 3D Settings’. Under ‘Global Settings’ the two options which matter are ‘Power management mode’ and ‘Shader Cache Size’.
- Set ‘Power management mode’ to ‘Prefer maximum performance’.
- Set ‘Shader Cache Size’ to at least 10GB. (I keep mine at 100GB). This helps prevent the game from having to recompile shaders due to the cache being shared between multiple games.
In-Game Options
In-Game OptionsGraphics Preset – Custom
- Graphics / General:
- Sync Every Frame (V-SYNC) – OFF
- Framerate Limit – 120
(I tend to cap at 120Hz despite having a 144Hz monitor. You may also have better frame timing by capping the framerate to 60hz.) - Direct X – 12
(This is System dependent, some people are having better performance on DX11, others on DX12, I tested both and had better luck with DX12, try both.)
- Graphics / Display:
- Fullscreen Mode – Borderless FullscreenFullscreen should give better performance and let you scale the rendering resolution. I personally use two monitors and alt tab frequently so I stick with Borderless Fullscreen.
If you’re using Fullscreen you should set the resolution to your Monitor’s native resolution and tweak the rendering resolution.
- Fullscreen Mode – Borderless FullscreenFullscreen should give better performance and let you scale the rendering resolution. I personally use two monitors and alt tab frequently so I stick with Borderless Fullscreen.
- Graphics / Lighting:
- Lighting Quality – Standard
- Shadow Quality – Medium
- Volumetrics Quality – Medium
- Particle Quality – Medium
- Screen Space Reflections – Enabled
- Physical Refractions – Enabled
- Ray-Traced Shadows – Disabled
- Ray-Traced Reflections – Disabled
Adjust these as per taste and performance, keep Ray-Tracing disabled, Screen Space Reflections and Volumetrics tend to affect both visual quality and performance heavily.
- Graphics / Effects:
- Depth Of Field – Disabled
- Motion Blur – Disabled
- Subsurface Scattering – Enabled
(Another setting that disabling can affect both performance and image quality). - Anti-Aliasing – TemporalAA
(More performance intensive but also helps improve visual quality dramatically) - Film Grain – On
(Personal Preference)
- Graphics / Advanced:
- Upscaling – AMD FSR 2
(Pretty much mandatory, sadly no DLSS for Nvidia users) - FSR2 Quality Mode – Performance
(I prefer the higher framerate, with Temportal AA enabled it doesn’t look bad to me.) - Mesh Quality – High
- Texture Quality – High
- Texture Filter Quality – Medium
(These last 3 can be lowered to improve performance)
- Upscaling – AMD FSR 2
Before We Continue
The next set of tweaks greatly helped with reducing the number of stutters, loading new areas resulting in more of an FPS drop for a few seconds. This did lower my average framerate, but I’m not being killed from the stutters and there seems to be better frame pacing. Generally outside of loading new areas and shared compilation I’m staying above 60fps.
I did notice a hit to the texture quality with these options, however the stutter reduction was well worth it in my opinion.
Launch Options
- Launch Options:
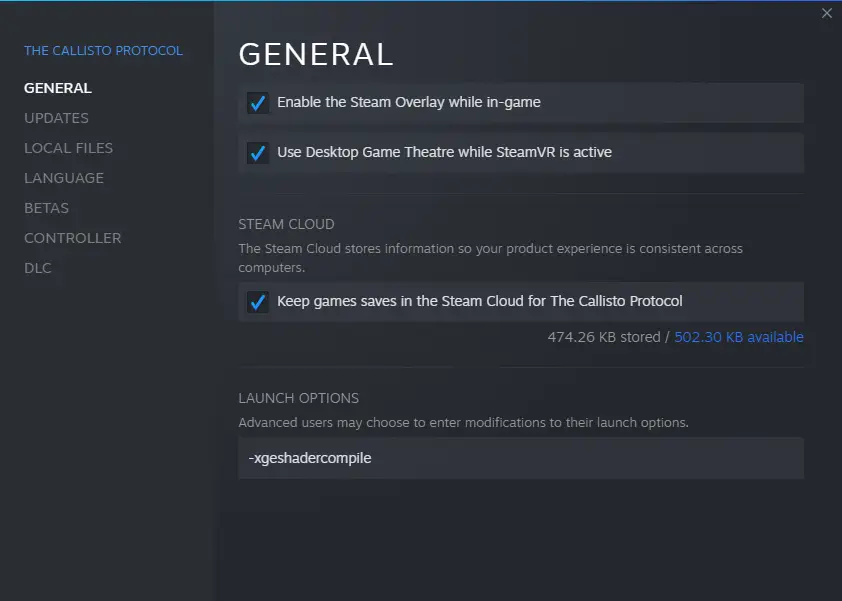
- In Steam, right click on The Callisto Protocol and select ‘Properties’.
- In the ‘Launch Options’ field, put in:
-xgeshadercompile
then exit out, make sure there’s no leading or trailing spaces.
Config File Edits
- Config File Edits
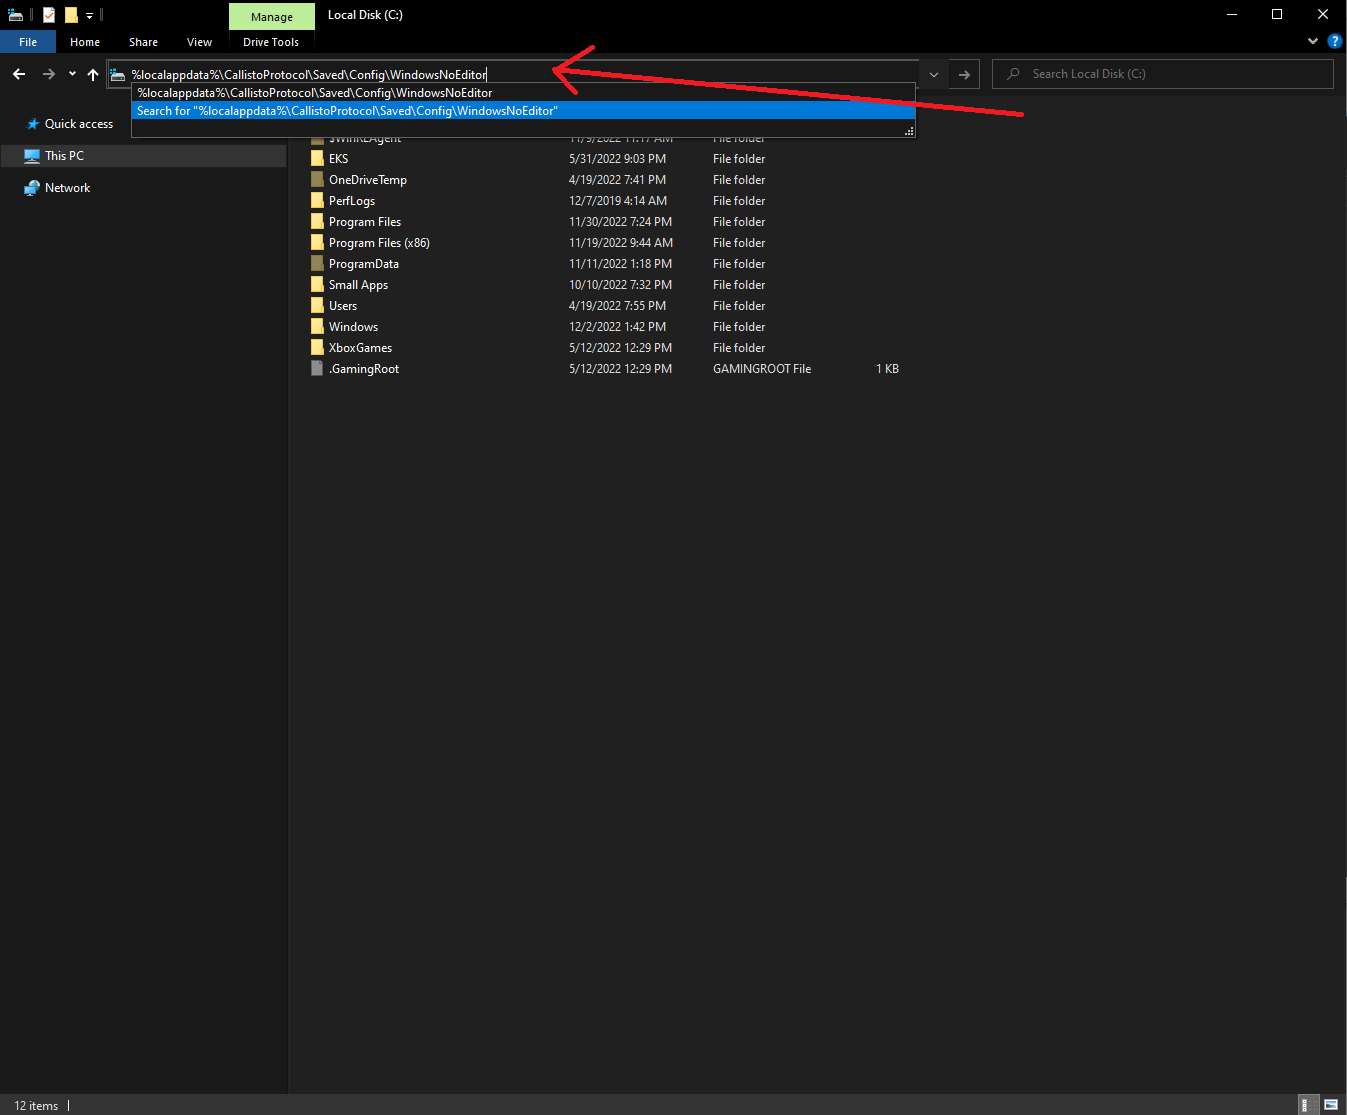
- Open file explorer and click in the top box and put in:
%localappdata%\CallistoProtocol\Saved\Config\WindowsNoEditor
and press enter.
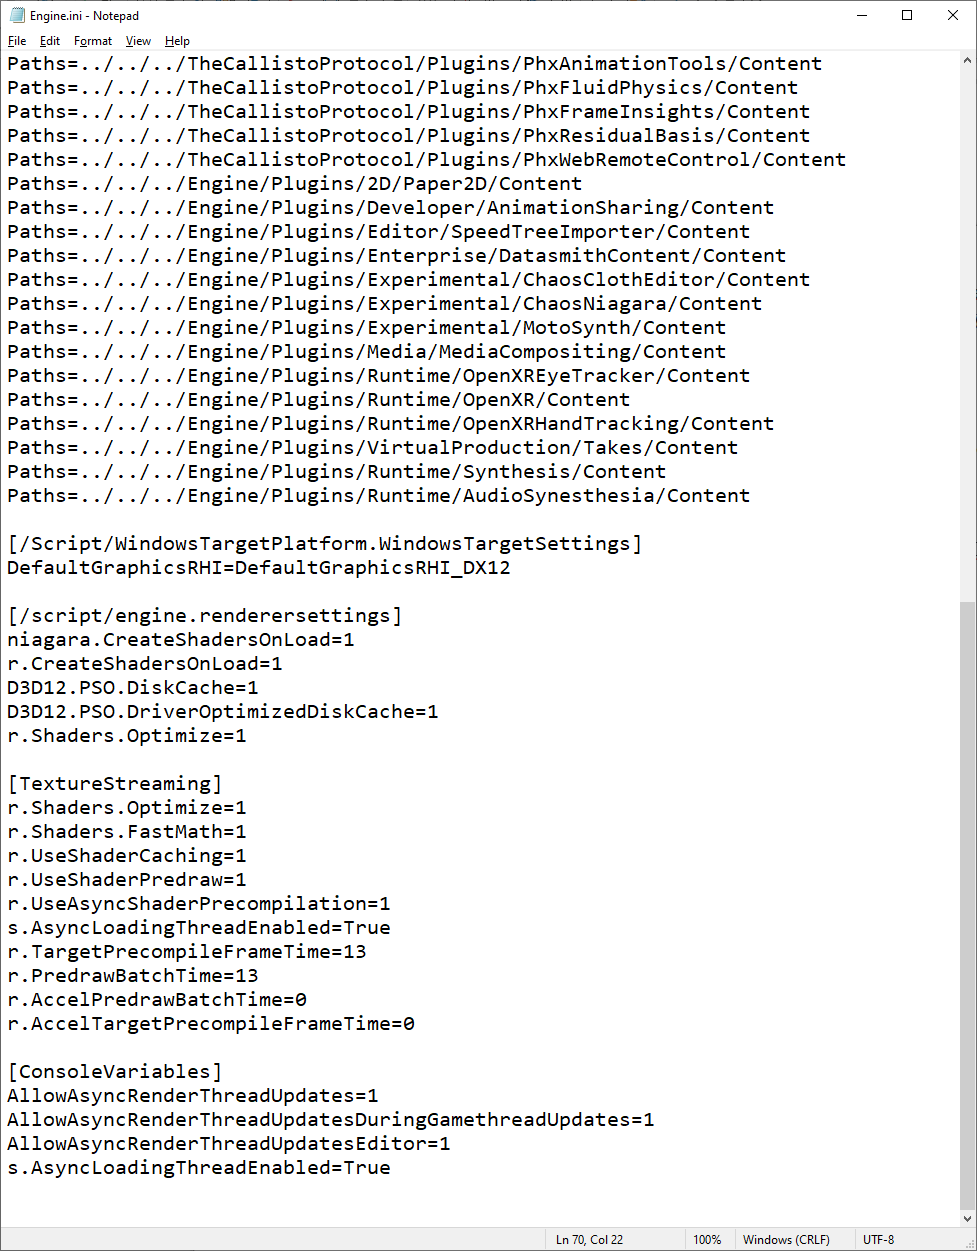
- Open ‘Engine.ini’ in Notepad.
- On a new line, add the following:
[/script/engine.renderersettings] niagara.CreateShadersOnLoad=1 r.CreateShadersOnLoad=1 D3D12.PSO.DiskCache=1 D3D12.PSO.DriverOptimizedDiskCache=1 r.Shaders.Optimize=1 [TextureStreaming] r.Shaders.Optimize=1 r.Shaders.FastMath=1 r.UseShaderCaching=1 r.UseShaderPredraw=1 r.UseAsyncShaderPrecompilation=1 s.AsyncLoadingThreadEnabled=True r.TargetPrecompileFrameTime=13 r.PredrawBatchTime=13 r.AccelPredrawBatchTime=0 r.AccelTargetPrecompileFrameTime=0 [ConsoleVariables] AllowAsyncRenderThreadUpdates=1 AllowAsyncRenderThreadUpdatesDuringGamethreadUpdates=1 AllowAsyncRenderThreadUpdatesEditor=1 s.AsyncLoadingThreadEnabled=True
and save it.
- Open file explorer and click in the top box and put in:
Final Notes
Reboot your computer if you haven’t already. Then go in game and do the benchmark twice, the second run should run much smoother. Hopefully you find these tweaks reduced the amount of stuttering and gets the game into a playable state until it’s properly fixed.
That's everything we are sharing today for this The Callisto Protocol guide. This guide was originally created and written by Advaris. In case we fail to update this guide, you can find the latest update by following this link.