- Título: WilderMyth
- Data de lançamento:
- Desenvolvedor:
- Editor:
Information about Wildermyth is still incomplete. Por favor, ajude-nos a preencher os detalhes do jogo usando este formulário de contato.
Este guia foi escrito em 1.0+322 TODOS OS BONES HOTFIX 3 e pode ser atualizado a qualquer momento, se houver grandes atualizações mecânicas no futuro, que mudarão a maneira como tocamos essa história e se eu estiver interessado em fazê -lo. It’s designed for tryhards like me who want to beat a game on the hardest difficulty just because you can. That means we’re always playing on Walking Lunch difficulty, Hardcore enabled (just select Carved in Stone in the Campaign Options at the New Story), with no undos or Mods. Even if you’re a more casual player or just playing with friends for fun, you can still benefit from this guide’s tips and tricks to improve your decision-making and correct some errors. I consider Multiplayer to be significantly harder and slower than a solo run (especially taking into account who might be your friends). Também, I roll all characters and don’t build their sheets to demonstrate that if you don’t misplay too much, anyone can beat this Campaign.
It does not contain spoilers about the Campaign Story or specific events and battlefields because no one wants their experience ruined simply because he/she wanted to know how to do something better and because knowing exactly what you’re up against is considered cheating. Particularly in Hardcore mode.
Capítulo 1
Starting it right
As your, presumivelmente, the first campaign, you play a tutorial and get to choose the weapon your characters will start with. You could choose the Pitchfork (because it’s easily recyclable for a spear) or the Pickaxe (because it’s easily recyclable for an axe because of Armor Shred) for the Warrior, but the pan is fine as well. I always recommend the Staff for the Mystic because I don’t believe in the Wand-Melee-Mage thing.
Então, after your first dungeon, you’ll want to let your Hunter scout the map alone while your Mystic works on researching the site, and this is a good opportunity to train a Recruit with your Warrior. I like going for a second Warrior because having your Warriors defend your ranged units makes sense in the early game when you lack proper firepower and armor. No entanto, if you want to have an extra Hunter or even a Mystic, I believe it is acceptable for this campaign.
Instead of researching the dungeon we just cleared, another viable strategy is to use the Mystic/Warrior to scout solo another uninfested (does that word exist?) telha. I’m going to do that in this run because I have the worst Chapter 1 map in all of my runs so far.
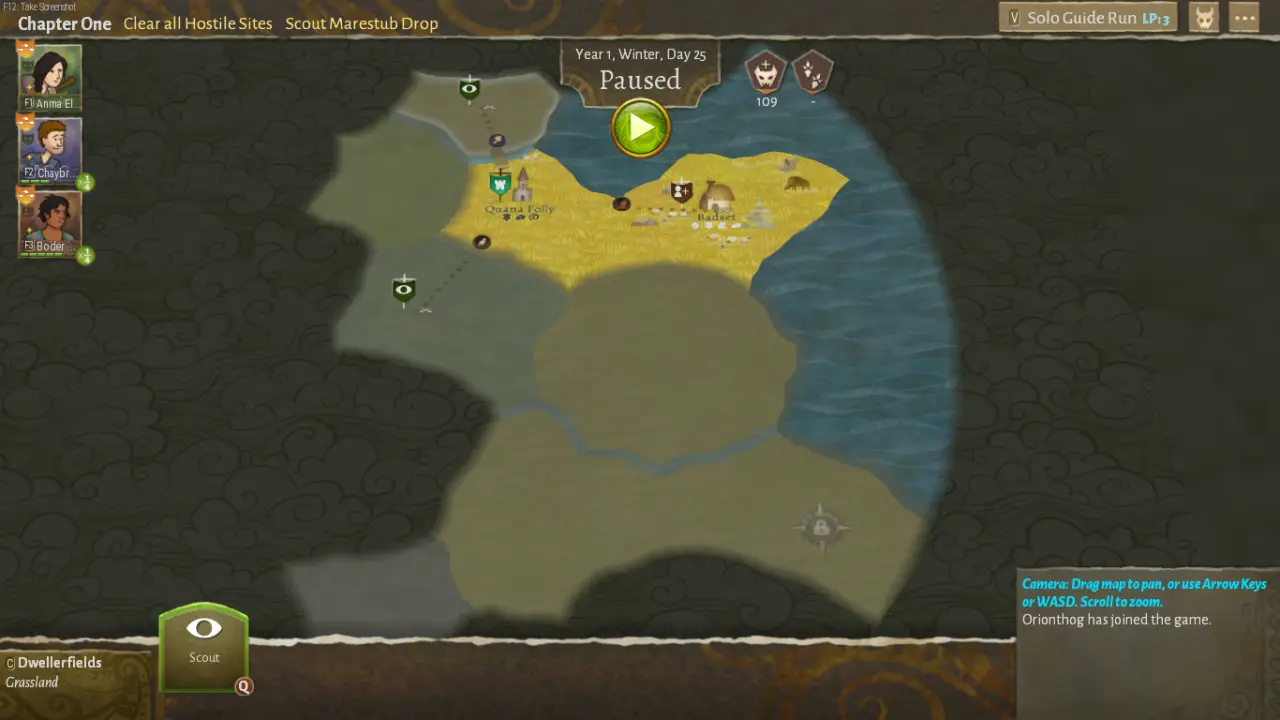
I’ll need a bridge to get to the Chapter 1 Chefe. That takes valuable time away from us, and we may not be able to finish the Chapter before the first Incursion. Normalmente, you can trample through this Chapter without encountering Incursions, constructing bridges, or preparing defenses. This is not the case here.
Our first good decision
Just scouting three tiles gives us a good idea of where we’ll be going and what we’ll be up against. I got 4 because I didn’t do any research on Quana Folly. Além disso, our station is in the middle of nowhere, we have enemies, such as we don’t have an efficient way to move clearing the map, if the Incursion comes from the other side of the river, we don’t know if we should Prepare Defenses on the Glintton Archives or on the Grasslands Station, and we can’t cross directly from Lylalia Dam to Noonmaze Watermill.
So now is an excellent time to make some critical decisions because:
- You get a level 1 defense on the secured tiles at the end of the chapter and can craft Gear.
- You want to spend as little time as possible letting the Gorgons buy cards and make Incursions while you don’t have proper Abilities or Gear. (Na verdade, you don’t want that, but here you should focus on making your party stronger quickly and without casualties.)
- They’ll be drawing cards in no time. So we need to clear at least one tile in order to earn LP and cancel some cards.
In the example, I chose to begin clearing the Dam because my main enemies are the Gorgons, and we’ll be concentrating on canceling their cards rather than the Drauven’s (Lizard-folk). That means we’ll have a chance to face the weakest Drauven we’ve ever encountered. Além disso, that tile is not infested, giving them Strength 4 e 4 5. Normalmente, you can clear two tiles, but I only got one because I had two days off. It’s not a big deal.
Because we lacked 200IQ options, I simply cleared all of the enemies we had scouted without taking more than 3 dano. If you’re having trouble in the early battles, you should reconsider your tactics because you can even get through some of them without letting your enemies hit the party. Because this is a Campaign Guide, I won’t go into detail about in-combat tactics. Now that we have some LP, we can construct a bridge, a station, and possibly finish the Chapter before the first Incursion.

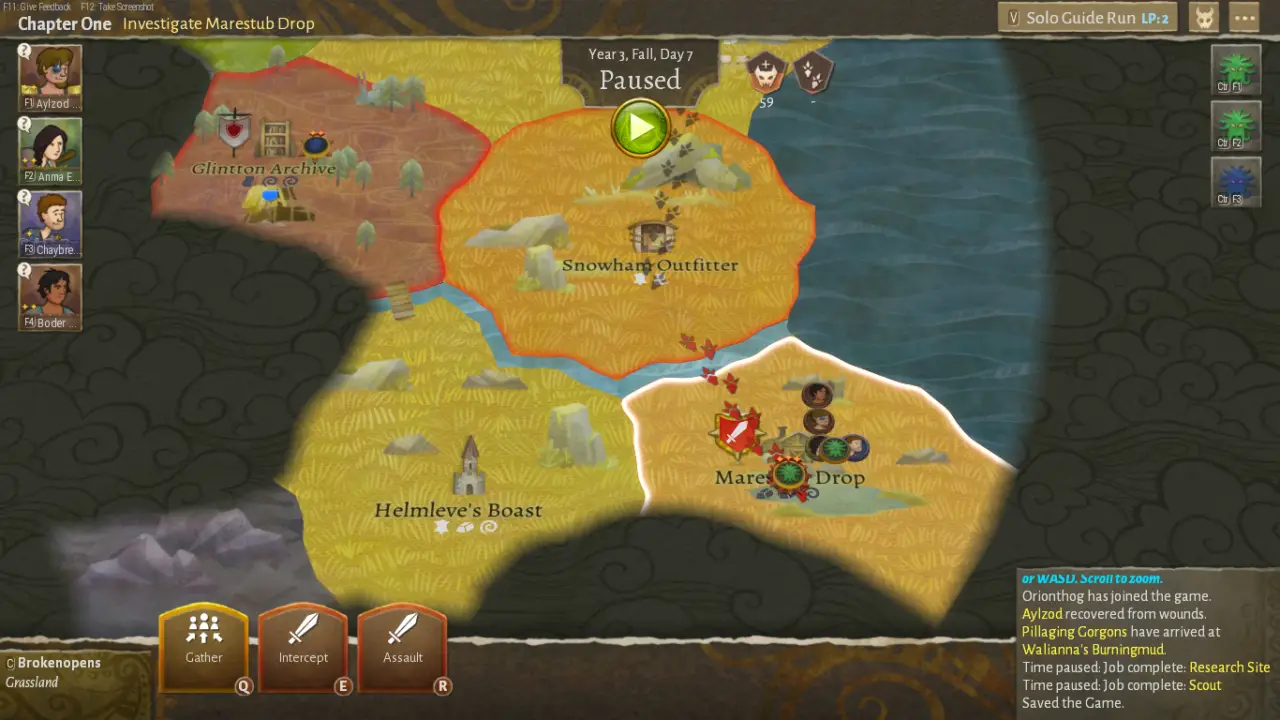
OK, we’ve got problems
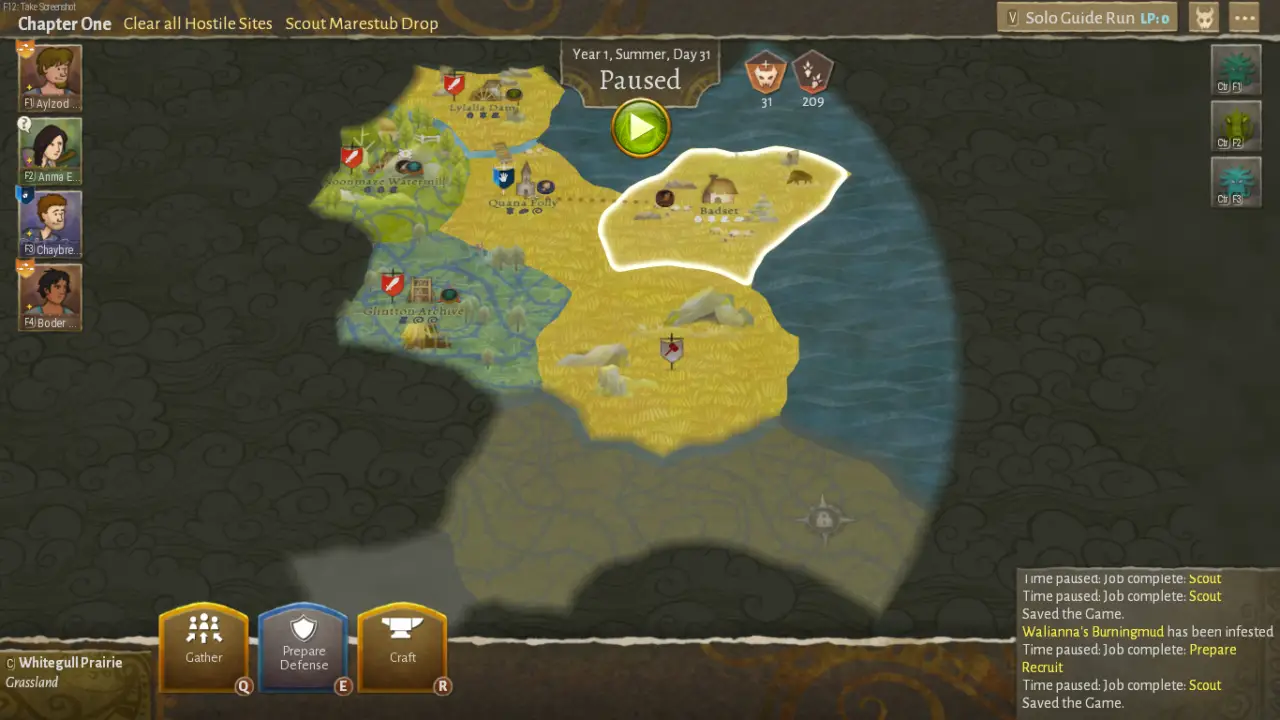
I should’ve built the bridge on the outpost tile because it would’ve saved me 1 travel and given us easy access from the outpost to the unscouted tile, and I should’ve skipped building the outpost altogether because the Incursion will ravage it and we’ll have to repair it. But it’s unlikely that we’ll be able to proceed directly from the last Gorgons to the Chapter 1 boss without stopping to heal. So the Incursion would have begun regardless? Então, should we have planned defenses? And where exactly? It’s simple to be an engineer of a finished building. All that remains is to face the following reality:
 Levou 75 days to reach the Outpost. 49 for the Archive My decision was to construct a Tier 2 Defense because it appears to be a good location in Chapter 2 when we reveal more maps and to Assault those Gorgons.
Levou 27 days to get to the Archives and a long time to get to the Outpost. I decided to take my time and Research an item, despite the fact that it would take 28 days because my Tier 2 Defense should keep the Gorgons busy until we reach the Boss. So here’s what we did:
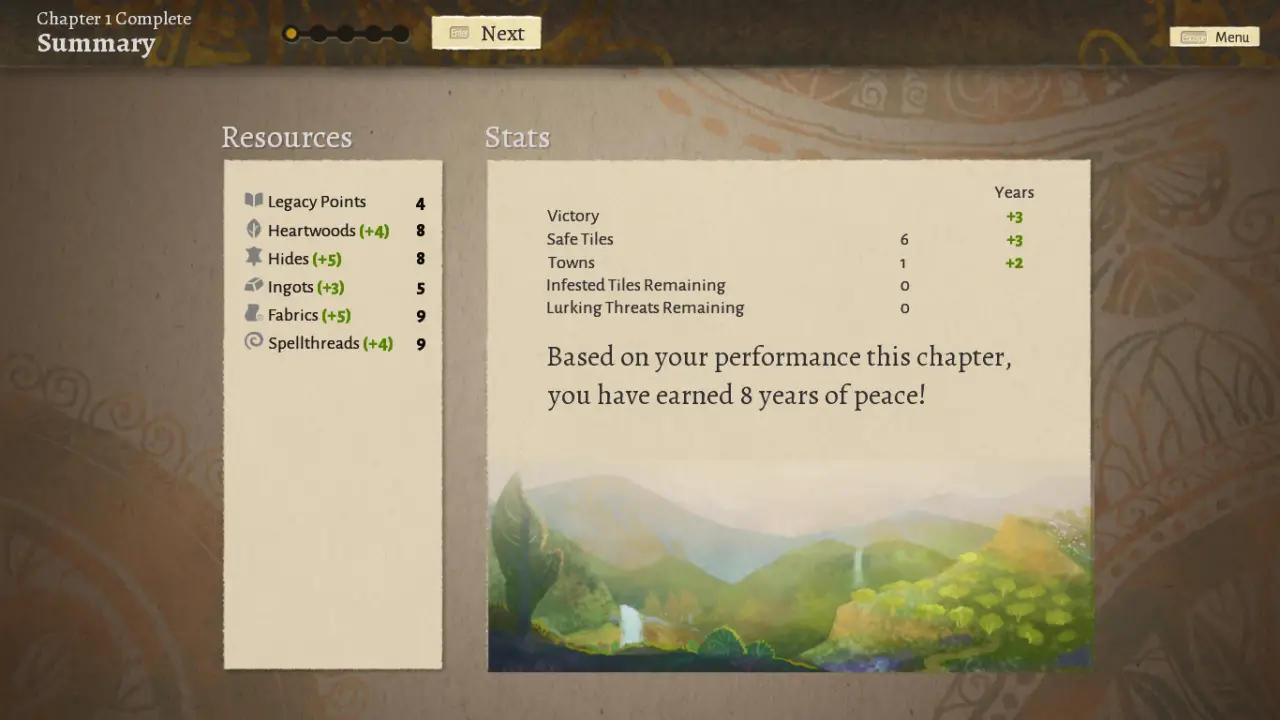
Now that we’ve completed Chapter 1, the Incursion simply vanishes, taking neither our years of peace nor the resources we’d gain.
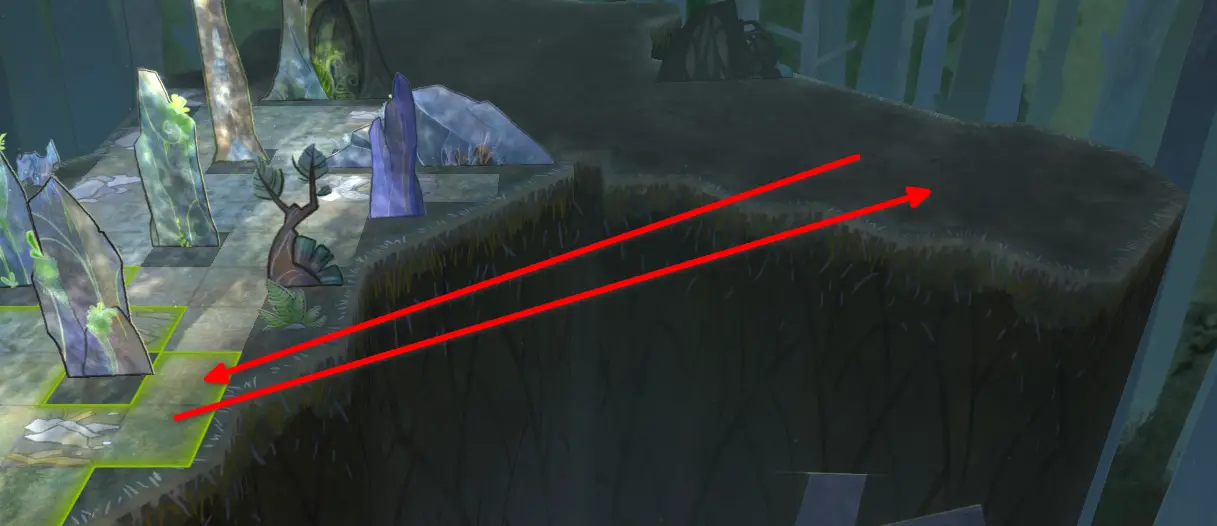
Just keep one thing in mind about this boss: ranged units can shoot through map gaps like this:
Card Cancelling
For this Campaign, sempre que possível, I’d pull Gorgon cards in the order listed below:
- Because the damage is what kills your heroes. Então, more damage equals more chances of being killed unfairly.
- +40% HP: because killing them quickly is the best way to avoid death.
- Armadura: because killing them quickly is the best way to avoid death.
- Corrupção: It’s a pain in the a$$ when you get a kill and corruption explodes on your tile, tratativa 1 damage that bypasses armor/warding. Although leaving a corrupt trial isn’t a big deal because you can still get around without too much trouble.
- New Gorgons: there isn’t a particularly dangerous enemy type in this campaign, na minha opinião, but if you’re afraid of someone, I wouldn’t mind if you canceled a Gheist or a Bogmoor to delay them a little.
Almost all other cards should be ignored, as LP is a valuable resource and the Gorgons are your main enemy anyway. Stopping twice Racoons, por exemplo, would make sense if you couldn’t cancel a +2 dano.
Capítulo 2
When upgrading your gear, I recommend prioritizing Armor over Weapons because a good weapon is useless in the hands of a dead hero.
So let’s see what’s in store for us. Because the map we got for the first Chapter was so bad, the probabilities should now balance everything, certo?
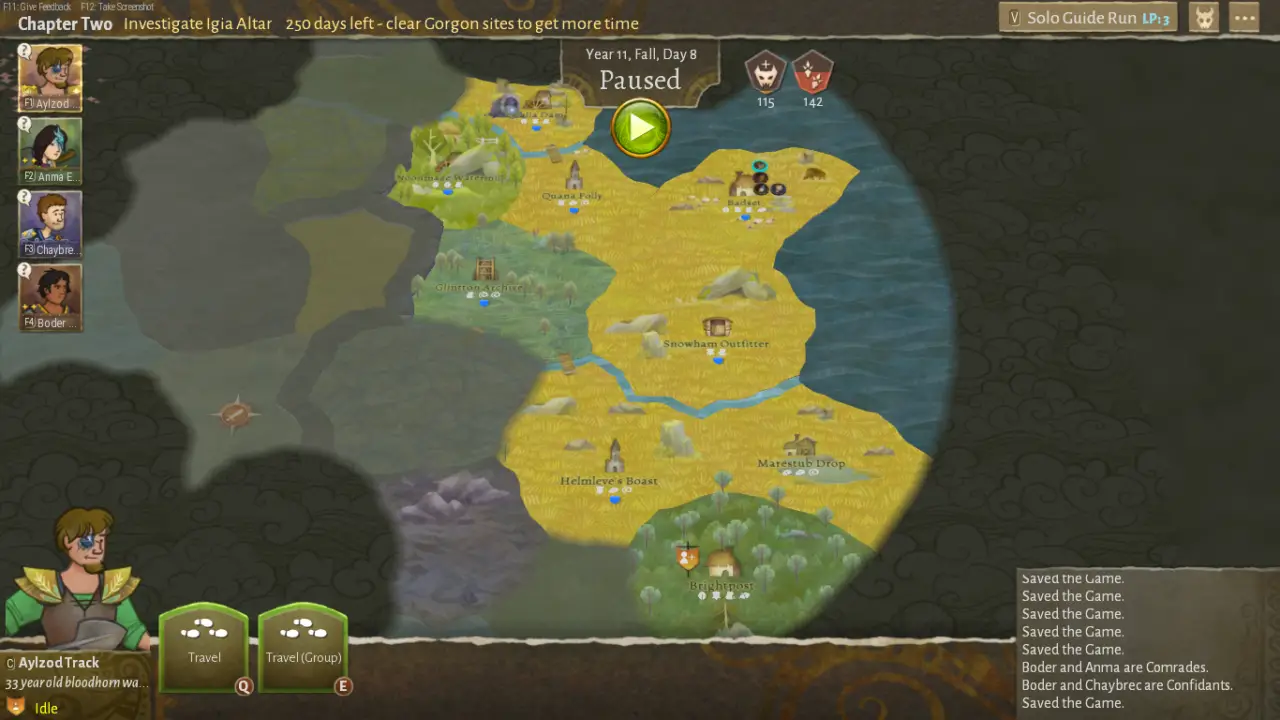
Errado.
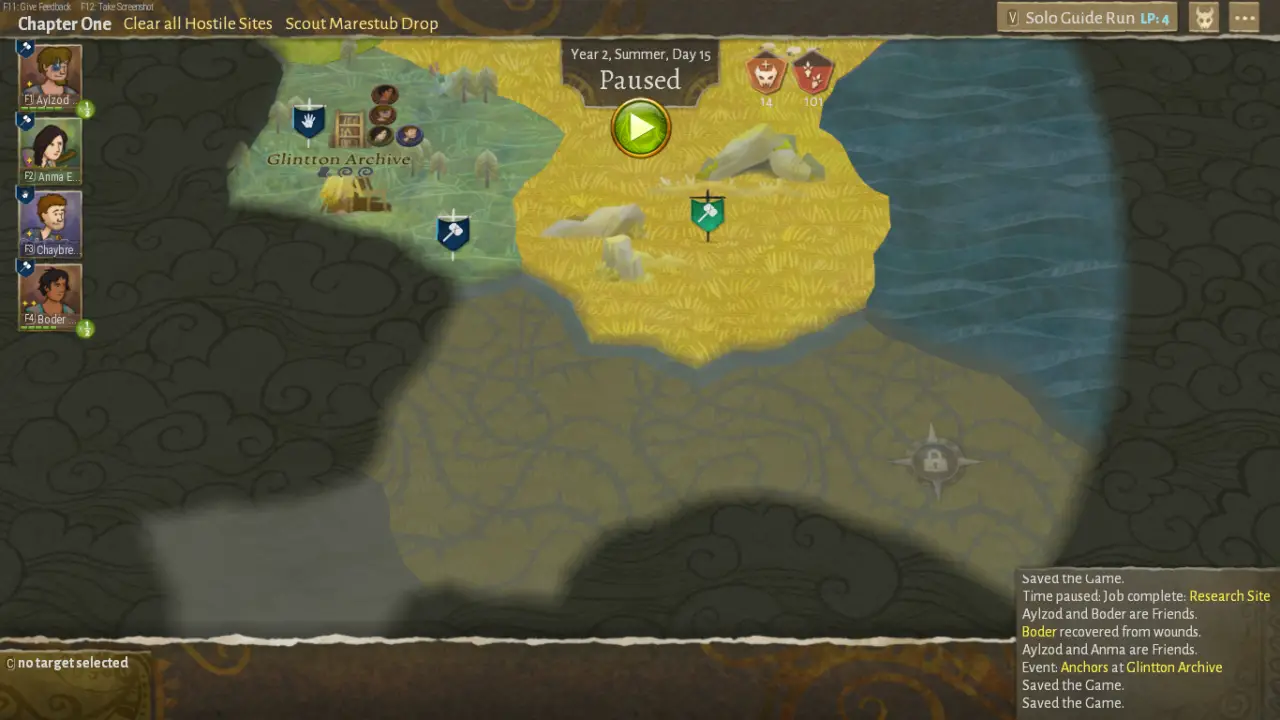
Eca, unlucky. There’s an isolated tile to the far south to explore, and another to the north; if I go north and follow to the Igia Altar (the Chapter objective), I won’t be able to defend against an Incursion from the tile adjacent to the Glintton Archive. Então, I suppose I could just secure the Eastern side of the world, defend properly, and advance, but keep in mind that I only have 250 dias para fazer isso, and you get a little more with each defeated Gorgon site.
Decisions again
I see as viable (and fun) opções:
- Rushing the objective through the Mountain.
- Try one big path to the objective, maybe letting some tiles unscouted.
- Playing it slow and using all the 250 dias.
I’m confident in my ability to speedrun this Chapter. Então vamos começar.
Boder was injured. Azarado. Ah bem, I had a Roe, a Racoon, and a Rager encircling Aylzod when they abruptly turned away and mobbed poor Boder, who was only 5 telhas de distância. That doesn’t significantly alter my plans. What about scouting that isolated tile on the Southside? Perhaps we’ll pay a visit and recruit someone?
OK, I just had an opportunity on the other side of the map, the Incursion is just between that tile in the south (por falar nisso, Thrixl??? wtf), I made a bad decision to hire a Recruit before the card draws on purpose because the difference would be canceling 1 cartão (and wasn’t punished). So my speedrunning strategy has evolved into a midrange one. You can say whatever you want, and all of the planning and stuff I described in this guide is dead. I call it a 200 IQ move because once you choose the fastest start, you can only be forced to go slower, whereas if you’re already going slow, you can only get slower because you can’t go back in time.
Não, Estou falando sério. We must make another critical decision.
Decision time
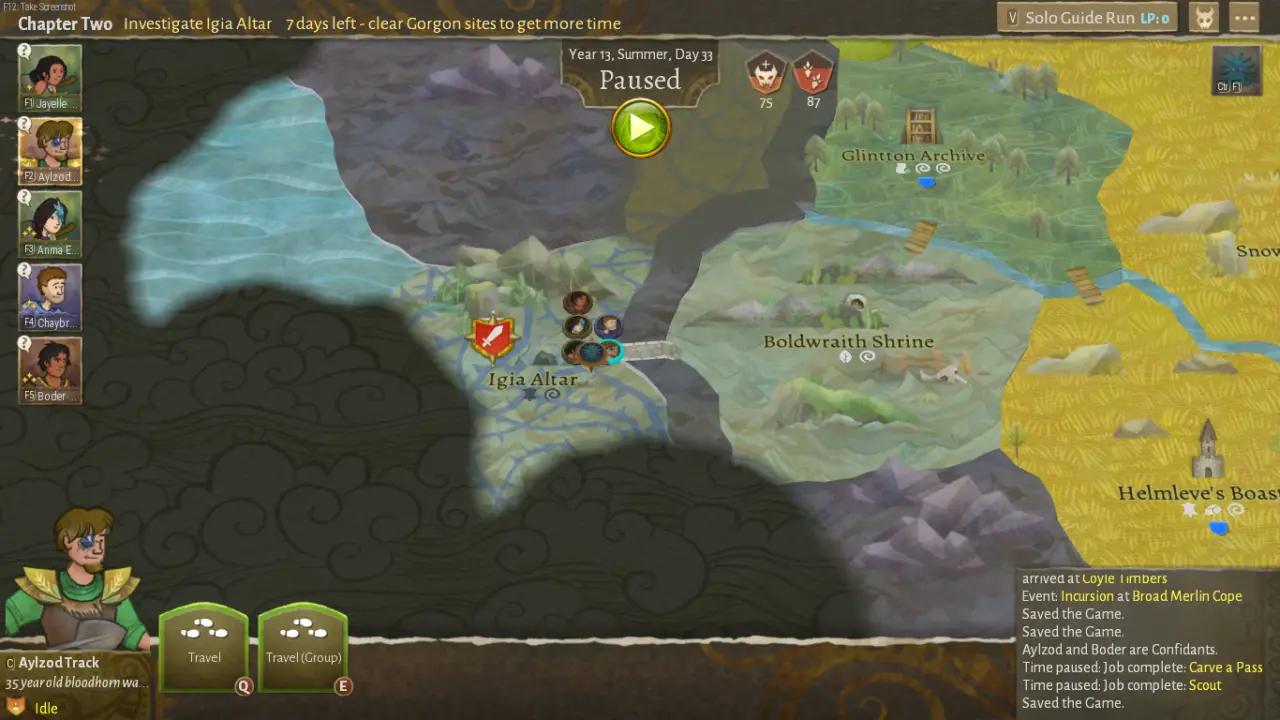
That Thrixl Incursion may appear to be a meme, but it isn’t. Tem 14 Força, and I only have enough time to build a Tier 1 Defesa. My party can gather there in time to defend Brightpost, but is it worth it? Do we try to defend it alongside Boder and six other villagers? The entire party and three villagers? Train the recruit while ignoring the Incursion in order to later repair Brightpost?
I believe you could make a case for each of those choices, but I recommend doing what we did in Chapter 1. Those Thrixl are still extremely vulnerable. I’ll try it on defense, but I’ll gather the party to make sure we don’t get a bunch of useless farmers without Guardian, Emboscada, or anything else decent. Except for Aylzod. He’s apparently a god at carving passes, and the Warriors aren’t that good in Incursions anyway because we try to focus our power and run away to get more Volley of Arrows.
That small decision to allow Aulzod to use the tunnel was the real MVP. Com apenas 7 dias restantes, we managed to reach the Chapter’s Boss. If we’d sent him down there, we’d almost certainly be late by a few days. Obviamente, we can’t scout the adjacent tiles for Gorgons to slaughter. Finalmente, we’ve made the decision to go straight to the boss.
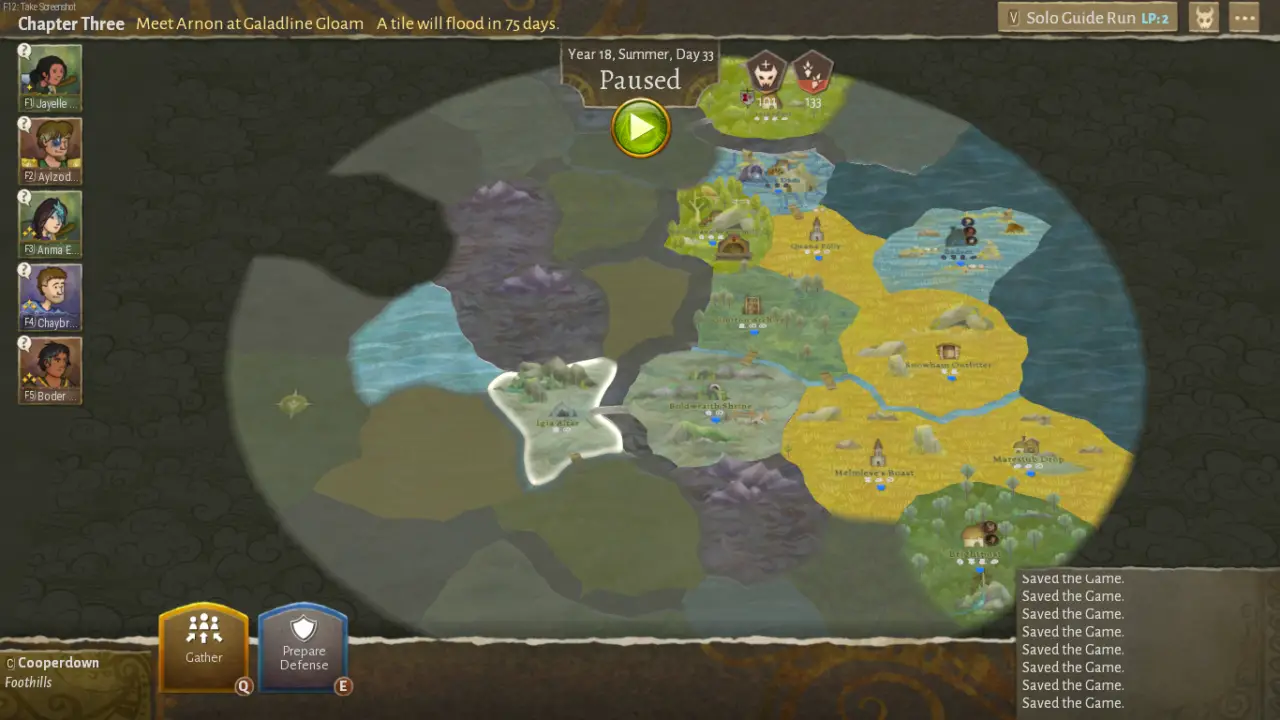
Capítulo 3
This is the final one. Materials are still useful because you can craft gear before the Final Boss. I’m going to speedrun the main objective because my map is completely BS, there’s the flood thing, this Campaign is pretty easy, and I feel like my party is prepared.
Então… you like clever moves, crianças? I’m the same way. That’s why I ignored an Opportunity event, misclicked one option, and exchanged our poor Aylzod for four Thrixl cards. Sim, we’re now fighting the boss with one fewer hero. We should be fine because he’s a warrior, and he’s only there to protect our ranged units. Eca, no rollbacks on the hardcore run, so it’s just doing it.
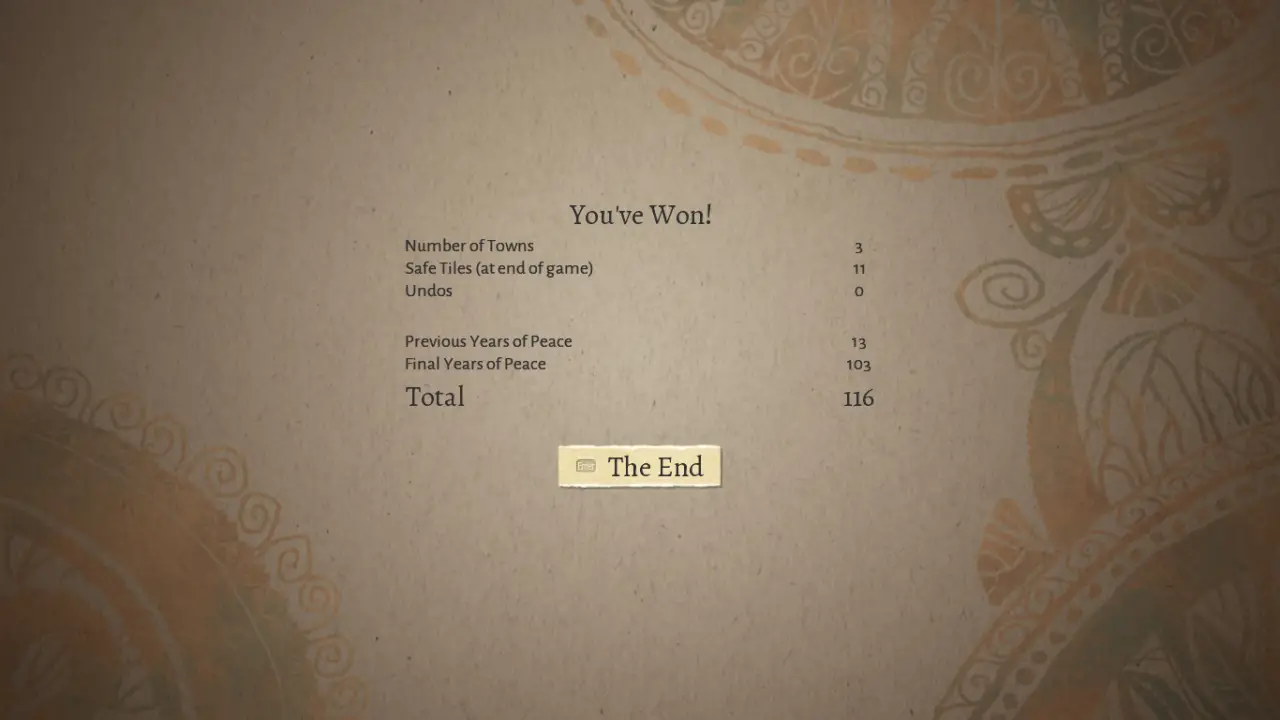
And I completed it. Por falar nisso, é bem simples. I simply ignored Incursions, dug a tunnel, built a bridge, and bulldozed some Gorgons with my 12 damage Discus, 5 Jumpjaws, Quelingmoss+, e 2 attack-per-turn Warrior.
Isso é tudo o que estamos compartilhando hoje para isso WilderMyth guia. Este guia foi originalmente criado e escrito por Mumicate. Caso não atualizemos este guia, você pode encontrar a atualização mais recente seguindo este link.