- Título: Linha de rolamento
- Data de lançamento:
- Desenvolvedor:
- Editor:
Information about Rolling Line is still incomplete. Por favor, ajude-nos a preencher os detalhes do jogo usando este formulário de contato.
This guide explains how to use the track style modding system to create your own custom track styles.
What is a track style?
Track styles are basically different 3D models that you can apply to track.
These can include all kinds of things, como:
- Rails
- Dormentes
- Pontes
- Túneis
- Roads
- Road markings
- Fences
- etc…
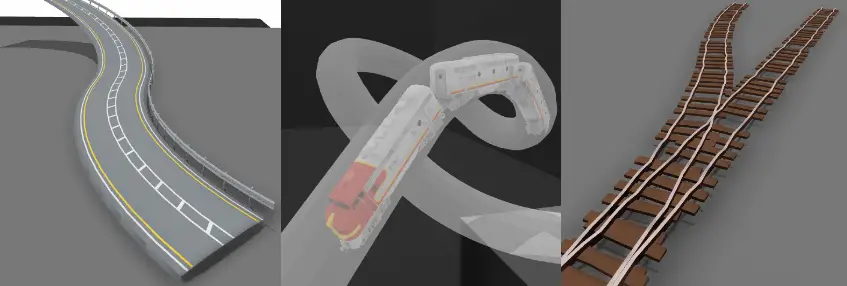
When you get really creative with track modding you can use this system to create anything that follows a custom curve! It doesn’t have to be track at all.
Things like fake roads, tubes, pipes, cercas, etc can all be made using this system.
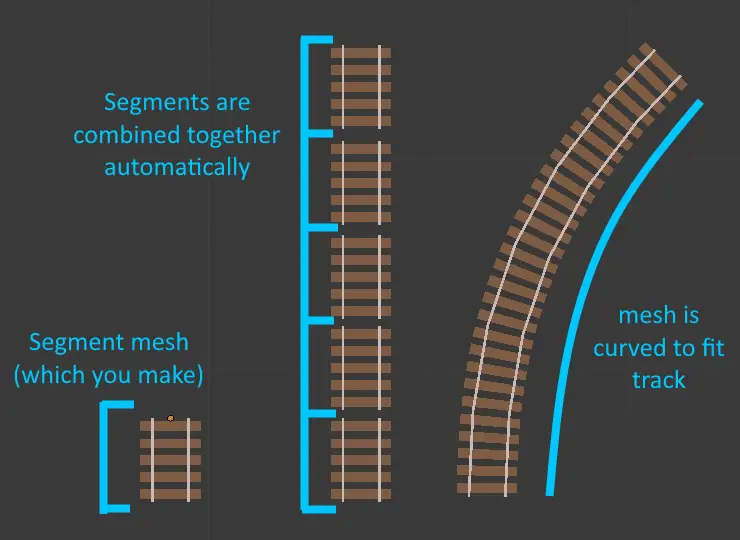
All you need to do is supply a “segment” 3D mesh, which is then duplicated and twisted to match the shape of the track:
Using a custom track style
Once you have made a new track style in the modding system (or downloaded one from the workshop) it will simply show up in the list alongside all the other built-in track styles.
Abra o “track style edit UI” on a piece of track by pressing Q when hovering over it:
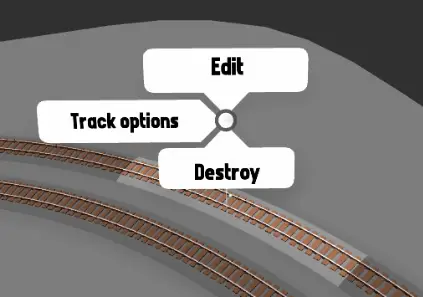
You will then see a window which shows all the different styles applied to the track. Basta clicar “Add new” to access the full list of available styles:
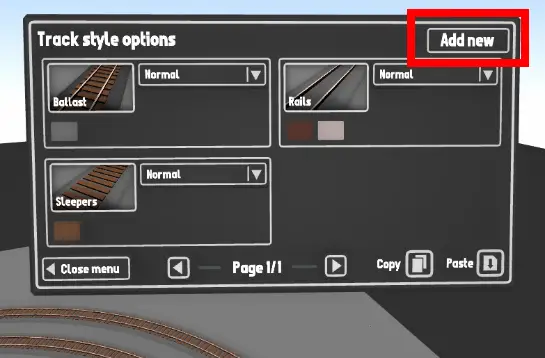
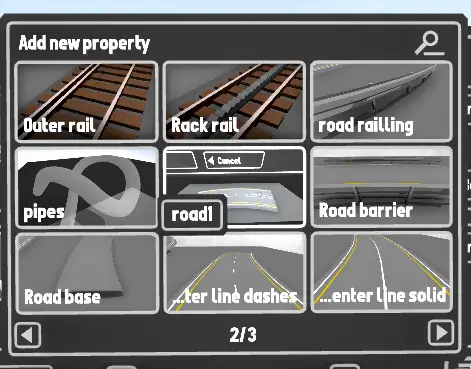
This list will show all built-in styles (like rail types, sleepers, etc) as well as any modded styles you have:
Example mod files
You can find some example models here:
...(Arquivos de programas)\Steam\steamapps\common\Rolling Line\Modding\templates\track style mod examples\
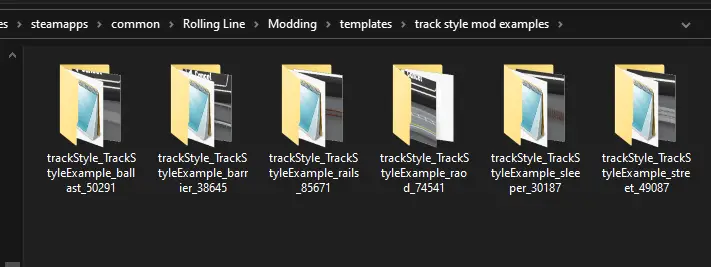
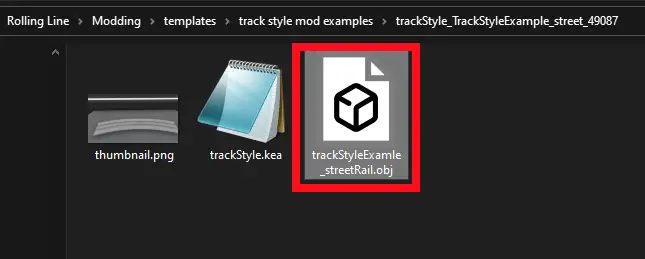
Para este guia, we are going to use the “street rails” example model.
...(Arquivos de programas)\Steam\steamapps\common\Rolling Line\Modding\templates\track style mod examples\ trackStyle_TrackStyleExample_street_49087
Copy the “trackStyleExamle_streetRail.obj” file and paste it into the “custom assets” pasta (just like you would with the prop modding and train modding system).
The custom assets folder can be found here:
...(Arquivos de programas)\Steam\steamapps\common\Rolling Line\Modding\custom assets
Any files inside this folder can be accessed in-game using the modding system.
For more information on how to use assets please look at the official guides for train modding and prop modding.
Setting up your mesh
Primeiramente, I recommend using an example model as a template.
This way you can easily match the position/rotation/scale of the template model.
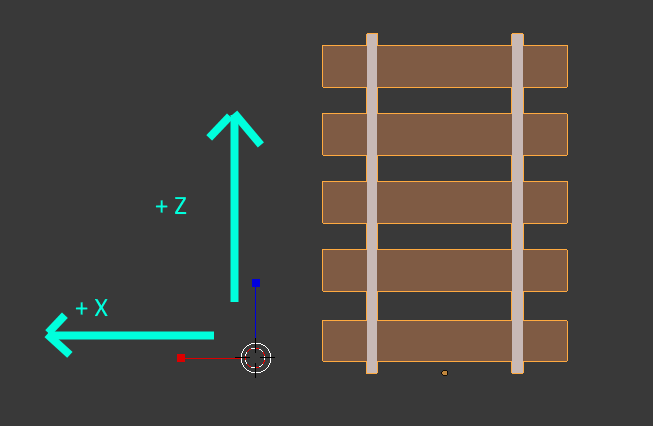
If you look at the 3D model inside some 3D software (like Blender) the main things you need to keep in mind is the rotation and size of the model.
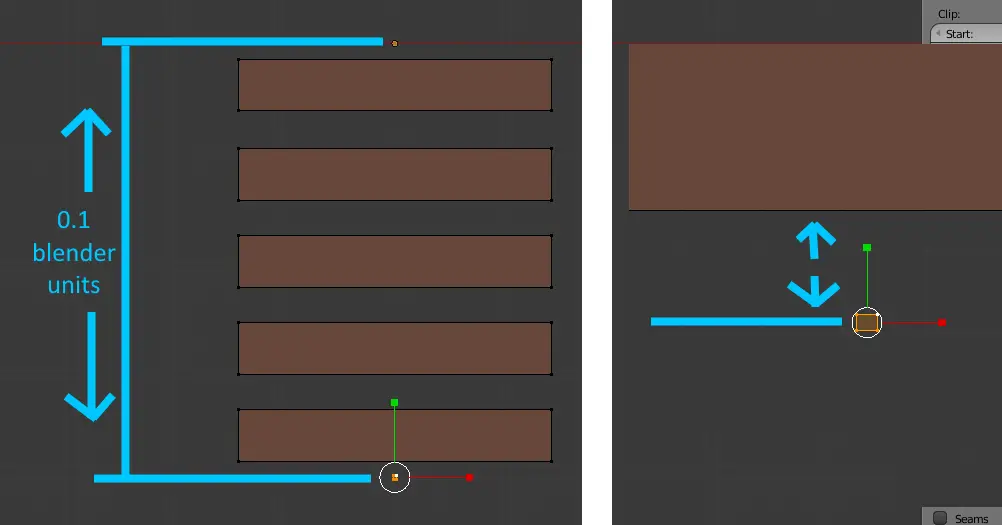
Um “segment” of track should be exactly 0.1 blender units long.
The mesh should have its origin point at (0,0,0) and it should extend 0.1 units in the +Z direction.
Observe: If you have a mesh that doesn’t fill the entire segment length (por exemplo. sleepers, which have gaps at each end) Then you will need to make a small mesh at both ends of the model. This is so that the curve generation system will use the whole length of the mesh and preserve the gaps since meshes are scaled to fit the whole segment:
Creating a mod in-game
Just like with the prop modding and train modding systems, vá para o “Modding manager” from the pause menu and set the mod category to “Track style”

You can then click “Add new” to create a new track style mod.
This will then bring you to the main setup menu:
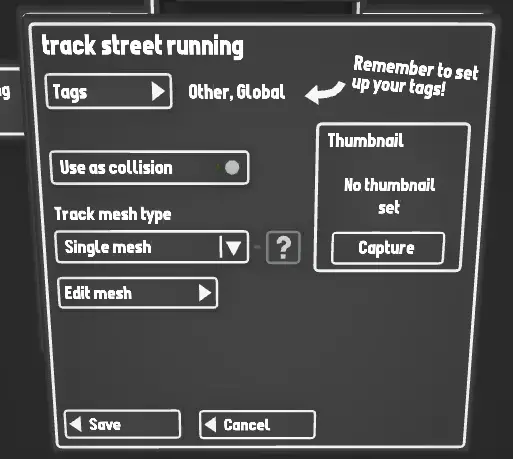
Just like with other mod types, from here you can set the thumbnail and tags.
But since this is a track-style mod, you can also set:
Collision
Set whether this mesh should be used as a collision mesh. The track will automatically use a “ballast” mesh if one exists, de outra forma, it will generate a default box collision. If the mesh you are making should be used as a collision mesh (por exemplo. a road or bridge) then enable this option.
Track mesh type
This will set what kind of mesh setup you want to use.
If you want your track style to support the left & right split feature then you will need to split your mesh in half. This is so that the track generator can generate a unique mesh for both the left & right sides of the track.
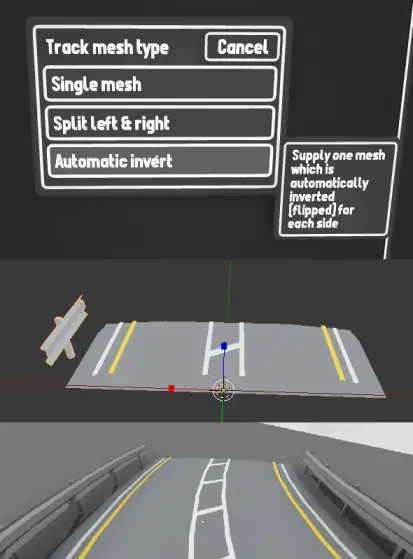
The options are:
- Single mesh – Supply one mesh that contains the whole model (does not support left & right split)
- Split left & certo – Supply two unique meshes for the left and right sides of the model
- Automatic invert – Supply one mesh that is automatically inverted (virou) for each side
If you want your track style to be toggleable for each side of the track the most useful option is “Automatic invert” since you only need to supply one model and the game will automatically flip the model for you:
If you want to provide a unique model for each side, então o “Split left & certo” option will let you do this.
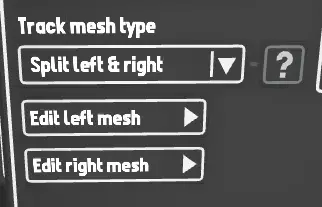
You can click on the “Edit mesh” options to open the mesh setup window.
Model data editing
Once you open the model editing window you will see a list of meshes:
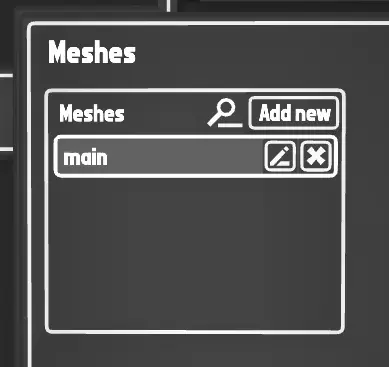
Using this list you can add multiple meshes for your track style.
Por exemplo, if you want your style to be paintable with multiple colours, create a new mesh for each colour slot.
You can also make some meshes use image textures, while others are paintable.
One important thing to remember is that if you are using the “Split left & right mesh” option and are supplying unique meshes for each side of the track, you MUST make sure both sides have the same number of mesh slots, and that paint slots match.
Por exemplo. se o “esquerda” mesh has 2 mesh slots which are both paintable, então o “Certo” mesh must also have 2 paintable mesh slots in the same order.
Editing a mesh
Simply click on a mesh slot to edit it.
This process is exactly the same as it is for setting up models for train & prop mods, so this guide will not go into detail about this.
You can assign your mesh from the custom assets folder, como “trackStyleExamle_streetRail.obj” Neste exemplo:
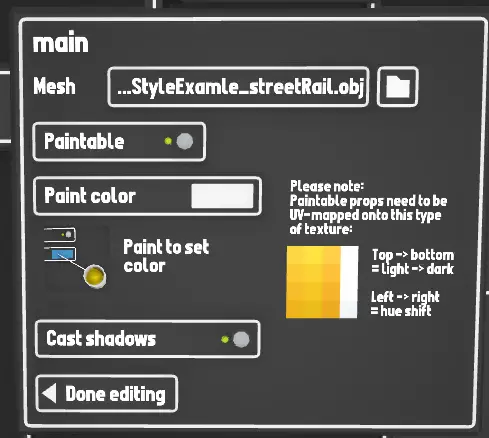
You can also set whether this mesh uses an image texture, or if it is paintable.
For this example the street running pavement can be a simple grey colour.
Clique “Done editing” to save.
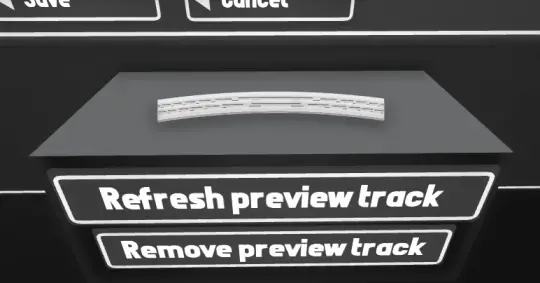
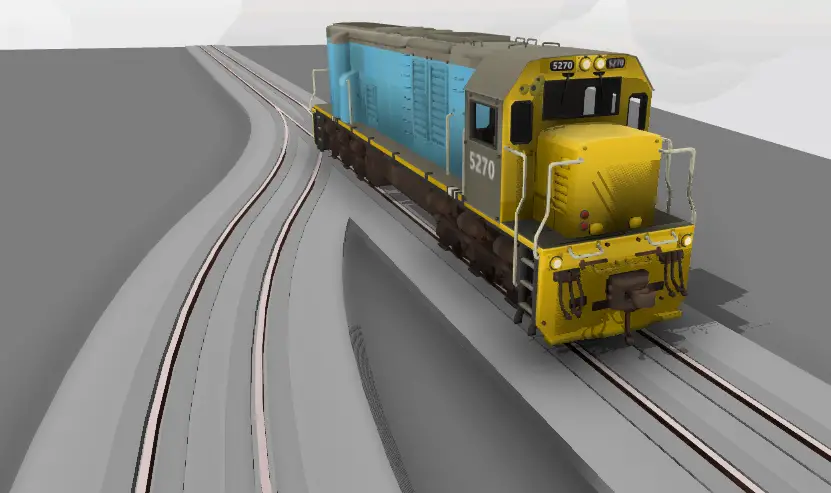
Preview model
You can click “Refresh preview track” to view a loaded preview of the style you are making.
Once you have refreshed the preview model, you can already edit any piece of track on your map to add the new style to it.
Clique “Salvar” to fully save your new track style.
You can now use it in your maps & upload it to the workshop.
Isso é tudo o que estamos compartilhando hoje para isso Linha de rolamento guia. Este guia foi originalmente criado e escrito por Francos. Caso não atualizemos este guia, você pode encontrar a atualização mais recente seguindo este link.