This is an essential manual for operating one of the first available scout-class submarines in the game, the Dugong.
While being a very interesting and valuable choice for beginners, there are a few things you may need to be aware of in your time spent on board and under the ice of Europa
Basic information
“Compared to larger vessels, the Dugong series is overshadowed in all aspects except one: their reliability for their price is world class. They’re lacking in firepower and speed, so smart maneuvering is key.”
~ In-game description
The Dugong is a scout class submarine. Its small size, maneuverability and straightforward layout make it a good choice for novice players but for higher difficulties, a more powerful submarine is recommended. Priced at 6000 Marks, the Dugong is one of two default subs available at the start of a single player campaign, the other being the Barsuk.
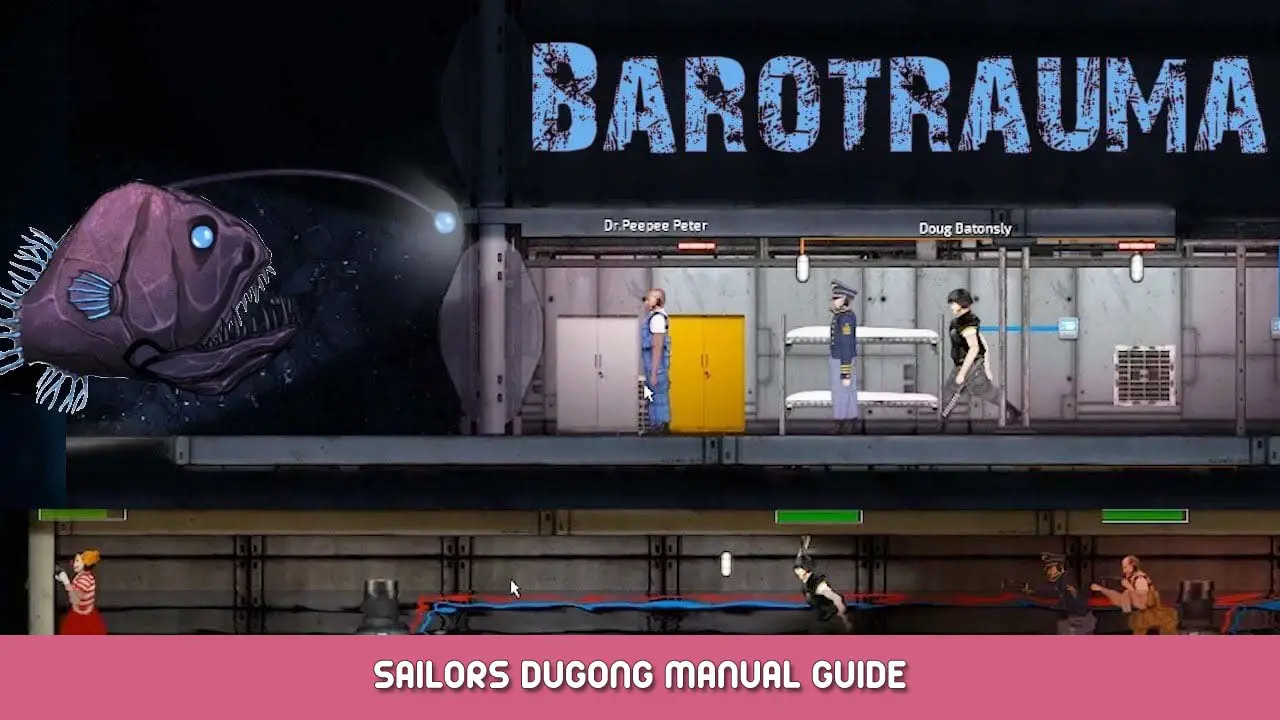
Layout
The Dugong’s command room is situated close to the rear, next to the engine room. In addition to the navigation terminal, it has two periscopes that are used to control two coilguns placed in the bottom-center and top-rear of the submarine.
In the front area of the main deck are a medical and weapons storerooms. The weapons storeroom can be opened by any crewmember, but a secure steel cabinet that contains the more powerful weaponry requires a captain’s or a security officer’s ID card.
The bottom deck has a reactor room, electrical room and a compartment for the oxygen generator. Two ballast tanks are also located on the bottom deck, one in the rear and one in the front.
The Dugong has one airlock, located on the top deck. Diving equipment is stored below it on the main deck.
Operating
The Dugong is an excellent choice for beginners, but does require a certain level of skill and methodical thinking to properly accomplish anything in this hellscape.
I highly reccomend a crew of at least two others, AI or human teammates are equally valuable, depending on the role you play.
Para este guia, we’ll assume you’re playing as a Captain with a crew of a Mechanic & an Engineer.
Hull damage
When sustaining danger to the hull of the ship, it’s always best to begin repairs in the lowest parts of the ship first as not to flood the remainder of the vessel with water, because chances are the pumps may have been damaged.
Mechanical/Engineering Damage
It’s best to assign your mechanic & engineer to damaged systems, but if they are incapacitated or dead, always repair in this order if they are damaged.
1. Reator
Always keep the reactor in pristine condition, or risk failure and loss of power, maybe even an overload.
2. Junction compartments
See all those boxes in that dark room below the ship? Those things constantly break and cause major equipment malfunction or power shortages if damaged. Keep them clean and free of damage.
3. Pumps
The pumps on board are critical to flushing excess levels of water from the ship, and without them you’ll be crunched under the thousand pound water pressure.
4. Terminals
The onboard terminals keep you aware of outside influences on your ship such as hostile entities or terrain. They keep you informed of leaks and damaged systems, making them essential to keeping maintained.
5. Motor
The Engine is critical to movement, so repairing it as soon as possible
6. Ballast Pumps
The Ballast Pumps are another component to vessel movement, allowing vertical climb and descent. Damaged pumps cripple ship efficiency very fast
Sub Specs
Class Scout
Preço: 5,000 mk
Nível: 1
Crew Size 3 – 5
Experiência: Novato
Dimensions
34 x 8 m Hull Volume
1,824,832 cm2
Mobilidade
Max Horizontal Speed
22 km/h Max Descent Speed
12 km/h
Cargo Capacity
8 Crates
Weaponry
2 Coilguns
1 Turret Hardpoint
Electrical Discharge Coils:1
Depth Charge Tubes:Nenhum
Reator
Fuel Consumption Rate
0.2 %/s Max Power Output
3,000 kW
Meltdown Delay
30 seconds Fire Delay
10 segundos
Isso é tudo o que estamos compartilhando hoje para isso Barotrauma guia. Este guia foi originalmente criado e escrito por The Haunted Hooligan. Caso não atualizemos este guia, você pode encontrar a atualização mais recente seguindo este link.