- Titel: Darkest Dungeon
- Releasedatum:
- Ontwikkelaar:
- Uitgever:
Information about Darkest Dungeon is still incomplete. Help ons alstublieft de details van het spel hiermee in te vullen contactformulier.
This guide will be showing you some of the most effect ways to earn gold and save it at the same time.
Capitalizing on Town Events
Every week, or upon the completion of specific missions, there is an opportunity for a town event to occur. Certain town events can be highly advantageous in terms of saving your gold.
Bumper Crop & Supply Run


Bumper Crop provides supplies and provisions for free, while Supply Run offers them at half price. Both events are excellent for saving gold, especially on medium and long missions.
Gevonden voorwerpen & A Job Well Done


Lost and Found offers a free weapon upgrade, and A Job Well Done provides a free armor upgrade for a hero. These events can help you save a significant amount of gold on enhancing your heroes’ versnelling.
Labour Force

Labour Force grants a free building upgrade. Although this doesn’t save immediate gold (since building upgrades require heirlooms), it can be a long-term gold saver if you choose a cost-reduction upgrade.
Trade-Off Stress Discounts

Various events fall under this category, where one stress relief facility option is unavailable, but the remaining options have their costs reduced by half. This can be a substantial gold-saving strategy for stress healing, except for heroes with quirks restricting them to the closed activity.
Mardis Gras & All Saints Day


Mardis Gras makes all Tavern activities free, while All Saints Day does the same for Chapel activities. These events are superior versions of the trade-off events, ensuring significant gold savings.
Medical Breakthrough & Caregivers Convention


Medical Breakthrough offers free disease curing at the Sanitarium, and Caregivers Convention makes all Sanitarium activities free. The latter is particularly powerful, allowing you to address quirks and diseases simultaneously without spending gold.
Nomad New Year
Nomad New Year cuts trinket prices at the Nomad Wagon in half. It’s primarily beneficial if you have your eye on a specific trinket in stock, offering substantial gold savings.
Town Fair

Town Fair provides free access to all stress relief facilities and makes all Sanitarium activities free. This is considered the ultimate town event, offering free stress healing, disease treatment, and quirk management for your heroes, making it a gold-saving treasure.
Torch Manipulation
Torch Manipulation is a tactical strategy in the game where you deliberately extinguish your torch before finishing a battle to benefit from the bonus loot that comes in pitch-black darkness. To execute this strategy effectively, it’s advisable to carry more torches than your standard loadout. Bijvoorbeeld, if you typically bring 8 torches for short missions, consider bringing around 14 torches when planning to employ Torch Manipulation.
To maximize the rewards, you should time the torch snuffing for moments when there is either a stunned, low-health enemy or an enemy guaranteed to succumb to blight or bleed effects. This ensures that you secure the bonus loot without compromising the safety of your heroes.
It’s important to note that Torch Manipulation doesn’t need to be applied in every encounter, as doing so would require an even larger torch supply than usual. An opportune moment to employ this strategy is during room fights that contain a treasure curio. It becomes even more lucrative if there’s a loot curio positioned just before or after the room, increasing the potential for valuable rewards.
Cost-Reducing Upgrades
In the Hamlet, there are cost-reducing upgrades available for each building, which can lead to substantial gold savings over time. The idea behind these upgrades is to consider the long-term benefits of seemingly small reductions in cost. Bijvoorbeeld, going from 1,000 naar 900 gold for a service may not appear significant initially, but when you multiply the 100 gold saved per visit over 10 visits, you’ve effectively saved 1,000 goud. The more of these discount upgrades you invest in, the greater your overall gold savings.
Here’s a breakdown of the cost-reducing upgrades for various buildings in the Hamlet:
De abdij & Tavern

Both the Abbey and Tavern activities have cost reductions at their 2nd and 5th upgrade ranks. These upgrades decrease the cost by 15% elk, resulting in a total reduction of 30% for each activity.
The Blacksmith, Guild, Nomad Wagon, and Survivalist


The Blacksmith, Guild, Nomad Wagon, and Survivalist each offer separate upgrade paths specifically aimed at reducing Equipment, Vaardigheid, and Trinket costs. Each rank in these upgrades lowers the cost by 10%, and with five ranks available, you can achieve a total reduction of 50%.
The Sanitarium

The Sanitarium has two distinct upgrade paths for its activities, and they function slightly differently. The Treatment Library upgrade reduces the cost of quirk treatment by 10% for each of its five ranks, totaling a 50% cost reduction. The Medical Devices upgrade focuses on disease treatment. It reduces the cost by 13% at its 1st, 3rd, and 5th ranks (with the 2nd and 4th ranks increasing the chance to cure extra diseases). In totaal, this upgrade offers a 39% reduction in disease treatment costs.
Investing in these cost-reducing upgrades is a smart financial strategy in the game, ultimately leading to significant gold savings over the course of your adventures.
Knowing the Curios
The most effective approach to acquire loot during missions involves familiarizing oneself with the properties of each curio encountered and understanding how to investigate them without risk. Although I won’t delve into the specifics of every curio and their interactions, I can provide a compilation of those that are particularly advantageous for discovering loot and should be researched.
General Curios

- Discarded Packs
- Heirloom Chests
- Sacks
- Unlocked Strongboxes
Ruins Curios

- Alchemy Tables
- Decorative Urns
- Iron Maidens
- Locked Display Cabinets
- Locked Sarcophagi
Warrens Curios

- Dinner Carts
- Makeshift Dining Tables
- Piles of Bones
- Racks of Blades
Weald Curios

- Beast Carcasses
- Eerie Spiderwebs
- Left Luggage
- Mummified Remains
- Old Trees
- Shallow Graves
Cove Curios

- Barnacle Crusted Chests
- Fish Carcasses
- Giant Oysters
Courtyard Curios

- Bloodflowers
- Forgotten Delicacies
- Hooded Shrews
- Wizened Shrews
- Piles of Strange Bones
- Thronging Hives
Farmstead Curios
- Stockpiles
- Mildred
The Right Districts
In terms of Districts, you have the opportunity to invest your resources such as gold, heirlooms, and blueprints to construct buildings that offer various advantages. Here are four specific buildings that can significantly impact your gold acquisition and savings:
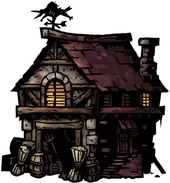
The Bank

- Kosten: 15,000 goud (0 in Radiant mode), 50 Paintings, en 1 Blueprint.
- This establishment enables you to accrue interest on your gold every week, set at a rate of 5%. Bijvoorbeeld, if you possess 1,000 gold at the start of the week, you’ll receive an additional 50 goud.
- This may seem like a modest effect initially, but it becomes substantial, particularly as you accumulate larger sums of gold.
The Cartographer’s Camp
- Kosten: 5,000 goud (1,000 in Radiant Mode), 300 Crests, en 1 Blueprint.
- The camp enhances the advantages of different Torchlight levels:
- +50% Loot Chance
- +1% Kritiek
- +2.5% Scouting Chance
- +5% Chance Monsters Surprised
- -5% Chance Party Surprised
- The most notable benefit is the +50% loot chance, meaning you’ll obtain more gold, edelsteen, and heirlooms.
The Granary
- Kosten: 2,500 goud (0 in Radiant Mode), 60 Busts, en 1 Blueprint.
- This facility boosts the amount of healing party members receive when consuming food by 15% and also provides you with approximately 4-10 free food units every week.
- While it doesn’t directly influence your gold income, it results in significant savings on food provisioning in the long run, similar to cost-reduction upgrades. Aanvullend, the extra healing is a valuable bonus.
The Geological Studyhall

- Kosten: 125 Comet Shards, and this building can only be constructed when the Color of Madness DLC is enabled.
- The studyhall increases the stack size of gems by one, including Puzzling Trapezohedrons.
- Though this enhancement might appear minor, it’s essential to note that a stack of six Jades, the second most common gem, is valued at 2,250 goud. The ability to carry this extra gem proves exceptionally beneficial for both gold accumulation and inventory management.
Selling Trinkets
Whether you find it surprising or not, a viable strategy for rapidly acquiring gold is to engage in the sale of trinkets, particularly those of lower potency. Onderstaand, you’ll find a breakdown of prices based on rarity, along with a compilation of subpar trinkets that hold potential for profitable selling.
Sell Prices
- (Erg) Gewoon: 750
- Gewoon: 1,125
- Ongewoon: 1,500
- Zeldzaam: 2,250
- Very Rare: 3,750
- Very Rare (Collector/Madman): 2,250
- Ancestral/Crimson Court: 7,500
(Erg) Commons

- Critical Stone
- Dodge Stone
- Debuff Stone
- Move Charm
- Stun Charm
Commons

- Deteriorating Bracer
- Lock of Patience
- Sturdy Greaves
- Sturdy Boots
- Defender’s Seal
- Healing Armlet
- Sly Eyepatch
- Rotgut Censer
- Virtuous Chalice
Uncommons

- Bloodthrist Ring
- Book of Holiness
- Gambler’s Charm
- Shimmering Cloak
- Bloodcourse Medallion
- Carapace Idol
- Double-Edged Pendant
- Longevity Eyepatch
- Haste Chalice
Rares

- Quick Draw Charm
- Sun Cloak
Very Rares

- Barristan’s Head
- Mantra of Fasting
Ancestral/Crimson Court

- Tyrant’s Fingerbone
- Onderwerp #40 Opmerkingen
Prioritizing Gems
In certain cases, a complete stack of gems can yield greater value than a stack of gold coins, making it a worthwhile endeavor to gather them while on a mission.
Which Gems Are Worth It?

Citrines, unequivocally, do not hold much value and are generally not worth the effort of collection, unless there are no other gem options available. Even with the presence of a study hall, a stack of six citrines is only valued at 1,500 goud, which falls short by 500 gold when compared to a standard stack of gold coins.

When it comes to Jades and Onyxes, there is some potential value to consider. A stack of five Jades holds a worth of 1,875 goud, surpassing a standard gold stack by 100 goud. Echter, if you have an Antiquarian in your party, it becomes less favorable to collect them since the Antiquarian allows you to carry more gold. The same principle applies to Onyxes, with the exception that a stack of five Onyxes equals the value of an Antiquarian’s gold stack. Toch, when a study hall is in place, a stack of six Onyxes exceeds the value of an Antiquarian’s gold stack, making it a more lucrative choice.


Emeralds, Sapphires, and Rubies unquestionably stand out as valuable gems worth collecting. Stacks of these gems consistently hold a significantly higher value than even an Antiquarian’s gold stack. The advantages of collecting these gems are further amplified when you have a study hall constructed.
The Geological Studyhall, Opnieuw
As previously mentioned in the Districts section, the construction of a Geological Study Hall provides the benefit of increasing the stacking capacity of gems by one, which includes Puzzling Trapezohedrons. This additional gem-carrying capacity can have a substantial impact on your overall gold earnings. Verder, it can make the collection of Onyxes worthwhile, especially when you have an Antiquarian in your party.
The Antiquarian

The Antiquarian is an invaluable asset when it comes to maximizing your gold accumulation during missions. She possesses two unique abilities tailored for enhancing your loot-gathering endeavors:
Larger Gold Stacks


With the inclusion of an Antiquarian in your party, your capacity to carry gold in stacks sees a substantial increase. For every Antiquarian present, you can stack up to 750 more gold. This means that with just one Antiquarian, you can amass a gold stack of 2,500, and with a full party of four Antiquarians, that number goes up to 4,750 gold per stack. Echter, it’s important to note that Antiquarians are not known for their combat prowess, so it’s generally not advisable to bring more than one of them along.
With a single Antiquarian, the value of full stacks of Jades and Onyxes is eclipsed by a single 2,500 gold stack, except when you have the Geological Studyhall constructed, making the collection of Onyxes still worthwhile. Vervolgens, when you have an Antiquarian in your team, it’s prudent to prioritize keeping Emeralds, Sapphires, and Rubies. This not only boosts your gold earnings but also simplifies inventory management by eliminating the need to carry less valuable gems.
Antiques


The Antiquarian’s second unique ability revolves around obtaining antiques when searching curios. It’s imperative that the Antiquarian herself performs the curio searches to acquire these antiques in addition to any other loot you might uncover. Verder, you can obtain antiques as loot drops from battles, and there are two categories to consider:
- Minor Antiques: Valued at 500 gold each and stackable up to 20, resulting in a total value of 10,000 goud.
- Rare Antiques: These hold a higher value of 1,250 gold each and can be stacked up to five, reaching a total worth of 6,250 goud.
By diligently collecting these antiques, you can further augment your gold earnings during missions. Bovendien, since you won’t be burdened with carrying less valuable gems, you can utilize your inventory space to accommodate these antiques instead, effectively optimizing your gold-making strategy.
Dat is alles wat we vandaag hiervoor delen Darkest Dungeon gids. Deze handleiding is oorspronkelijk gemaakt en geschreven door Brothers in Blues Enjoyer. Voor het geval we er niet in slagen deze handleiding bij te werken, U kunt de laatste update vinden door dit te volgen link.