- Title: Left 4 Dead 2
- Release Date:
- Developer:
- Publisher:
Information about Left 4 Dead 2 is still incomplete. Please help us fill the details of the game using this contact form.
This guide will show you how to make your own custom crosshair from scratch into an addon and use it in the game.
Introduction
For starters make sure you have these three applications:
- GCFScape
- VTFEdit
- NotePad++
Design your crosshair
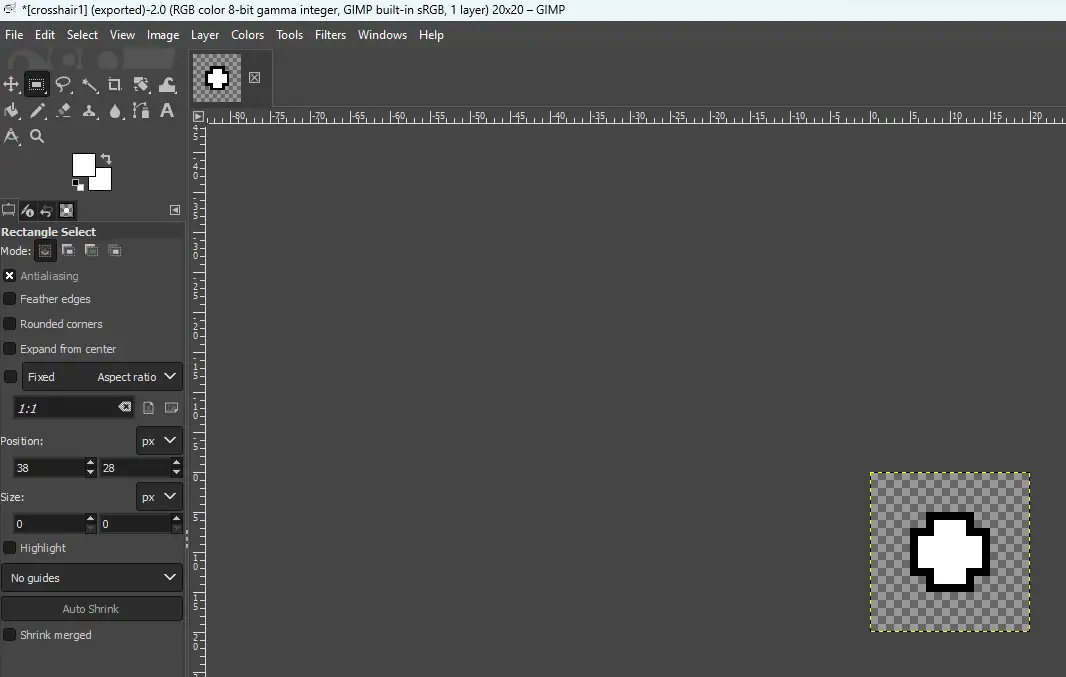
Use any type of photo editor to make your crosshair. I personally like using GIMP when designing or editing things. So here I’ll explain how I made this crosshair with GIMP.
- Create a new image with 20×20 px.
- Make the background transparent by right clicking the image under Layers, click on “Add Alpha Channel”. Mark your image and press the Delete button to make it transparent.
- Use the pencil and pick pixel as a brush.
- Draw your crosshair however you like it. I made it into a broad cross that later will look like a dot in the game.
Either you make sure there’s no space between the crosshair and background OR make sure the crosshair is in the middle of the background it has an even width and length, otherwise it will stretch and look weird later.
It doesn’t really matter that much what size the crosshair is, it can be adjusted later on, however it’s best if it’s not too big or too small.
When it’s done click on File > Export As and save it as a PNG file.
Make a folder
In order for this to work and make it into a VPK, it has to mimic the directory of the game’s default folders, which for the crosshair needs to be these two folders; materials and scripts.
The materials folder will contain this:
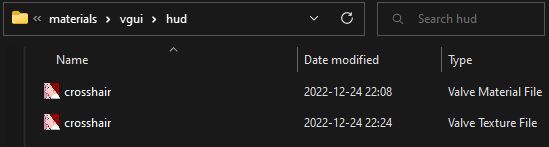
Folders are materials > vgui > hud
VMF and VTF of the crosshair will be in hud, both need to be named crosshair. The VTF is the actual crosshair that was designed earlier, and will be explained how it’s converted into a VTF in the next step.
For now in order to make a VMF:
- Open VTFEdit
- Click on File > New
- Remove whatever is written there, copy the following text and paste it there
UnlitGeneric
{
     $basetexture "vgui\hud\crosshair"
     $translucent 1
     $ignorez 1
     $vertexcolor 1
     $vertexalpha 1
}
- Click on Save As and save it as a VMT in the materials folder, name it crosshair.
The scripts folder will contain this:
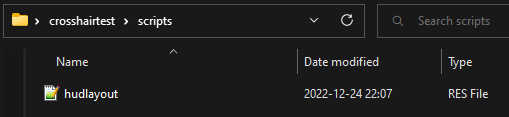
This is the RES file of hudlayout. It can be retrieved from steamapps > common > Left 4 Dead 2 > left4dead2.
- Find pak01_dir and open it with GCFScape
- Look for hudlayout.res there and drag it into your own scripts folder
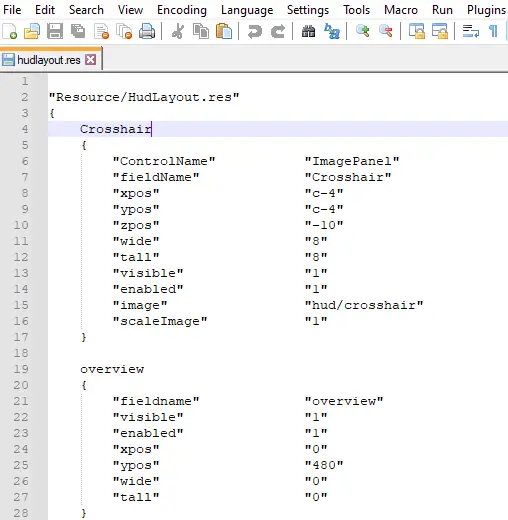
The hudlayout.res needs to have a section added for the custom crosshair. Open it with NotePad++, press enter twice at the beginning of “overview” to lower it and make room for this text:
Crosshair
{
"ControlName" "ImagePanel"
"fieldName" "Crosshair"
"xpos" "c-4"
"ypos" "c-4"
"zpos" "-10"
"wide" "8"
"tall" "8"
"visible" "1"
"enabled" "1"
"image" "hud/crosshair"
"scaleImage" "1"
}
It should look like this:
The digits in “xpos”, “ypos”, “wide”, and “tall” can be changed later if you need to change positions or change the size of the crosshair, depending on how you originally designed the crosshair.
Make the VTF
To make the actual crosshair from a PNG-file into a VTF and put it together with the VMF that was made earlier:
- Open VTFEdit
- Click on File > Import
- Select your PNG crosshair
- Click on Save As and save it at materials > vgui > hud
- Name it crosshair
These are the settings I use:

Make the VPK
Final step is to convert all of this into a VPK. In order to find the VPK application go to steamapps > common > Left 4 Dead 2 > bin.
Make a shortcut of it to your desktop. Drag your finished folder and drop it into the VPK application, a VPK file will be generated. Now this VPK can be added to steamapps > common > Left 4 Dead 2 > left4dead2 > addons.
Adjustments
In order to change the size of the crosshair, go to your original folder before it’s converted into a VPK, go to scripts and open up hudlayout.res with NotePad++.
Under the section “crosshair” that was added, the size can be changed with the numbers next to “wide” and “tall”. The greater the number is the bigger the crosshair will be and vice versa. This is also where you can change the placement of the crosshair with “xpos” and “ypos”.
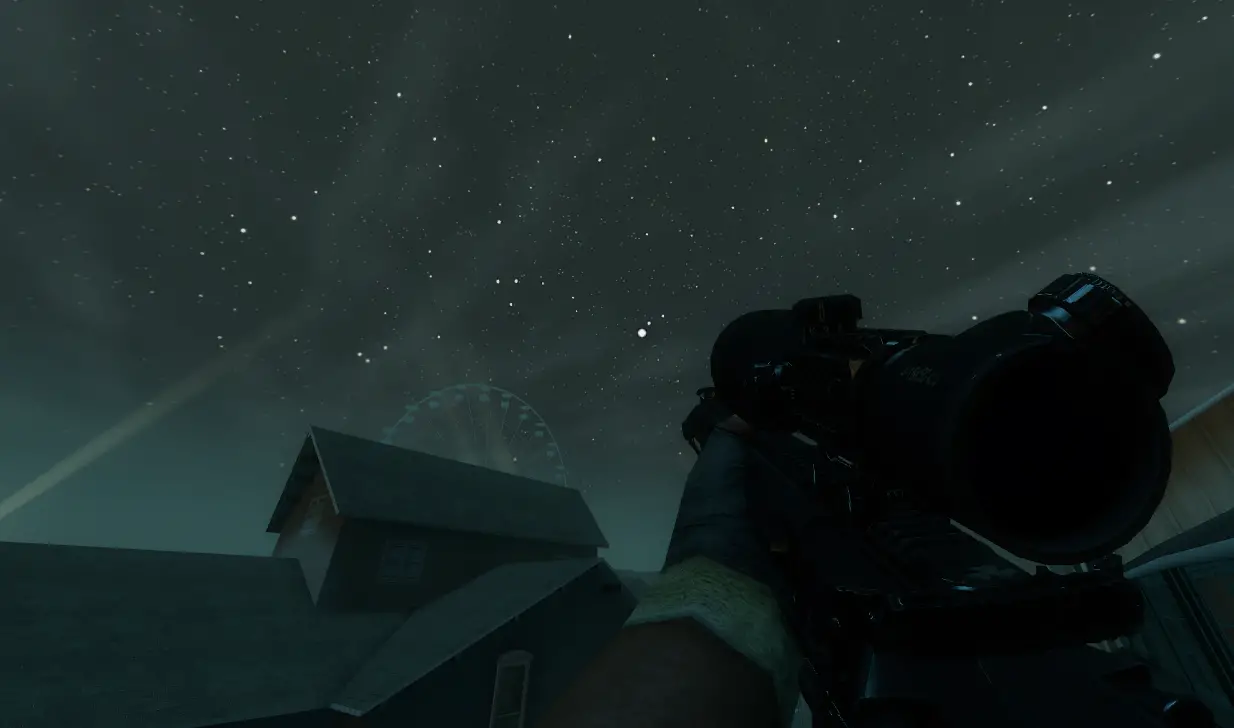
Final Results
This is what the crosshair looks in-game:
This is what it looks with a laser:

Thank you for reading this guide, I hope it was helpful.
That's everything we are sharing today for this Left 4 Dead 2 guide. This guide was originally created and written by Heeb. In case we fail to update this guide, you can find the latest update by following this link.