

In this guide I will show you how to make a modular engine
Überblick
In this guide I will show you how to make a modular engine.
I know it may look like a long guide and may seem complicated, but once you understand it, it will come easy to you.
This works with all sizes of modular engines.

Unlike basic engines, there are no huge differences between each engine. All pistons have four manifold connections, but small pistons have them on four sides instead of just two.
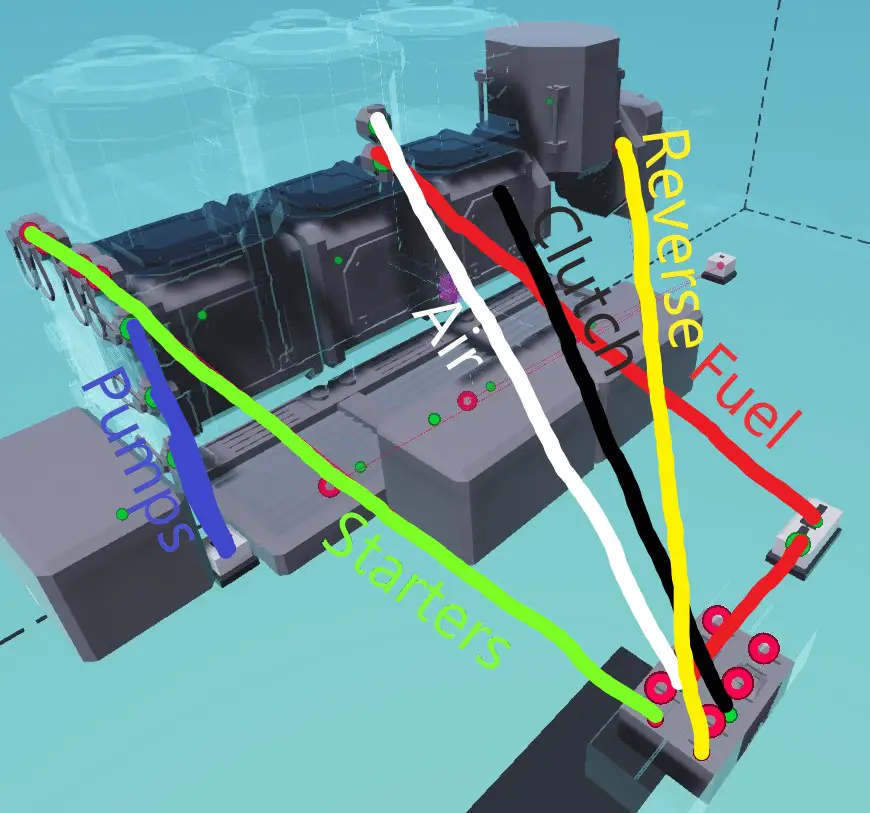
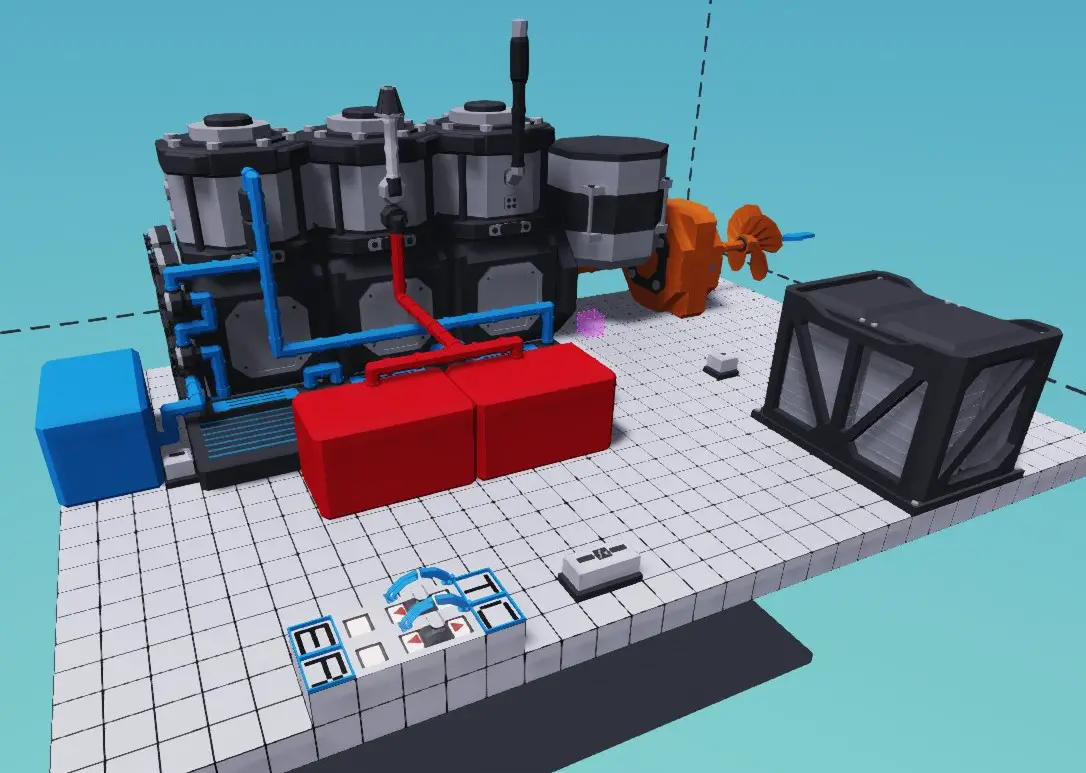
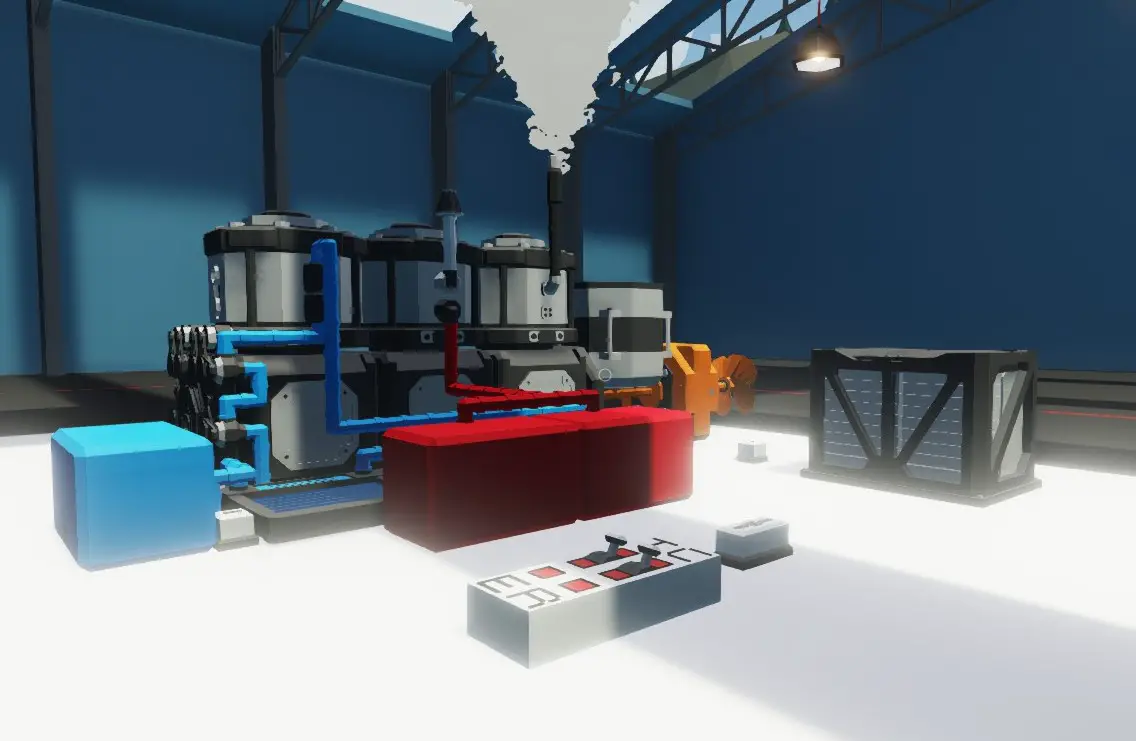
I will be color coding the engine.
- Kraftstoff: Rot
- Coolant: Blau
- Auspuff: Grau
- Luft: Weiß
- Leistung: Orange
I recommend that you color code your engine, so that you can easily identify each part of the engine.
Modular engines can be designed in many different ways, so nothing about your engine needs to be the same as mine to work properly.
I will be spreading my engine out a lot so that every piece is visible. Your engine does not need to be spread out as much as I have it.
Time to get started.
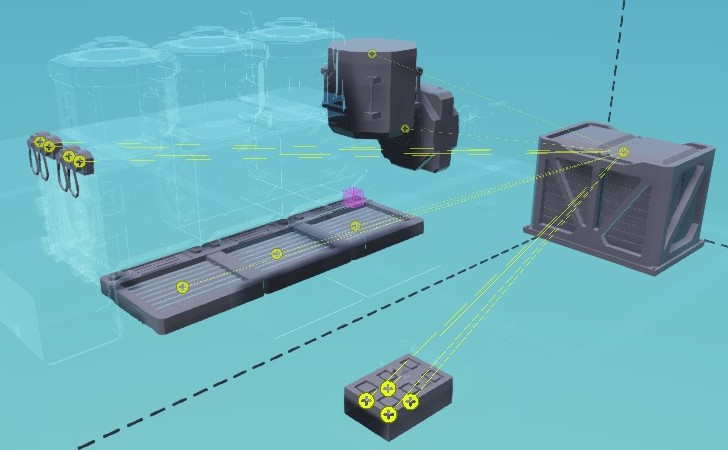
Motor
Each engine has some parts that match its size. So if there is a measurement make sure to match the parts (5×5 to 5×5, 3×3 to 3×3, und 1×1 to 1×1).
I will be making a 5×5 Motor, so I will be using:
- Modular Engine Crankshaft 5×5
- Modular Engine Cylinder 5×5
- Modular Engine Drive Belt 5×5
- Modular Engine Clutch 5×5
- Gearbox 5×5
Only size specific parts are on this listYou may want to raise your engine one block (0.25M) above the floor. This can help you with attaching parts to the drive belt.
When you build your engine, make sure the octagons on the crankshafts are touching. When attaching pistons
(1×1 builders see below image)make sure that the octagons on the pistons are touching, and your pistons will be sharing fluids.
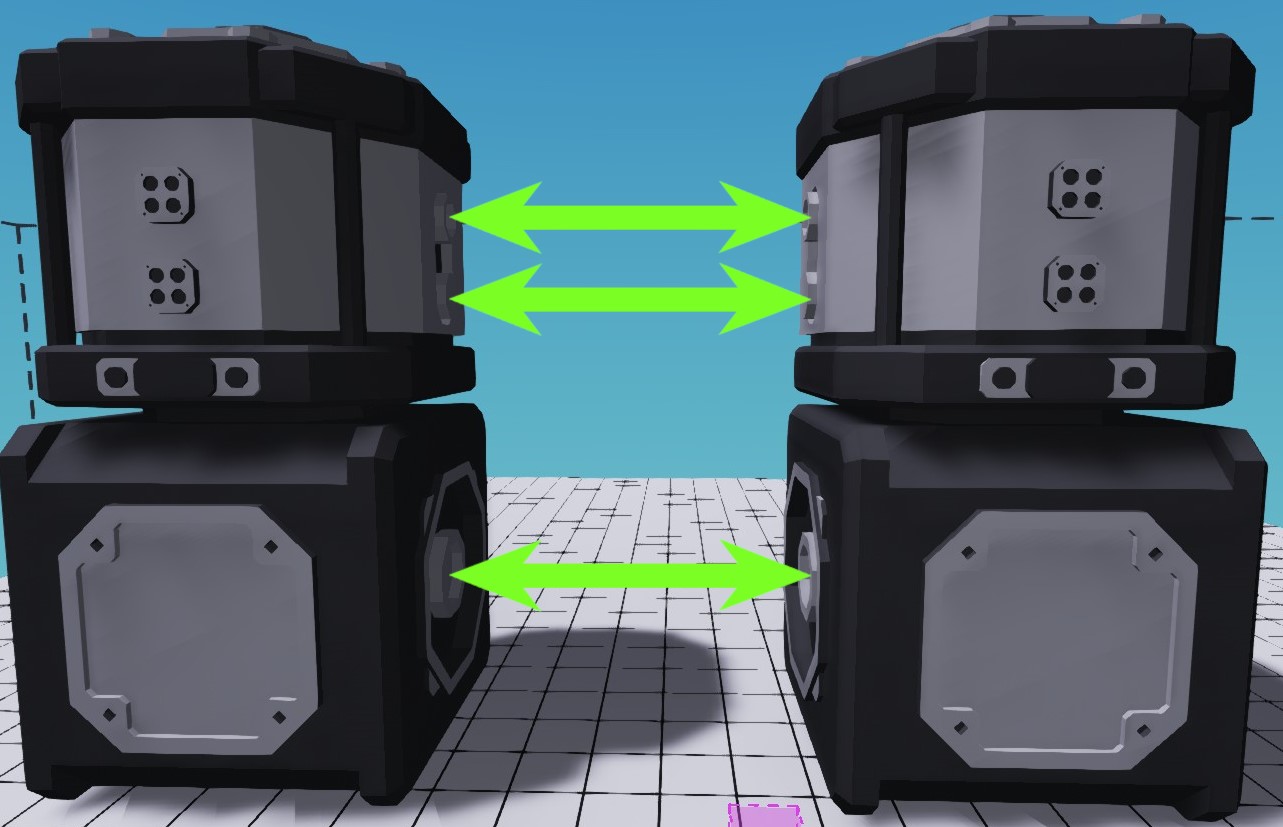
1×1 users will have manifolds instead of octagons touching to connect pistons together and share fluids
Drivebelt and Clutch
Make sure parts are the corresponding sizeAttach the clutch to the rear center of your engine’s crankshaft.
Wichtig: Make sure that you are using the MODULAR ENGINE CLUTCH and not the other one just called clutchAttach the drive belt to the front center of your engine’s crankshaft.
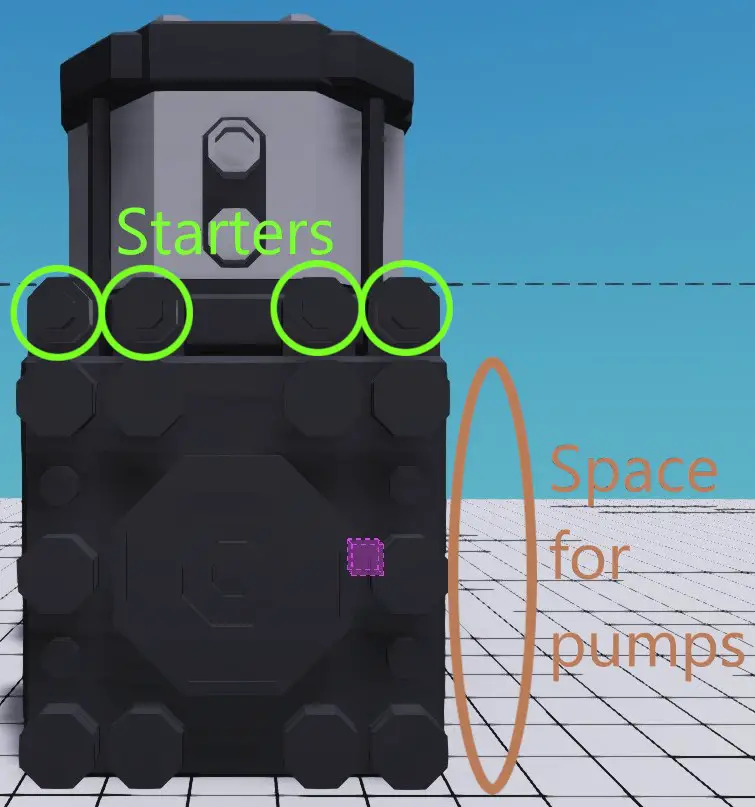
On your drive belt attach one or more Modular Engine Starters. I will be attaching four.
Falls Sie es wollen, you can leave some space on the drive belt for Modular Engine Fluid Pumps. This is not needed since it can be done with electric pumps, but it is what I will be doing.
Falls Sie es wollen, you can attach Modular Engine Alternators to generate electricity. I will not be doing this as it is not needed.
Coolant
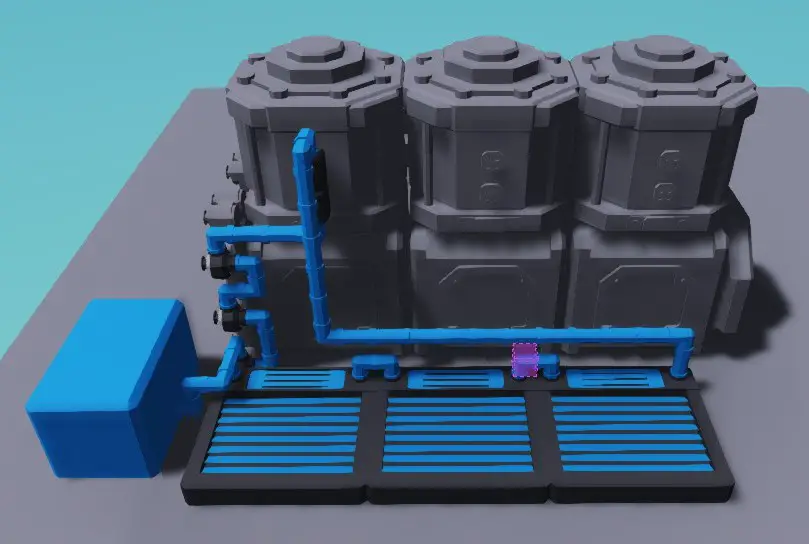
I will be using Modular Engine Fluid Pumps on my engine, but the same job can be done with normal fluid pumps.
You need fluid heat radiators and fluid tanks for coolant. How many and what type you need will depend on your engine design and load. I will be using three electric 5×5 radiators and 1 large fluid tank.
Enter select mode and set the fluid type in the fluid tank to fresh water.
Because there is no specific side that the coolant has to go through, your water tank can be on either side.
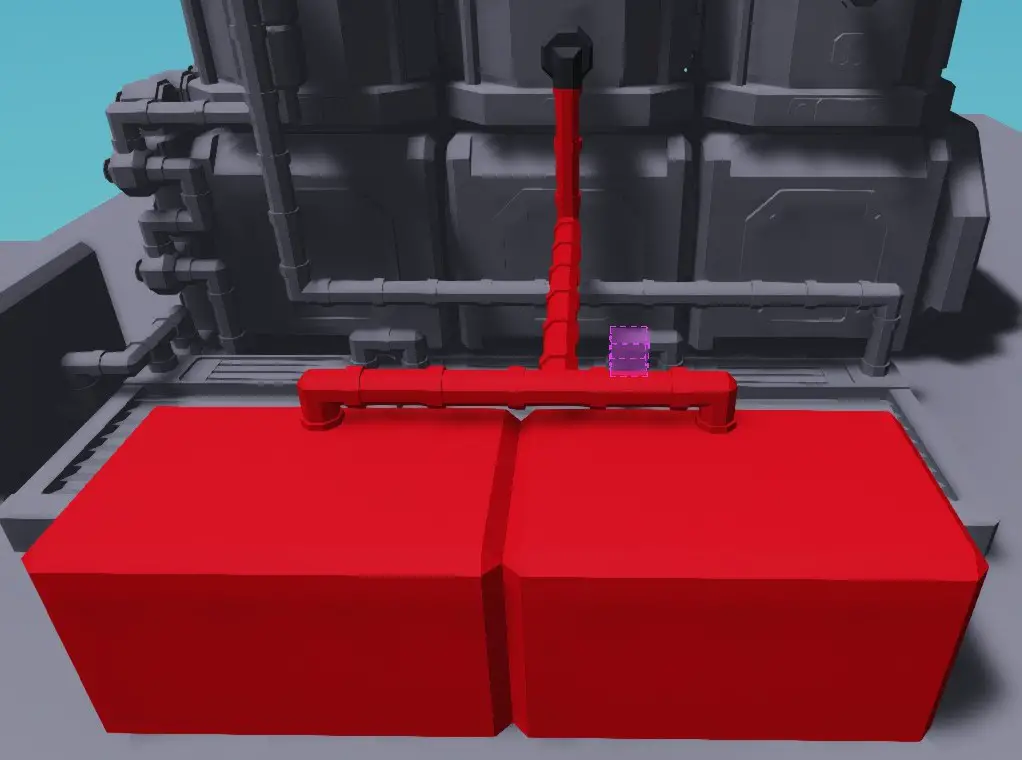
To get coolant into your engine, you will need a Modular Engine Coolant Manifold.
You do not need two coolant manifolds like I have, but because of the way I placed it, the top manifold would not be used anyway
Auspuff
For exhaust you will need to convert the manifold connection to a pipe connection, which can be done with either the Modular Engine Exhaust Manifold (Corner) or the Modular Engine Exhaust Manifold (Straight). I will use the corner so that the exhaust is facing up.
Once the exhaust connection is converted into a pipe, you can attach a fluid exhaust piece.

Kraftstoff
For your fuel you will need a Modular Engine Fuel Manifold. This converts the manifold connection into pipes. Connect the manifold to your fuel tank(S).
Luft
For the air, you will need a Modular Engine Air Manifold and an air filter.
Wichtig: The air filter must be connected to the outside of the boat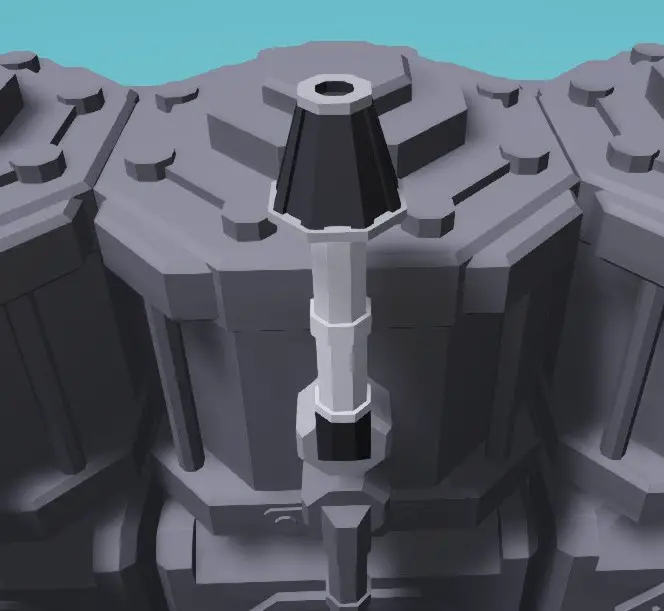
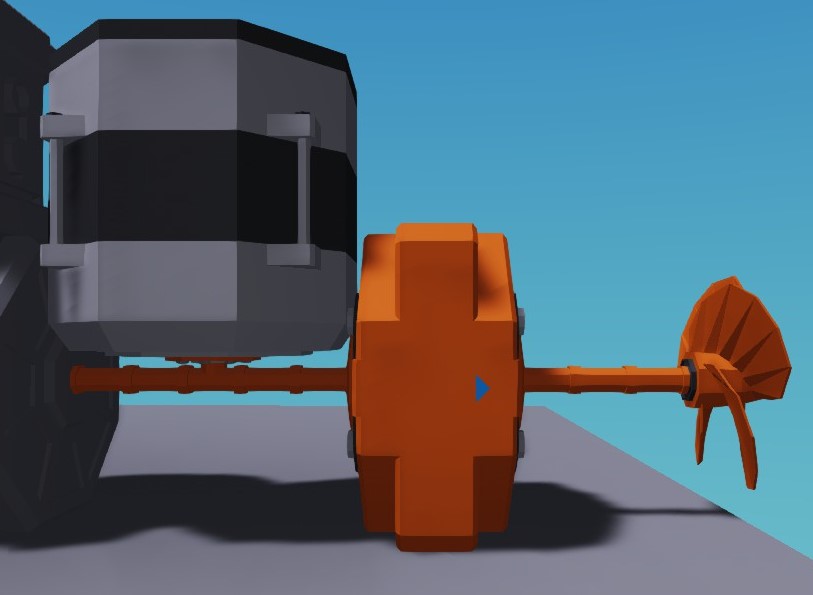
Leistung
For power, after the clutch, connect a generator, one or more corresponding gearboxes, and your power output.
Enter select mode and set one of the gearboxes ratio on to 1:-1. This will be your reverse gearbox.
Kontrollen
For the engine to work, you should have twice the air in the engine as you do with fuel. You could do this manually, or you can use a throttle lever and a function block.
Place your function block and a throttle lever. Enter select mode and set the equation in the funtion block to
x/2. This will divide the input (X) by two.
Now place another throttle lever, a push button, and a toggle button.
T: Throttle Lever
C: Clutch Lever
E: Start Engine Button
R: Reverse Button
Extra buttons can be added for extra gearboxes.

Logik
Connect your Start Engine Button to your starter(S).
Connect your Reverse Button (and other gear buttons if needed) to the gearbox.
Connect your Clutch Lever to your clutch.
Connect your Throttle Lever to your Air Manifold(S) and the x value for your function block. Connect the output of the function block to your Fuel Manifold(S).
If you have them, connect your fluid pumps to a constant number block. Enter select mode and change the value of the constant to 1.
Because I am not making an active engine, I will connect my fluid radiator fans to a constant on.
Finishing Touches
Place a battery and connect it to everything.
Das Ende
Your engine is now finished.
Turn up the Throttle and hold the Start Engine Button for however long it takes to start your engine. Turn up the Clutch, and your power output should start moving. When you press the Reverse Button, your power should output should reverse direction.
If you need any help, leave a comment and I can try to figure out the problem or take a look at the engine model Hier.
Das ist alles, was wir heute dafür teilen Sturmwerke: Bauen und retten Führung. Dieser Leitfaden wurde ursprünglich erstellt und geschrieben von Z3ro_Bong0. Für den Fall, dass wir diesen Leitfaden nicht aktualisieren können, Sie können das neueste Update finden, indem Sie diesem folgen Verknüpfung.