- Titel: Loop-Held
- Veröffentlichungsdatum:
- Entwickler:
- Herausgeber:
Information about Loop Hero is still incomplete. Bitte helfen Sie uns dabei, die Details des Spiels auszufüllen Kontaktformular.
This guide outlines a strategy for completing the final chapter of Loop Hero in just two loops. The goal is to bypass the boss rush and directly confront the last boss. While it’s not possible to achieve this on every attempt due to the element of luck involved, the strategy offers a degree of reliability. With optimal play, it’s estimated that around 1 In 10 Zu 20 runs can result in victory.
Typischerweise, players take their runs to the end of the first loop to assess the viability of the start. Failed attempts are short, lasting only 2 Zu 5 Minuten, making it feasible to undertake this self-imposed challenge within a single dedicated playing session.
The motivation behind this approach is to forgo the boss rush and solely engage in the final battle. This path unlocks a secret dialogue and a gratifying sense of accomplishment. The guide introduces a unique way of playing the necromancer class, prompting a reevaluation of the usefulness of traits and statistics. Außerdem, this method represents a valid, albeit notably challenging, means of completing the game with minimal reliance on meta progression.
It’s worth noting that this guide is an enhancement of the author’s previous guide on Reddit. Adjustments have been made to the decklist, a better understanding of the stall component has been achieved, und das Wichtigste, flexibility and consistency have been incorporated into the strategy.
The Decklist
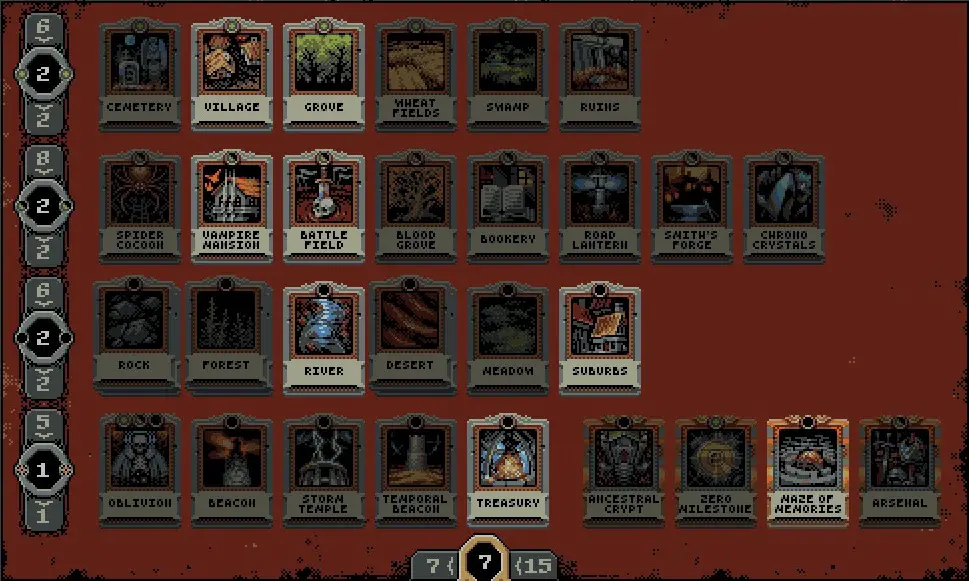
The game strategy revolves around deliberately slowing down loop clearing to enable the spawning of numerous enemies, which in turn generates a rapid accumulation of cards and tiles. Certain traits play a pivotal role in this approach, serving both the purpose of stalling and defeating the boss. The deck has been streamlined to contain a minimal number of cards (46 in Summe) to increase the likelihood of drawing key pieces.
Key Cards:
- Maze of Memories: This card grants a head start of 37 Fliesen, a valuable advantage given the rush to fill 202 tiles within just 2 Schleifen. Zusätzlich, the Maze can trigger instant Treasury spawns, providing a helpful boost. While this card is essential, Ancestral Crypt or Arsenal could be considered for survivability.
- Dorf (3): When ravaged, Village initiates an immediate encounter with 5 Feinde. Although its card generation contribution is modest (averaging about 2.6 cards from the whole pack), it serves as effective stall tactics and a significant source of experience points. It also spawns bandit camps, aiding rapid map progression.
- Hain (4): This card excels in card generation, as Groves spawn quickly (jeder 2 Tage) and can cover three tiles over time. This amounts to spawning 12 ratwolves, each yielding an average of 0.9 cards along with higher-level gray gear. This card’s card generation prowess is second only to the best regular enemy, the slime.
- Vampire Mansion (3): Arguably the most powerful card, it introduces healing to enemies, creating an optimal stall engine. Durchschnittlich, es fügt hinzu 1.66 cards to encounter rewards (0.83 without a way to spawn Swarm of Bats).
- Schlachtfeld (2): Ghost encounters yield a substantial number of cards (1.5 durchschnittlich). The inclusion of Ghost of a ghost contributes to a potent stall setup. Although overlapping Battlefields can fill road tiles, it’s not always necessary.
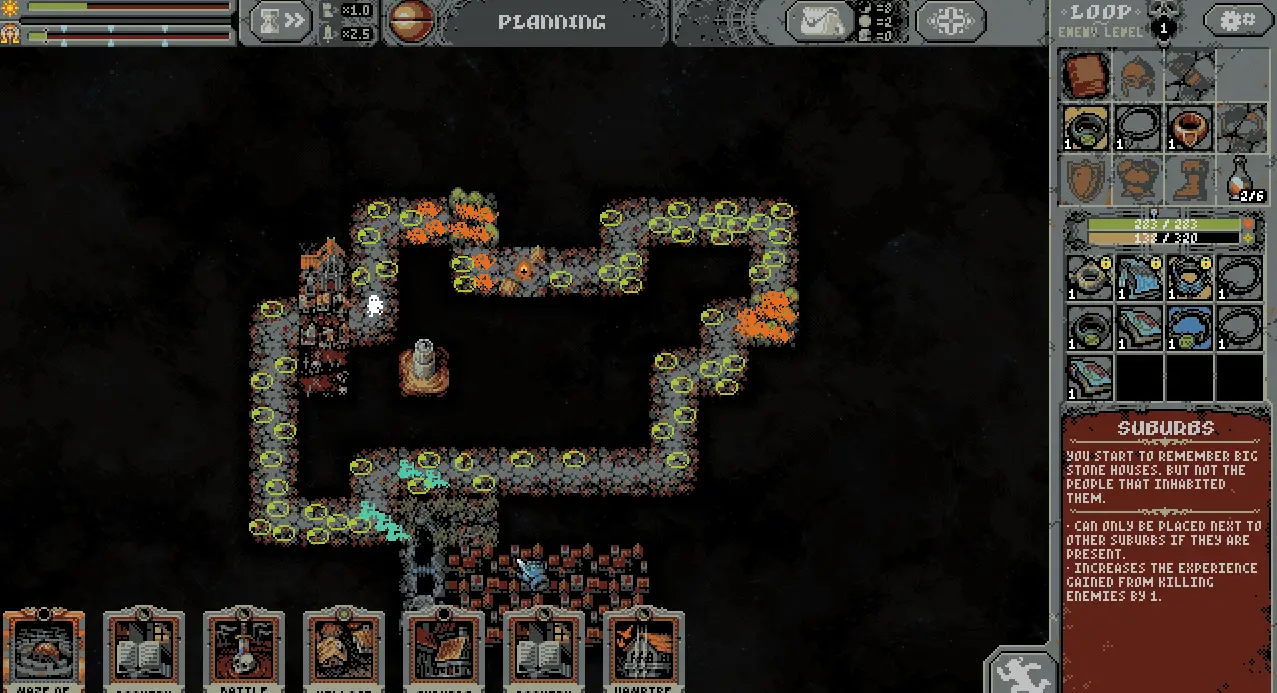
- Suburb (18): Vital for achieving an early level, preferably in loop 1 or early loop 2. Suburbs are critical for this purpose.
- Fluss (14): Provides an initial boost to Suburb experience and spawns Fishmen when turned to Reed. While Fishmen aren’t the most card-efficient (0.42), this is offset by the River’s more frequent drops compared to all other spawners combined.
- Finanzministerium (2): Among limited options for special cards, the Treasury stands out as it pays for itself and offers more (2 Karten und 2 items upon completion).
- Optional Cards:
- Temporal Beacon: Speeds up the day cycle for better spawn rates, but its usefulness is questionable due to time reversal caused by Watchers. While not highly recommended, extensive testing might yield different results.
- Chrono Crystal: Challenging to use alongside Reed, yet significantly enhances Grove efficiency. Although not strictly necessary, it’s best to avoid diluting the card pool.
- Bookery: Enables cycling for advantageous cards, but interferes with Maze of Memories and cannot be placed before the start of Loop 2.
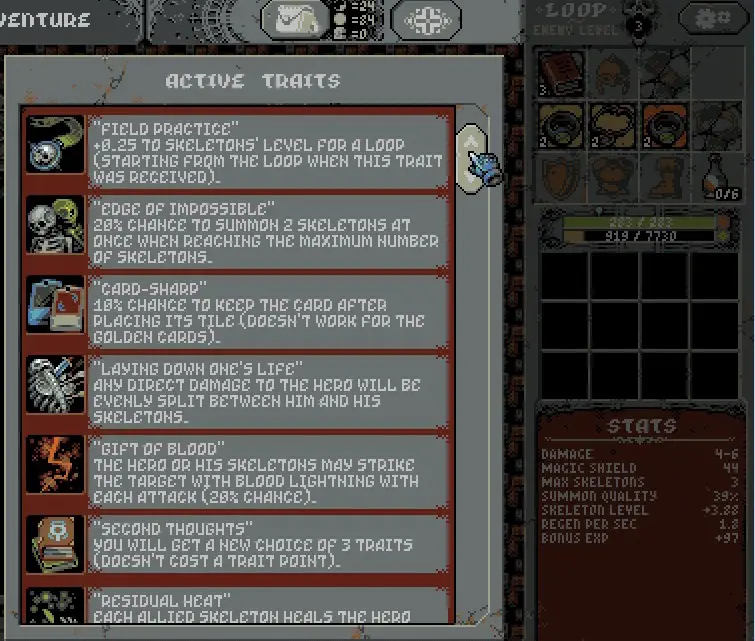
The Traits

Certain traits are essential for achieving success in this strategy, with only one optional trait, Gift of Blood. Other extra traits should remain unchecked. Here’s a tier list to help assess their value, which can be situation-dependent:
- Laying Down One’s Life (LdoL) – (S Stufe): This is the most vital trait. It enhances the hero’s survivability and toughness, and enemies efficiently clear skeletons. This mutual benefit is essential for facing tougher fights and the boss.
- Gift of Blood – (Eine Stufe): Hard to defeat the boss without this trait, as the boss has high defense and skeletons alone struggle to damage it. It’s a potent offensive trait, accelerating the clear rate and breaking stall setups. Ideal, select it just before the boss, or when needed for power to survive. If chosen early, mitigate its impact by setting the combat speed slider to 2.5x.
- Residual Heat – (Eine Stufe): Offers substantial healing, but relies on having LdoL or summon quality, which isn’t often affordable. Ansonsten, enemies may target the hero. Für diesen Build, Residual Heat contributes around 1xLoop hp/sec of regeneration.
- Card Sharp – (Eine Stufe): Despite criticism, this trait proves useful. Mit 202 tiles to cover (ohne die 37 with Maze) and the Lich assisting with roughly 10, um 155 bleiben. Early selection can address around 10-15 Karten, with potential for snowballing.
- Field Practice – (B -Tier): Typically yields 0.25 of a level for the second loop and 0.5 for the boss, making a meaningful difference and freeing inventory slots.
- Horde – (B -Tier): Provides a significant boost at the beginning of the boss fight.
- Art of Control – (B -Tier): Reliant on high skeleton level and/or attack speed to be effective.
- Edge of the Impossible – (B -Tier): Theoretically beneficial due to the low max skeleton count.
Keep in mind that these trait assessments are subject to the specific circumstances of your gameplay.
The Stall Setups
Here’s a breakdown of the progression with recommended skeleton levels and required regeneration values, alongside the number of in-game days passed, for specific scenarios:
Ransacked Village:
This is a reliable stall method.
- Schleife 1: 0 skeleton level, erfordert 3.6 HP/sec regeneration – 1 Tag. Without sufficient regeneration, you’ll lose around 150 PS, but you can still win.
- Schleife 2: 1.2 skeleton level – 1 Tag.
Ghost of a Ghost Under Vamp Aura in Loop 1:
Considered the best setup, but requires luck to spawn. This fight occupies the hero for an extended period but demands luck. Bei Erfolg, it sets you up for the rest of the run in terms of enemy and card generation. The situation requires the Laying Down One’s Life (LdoL) Eigenschaft.
- LdoL, 0 sk lvl: Erfordert 0.6 HP/sec regeneration – 7-30 Tage.
- No LdoL, 0 sk lvl: Requires around 1.8 HP/sec regeneration – 1-4 Tage. Defensive equipment is an option here.
Vampir + Slime in Loop 2:
A challenging battle involving a vampire and bats. Their damage output is high, making it tough to outlast them. You must carefully manage your skeleton level to maximize benefits and avoid death.
- LdoL, 0 sk lvl: Erfordert 4.2 HP/sec regeneration (2.2 from LdoL + Residual Heat) – infinite days.
- No LdoL, 0 sk lvl: Typically lasts about 1 day at the cost of one and a half reincarnations.
These scenarios illustrate the complex balance of skeleton levels, regeneration rates, and luck that play into the effectiveness of different strategies in the game.
The Motions
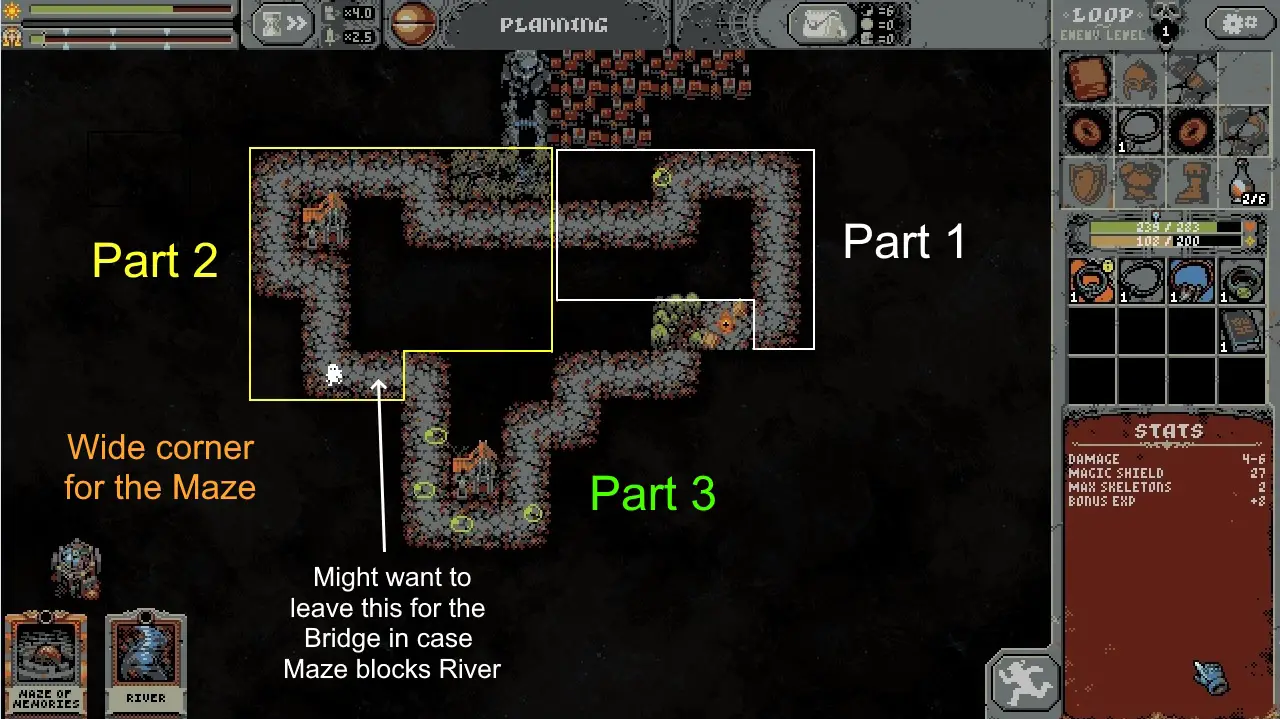
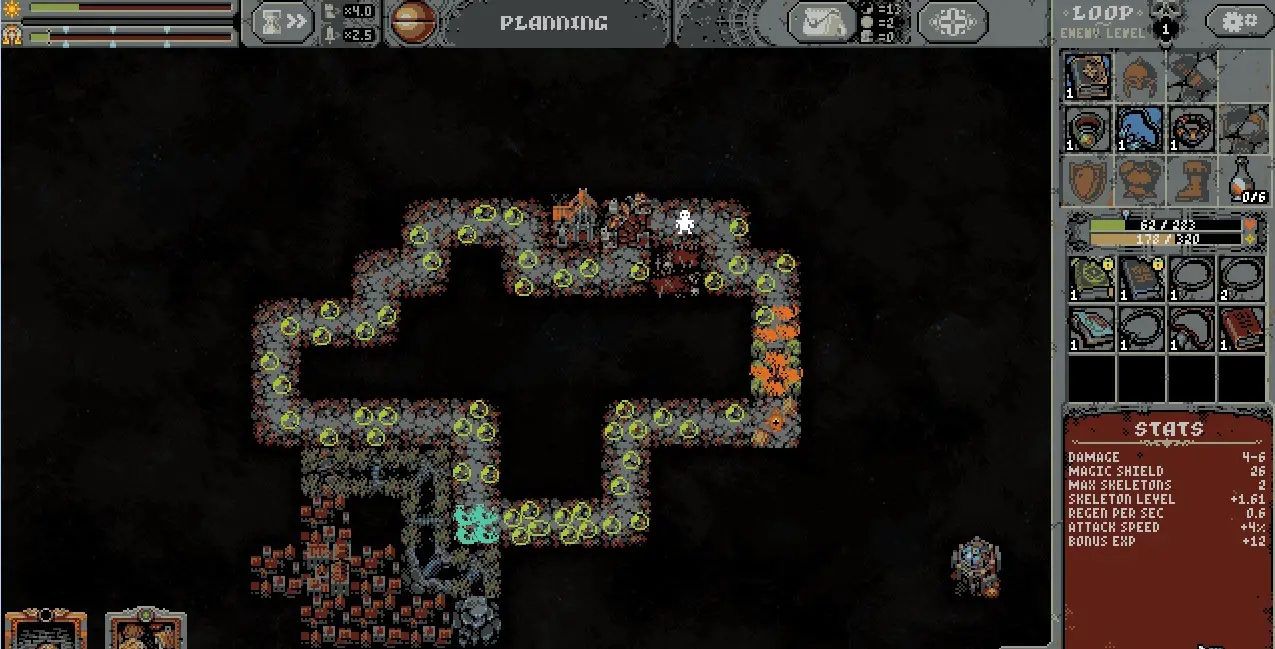
- Start your run by assessing the loop ahead of you. Divide it into three roughly equal sections: the first for stalling and gaining items at the start of loop 2, the second for Reed, and the third for Groves. Place the beginning of the second section near the map edge to quickly start Reed placement. Be cautious about placing landscape cards to avoid unfavorable conditions from cards like Maze or Palace.
- Equip the amulet and any regeneration items. Avoid equipping the grimoire or skeleton-level items for now. Defense and evasion items might not be beneficial. In terms of cards, aim for Vampire’s Mansions, Dörfer, and Battlefields. If you don’t have the complete combo, it’s not a major setback. Place Mansions over at least two slime fights, with an open road spot if possible for a zombie fight later.
- If you summon the Ghost of a Ghost on a vampire tile or trigger Laying Down One’s Life on a level up, Großartig! Be prepared to equip the book if Primal Matter appears. Wenn nicht, consider making Ravaged villages if possible and save a Mansion for the start of loop 2.
- When you obtain a Grove, place one just before the Camp tile to avoid it being blocked by a Palace. Place other Groves at the start of the third section. Keep Treasuries in a designated corner for now, to be used with the Maze of Memories later. Make sure this corner is on a different side of the map from your Suburbs and far from Camp for Palace spawns.
- A sign of a good run is how close you are to spawning the first boss by the end of loop 1 (ideal 38 Fliesen, Manchmal 37 might work). Don’t summon the first boss until you cross to loop 2. In case you have excess cards, a Village on an enemy group can save you from discarding the Maze (max hand size is 13). Sometimes you’ll have to discard the Maze and more.
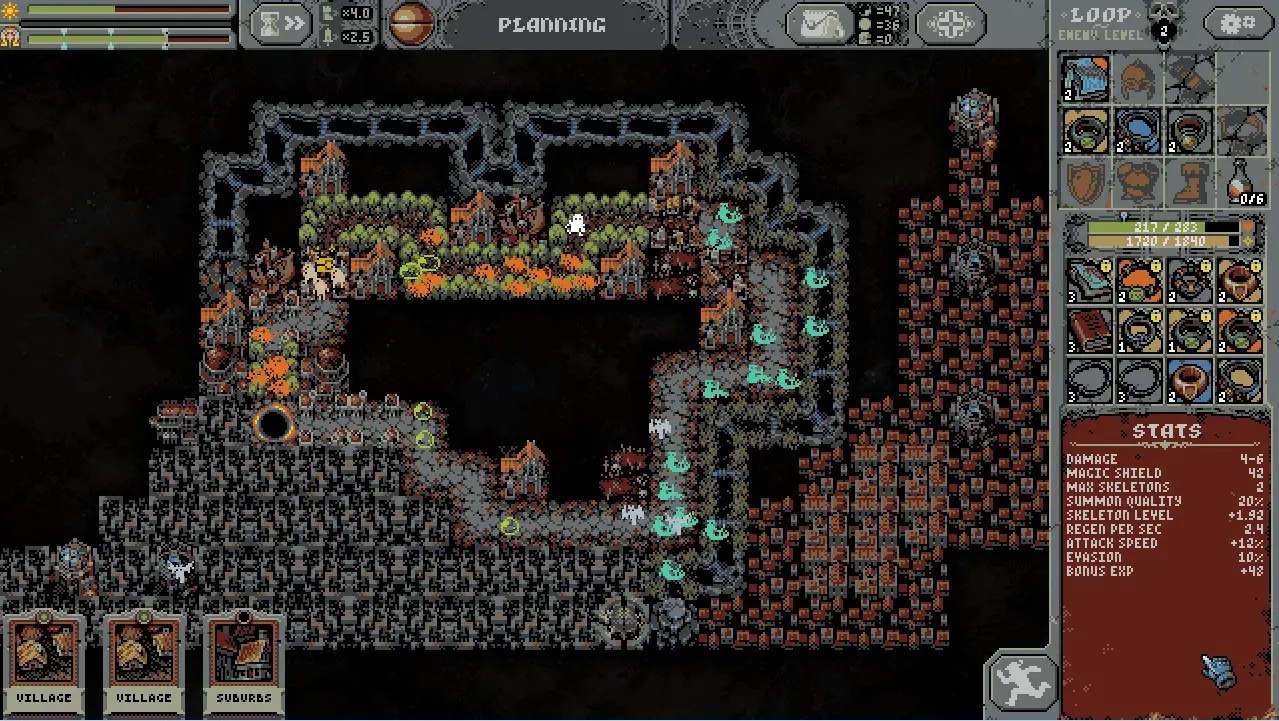
- Once loop 2 beginnt, you can place the Maze. Sometimes there are enough cards to instantly replace boss 1 with boss 2. If you stalled well in loop 1, equip some skeleton-level items and proceed as usual. Place Villages and Mansions along the way, and save Battlefields and maybe a Mansion for the Fishmen fights. For Vamp+Slime fights, 0.8 sk lvl suffices, while Ravaged village fights need around 1.2 sk lvl. If you didn’t stall enough, consider using Vamp+Slime stall and switch in skeleton level during the fight to avoid dying.
- Now for the Reed part. Successful runs often see at least 2 Fishmen spawn from the first Reed and numerous Slimes from Ghost of a Ghost. Decide whether to continue or restart based on your progress.
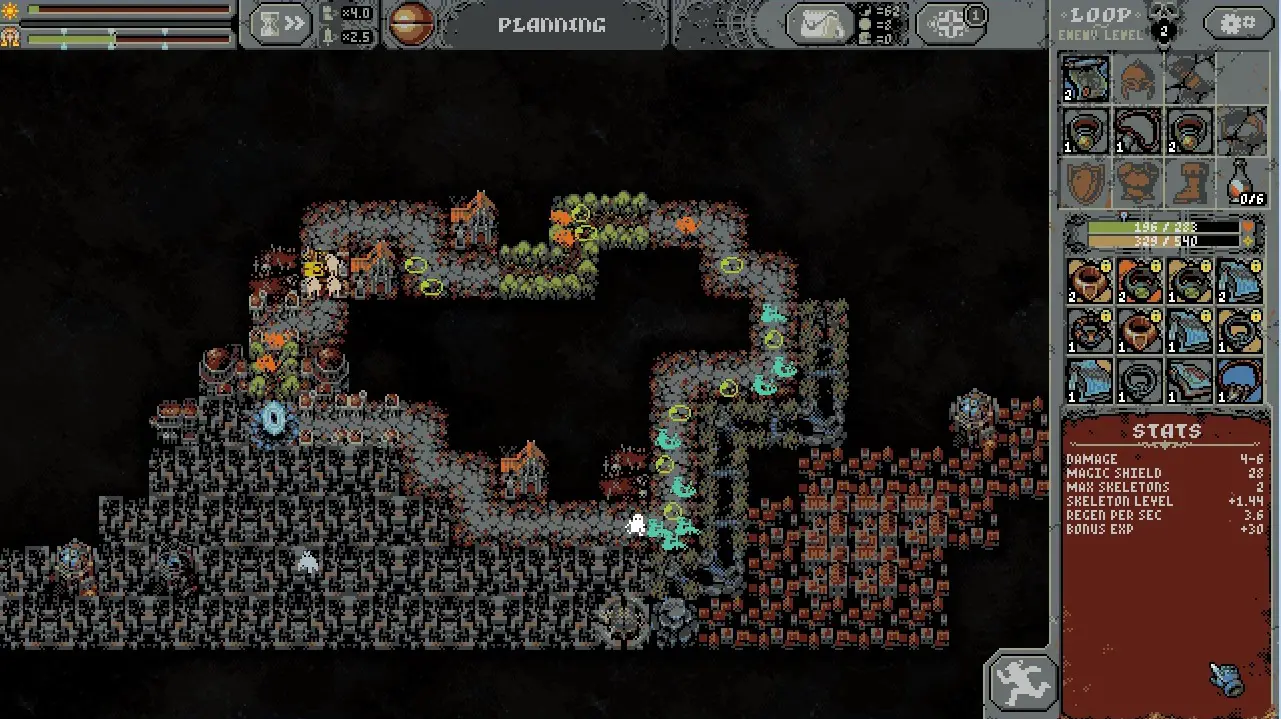
- Aim to extend the Vampire and Battlefield aura throughout the Loop. Use Villages mainly in the first section to try and spawn Bandit camps. Adjust your skeleton level and maintain some regen. Zielen nach 1.8 sk lvl for a couple of Fishmen and a Vampire, while full Fishmen and Ratwolf fights require at least 2.5 sk lvl. Be cautious with adjusting skeleton level, especially if Prime Matter appears. Collect high-level gear from Ratwolves and lock in lvl 3 evasion rings and high sk lvl books.
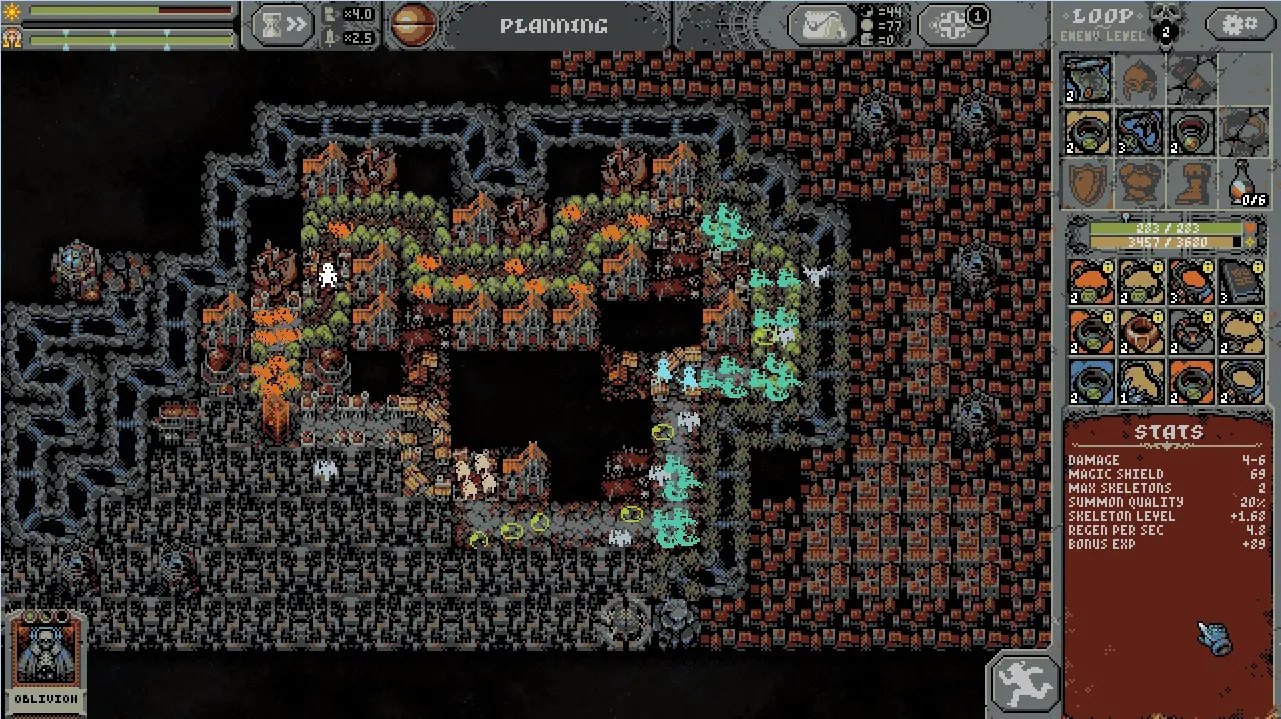
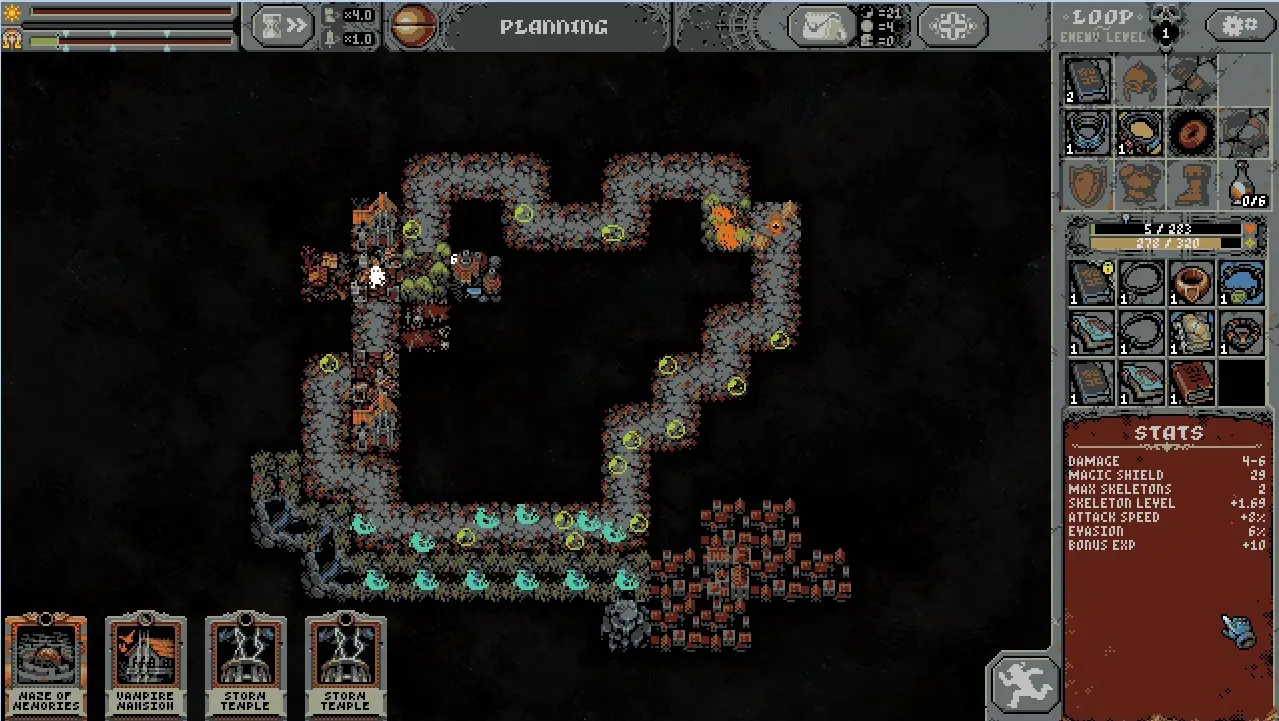
- The final boss can be challenging due to slow summon speed and limited max skeleton count. Effective setups include:
- 2.5+ sk lvl, 30-40% Ausweichen, ~1.2 HP/sec, Gift of Blood, Residual heat, LdoL (am besten)
- 2.8+ sk lvl, 40% Angriffsgeschwindigkeit, ~1.2 HP/sec, Gift of Blood, Residual heat, LdoL, 3+ max skeletons
- 3.2+ sk lvl, ~1.2 HP/sec, Gift of Blood, Residual heat, LdoL
- 4.6+ sk lvl, ~1.2 HP/sec, Residual heat, LdoL
Glückwunsch, you’ve succeeded in your strategy!
Das ist alles, was wir heute dafür teilen Loop-Held Führung. Dieser Leitfaden wurde ursprünglich erstellt und geschrieben von demon_r. Für den Fall, dass wir diesen Leitfaden nicht aktualisieren können, Sie können das neueste Update finden, indem Sie diesem folgen Verknüpfung.