

- Title: Borderlands 2
- Release Date:
- Developer:
- Publisher:
Information about Borderlands 2 is still incomplete. Please help us fill the details of the game using this contact form.
Traveling the Borderlands 2? Welcome to Pandora! You will need this map if you are to find your way around and successfully achieve the “World Traveler” achievement!
Introduction
So, you want to discover all the locations in Borderlands 2? Good for you! You will need this map if you are to keep track of all the places you’ve been and are yet to be (also known as “foreshadowing”).
These maps have been put together to help you understand all the areas and locations you need to visit for the “Arctic Explorer”, “Urban Explorer”, “Highlands Explorer” and “Blight Explorer”, as well as the “World Traveler” achievements. There are a few exceptions to these maps and they are mentioned in the “Legend” section of this guide.
Before you go on and discover all of Pandora, complete the main storyline and the side missions since many areas happen to be locked until you complete the pre-requisite mission, allowing you access to the zone afterward.
Legend

Miscellaneous and Good to Know:
- Three Horns Divide: This map exit will lead to Sanctuary. However, after the “Bright Lights, Flying City” this map will lead to Sanctuary Hole.
- Sanctuary: After the “Bright Lights, Flying City” this map can only be accessed via Fast Travel stations.
- The Dust: The Hodunk Speedway can only be accessed after starting the side mission “Clan War: Starting the War”.
- Bloodshot Stronghold: The Rat’s Nest can only be accessed through the “Splinter Group” side mission.
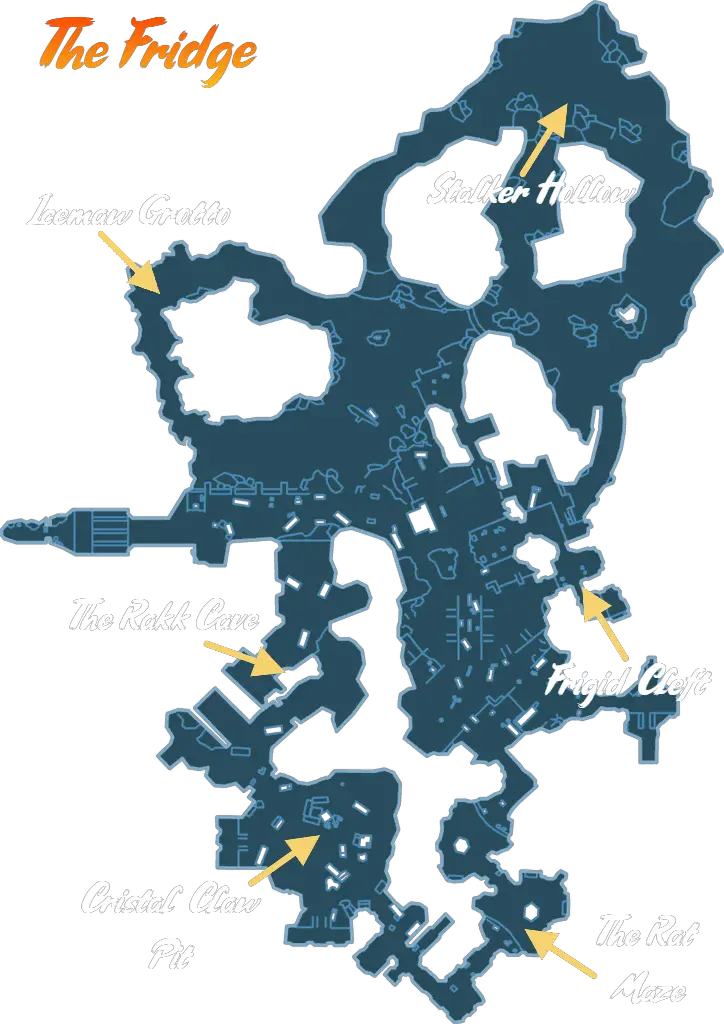
- The Fridge: The Rat Maze, Crystal Claw, and the Rakk Cave can only be accessed through the “Swallowed Whole” side mission.
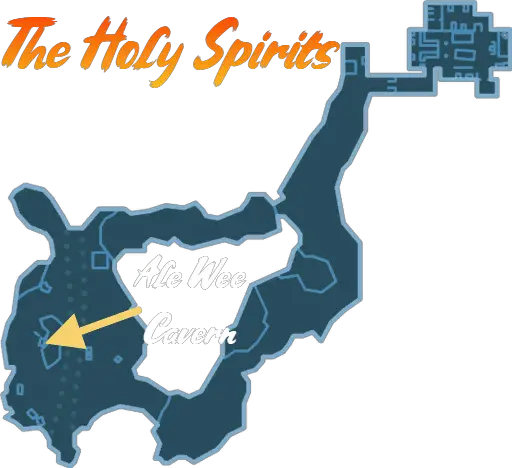
- The Holy Spirits: Ale Wee Cavern can only be accessed through the side mission “Clan War: End of the Rainbow”.
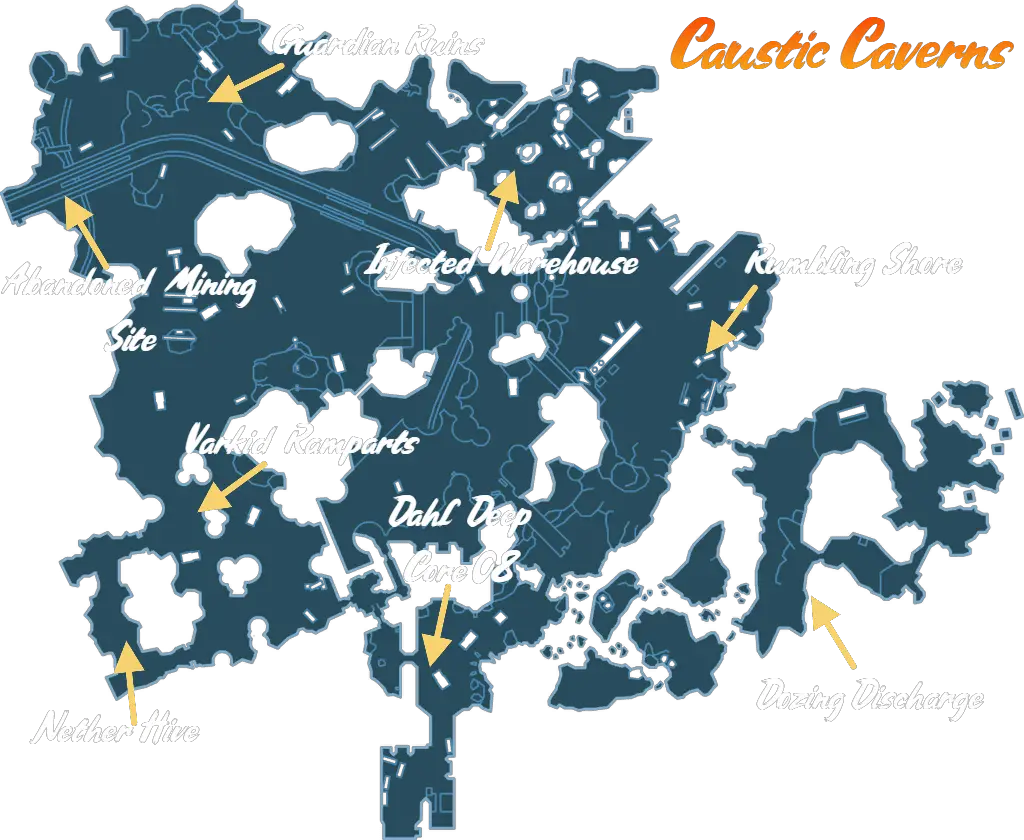
- Caustic Caverns: The Dahl Deep Core 06 can only be accessed through the “Minecart Mischief” side mission. The Varkid Ramparts can only be accessed through the “The Lost Treasure” side mission.
- Control Core Angel: This area can only be accessed through the “Where Angels Fear to Tread” main mission and the area will be unlocked afterward.
- Terramorphous Peak: This area is not required for the World Traveler achievement.
- Sawtooth Cauldron: Avie’s Camp can only be accessed after the “Toil and Trouble” main mission. Once completed, the elevator will be available to reach the top of the tower. Avie’s Camp will be located where the map rea is greyed out. Located the area and jump from the tower to reach it.
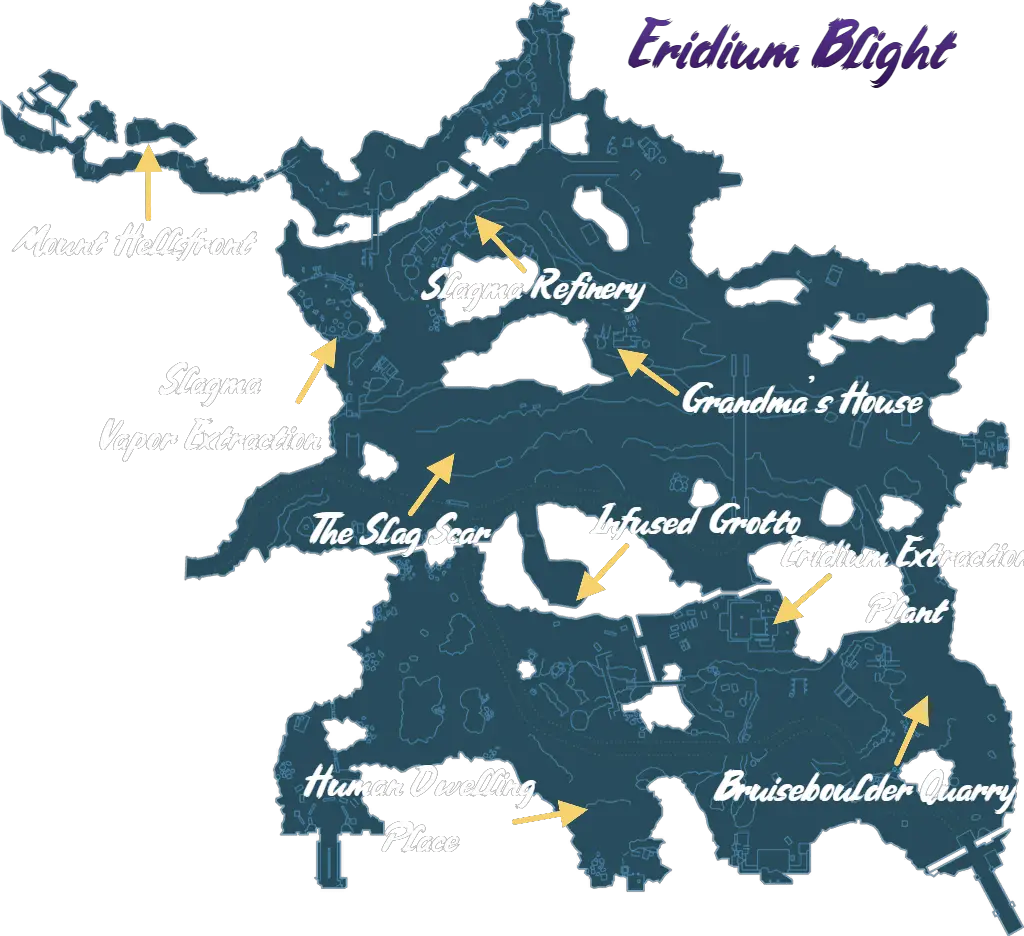
- Eridium Blight: Infused Grotto is behind an electric fence. Follow the cables and when you discover the fuse box shoot it and the way will be opened.
- Lynchwood: Keep following the road at Gunslinger’s Corner. There is an elevator all the way in the back.
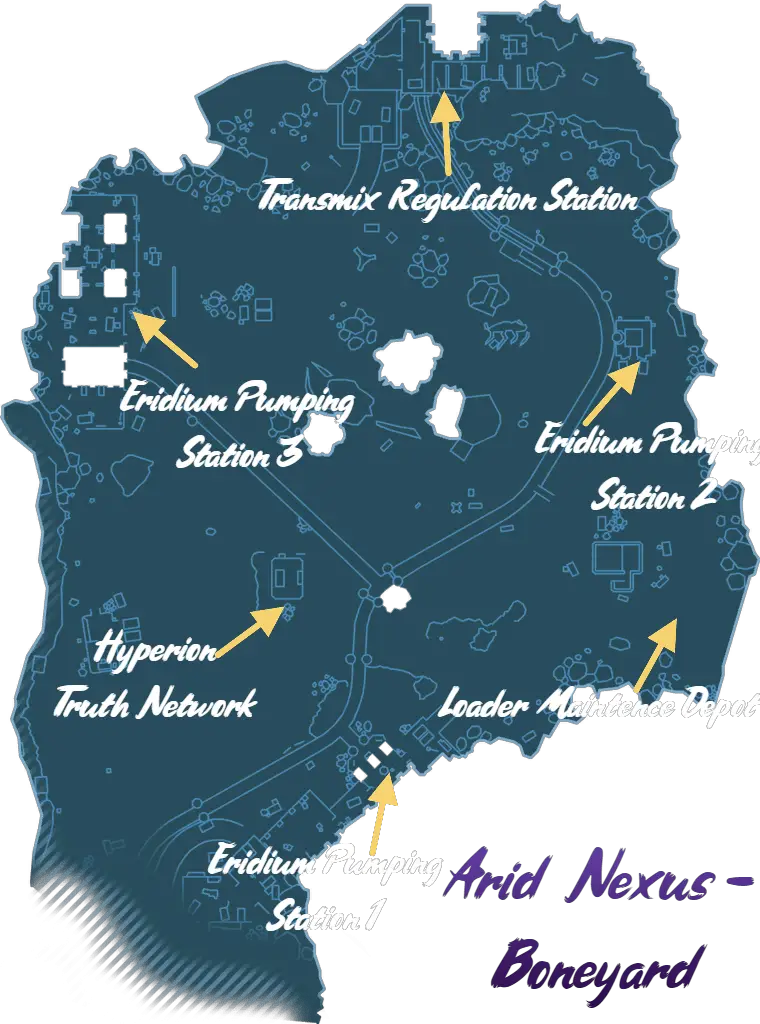
- Arid Nexus – Boneyard: Eridium Pump Station 2 is located underground. Look for an elevator.
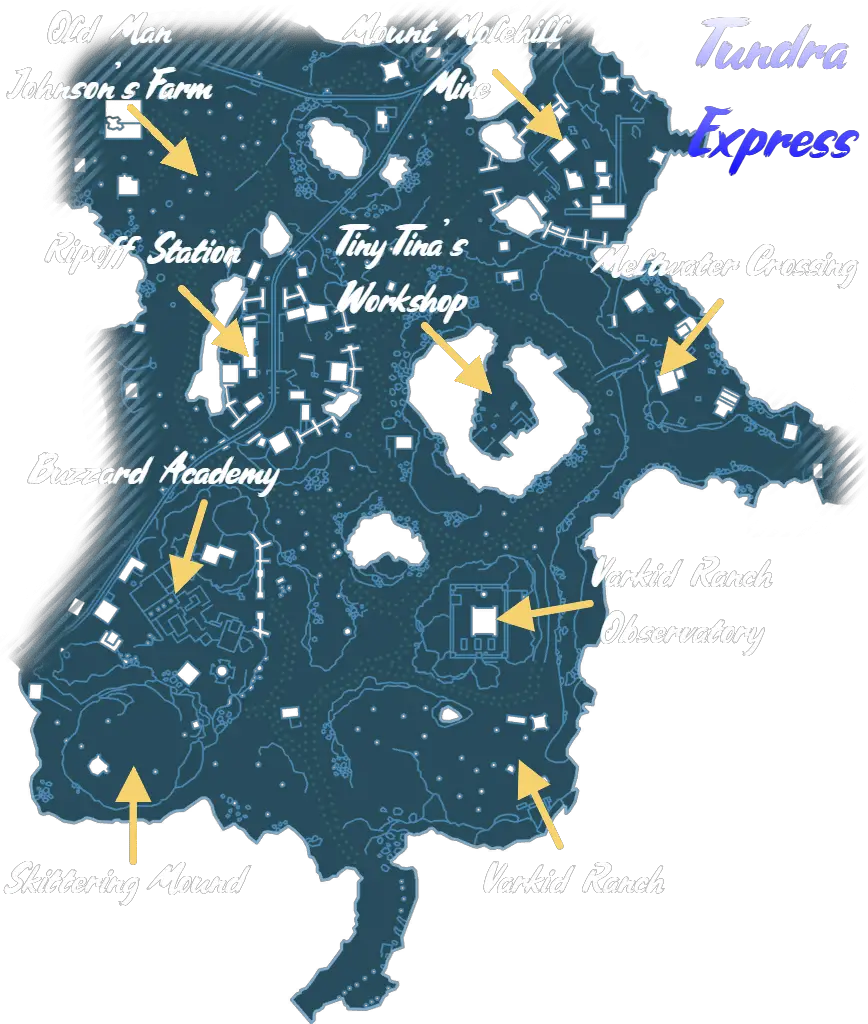
- Tundra Express: The Fast Travel station at Old Man Johnson’s Farm is in the basement of a small shack, blocked by an electric fence. Follow the wire and shoot the fuse box to shut down the fence.
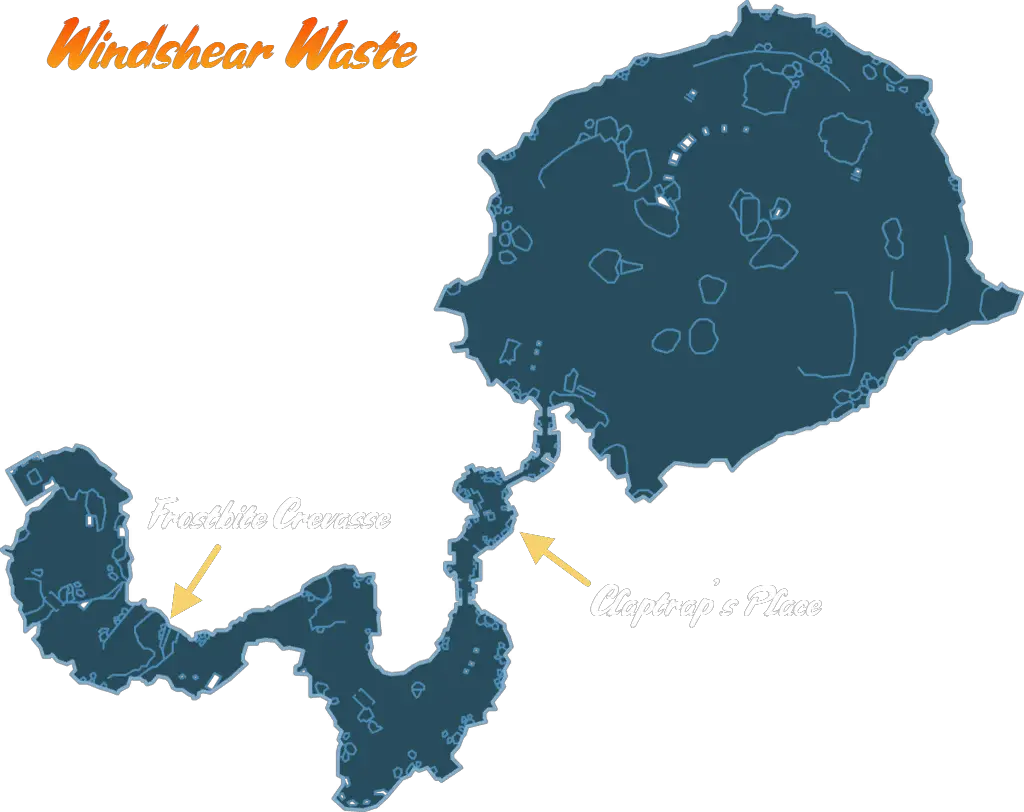
Windshear Waste
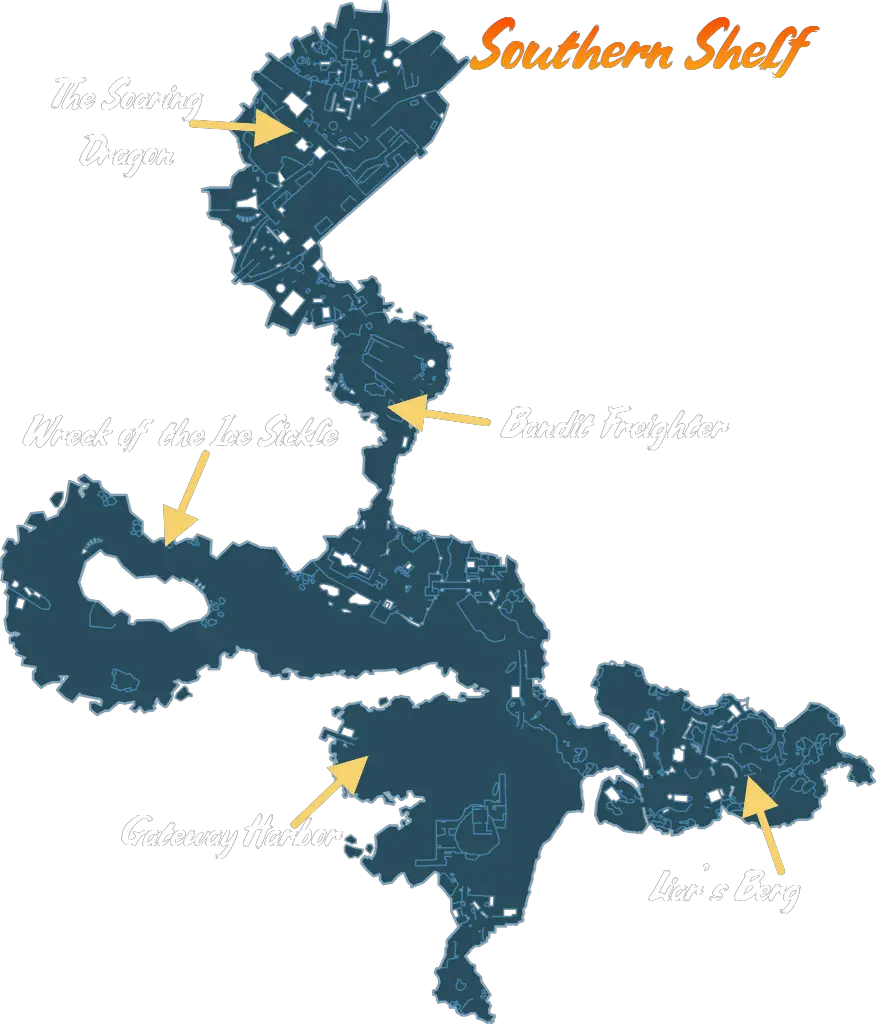
Southern Shelf
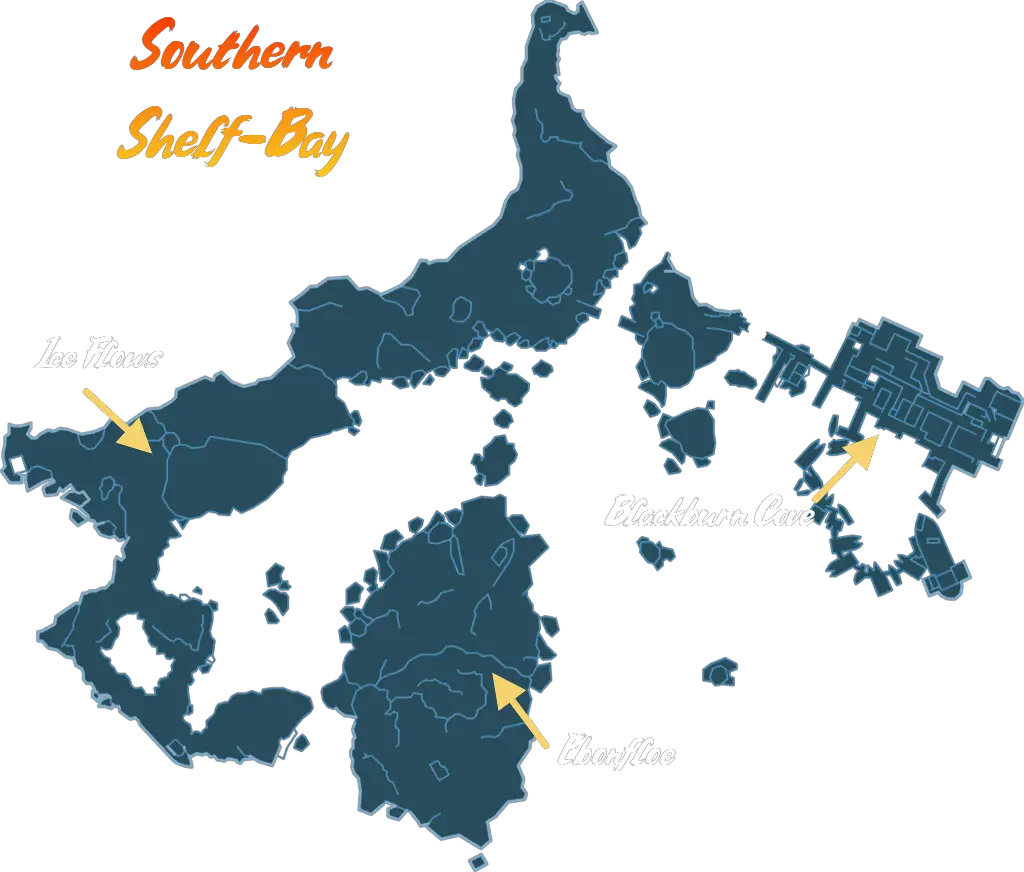
Southern Shelf – Bay
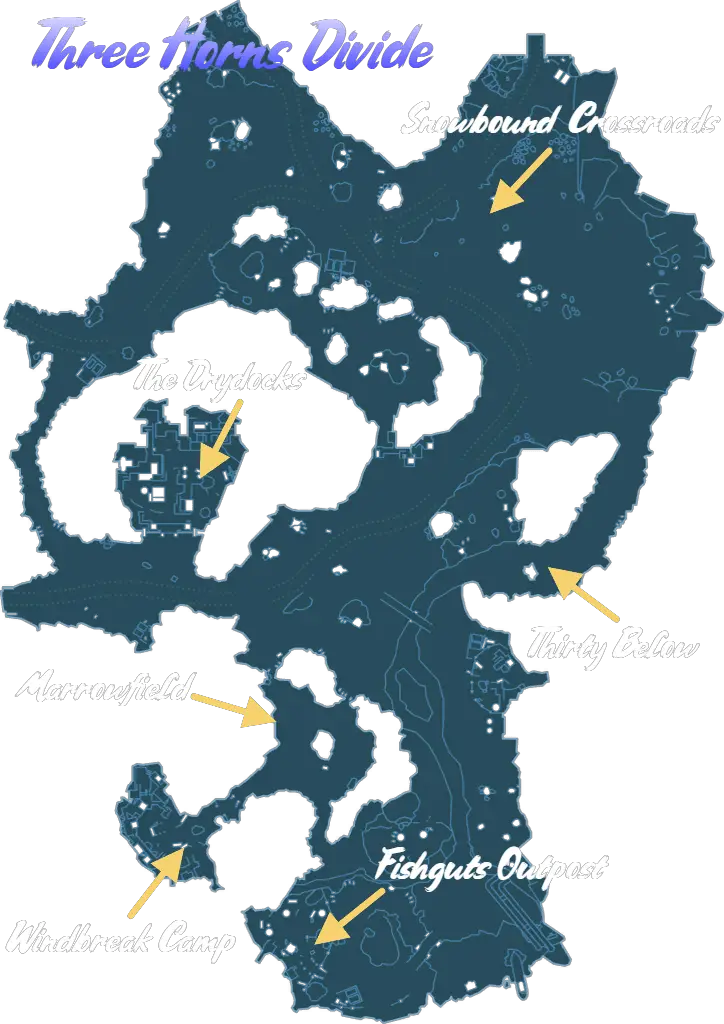
Three Horns Divide
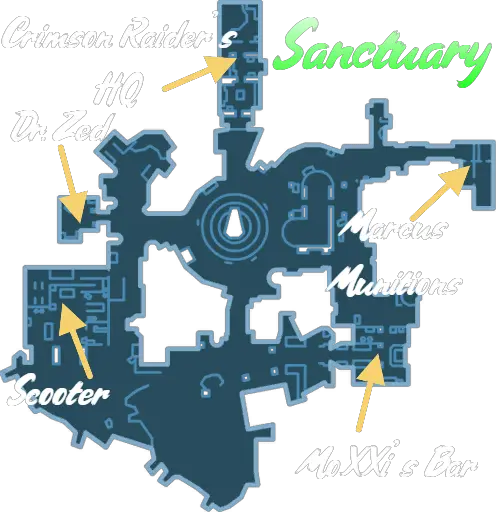
Sanctuary
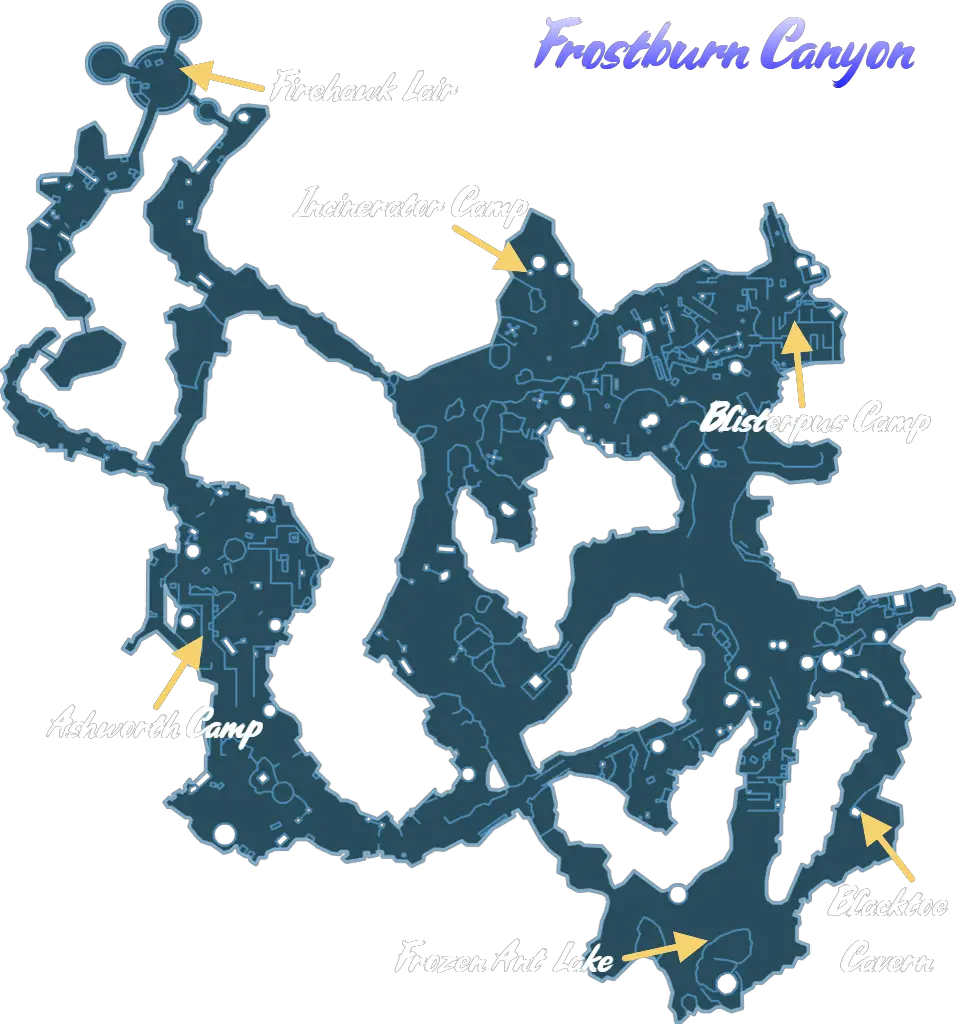
Frostburn Canyon
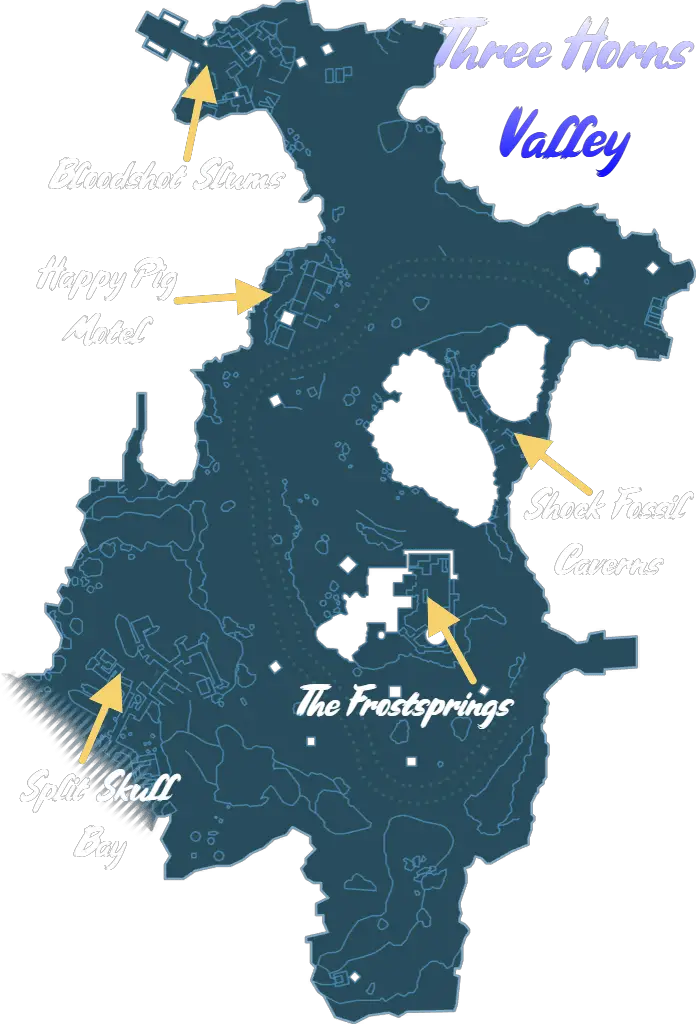
Three Horns Valley
Southpaw Steam & Power

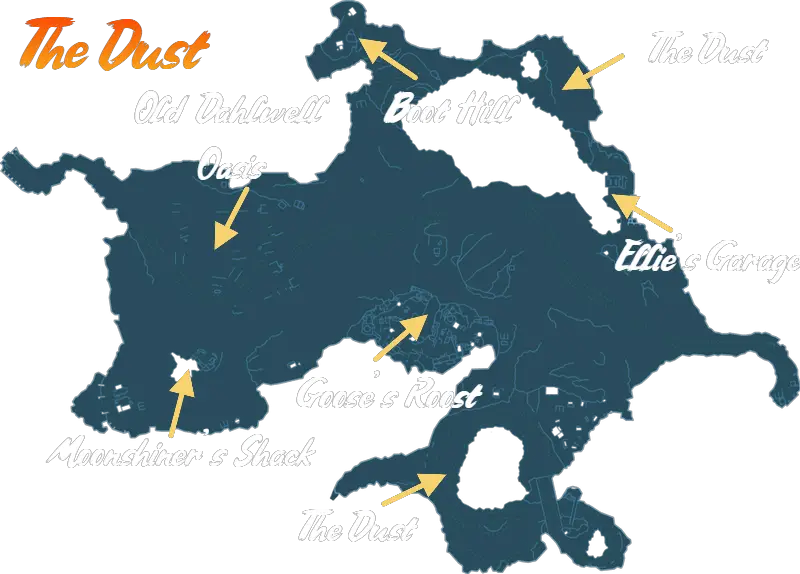
The Dust
Bloodshot Stronghold

Bloodshot Ramparts

Friendship Gulag

Tundra Express
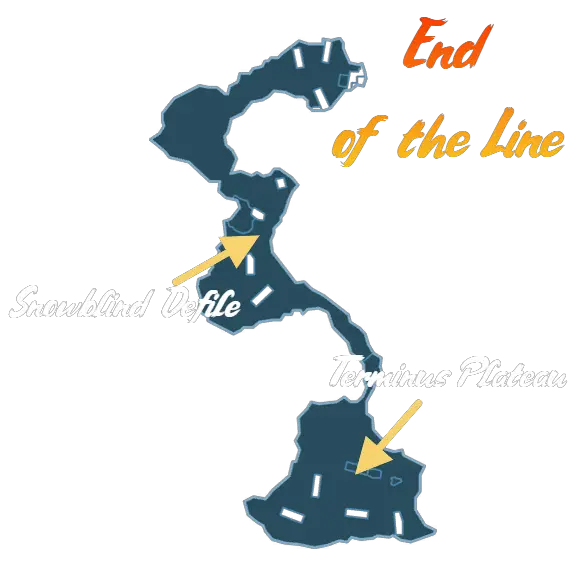
End of the Line
The Fridge
Fink’s Slaughterhouse

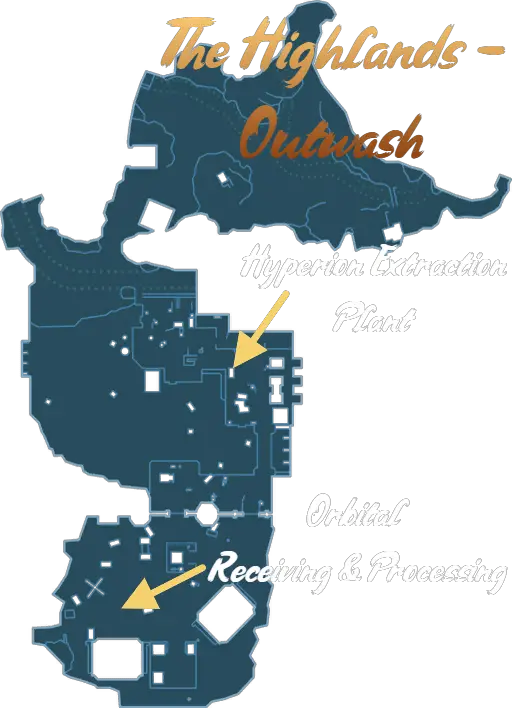
The Highlands – Outwash
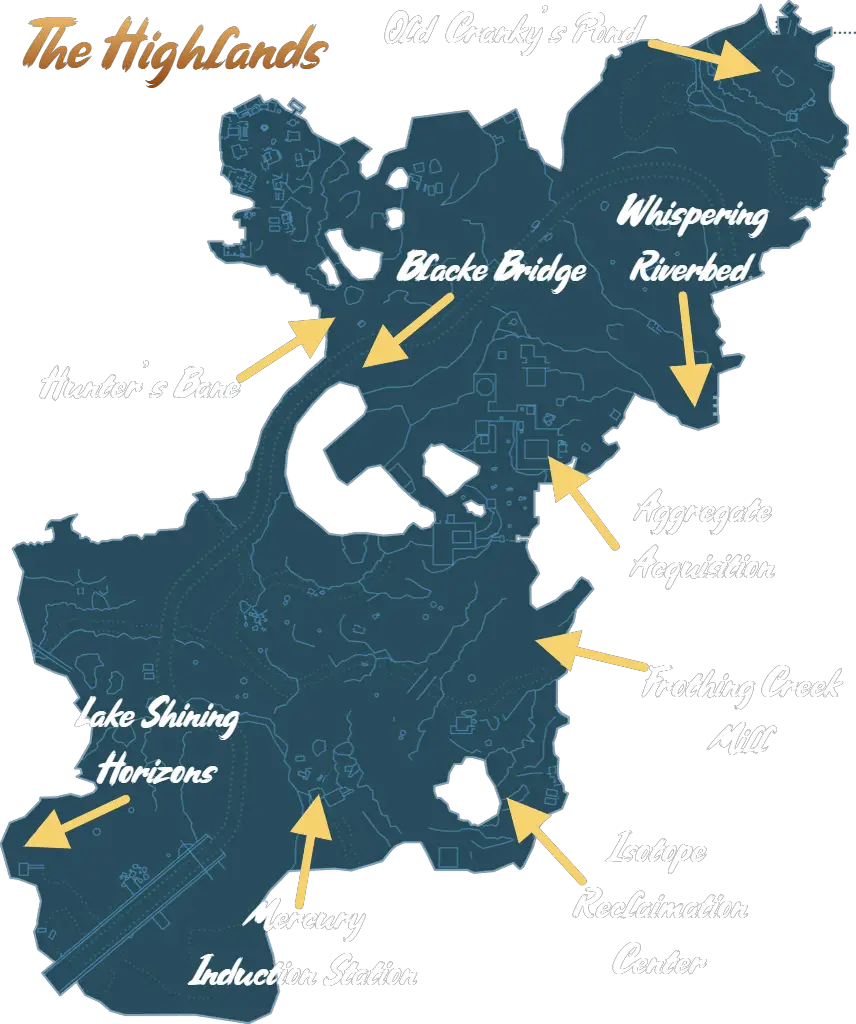
The Highlands
The Holy Spirits
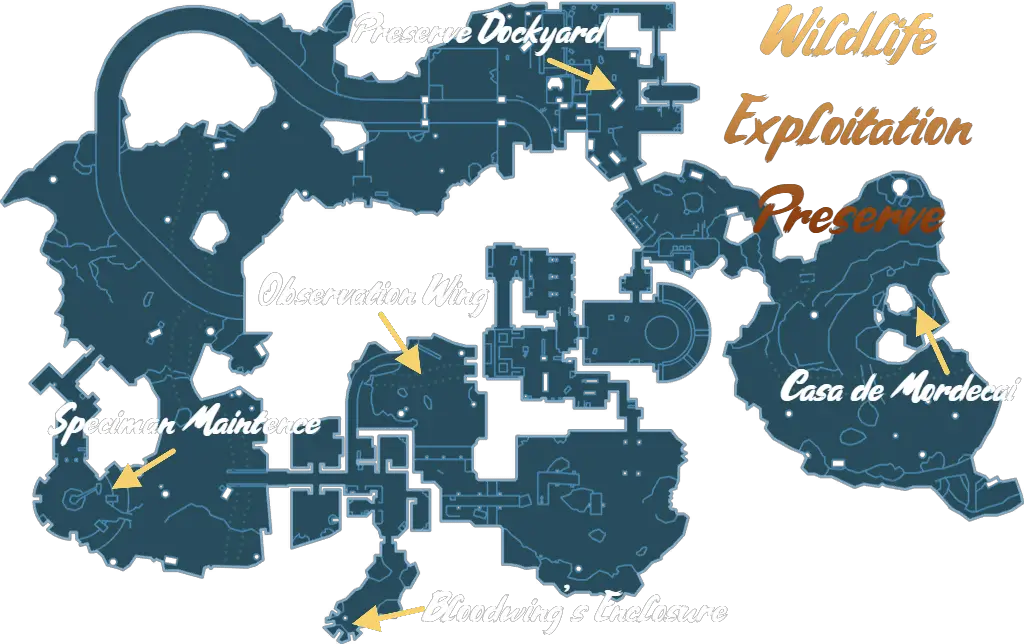
Wildlife Exploitation Preserve
Natural Selection Annex

Opportunity

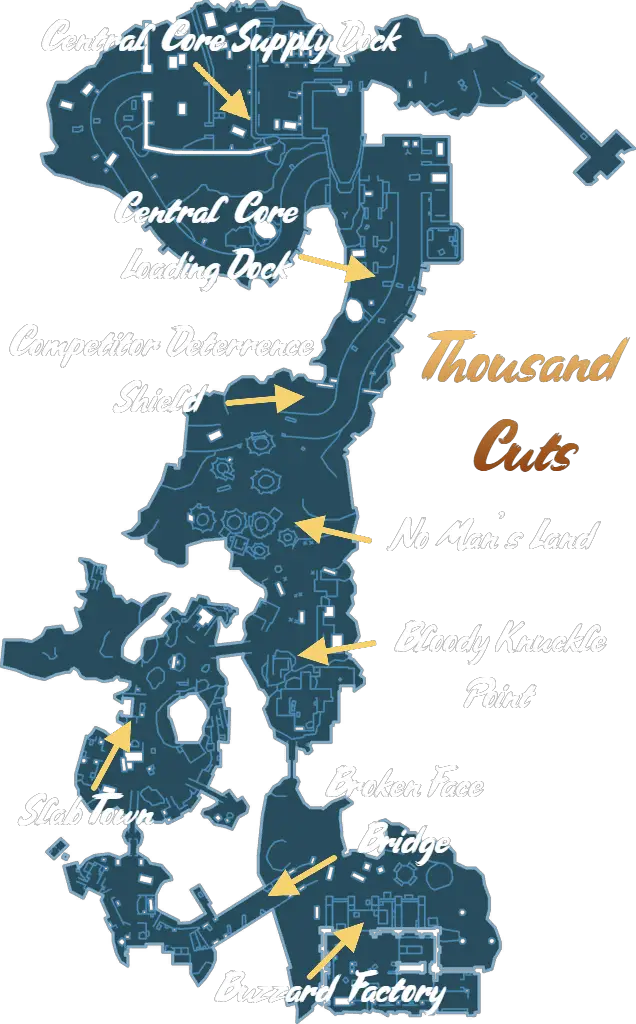
Thousand Cuts
The Bunker

Terramorphous Peak

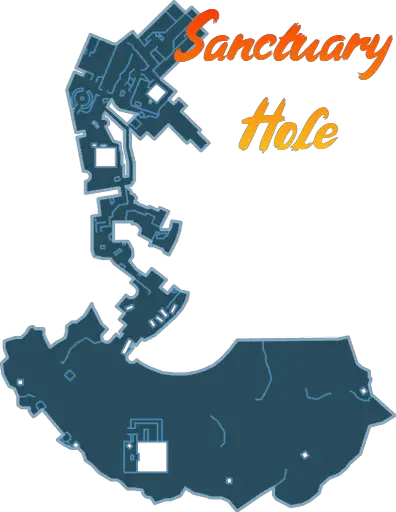
Sanctuary Hole
Caustic Caverns
Lynchwood

Eridium Blight
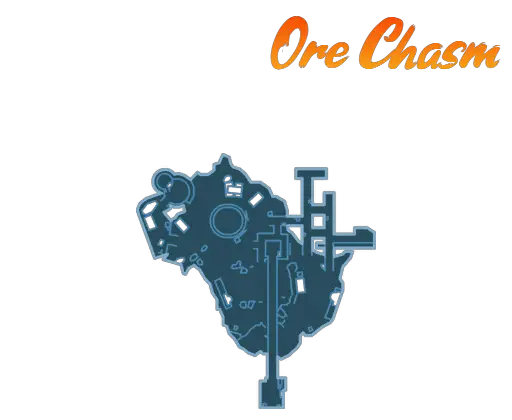
Ore Chasm
Sawtooth Cauldron

Arid Nexus – Boneyard
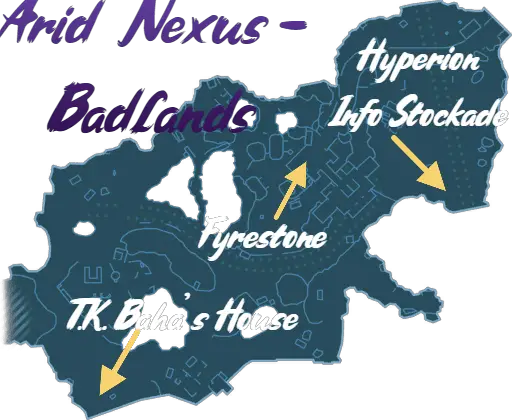
Arid Nexus – Badlands
Hero’s Pass

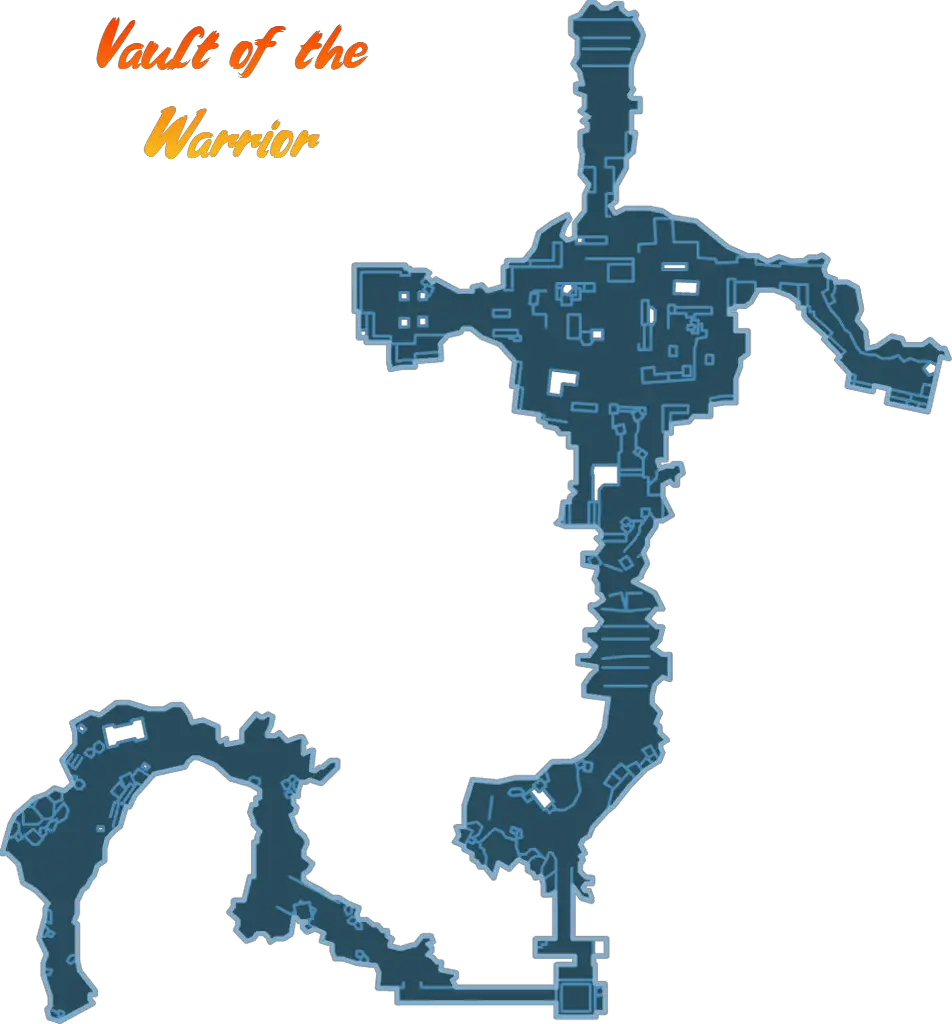
Vault of the Warrior
That's everything we are sharing today for this Borderlands 2 guide. This guide was originally created and written by ๖ۣۜKyozo ✗ ๖ۣۜKami. In case we fail to update this guide, you can find the latest update by following this link.