- Title: Amnesia: Rebirth
- Release Date:
- Developer:
- Publisher:
Information about Amnesia: Rebirth is still incomplete. Please help us fill the details of the game using this contact form.
In Amnesia: Rebirth, there are a total of 14 Hank’s Notes that need to be collected to achieve the Crewmember status. It’s important to gather all the notes in a single playthrough. This guide aims to provide a straightforward approach, accompanied by pictures, to assist you in locating each note accurately.
This guide may not be as elaborate as those created by experienced writers, and my proficiency in the English language may be limited. However, I have made an effort to present clear instructions and included visual references to enhance your understanding. If you find any instructions unclear or believe that additional details would be beneficial, please leave a comment so that I can improve the guide for future readers.
The Cassandra
01/14
Nicolas Masson Location – Easy to Find
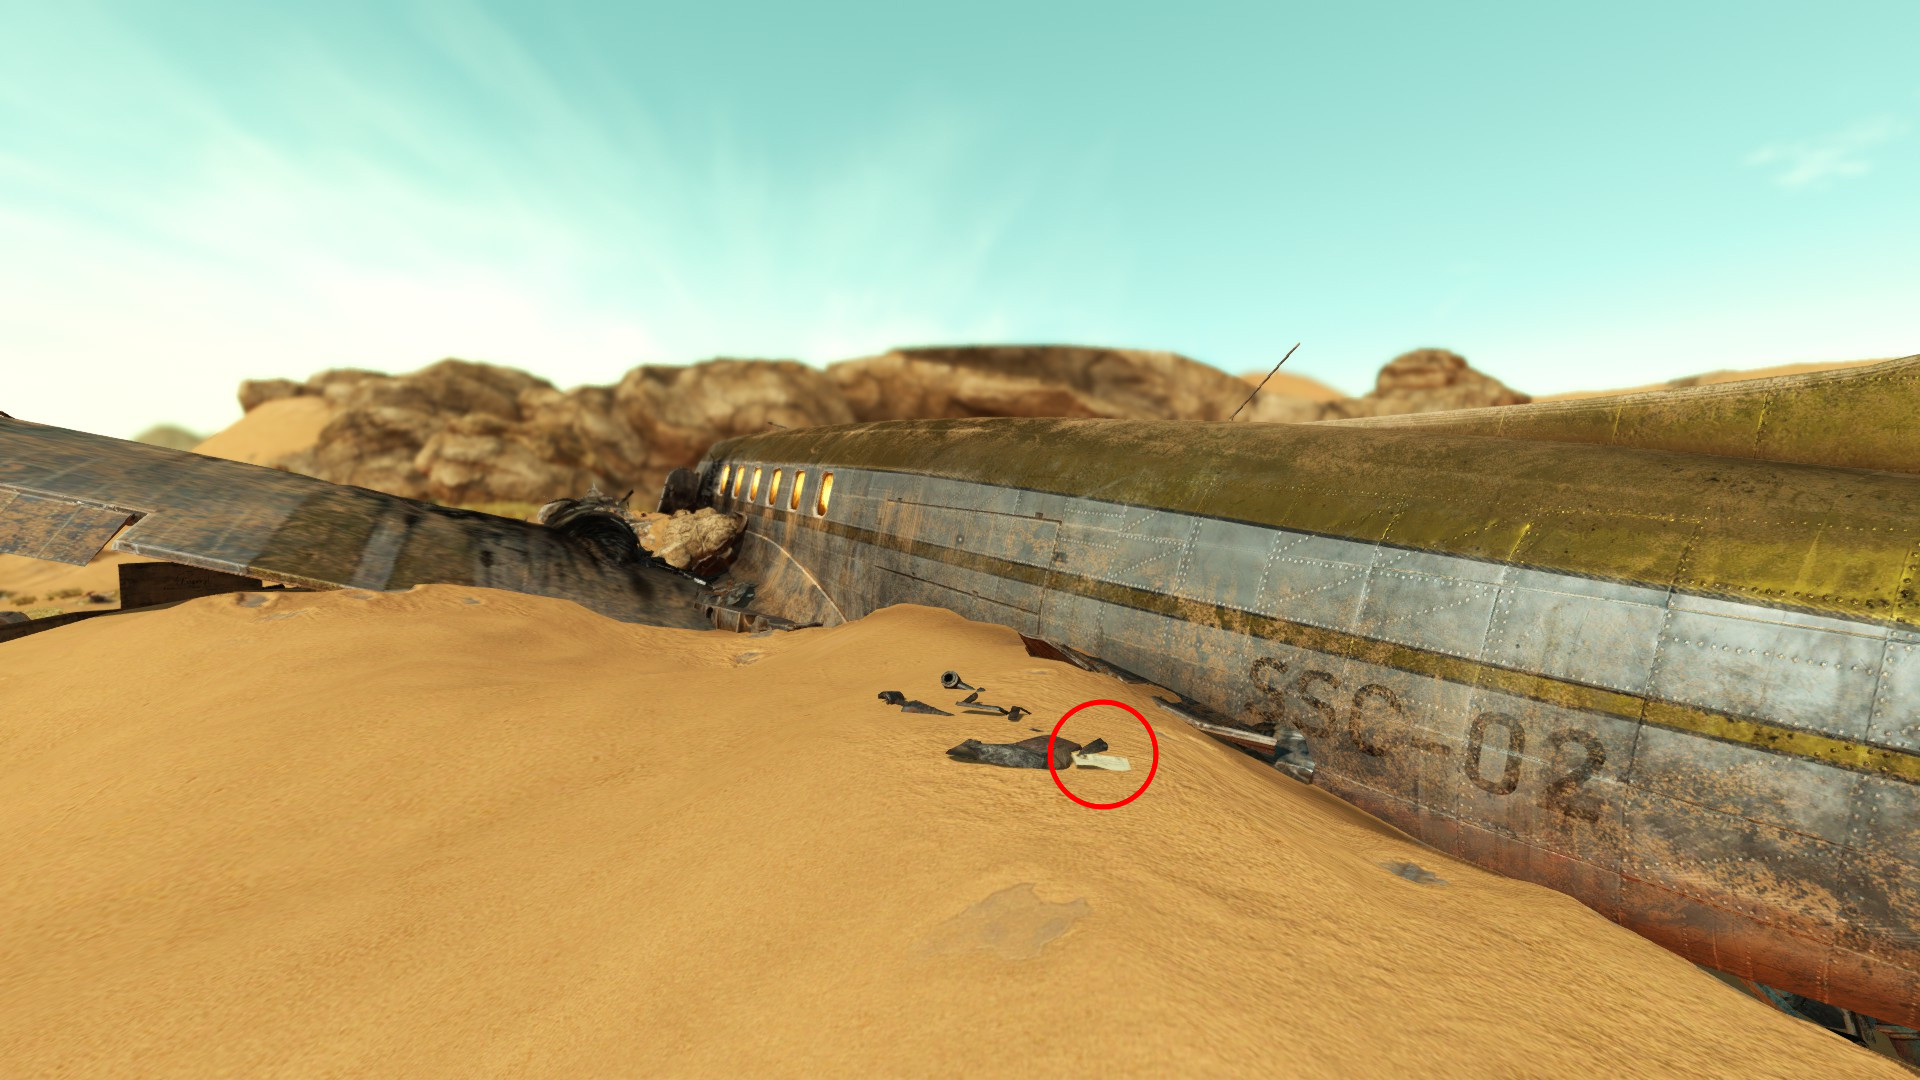
Upon completing the game’s opening sequence and gaining control of your character to exit the plane, you’ll find the Nicolas Masson collectible by following a simple path. Immediately turn left and head towards the tail of the plane. There, you’ll spot the first collectible waiting for you.
02/14
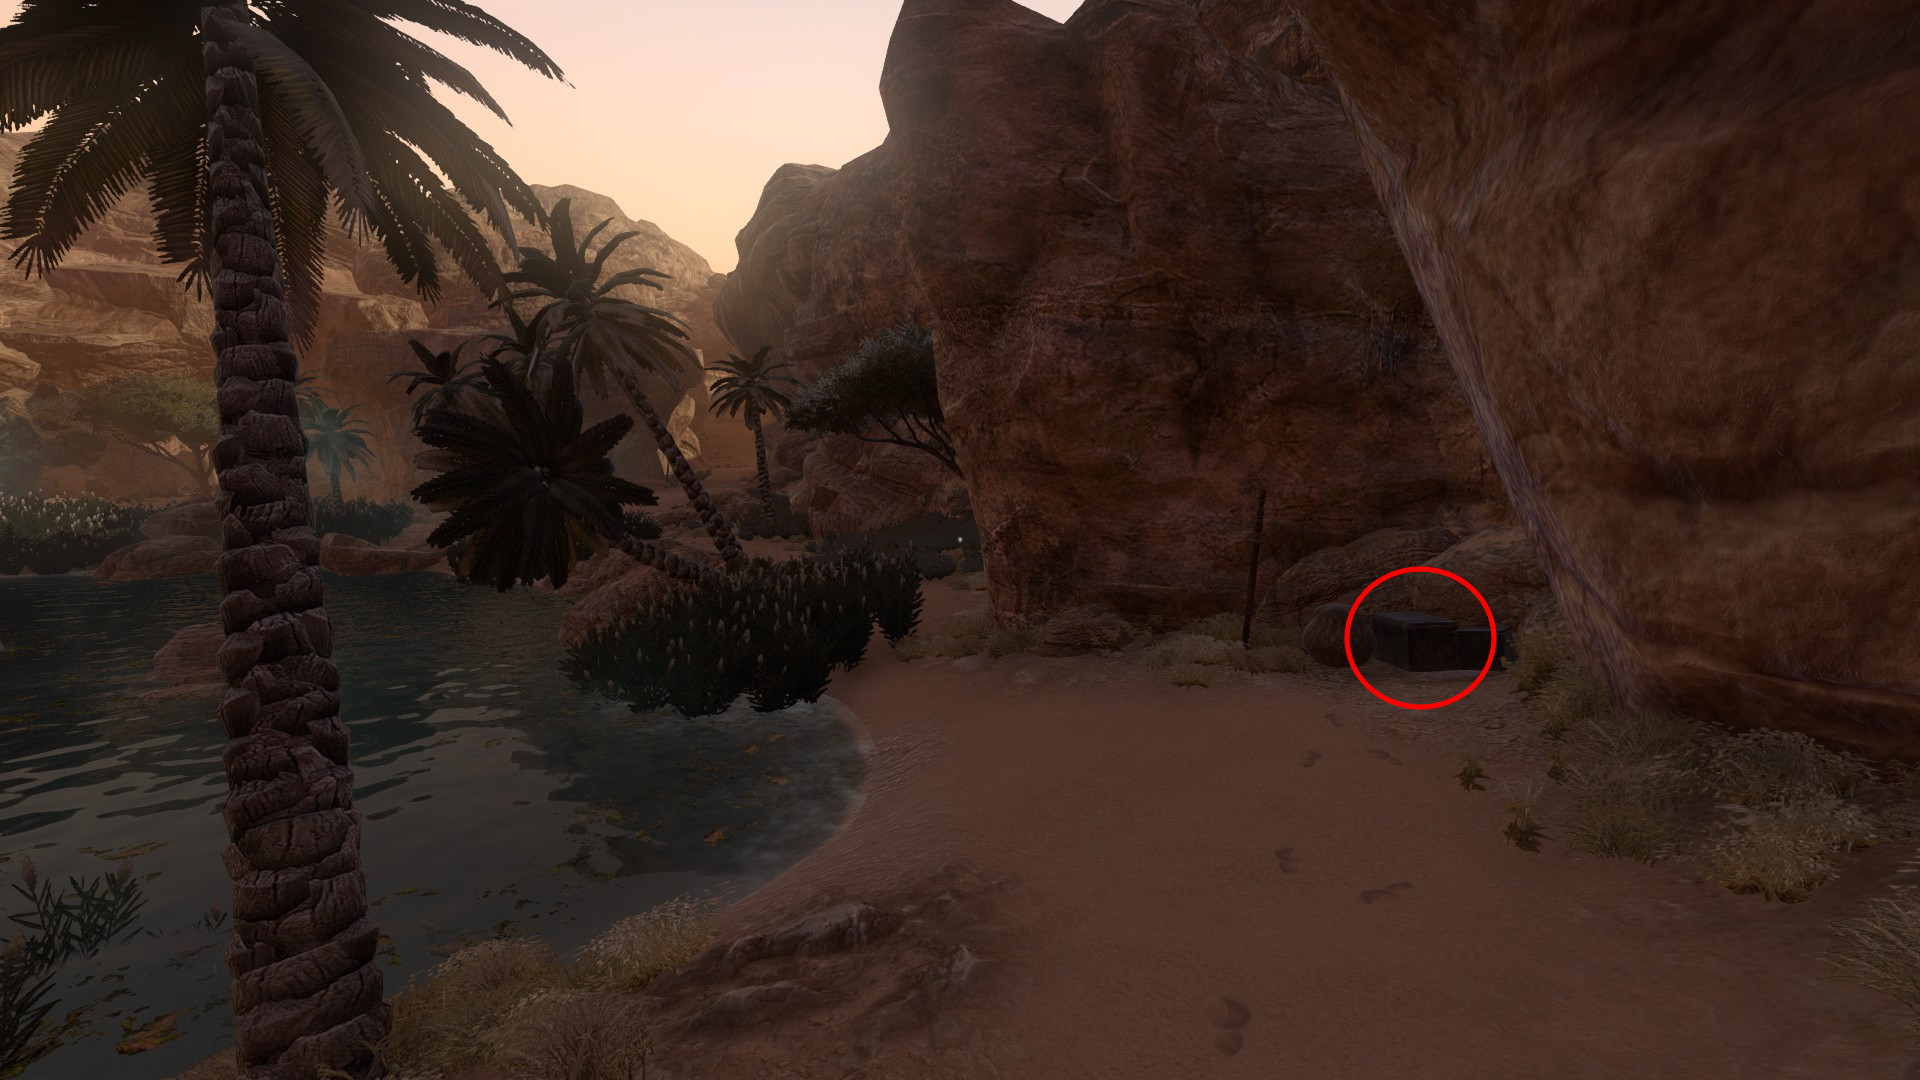
Rachael Holt Location – Cave Entrance
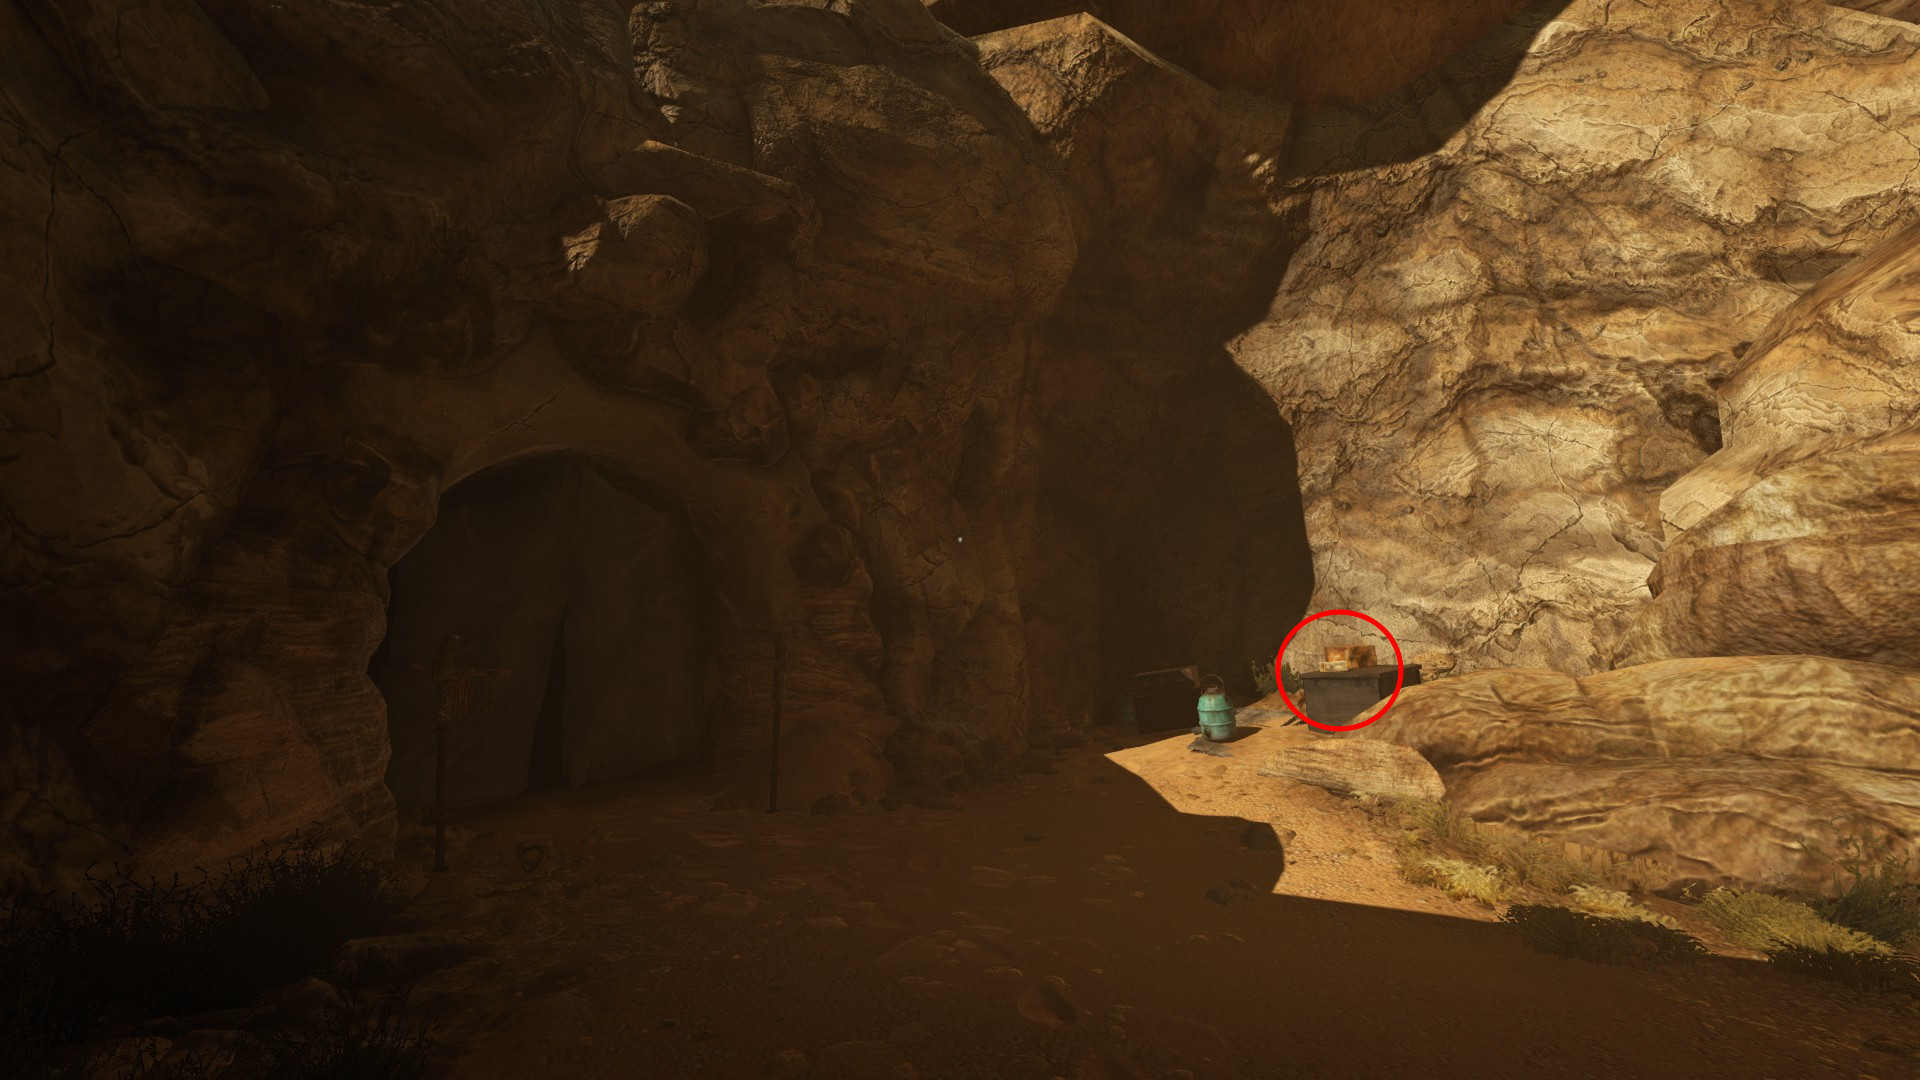
Once you’ve obtained Nicolas’ note, continue your journey through the desert until you arrive at a cave entrance. Inside the cave, you’ll discover the next collectible. Look for a brown desk with a box on top of it, and there you’ll find the Rachael Holt collectible, waiting to be collected.
The Caves
03/14
Anastasie Trianon Location – Inside the Cave
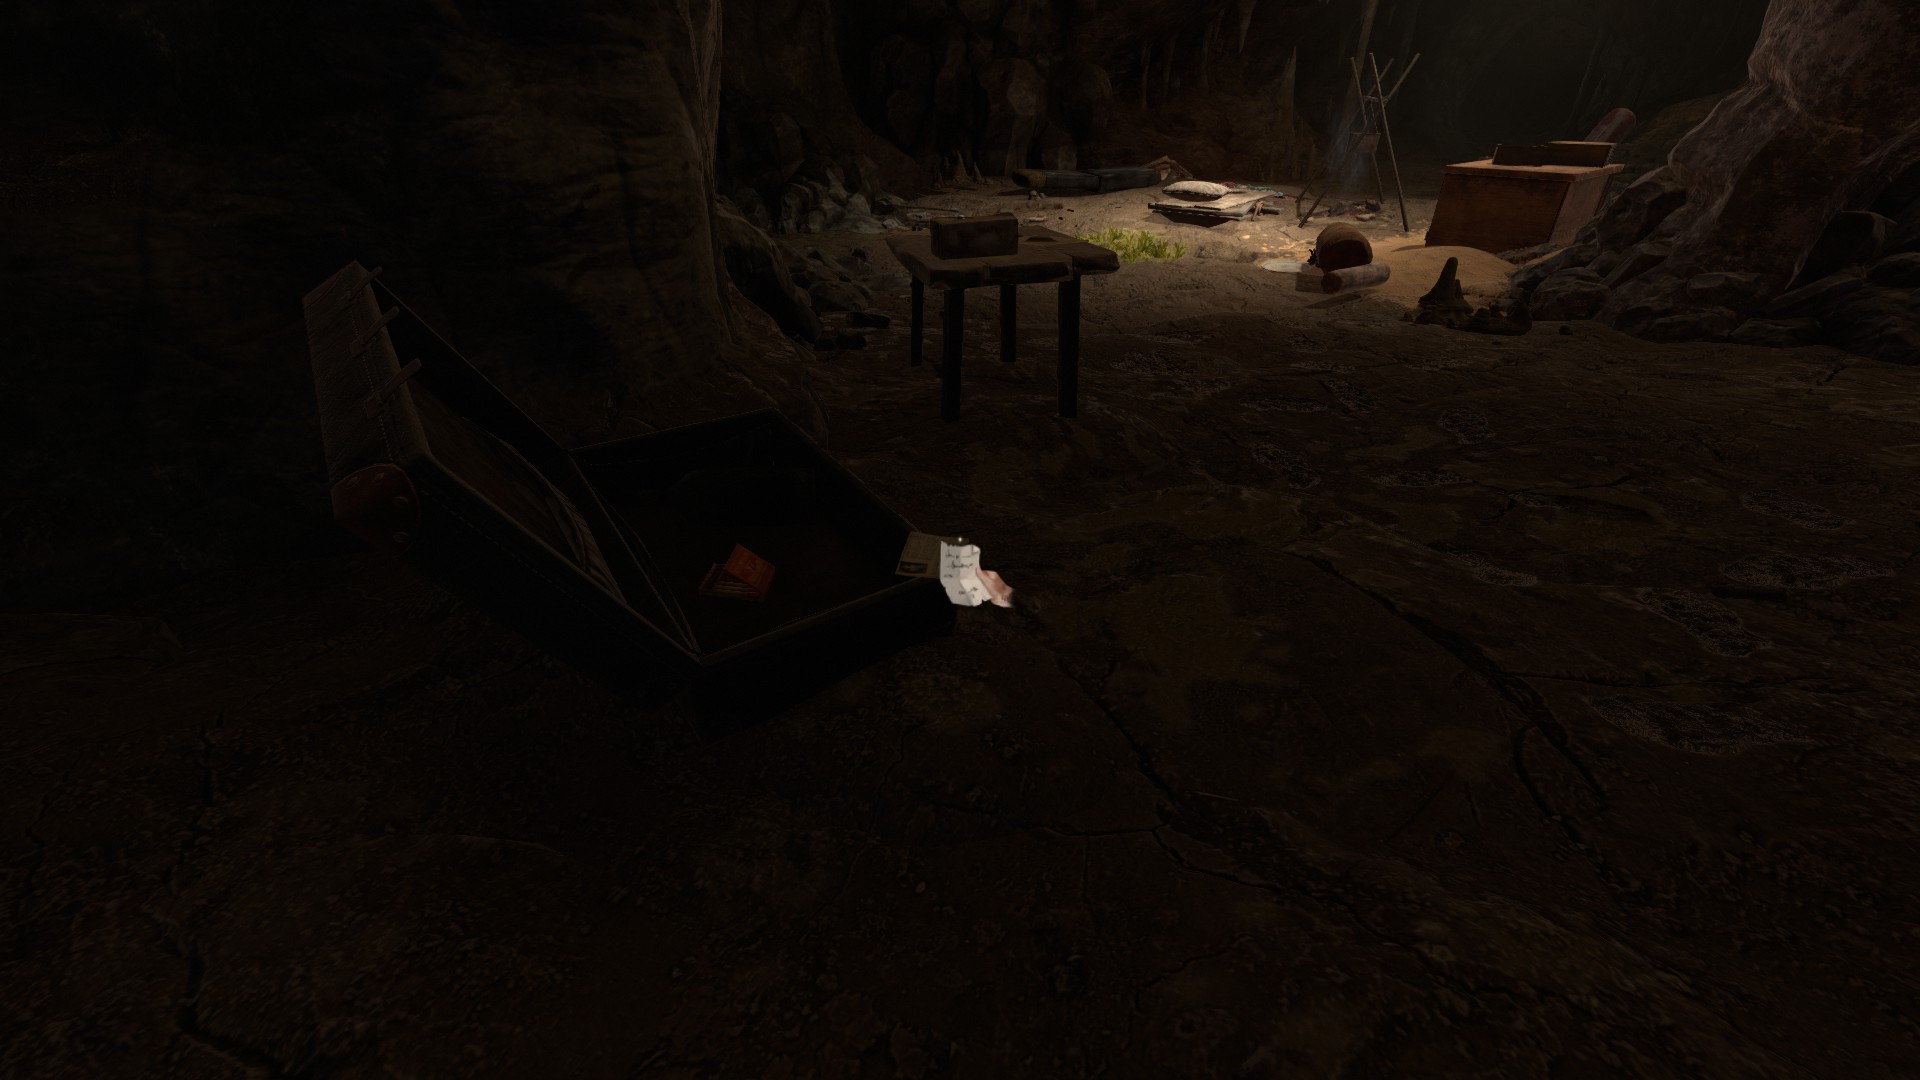
Upon entering the cave, you’ll come across a scene with a sleeping bag, table, and a cluttered area straight ahead on the right side. Just beyond this mess, you’ll notice a suitcase resting on the ground. The Anastasie Trianon collectible is tucked inside this suitcase. To help you visualize the location, the provided image below shows the view facing backward, towards the entrance of the cave.
04/14
Eva Ritter Location – Small Cave Area
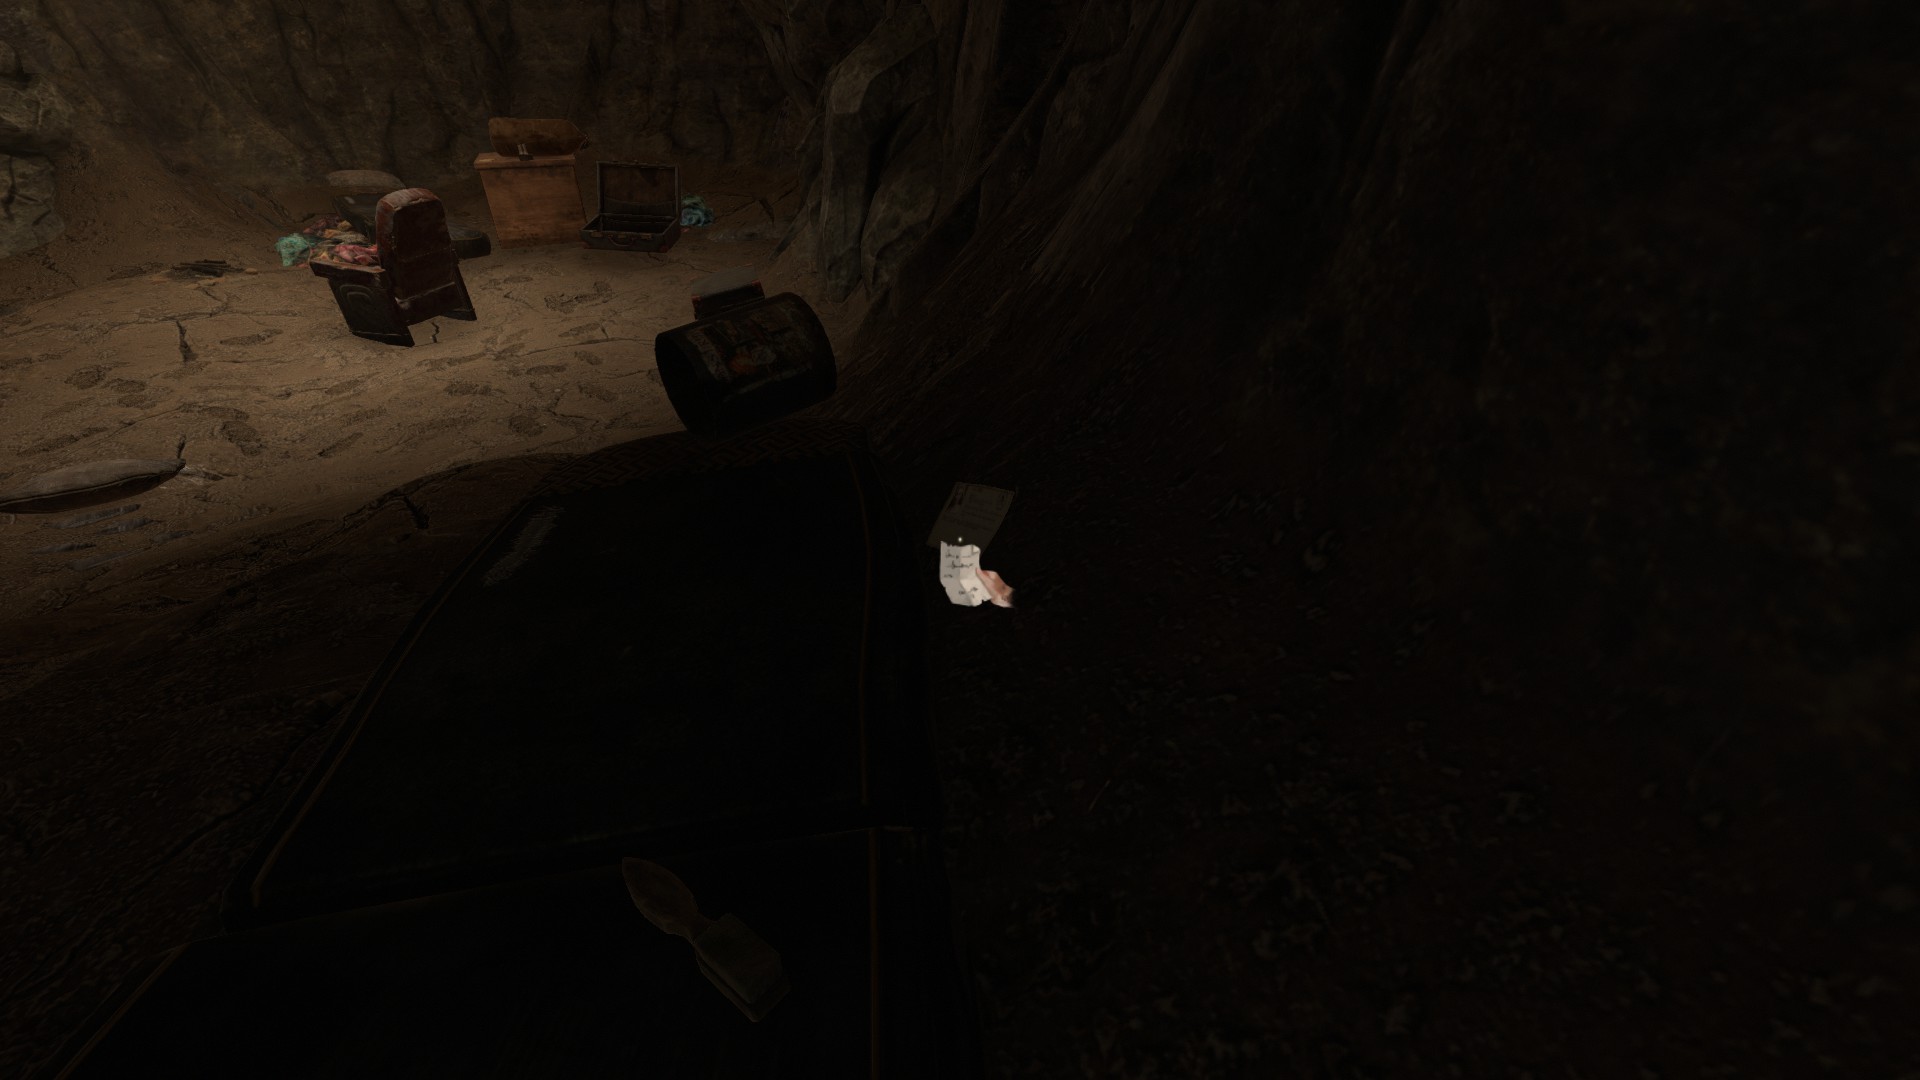
From the viewpoint directly behind the character in the previously mentioned image, you’ll find a wooden plank that leads to a small cave area. It will take only a few seconds to reach this spot. Once you reach the top of the plank, look to the immediate right, where you’ll spot a sleeping bag with a pillow resting on top. Underneath the pillow, you’ll discover the Eva Ritter collectible.
05/14
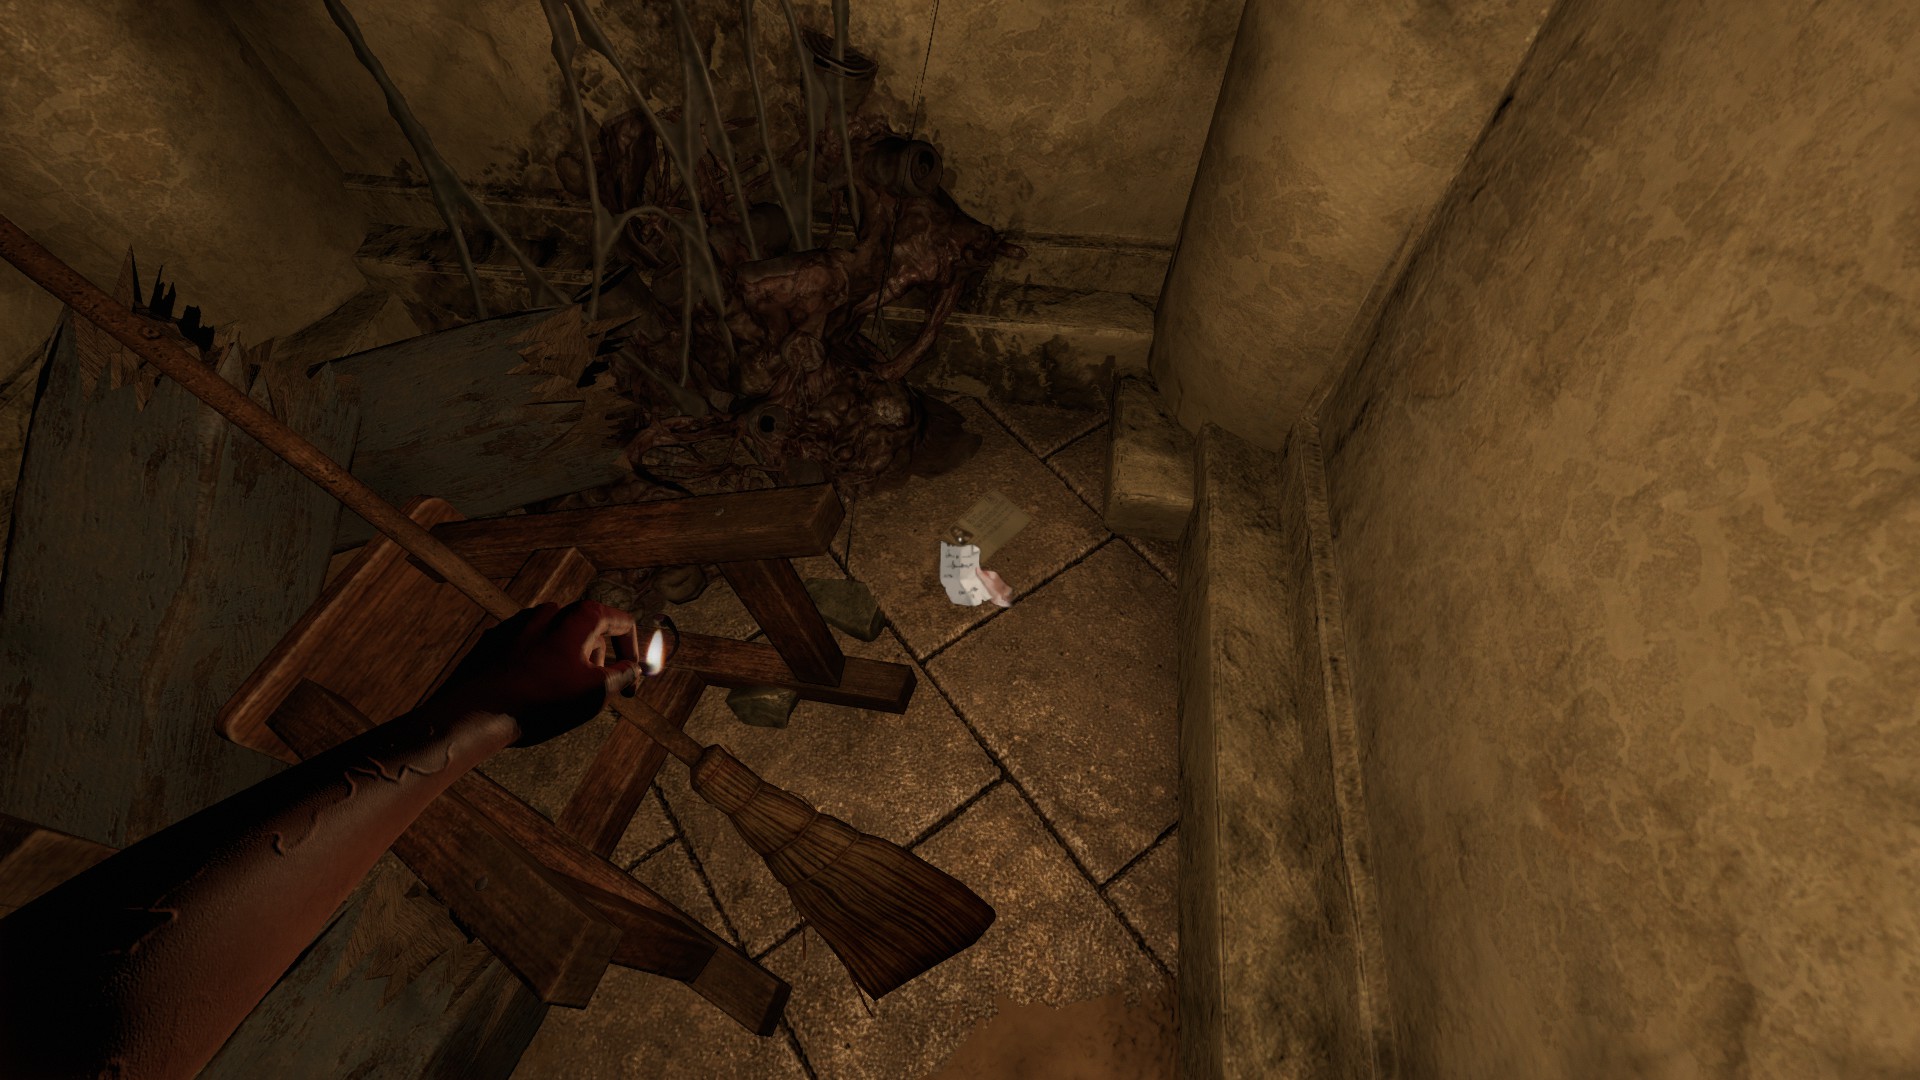
Lukas Ritter Location – Cave System
While progressing through the cave system, you will come across a door on your right with a note in front of a statue, which reads “Holy Mother, hear my plea.” After leaving this area, continue until you reach a T-intersection at the end of the path. Take a left turn at the intersection, and you will find the Lukas Ritter collectable right in front of you, on the ground. If you reach the section where you need to cross narrow rock beams over a large gap, it means you have gone too far. Please refer to the provided photo of the statue, as it might help in locating this collectable since it is situated in a dark area, and the actual location in the second image is originally unlit.

The Deeper Caves
05/14
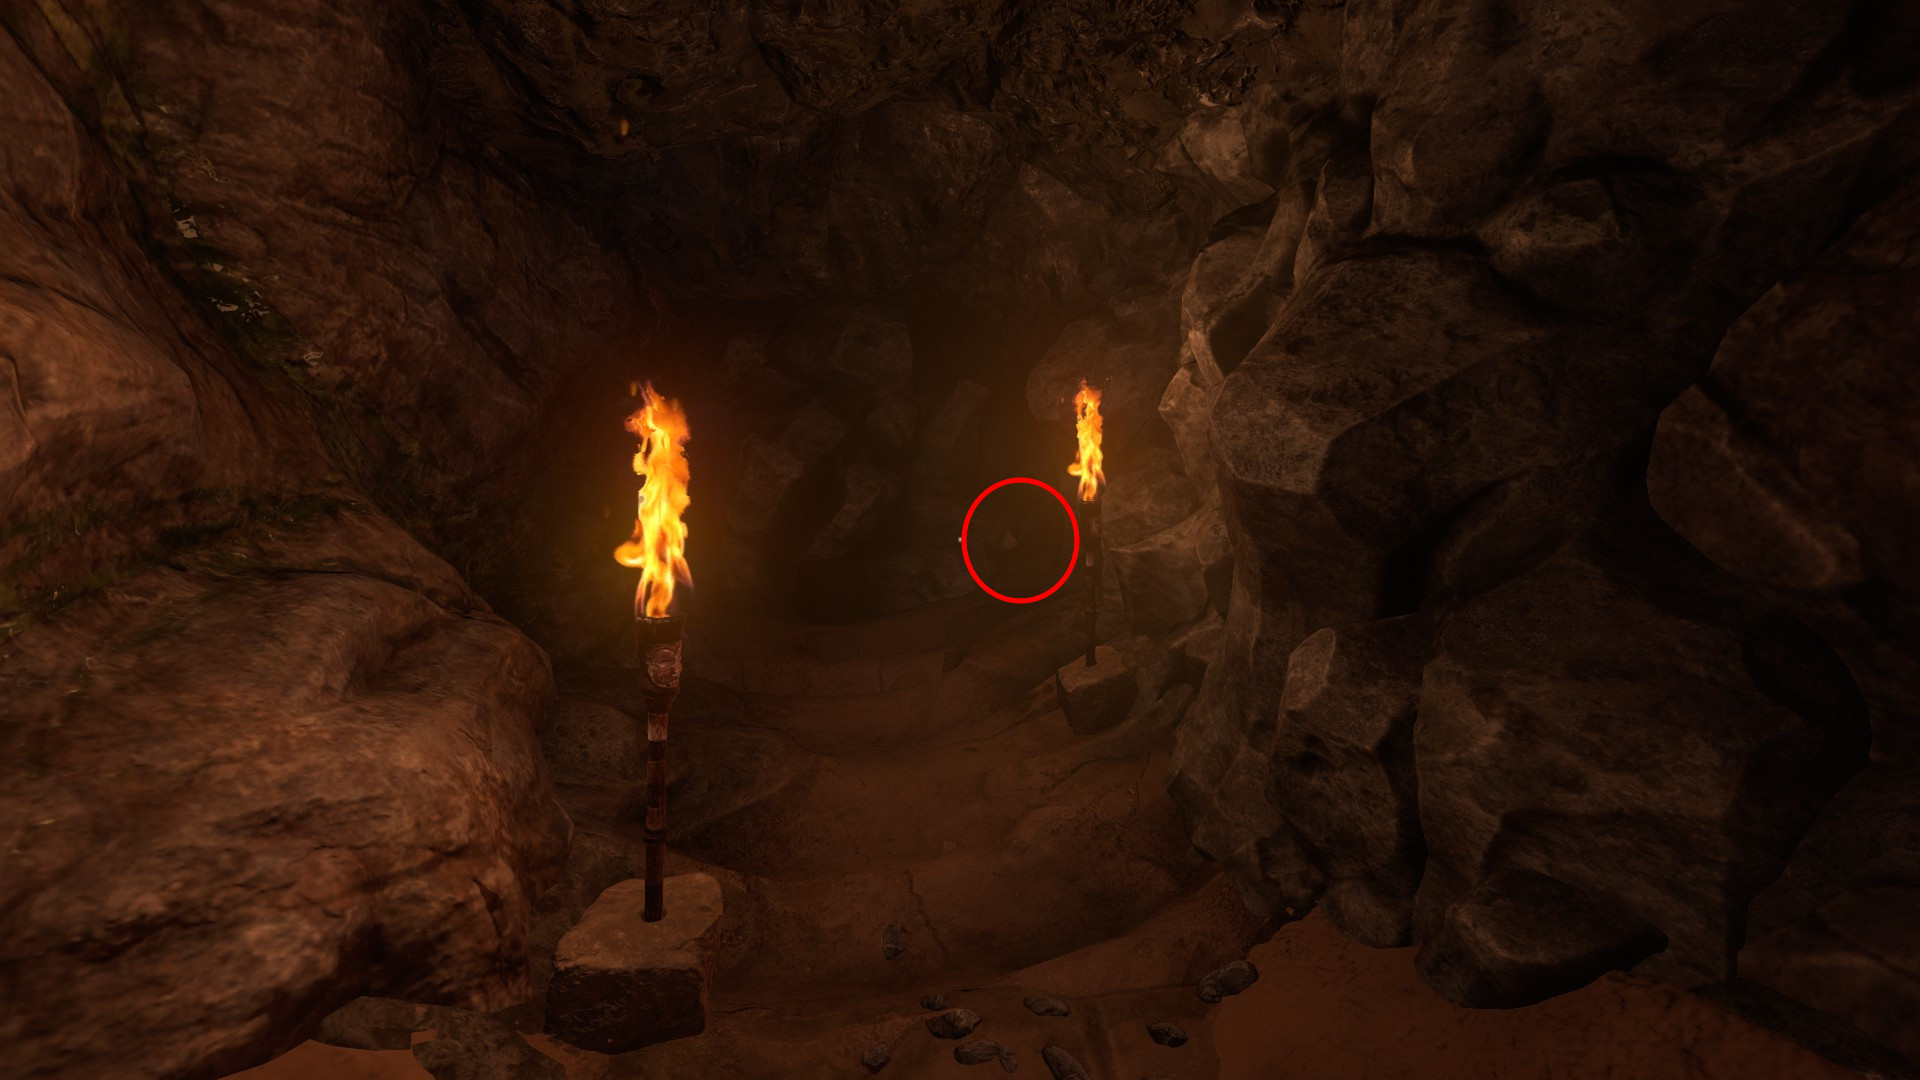
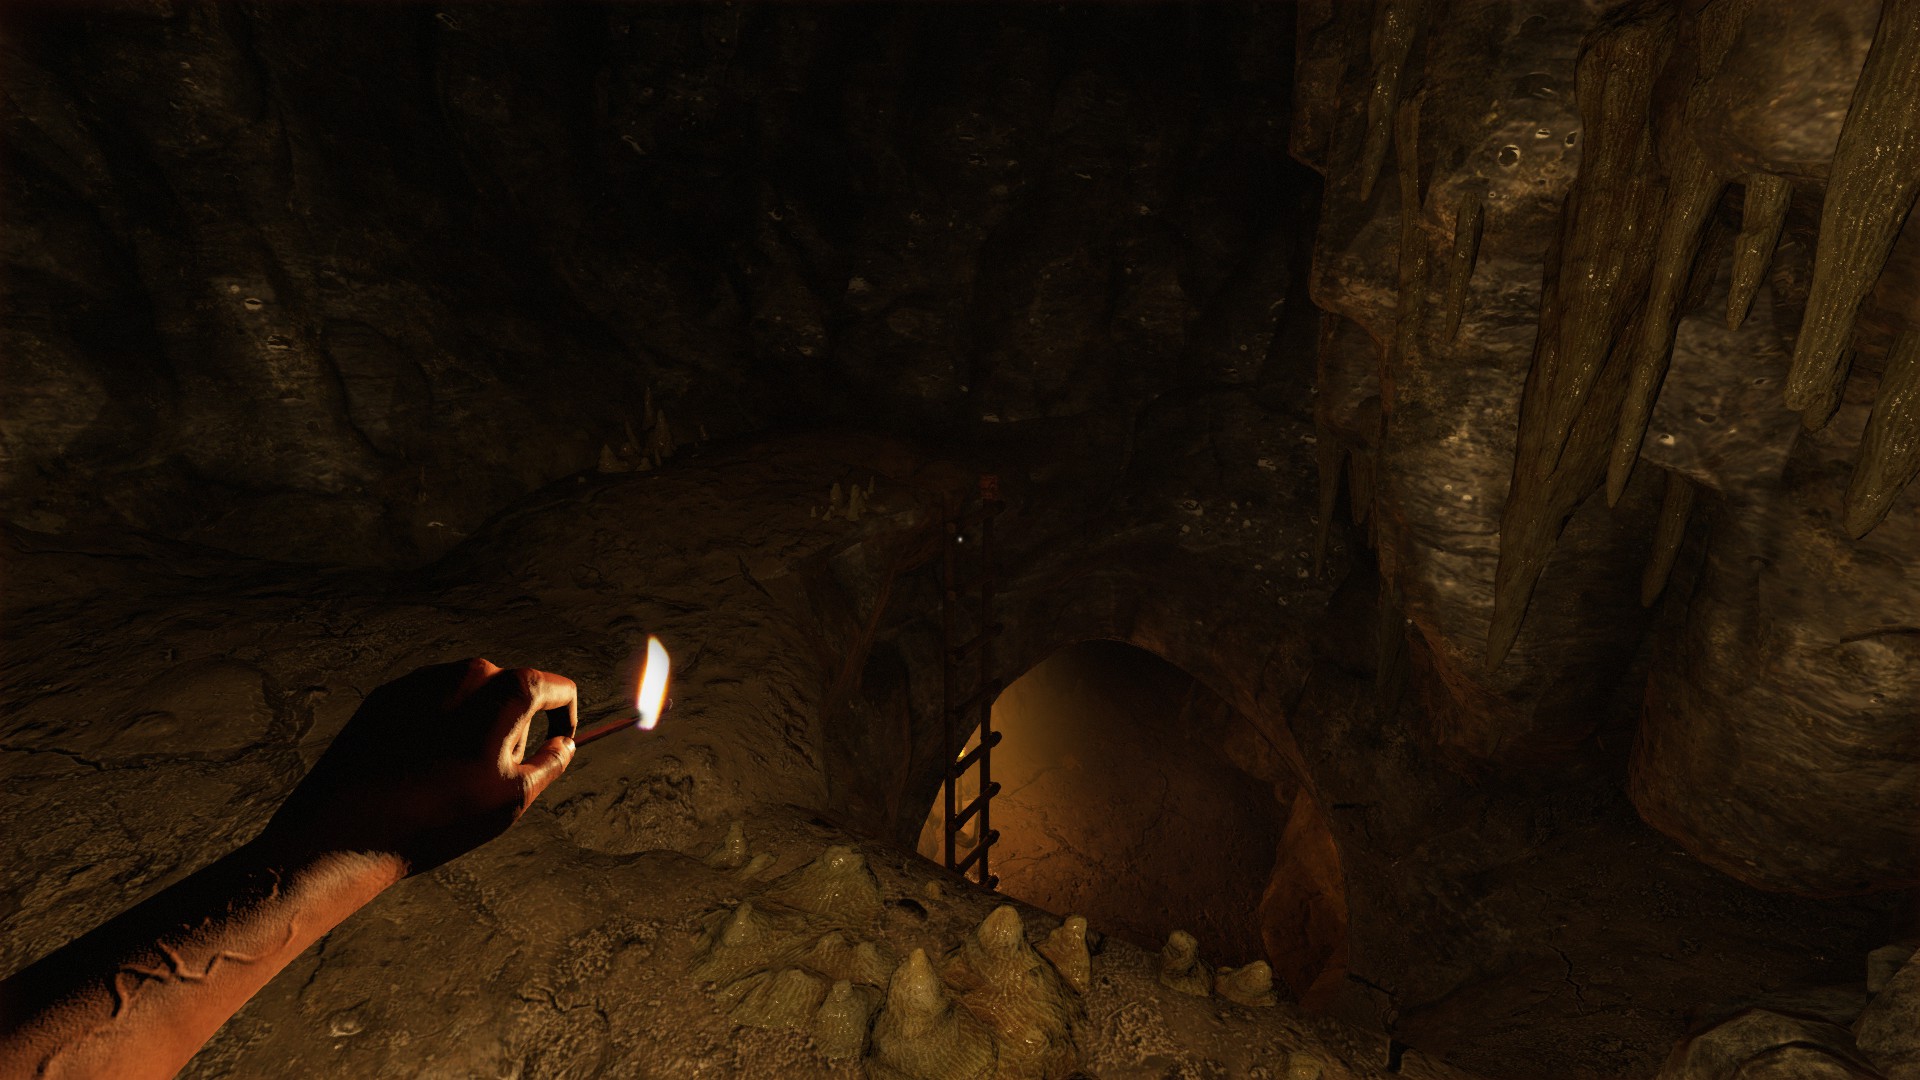
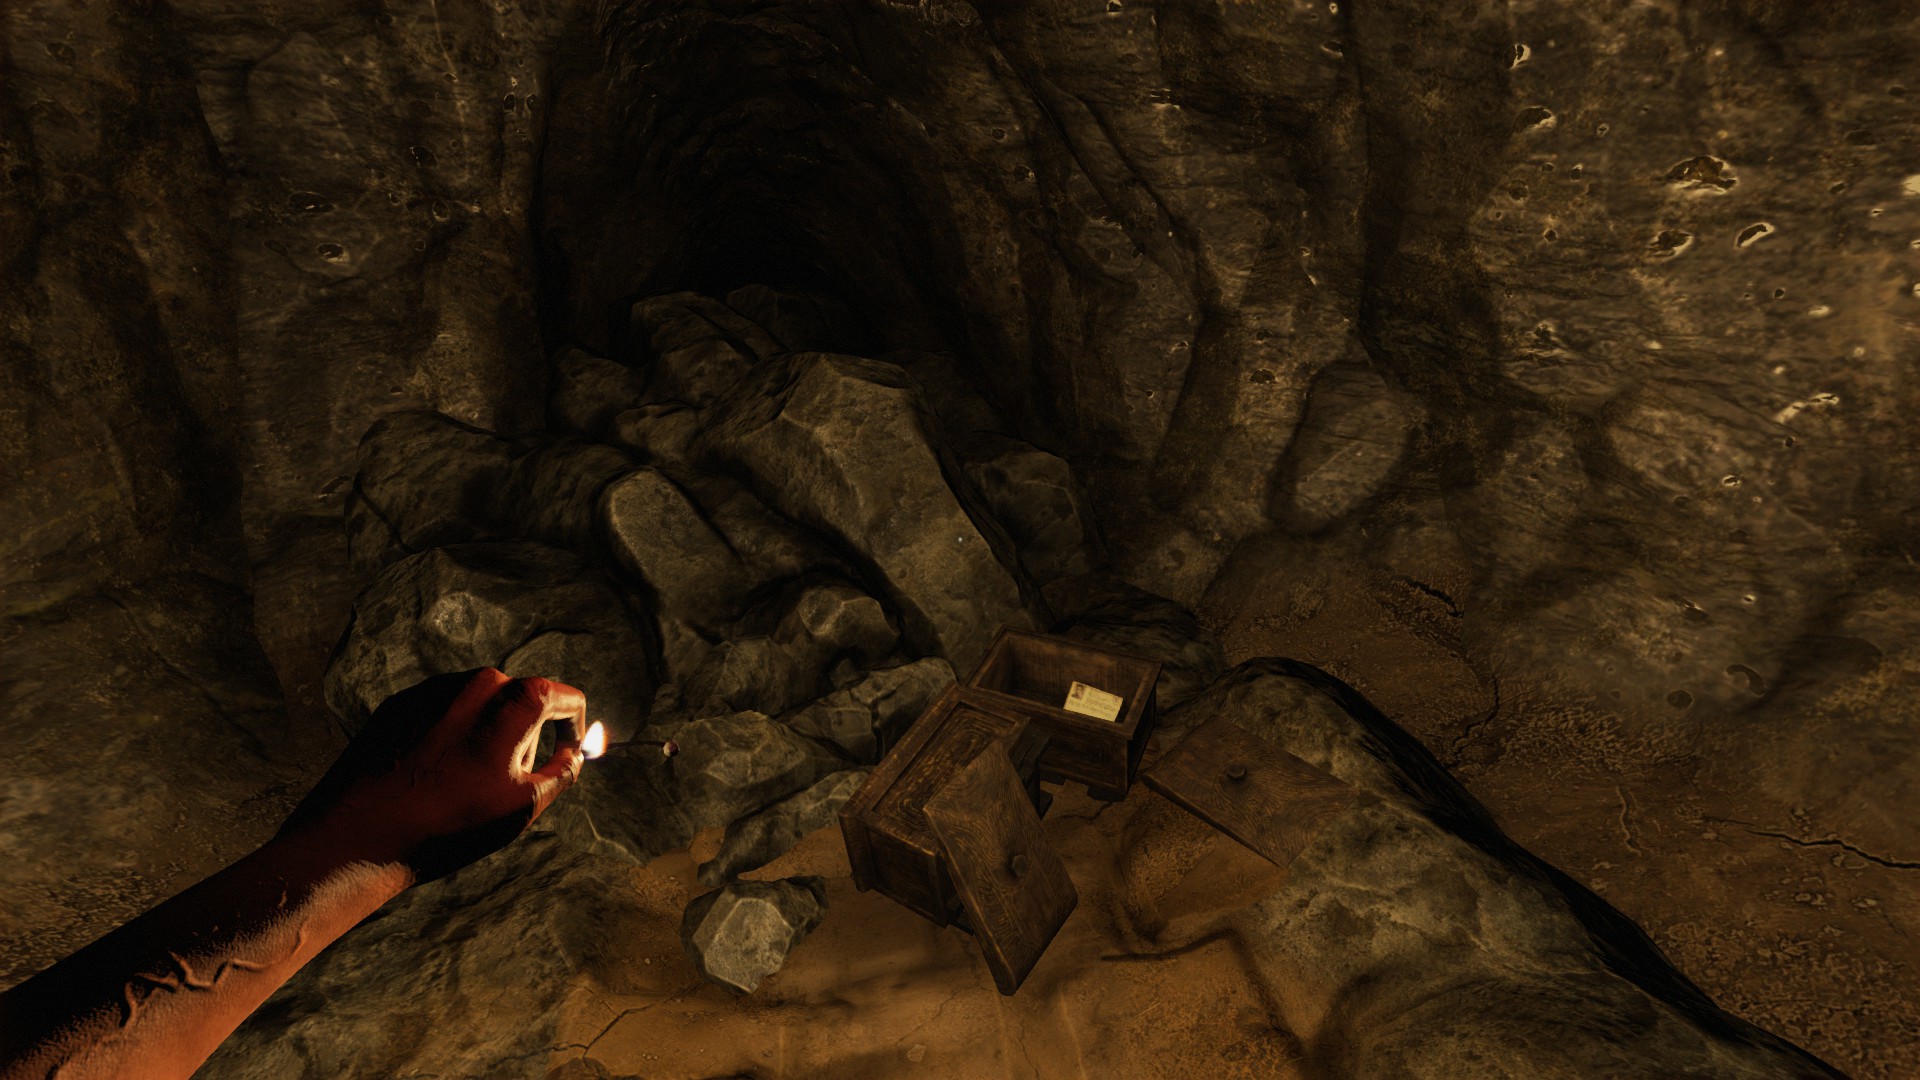
Salim Hannachi Location – Room with Ladder
As you continue progressing through the cave system, you will eventually come across a point where you need to cross a narrow rock beam over a large gap. After crossing the beam, you’ll enter a room with a ladder that leads down. In this area, if you turn around and face the ladder (referring to the first image provided), you’ll find the Salim Hannachi collectable placed inside a box within a small secluded area. Make sure to thoroughly explore the surroundings to locate this collectable.
The Desert Paths
06/14
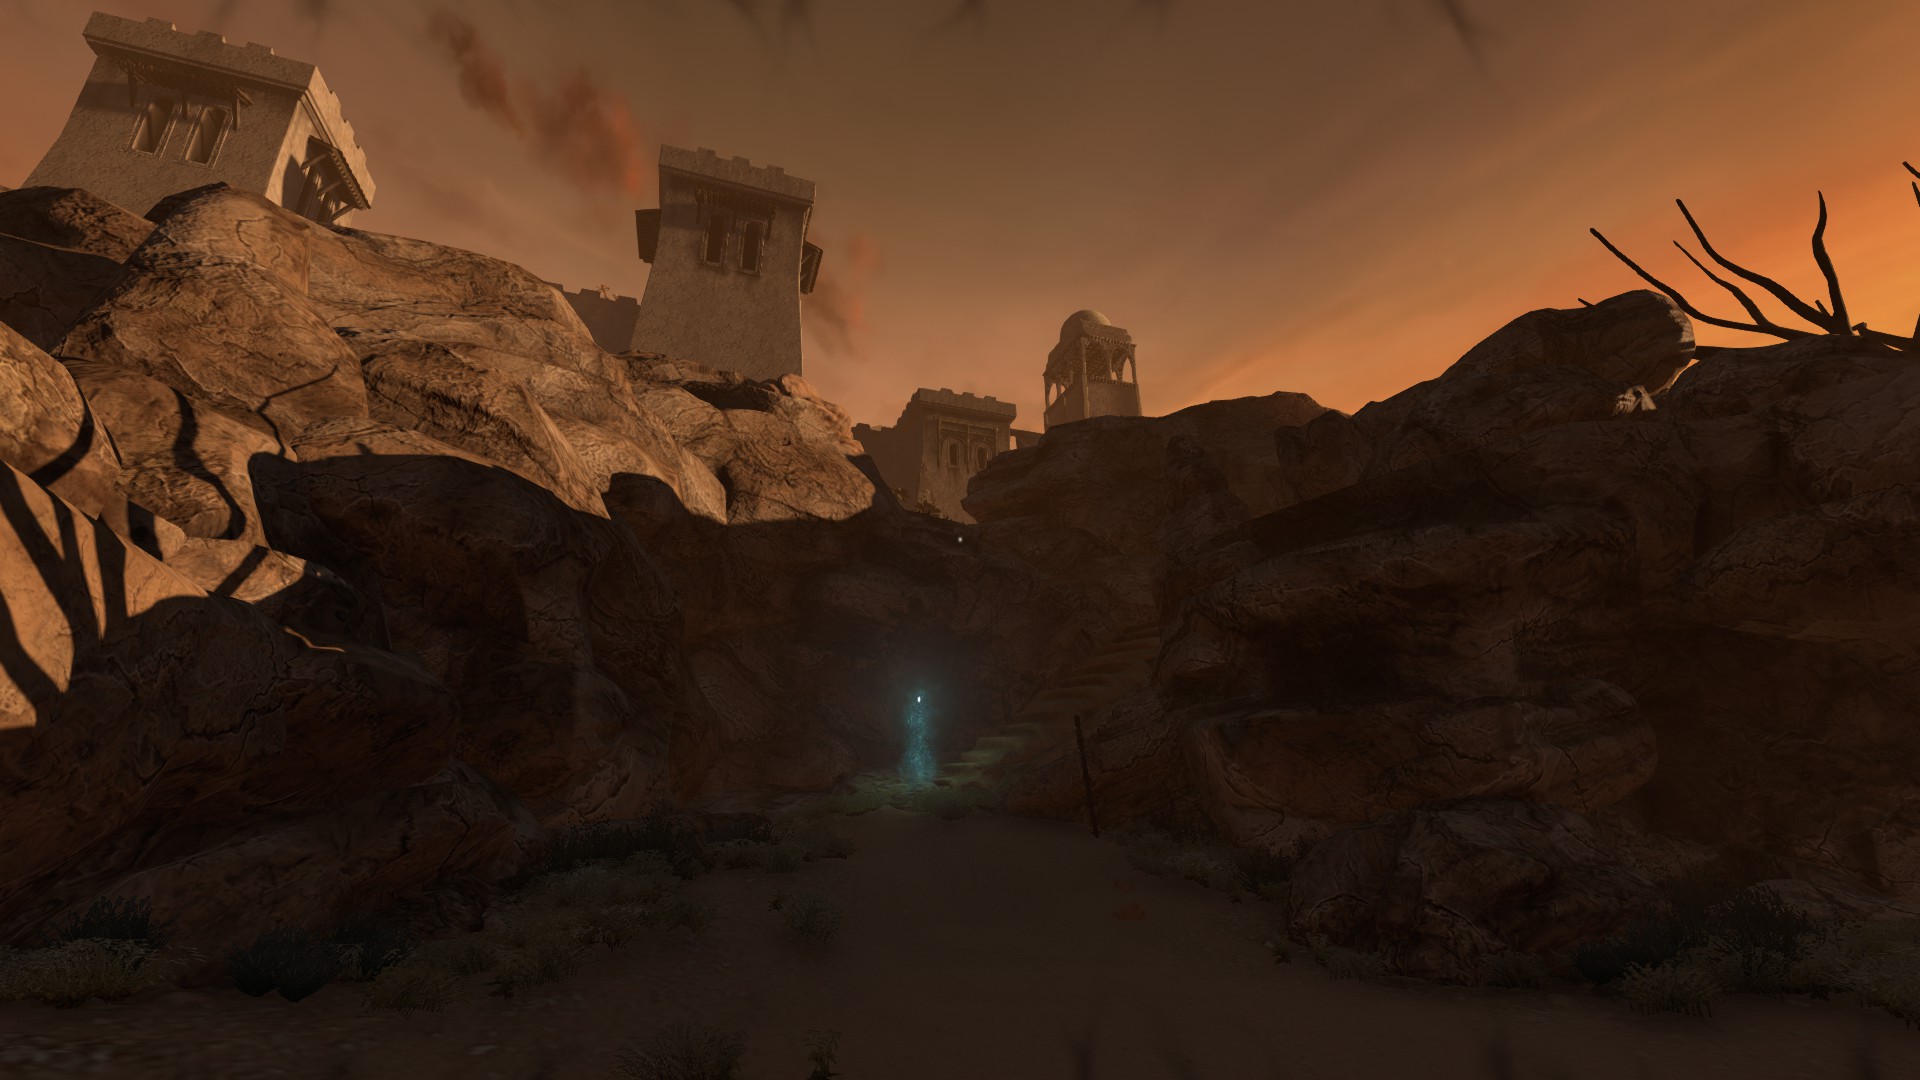
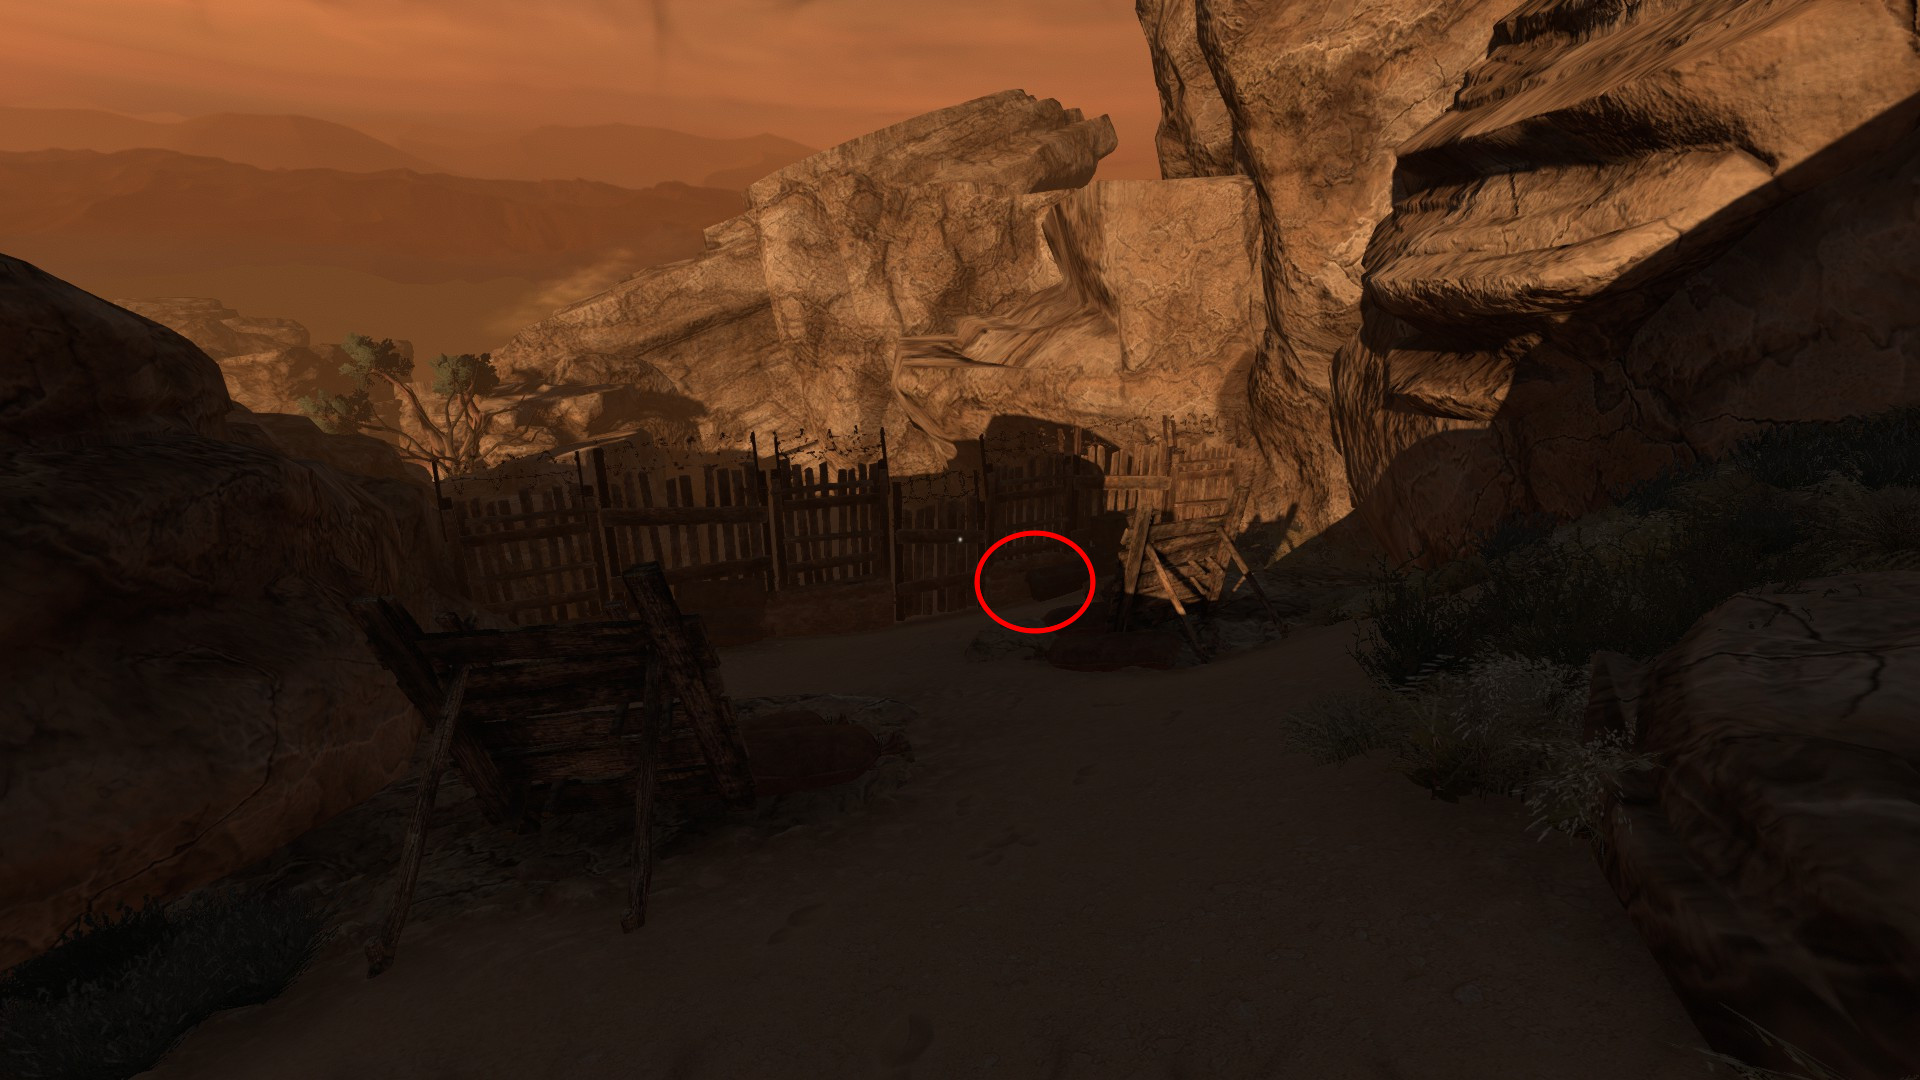
Jonathan Webber Location – Staircase Encounter
At a certain point, you will witness a fleeting blue ghost-like figure flashing before you at the bottom of a flight of stairs. Ascend these stairs and upon reaching the top, immediately turn left and follow the path that leads you down. As you progress, you will notice a fence that blocks further progress. To the right of the door, within a container on the ground, you will discover the Jonathan Webber collectable. Take a moment to explore the area carefully to locate this item.
The Fortress
07/14
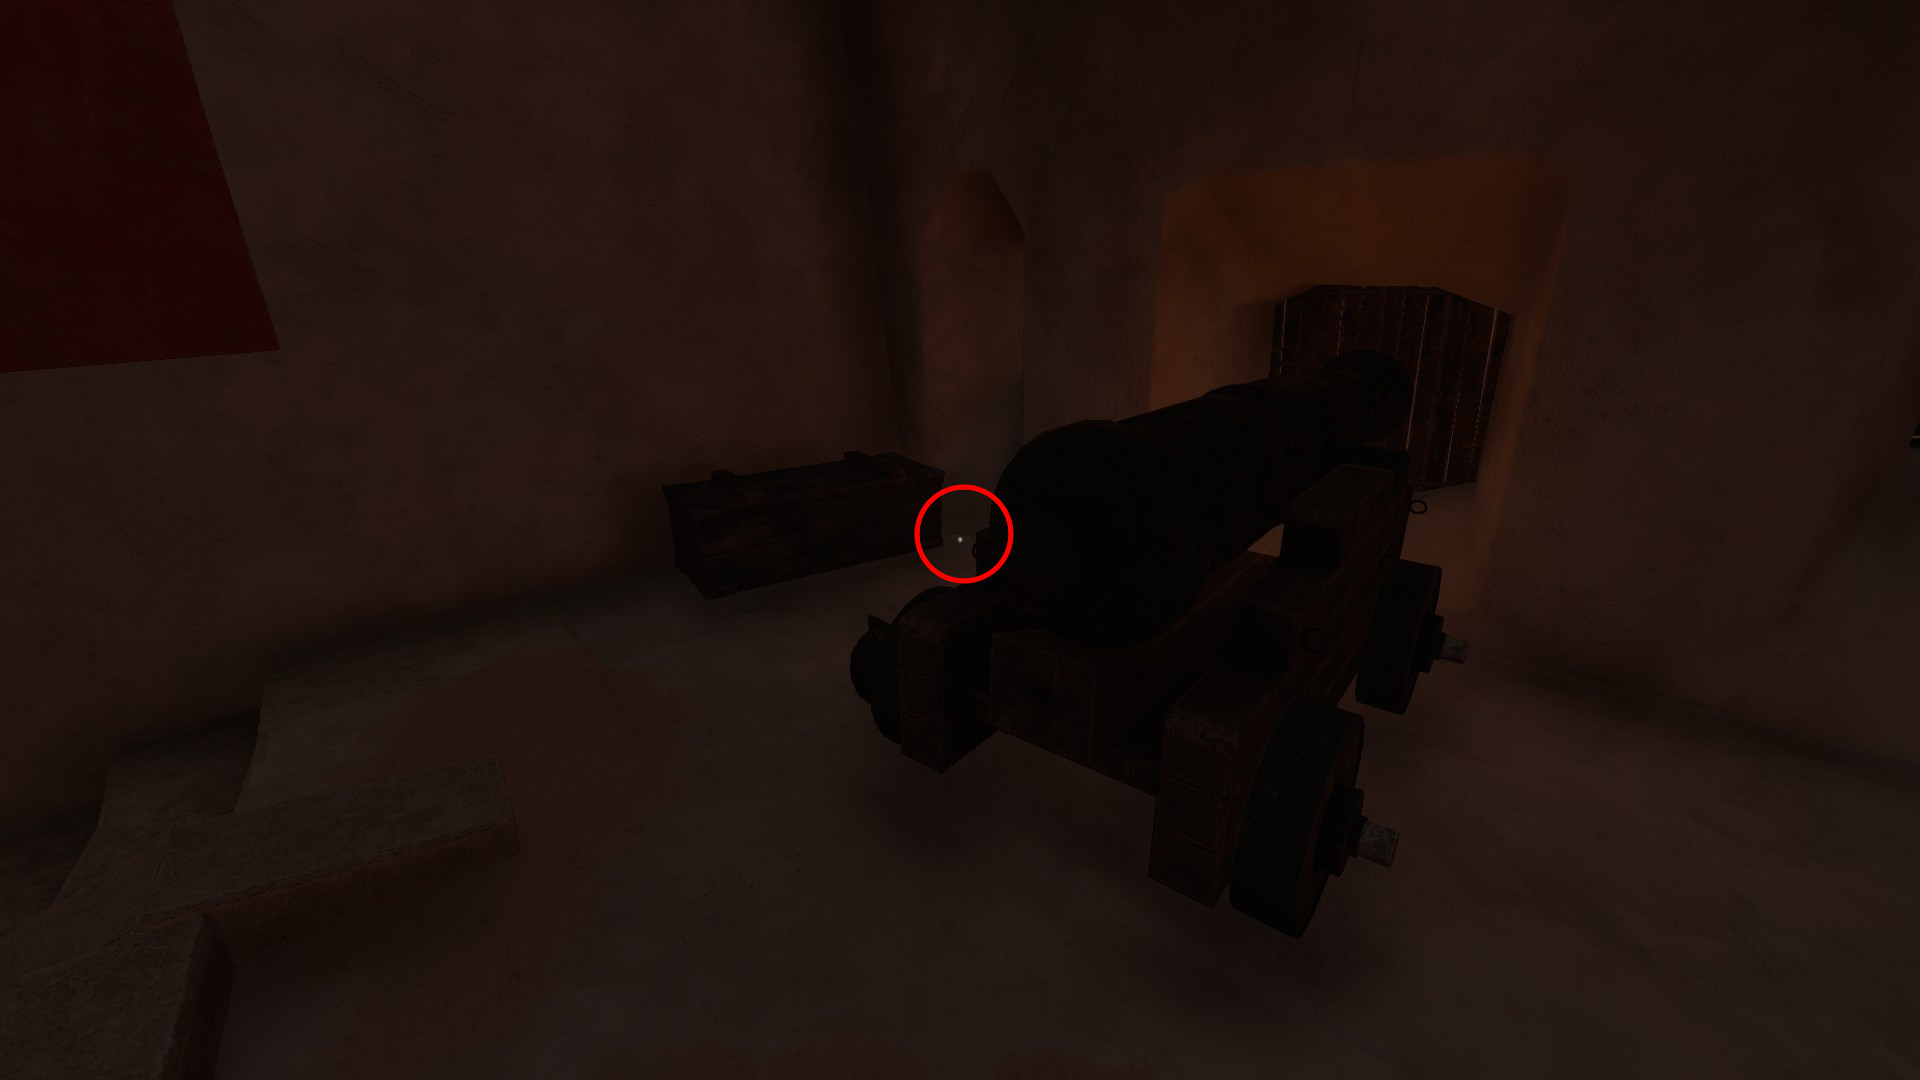
Malick Tamboura Location – Fortress Entry
Upon entering the fortress, you will spot a flight of stairs on your right. Ascend these stairs, and once you reach the top, you’ll find a cannon. Just on the other side of the cannon, you will discover the Malick Tamboura collectable. Take a moment to retrieve it from its location.
08/14
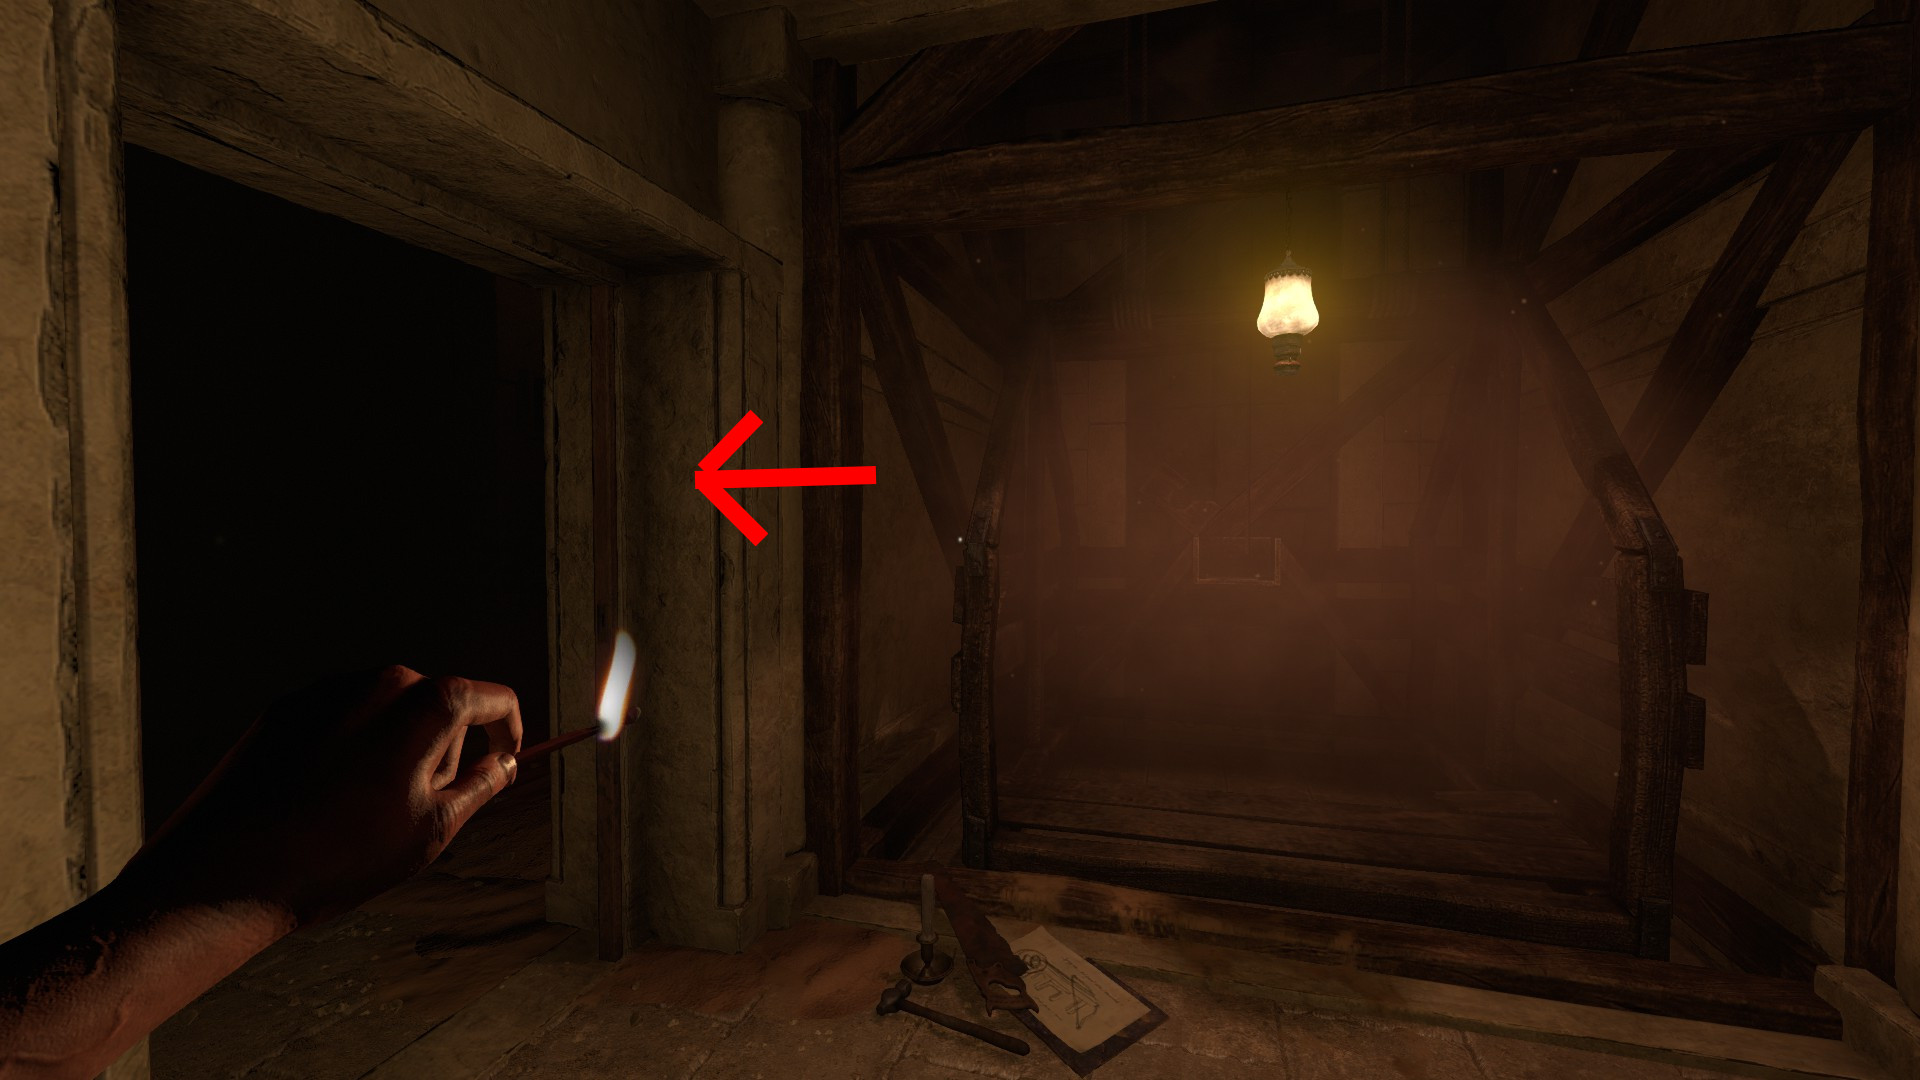
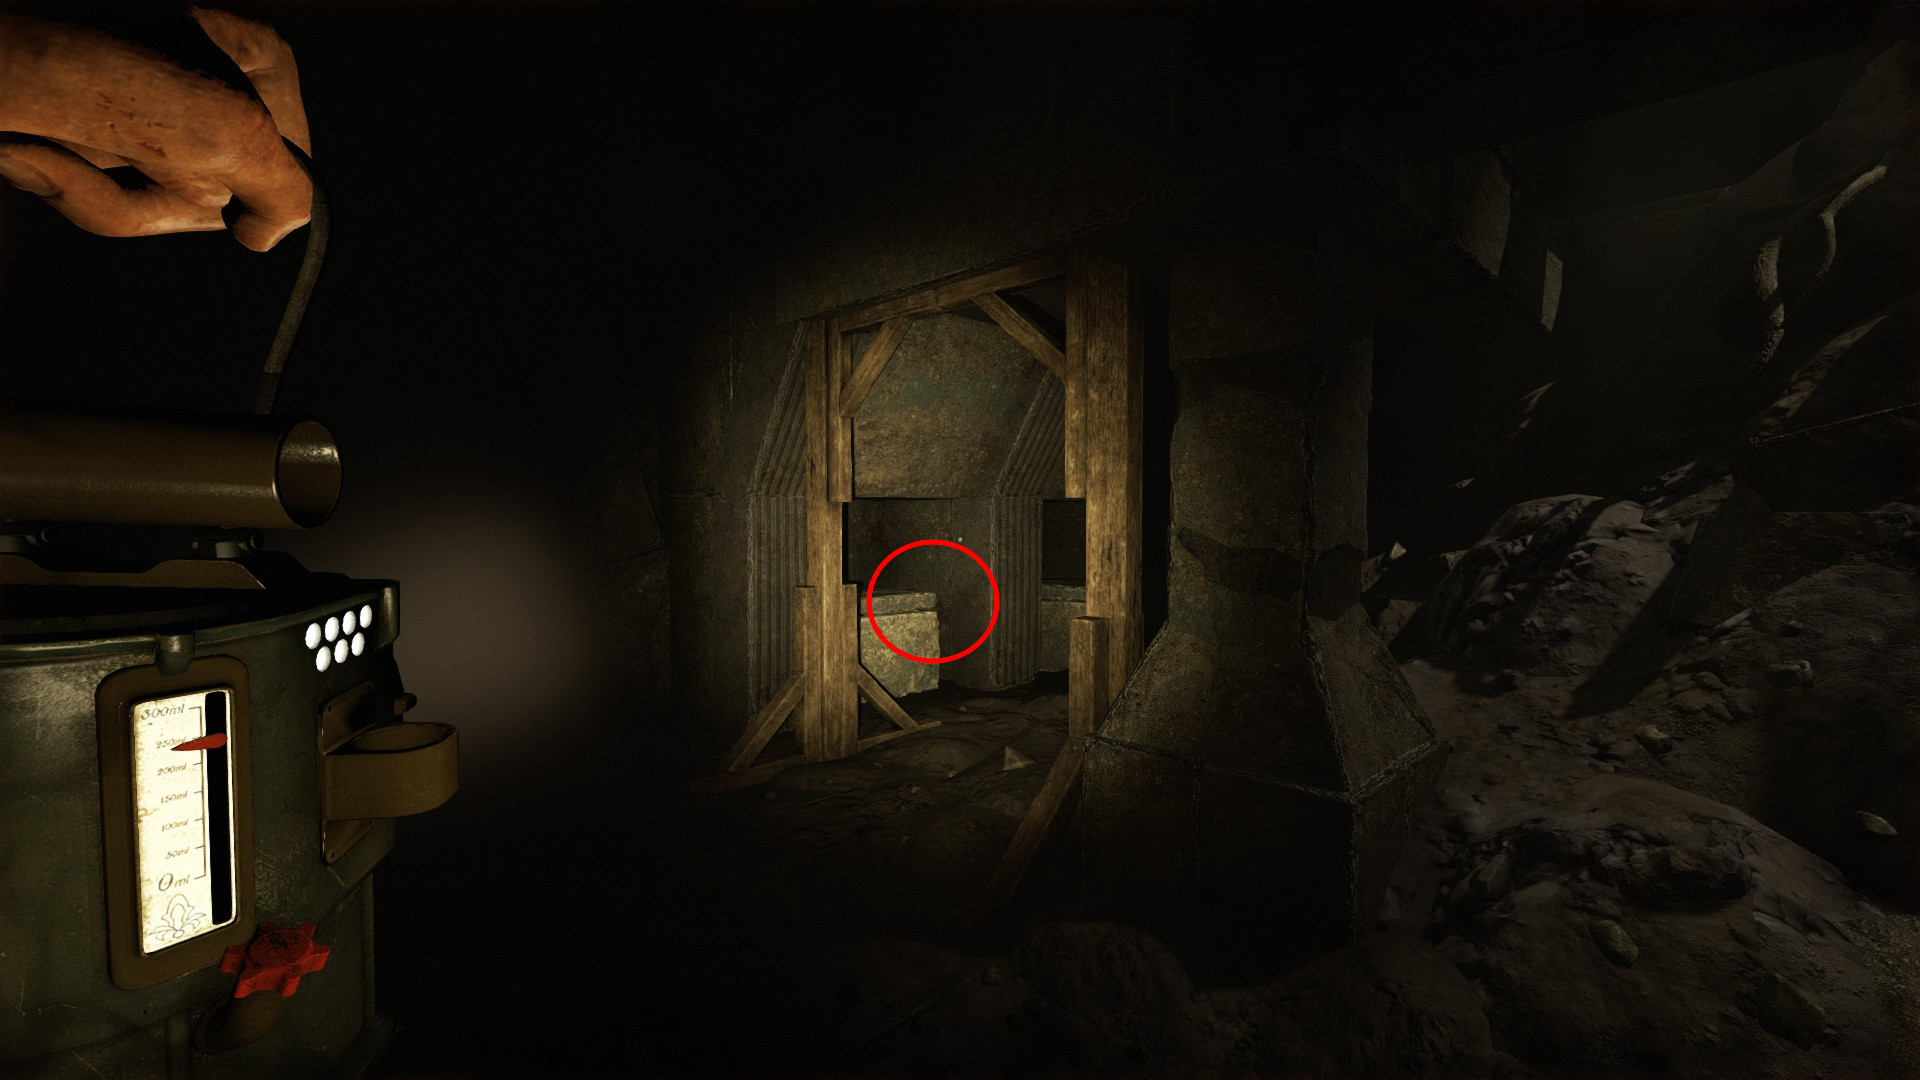
Dr. Anton Metzier Location – Corridor with Broken Elevator
Referring to the provided image, you will find a blue door next to a broken tank directly behind you. Enter through this door and proceed straight to the far-right corner of the room. There, you’ll find another door. Enter through it, turn left, and continue straight down the corridor until you reach a broken elevator. To your left, there will be a door. Take this path, passing barrels and traversing over crumbled pillars. Eventually, at the end of the path, you will discover the Dr. Anton Metzier collectable sitting on a mound of sand.
09/14
Yasmin Chabani Location – Corridor on the Next Floor
Once you have successfully fixed the elevator and taken it to the next floor, make an immediate left turn and proceed down the corridor. Follow the corridor all the way to the end, and you will come across the Yasmin Chabani collectable on the floor. It may be partially obscured by some rubbish, so be sure to look carefully to locate it.
The Oasis
11/14
Alexander Melville Sterling Location – Oasis Viewpoint
Upon reaching the opening that offers a panoramic view of an oasis, with palm trees surrounding it, make sure to hug the boundary to your right. Take a short walk along the boundary, and you will soon come across the Alexander Melville Sterling collectable on the ground. Look for a basket or container underneath which the collectable will be found.
12/14
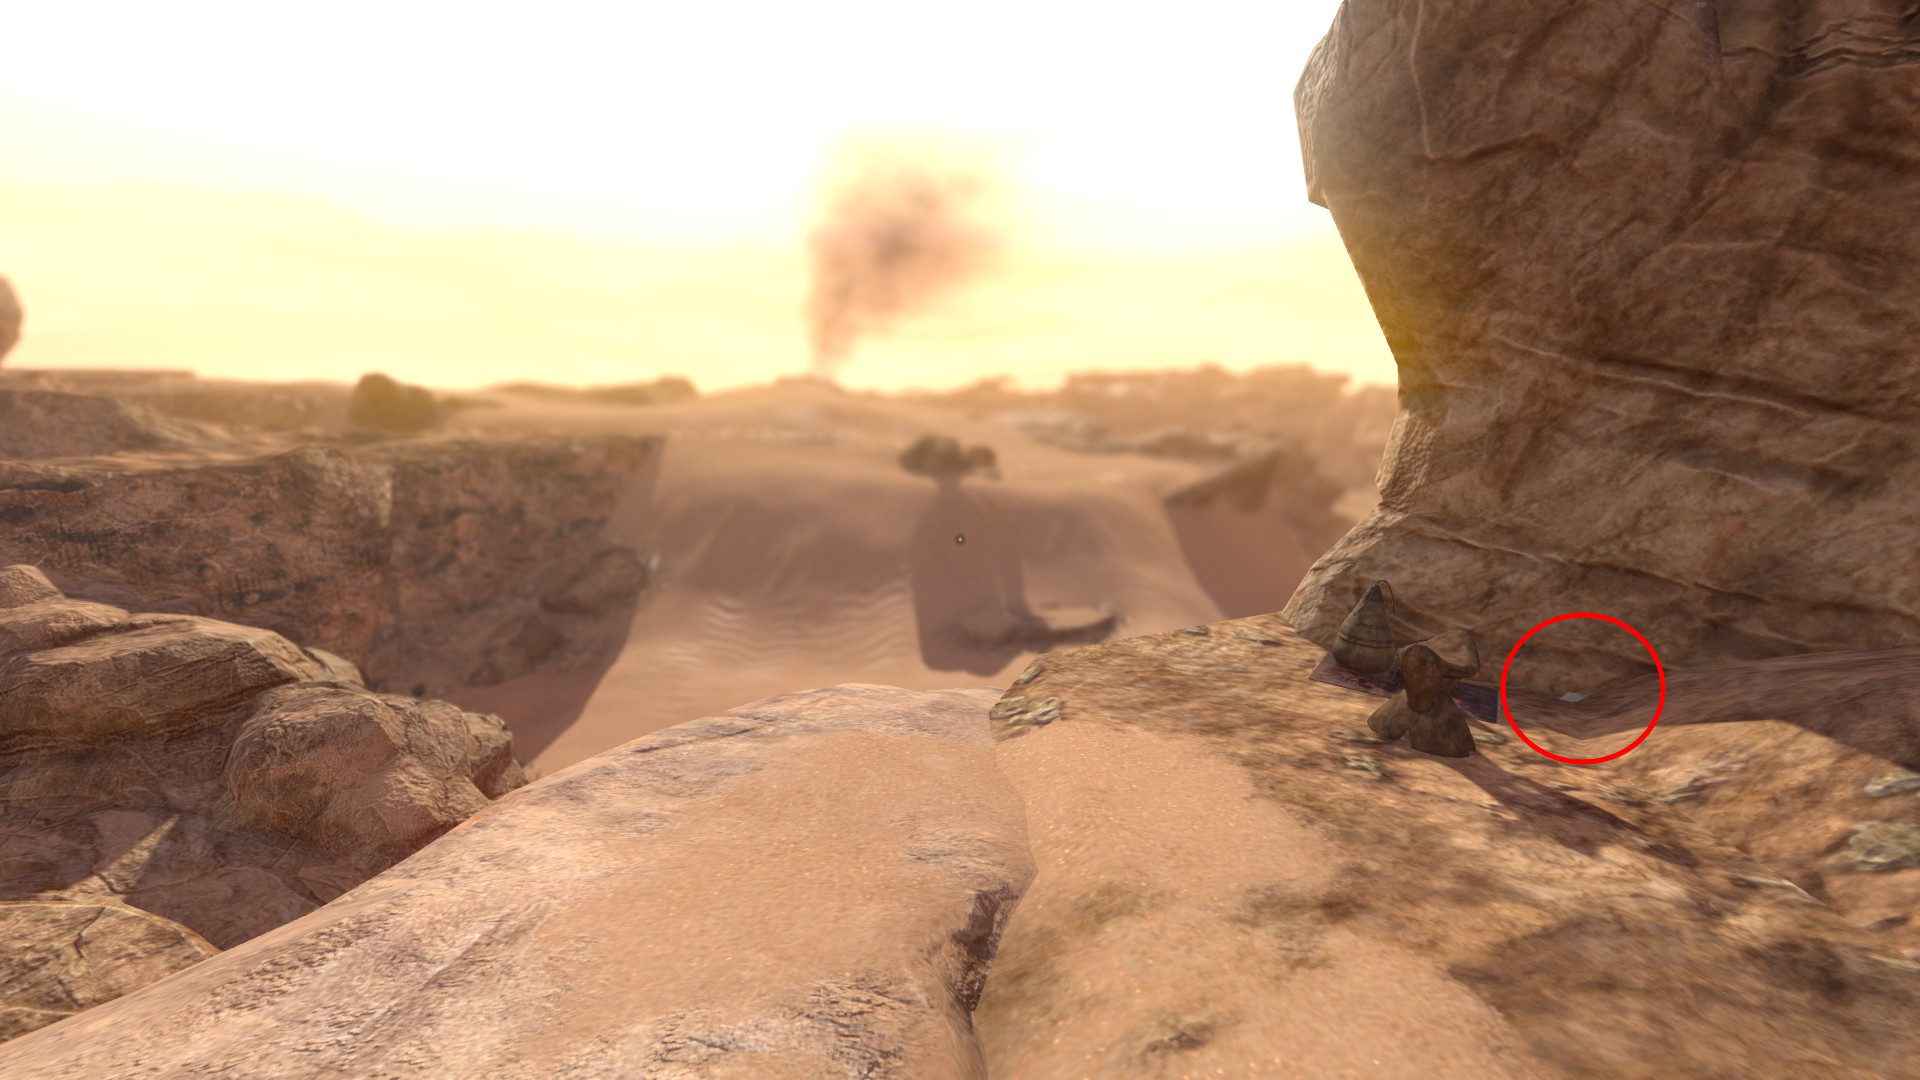
Richard Fairchild Location – Rock Formation Path
Once you have finished speaking to the doctor on the radio and climbed the ladder to a vantage point where you can spot black smoke on the horizon, you will notice a substantial rock formation ahead of you. This formation has paths branching off to the left and right. Head towards the path on the right side, and at the beginning of this path, you will see another path on your left that leads up to the top of the rock formation.
Take the path to the left and ascend to the top of the rock formation. On the other side of the formation, you will find the Richard Fairchild collectable next to a rug on the ground. Take a moment to locate and collect it in this area.
The Chamber of Pillars
13/14
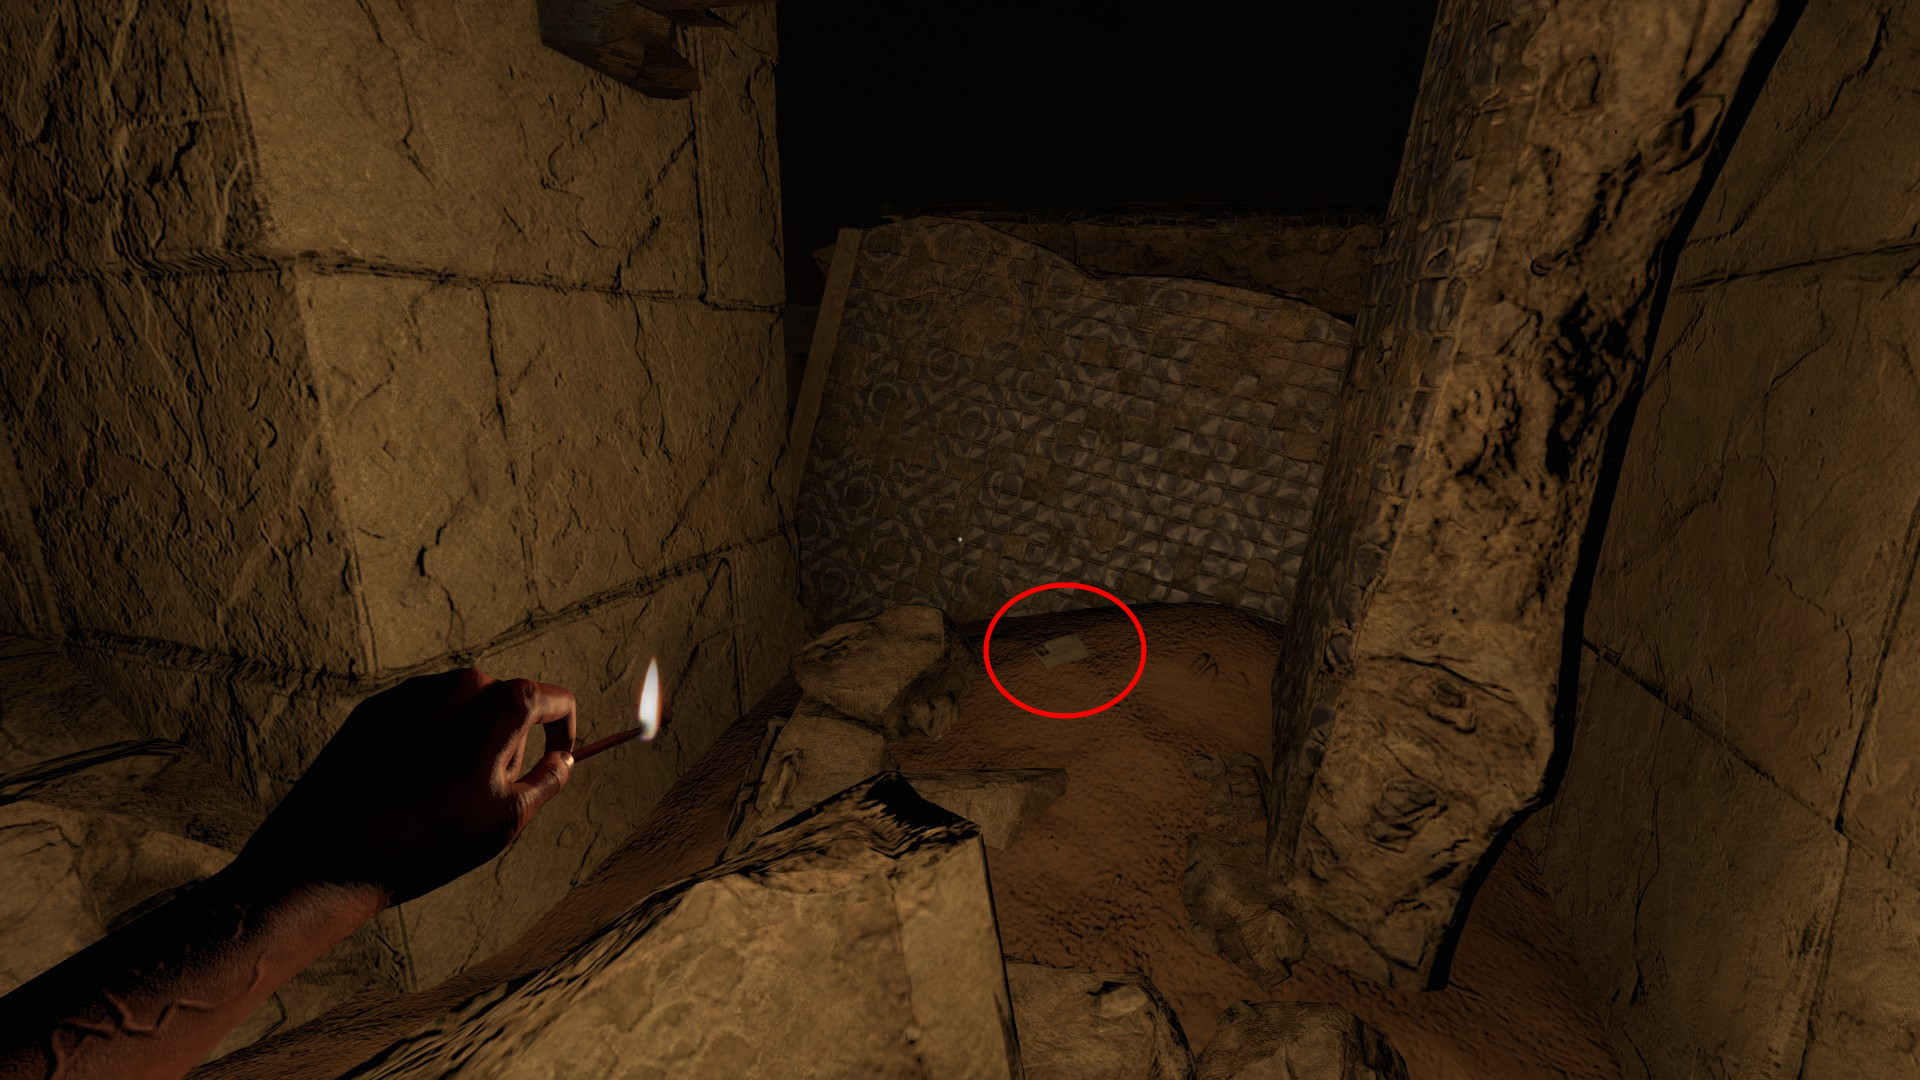
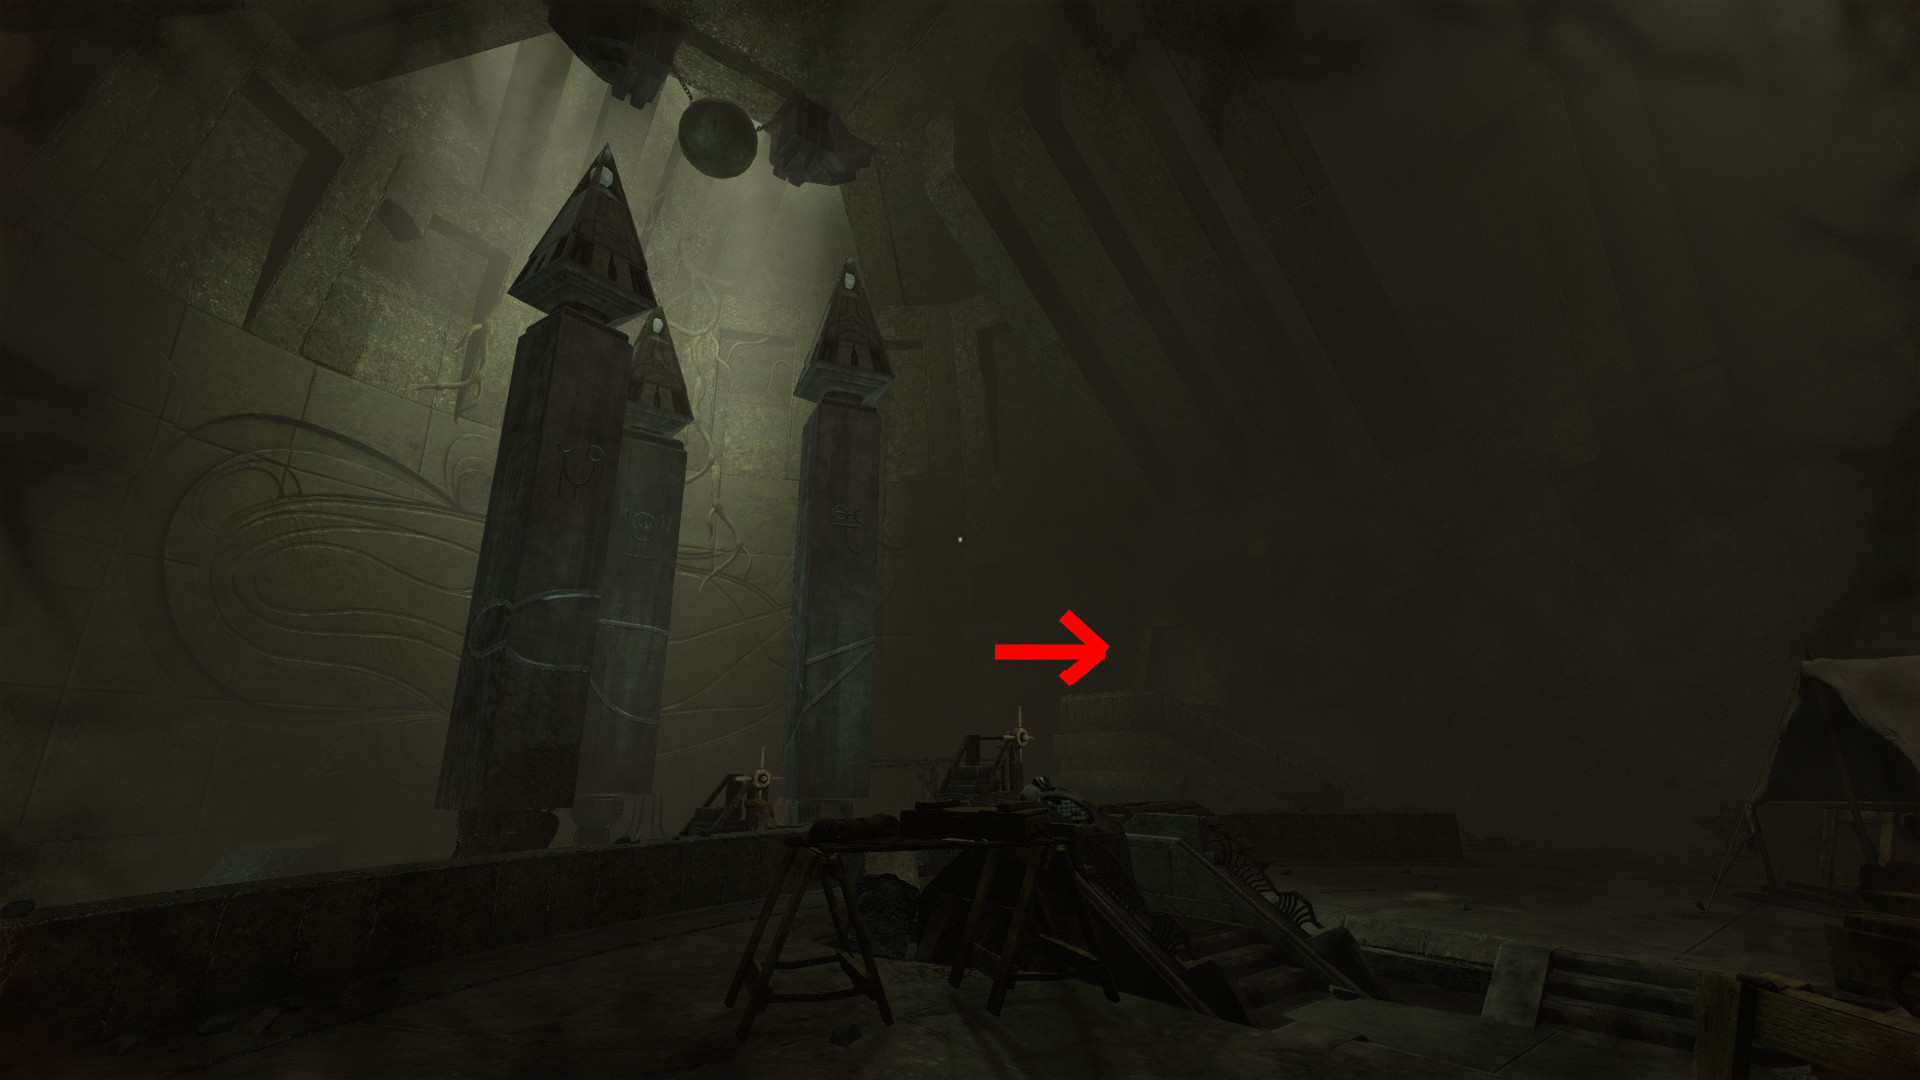
Leon de Vries Location – Tomb-Like Structure
Upon reaching the area with three massive pillars, make your way towards the flight of stairs nearby where a door is partially hidden by collapsed pillars. Once you are underneath the collapsed structure, turn right and proceed down the corridor until you reach the end. At the end of the corridor, turn left through the doorway.
In front of you, there will be a wooden frame with a tomb-like structure. To access the next collectable, you will need to remove the lid of this structure. Take the necessary steps to open the lid and retrieve the Leon de Vries collectable.
The Tower
14/14
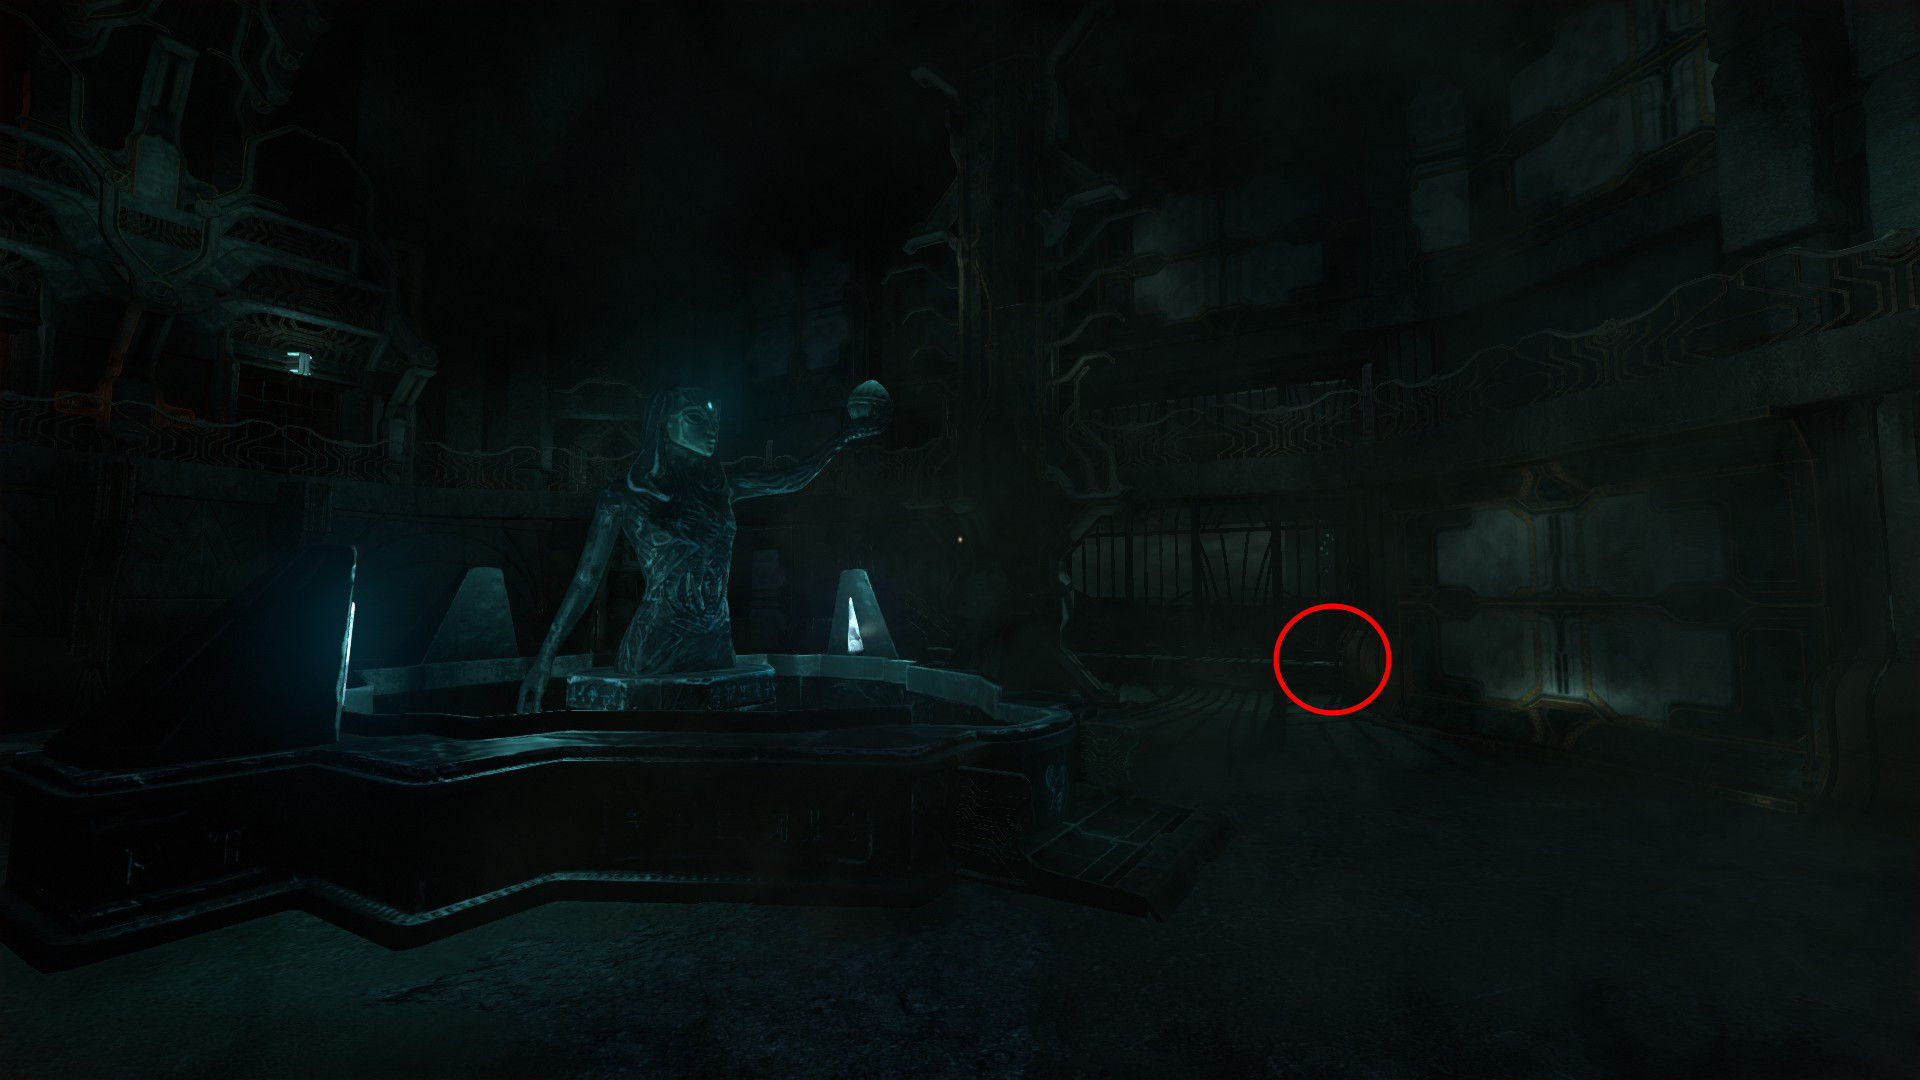
James Henry Mitchell Location – Area with Fountain
Towards the end of the game, after a considerable amount of progress, you will find yourself in an elevator that malfunctions during its ascent. Exiting through the roof of the elevator, you will need to navigate through a vent, which will eventually trigger a cut-scene. After the cut-scene, you will arrive in an area with a fountain at its center.
Directly to the right of the fountain, you will notice a bench positioned next to a window. On this bench, you will discover the final collectable of the game, the James Henry Mitchell collectable. Take a moment to locate and collect it before continuing with your journey.
That's everything we are sharing today for this Amnesia: Rebirth guide. This guide was originally created and written by IDDQD. In case we fail to update this guide, you can find the latest update by following this link.