

Let you enter anywhere even you don’t have access.
Chapter 1: Airlock Lockpicking
You’ll need: Screwdriver, Wirecutter, Crowbar
- Use the screwdriver to open the airlock panel
- Use the wire cutter to cut off the POWER
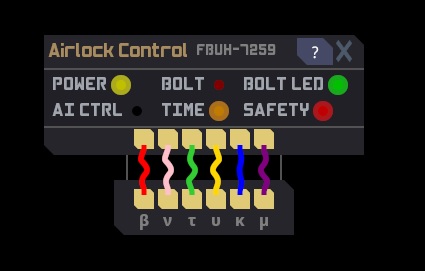
There’s ONE wire that will bolt the airlock, which makes it unpickable, you need a multitool to reset if it’s bolted.
- Use the crowbar to crank the airlock open.
Chapter 2: Airlock Access
You’ll need: Welder, Screwdriver, Crowbar
If you are afraid of the airlock being bolted while you lockpicking it, this method is for you.
- Use the welder to weld the airlock
- Use the screwdriver to open the airlock panel
- Use the crowbar to remove the door electronic part
- Reinstall the door electronic part
- Use the screwdriver to install the airlock
Now you have access to the airlock, anyone now can access this airlock.
Chapter 3: Wall Deconstruct
You’ll need, Welder, Wrench, Screwdriver(optional)
- Use the welder to weld the wall
- Use a wrench to unanchor the wall frame
- Use a screwdriver to deconstruct the wall frame
You can just simply push the wall frame away while it is unanchored to skip the screwdriver parts.
Chapter 4: Reinforced Wall Deconstruct
You’ll need: Screwdriver, Wirecutter, Welder, Crowbar, Wrench
The deconstruct procedure is by following:
- Wirecutter
- Screwdriver
- Welder
- Crowbar
- Wrench
- Welder
- Crowbar
- Screwdriver
- Wirecutter
After this, the reinforced wall will turn into a wall frame, just like a normal wall frame, you can unanchor it with a wrench and push it away or deconstruct it with a screwdriver.
Chapter 5: Window Deconstruct
You’ll need a Screwdriver and Wrench
- Use screwdriver to screw the window
- Use wrench to deconstruct the window
Chapter 6: Reinforced Window Deconstruct
You’ll need: Screwdriver, Wrench, Crowbar
The procedure to deconstruct is by following:
- Screwdriver
- Crowbar
- Screwdriver
- Wrench
If you can’t memorize that, you can just throw a (Ctrl+Q) spear to break the window.
That's everything we are sharing today for this Space Station 14 guide. This guide was originally created and written by Tannco. In case we fail to update this guide, you can find the latest update by following this link.