
A rather In-depth guide on how to render exported vehicles into blender, from exporting to rendering, and some extra info.
Exporting your vehicle from Stormworks into Blender
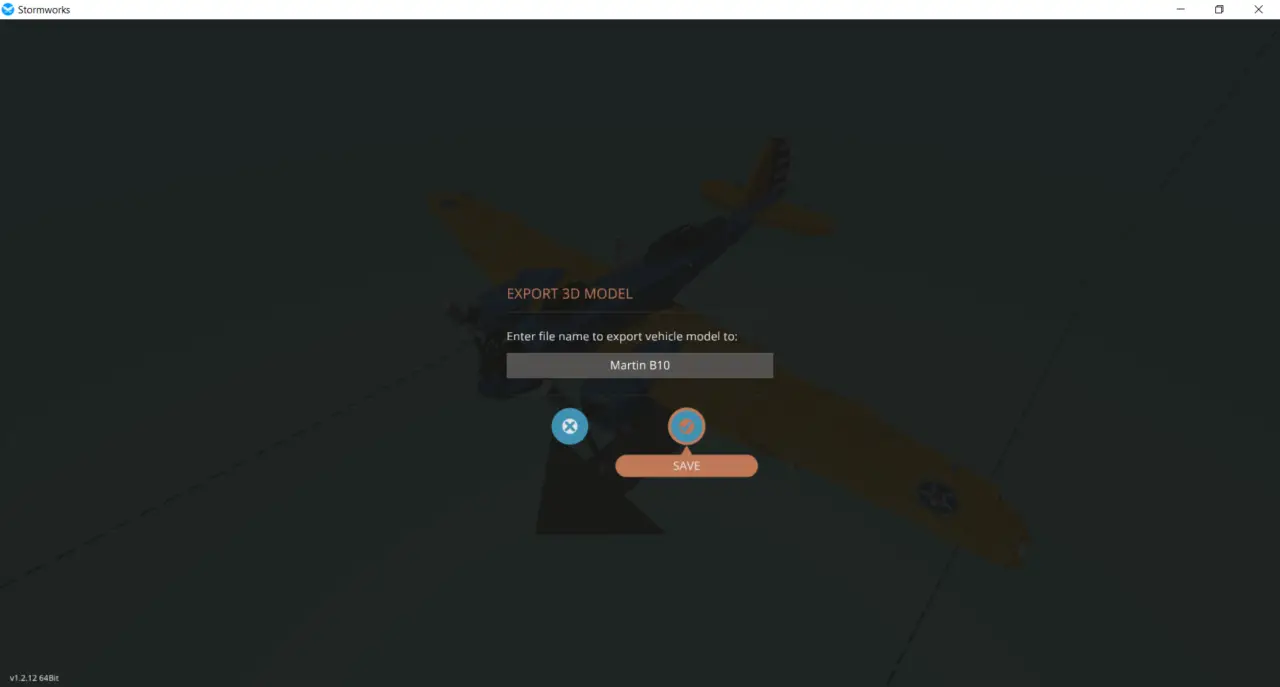
Первый, you need to get your vehicle into a file that blender can take, and blender Installed. (If you don’t know the basics of blender I highly recommend waiting and watching a video on the basics or this guide is going to make no sense.) Stormworks has an an-built in exporter, so all we need to do is export the vehicle by pressing F11 while in the vehicle editor with the vehicle selected. В этом руководстве, we are going to be using Martin B-10B as our example. Это можно найти здесь. After opening the game and loading in, head to the workbench and open the vehicle you want to use, and press F11, after pressing F11 you should see this popup.
Сейчас, after you’ve exported it, you should have a .ply file with the name that you selected in your Stormworks exports folder, the folder will be located at
С:\Users\Your Username\AppData\Roaming\Stormworks\export
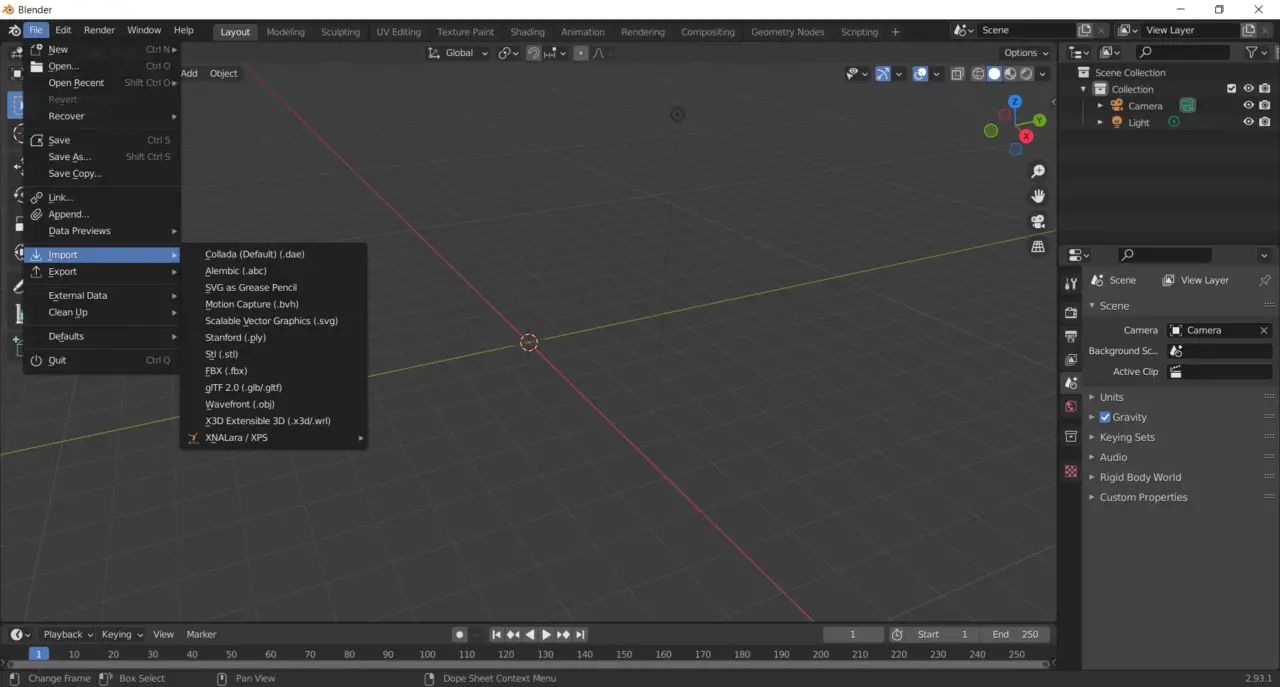
Now launch blender, delete the default cube, and go to File > Импорт > Standford (.ply) as shown in this image. В моем случае, the file will be named Martin B10. Your’s will be different depending on what you named it.
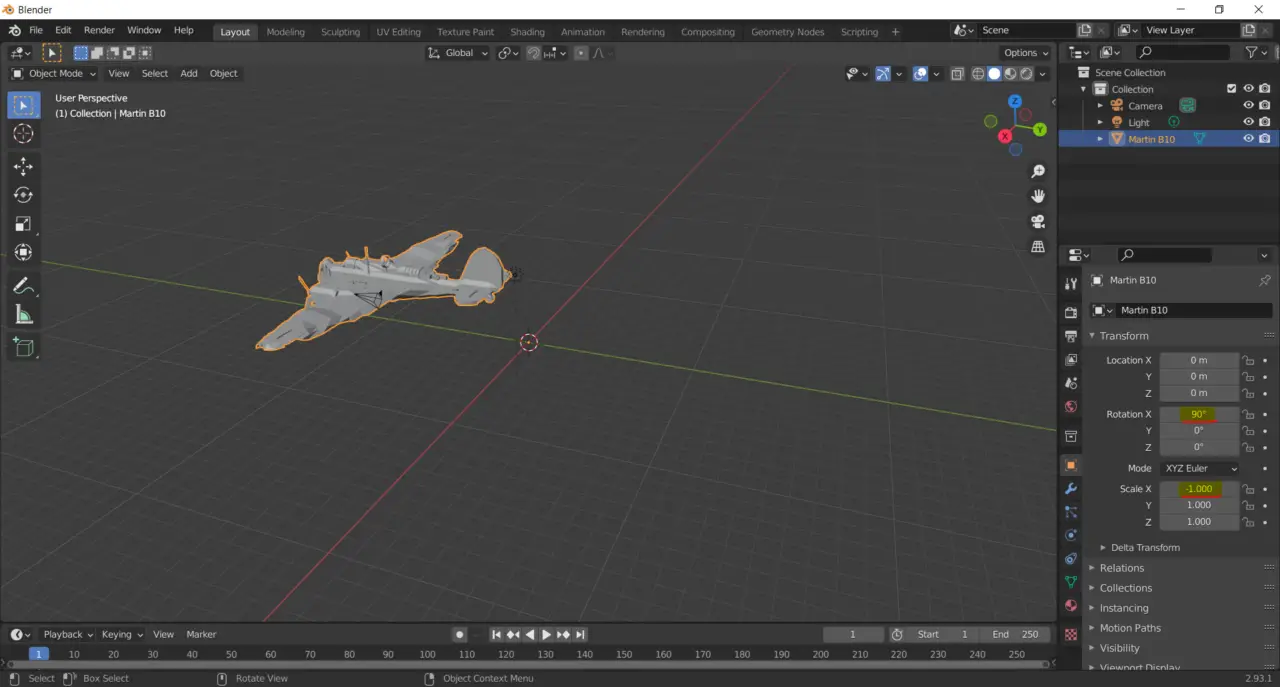
A window should pop up where you can import your file. After Importing it to blender, you show to see it facing upwards, and flipped on the X-axis. To fix this you need to set your X Rotation to 90 Degrees and set your X-Scale to -1, как показано.
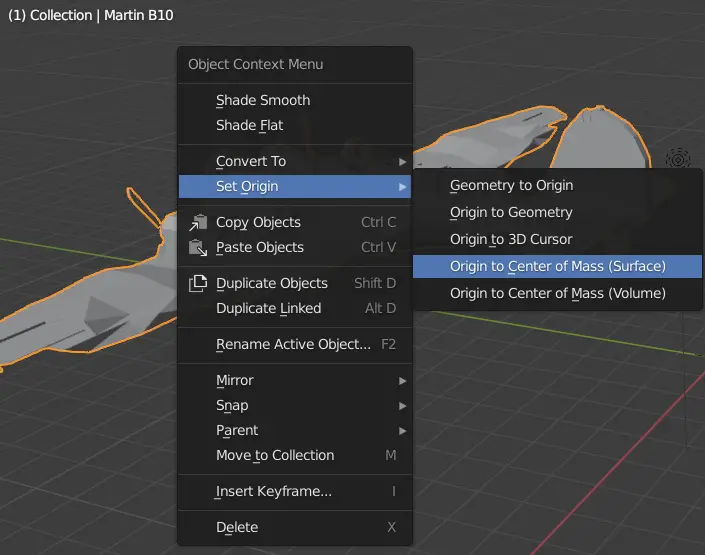
Сейчас, the origin of the import is off, so what we need to do is Right-Click > Set Origin > Origin to Center of Mass (Поверхность).
Сейчас, this step is optional but recommended if you are going to fix any modded parts on the vehicle.
In blender, go to Edit mode, and select all vertices and then go to Сетка > Merge > By Distance
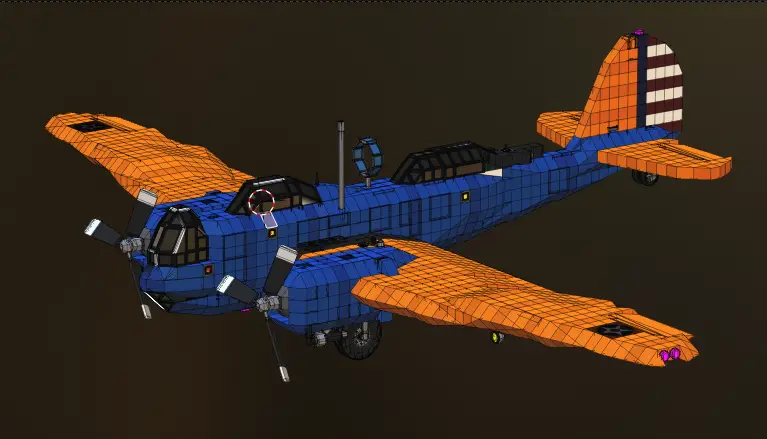
После этого, with them still selected, go into Face Select, затем Щелкните правой кнопкой мыши > Tris to Quads, Now your vehicle is into Blender, but is lacking materials.

Сейчас, concluding Section 1, we have imported the model, fixed it being flipped, and corrected the origin.
Material Setup
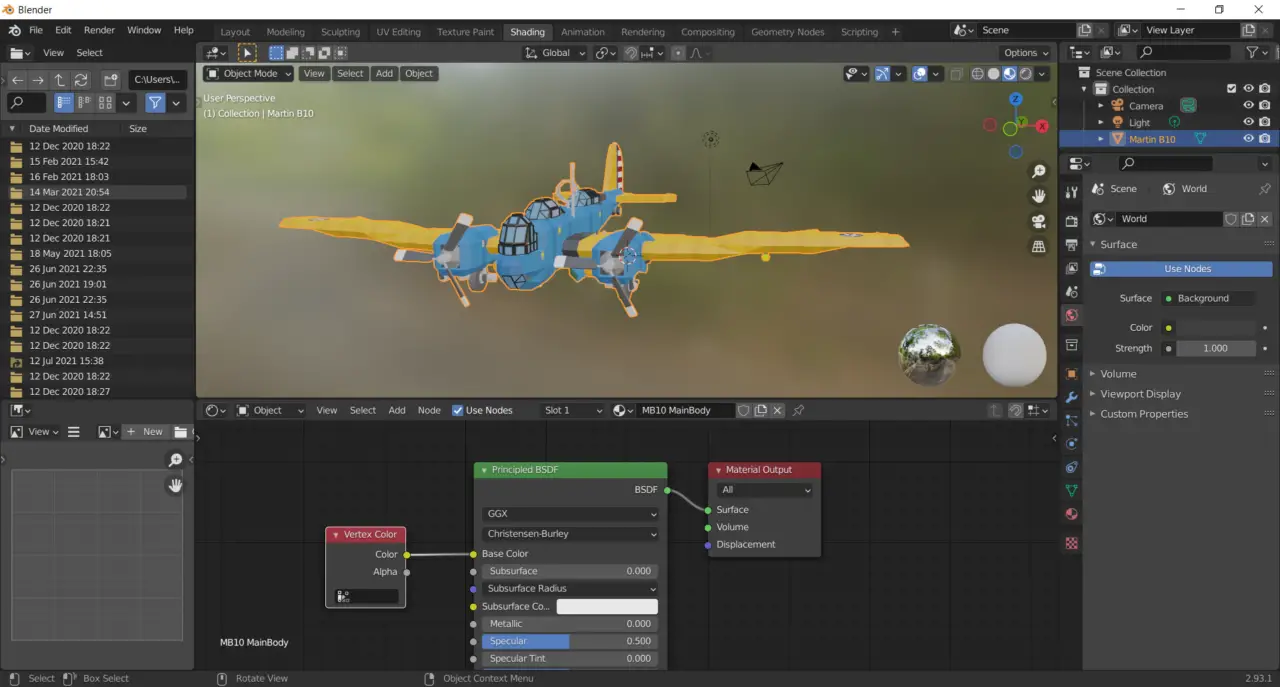
Сейчас, with our vehicle in blender, you need to go into the shader editor and create new material for the vehicle. В моем случае, I’ll be naming it MB10 MainBody. In the node editor, we need to add a Vertex Color node to our Principled BDSF Shader.
Сейчас, to have multiple materials on the model, we need to assign our glass material to our windows and dial faces. I’ll be using cycles, in other rendering engines, making glowing materials that illuminate the area around them are different, так что имейте это в виду. Первый, let’s make our glass material, to keep things simple, it will be a Glass BDFS Shader with a low roughness value.
Go into the shader editor, add a slot for our glass, and create new material.

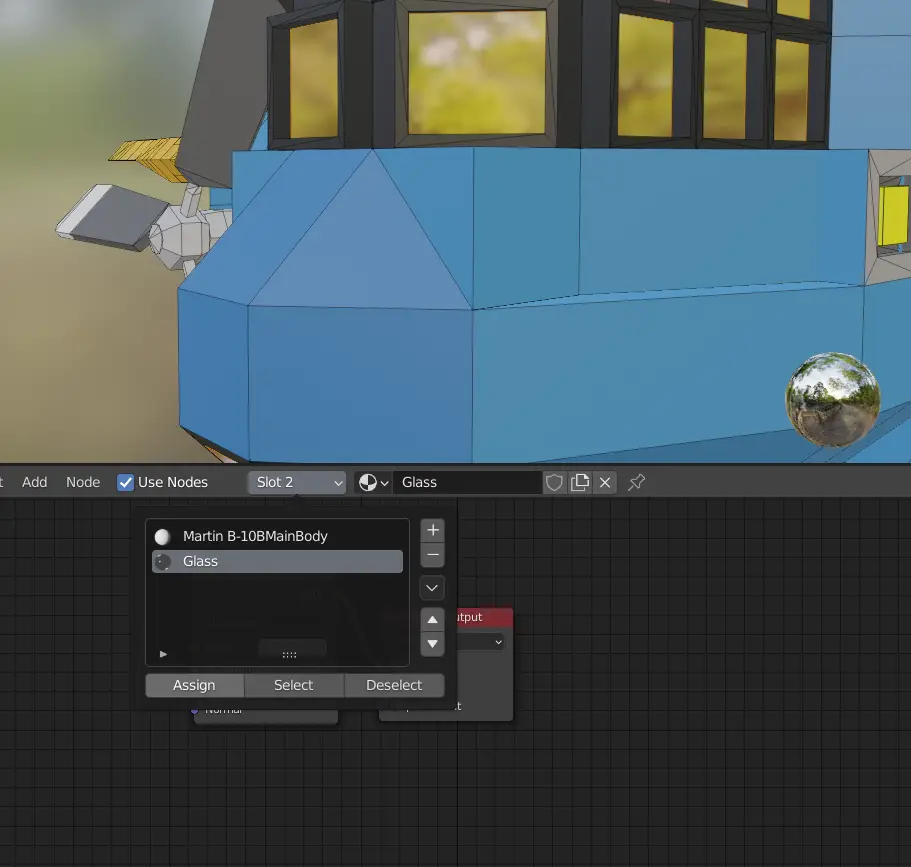
Create the glass shader, then select the window faces, после этого, click on the slot dropdown, and click assign, после этого, your windows should show the glass preview.
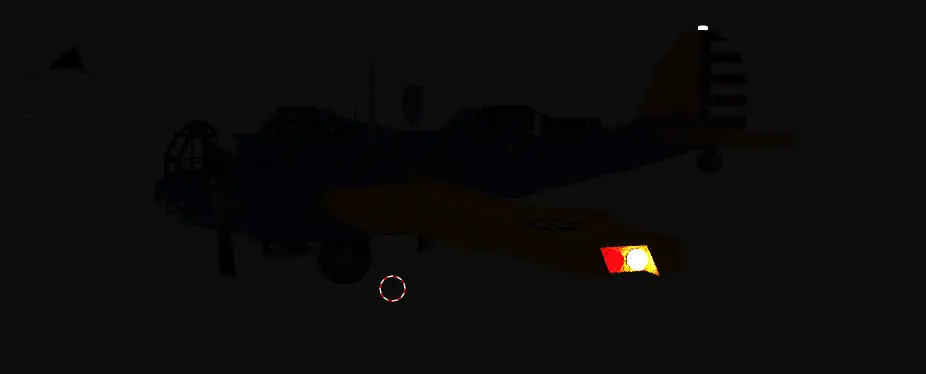
После этого, we can rinse and repeat the process of adding a slot and assigning it to things that are a different material. В нашем случае, we need to do the Nav-lights on the plane. Cycles have a light output node that can make a material that can light up its surroundings. Первый, select the faces of the lights that you want the color you are about to choose, в нашем случае. If there are these blue faces clipped inside of the light, just delete them.
В моем случае, here is the shader I used for the Red Nav light.
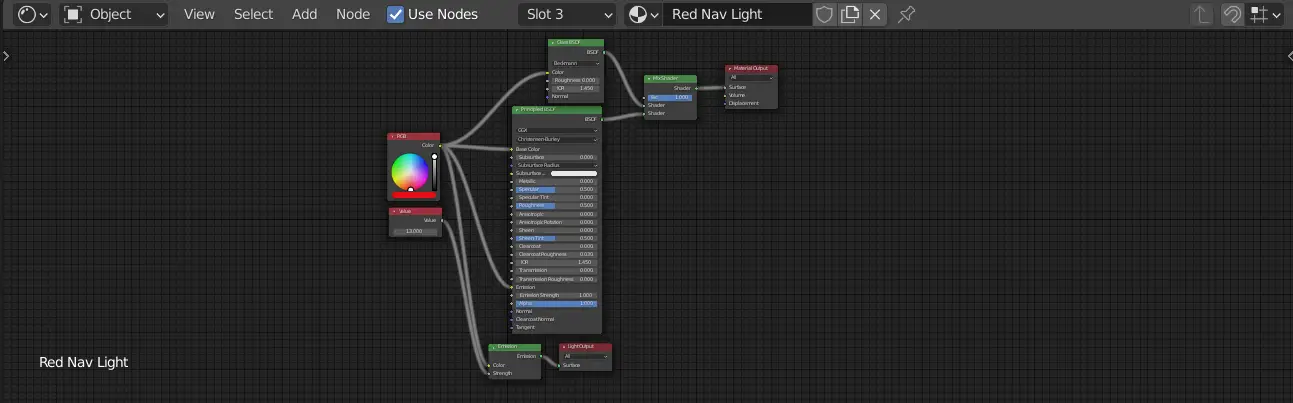
Еще одна заметка, I swapped to the RAW Color space after this point, so the right value is cranked up a lot, так что имейте это в виду. I reused the shader for the rest of the light, by just changing the color of the RGB Input.
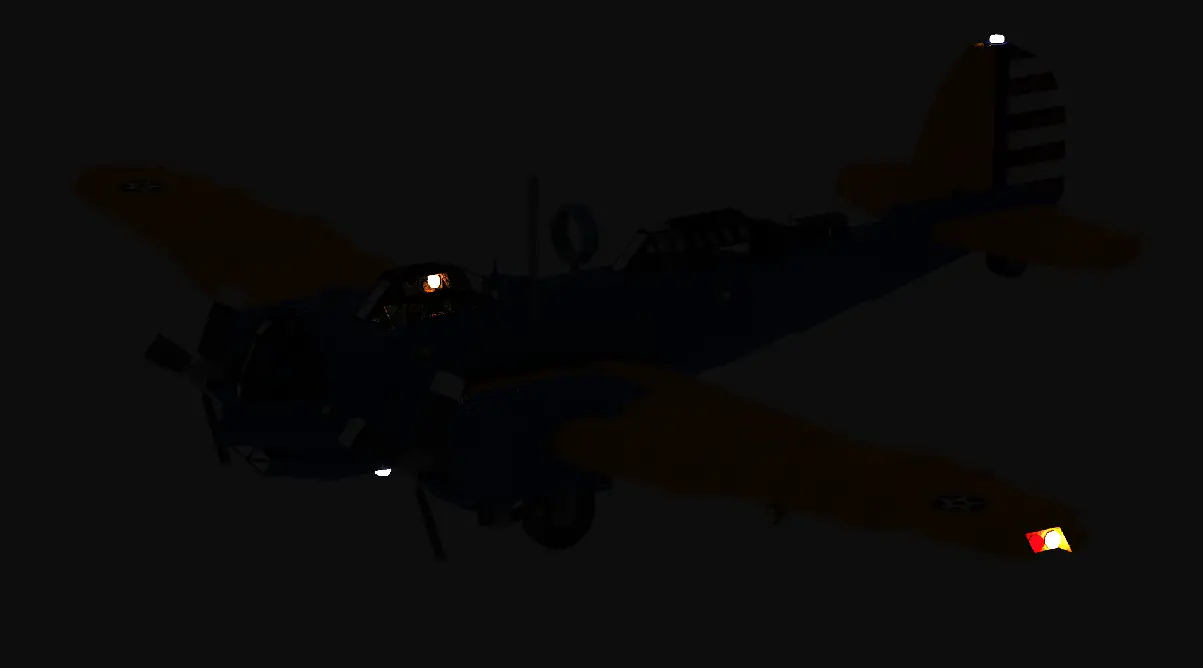
This is what the model should look like at this point.
Сейчас, the cockpit light was the same shader as the others, except the RGB Node was replaced with a Blackbody, with the Temp set to 2750, for a warm white, and the brightness cranked up.
Concluding this section, here is a preview render of what we have so far, в темноте.
Cleaning Up the Model and Preparing to Render
To start off this section, we are going to clean up the modded windows, первый, we need to mess around with the position of the faces, this can’t really be explained within this guide, as you editing the model as you would with anything in blender, so I’m not going to into depth a whole lot. But here’s what I changed with the windows.
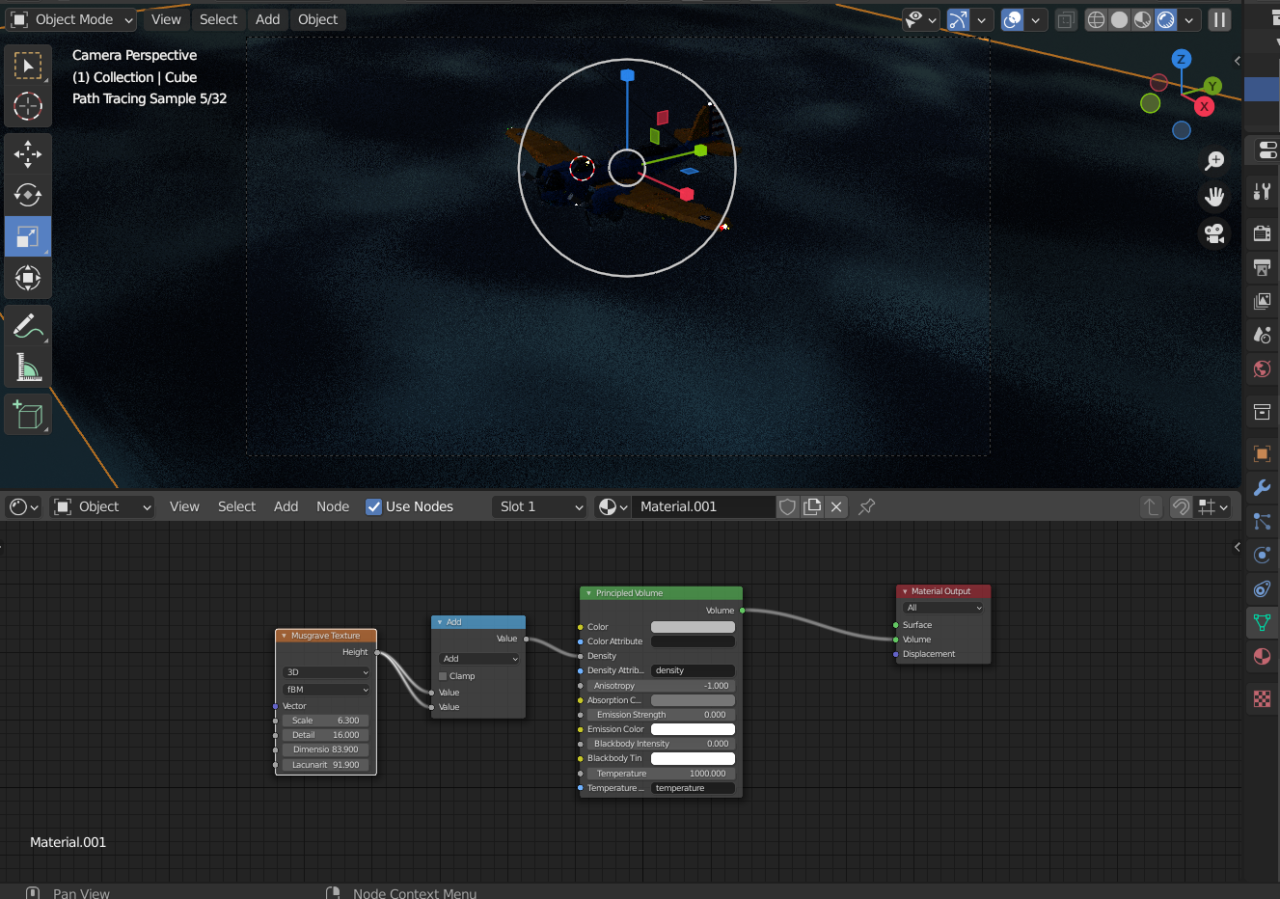
Сейчас, since we got the vehicle model cleaned up and imported, we need to setup the scene around the vehicle, in my case I want to portray the B-10B flying above the clouds in the moonlight.
First I’m going to add dim sunlight and then change the sky shader. For the clouds, I used a wide cube with a principled volume shader with a musgrave texture.
Сейчас, all we need to do is render, and move on to compositing.
Это все, чем мы делимся сегодня для этого. Штормворк: Стройте и спасайте гид. Это руководство было первоначально создано и написано Схема. На случай, если нам не удастся обновить это руководство, вы можете найти последнее обновление, следуя этому связь.