Солдаты, у вас есть новые классные вещи, которые можно использовать.. Но прежде чем ты начнешь возиться, важно знать, что делает каждая вещь. Вот некоторая информация об этом, вместе с некоторыми дополнительными советами!
Следите за обновлениями этого руководства по мере выпуска нового оборудования..
Классы
If you’re new here, you’ll probably want to know what each class does. В противном случае, не стесняйтесь переходить к следующему разделу.
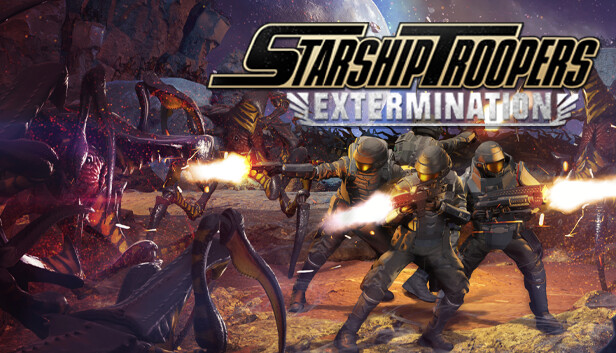
Охотник
The Hunter class focuses on mobility, обнаружение, and taking out important targets, especially with marksman rifles. They should always grab rocket launchers as they can make the best use of them. Use the jetpack to get high up and avoid bugs. Although they’re the fastest, they’re not the best at taking hits, so watch out for melee bugs. They’re not great at carrying ore canisters, so avoid picking those up if you can.
In AAS and Horde, Hunters are best for eliminating Grenadier and Gunner bugs before they become a problem. Bastions often appreciate Hunters for their support with scan beacons. In ARC, a Hunter squad usually goes from Extermination to Extermination. В настоящее время, they’re not very useful in Hives.
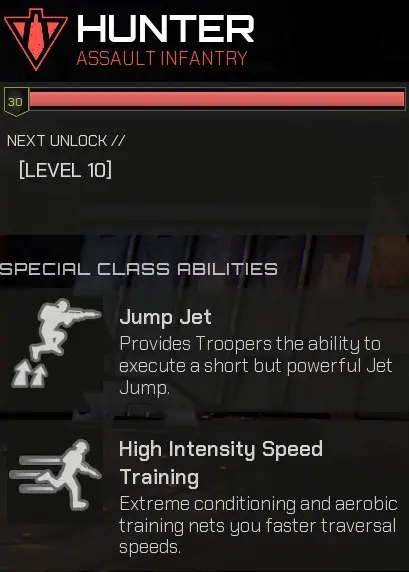
Бастион
Some might think the main way to play as a Bastion is to sit in a corner with a SAW and shoot bugs all day. While that’s one option, there are more ways to use this class. The Bastion can be surprisingly versatile, and their special ability can be used both offensively and defensively. Например, activating Siege Mode can knock back bugs and help revive downed teammates. Later perks and utilities allow them to act as engineers or create choke points. The Bastion is tough, so if you like getting into the action, this might be the class for you.
There are various ways to play as a Bastion, but in Horde and Hive, they’re often found holding choke points like a turret. The main downside is that it takes longer to unlock useful equipment and perks compared to other classes.
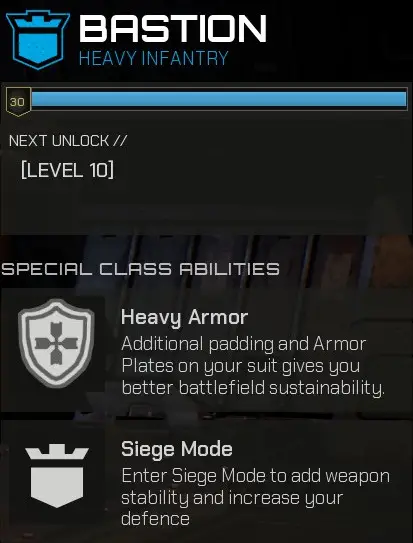
Оператор
The Operator class often has a thankless job, handling all the dirty work and juggling multiple tasks. The deployed UAV drone has a long cooldown but can revive and heal everyone nearby, включая себя. Operators run fastest with ore canisters and can carry two at a time. You’ll unlock useful tools early on, but it takes time to master them.
This class is essential in every mode, but in Horde, they’re often wanted for fabricators and healing. In Hives, they excel at maneuvering over bugs and planting nukes, making them ideal for speed running.
Оружие
Прежде чем мы погрузимся в, let’s understand what each weapon stat actually means and which ones are crucial.
Вот разбивка:
- Повреждать – This stat isn’t very useful to rely on due to the lack of weak spots in the game and the fact that it doesn’t accurately represent in-game performance.
- Скорострельность – По сути, it’s how fast you can shoot bullets, but it’s not a major stat to focus on.
- Диапазон – This is a stat worth considering, as there’s damage falloff, meaning it takes more bullets to kill when you’re far away.
- Точность – Similar to damage, it doesn’t accurately represent how it works in the game.
- шататься – One of the two most important stats to consider. Stagger can slow down bugs and even knock them backwards, giving you precious time in each engagement.
- Оглушить – Другая критическая статистика. Stun allows you to momentarily freeze bugs, giving you a chance to either escape or reload and finish the job.
Now that is covered onto the guns themselves:
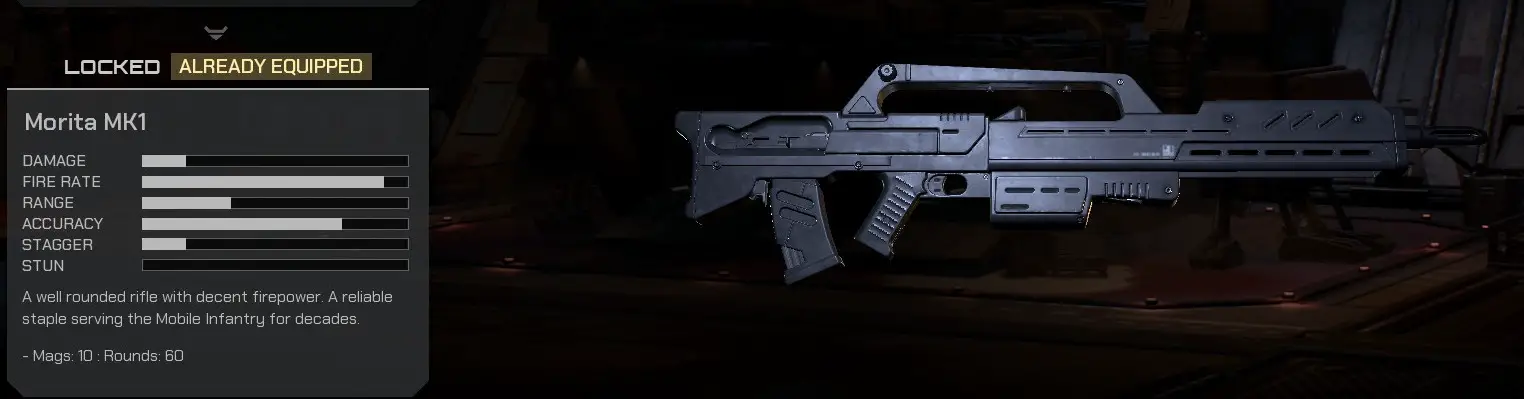
Morita Mk 1
Usable by: Everyone
The basic starting weapon. It can take out bugs, but it’s not anything extraordinary. Almost every other weapon in the game is an upgrade to it. Интересно, attaching a scope to this weapon enhances its stats, including increasing its magazine size. Some call it the Burrito. Let’s not talk about the shotgun, хотя.
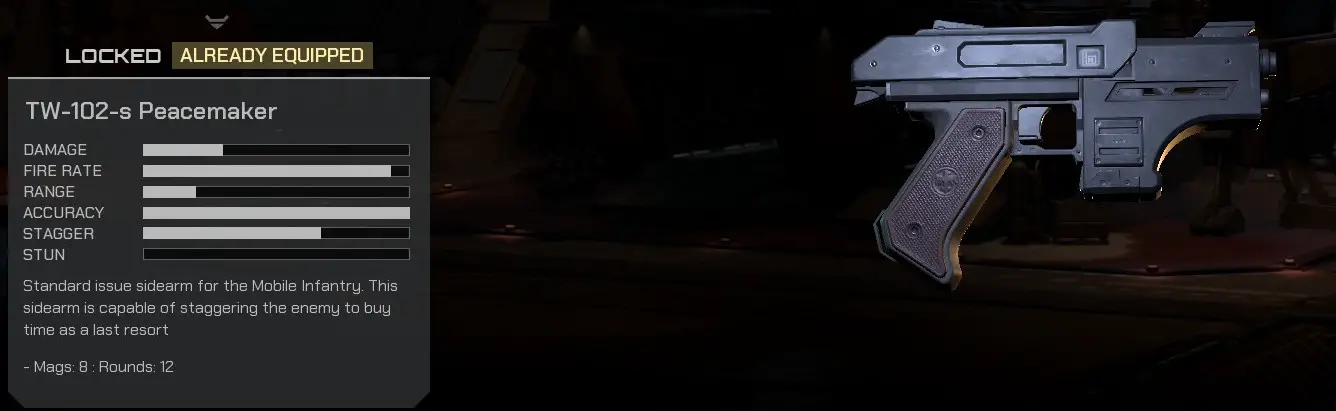
TW-102-s Peacemaker
Usable by: Everyone
The starting sidearm. Its main drawback is the limited magazine capacity, but it can be surprisingly effective, sometimes even better than the initial Morita. It’s better than nothing, but don’t expect miracles.
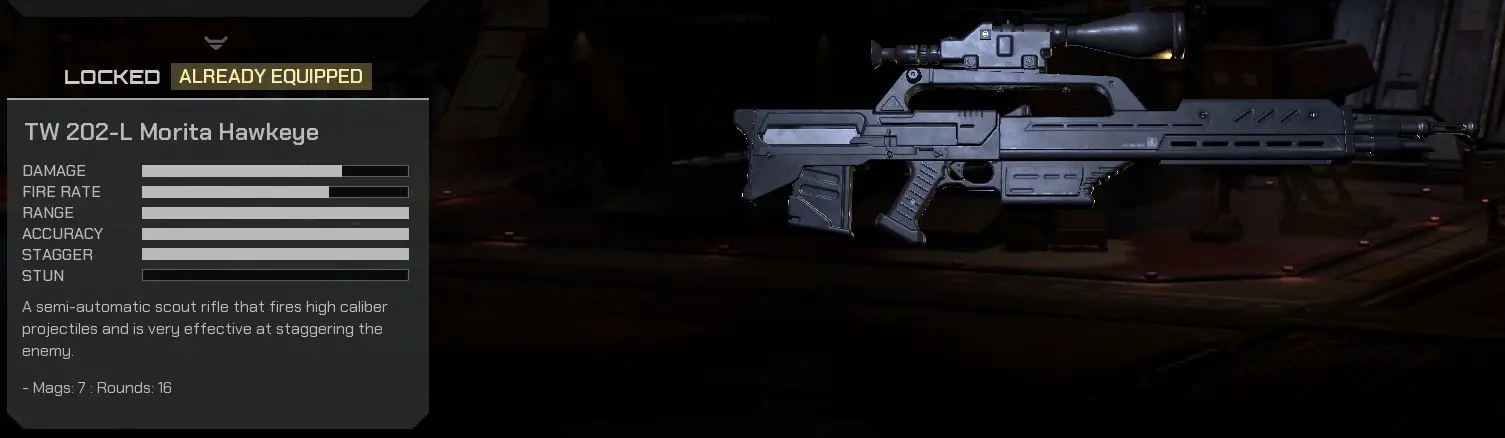
TW 202-L Morita Hawkeye
Usable by: Охотник
This DMR is the Hunter’s first unlocked gun and a clear upgrade to the Morita Mk 1 как только ты освоишься. When crouched, you can use it from the hip like a Battle Rifle, making it effective against bugs. Its crucial feature is its ability to knock bugs backward, который может быть спасателем. Focus on taking down Gunners, Гренадеры, and Tiger bugs with this.
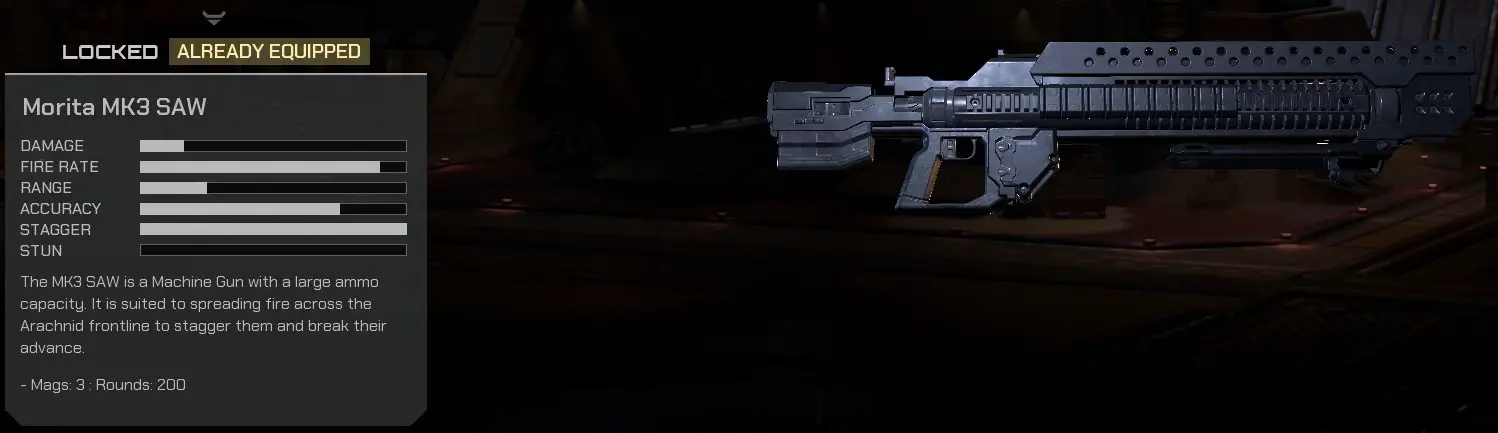
Morita MK 3 ПИЛА
Usable by: Бастион
The first weapon unlocked for the Bastion. It might take some practice to get used to its recoil. Don’t try firing it while moving; you’ll miss everything. Crouch or, еще лучше, deploy it to slow down a horde of bugs. Помнить, it’s not about damage with this weapon, but about causing stagger.
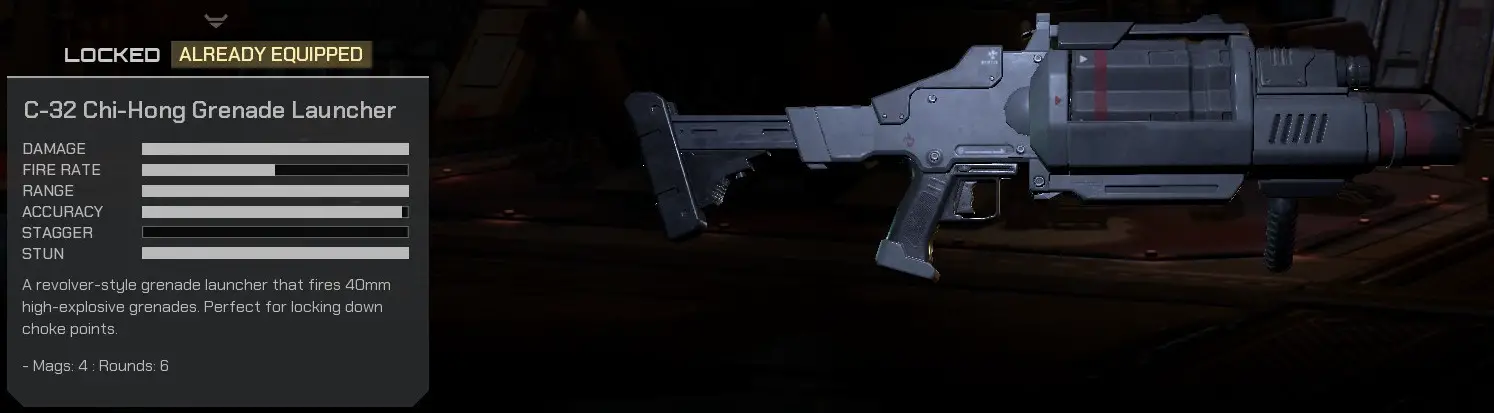
C-32 Chi-Hong Grenade Launcher
Usable by: Оператор
This is the first new primary weapon you unlock as an Operator. In the hands of a novice, it can be detrimental to your team because it has the potential to destroy useful utilities like ammo fabricators, heal beacons, and deployable walls. Learn to control and aim it to make it a valuable asset in the field and for base defense. Remember to be cautious when firing it near friendly utilities.
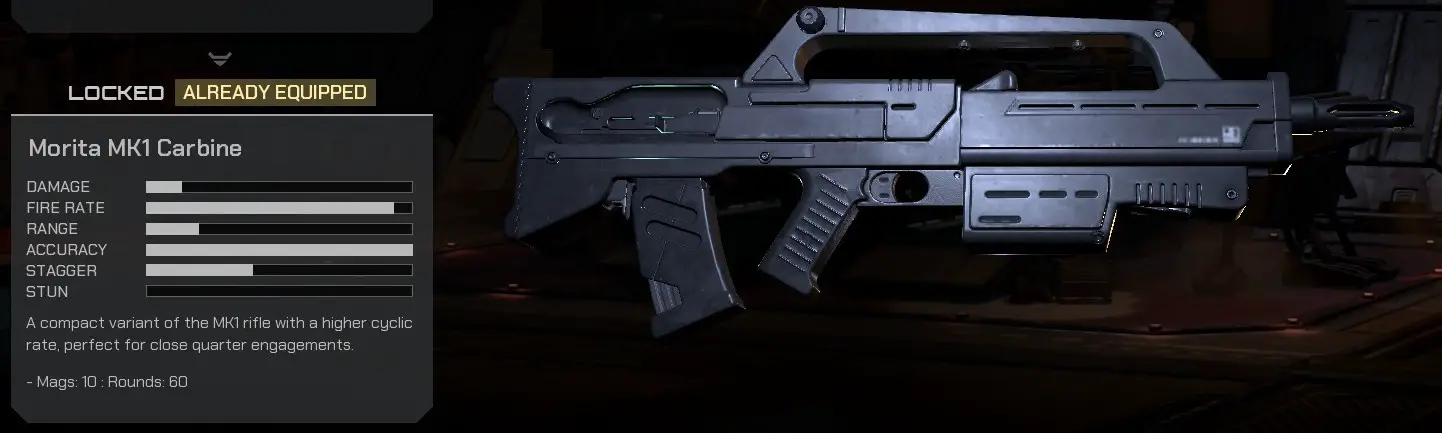
Morita Mk 1 Карабин
Usable by: Everyone
This is a definite upgrade to the Morita Mk 1. Despite having seemingly less range and damage on paper, it shoots faster, and shortening the barrel apparently makes it more accurate. Its stagger capability is better than the regular Morita, making it an ideal weapon for firing on the move.
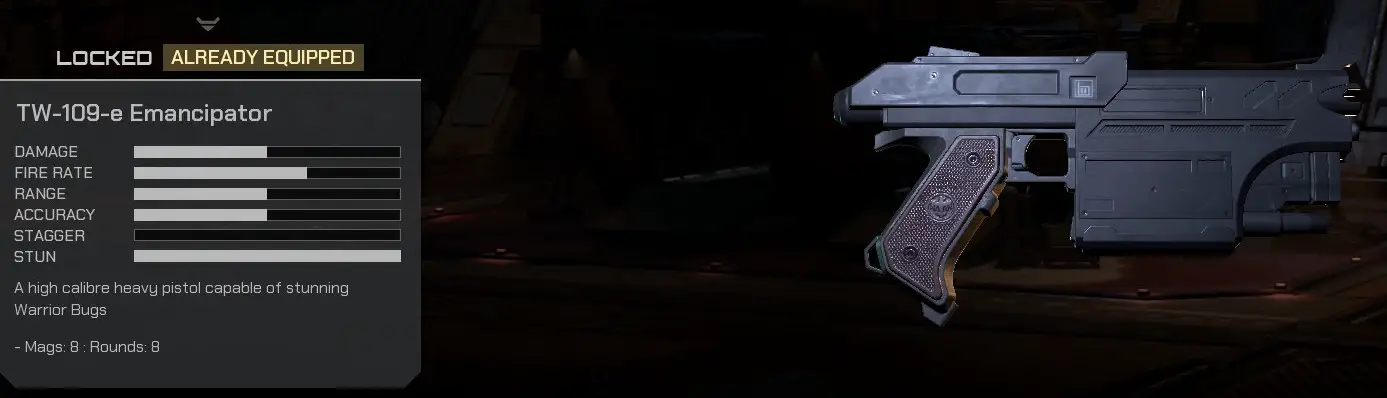
TW-109-e Emancipator
Usable by: Everyone
This is the only other pistol in the game and an upgrade to the Peacemaker. A single shot from this handgun can stun a Warrior or even a Gunner bug, making it a useful sidearm to have. It’s often more effective in getting out of trouble than a primary weapon.
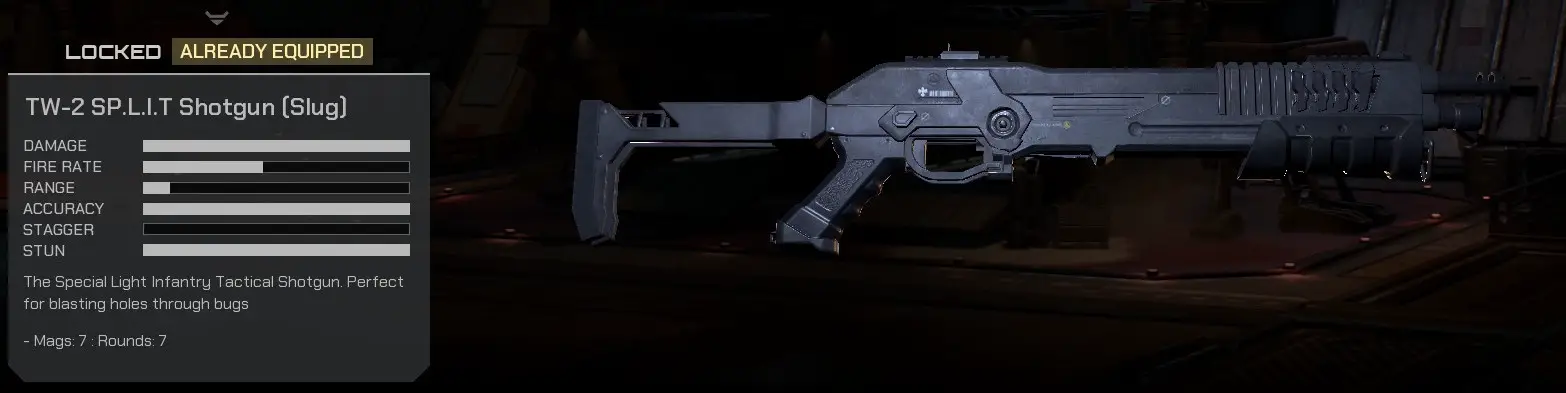
TW-2 SP.L.I.T Shotgun (Слизень)
Usable by: Охотник
This weapon is more like a pump-action rifle than a shotgun. It can stun bugs, but the Emancipator pistol already does that job. It’s better to choose a more versatile option.
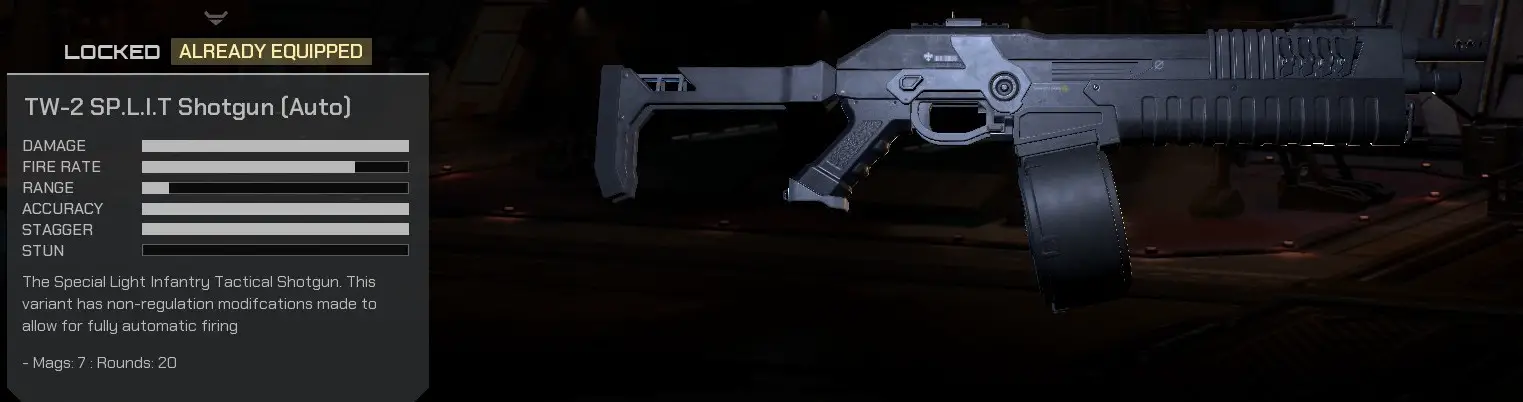
TW-2 SP.L.I.T Shotgun (Авто)
Usable by: Бастион
На бумаге, this might seem like a good weapon, но на самом деле, it’s highly situational. Even in the most specific situations, you’re better off with any other weapon. Its stagger capability isn’t sufficient, and it fires slugs instead of shells. Stick with the SAW; it’ll serve you better.
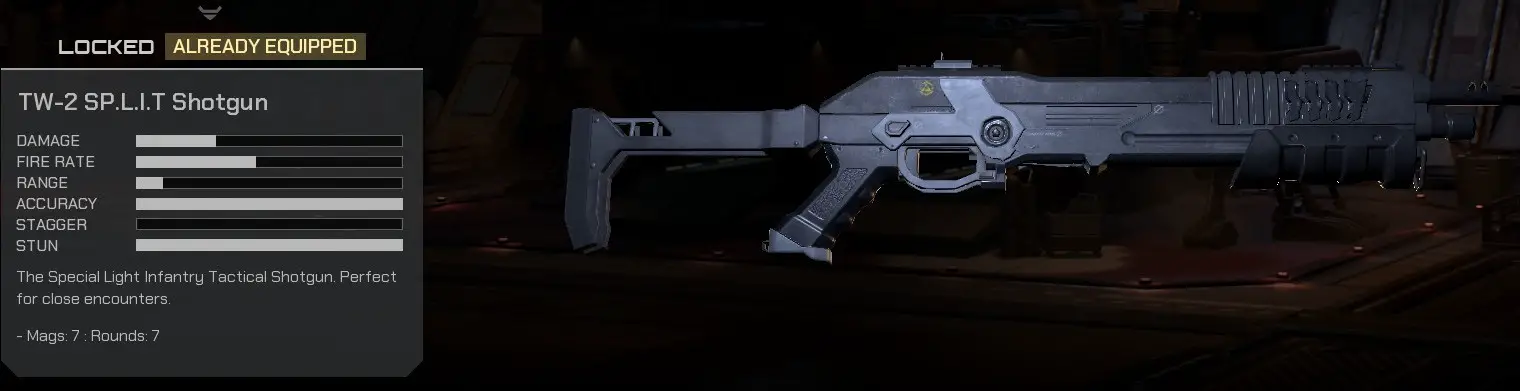
TW-2 SP.L.I.T Shotgun
Usable by: Оператор
This is the best shotgun in the game, primarily because it’s usable. If you prefer close-quarters combat, this is a good weapon to have, especially as it can stun multiple bugs with a single shot and finish off Veterans in 2-3 выстрелы. Just keep an eye on your ammo; you’ll run out fast.
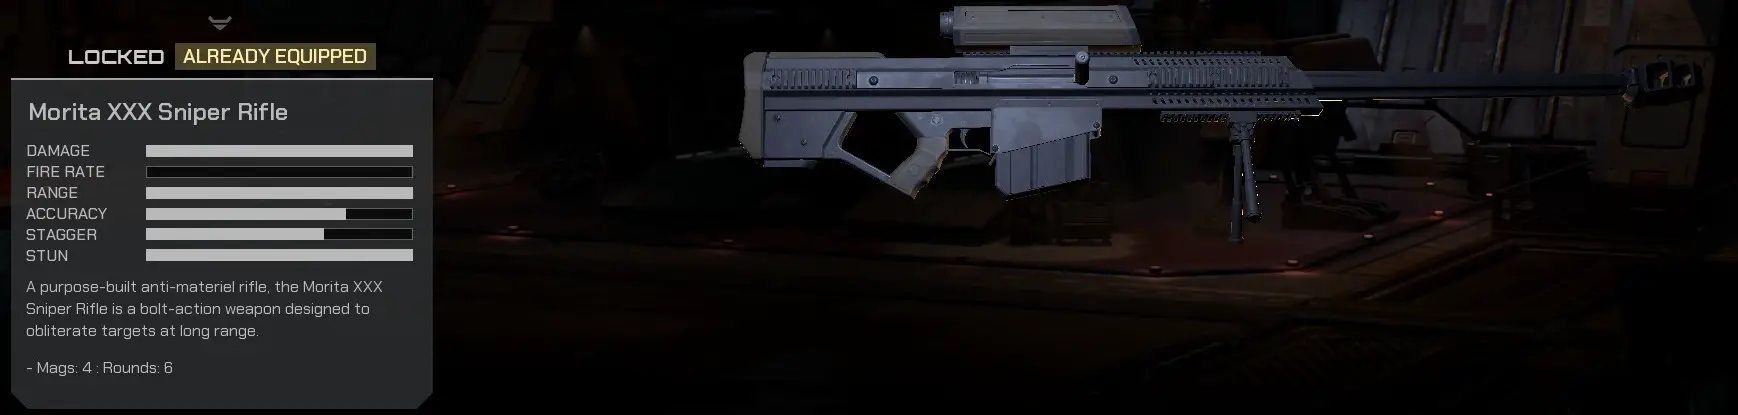
Morita XXX Sniper Rifle
Usable by: Охотник
This weapon can one-hit kill Warrior bugs, but it’s not the best way to use it. It’s best combined with scanning and focusing down Gunners, Гренадеры, and Tiger bugs. Помнить, you’ll need a few seconds to steady the weapon before you have a good chance of accurately hitting a target, so find a good firing position before using it.
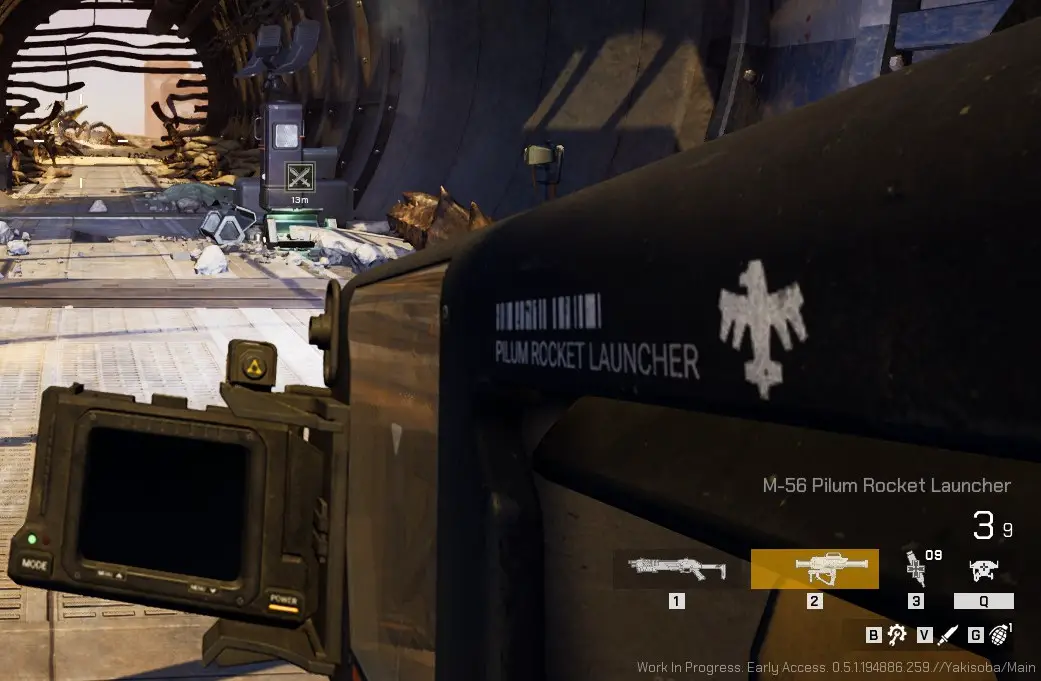
M-56 Pilum Rocket Launcher
Usable by: Whoever picks it up
This weapon is unique, as you can only find it by completing special objectives. It’s excellent for dealing with hordes of bugs and high-priority targets like Grenadiers or Tigers, but you’ll need a steady supply of ammo. Be careful when aiming at utilities like ammo fabricators, as they can destroy friendly ones. Give priority to Hunters when it comes to picking up this weapon, as their mobility allows them to make the best use of it.
Гранаты
Here’s a brief overview of each grenade type, что они делают, and what to consider when using them. Keep in mind that many grenades are mostly for utility or specific situations, so think before you throw!
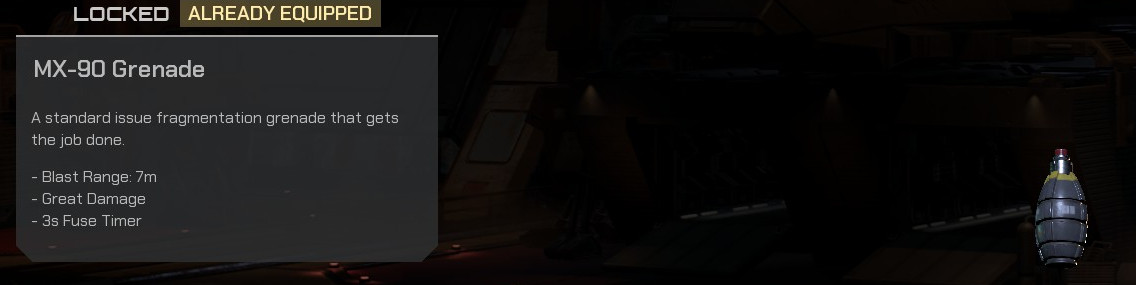
MX-90 Grenade
Usable by: Everyone
This is the starting grenade, not particularly impressive. It can cause damage, но это все. Replace it as soon as you can.
Шоковая граната
Usable by: Бастион, Оператор
Essentially a stun grenade. It can be useful in a tight spot, but there are better tools available if stunning bugs is your goal.

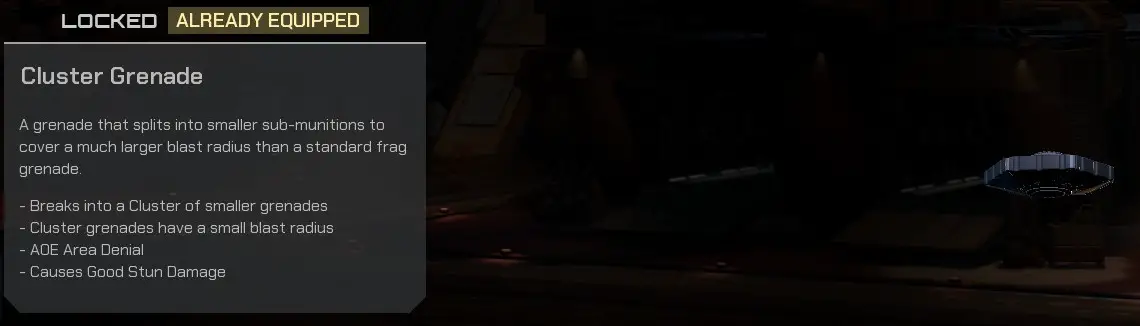
Кассетная граната
Usable by: Бастион
This is like an exploding Frisbee. You can throw it above targets, and it will explode midair, dropping a burst of grenades onto targets below.
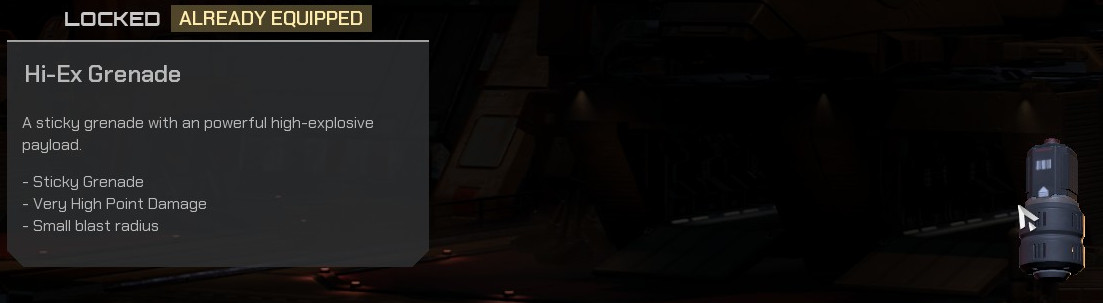
Привет-Ex граната
Usable by: Охотник
Essentially a sticky grenade. Save this for Grenadiers and Tigers; в противном случае, it’s a waste of a grenade.
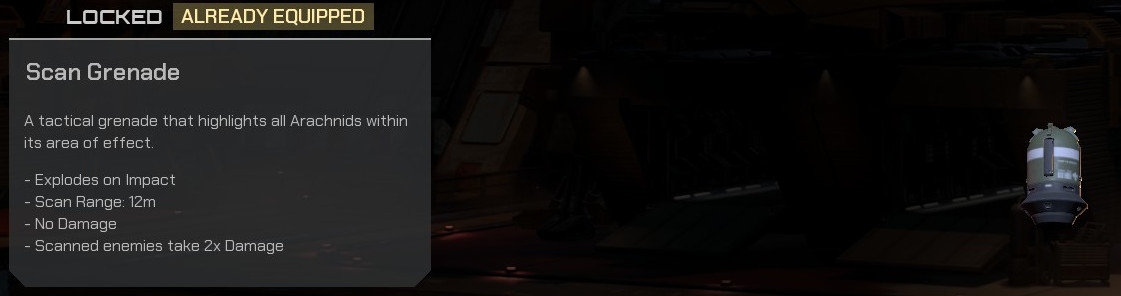
Сканирующая граната
Usable by: Охотник
Does exactly what it says. It highlights targets for the team, and highlighted targets take increased damage. Однако, for scanning targets, utilities might be more useful.
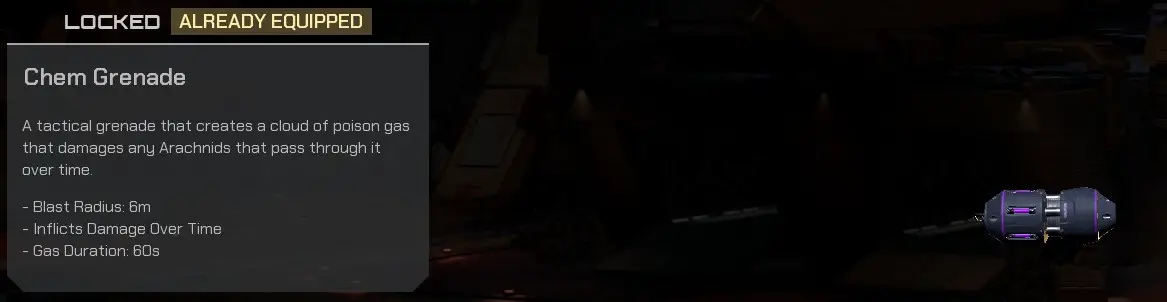
Chem Grenade
Usable by: Охотник, Оператор
This is the best grenade for dealing with swarms of bugs at choke points. It not only slows them down and causes damage over time but also makes the bugs continue to run through the toxic cloud without changing their path.
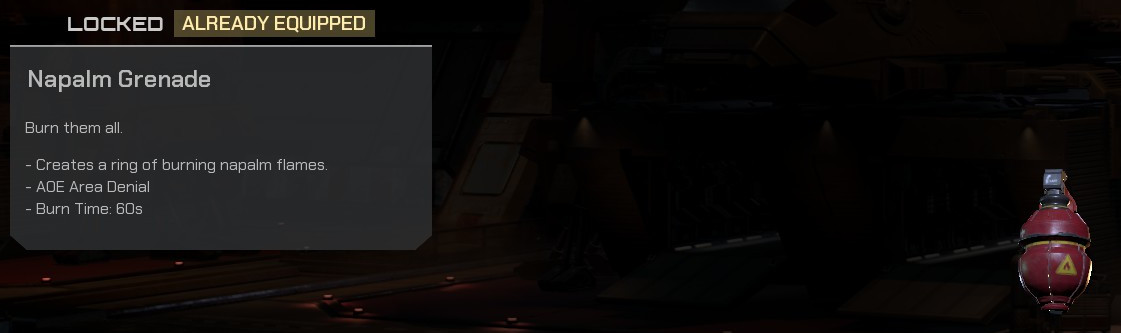
Напалмовая граната
Usable by: Бастион, Оператор
In the hands of an inexperienced player, this grenade can be harmful to the team. Consider where you throw it carefully, as when it lands, bugs will avoid the area, potentially redirecting their attack to another position. Будьте осторожны, as this can lead to an unexpected overwhelming of a poorly defended section of the base.
Утилиты
Here are all the cool gadgets and gizmos that Mobile Infantry personnel could ever need, к лучшему или хуже.
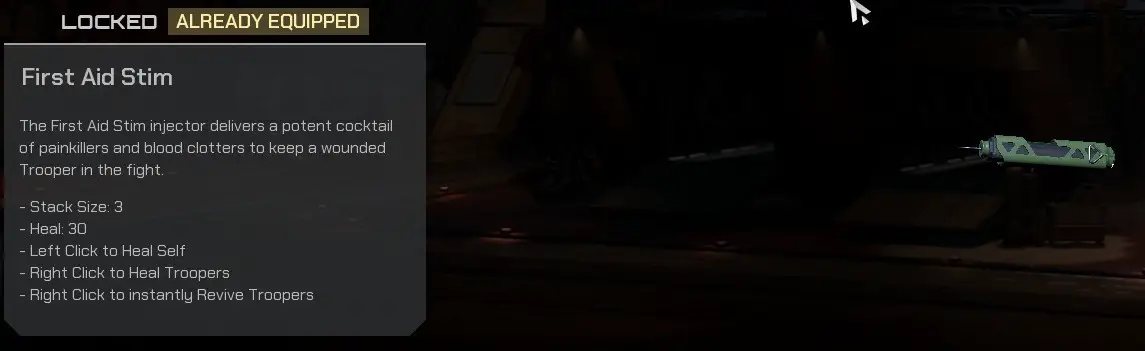
Стимул первой помощи
Usable by: Оператор
This utility is often underestimated but quite handy, even at max level. It allows you to instantly revive other troopers and lets you see their health. The challenge is that many troopers might not realize you want to heal them, even if you’re shouting at them. Some folks call it “Heroin.”
Thermo Charge
Usable by: Охотник, Бастион
This is generally situational at best. You’re better off with more useful utilities that have more practical applications.

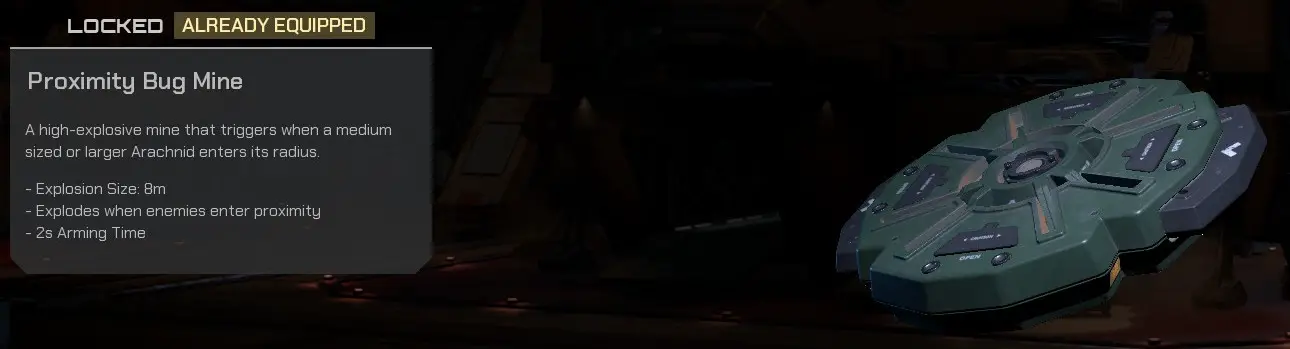
Близкая мина-жук
Usable by: Бастион
It’s essentially a deployable mine, but you’ll often find other utilities more useful.
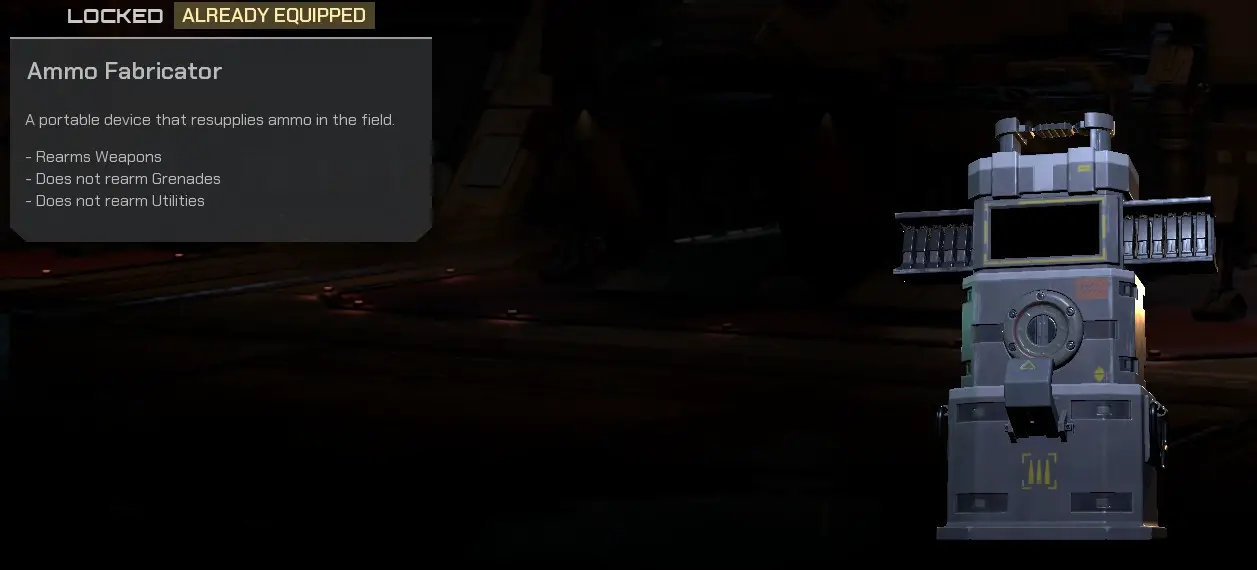
Производитель боеприпасов
Usable by: Охотник, Оператор
A handy piece of equipment, especially in ARC, where you can resupply in the field. Just be cautious not to fire explosives near it, as it can be destroyed.
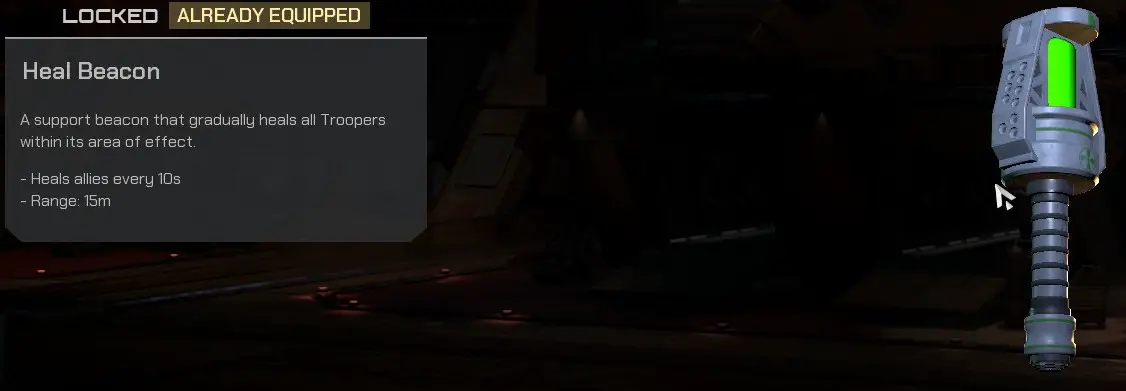
Heal Beacon
Usable by: Бастион, Оператор
A very useful tool for healing troopers, especially since the green light is visible, so people know to stay near it. Bastions, в частности, will get good mileage out of it, especially if they are acting like a mobile turret.
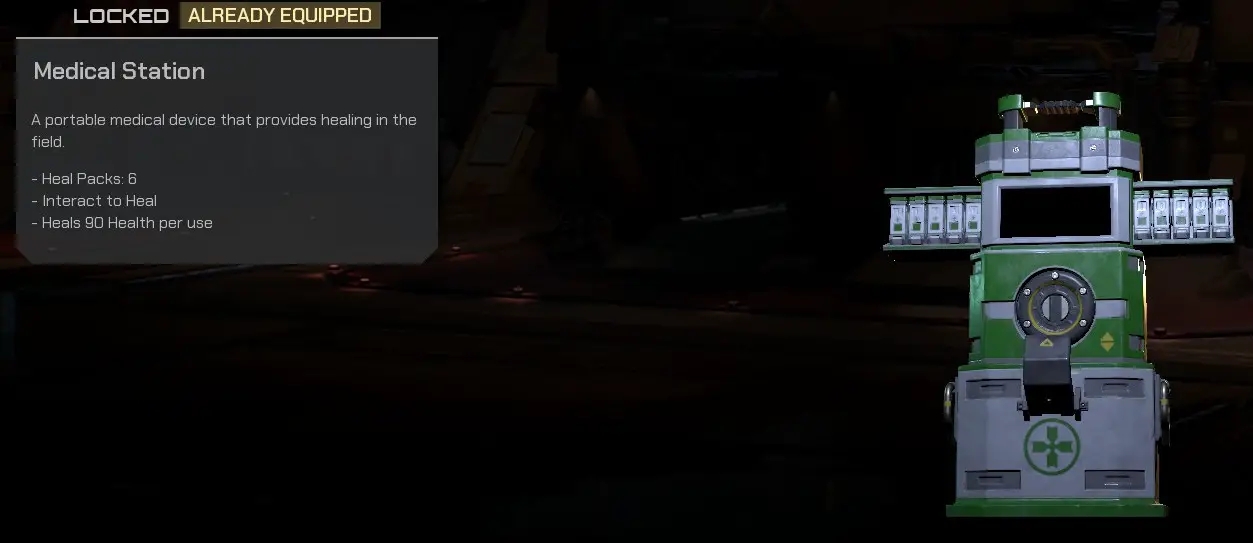
Medical Station
Usable by: Оператор
Честно, this is kind of pointless, as there are more efficient tools for healing. If you deploy this device, all you’ll get are disappointed faces from troopers hoping for an ammo fabricator or a speed stim dispenser.
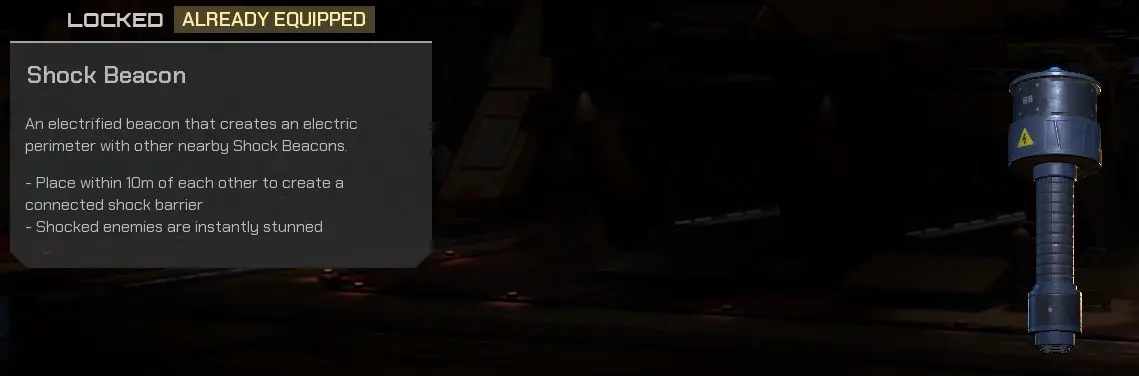
Ударный маяк
Usable by: Охотник, Бастион
A handy device that lets you create an electric wall that stuns bugs. Great for defending something like an ore extractor.
Ядерный Детский Пакет
Usable by: Все
This is pretty much a joke. It’s hardly worth bringing. The splash radius is so small that you need to be right on top of a bug for it to have any real effect. You can use it to destroy Hives in Hive mode, but if you’re in a position to do that, you can use the free one.

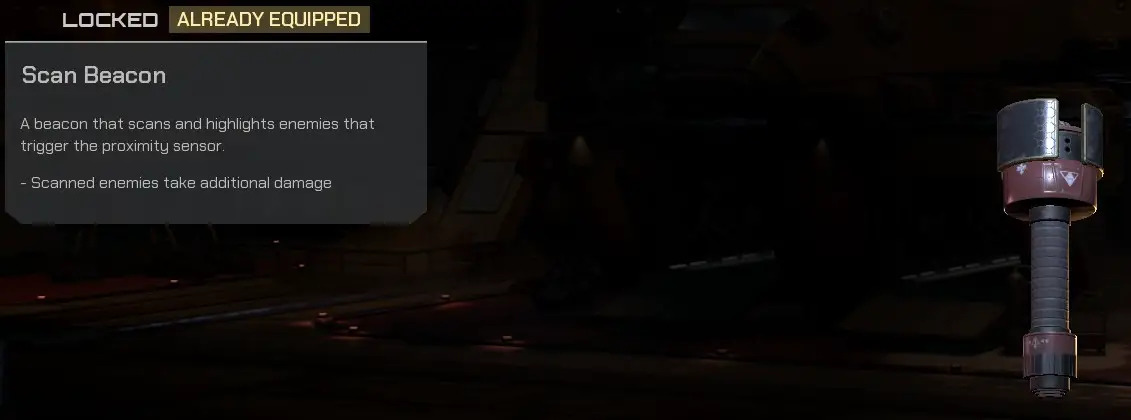
Сканирующий маяк
Usable by: Охотник, Оператор
This device will earn you a lot of thanks, especially from Bastions, but nothing in XP. It’s a great tool as it not only highlights bugs for the entire team but makes them take increased damage.
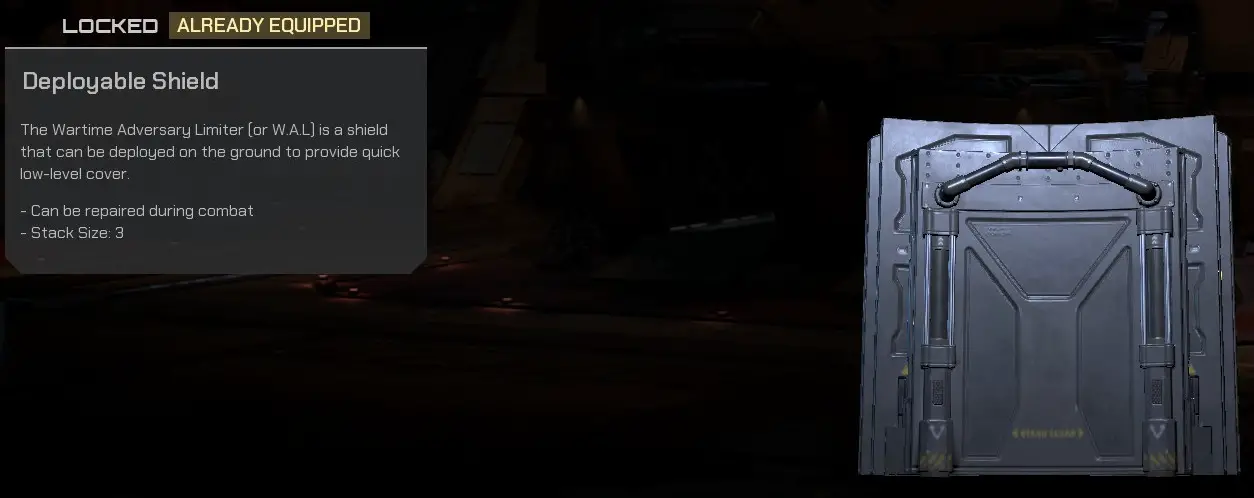
Deployable Shield
Usable by: Бастион
A very useful piece of equipment for creating your choke points, especially in Horde. Однако, if you see an Operator anywhere near them with a Grenade Launcher, you might want to yell at them until they go away, as they can and will destroy these walls with careless fire.
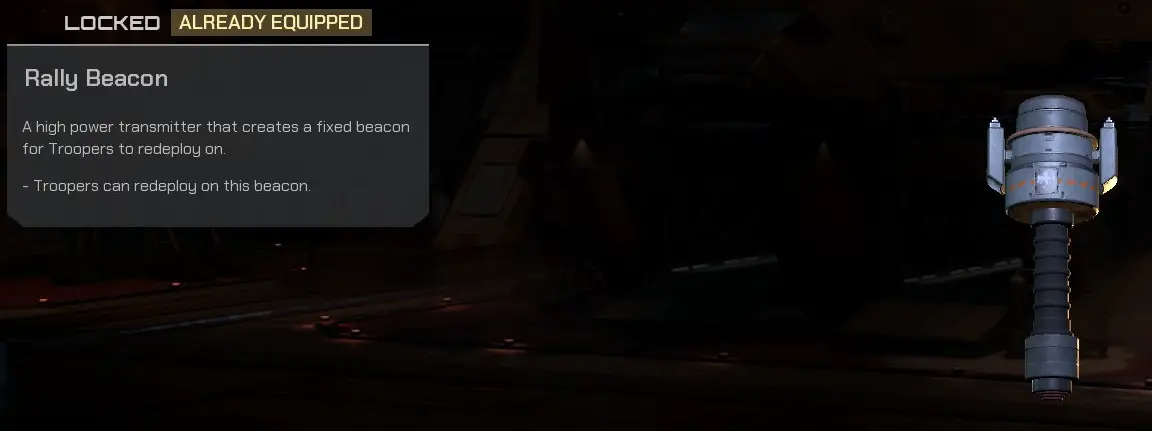
Rally Beacon
Usable by: Оператор
This is a very situational device that really only has a use in ARC, и даже тогда, chances are you don’t need it with a coordinated team.
Portable Sentry Turret
Usable by: Бастион
A very useful mini-turret that helps thin out hordes. You can deploy two of them at a time, so it may be worth considering equipping the extra Utility Perk if you’re going for a more offensive approach when using them.

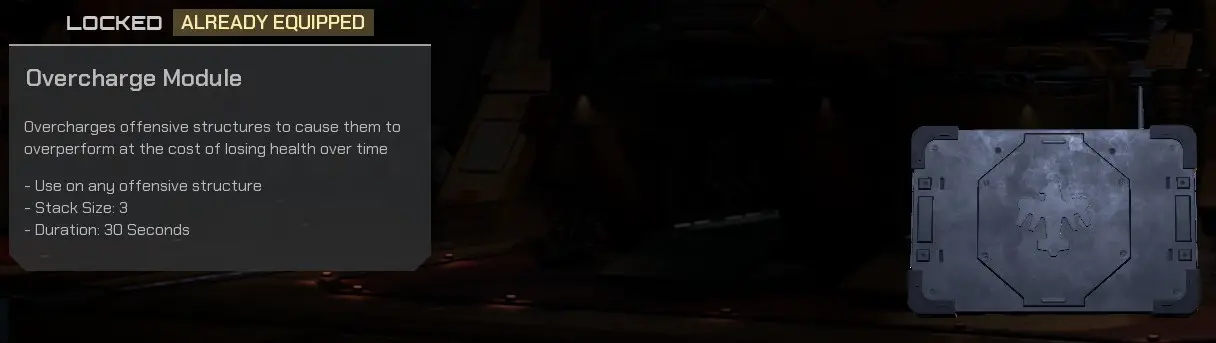
Overcharge Module
Usable by: Бастион
Handy if you like to play as an engineer Bastion and use turrets. Однако, don’t forget to use it and make sure to repair!
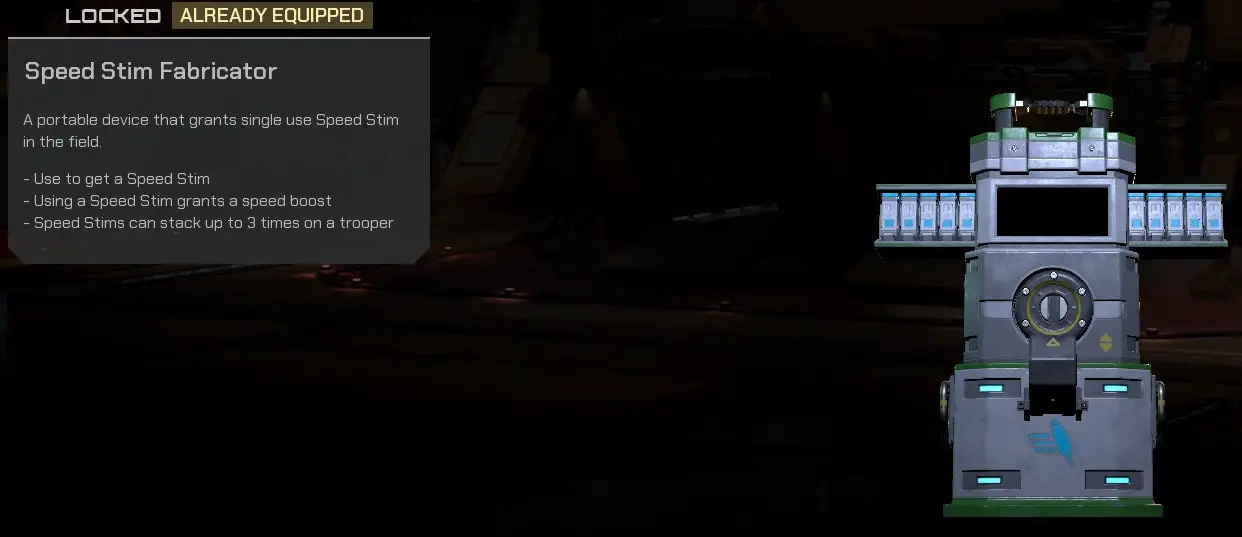
Speed Stim Fabricator
Usable by: Оператор
Nicknamed “Мет” by those who deploy and use it. It dispenses 10 speed stims that anyone can pick up. You can carry up to 6 Speed Stims (8 with the Utility Perk) and stack the effect 3 раз, giving you insane bursts of speed. Very useful for quickly extracting ore, getting out of trouble, evacuating to the dropship, and even speedrunning Hives.
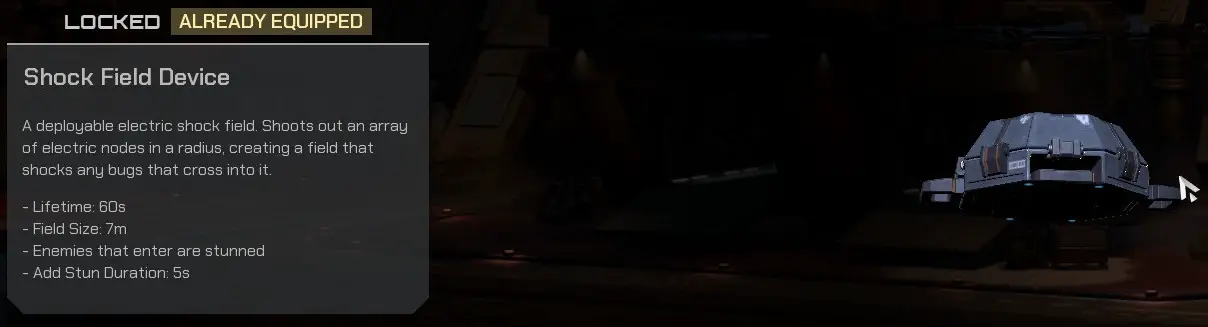
Shock Field Device
Usable by: Охотник
For those who love shock nodes but are too lazy to set them up by themselves. This device can quickly set up a perimeter.
Guardian UAV
Usable by: Оператор
The tooltips say it can be remote-controlled, but it really only goes where you point it, which still makes it more intelligent than your average Mobile Infantryman. It can be a handy device to have around, but you’ll trade out some other sought-after utilities to use it.

льготы
Choosing the right perks to match your combat style can significantly impact your class performance. Some perks are situational, while others become more useful as you unlock later equipment.
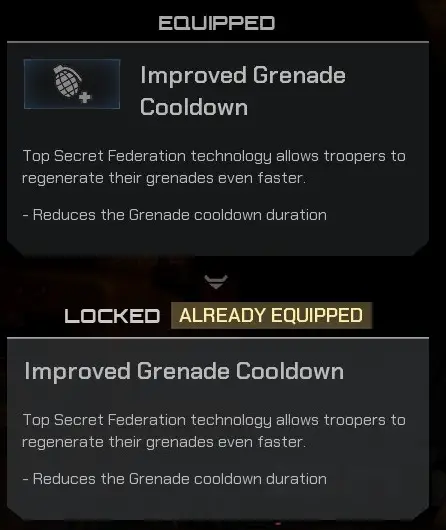
Улучшено время восстановления гранат.
Usable by: Оператор
This perk lets you throw grenades more frequently. While it doesn’t provide specific numbers, it reduces the cooldown from over a minute to around every 45 секунды, making it more handy when you unlock grenades like Chem grenades.
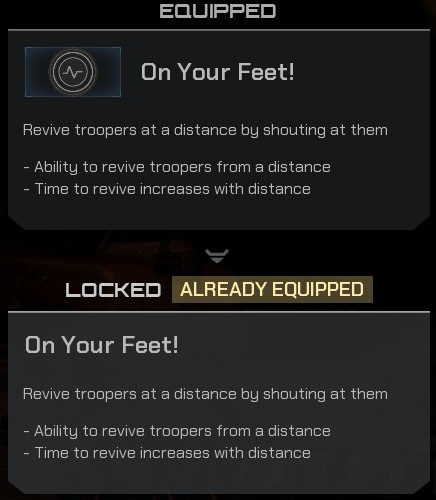
On Your Feet
Usable by: Оператор
В теории, this seems like a useful perk, но на практике, if you’re playing as an Operator medic, you have other tools for quicker revives. The short distance for this perk makes it quite situational.
изысканный
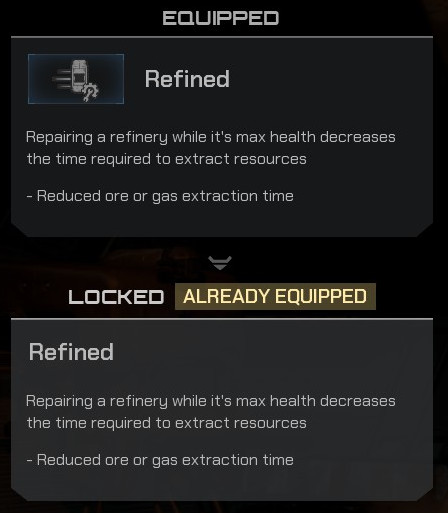
Usable by: Оператор
This perk makes more sense in ARC mode, especially when coordinating with a team. It halves the time it takes for ore to extract and increases the yield from each extractor, effectively doubling the amount of ore one Operator can obtain before it goes into cooldown.
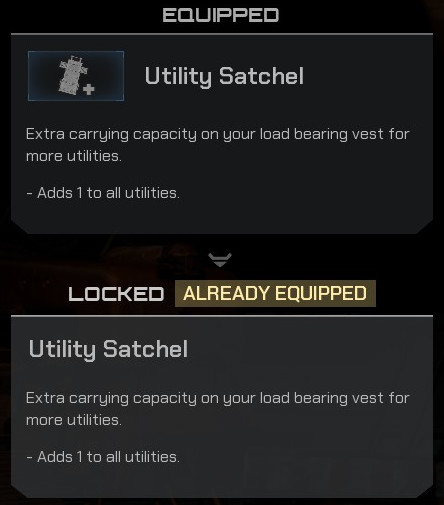
Utility Satchel
Usable by: Все
This perk allows you to carry an additional utility in your inventory. It’s more useful for utilities like a sentry turret or heal beacon than a first aid stim, например.
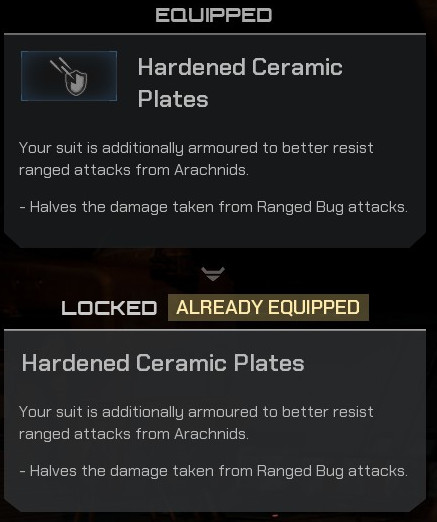
Hardened Ceramic Plates
Usable by: Охотник, Бастион
If you dislike those pesky Gunner bugs, this perk can be of help.
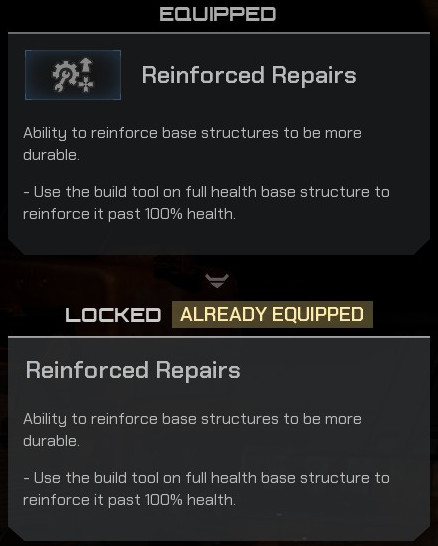
Reinforced Repairs
Usable by: Бастион
It lets you make bases even tougher, что может быть полезно, especially when playing as an engineer Bastion.
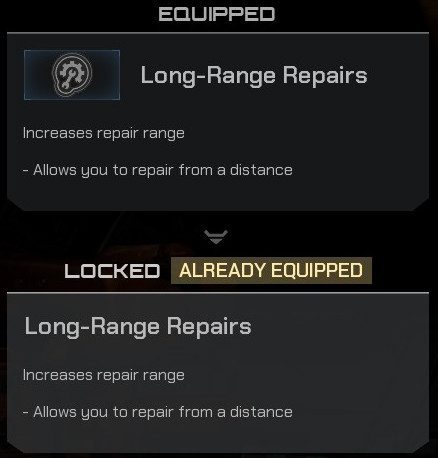
Long-Ranged Repairs
Usable by: Бастион
While it allows you to repair at a greater distance, other engineer-style perks may be more practical.
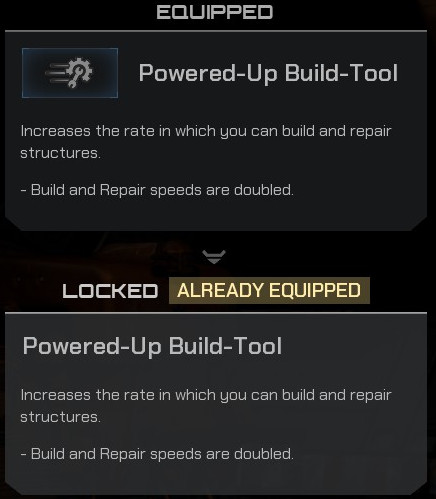
Powered-Up Build-Tool
Usable by: Бастион
Very handy for an engineer Bastion on Horde when you want to build and repair bases quickly.
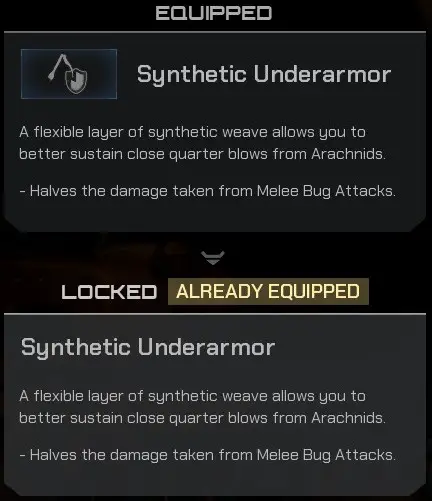
Синтетическая нижняя броня
Usable by: Бастион, Оператор
Sometimes humorously called “Synthetic Underwear.” It’s nearly essential for an Operator who gets out in the field, allowing you to absorb a lot of damage, even on Veteran difficulty. Однако, even a deployed Bastion won’t survive a heavy hit from a Tiger bug.
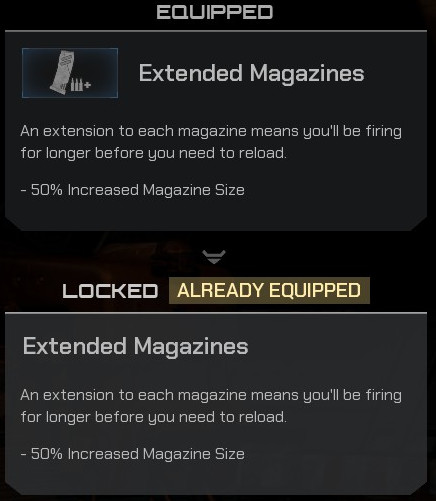
Расширенные журналы
Usable by: Охотник, Бастион
This perk increases magazine capacity by 50%, including your spare magazines. If you often run low on bullets, it’s a helpful perk.
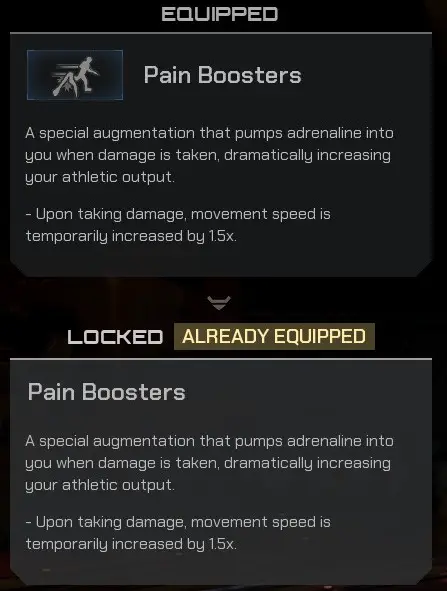
Pain Boosters
Usable by: Охотник, Оператор
This perk is situational and more useful if you’re skilled at bug surfing. В противном случае, there are better perks to choose.
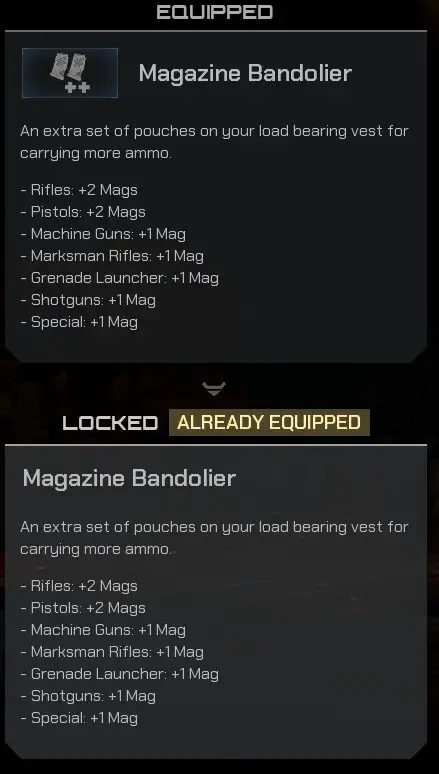
Журнал Патронташ
Usable by: Все
It provides extra magazines depending on the weapon. If you prefer to roam without relying on an ammo fabricator, this perk is handy, especially when combined with Extended Magazines.
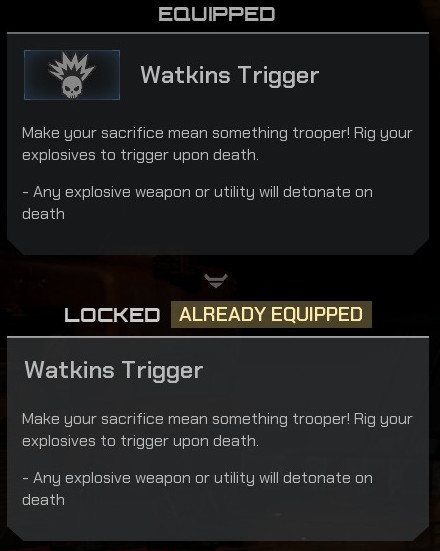
Watkins Trigger
Usable by: Охотник, Бастион
This unusual perk lets you turn into a “Mormon Extremist” and suicide bomb the bugs. It’s best used with something like a Nuclear Detpack in a no-revive mutator.
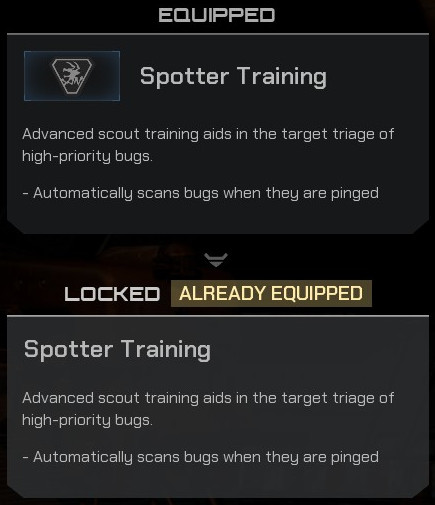
Spotter Training
Usable by: Охотник
This perk scans bugs you highlight, causing them to take double damage. It’s very useful against tough bugs like Tigers or Grenadiers.
Running Start
Usable by: Охотник, Оператор
It allows you to launch yourself further and farther, though you can achieve the same by bug surfing.

Жажда крови
Usable by: Охотник, Оператор
This perk is risky but rewarding if you use a stun build. Keep in mind that health regeneration starts after a short pause following a melee attack on a bug, and it regenerates incrementally over several seconds.
Mobile Training
Usable by: Охотник
На бумаге, it might seem useful, but as a Hunter with a Jetpack, being in melee range of a bug means you likely have bigger problems to worry about.

Турели
Apart from the guns, коммунальные услуги, and grenades, you can also build turrets to aid in bug extermination. No matter the arguments about how and when to use them, there is one golden rule that should always be followed:
An unused turret is a useless turret!
Другими словами, if you’re going to build a turret, consider whether it will actually get used. If the answer is “нет,” then don’t bother building it. Это так просто. There’s no point in having a turret that will never fire at a bug. Сейчас, onto the turret types:
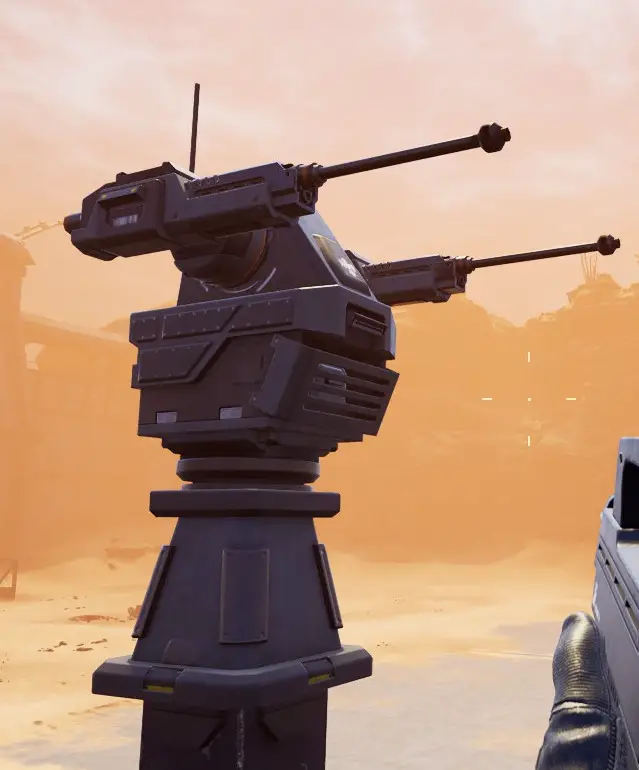
Auto Sentry
These turrets will automatically shoot bugs, and despite the option to manually load them, they will restock their ammunition automatically. I cannot stress enough not to load these turrets, especially when the Heavy Machine Gun badly needs it. В идеале, you’ll want to place these turrets spaced out, typically in a corner, to give them a good field of fire. Bugs don’t attack corners very effectively, so this placement can be advantageous.
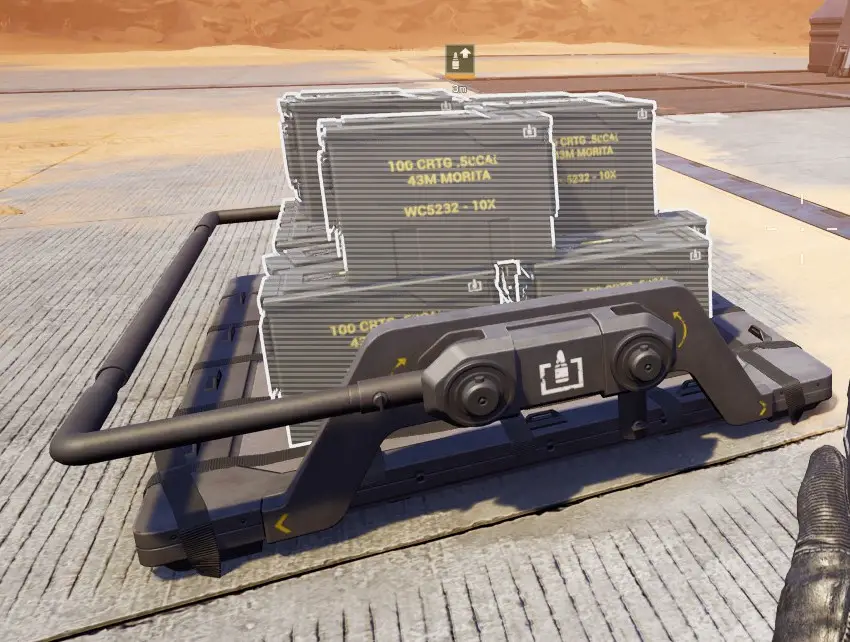
Тяжелый пулемет
This turret needs to be manually operated, essentially requiring a two-person job—one to fire and the other to load. If you’re wondering what to load these with, it’s the ammunition as follows:
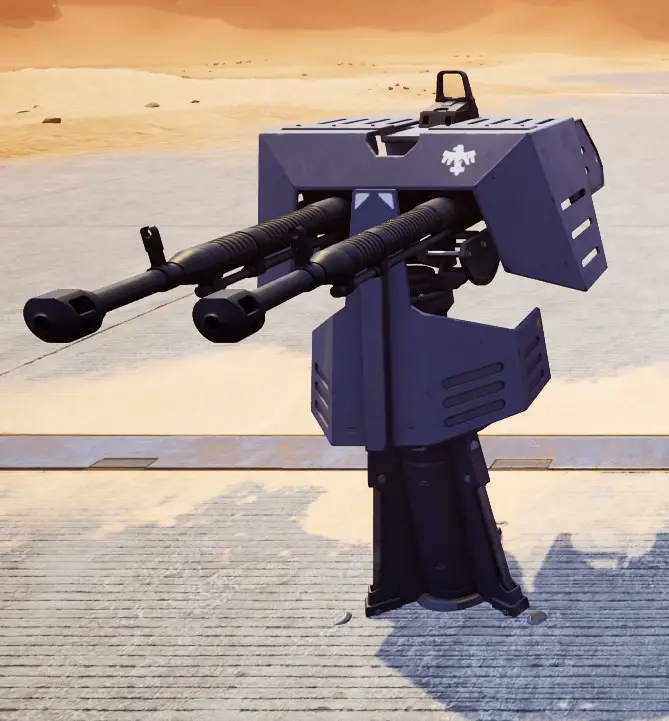
Ignore the fact that it only loads 50 despite saying it has 100 rounds in a box.
Some of the biggest mistakes are made regarding this turret, ranging from placing them in positions where they cannot fire, grouping them together in one heavily exposed spot, not placing ammunition boxes nearby for loading, or even building them and completely forgetting about them.
This turret can quickly dispatch Tiger and even Grenadier bugs if they are close. If you see them approaching, make sure to focus on them. Used correctly, this turret is a great asset to any base defender, but used incorrectly, it’s an extreme waste of resources.
Miscellaneous Hints
Here are some general tips and tricks, some of which are common sense, но опять же, if the Mobile Infantry had common sense, they’d be flying with the fleet!
- Bootcamp Bugs – Did you know you can get bugs to spawn in on the boot camp map? Just as you leave the dropship, there are some crates and a datapad. This can be useful if you fancy some live fire exercise.
- Bug Surfing – В этом руководстве, you’ve probably read about something called bug surfing. It’s hard to visualize, but it involves timing a jump just as a bug is about to hit you in melee, launching you quite far back. If timed right, you can surf a whole horde of bugs to safety. All classes can do it, but Operators generally make the best use of this technique.
- Крауч – Crouching not only improves accuracy but, in tight spaces, it means the person behind you can support you with their firepower. Two sets of guns are better than one when it comes to killing bugs, so remember to duck and let the other person shoot!
- Ситуационная осведомленность – It’s easy to get tunnel vision on a single task or target, but if you can develop the habit of looking around, even during an engagement, it can pay off. Frequently, someone bleeds out, or an ARC gets destroyed because people were not taking a moment to pay attention to what was happening around them.
- Коммуникация – While voice communication tools are limited at the moment, you don’t need a mic to call out targets or points of interest. Remember that you can always mark targets like Grenadiers or Tigers by default with a middle mouse click, and it’ll show for other players. If you don’t alert others, they won’t know.
- Ignore the loading tooltips – While loading, you might see tooltips explaining how things work, but it’s often best not to pay much attention to them. Some of the content displayed in these tooltips can be plain wrong or not functional in the game. Например, claiming that the Emancipator can drop a Warrior bug in two shots or less is incorrect, and weak points are not yet implemented. This is a section that will likely change as updates roll out.
Это все, чем мы делимся сегодня для этого. Звездный десант: Истребление гид. Это руководство было первоначально создано и написано Заблудившийся. На случай, если нам не удастся обновить это руководство, вы можете найти последнее обновление, следуя этому связь.