A reasonably thorough guide in which a lot of tactics and insights about Eclipse mode are explored. This guide is intended to mostly cover Eclipse-specific ideas, but I will inevitably fail in this regard.
Guide Overview
Is Eclipse mode rather daunting? Is that one particular character giving you a lot of grief? Or are you just finding your attempts inconsistent, and are looking for that edge to help improve the overall quality of your runs? Regardless, I hope you’ll be able to learn at least one thing from this guide.
At the time of posting this, I will have completed all 8 Eclipse difficulties on all 11 survivors. If you’re seeing this before that, then I’ve screwed up somewhere. Oh well.
One thing to note is that I’ll be grabbing all my screenshots on Drizzle difficulty where applicable, just because it’ll be easier on me that way. Another thing to note is that I’ve edited a lot of text in-game for silly aesthetic reasons, so if something looks goofy, that’s why. Aside from this, the game is entirely unmodified; these strategies are intended for a completely vanilla game.
This guide is intended for reasonably experienced players of the game. Aside from Eclipse-specific mechanics, I won’t be taking the time to explain the details of the game itself. If I mention a Ukelele and you can’t remember for the life of you what it does, then this guide may be out of scope for your purposes. But you can use your own judgment there; I’m not your dad.
Eclipse Overview
For the uninitiated, Eclipse is a series of purely detrimental modifiers that stack upon Monsoon difficulty with each victory, up to a maximum of 8. I will refer to these modifiers as E1 through E8, for short. The modifiers are as follows:

Now, let’s go through them and see how they affect the game, and therefore your playstyle, in regard to engaging in counterplay against them:
E1: Ally Starting Health -50%
This modifier halves your current HP at the start of every stage. To yourself, this effect does very little on its own, but it may be notable to keep in mind for later runs, since you may not even reach your maximum health on Stage 1 if you have no healing on E5+(half healing).
This modifier puts a slight emphasis on healing items on Stage 1. Since shields are immediately recovered upon starting a stage, this also benefits the Personal Shield Generator and Transcendence. This modifier lowers the effectiveness of a lot of items that are centered around your allies, since any recruited ally will only have half their HP, including picking up drones.
For survivors, this modifier affects them all roughly equally, except for REX, who promptly doesn’t care about it at all, and Engineer, who will cry at his turrets being spawned with half HP, until Bustling Fungus has been obtained(assuming stationary turrets), where he will promptly laugh at this modifier as well.
E2: Teleporter Radius -50%
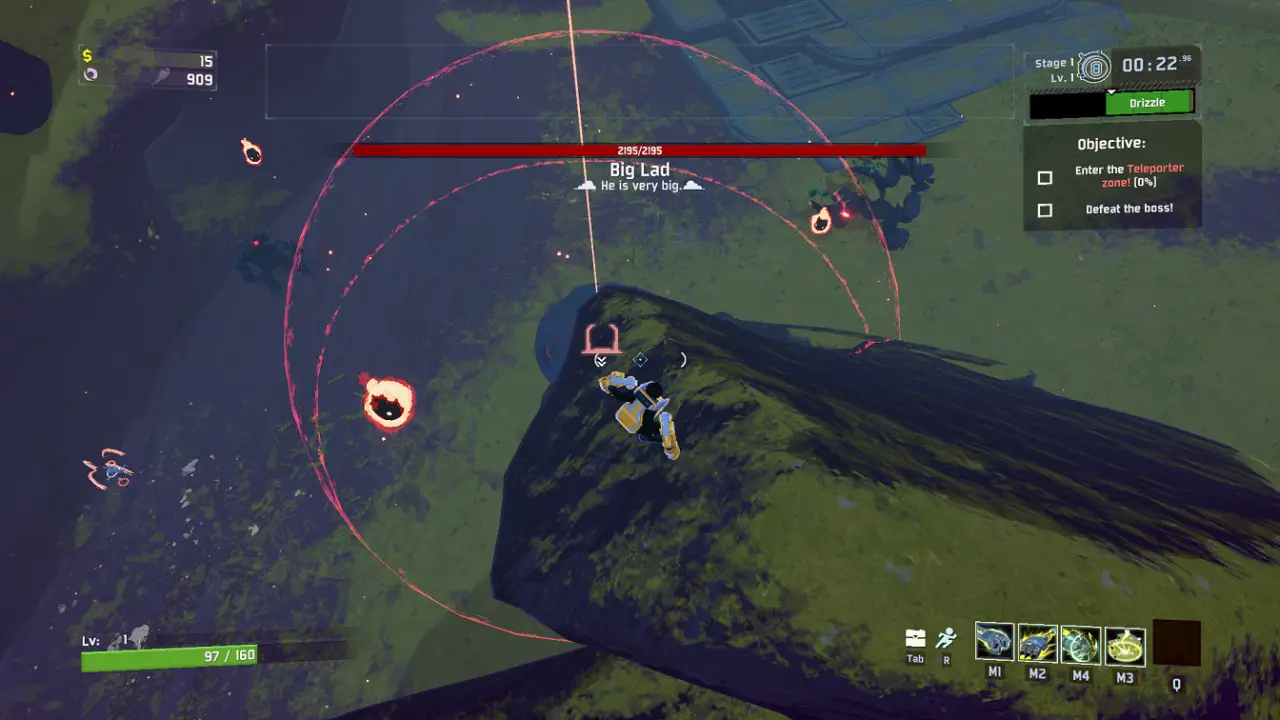
This modifier applies to any teleporter event, including on Void Fields and Commencement. If you’ve never played around it at all, the effect is more drastic than you might expect. Without taking too much of a tangent into mathematics, cutting the radius in half cuts the volume of the spherical teleporters by a factor of 8, which is a pretty big deal:
This effect doesn’t really change how you should choose your items; it moreso comes down to the execution of the teleporter events themselves. Though it does make Focused Convergence itself much more difficult to play around, as well as Glowing Meteorite, if anyone actually cared about it.
As for survivors, this modifier definitely affects some more harshly than others. Characters who rely on being extremely mobile may feel claustrophobic due to this modifier. Melee survivors may also find this modifier challenging to work around, since most bosses will spawn slightly outside the teleporter radius and not feel particularly inclined to join you in the party zone. Finally, Artificer will yeet herself clean out of the teleporter radius every time she uses Ion Surge, so you’ll have to consciously adjust her height, or accept a time loss when charging the teleporter. On the other hand, survivors that can stand their ground will care about this modifier less.
E3: Ally Fall Damage +100%, lethal
This modifier functions like the Artifact of Frailty, except it inconveniently doesn’t apply to the enemies anymore. So falling off the stage under somewhat common circumstances is a death sentence.
Regarding items, this modifier has a large impact on those that are useful. Of obvious importance is the H3AD-5T v2 and Transcendence, which make fall damage a non-issue. Hopoo Feathers have renewed applicability as well. For some survivors, the Strides of Heresy is a very nice item to pick up, giving any survivor the ability to cut down their fall damage. Of lesser importance for this purpose are the Volcanic Egg, Milky Chrysalis, and Tougher Times, as they offer potentially inconsistent ways of avoiding fall damage.
As for survivors, first and foremost, Loader doesn’t care about this modifier at all. Aside from your stupid Beetle Guard committing not alive by jumping off cliffs, Loader herself doesn’t take fall damage, so she won’t notice this modifier. Characters with utility skills that break their fall don’t have too much of a problem with this modifier either. Finally, Artificer can deal with all of her problems using her jetpack, which is totally awesome. On the contrary, characters with poor vertical control suffer greatly due to this modifier, like Captain.
E4: Enemy Speed +40%
This modifier is mostly not a terribly dangerous modifier, but it’s worth keeping in mind when fighting dangerous enemies that are also mobile, like the Elder Lemurian. Overall, this could be the one modifier that you could consider beneficial, for reasons I’ll note later.
This modifier makes items that increase your own mobility more useful, in order to keep distance from enemies. It also makes damage-increasing items more useful, so that enemies can be killed before they can move around too much.
Regarding survivors, this modifier affects survivors that have to aim and/or lead their target, like REX or Artificer, as well as survivors that have to keep their distance, like Huntress. Survivors that have an overbearing playstyle like Loader or Mercenary will care about this modifier less.
E5: Ally Healing -50%
This modifier is also pretty self-explanatory: any incoming healing from any source is halved. I found this modifier to be the most unexpectedly dangerous out of the eight; it requires you to play with fewer flaws.
For items, this modifier massively impacts any item related to healing, including the N’Kuhana’s Option and the Aegis. Instead, it puts a larger focus on alternate means of staying alive, like shields or dodging. The Rejuvenation Rack is also a welcome surprise if you haven’t picked up Transcendence.
For survivors, any survivor that deals with threats quickly will have less difficulty adjusting to this modifier. Alternatively, survivors that rely on their healing or have drawn out encounters will suffer more severely from E5.
E6: Enemy Gold Drops -20%
This modifier only affects the direct gold drops from enemies. It will generally slow down your gameplay, and acts more akin to an overall buff of the enemy’s power compared to yours.
For items, this will make the Ghor’s Tome more useful, as well as the Defiant Gouge. More importantly, it makes stage objects like Shrines of Combat and Blood more useful, and even Barrels as well.
Survivors are affected evenly, except for Captain, who cares less if he has Hacking Beacons set.
E7: Enemy Cooldowns -50%
It may be hard to predict what enemies benefit the most from this modifier, since enemy cooldowns aren’t readily available information. Some enemies will be significantly more dangerous on E7+, while others will seem identical. Of note are most bosses, which often have high-threat moves on a long cooldown.
E8: Allies receive permanent damage
This means that characters will receive a reduction to their Max HP whenever they take a hit that’s a large enough percentage of their HP. The formula that governs this is 40 Damage/MaxHealth, rounded down(credits to the wiki). This means that small enough damage sources, compared to a survivor’s maximum health, will not yield any permanent damage. All permanent damage is removed upon traveling to a new stage.
This modifier encourages the player to consider damage reduction. Repulsion Armor Plate is a godsend for E8; you can’t really have too many for a lot of reasons. Bison Steak and Infusion are also slightly more helpful early on; increasing Maximum HP will slightly decrease the amount of permanent damage incurred. In this vein, Transcendence also helps, as it increases your maximum health. Dio’s Best Friend will also revive you with fully maximum HP.
Survivors that are tanky or mobile will care about this less. On the other hand, survivors that accept incidental damage and heal through it will be hurt a lot by this modifier. REX is notable for having to consider drastic countermeasures to best this modifier; self-damaging skills will incur permanent damage. Somewhat related, Shrines of Blood also become pretty unviable to use compared to before.
General Tips
There are many ways to improve your gameplay that aren’t related to any specific survivor. A lot of it is stuff you will have likely practiced on lower difficulties. I won’t be going over too many of those things; I’m sure there are enough guide videos out there for general things. But I would like to throw my hat in the ring on the subject of speed, since it’s perhaps the most debated topic in the community. How fast should you progress through a level? What situations should you stop for items? Well, let’s consider a couple situations:
First, imagine you’re hyper-optimizing speed. You find the teleporter and activate it within 30 seconds. You beat the boss, get an item, and maybe pick up an item within the teleporter’s radius. You exit Stage 1 in 2.5 minutes, with 2 items. You are therefore about just as powerful as you were when you had no items, but the enemies have leveled up a fair amount due to their level jumping by a percentage between stages. Are you in a better situation than you were before? Probably not.
Alternatively, let’s say you scour the first stage, and spent 40 minutes on it looking for Cloaked Chests(bet you forgot those exist). You leave Stage 1 with 11 items in your pocket. Are you absolutely screwed? Absolutely. So what’s the right answer? Well, surely, it’s gotta be somewhere in the middle.
Therefore, in my opinion, what you should be aiming for is efficiency. Keep an eye on both the number of items you have, and the number of stages you’ve completed, at least for the first two. If you spend 7 minutes in the first stage and have 11 items, you’re in a pretty good spot. If you spend 4 minutes in the first stage and only have 1 item, you’re doing poorly. As long as you’re acquiring items at a decent rate, you’re doing well.
Getting items efficiently will build your power faster than time aids the enemies. After all, it must be the case that this is true. Otherwise, it wouldn’t matter what you did, you’d be overwhelmed by enemy firepower eventually. The strongest of runs are also the ones that build the most powerful synergies. This happens more frequently when you have a larger pool of items. Not only can you get a bunch of stuff that scales well together, but you also have a lot of 3D Printer fodder for if you find that Lens-Maker’s Glasses printer, for example, so any item that performs well when stacked will see a lot of power using printers.
Regarding efficiency, I do break from the general “get money, buy items, kill boss” loop in Stage 5. Typically, the items in Stage 5 aren’t as big of a power spike(even if there are a lot of them), because you already have a bunch. I instead immediately activate the teleporter and buy stuff after(I aim for $8000 on E6+). The power spike in Stage 5 typically comes from scrapping and printing, which you can also do after with no danger.
LUNAR SHOPS
If you’ve been thinking about the modifiers, you may notice that one item comes up somewhat frequently: Transcendence. It single-handedly counters E1, E3, and E5, as well as helping with E8 somewhat. It also mostly invalidates healing items, so those can be turned into Scrap for great benefit. So in general, you will want to target the Bazaar as a priority, if only for Transcendence. But there are also build-defining items like Purity or the cauldrons. Make it a habit to visit the Bazaar at least once per run, even if it means you have to…” legitimately acquire” a few billion Lunar Coins.
THE MOON IS MADE OF CHEESE
Specifically, there are a few unorthodox strategies related to the final stage and the Mithrix fight that can help your success rate significantly. The first is skipping the pillars entirely. There are character-specific methods that can be used to skip these, but there are some general ones as well, that any character can take advantage of. Most obviously are Equipment, so you’ll be getting familiar with these guys right here:

First is the Milky Chrysalis. This is probably the worst of the three general options, but it’s not without its merits. It doesn’t require any particular skill or knowledge to take advantage of, it allows you to fly over Mithrix’s windmill attack, and it trivializes the escape sequence(the teleporter zone is an infinite cylinder here, so once you trigger the countdown to start, you can fly as high as you want).
Next is the Volcanic Egg. This is the middle of the three options in terms of usefulness. It allows you to actually deal damage with it, which is useful for the earlier stages…sometimes. It unfortunately generally requires a Fuel Cell to skip the pillars(and if you pick up a Gesture of the Drowned to use with it, you’re literally trolling). But most importantly, it allows you to clip outside of the boss arena, which will be expounded upon in a bit.
Finally, the Eccentric Vase. This is my favourite equipment to see in an Eclipse run. It allows you to unconditionally skip the final stage, clip outside of the final boss arena, and if you have a Fuel Cell, you can even zip across the stage to check out the cauldrons with little time lost, if you have some Scrap and whatnot.
YO, CLIP THAT
As promised, the forbidden knowledge. Keep in mind that these are both almost certainly unintended behavior, so this knowledge may become deprecated eventually. But so long as the iron’s hot, I will strike it.
First the Volcanic Egg. Using the images below, point in the indicated direction at the indicated location below(this strategy definitely works on this specific location; I haven’t tested if it works on any of the other arches:
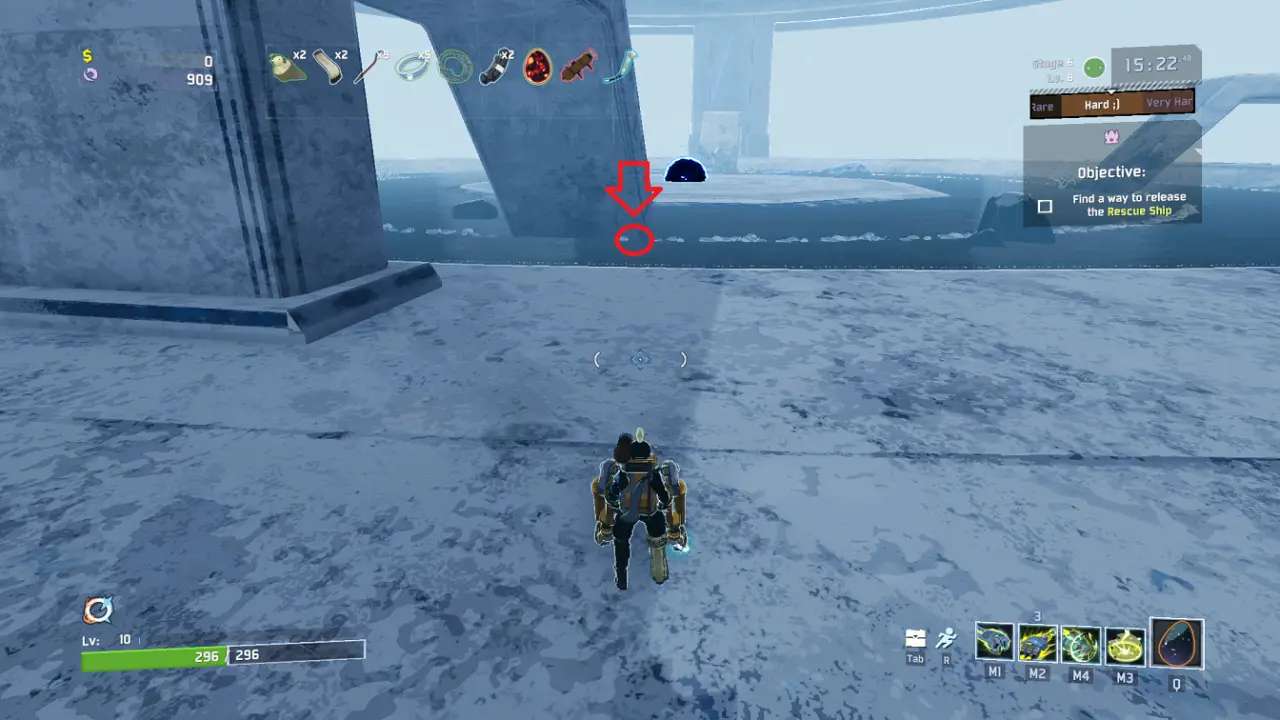
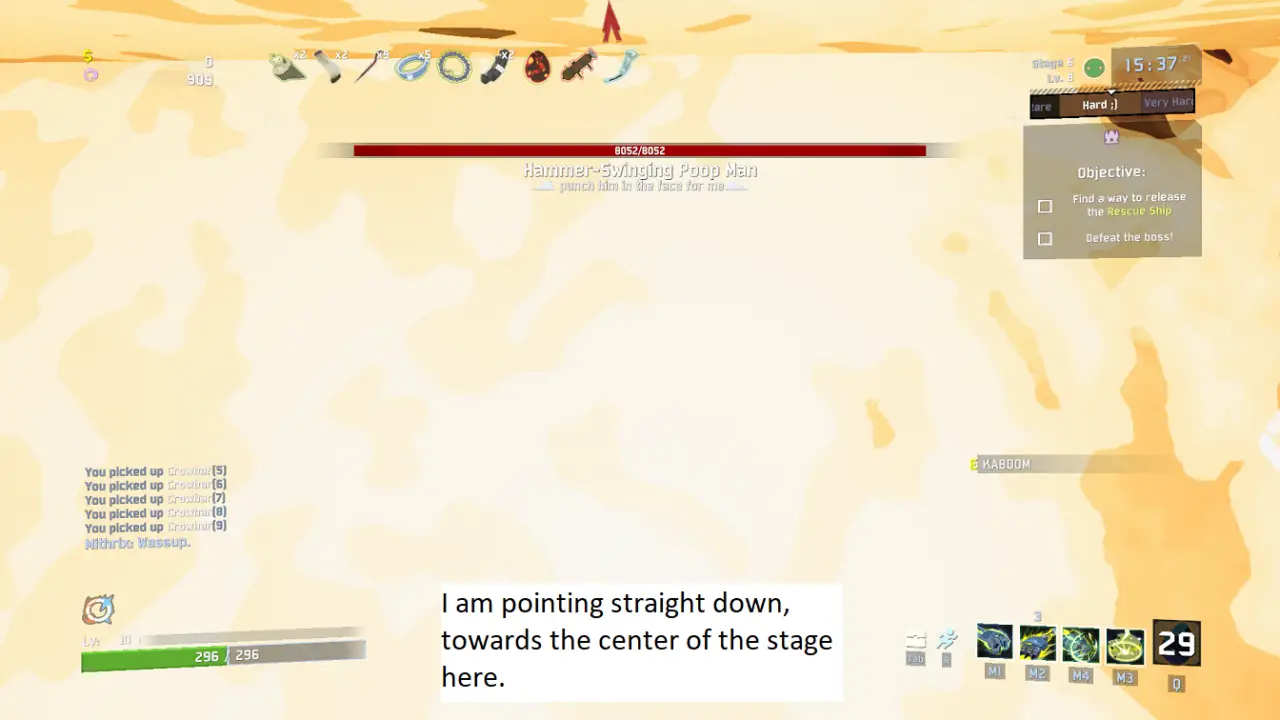
Once you detonate the equipment, you should fall out of the stage. Keep in mind that at E3+, the fall will be fatal, so make sure to have some sort of fall protection.
With the Eccentric Vase, once you skip up to the arena, make sure to not go past the wall. From the outside, make a tunnel that goes from the inside to the outside like this:

Then, rush in, start the fight, and then use the tunnel backward to leave the arena.
Either way, once you’re out of the arena, you can fire upon Mithrix and he won’t have many options. If any of the Lunar Chimeras are right pressed against the wall like a kid at an aquarium, they can fire past the wall and hit you, so be careful. Mithrix can also hit you with his windmill attack. If you need to dodge the windmill with certainty, you can use the Volcanic Egg to go above the stage if you wish. Mind that melee characters cannot really use these strategies effectively unless you get a Visions of Heresy.
TO THE MOON
One relatively well-known piece of information for Eclipse enthusiasts is that Mithrix is kinda fast on E4+. Too fast. With some unorthodox pathing, you can trick him into launching himself off the ramps. If done correctly, he’ll fly so high that he’ll take 10-20% of his health in fall damage. Here’s about where you should jump or move, depending on if you have a Hopoo Feather or not. Take a few attempts to get used to the timing; it’s a pretty easy trick to learn, and has great consequences on all survivors:
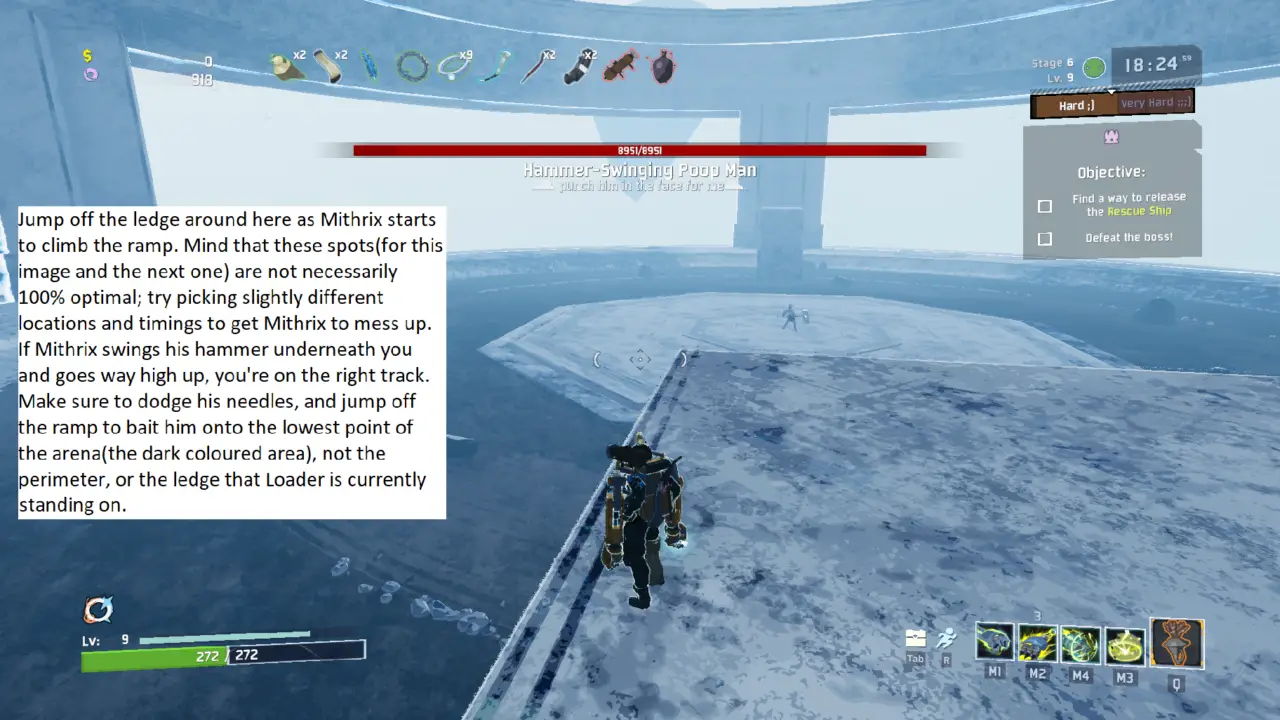
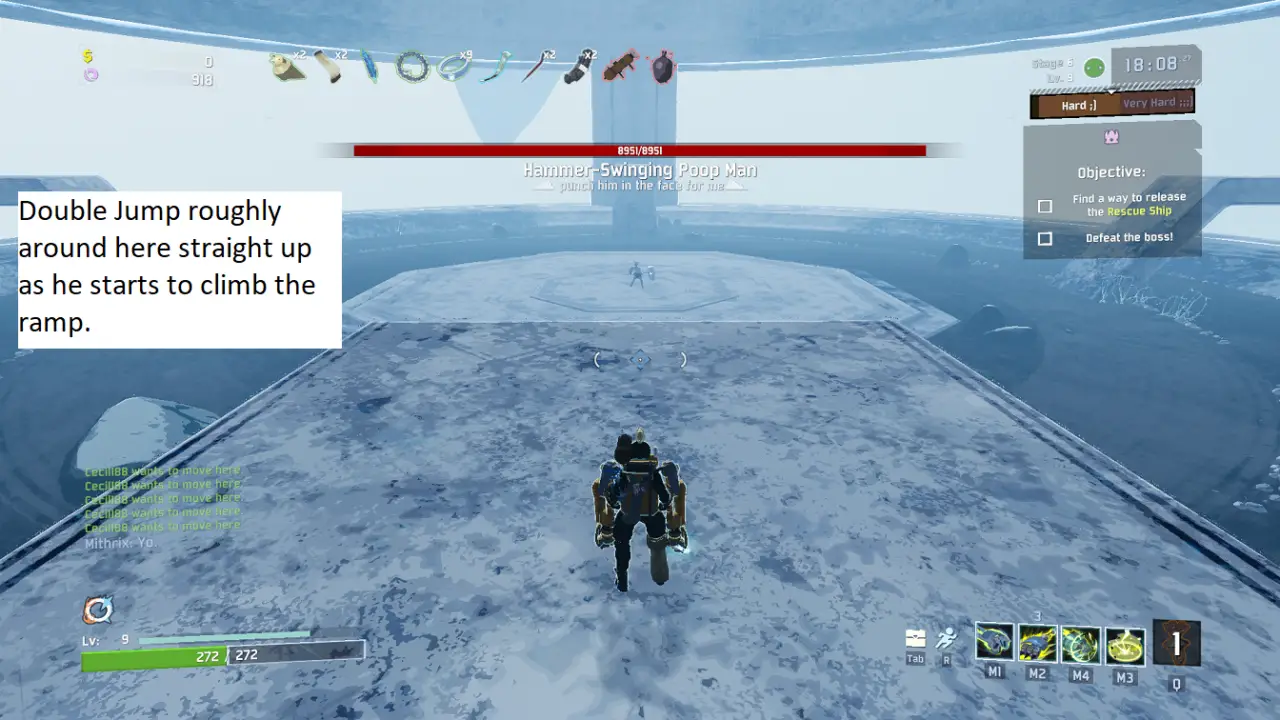
On E7+, he’ll windmill in the center of the stage, so after the windmill, he’ll be far enough away from the ramp to build enough speed to launch off it, so you can trick him in this circumstance as well. Keep in mind that if you have a Chronobauble or some other source of slow, you will want to deliberately not attack Mithrix while he runs at you, or else he won’t have the necessary speed to hurt himself.
Commando
Overall Difficulty: 8/10
Commando is a well-rounded survivor, sucking at just about everything equally.
Jokes aside, he makes use of most items better than most other survivors, but his kit leaves a lot to be desired for taking care of threats quickly. This can make it easy to get overwhelmed, causing time to be lost just trying to overcome the enemy’s HP as opposed to ending some enemies, grabbing some loot, holding down the teleporter zone, and then moving on. This becomes especially true on E8. I tried to patch this up as much as possible by picking a kit that lends itself to burst damage somewhat consistently:
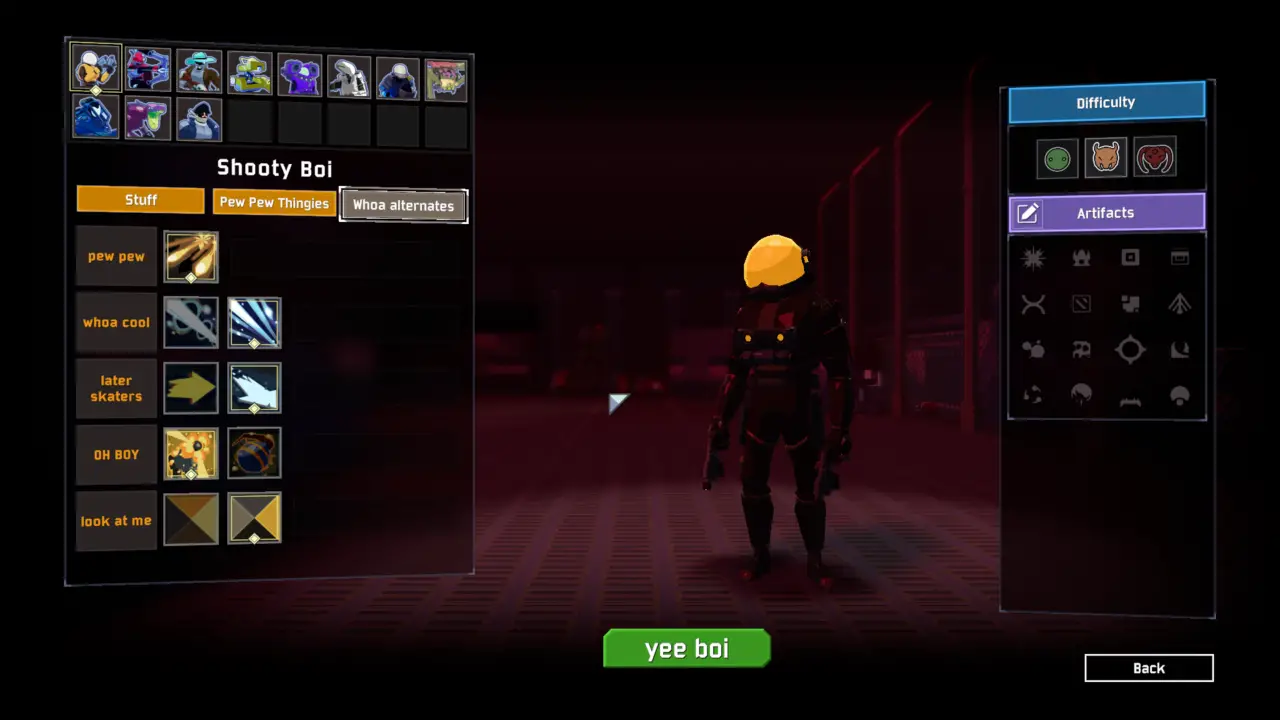
For the secondary, I prefer Phase Blast for taking out something at point blank quickly. It helps make quick work of Golems on the first stage, for example, whereas Phase Round’s scaling is a bit awkward to make work, and won’t really generate any significantly great numbers regardless, unless you’re queuing up a bunch of enemies in a line like a row of watermelons. However, it is somewhat trivial for it to reach the 400% damage threshold for Bands, so if you want Band support, consider taking Phase Round. Regarding the utility skill, Tactical Slide seems to be generally better than Tactical Dive. You have to be cognisant when using it in combat if you want the faster speed, as using it in the air isn’t all that great for dodging most attacks. But having the ability to gain a little extra height, as well as being able to fire during it, allows it to be a generally more versatile skill. For the Special, I must admit I’ve never tried the Frag Grenades. I’m generally pretty bad at aiming things such as this, and I do value the stun of Suppressive Fire a lot, especially against Elder Lemurians; the bane of my existence. 700% for the Frag Grenades seems pretty good in theory though; I wouldn’t be surprised if it’s the generally better option, despite my hesitance. Use whichever Special you prefer. Note that if you pick the exact loadout that I have, you will have no innate Band support. Consider dedicating your Equipment slot to a Preon Accumulator, Royal Capacitor, or the like, or aim for a Hooks of Heresy, or especially an Essence of Heresy to pass the 400% damage threshold for Bands.
Regarding Eclipse modifiers, none of them stick out as being particularly devastating or forgettable, with the exception of E8. Commando gets stuck in prolonged encounters, especially if you have a lacking set of items to work with. This means that chip damage against your maximum HP will eventually have a marked impact on how defensive you have to play to avoid dying. The rest of the issues that Commando has generally just comes from his natural weaknesses; his strength is being able to handle the Eclipse modifiers rather well comparatively.
Due to this, Commando can build items similarly to how you typically build him for other difficulties. Bleed is still incredible for razing bosses and high-threat Elites to the ground. Critical Strikes combined with some Predatory Instincts can also ramp up damage quickly, especially with a favourable Legendary like the Shattering Justice or the Brilliant Behemoth. Combine these things, with maybe a Ukelele or two, and Commando becomes unstoppable. Consider Transcendence to combat E3, and later E5, where Harvester’s Scythes may not be sufficient to overcome the damage being dealt.
Commando, being as basic as he is, doesn’t really have any Eclipse-specific ideas that I’ve found.

Huntress
Relative Difficulty: 9/10
I don’t know if I just suck with Huntress, or if she suffers rather significantly with Eclipse, but I found her damage somewhat lacking, and her dodging ability to not quite make up for it. Here’s the loadout I used:

I feel this loadout is something of a slam dunk; Strafe is much more reliable in a shorter-game-length setting than Flurry; it’s simply not common to get an extreme enough amount of crit to allow Flurry to eclipse Strafe. Phase Blink is indispensable in combat at the small cost of mobility during exploration, and Ballista’s damage output is too extreme to pass up for an AoE that Huntress doesn’t really need and a slow effect that isn’t really important.
It’s hard to offer advice for Huntress, since she is something of a well-rounded character by design. Regarding the modifiers, E3 hurts her less than average, since fall damage isn’t typically a concern for her. E4 hurts her a lot, surprisingly, since she will find it harder to maintain the correct distance from certain high-threat targets, like Elder Lemurians and Brass Contraptions. E7 also hurts her quite a bit, since she will have to dodge more attacks simultaneously. Finally, E8 forces the player to be much more conscious of their playing, since she absolutely relies on her ability to dodge to mitigate damage; her incredibly low HP means practically any instance of damage will incur permanent HP loss.
For build decisions, Eclipse doesn’t really change what sort of stuff she may want to aim for. One notable choice is to acquire a Purity to allow for the ability to use her Utility skill practically whenever you want. From there, you’d want to focus on acquiring Kjaro’s and Runald’s Bands and do most of the heavy lifting with her Ballista special. Purity also allows you to skip the pillars with Volcanic Egg even without a Fuel Cell. Just start with the Volcanic Egg from here, above the arena that contains the Pillars of Blood:

And then once the Egg runs out, stall with a combination of blinks, and hovering for maximum time with the Ballista until the Egg cooldown runs out, as it’s a rather short cooldown. Then you can use the Egg to get on the branches of the tree, and use similar tactics to reach the top from there.
Unfortunately, I have no clever tricks to add for Huntress.

Bandit
Relative Difficulty: 2/10
In contrast to Huntress, Bandit was way easier than I had anticipated. Bandit just has so many good options for skills and build choices, and manages the Eclipse modifiers rather elegantly. Here’s the loadout that I used:
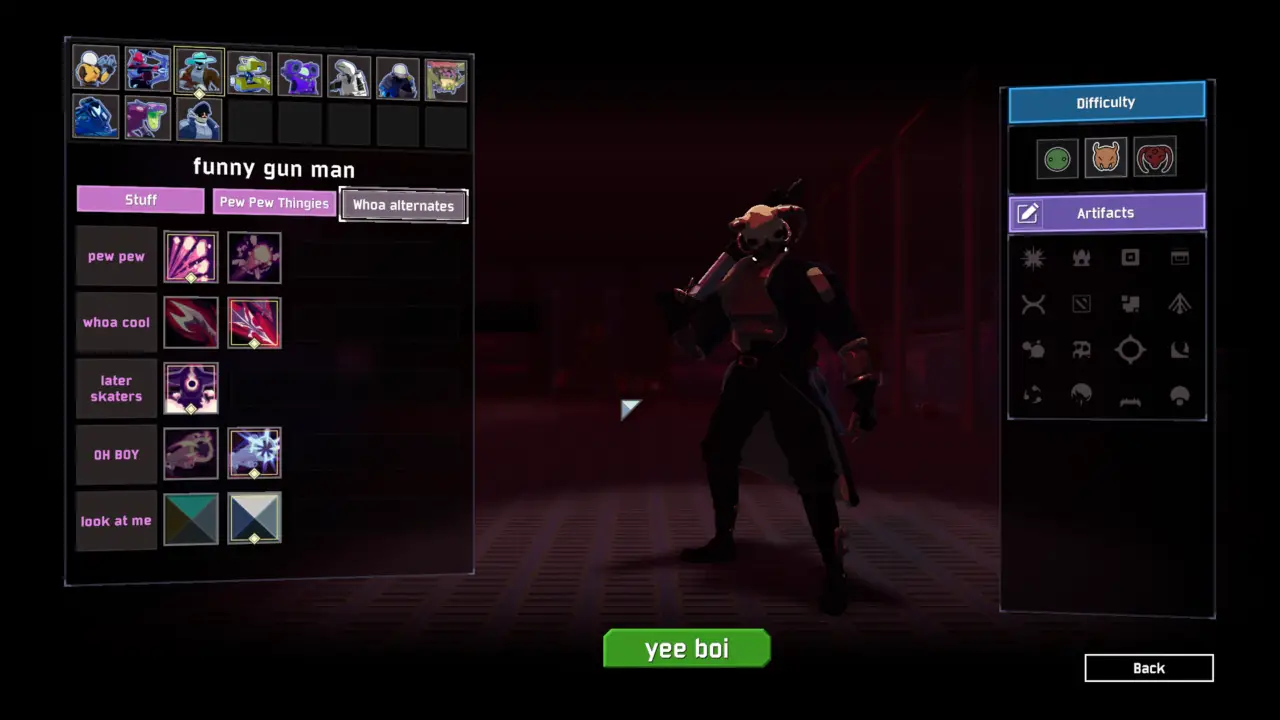
I’ve never used Bandit’s Blast; I feel the shotgun Burst works better for what I use his primary for; If I want to hit a target at long range rather strongly, I’d use Desperado. The shotgun, on the other hand, razes close-range targets extremely quickly, including bosses, and synergizes very well with the Harvester’s Scythe or the Shatterspleen, for example. I suspect I may be picking the wrong option by choosing Serrated Shiv for Bandit’s secondary, but I think it’s cooler aesthetically, and it’s bar none the least important part of his kit, so much so that I don’t use it more than once a stage most times. Finally, I consider Desperado to be much better than Lights Out, since Bandit’s cooldowns are short anyways, and Lights Out has antisynergy or redundancy with many items, such as Bandolier, Brainstalks, Purity, and others. Desperado also makes bosses a breeze, with simply overwhelming power for the first 2 stages, or 4 if you get even just a single band.
As far as Eclipse modifiers go, E2 affects Bandit less because he can decimate the boss extremely quickly, and then stand his ground against the remaining enemies mostly trivially. E3 also does little against Bandit, since his Utility skill is akin to having two extra jumps right off the bat. E6 probably hurts him more than the average survivor, because losing a bit of power relative to the enemy due to loss of gold income means that he’ll be a bit more likely to be on the wrong side of the fence when it comes to killing enemies extremely fast. E8 is also more challenging for Bandit because he has a more difficult time mitigating damage.
Regarding items, I tended to build around Desperado. Purity is an incredible option, because the numbers happen to work out that each one *sort of* allows you to fire Desperado twice as fast, up to a maximum of 3. 2 Purities is also enough to gain height on the final stage with Bandit’s Utility skill alone(though it takes a while and requires strict timing). If you can skip the pillars this way, you can save your equipment slot for a stronger one in terms of damage like a Royal Capacitor, if desired. Brilliant Behemoth is also exceptional because there’s an exploit where any enemies killed with Desperado’s acquired explosion also grant the stacking tokens, allowing a group of enemies clustered together to yield a few tokens in a single shot. (This is also probably unintended behavior, so don’t be surprised if this particular note becomes outdated at some point).
Aside from that, Bands are obviously extremely powerful items for Bandit, and the Hooks of Heresy are a good option to replace Bandit’s lacklustre Secondary. Strides of Heresy are also worth considering, especially if lacking Transcendence, to give Bandit a truly useful option for healing and avoiding damage.
One trick, if the player has enough Purity, or other appropriate items to reduce cooldowns, is that Bandit can fly above Mithrix’s windmill attack. This attack does not reach all the way to the ceiling, so if Bandit is up against the ceiling, he cannot be hit by it. It also provides you with plenty of opportunities to fire Desperado at Mithrix, even from behind for the guaranteed critical hit, when he’s a sitting duck. Notably, Bandit also fares well against Mithrix’s final phase, as he cannot steal your Desperado tokens.
MUL-T
Relative Difficulty: 1/10
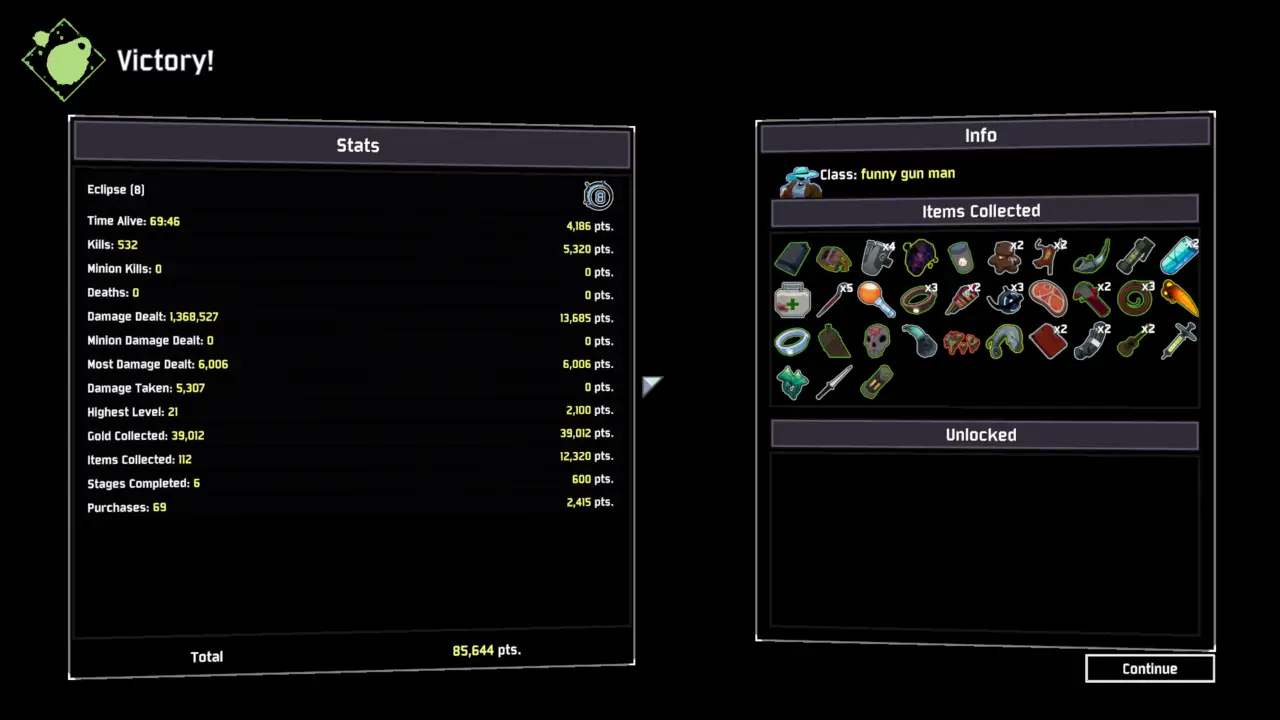
Eight runs, eight victories. MUL-T is absolutely busted and can do no wrong. He’s basically invincible and never gives a crap about anything in his path. His damage is exceedingly powerful, and he has the sustain to generally just force his way through any opposition while they try to leave a scratch on him. I figured his low mobility would make him a somewhat difficult survivor to beat Eclipse with, and I can’t recall the last time I’ve made such a grievous error in judgement. Here’s the loadout I used:

Going into this, I had anticipated recommending whatever primary you feel comfortable with, since MUL-T has a pretty good set of options for whatever playstyle. But, given the extreme dominance that the Rebar Puncher exploit grants, I have to circle back on that and insist that you at least entertain the idea. For the uninitiated, since Hopoo changed the Rebar to fire at the start of the cycle, and charge after it’s been fired, as opposed to the other way around, you can skip the charging by using Retool. So if you constantly hold down the inputs for Rebar and Retool, you can fire the Rebar far more frequently than intended. Hopoo seems to have made an attempt to nerf it since the exploit was discovered, but any source of attack speed increase will put it back to where it was, about twice as fast as it is right now with no items. I suspect this will be nerfed again in the future. As for choosing Retool, not only is it required for the exploit, but it also gives you a second equipment slot. This is very nice because it allows you to clip out of the stage with otherwise mediocre equipment, and still have a slot available for a heavy hitting item like the Royal Capacitor.
Regarding Eclipse modifiers, MUL-T dislikes E3…and that’s about it. He simply does not really care about any of the other modifiers at all. And since his HP pool is rather ridiculous, getting a Transcendence makes him all but immortal, whilst simultaneously removing the singular Achilles’ heel that he has.
For items, MUL-T will want to make an immediate dash for anything that consistently increases his attack speed. The obvious choice is the Soldier’s Syringe, and it works just as effectively as you’d expect. Getting a single one of these roughly doubles your damage output, so it is absolutely priority number one. If the game refuses to give you one of those, the Warbanner is also unironically amazing for this situation, for perhaps the first time in RoR2 history, since it allows you to clean up the Teleporter event quite handily. No other source of attack speed is nearly as consistent, unless you can get an absurd amount of critical strike chance to pair with Predatory Instincts, or an absurd amount of Equipment usage to pair with a War Horn or Gorag’s Opus.
MUL-T doesn’t have any special strategies on Eclipse. He doesn’t need them.

Engineer
Relative Difficulty: 3/10
Engineer seems to either perform extremely well, or he gets murked in the first 4 seconds of an unfavourable encounter. Part of this is due to his generally quirky playstyles, which can be exacerbated further depending on what sort of loadout you give him. So without further ado, here’s mine:

To start with, the Spider Mines are a pretty slam-dunk choice for me with my playstyle of just yeeting them at the enemy and hoping it sticks to them. I typically don’t remember to set up mines ahead of time, but I suspect that even if I did, the Spider Mines are generally more favourable just on their stats and context alone. Engineer’s Bubble Shield utility is a great option for Stage 5 in particular, where Mushrums tend to eviscerate your turrets in 3.4 seconds any time you set them up in the same time zone as them, as well as against Brass Contraptions and Elder Lemurians, but I still find the Thermal Harpoons to be too good to give up, especially for the earlier stages. It’s Engineer’s only real on-demand option to take care of flying enemies, unless you happen to have a few Bandoliers or something. As for turrets, I prefer the stationary ones, but there are definitely arguments to be made for the moving turrets, especially on E3+.
As far as Eclipse modifiers go, E1 is surprisingly impactful against Engineer unless you have some way to heal fast or not need to in the first place, since his turrets will spawn with half HP and be less likely to overcome an immediate threat before breaking. E2 is generally less impactful, because Engineer’s a couch potato and likes to secure a small area himself in the first place. E3 is a menace for Engineer though, since he has no fall protection. Normally, Transcendence is the obvious choice, but if you’re choosing to use the stationary turrets, it renders Bustling Fungus strategies completely irrelevant. Consider Transcendence if you are using moving turrets, or if you haven’t found any Bustling Fungus by Stage 4 or so, depending on how you want to play it. Finally, E5 is of note for Engineer, since he’s one of the few survivors that can pull off a healing-based playstyle.
Besides the obvious healing related synergies that are probably present in every guide out there, Engineer is another survivor that likes a Crowbar early on. Both his mines and his harpoons are generally just shy of killing most common enemies in one hit, so a Crowbar allows you to kill them without having to finish them off with his awkward Bouncing Grenades. This also prevents accidentally doubly targeting basic enemies with harpoons, as if the first one kills, the second one will redirect to something else, as opposed to overkilling a basic Beetle or Lemurian.
Engineer is extremely quirky with the various shenanigan-related strategies. He has no attack that has an arbitrary range(consider Visions of Heresy to fix this). Thus, if you clip out of the arena, then once you start phase 2, phase 3, or have your turrets die in phase 3 due to windmills, then Mithrix(or the chimeras) may lose aggro, with no trivial way to actually attack them to have them come after you again. In such circumstances, you can place a turret through the arena barrier, while being careful not to walk through it yourself. This will create a valid target to bait the enemies. Alternatively, you can set up the method to clip out of the arena a second time to draw the enemy in again. While you’re out of the arena, on E4+, once you have drawn Mithrix’s attention, consider placing your turrets about here:
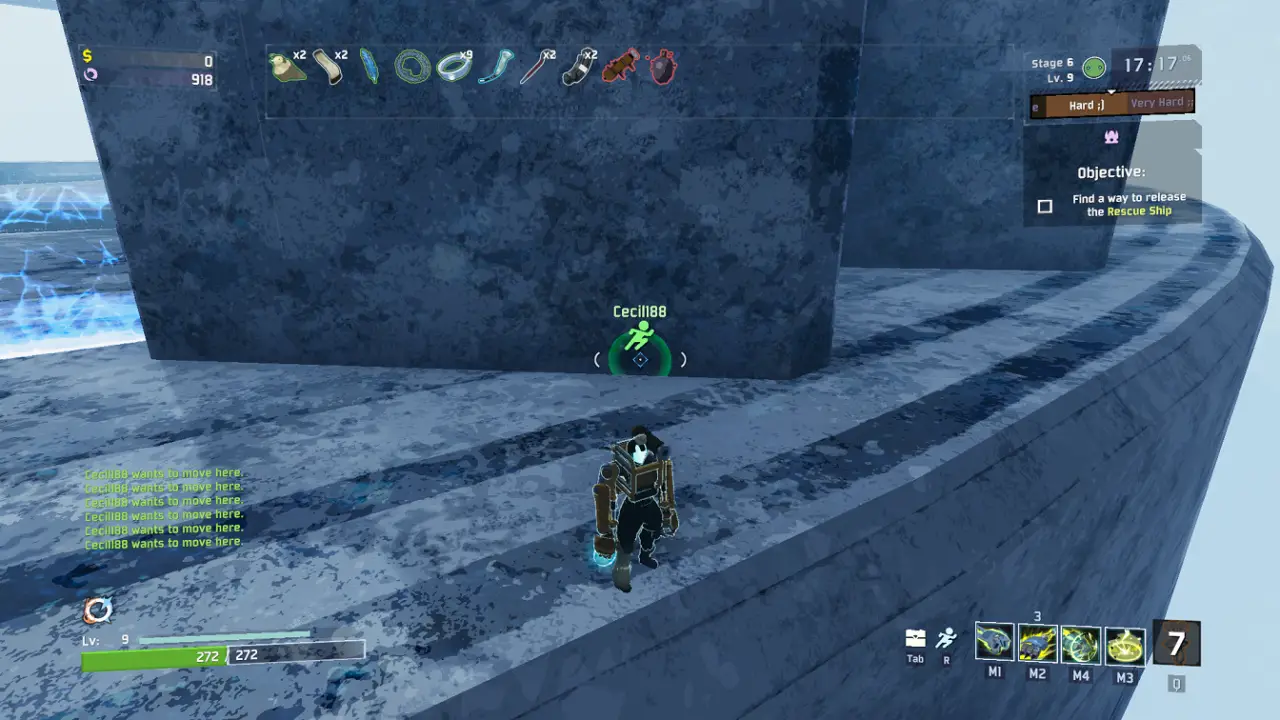
This is roughly the spot where Mithrix will jebait himself off the ramp and take fall damage if he goes after your turrets. Alternatively, if you don’t have a way to clip out of the arena, consider placing your turrets here:
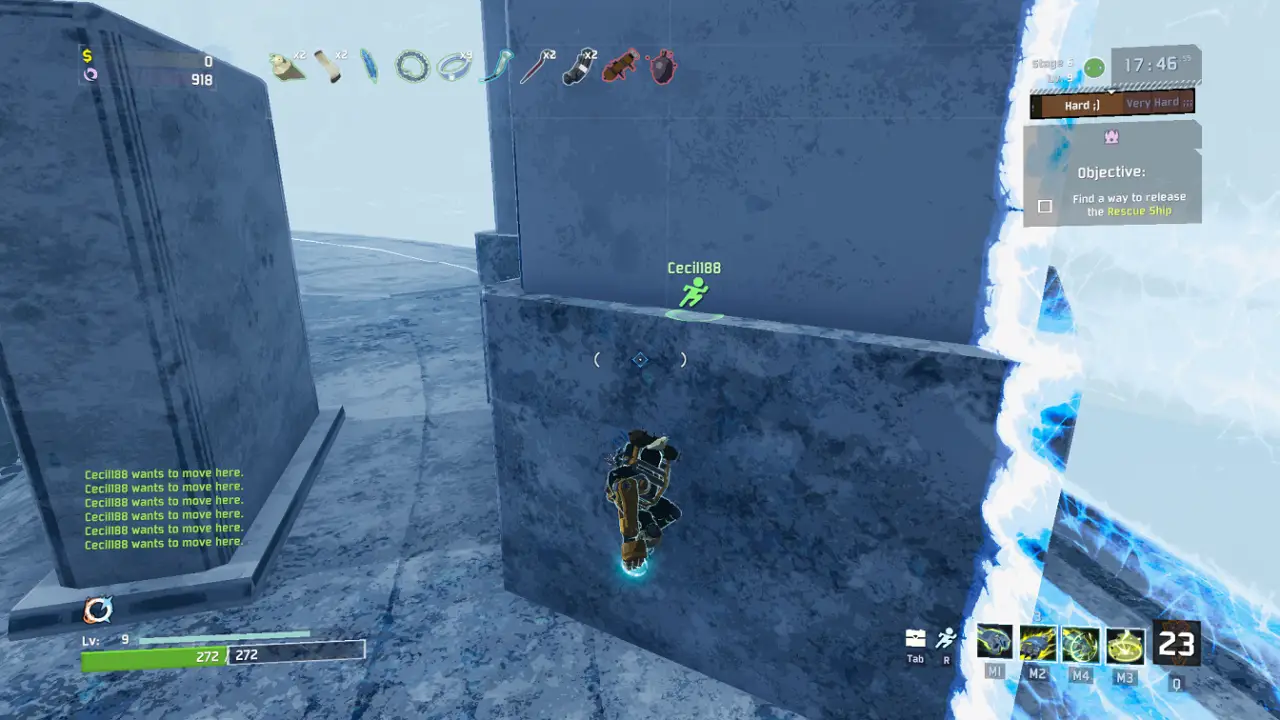
In phase 1, Mithrix cannot hit the turrets on this ledge ever, if Mithrix is on ground level. Once the turrets are attacking him unfettered, you can go to the higher platform to attack Mithrix yourself from there. In phase 3, this will still work to some degree, but the pillars of light he spawns with his hammer can be placed in a spot that will damage anything on that portion of the ledge, so take care to not spend too much time there. On a slightly unrelated note, Engineer’s turrets have a lot more survivability if you’re charging the pillars if you place them *on top* of the pillar itself. This will keep them out of reach of the death pools of Lunar Exploders.

Artificer
Relative Difficulty: 4/10
Artificer is a strange character for me, in which I found her attempts to struggle more against the regular stages compared to the final boss, whereas it’s typically the other way around. Here’s the loadout I used for her:

Artificer’s Flame Bolt was preferable for me, due to it being able to kill Lesser Wisps in one strike on Stage 1, which is quite important for E8. For her secondary, I imagine both options are good, though I’ve never used the Nano-Spear. I really value the spherical damage option from the Nano-Bomb, and since she only has one Utility, I already have the icy execute covered there. For the Special skill, I can’t imagine taking the Flamethrower. I know some people swear by it, but I’ve accidentally cancelled it by sprinting far too many times, and it doesn’t let me unconditionally skip the pillars. Ion Surge all the way for me.
As far as modifiers go, E2 is a bigger issue to watch out for, since Ion Surge carries you out of the teleporter radius. E4 is also something to get used to, since Artificer lives off having long-ranged attacks that travel slowly. E8 is less of a problem than average, however, since she can avoid entire situations at will with Ion Surge, which is especially notable in the fight against Mithrix.
Regarding her loadout, Artificer can somewhat safely avoid things to boost attack speed, since attack speed does relatively little for her, as well as things that proc on hit, since she hits relatively infrequently. Of course, a Nano-Bomb yielding an AtG Missile proc will obviously be devastating, but it’s uncommon enough such that reliable things like Bands will generally be preferable. To this end, Purity can have a decent impact on her primary and secondary for little loss if items are chosen carefully. Transcendence is also an even better item than usual for Artificer, since she can completely disengage from a fight at will, even if she doesn’t benefit from the near-immunity from fall damage as much.
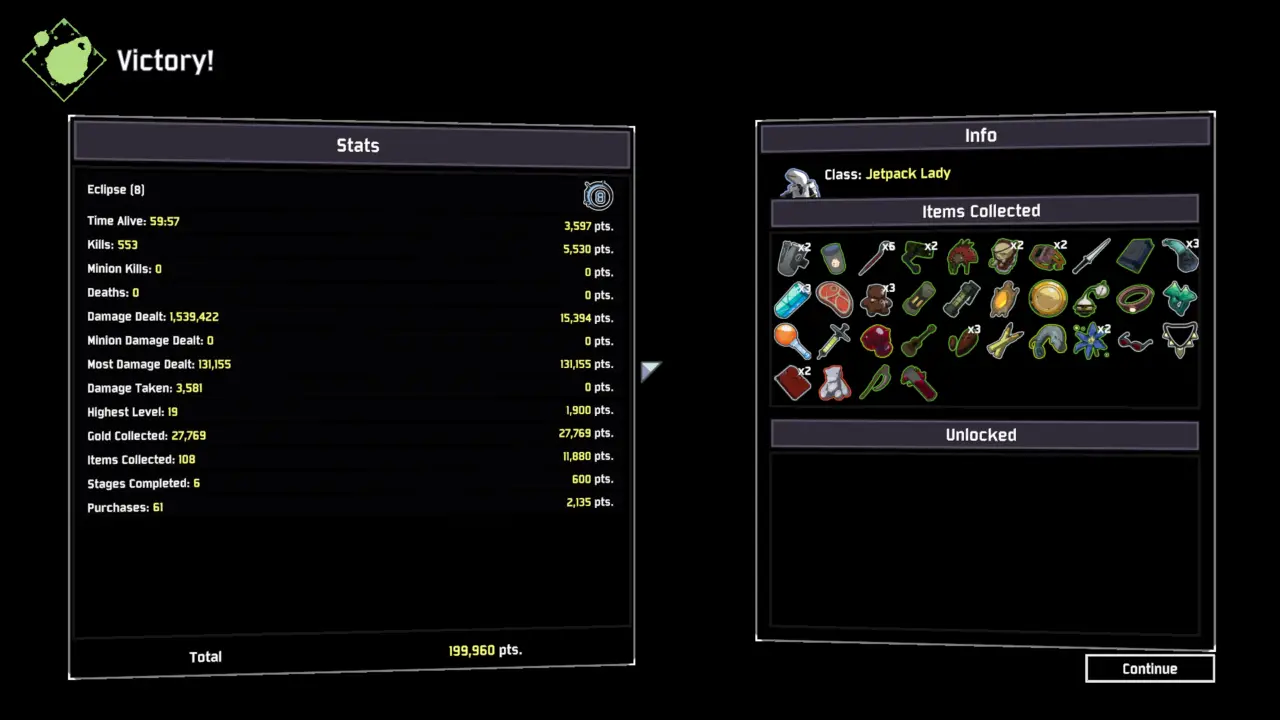
Artificer has a couple tricks up her sleeve for the final stage. Obviously, skipping the pillars is trivial with Ion Surge, but she can also fly over Mithrix’s windmill attack. It’s also super common knowledge, but Mithrix is vulnerable to icy executions from Artificer’s secondary or utility skill, so you can ignore about a third of Mithrix’s health. Finally, staying above Mithrix’s head constantly prevents enemies from spawning. On E4+, Mithrix also moves fast enough such that if you charge your Nano-Bomb at sprinting speed, while pointing as far down as you possibly can, it will generally land close to or on Mithrix’s head, allowing you to best him without leaving the top 10% of the arena. This means that no supporting enemies will spawn in the third phase. Just make sure to dodge his needle attacks.
Mercenary
Overall Difficulty: 2/10
I originally anticipated that Mercenary was going to be rather challenging, due to the fact that none of my anticipated cheesy tactics were going to work without picking up a Visions of Heresy or relying on Slicing Winds, and even that would be a questionable approach at best. Thankfully, Mercenary is an absolute chad and doesn’t really care about things like “enemy attacks” or “hitboxes.”

I picked this loadout for a couple of reasons and found even more reason to bolster my choice as I did the Eclipse runs (I’ll go over that later). For one, Rising Thunder can trigger Bands, which Whirlwind cannot. I dislike the need to constantly do 180s and such with Blinding Assault, so Focused Assault is much easier on my wrist and gives Mercenary a higher single-target damage skill. I’ve never actually tried Slicing Winds, admittedly. Eviscerate just seems to fit better with what I want Mercenary to do.
Mercenary is a character that’s pretty good at ignoring the Eclipse modifiers. E2 is notably annoying, though, for making the teleporter event take longer if the boss happens to be a Wandering Vagrant that decides to hover just outside of the teleporter radius or something. Also if you dash outside the teleporter radius with one of Mercenary’s 67 movement skills, that’s also time lost. But other than that, Eclipse modifiers perform somewhat poorly when trying to obstruct iframes as a source of defense.
For items, if you are scamming Newt with billions of counterfeit Lunar Coins, you can always choose to finesse several Purities from him, allowing you to remain invincible so long as you chain Eviscerate against things. Aside from that, Mercenary is just built such that anything can be of use. As such, while Transcendence’s fall protection is less exaggerated in terms of use due to Mercenary’s excellent vertical control, it still nullifies the need for any healing items. Pair this with the aforementioned Purity(or don’t), and you end up being left with a lot of 3D Printer fodder. Find a good Focus Crystal or Tri-Tip Dagger printer(or something), and you can stack things to a very significant degree, giving you a very pronounced effect.
As for special tricks, Mercenary doesn’t really need them all that much. And given that he’ll be hard pressed to cheese the Mithrix fight in any way, you can feel free to keep more traditional Equipment like the Royal Capacitor or Disposable Missile Launcher(which will be indispensable in the final phase of the fight. He even has a built-in double jump, to make E4+ Mithrix easy to jebait. That being said, Mercenary does have a trick up his sleeve, in that he can skip the pillars pretty much unconditionally. If you start from here:

then you can make it up to the top with his skills alone. This is dependent on your loadout; this is the aforementioned bolstering that vindicated my choice of skills here. Admittedly, I’ve never actually tested if he can make it up there with nothing, simply because I already incidentally had enough mobility to make it up there every single run; even a single Backup Magazine or Hopoo Feather is sufficient. Just some tips: if you have a Backup Magazine, use your secondary first, so that it won’t be sitting on full charges as frequently. If you have a Wax Quail, make sure that you take your innate second jump while sprinting; it also receives the bonus from it, unlike jumps granted by the Hopoo Feather. Finally, if you have a Hopoo Feather, use your bonus jump last, to maximize the distance covered by your skills before resorting to the midair jump to keep you airborne. The more of these items you get, the less important it is to use your mobility resources wisely, though.
And as an aside, you can use similar techniques to keep yourself high above the dropship when escaping the final stage, similar to Ion Surge Artificer. Just keep an eye out to make sure you don’t dash out of the radius, and keep some sort of plan in mind when you inevitably have to land; it would be terrible to die to fall damage after charging the dropship.
REX
Relative Difficulty: 10/10
Let’s be clear: I actually really enjoy playing REX. REX was my original main before I started branching out and acquiring mastery of every character. But Eclipse does a great job of kneecapping REX at every turn. If you can beat E8 with REX, you can find victory with any character. For E1-E7, I used this loadout:

I recognize that REX’s Directive: Drill isn’t exactly popular for REX’s secondary, but I generally prefer it. But this isn’t exactly the kind of guide to have a big debate on that, so if you’re a die-hard Seed Barrage kinda person, go for it. It’s hard to justify taking REX’s Directive: Disperse for the utility skill or Directive: Harvest for the special skill, though. The choices I have here just seem better overall. For E8, however, I swapped to all of REX’s attacks that don’t deal self-damage, since it’s a huge penalty to lose a bunch of your maximum health for one of your own attacks.
As far as the modifiers go, REX is probably the singly most affected character. E3 is tough for REX, since he has twice as many ankles to break he doesn’t have a good utility skill for breaking his fall. E4 makes a relatively large difference since REX has to lead his primary shot and can have trouble maintaining a sufficient distance from mobile enemies. E5 hurts a ton because REX lives and dies by strong healing. E7 makes a large difference because there are more attacks being thrown around that REX has to tank. And E8 is a major problem because it pigeonholes you into choosing arguably REX’s worst possible kit overall. Worst of all, Transcendence is a hard sell because it cuts the extra survivability offered by his primary clean off.
REX can benefit from just about any item you throw at him, at least. Depending on the circumstance, you can even start doing things like ditching healing items for attack speed, since REX can live off the healing granted by his kit alone. For Eclipse runs, I tended to build to take advantage of my secondary attack, so things like Leeching Seeds, Harvester’s Scythes, Shatterspleens, Tri-Tip Daggers, and such would scale more strongly with the repeated hits of the secondary. If using the default secondary, you may prefer Bands, as well as more traditional on-hit items, like AtG Missiles, Molten Perforators, and such.
REX has a unique way of skipping the pillars. All he needs is a Hardlight Afterburner. Using all three charges of your Utility at once after jumping and pointing straight down will yield a massive amount of vertical mobility. From there, you can use any further charges that come off cooldown for additional momentum, or to steer. Keep in mind that if you fail this maneuver on E3+, you will likely die from the fall. You may wish to do this outside of this level of difficulty once to see how it’s done.
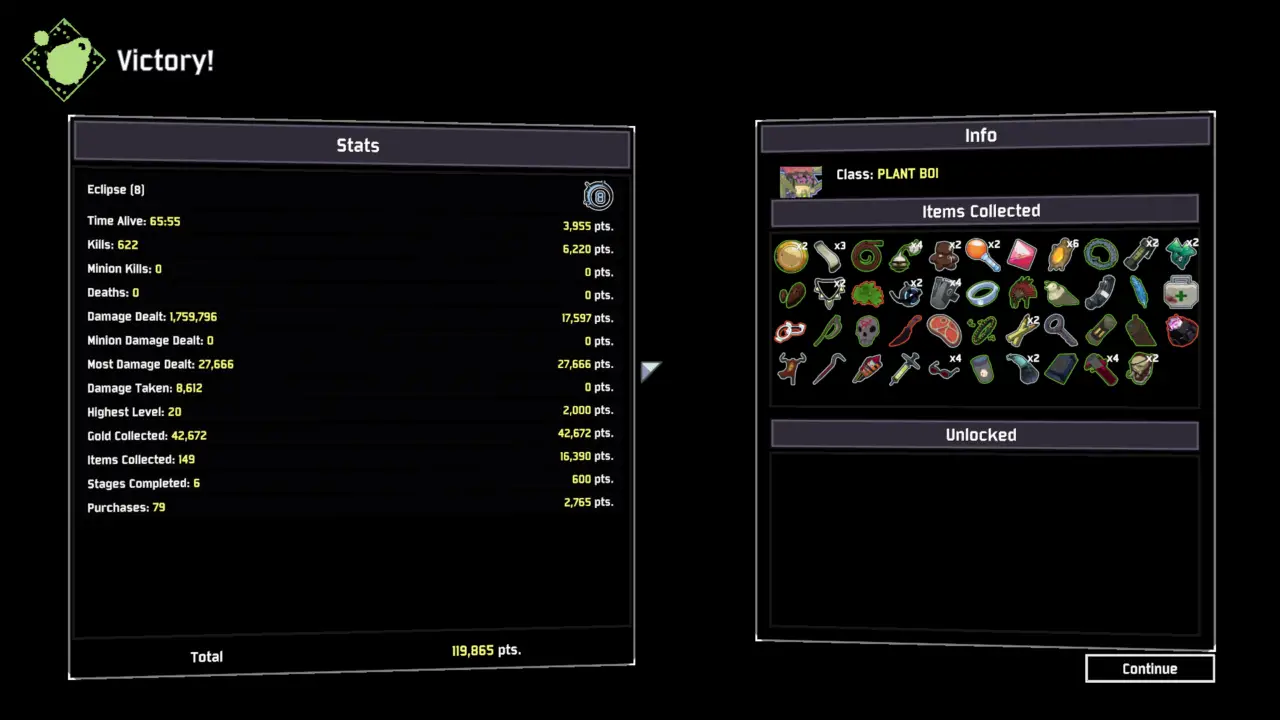
REX has some unique tech during the Mithrix fight. On E4-7, you can use the standard trick to have Mithrix launch himself high into the air. If you can predict where he will land and use your default Special there, it will drag him into the ground at even higher speeds, yielding even higher fall damage. I think my record was about 1/3 of his health; a clean 40 000 damage. It’s tough to pull off, but there’s little consequence for failing, so you might as well give it a shot. Alternatively, on E6-(redundant on E7+), you can snare Mithrix in the centre of the stage on his third phase so that he always does his windmill attack at centre. This has the advantage of him being farther away if you prefer dodging the attack just through luck by being far away, and on E4-6, it allows Mithrix to be far enough away to build up enough speed to jump too high and receive fall damage. Just don’t shoot him with your primary as he runs towards you; the third hit inflicts Weaken, which reduces movement speed.
Loader
Relative Difficulty: 6/10
I imagine if I went through all of Eclipse with what I know now, I would find it a fair bit easier than this. But since Loader was my first character for Eclipse, I was still figuring out what worked and what didn’t. I also suck at the Mithrix fight, which Loader has somewhat of a difficult time managing with the loadout I picked:

Spiked Fist is unsurprisingly my favoured choice here for the secondary skill. I also prefer the Thunderslam special to the Pylon for more burst damage. Using the Pylon as a grapple point also becomes less necessary as you get more familiar with Loader’s movement. From here, I choose Thunder Gauntlet for the ability to kill groups of enemies a bit more easily, though it suffers from not having an exit strategy against Mithrix.
Loader manages Eclipse modifiers reasonably well. Once the boss is dead, she can stand her ground in E2’s smaller teleporter radius. E3 is a nonevent, and none of the modifiers stand out as being particularly obnoxious for Loader.
For items, just pray to the holy Band gods and you’ll be fine. Crowbars can also be of great service. Attack speed can be mostly neglected/traded for other things. Other things that consistently boost damage like Focus Crystals and Lens-Maker’s Glasses can also allow Loader to breeze through enemies. Purity’s a potentially off-beat choice, but can be quite helpful, especially paired with some other cooldown reduction like an Alien Head or Hardlight Afterburner.
Loader needs no additional support to skip the pillars, so you can save your Equipment slot for something that deals damage. Of note are the Royal Capacitor, the Disposable Missile Launcher, and the Forgive Me Please(with the correct items), since those can be used from the ceiling to target Mithrix. Reaching the ceiling on phase 1 requires some item support, but is largely unnecessary. It’s much easier and more useful to do so on phase 3, where you can grapple onto the tallest pillar, and then punch and grapple upwards to reach the ceiling.
This is important because Loader has unique tech that allows her to grapple the “invisible” ceiling barrier above Mithrix’s stage. This allows you to dodge all of Mithrix’s attacks unconditionally except some stray needles, occasionally. From here, all you need to do is slowly and steadily whittle down Mithrix’s HP, due to the fact that no other enemies will spawn due to your extreme height. If you have no relevant equipment, you can still quickly escape to the ceiling to dodge the windmill attack. From there, you can often approach and deal damage with Thunderslam, and then retreat using your secondary.
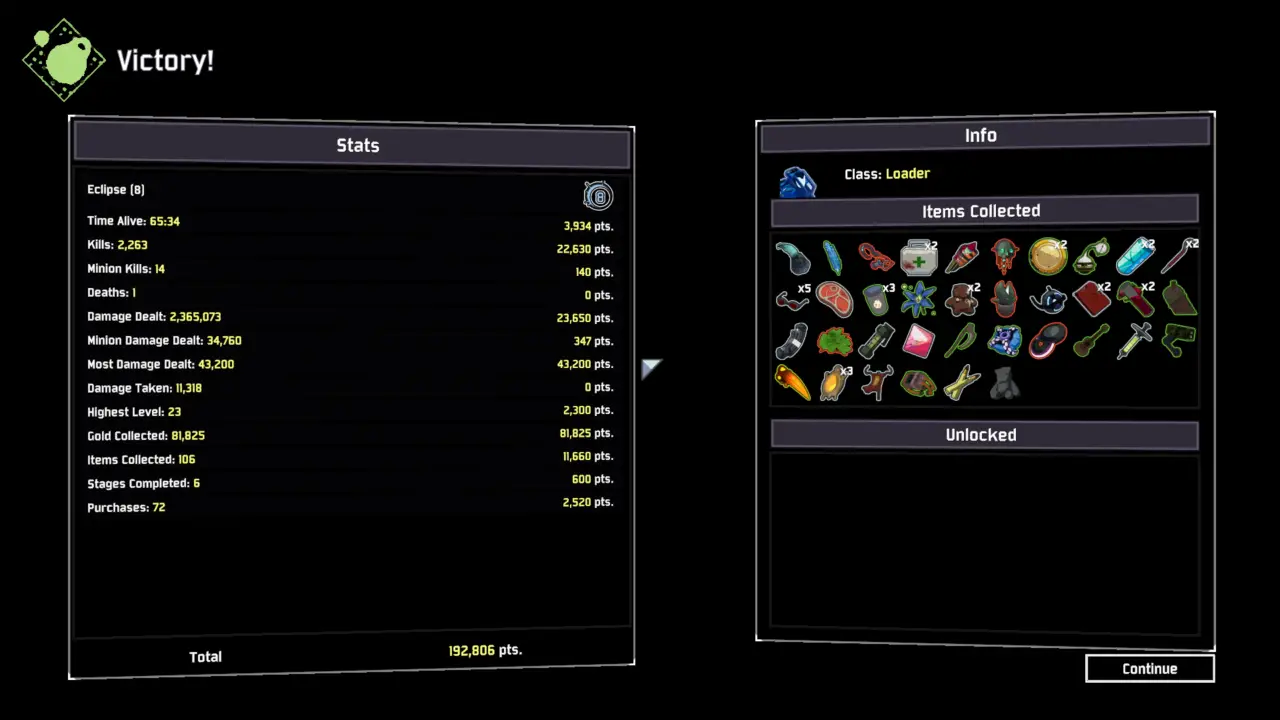
Acrid
Difficulty: 2/10
Acrid is yet another character who I thought would be pretty difficult to handle, but turned out to be surprisingly effective. I underestimated how much Poison just shreds high threat targets, and counteracts some of the more obnoxious mechanics like the shield regeneration of Overloading targets. He generally needs some specific items for support, so I tried to pick his loadout to make use of as much as possible:

First, Poison is just too strong to take Blight over it. Acrid typically isn’t sweating over the low-threat targets that can be tanked; he wants to get rid of the higher priority targets that he can have a hard time dodging, like Stone Golems. Poison’s inability to kill isn’t a big deal either; it just means that he may have to use his Special an additional time to clear out a group. I picked Neurotoxin for my secondary over Ravenous Bite; Acrid is rather clumsy at dealing with aerial threats, and this is his best option to deal with them other than perhaps getting a Visions of Heresy. Frenzied Leap over Caustic Leap is perhaps a matter of taste; the former has Band support, and is the only part of Acrid’s kit that has it aside from the third hit on his unwieldy primary, or against a sufficiently damaged target with his alternate secondary, which typically defeats the purpose of Bands in the first place, so I chose that rather than the added movement flexibility that typically comes with Caustic Leap.
Eclipse modifiers are somewhat uneventful for Acrid. However, E3 is surprisingly detrimental, despite Acrid’s ability to negate fall damage with his Utility. If you strike a wall with it at a downward angle, you will cancel the utility skill, alongside with its fall protection, and the downward velocity generated from the utility can cause you to die. If you don’t have any fall protection from items, try to be aware of exactly how you use your Utility skill. E8 is also theoretically a problem. Acrid has a very difficult time dodging certain attacks due to his larger hurtbox and an overall lack of mobility outside of his Utility skill. Be mindful of how you approach and dispatch certain common targets like Beetle Guards and Stone Golems, and practice defeating them without taking damage on lower Eclipse difficulties.
As for items, Acrid obviously wants things to help him clear groups of threats, like Gasoline or Will-o-the-Wisps. Transcendence is, once again, another high-priority item if you want to use it, but for a slightly different reason this time. Similar to Artificer, Acrid can launch himself high into the air, with his utility. If you have enough movement speed and are facing targets that are mostly grounded or with easy-to-dodge projectiles, launching yourself straight up can potentially be an unconditional way to stay out of danger for 9 seconds, allowing you to have your shields regenerate to full. Acrid can focus on items that facilitate this sort of gameplay, because most bread-and-butter options for additional damage like Soldier’s Syringe, Sticky Bomb, and Predatory Instincts, for example, aren’t as useful if you adopt a more hit-and-run playstyle that leans on Poison damage.
Acrid can skip the pillars somewhat generally; all he requires is a nebulous amount of movement speed(I have no idea exactly how much; there are plenty of sources of it, and you can get away with less if you are skilled with Acrid’s leap). Acrid’s Utility skill will cover most of the height, so you typically want to start near the tree and go straight up, rather than start in a place that’s technically closer to the top, but ends up being somewhat far out rather than somewhat far below. Another thing is that you typically want to use mid-air jumps and such to stall, rather than try to gain height with them. Stalling is easier if you’ve taken Caustic Leap, since it has a shorter cooldown, so you’ll generally need less movement speed in general with it. Finally, stalling is important because it allows Red Whip to become active again, as Acrid’s Utility will gain the benefit from any bonus movement speed that the Red Whip is conferring, but also consume the movement buff in the process(making it the only Utility skill that exhibits this sort of behaviour, as far as I know), so getting an extra leap with the Red Whip buff active can make the difference between making it up the tree or failing to do so and falling to your death.
If you clip outside of Mithrix’s arena using the Egg or Vase, Acrid can shoot Mithrix in the center of the arena using his Special skill; this can prevent you from needing to enter the arena and clip out again for phases 3 and 4. Also, notably, with enough movement speed, Acrid can land on the ledge above the arena:

This allows him to dodge the windmill attack unconditionally.
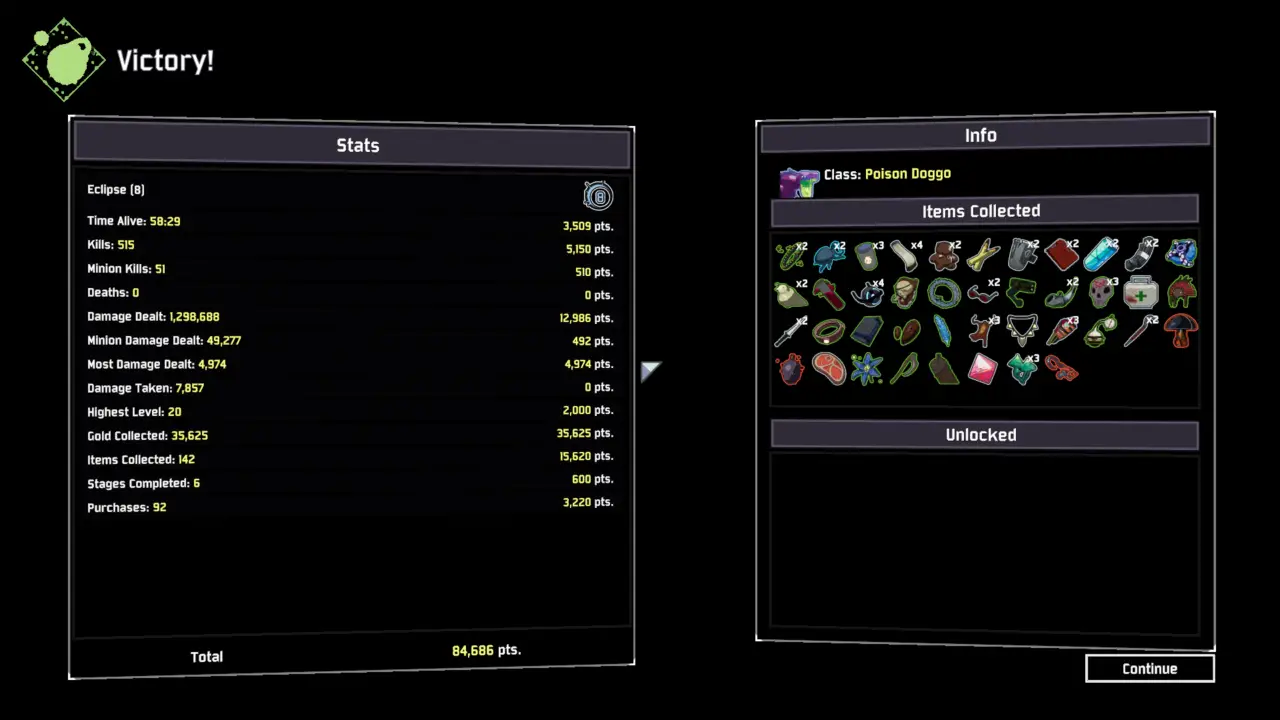
Captain
Relative Difficulty: 7/10
Captain is a survivor in which you really have to be conscious in playing to his strengths, and patching up his weaknesses. What said strengths and weaknesses are will also be somewhat dependent on what loadout you use. So let’s start with that:

To start with: the choice in utility skill. This was probably the hardest choice I had to make regarding loadouts, at least from my perspective. Orbital Probe is well-rounded, powerful, and generally useful. The Diablo Strike is much more unbalanced, and thus has a lot stronger benefits, but also drawbacks. It’s not something that can be used in general combat for the most part, instead opting to delete bosses. This also includes Mithrix. I did have Diablo Strike for E1, before I swapped it out on E2+, and I was able to take out over half of Mithrix’s health in Phase 3 in one hit; an incredible boon if landed correctly. Diablo Strike also unconditionally allows you to skip the pillars–by aiming it at yourself(it has friendly fire). However, this has some caveats. The only remotely reasonable way to survive it is through One-Shot Protection. Thus, if you get hit by pretty much anything before the Diablo Strike lands, you will kill yourself. Also, if you launch yourself too high, you will die to fall damage on E3+ even on an otherwise correct launch, unless you have some sort of fall protection. And if you don’t launch high enough, you won’t make it, so you’ll also die there. And on E8, this comes at the cost of a lot of your maximum HP as well. Altogether, it was just too many conditionals for me to justify choosing it. However, a difficult choice is still a difficult choice; both options are definitely defensible, and if landing that Diablo Strike is just too satisfying, absolutely give it a go. As for beacons, I found Hacking Beacons to be generally the most consistent option. Healing Beacons are great, but given the prevalence of Transcendence, they miss their mark in general. Shocking Beacons are alright for Stage 1, but aren’t fantastic for many things. Equipment Beacons are usable, but given my preference for certain unsavoury pillar-skipping equipment, they also miss their mark there. Hacking Beacons allow me to finally get my revenge on all of the stupid Shrines of Chance that betray me. Though perhaps one Healing Beacon and one Hacking Beacon would also be plausible; most of my deaths occurred before I got Transcendence.
As for Eclipse modifiers, E3 is once again the big one; Captain is pretty much the poster boy for characters who want Transcendence; boasting literally zero fall protection innately; a trait only shared by Engineer, who shies away from Transcendence under certain parameters. E6 isn’t a big deal for Captain at all; he typically has money to roll in due to Hacking Beacons. E8 is a pretty large problem for Captain, however, since he struggles to mitigate damage from certain sources, the most notable of which are Lesser Wisps.
In case it hasn’t already been made obvious, the first and foremost priority is finding a portal to the Bazaar Between Time as early as possible, and getting a Transcendence, as far as items go. While there, it is also generally worth attempting to get a Hooks of Heresy, to replace Captain’s supremely mediocre secondary. At this point, it becomes the case that many different items are borderline useless or rather underwhelming. So make an effort to scrap unwanted items frequently, and be on the lookout for good printers. Captain makes extreme use of bleed related builds, and Bands are also great for him since his Utility skill (either one) has notable power. Captain also struggles with dealing with multiple threats quickly, so Gasoline and Will-o-the-Wisps can be a heightened priority. Captain also deals with large numbers of Lesser Wisps somewhat poorly; if Repulsion Armor Plates aren’t already a high priority for you, they perhaps ought to be on Captain especially.
As an aside, regarding leaning into his strengths, Hopoo has arguably succeeded in making Captain the drone master. Especially on the first stage, where the effects of drones are most pronounced, and there’s relatively little to use Hacking Beacons on otherwise, consider making the effort to pick up a couple of drones. Doubling or tripling the effect of Captain’s innate Red item is as good as it sounds, on top of drones drawing aggro from enemies that Captain typically has a difficult time dodging.
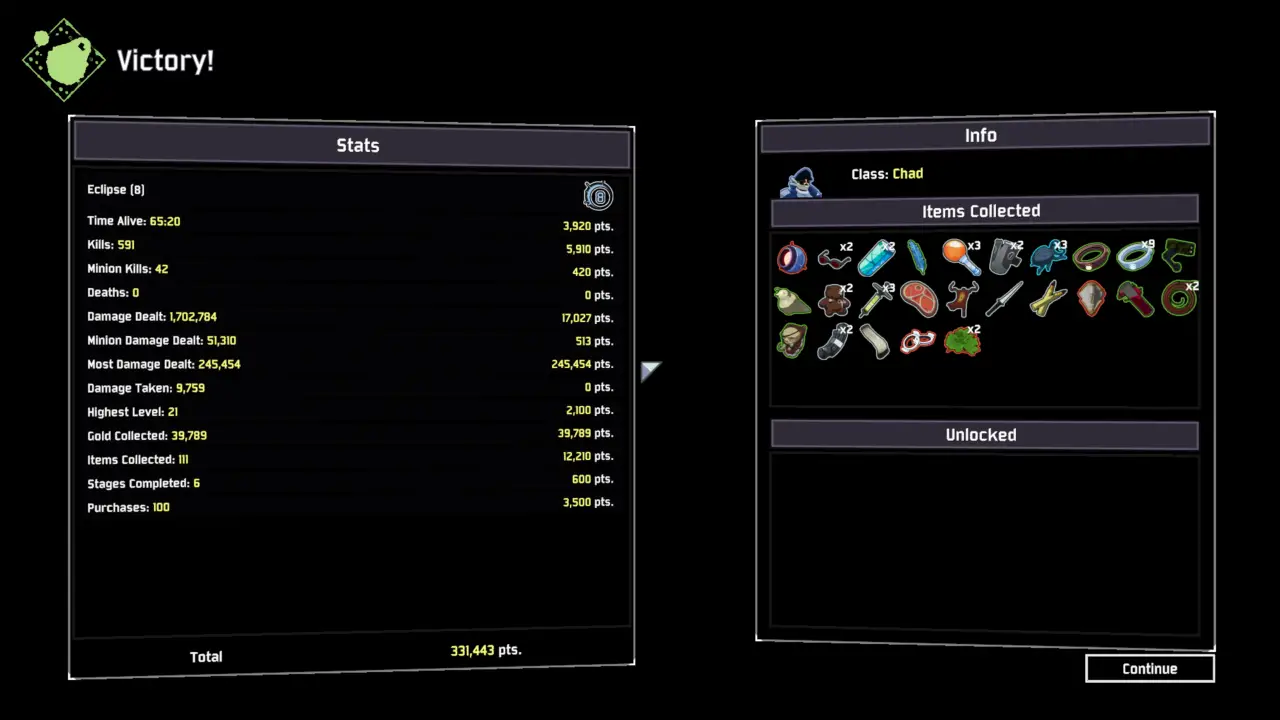
That's everything we are sharing today for this Risk of Rain 2 guide. This guide was originally created and written by Cecil188. In case we fail to update this guide, you can find the latest update by following this link.
