
- Title: Receiver 2
- Release Date:
- Developer:
- Publisher:
Information about Receiver 2 is still incomplete. Please help us fill the details of the game using this contact form.
This guide will show you how to obtain and use the golden guns in the Receiver 2 campaign.
Modify default Receiver 2 loadouts
In your steam library, right-click Receiver 2 and pick MANAGE/BROWSE LOCAL FILES, then go to Receiver2_Data\StreamingAssets\PlayerLoadouts\
Here you need to edit the following JSON files:
- IntroLoadout.json
- RandomizedBerettaLoadout.json
- RandomizedDesertEagleLoadout.json
- RandomizedDetectiveLoadout.json
- RandomizedGlockLoadout.json
- RandomizedHiPointLoadout.json
- RandomizedM10Loadout.json
- RandomizedM1911Loadout.json
- RandomizedSAALoadout.json
- RandomizedSig226Loadout.json
Open each file in Notepad or — even better — Notepad++ and find the “gun_internal_name” section. It usually looks something like this:
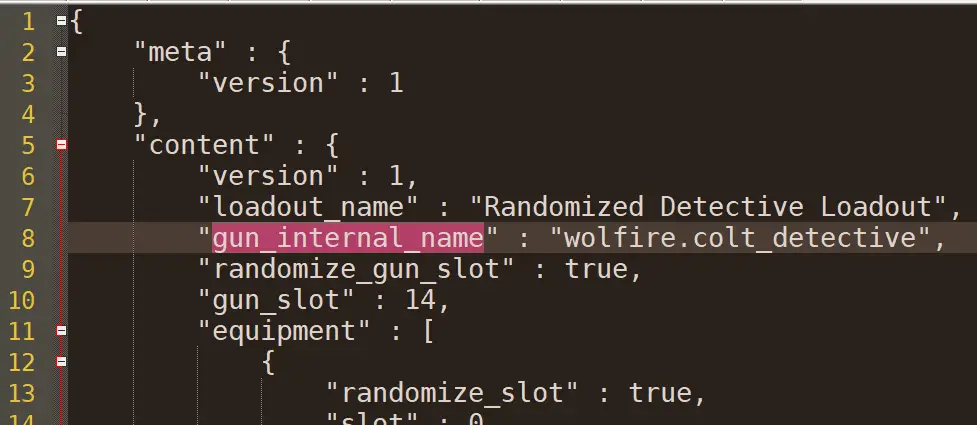
In each file, replace the “normal” gun model name with the golden gun name by simply adding “_gold” to the end.
For example:
- “wolfire.smith_and_wesson_model_10” becomes “wolfire.smith_and_wesson_model_10_gold”
- “wolfire.beretta_m9” becomes “wolfire.beretta_m9_gold”
- “wolfire.hi_point_c9” becomes “wolfire.hi_point_c9_gold”
Be careful to preserve all ” : , symbols as they were. See below for what to do if you mess things up.
Save the .json files.
Congratulations, now you’re cooking with gold.
That's everything we are sharing today for this Receiver 2 guide. This guide was originally created and written by iwanPlays. In case we fail to update this guide, you can find the latest update by following this link.