- Título: Remake de choque do sistema
- Data de lançamento:
- Desenvolvedor:
- Editor:
Informações sobre o remake de choque do sistema ainda estão incompletas. Por favor, ajude-nos a preencher os detalhes do jogo usando este formulário de contato.
Before we delve into the locations of all ten Skully hidden throughout Citadel in System Shock Remake, it’s important to be aware of potential softlocks that could occur during your playthrough.
Please note that it’s currently uncertain if the skulls you find are saved across different playthroughs. To avoid encountering any softlocks, pay attention to the following situations where you may need to load a previous save:
- Levels R to 7: To ensure you don’t miss these skulls, avoid leaving the elevator room that connects Engineering to Security.
- Nível 8: Prior to entering the elevator that connects Security to Bridge, make sure you have already picked up the skull on this level.
- Nível 9: Be cautious when progressing through the section that becomes accessible after using a specific key item called the Isolinear Chipset. It’s recommended to collect the skull before advancing further.
Adicionalmente, it’s highly likely that you will need Jump Jets v3 to successfully reach some of these skull locations. The increased jump height provided by Jump Jets v3 will greatly assist you in maneuvering around.
Please be aware that the following information contains unmarked spoilers. Proceed with caution and at your own risk.
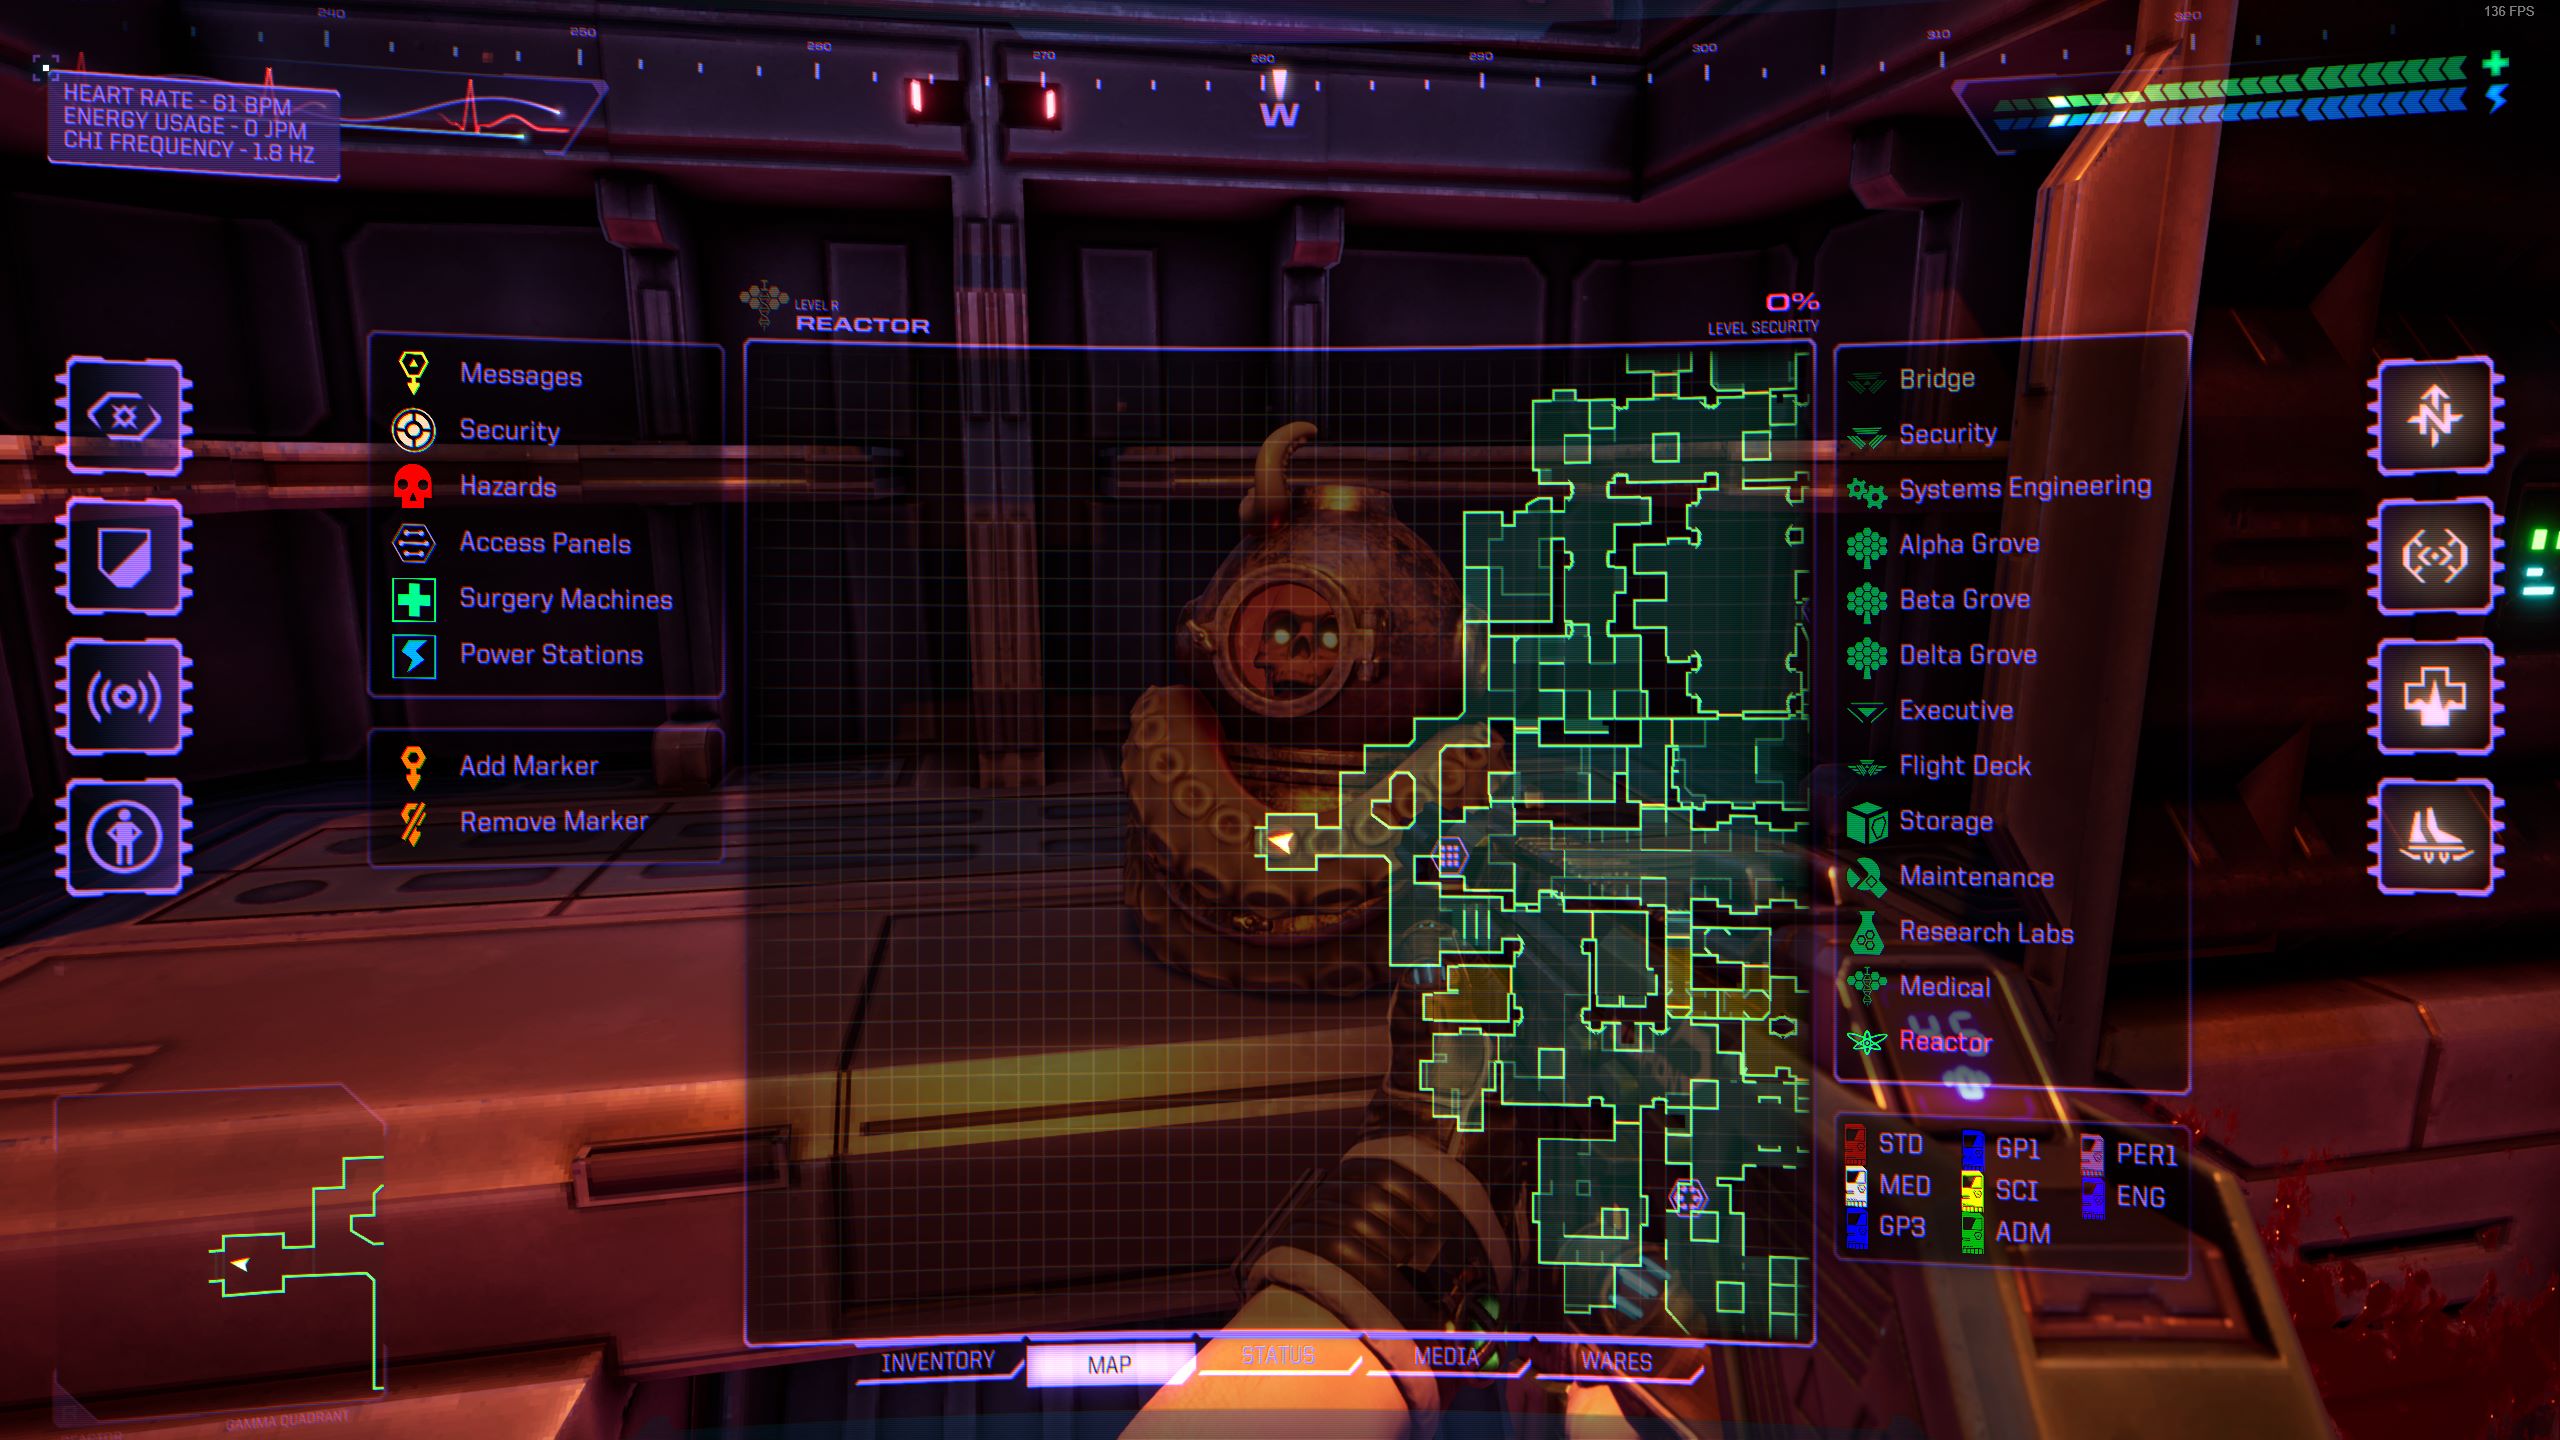
Level R – Reator
To find the first Skully location in Citadel, head to the westernmost section of the area. Look for a gap in the ceiling and use your jumping abilities to reach it. Quando você estiver lá em cima, you’ll discover the first skull.
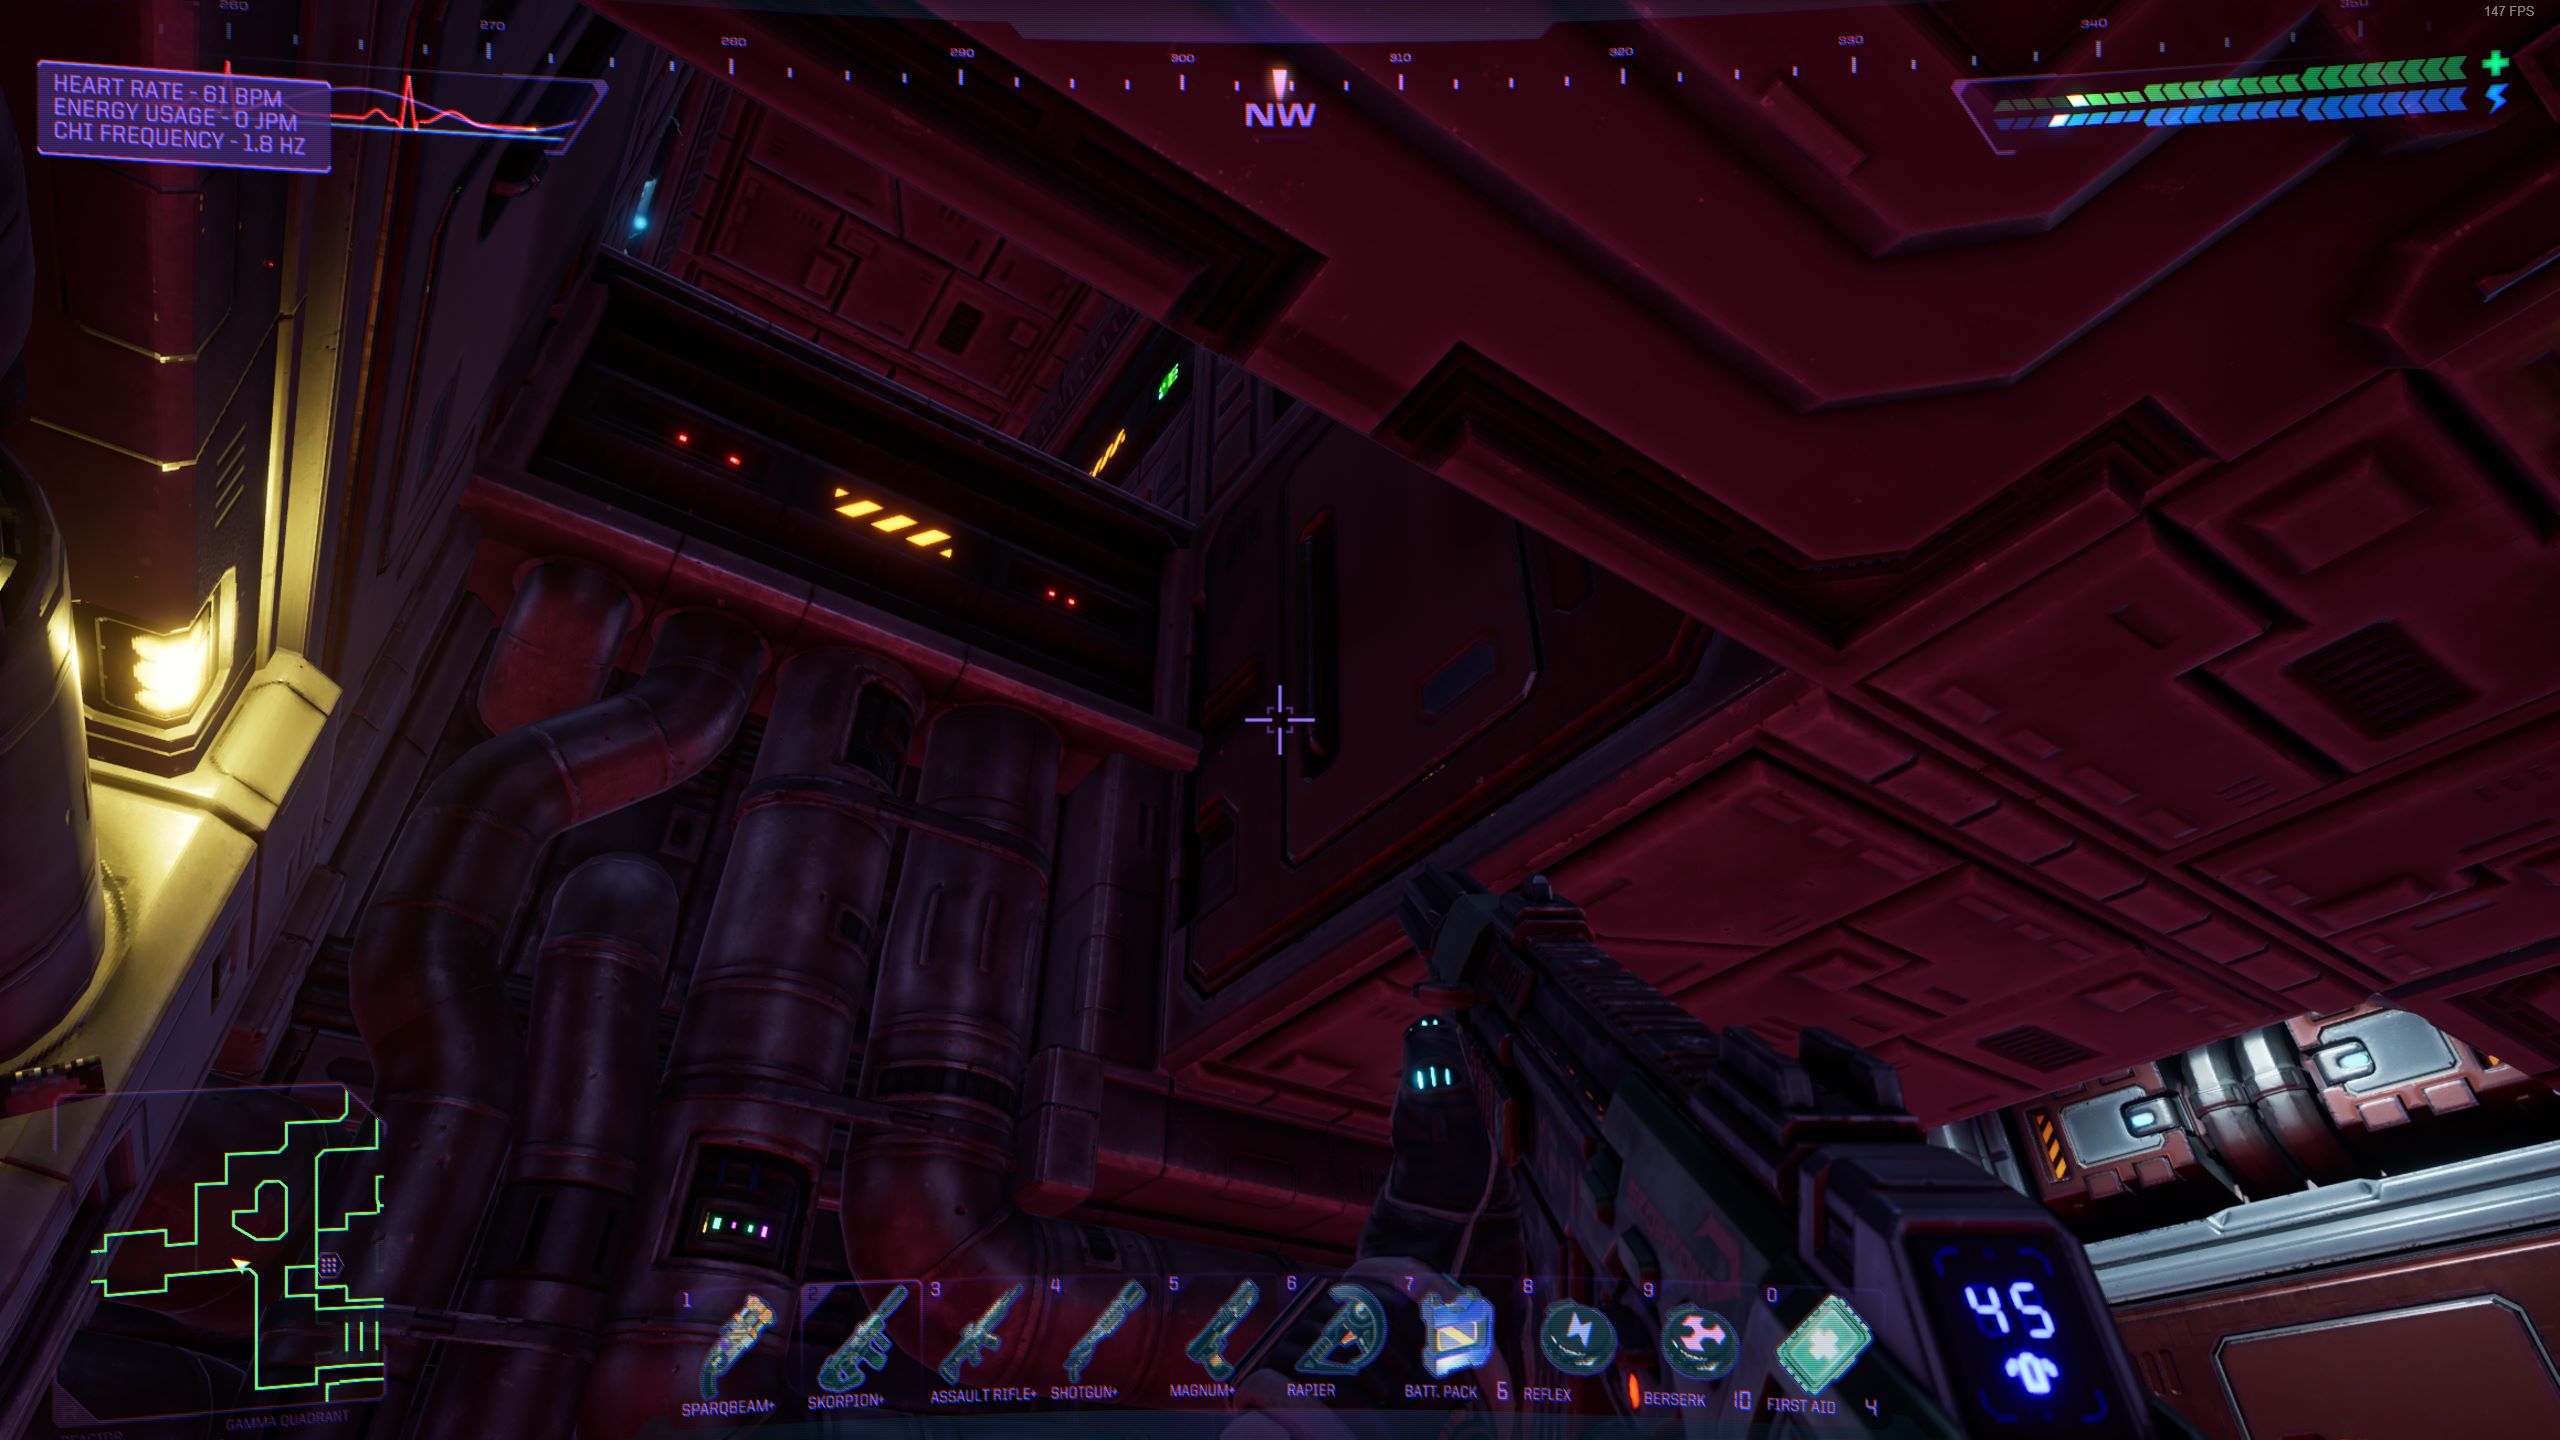
Map Location:
Nível 1 – Médico
After leaving the room with the cargo lift, take the first door on your left. Continue straight until you reach a left turn. In that area, you’ll come across a dead body. Olhe para cima, and you’ll spot the skull hidden above.

Map Location:

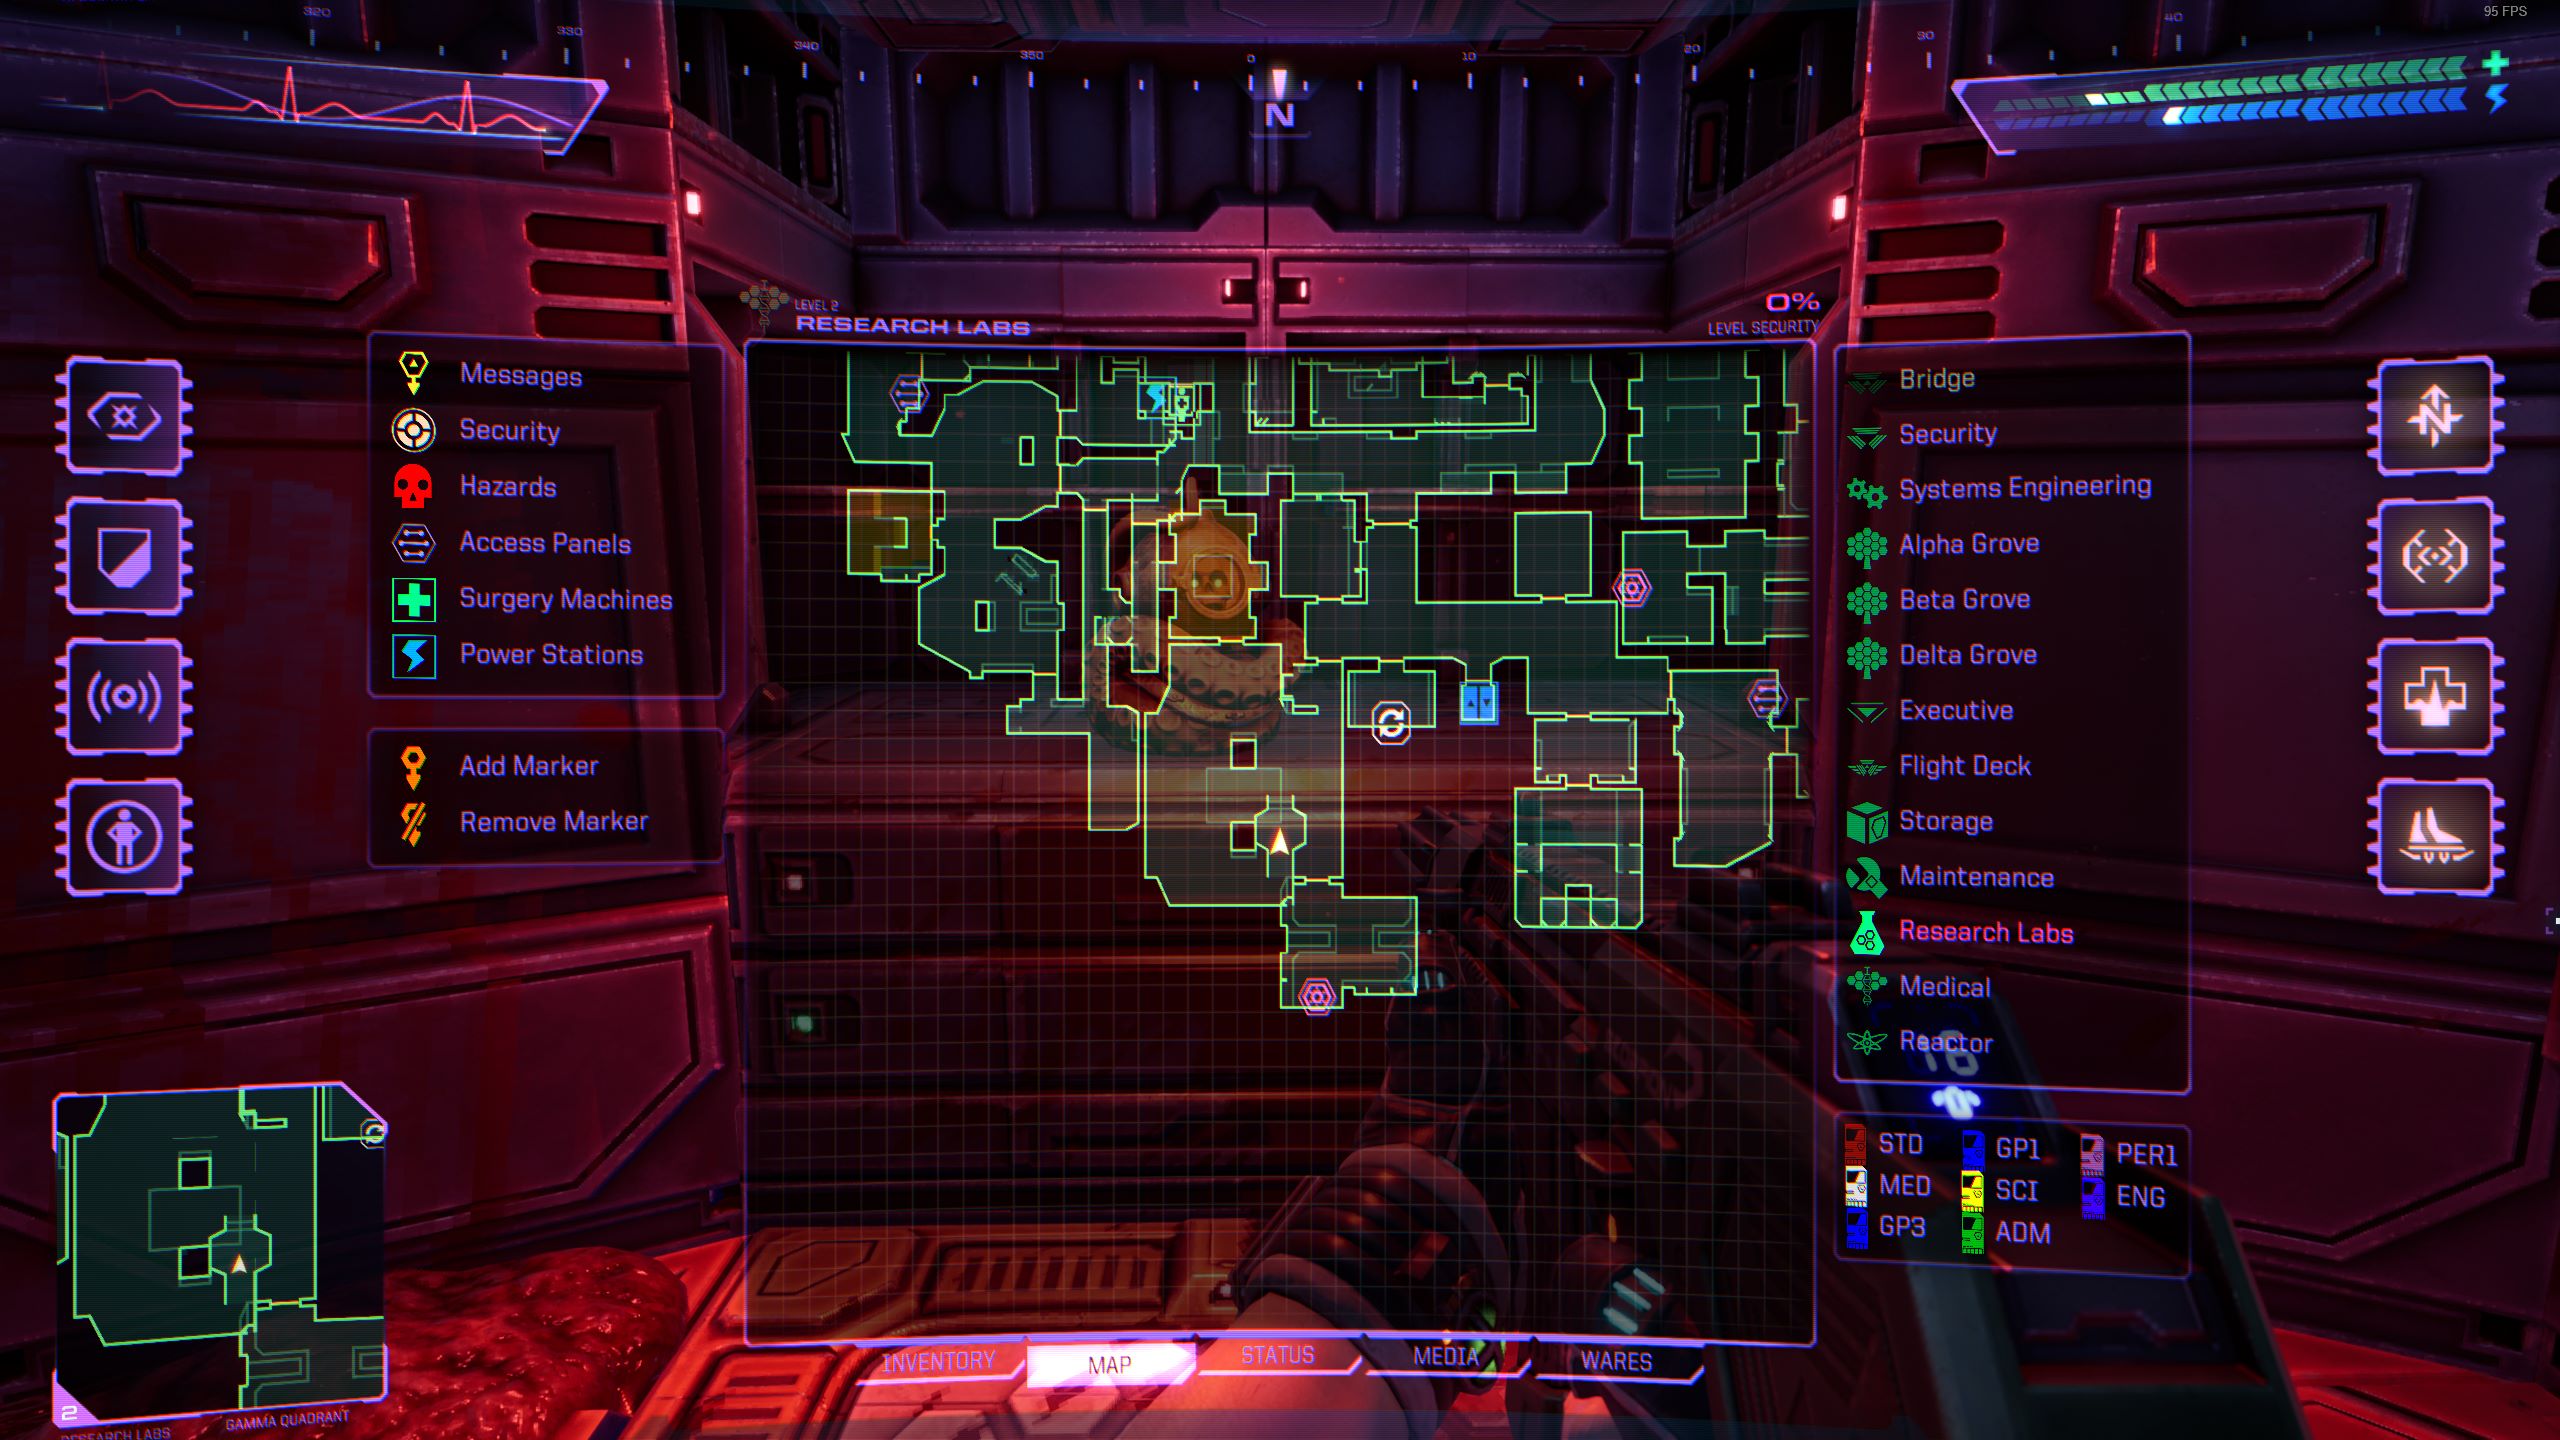
Nível 2 – Pesquisar
Once you exit the room with the recycler, go through the first door on your left. Directly across from you, there will be a door with a ledge next to it. Position yourself on that ledge and jump up to reach an alcove where the skull is hidden.

Map Location:
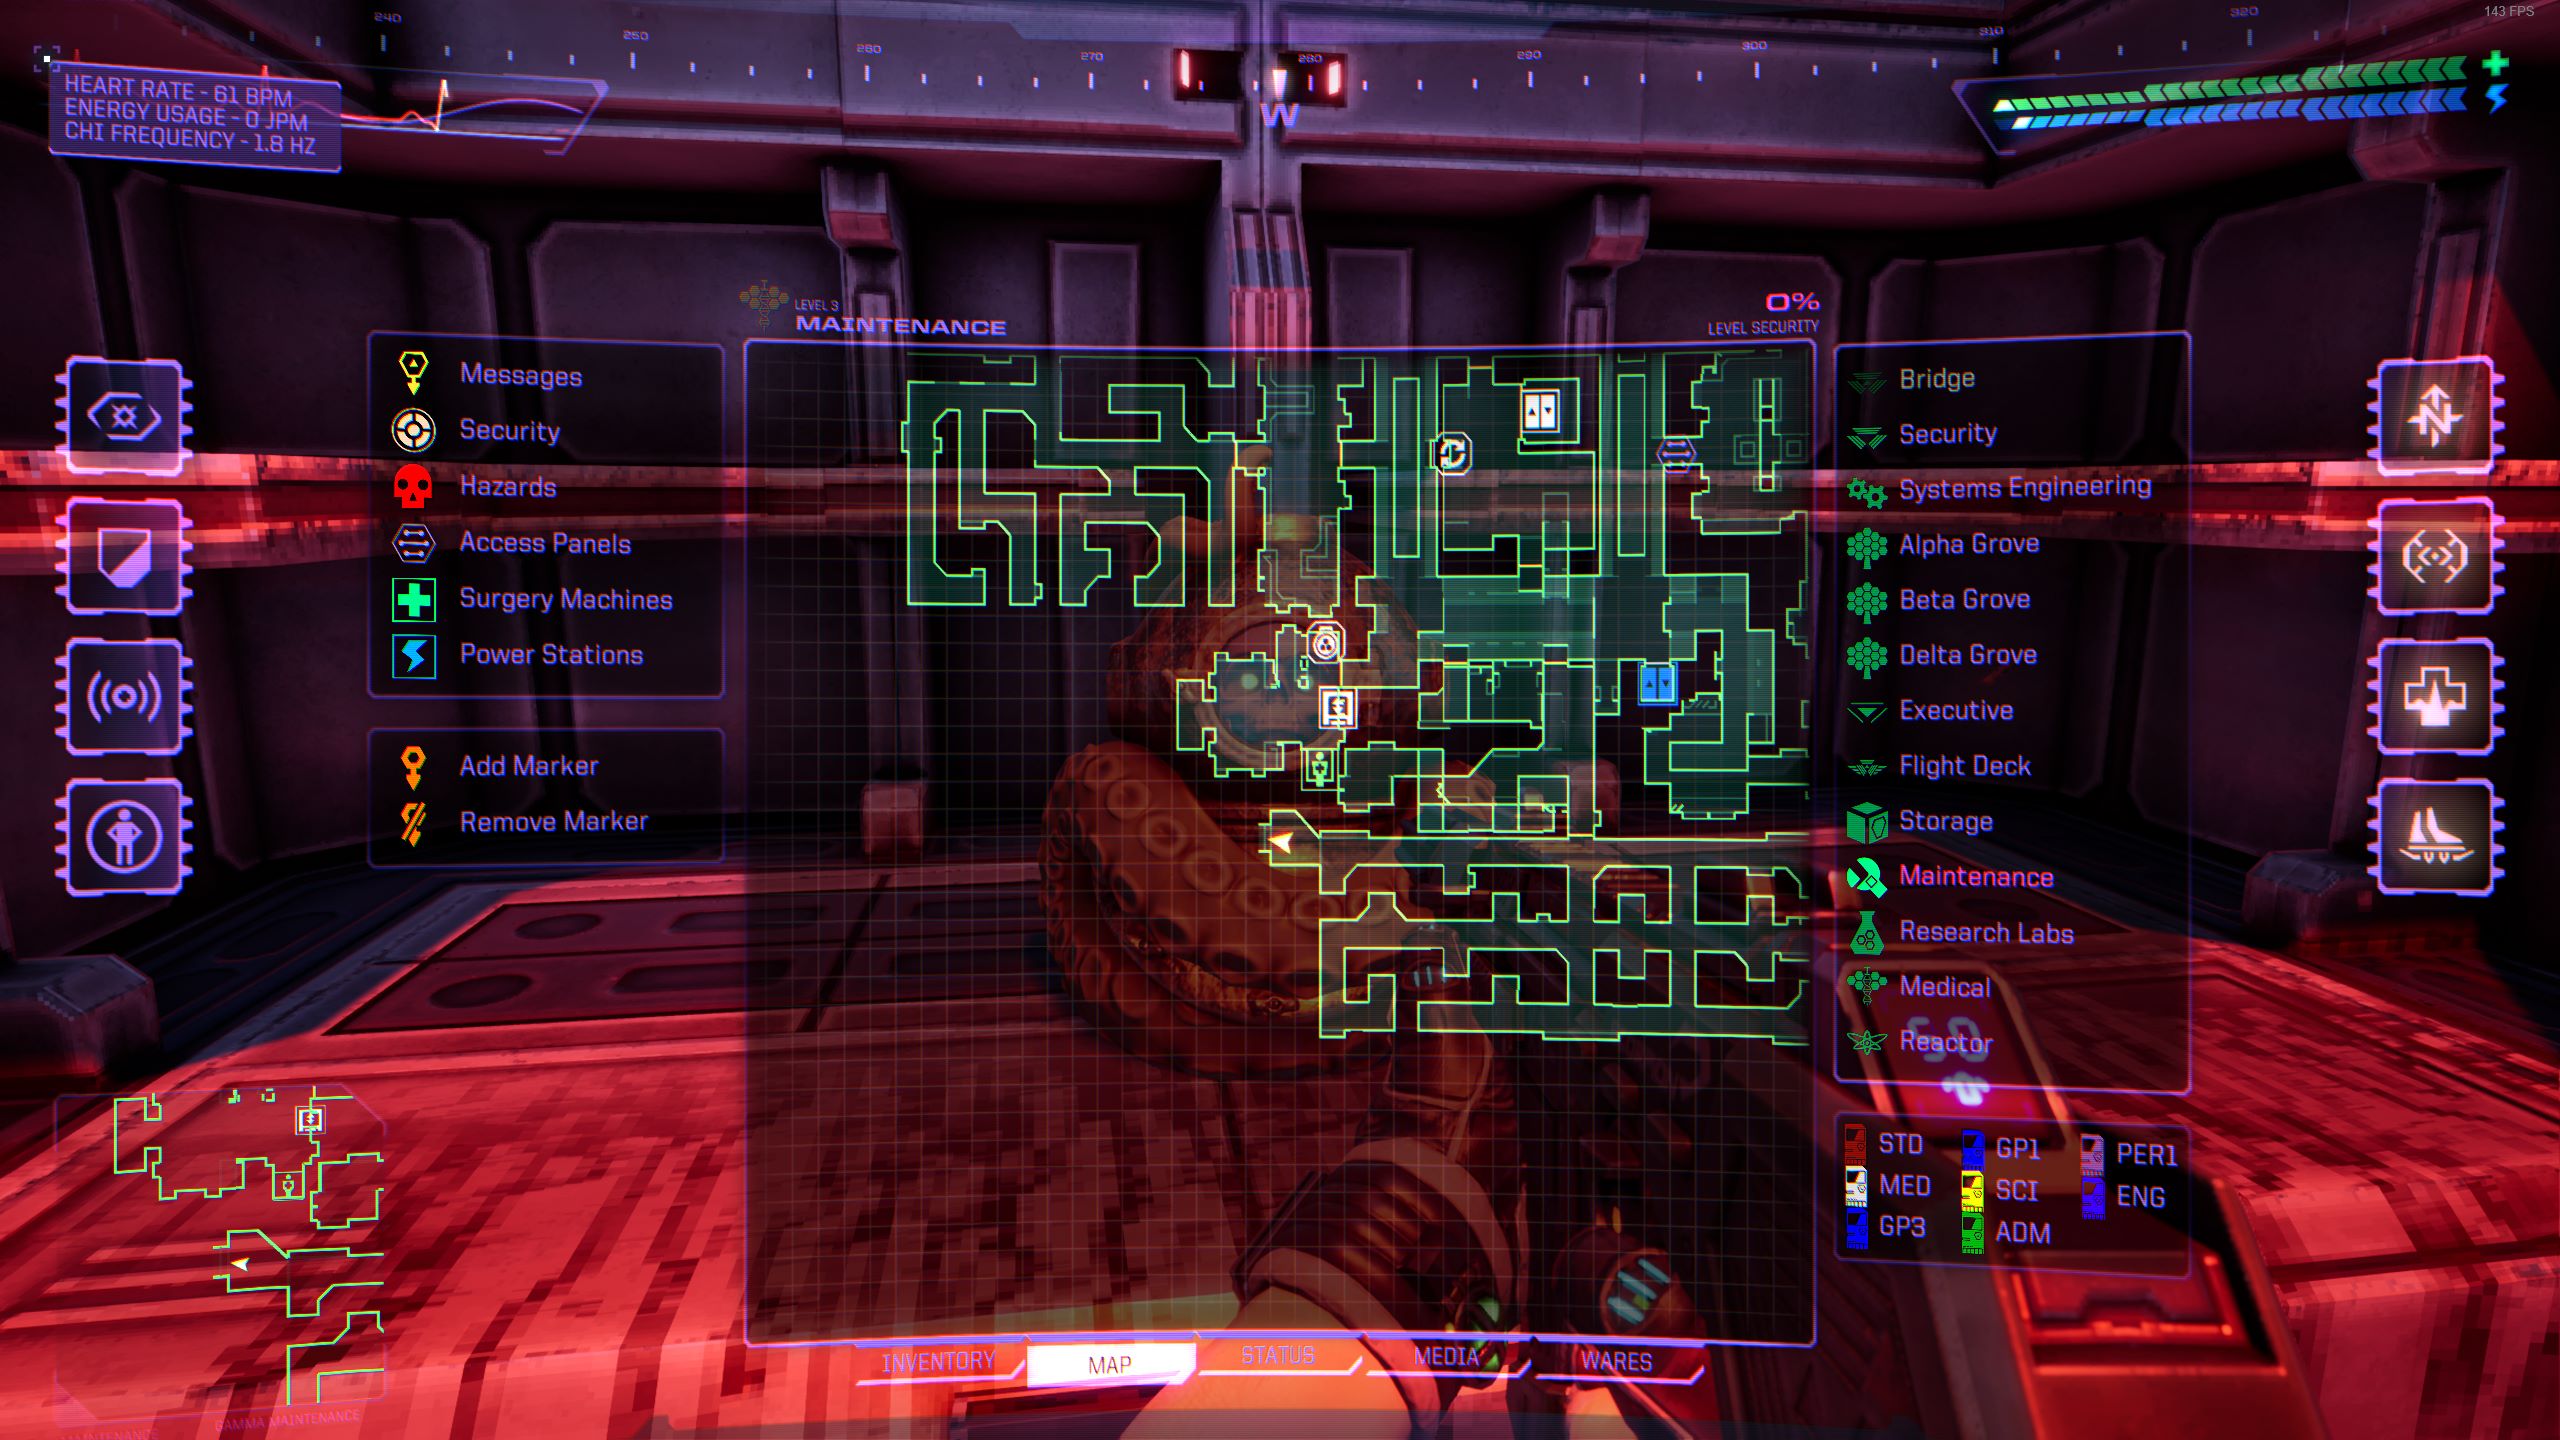
Nível 3 – Manutenção
After leaving the room with the cargo lift, take the second door on your right. Continue straight ahead and enter the next door. De lá, turn right and walk down the hallway. No final do corredor, you’ll notice an opening above you. Jump up to reach the opening and find the skull there.

Map Location:
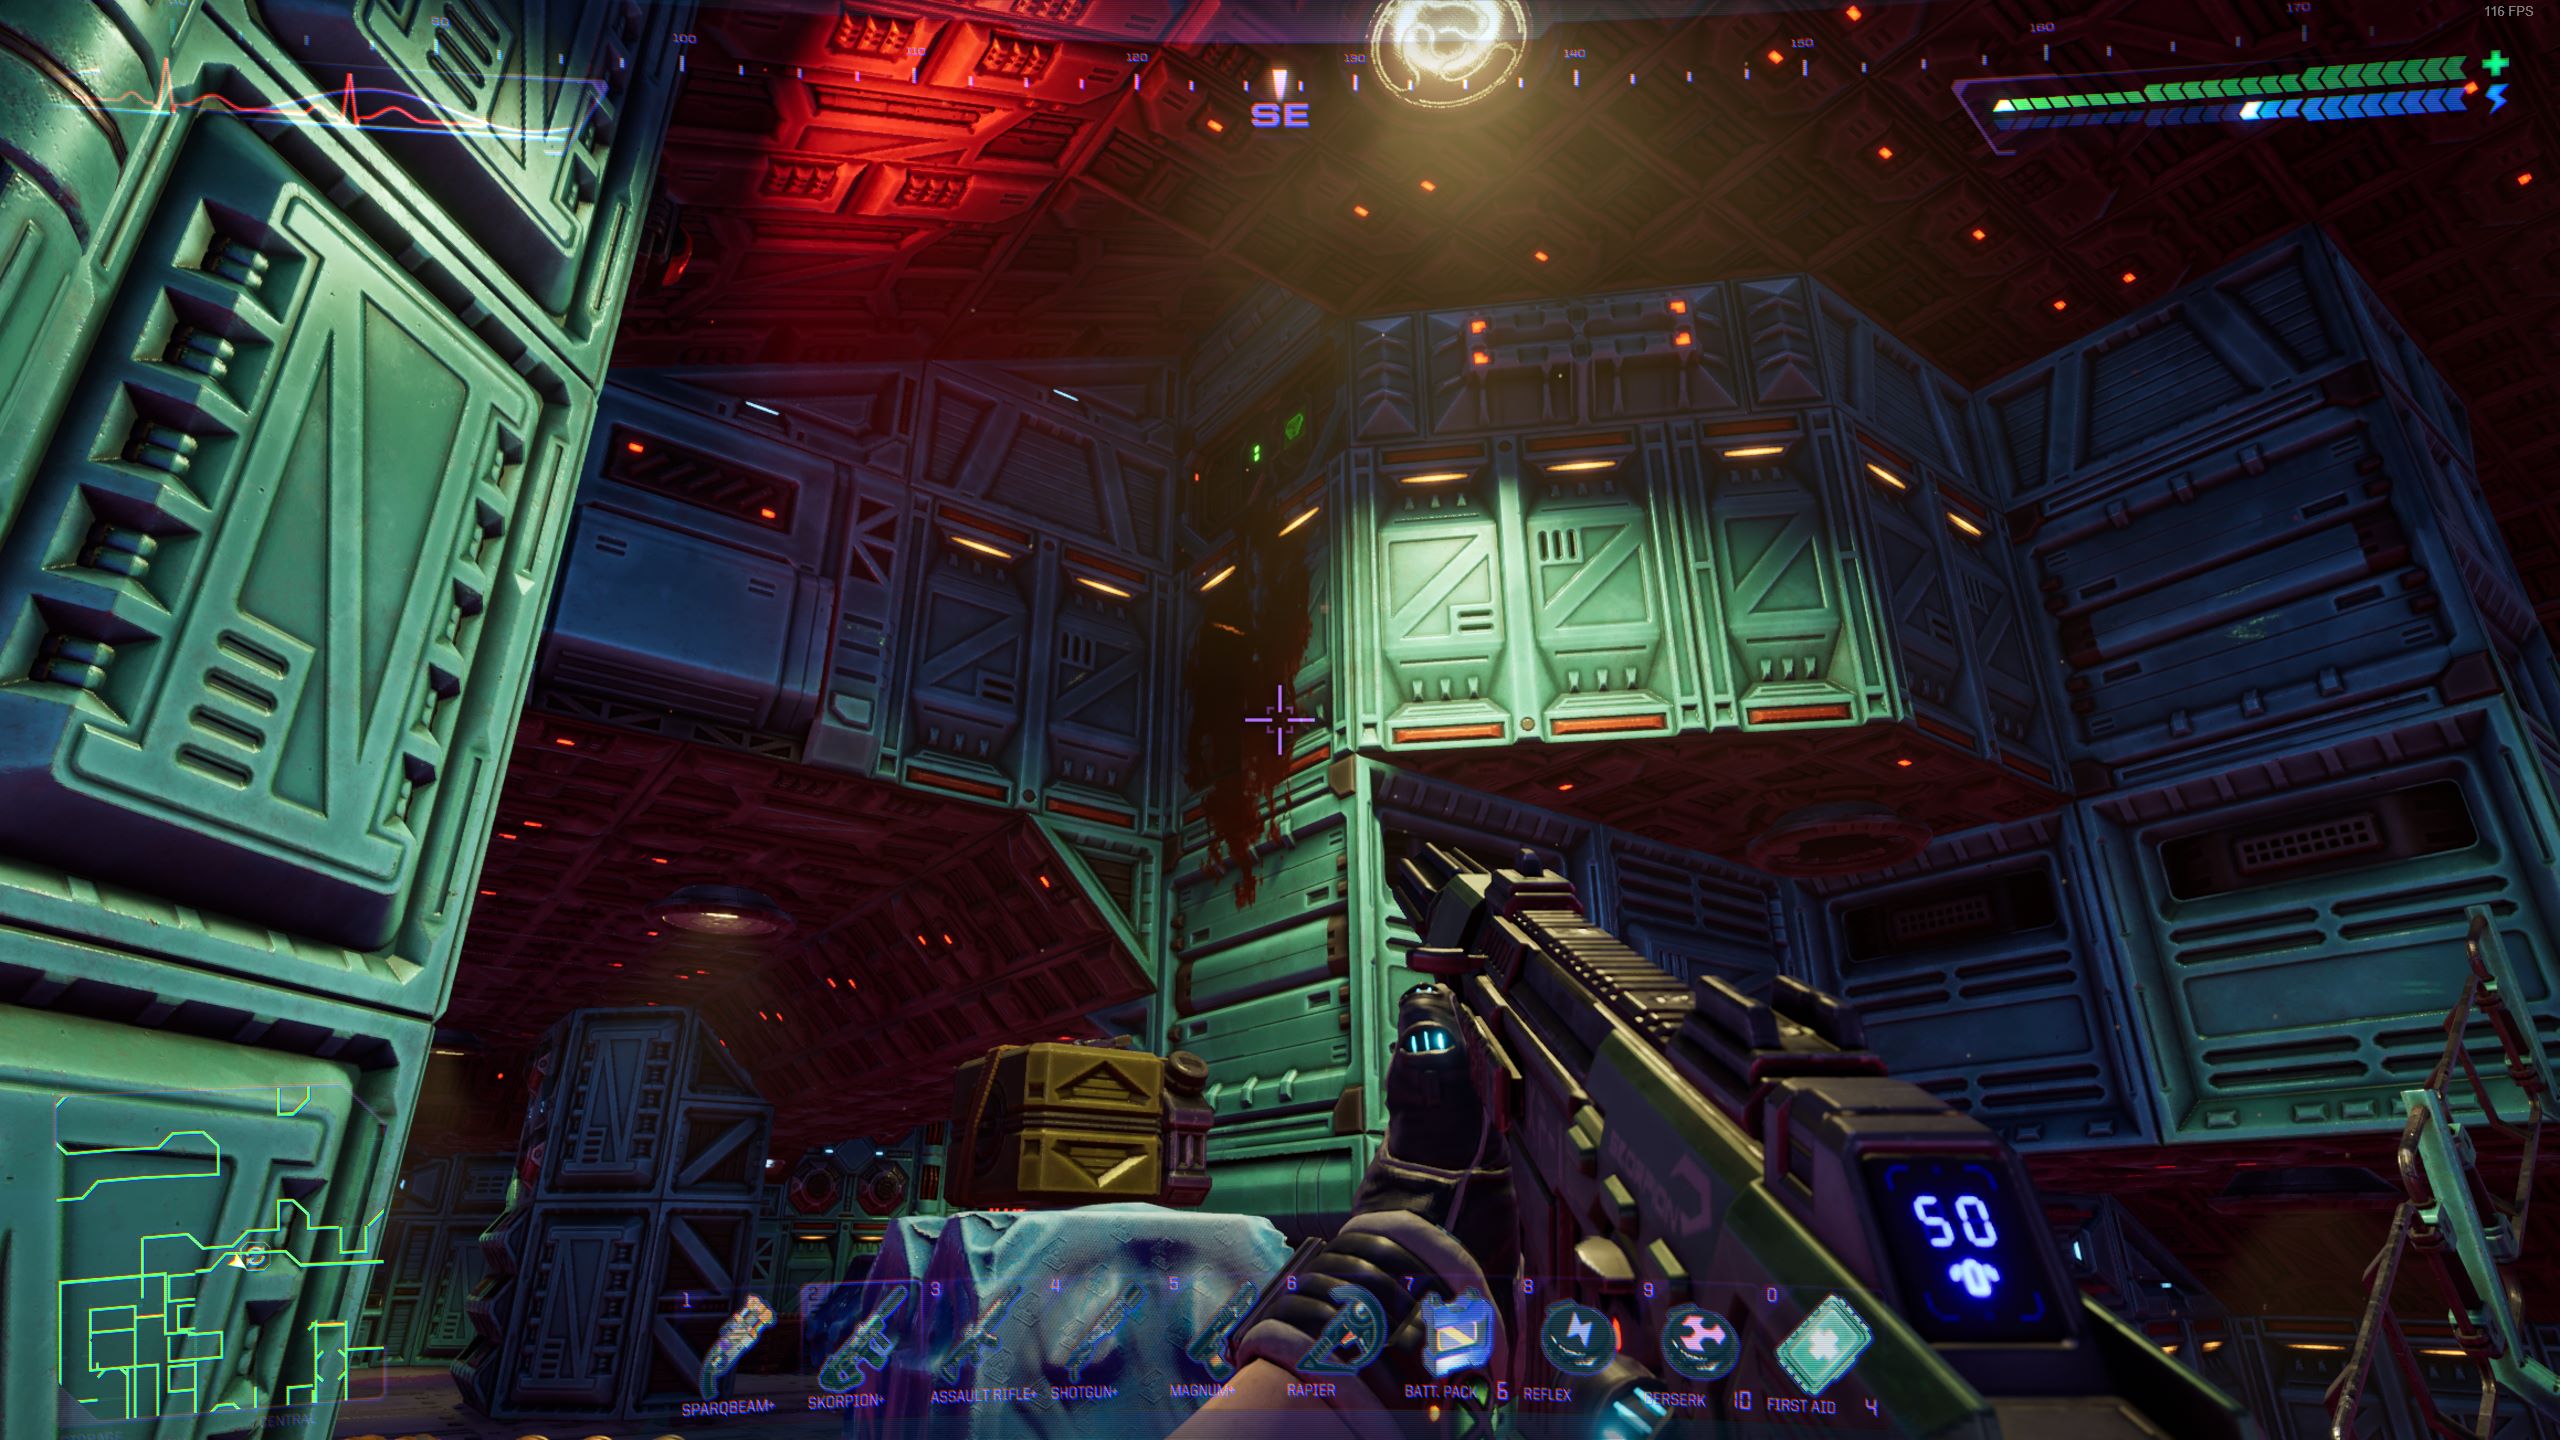
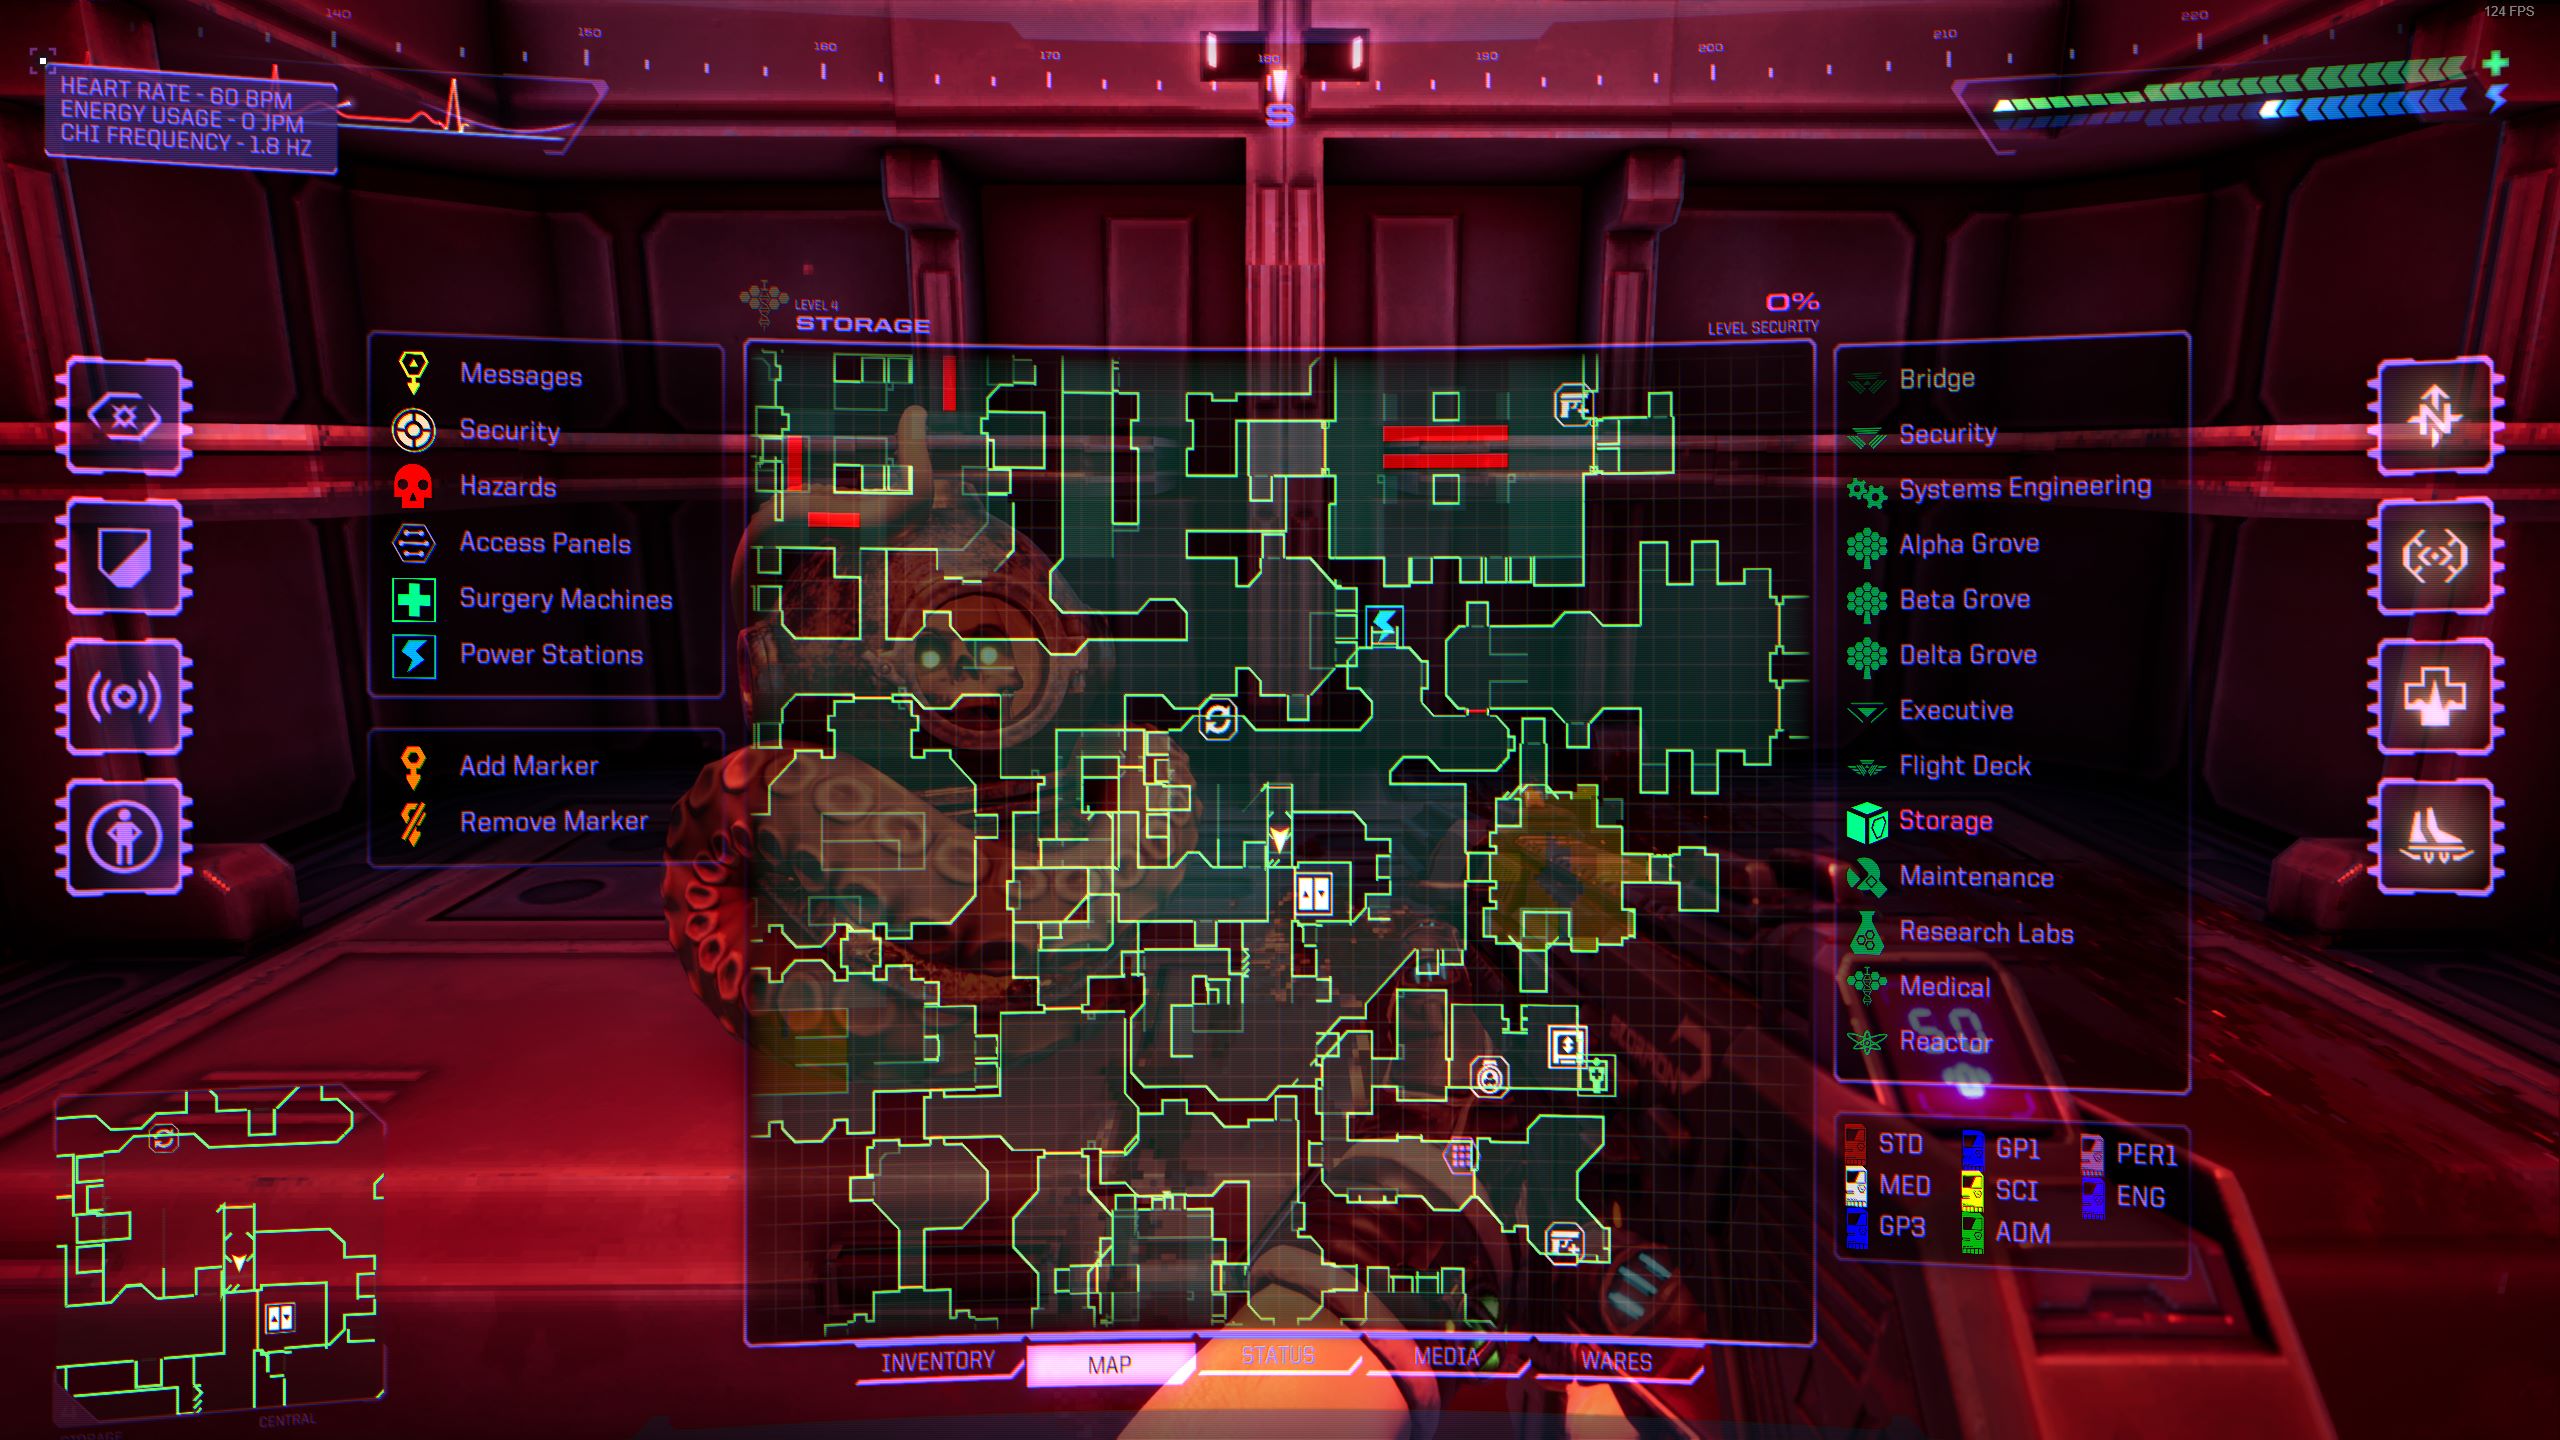
Nível 4 – Armazenar
From the location of the recycler, face southeast. You’ll see a small door above you. Jump onto the nearby crates and while you’re in midair, crouch to crawl inside the door. Uma vez dentro, you’ll find the skull.
Map Location:
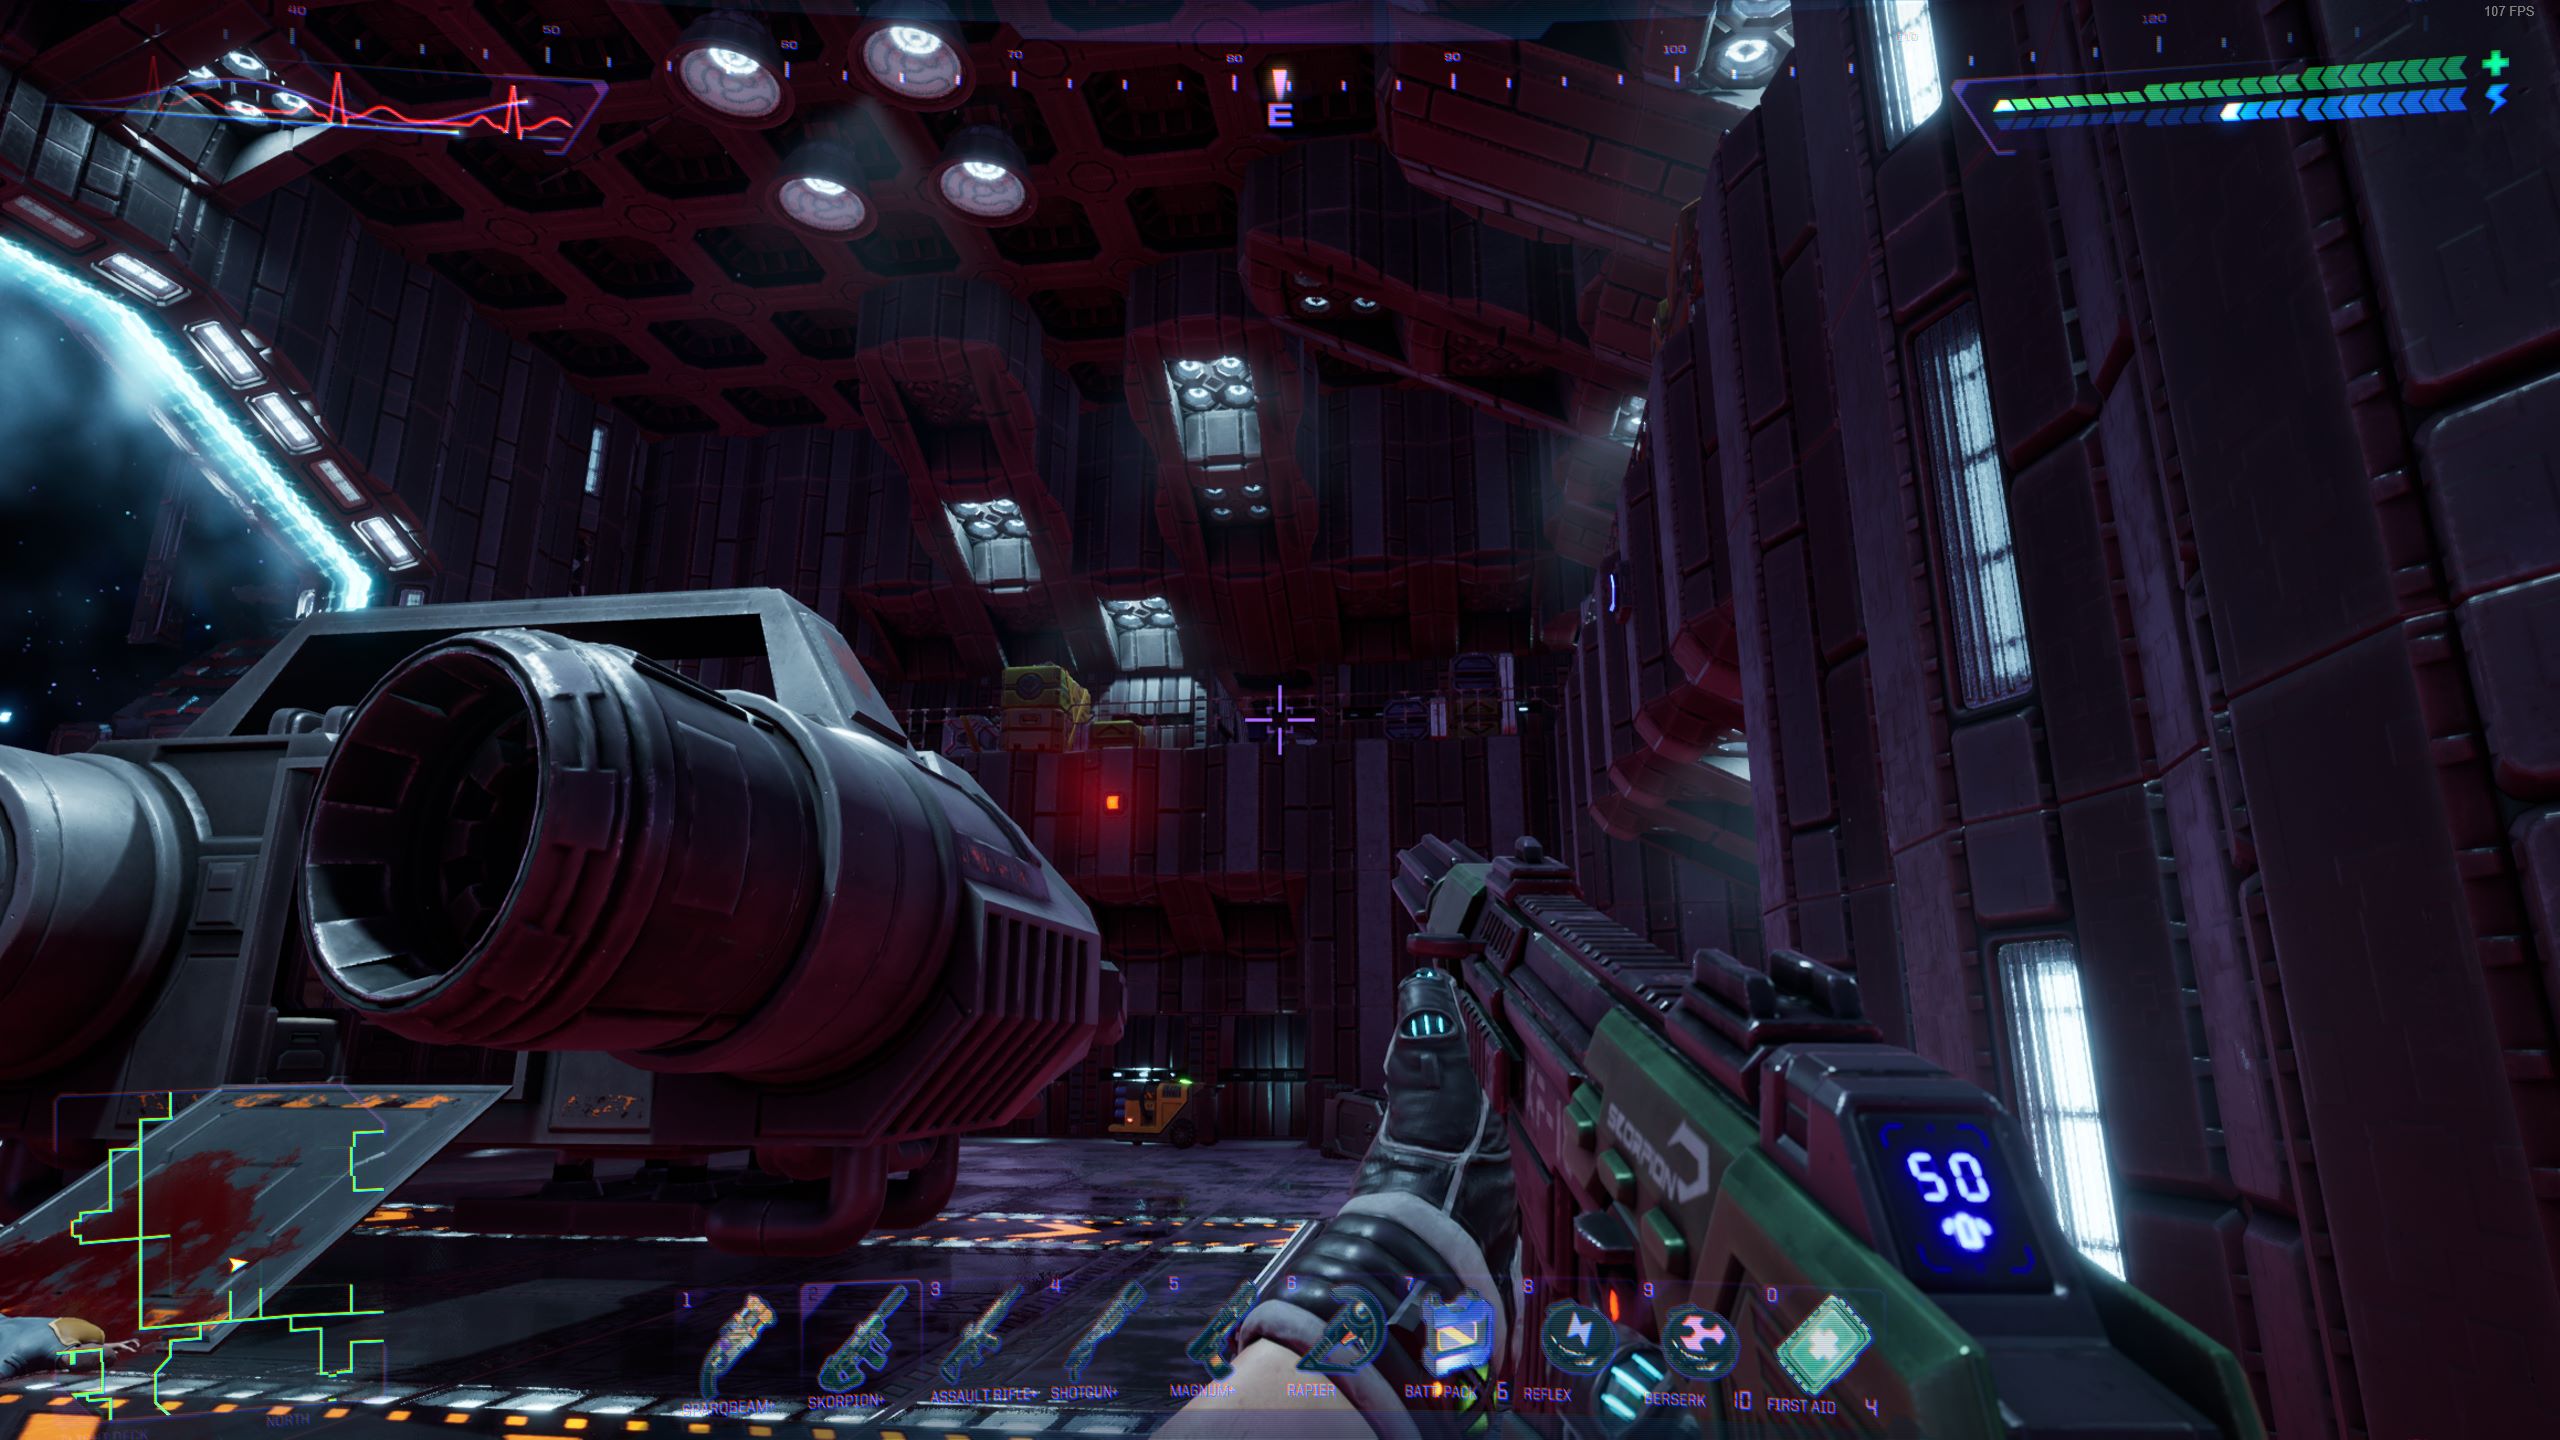
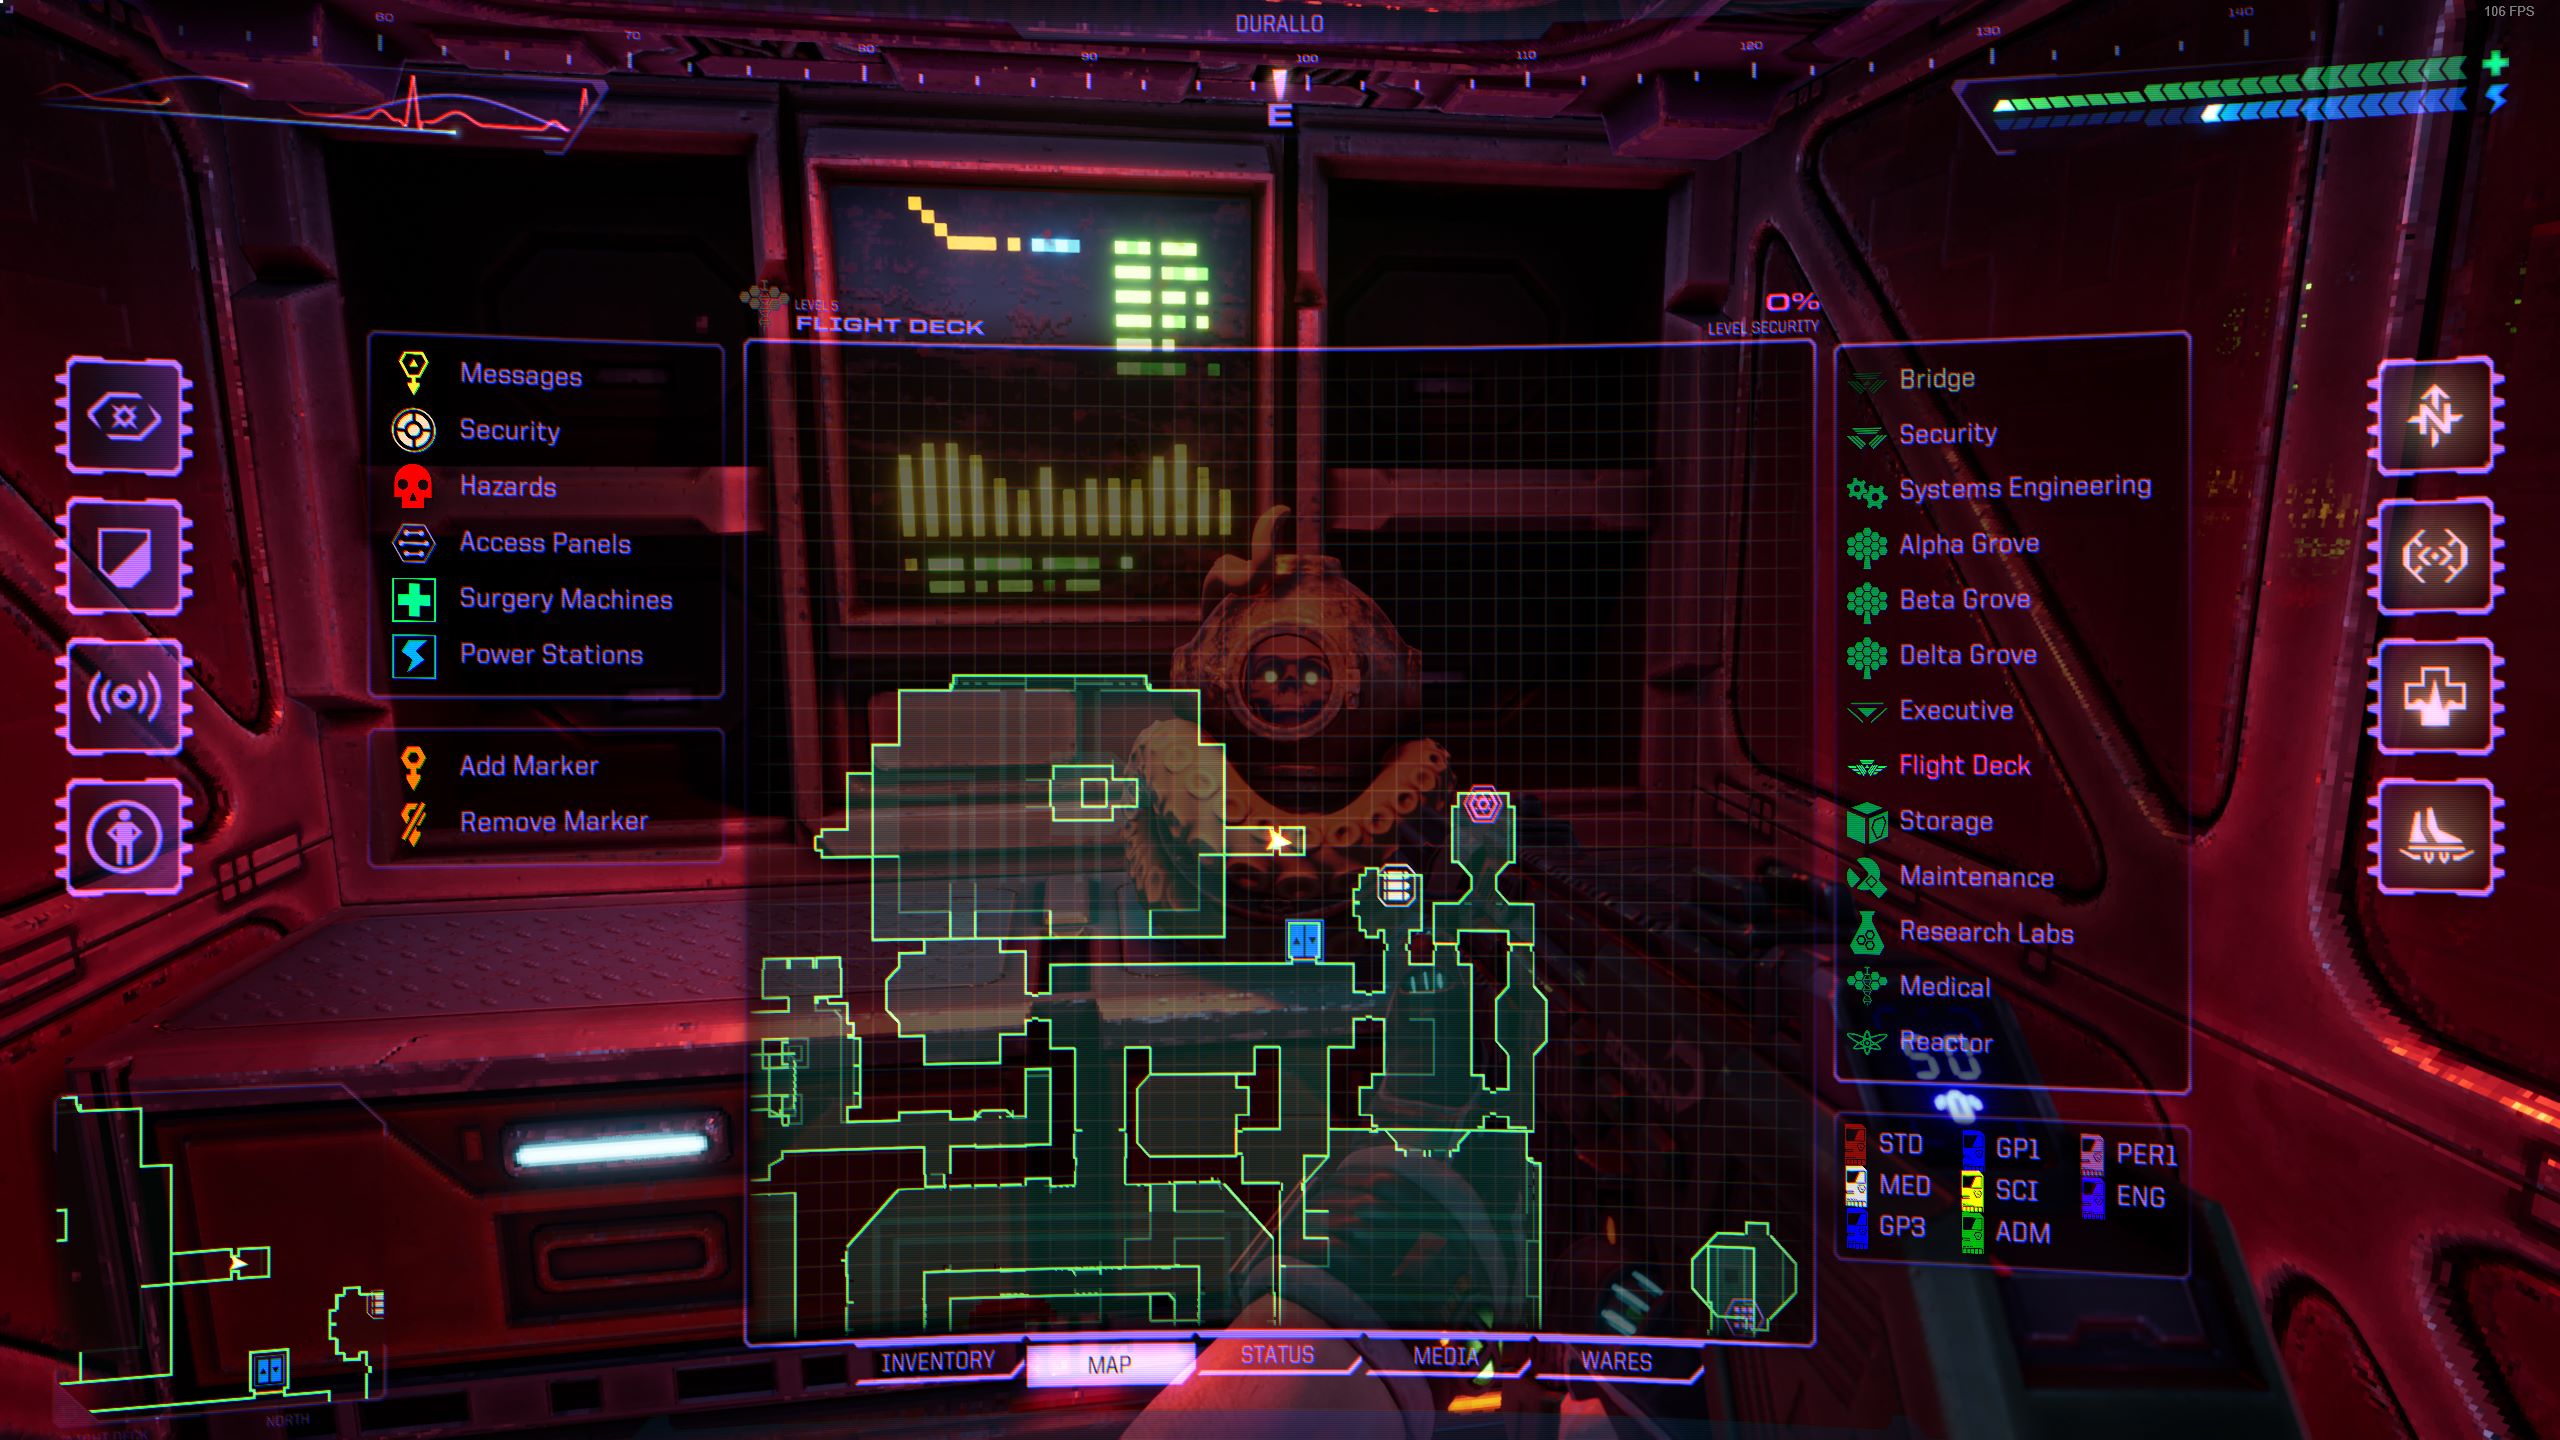
Nível 5 – Nedia de comando
To find the next skull, make your way to bay 1 in the northernmost section. Jump on top of the ship in the bay, E a partir daí, make another jump to reach the balcony located above. The skull can be found on this balcony.
Map Location:
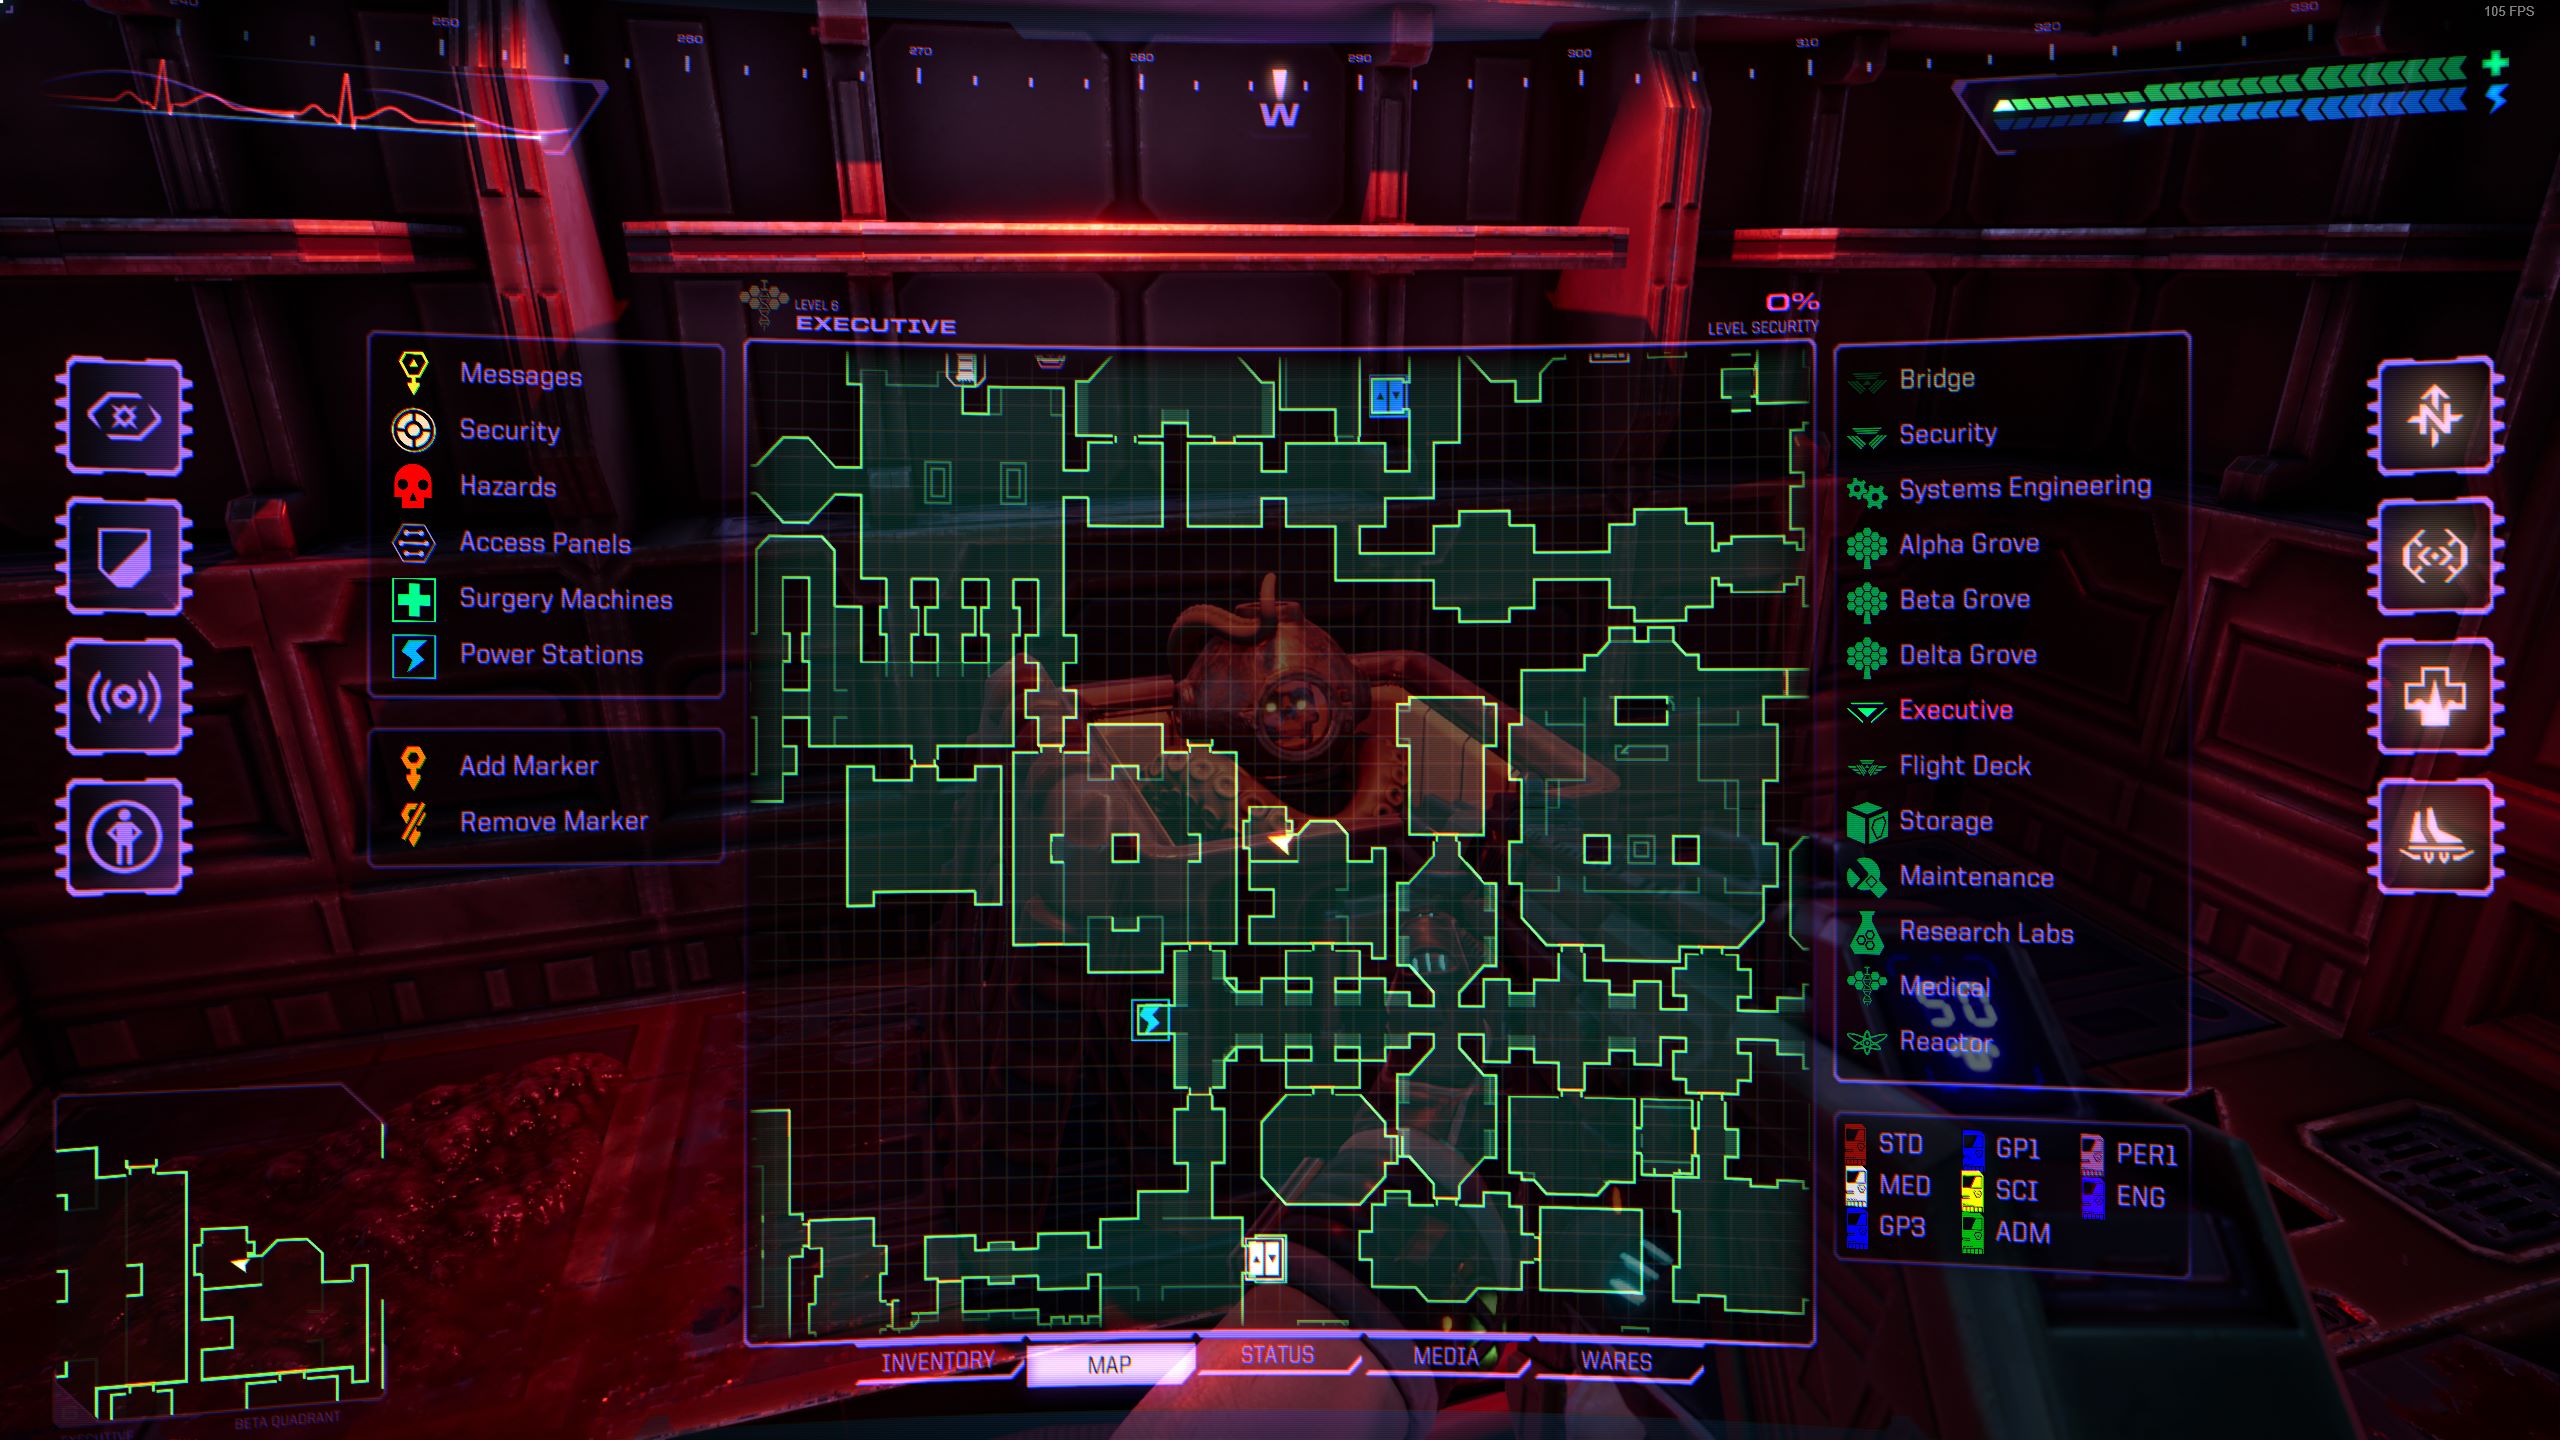
Nível 6 – Executivo
Starting from the power station, direct your gaze towards the eastern end of the hallway. Proceed by choosing the second door on your left-hand side. As you enter this particular room, you will immediately observe an opening in the ceiling.

Map Location:
Nível 7 – Engenharia
Begin at the central section that connects all four quadrants, E a partir daí, make a leap onto the metal supports located in the southern direction. Continue jumping on these supports until you successfully reach the skull.
Map Location:

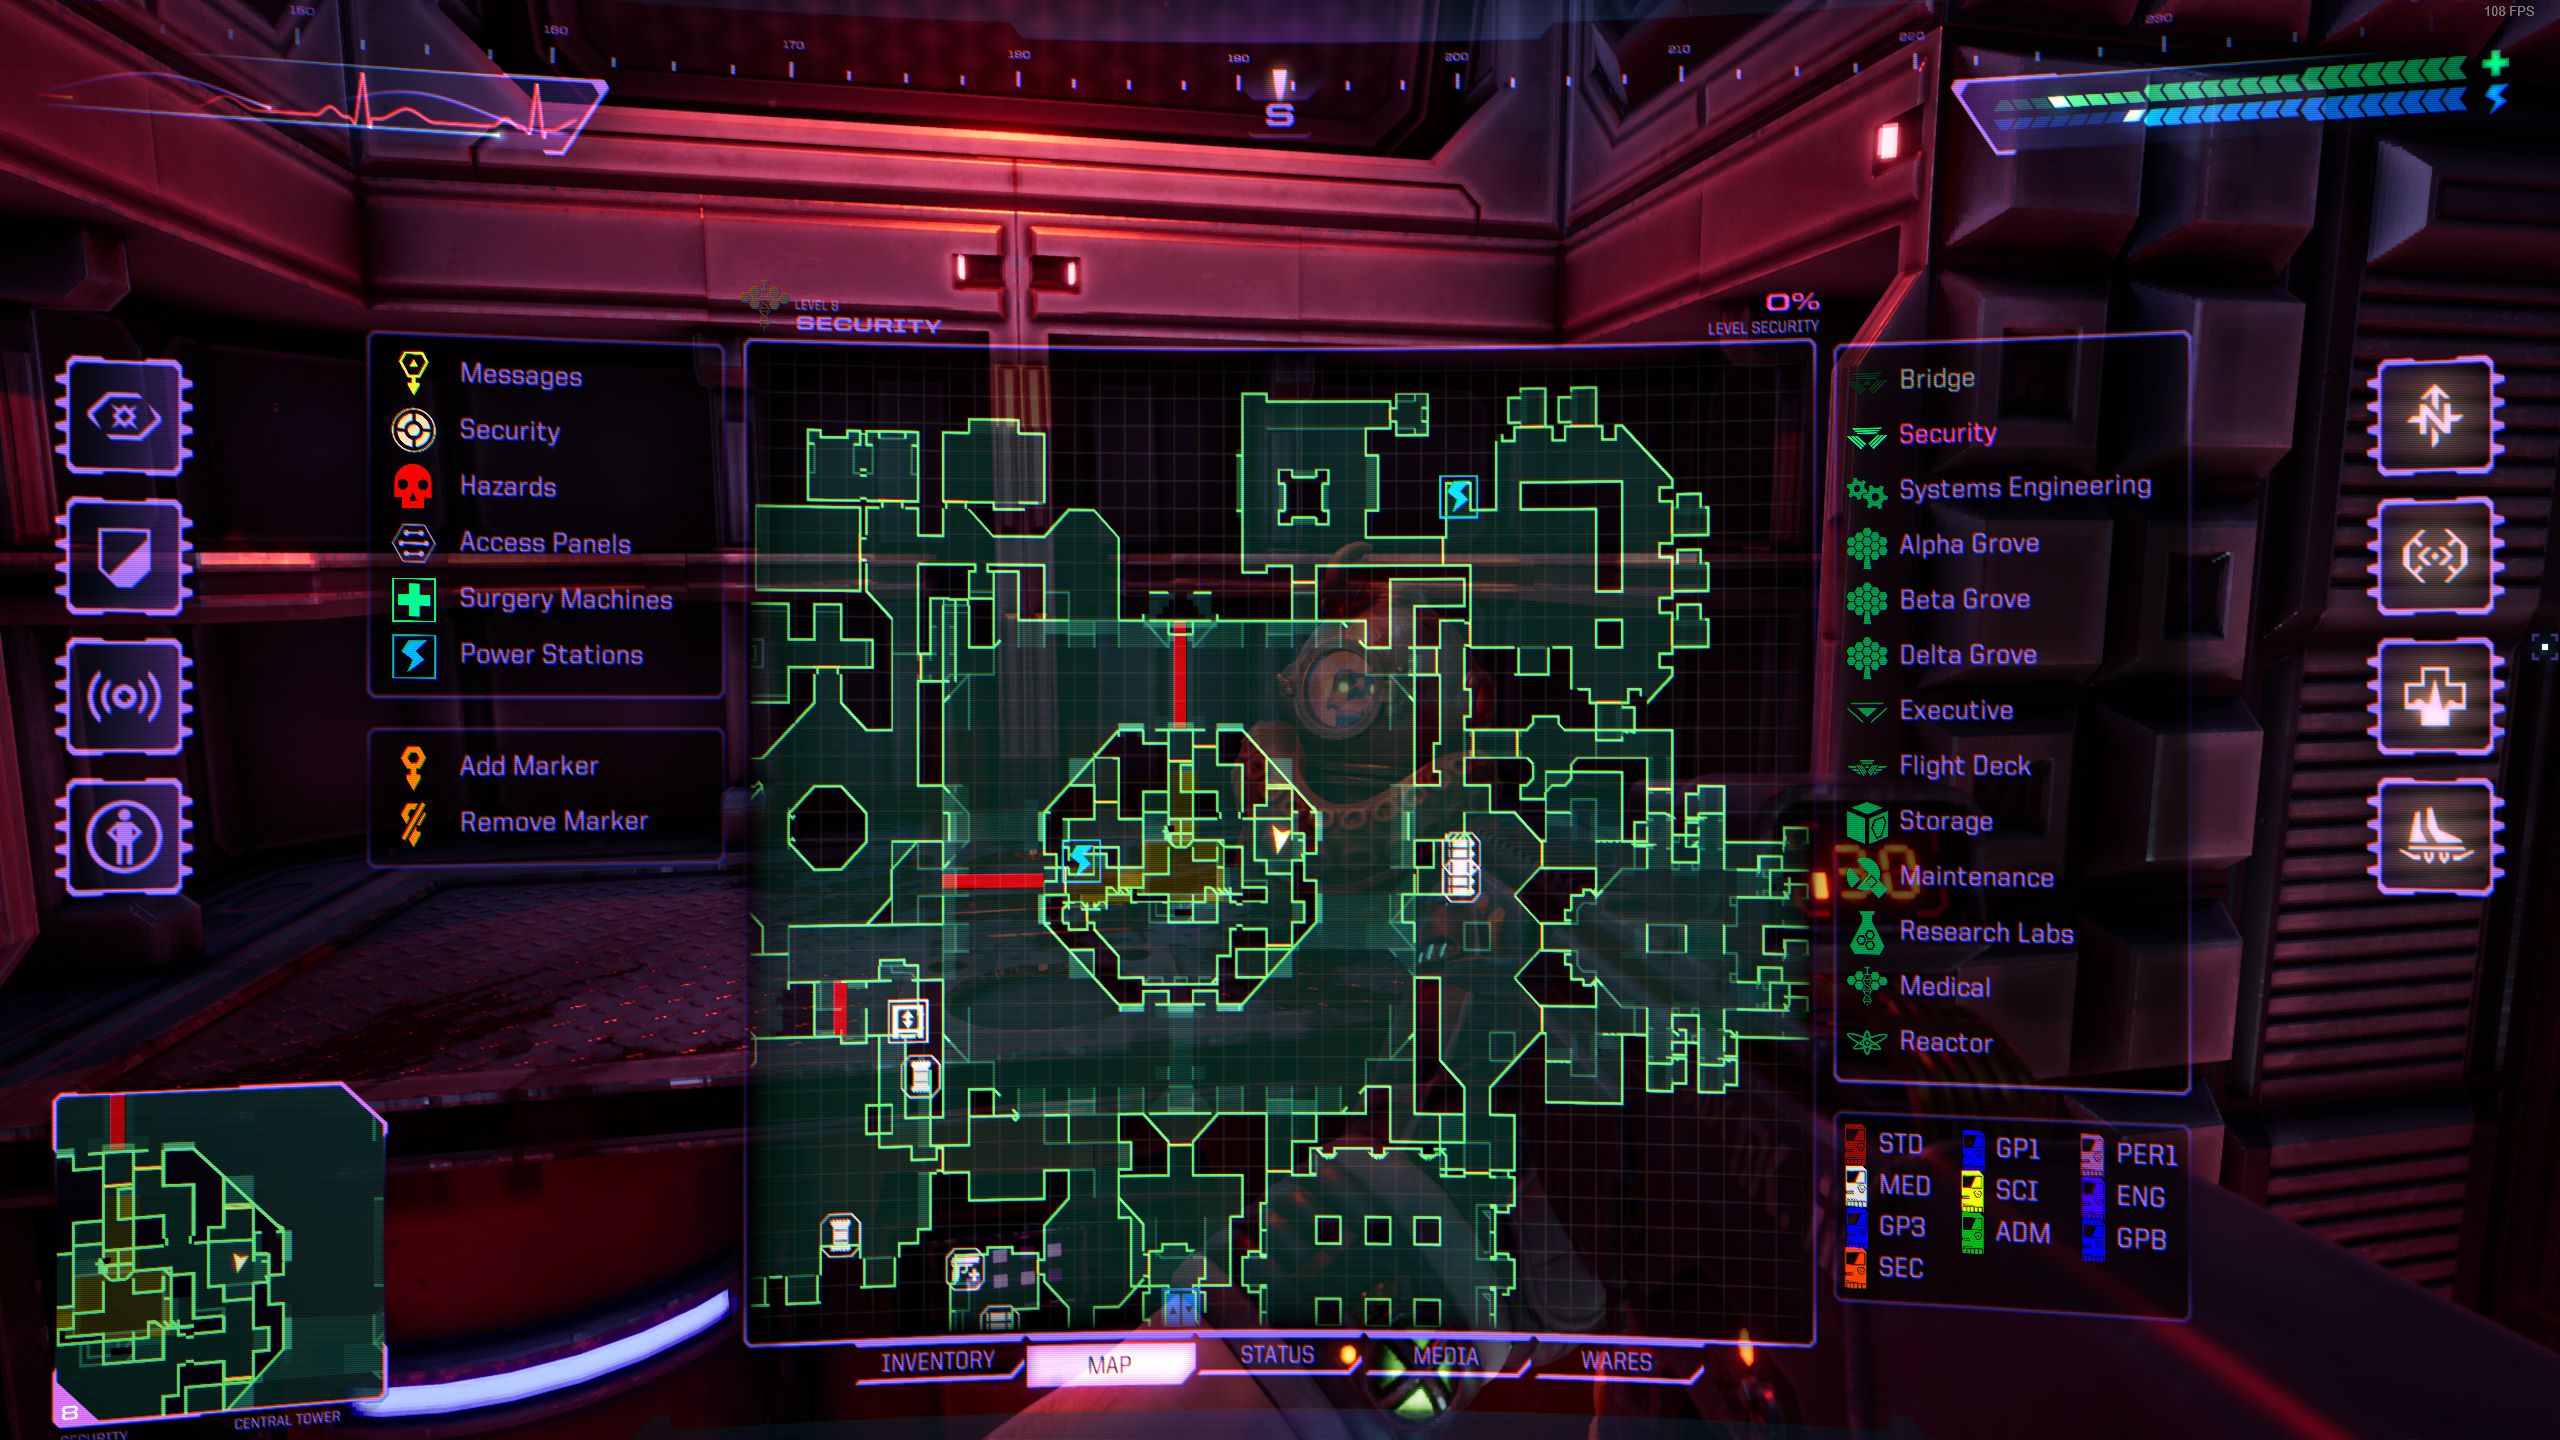
Nível 8 – Segurança
While positioned on the northern force bridge that leads to the Bridge elevator, shift your gaze towards the southern direction, specifically directed at the central tower. Within this central tower, you will easily spot an alcove slightly lower to your left. Glide gracefully towards that alcove and proceed to open the door, revealing the location of the skull.

Map Location:
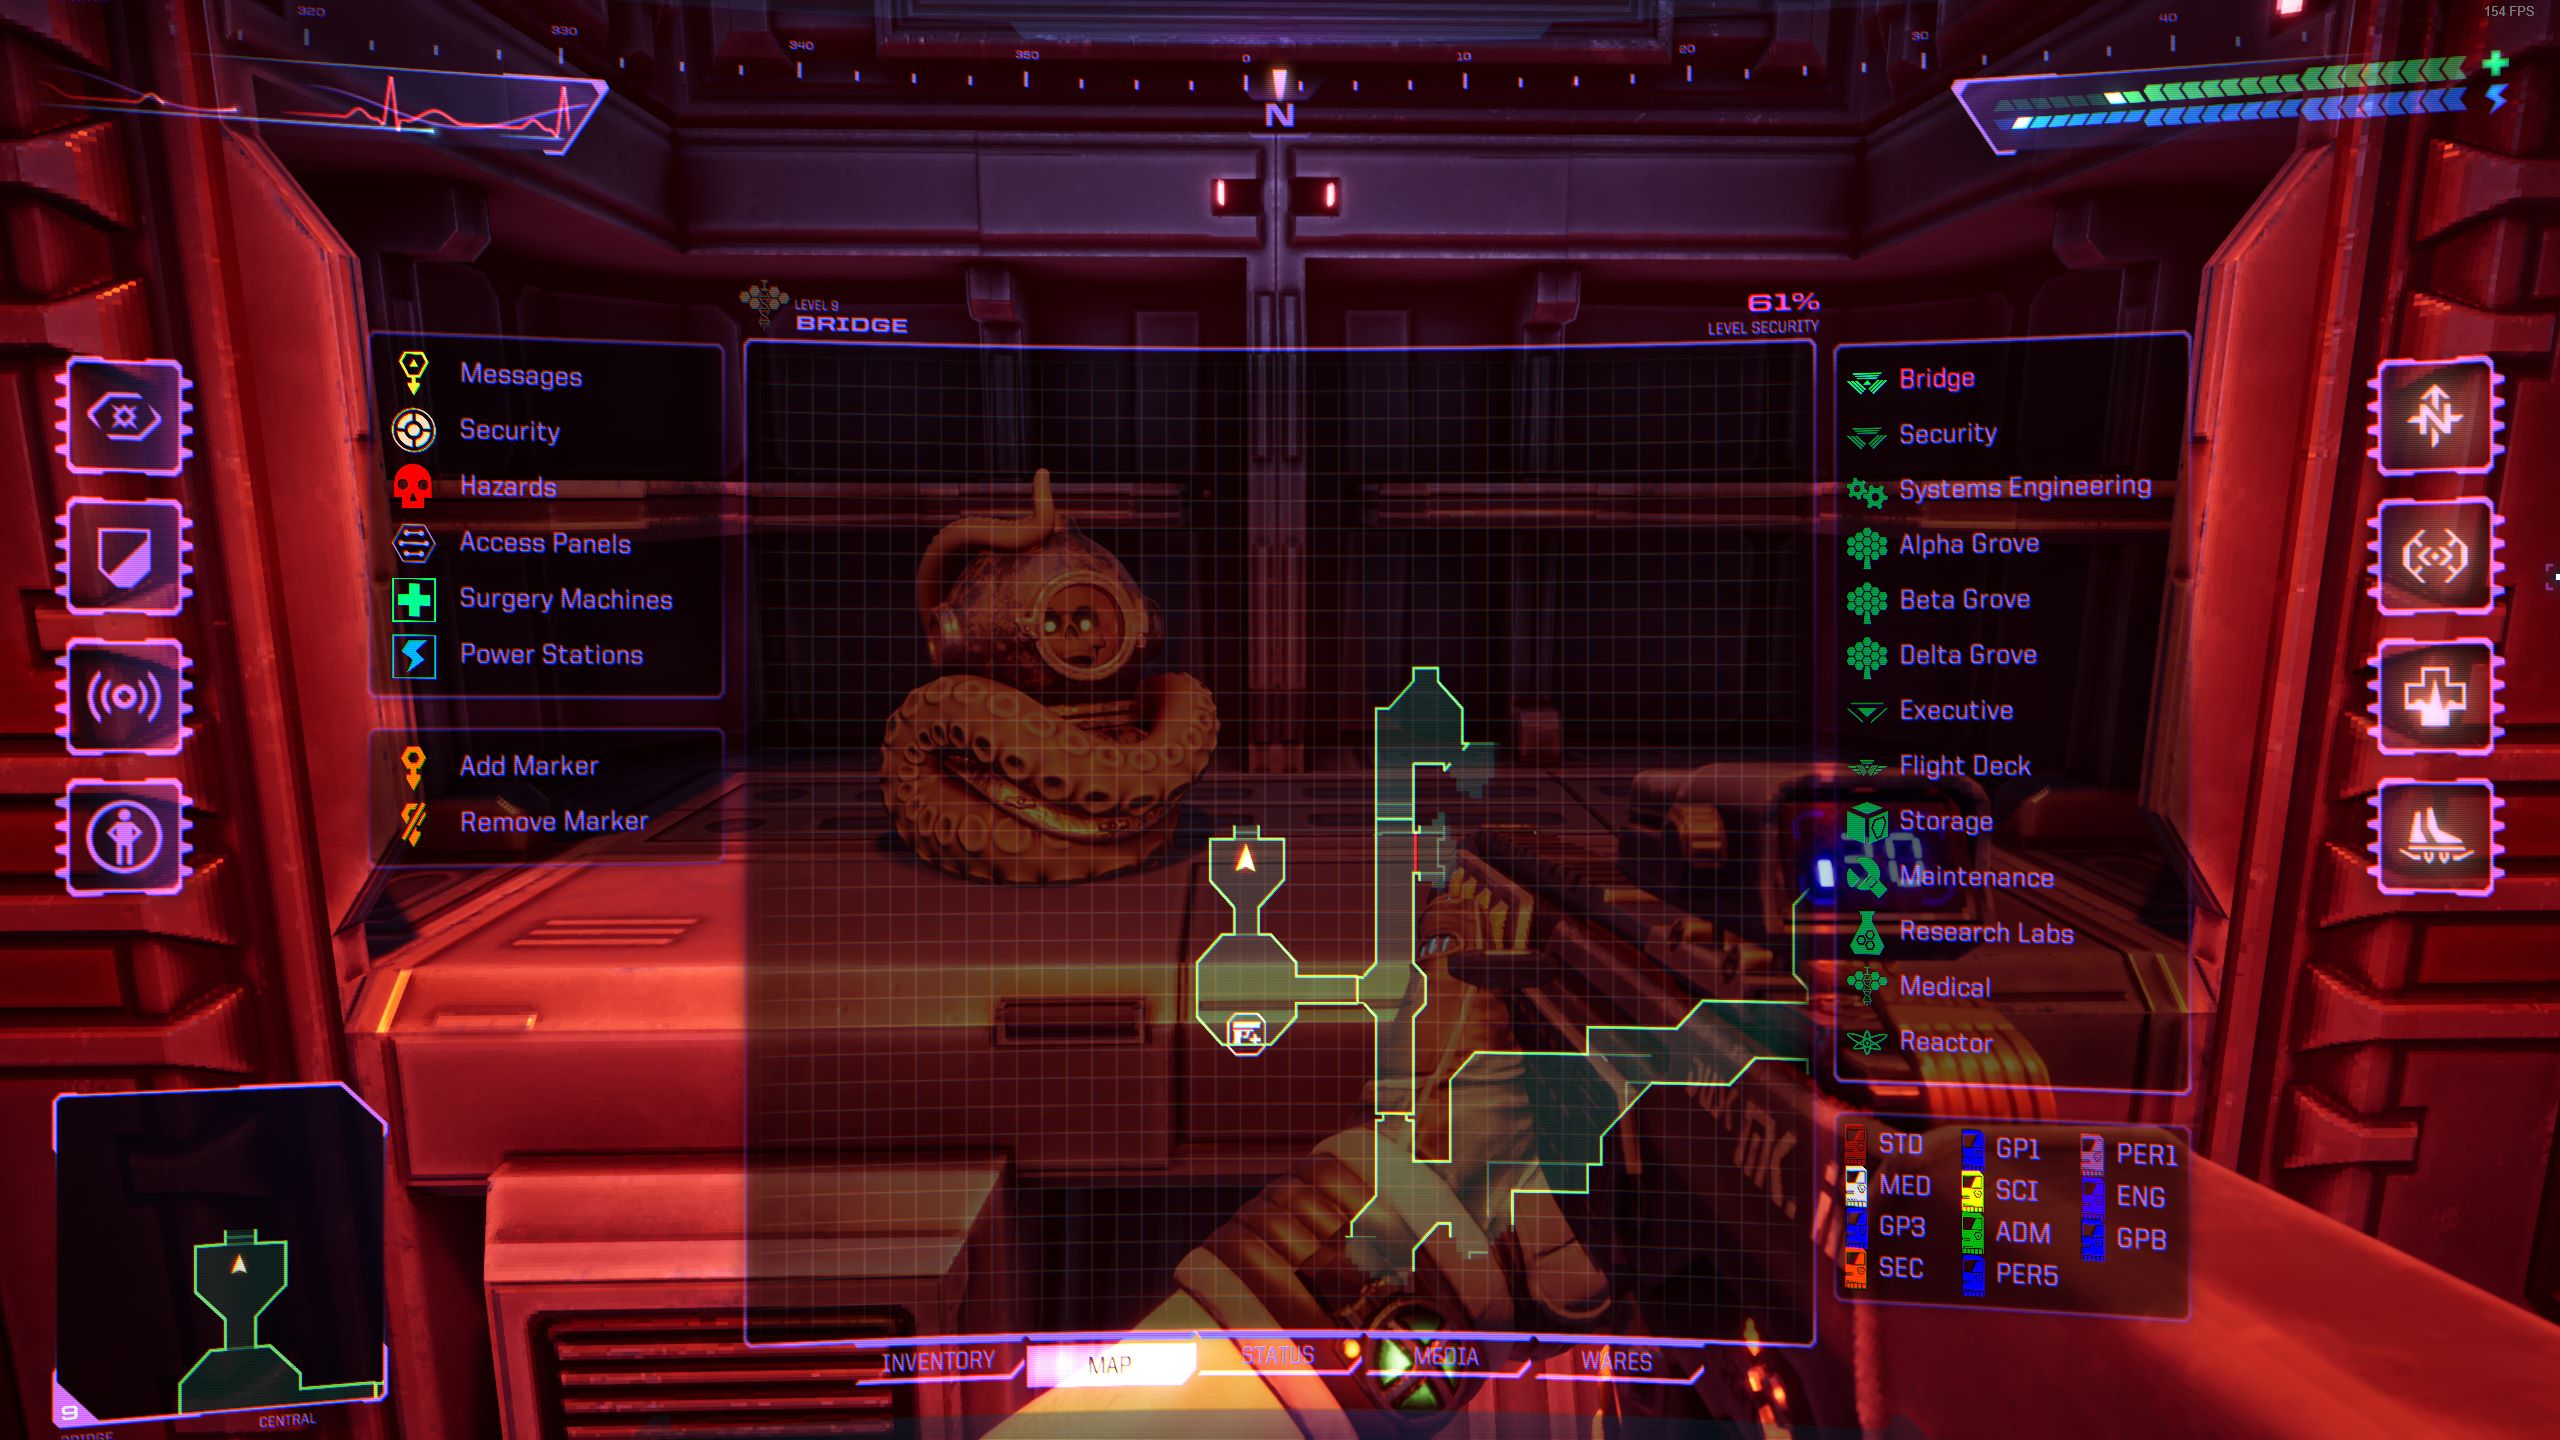
Nível 9 – Ponte
From the mod-kit station, direct your attention towards the north, where you will come across an aperture in the ceiling. Leap onto the ledge to ascend and reach the opening, leading you to the discovery of the ultimate skull.
Map Location:
Isso é tudo o que estamos compartilhando hoje para isso Remake de choque do sistema guia. Este guia foi originalmente criado e escrito por Kalcys. Caso não atualizemos este guia, você pode encontrar a atualização mais recente seguindo este link.