
This guide is intended for users with NVIDIA GPUs who want to add DLSS (Deep Learning Super Sampling) to Starfield without modifying game files or affecting achievements. DLSS is a technology developed by NVIDIA that utilizes deep learning to enhance the visual quality of a lower resolution image, effectively boosting performance while maintaining image quality.
There are two primary methods to add DLSS to Starfield:
- ReShade Dependency Method: This method requires ReShade but may disable the Steam overlay. It offers DLSS with sharpening.
- Dependency-Free Method: This approach doesn’t rely on ReShade but does not include sharpening. No entanto, it avoids disabling the Steam overlay.
Neste guia, we will walk you through the step-by-step process of adding DLSS and the simplest way to incorporate sharpening. The goal is to achieve these enhancements without making any changes to the game files, preserving achievements, and ensuring easy removal if needed.
It’s worth noting that DLSS is beneficial for improving performance while maintaining visual quality. While AMD offers a similar technology called FSR (FidelityFX Super Resolution), DLSS generally provides better results, especially on non-AMD graphics cards. By replacing FSR with DLSS, you can upscale the game from a lower resolution to your native resolution, resulting in increased FPS and a consistently high image quality.
Adding DLSS
1. Download FSRBridge – DLSS from Nexus Mods
Pode ser encontrado aqui.
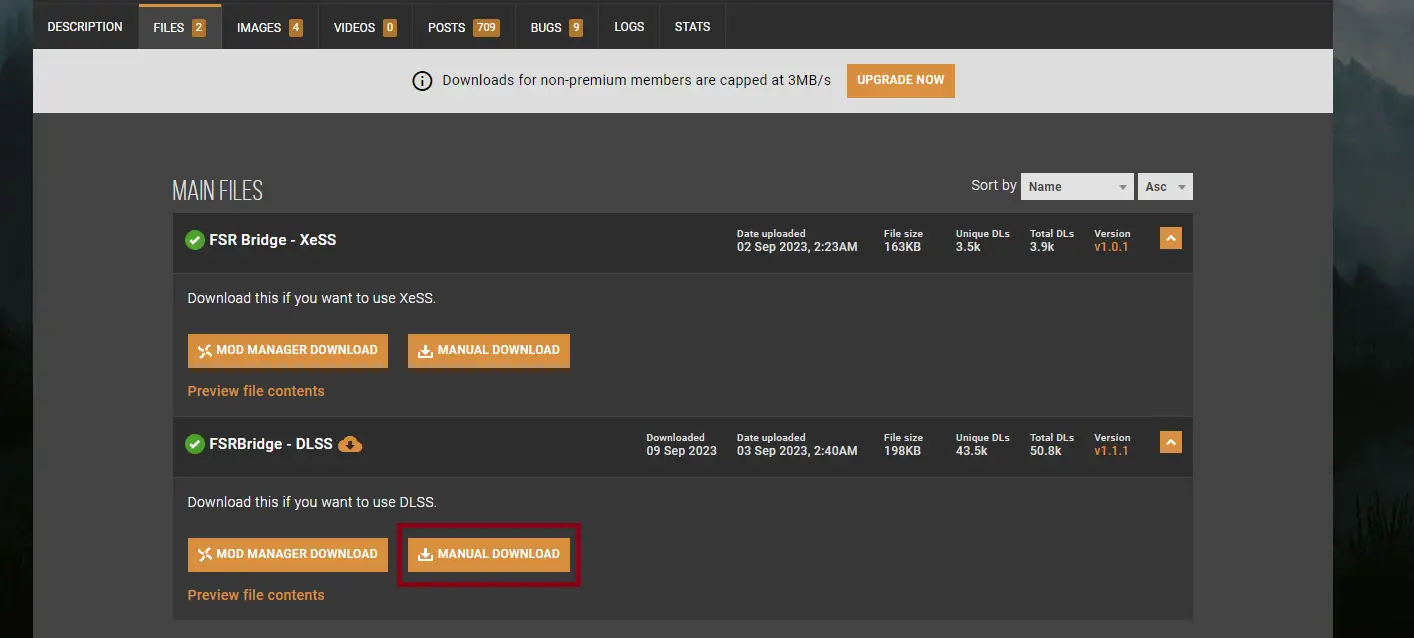
Note that you need to create an account and use the slow download button afterwards.
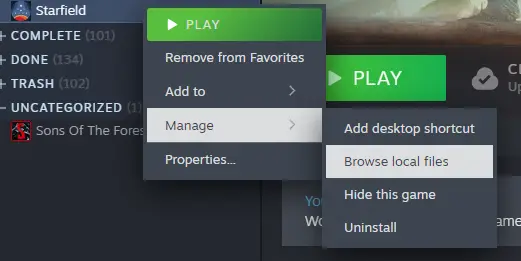
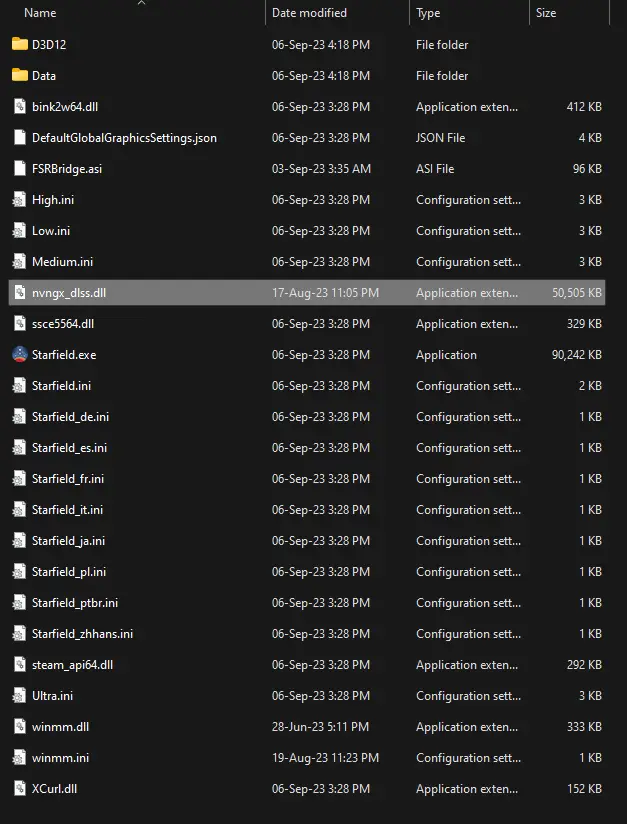
2. Extract the downloaded files into your game folder
Using 7-Zip or even the default Windows unzipper extract these three files.
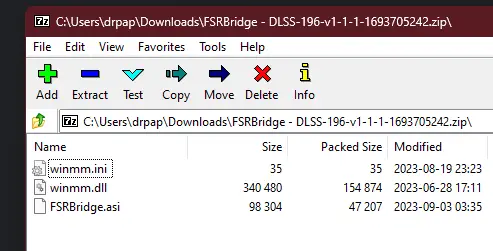
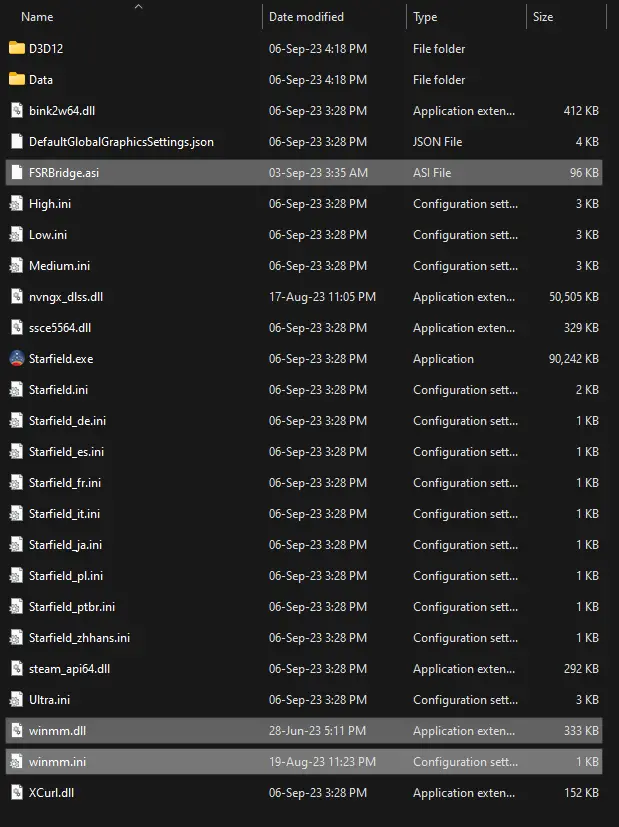
Move them to your Starfield game folder.
If you want to remove it later just delete these files.
3. Download the latest version of DLSS and add it into your game folder
Pode ser encontrado aqui.
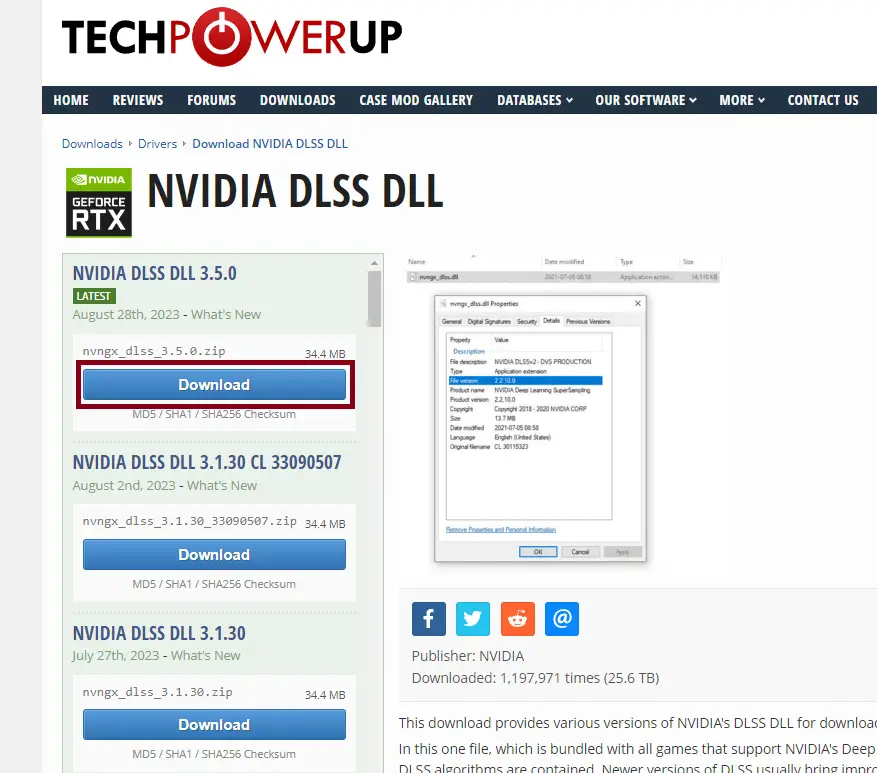
Choose any server and the download will start automatically.
Using 7-Zip or even the default Windows unzipper extract this file.
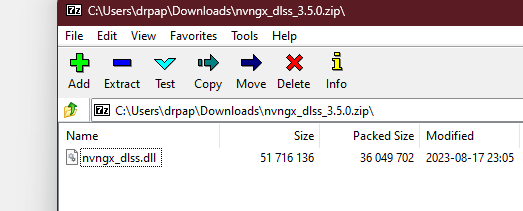
Move it to your Starfield game folder, igual a antes.
If you want to remove it later just delete this file.
4. Turn on FSR2 in your game and adjust the upscaling
FSR is now replaced with DLSS. You need to keep it turned on!


The render resolution scale percentage determines from which resolution will DLSS upscale the image to your native resolution. Mais baixo % gives more FPS but lower quality. Putting it at 100% doesn’t provide any FPS increase. Play with this setting until your find your preferred FPS/quality ratio.

Note that sharpening no longer works. Não importa o que % you set it at, it won’t change anything. I keep it at 0.
Adding Sharpening
We will be using NVIDIA Freestyle, the simplest method which will also preserve performance compared to ReShade.
1. Download GeForce Experience
There is a likely chance that you already have it installed.
Se não, you can download it aqui.
It can also be used to update your GPU drivers if they aren’t already which is crucial to performance.
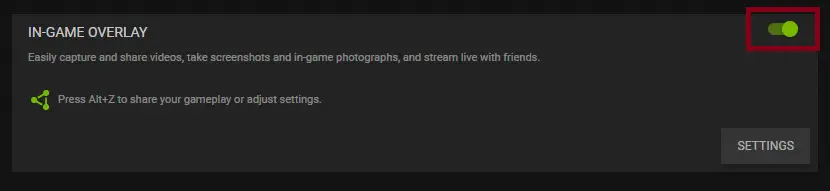
2. Enable the in-game overlay
Open the GeForce Experience settings and enable the overlay.
3. Enable the Sharpening filter in game
Launch Starfield and press ALT+F3 to open up the filters overlay.
Add Sharpening and fiddle with the sliders to get your preferred look.
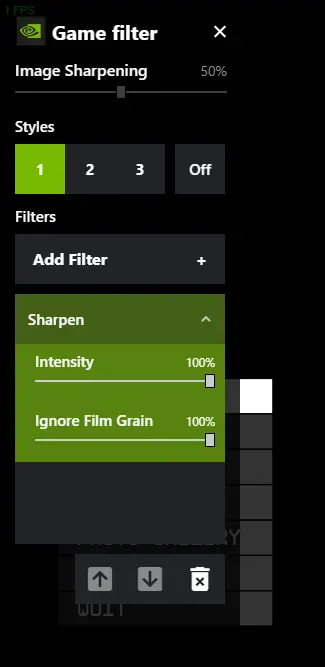
Note that I am not talking about the “Afiação da imagem” slider at the top!!!
I keep mine at 100/100.
Note that you can also add some other filters if you so choose.
Uninstalling
Simply delete the 4 files from the game folder:
- FSRBridge.asi
- nvngx_dlss.dll
- winmm.dll
- winmm.ini
Disable the GeForce Experience in-game overlay or simply remove the sharpen filter via the overlay.
Isso é tudo o que estamos compartilhando hoje para isso Campo Estelar guia. Este guia foi originalmente criado e escrito por dr papanak. Caso não atualizemos este guia, você pode encontrar a atualização mais recente seguindo este link.