This guide will show you how to properly install and add custom parts in the Custom Suits Mod for Space Enginners.
Requisitos
To modify custom parts, you’ll need a few tools:
- Primeiro, use Blender to export models to MWM effortlessly.
- Próximo, grab a text editor to tweak the XML data.
- Por último, make sure to have an image editor that supports .DDS for crafting those icons.
Mod Setup & Folder Structure
For every part mod, you must have a file named “CustomSuitsModDefinitions.xml.” Place it precisely within “ModRoot/Data/.” If it’s not in that spot, the game won’t load it.

Inside the CustomSuitsModDefinitions.xml, you can start with this xml:
<?versão xml="1.0" codificação="utf-16"?>
<CustomSuitsModDefinitions xmlns:xsd="http://www.w3.org/2001/XMLSchema" xmlns:xsi="http://www.w3.org/2001/XMLSchema-instance">
<PartDefinitions>
<PartDefinition>
<SubtypeId>YourHat</SubtypeId>
<Nome>Your Hat</Nome>
<Ícone>YourHat_Texture</Ícone>
<Modelo>Models\Hats\YourHat.mwm</Modelo>
<Osso>SE_RigHead</Osso>
<Posição>
<X>0</X>
<S>0</S>
<Z>0</Z>
</Posição>
<Rotation>
<X>0</X>
<S>90</S>
<Z>90</Z>
</Rotation>
<Escala>
<X>1</X>
<S>1</S>
<Z>1</Z>
</Escala>
<HideInFirstPerson>falso</HideInFirstPerson>
<HideWhenDead>falso</HideWhenDead>
<Colorable>falso</Colorable>
</PartDefinition>
</PartDefinitions>
</CustomSuitsModDefinitions>
To add new parts, remember that the SubtypeId must be one of a kind. If it’s not unique, it might replace or be replaced by another hat.
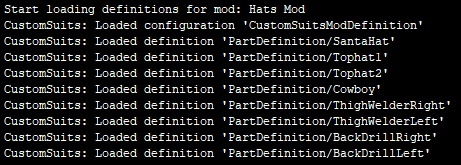
Check if your part is loaded by inspecting the log found in %appdata%/SpaceEngineers/.
To include multiple parts, duplicate the text from <PartDefinition> para </PartDefinition>. Paste it right after. Ensure the pasted <PartDefinition> is nested within the <PartDefinitions> scope.
Part definition
Modelo
The relative model path from mod root. If the file does not exist in the mod path, it will use the game content path instead. Any MWM can be used and you do not need setup collisions.
Exemplos:
<Modelo>Models\Hats\SantaHat.mwm</Modelo>
I have added SantaHat.mwm to my mod, the mod will use this model.
<Modelo>Models\Cubes\small\RemoteControl.mwm</Modelo>
RemoteControl.mwm does not exist in my mod, it will use the game’s RemoteControl.mwm instead.
Osso
To attach a part, specify the bone’s name. If the bone isn’t on the character, the part won’t be made, and a log message will appear.
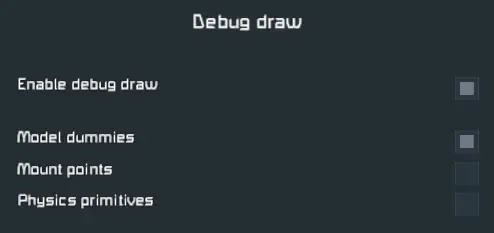
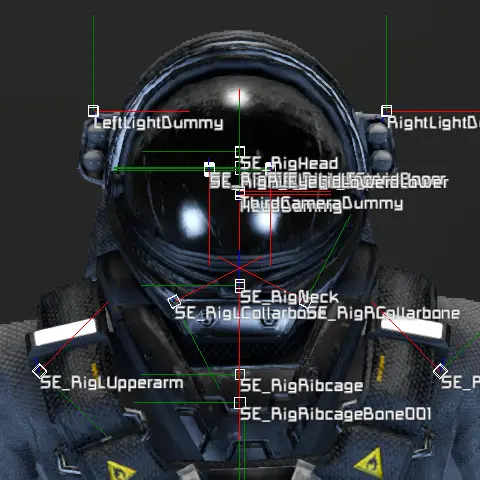
View available bones by activating Model Dummy Debug Draw in the F11 menu. Note that the bone debug draw uses a T-pose, not the character’s animation.
Exemplos:
<Osso>SE_RigHead</Osso>
The character’s head bone will be used.
<Osso>SE_RigRibcage</Osso>
The character’s ribcage bone will be used. This is also the bone the backpack is attached to.
Nome.
The display name shown in the GUI. This is not currently localized.
Exemplo:
<Nome>Shoulder Pad (Certo)</Nome>
Ícone
Transparent material subtype id of the icon of the part. For making icons, I use the Keen Block Showroom.
with the following details:
- Character with no skins, 0% matiz, 0% saturação, 20% valor
- Third person, minimum zoom to maintain consistent distance
- Ansel at 40 campo de visão
After taking the screenshot, I crop the image to a square and replace the background with the color #282828. I then finally resize the image to a 256×256 resolução.
Exemplo:
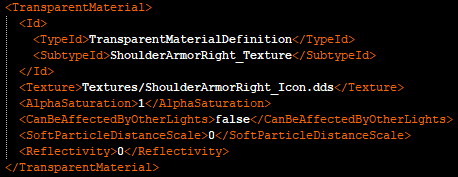
<Ícone>ShoulderArmorRight_Texture</Ícone>
In my TransparentMaterials.sbc file, I have created a material called ShoulderArmorRight_Texture.
Posição
The position offset in meters.
Exemplo:
<Posição>
<X>-0.09</X>
<S>0</S>
<Z>0</Z>
</Posição>
This is for a tophat part. To put the hat in the right position, I needed to move the part up 0.09 metros.
Rotation
The rotation of the part in degrees. Due to bone rotations not always being the same rotation, it may take some guess work to find the correct orientation you want. Modifying the rotation will not affect the position offset.
Exemplo:
<Rotation>
<X>0</X>
<S>90</S>
<Z>90</Z>
</Rotation>
This will rotate the part by 90 degrees for the Y and Z axis.
Escala
Scale multiplier of the part model.
Exemplo:
<Escala>
<X>2</X>
<S>2</S>
<Z>2</Z>
</Escala>
This will scale the part’s model 2x uniformly.
HideInFirstPerson
When true, the part will be hidden when the player is in first person view. This is helpful for hiding parts that obstruct the view. When deciding if this should be true, you should drop the character from a height; the landing animation sometimes shows parts not visible from standard gameplay.
Exemplos:
<HideInFirstPerson>falso</HideInFirstPerson>
The part will be shown when in first person.
<HideInFirstPerson>verdadeiro</HideInFirstPerson>
The part will be hidden when in first person.
HideWhenDead
When the character dies, the part will be hidden (like to prevent floating parts when the backpack detaches).
Exemplos:
<HideWhenDead>falso</HideWhenDead>
The part will still be visible if the player dies.
<HideWhenDead>verdadeiro</HideWhenDead>
The part will be hidden if the player dies.
Colorable
When true, the part’s color mask can be changed. You can determine if the part is colorable by the materials on the model. All block models are colorable, but component models are not.
Exemplos:
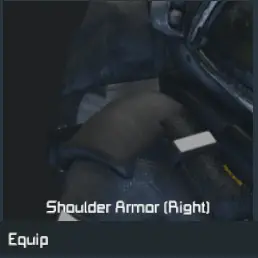
<Colorable>falso</Colorable>
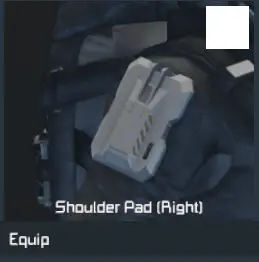
The part will not be colorable. Notice the color swatch is disabled in the image below.
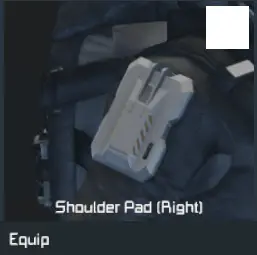
<Colorable>verdadeiro</Colorable>
The part is colorable. Notice the color swatch is available in the image below.
Isso é tudo o que estamos compartilhando hoje para isso Engenheiros Espaciais guia. Este guia foi originalmente criado e escrito por Jakaria. Caso não atualizemos este guia, você pode encontrar a atualização mais recente seguindo este link.