
This guide provides instructions on how to acquire the majority of badges for the Twins of Nerechtemeresch. Some badges are quite self-explanatory and will not be detailed in this guide:
- Back To the Marley (Use all Tears): Make sure to utilize all Tears during your journey.
- Choose your landing (Use all landing spots): Utilize all available landing spots strategically.
- First Step (Finish the mission): Successfully complete the mission objective.
- The Bridge Must Hold (Don’t attack the Kindred): Avoid engaging with the Kindred; maintain peace.
- Not That Kind Of Magic (Do not enter the cave): Refrain from entering the cave during your adventure.
- Luzes apagadas (Kill all guards that carry lanterns. Only have John in your team): Eliminate all guards carrying lanterns while having John as the sole member of your team.
Prepare For Trouble
No Favourites
Hide at least one body in both the red and the blue bush
To simplify this task, consider bringing a crewmate who can swim with you. Kill one guard on each Islet and place their bodies in the respective bush.
It Was Enough 10 Bodies Ago
Esconder 20 guards in the magic bushes
Even if the objective is marked as complete after hiding a few bodies, keep going. Just remember to use only the designated magic bushes and not any other hiding spots.
For All the World To See
Finish mission without touching any hiding spots
To earn this badge, finish the mission without using any hiding spots, which primarily refer to bushes. You can still explore other areas like the cave, go into the water, or utilize John’s Anchor Down/Pull Below ability.
John’s Revenge (Ch. 1)
Enough Of the Below
Don’t use the Anchor Down skill more than 4 vezes.
Only have John on your team
You need to use John’s Anchor Down/Pull Below skill exactly three times. Primeiro, use it for the collectible item objective; there’s no other way to reach it using solo John. The other two uses should be for pulling down the two guards into the Below. This leaves you with one free use of the skill. It’s recommended to use it for one of the guards near the mission objective guy on the cliffs. Por exemplo, extinguish the light downstairs, use Anchor Down to hide, and Anchor Up as soon as the guard is about to relight the light.
Minimalist Approach
Don’t use any distractions
Keep in mind that the restriction on skill usage only applies to skills. You can still use distractions like tracks in the sand or bodies lying on the ground to divert the attention of guards.
Firekeeper
Don’t extinguish any lights
Be cautious not to kill guards carrying lights, or if you do, avoid walking over their bodies, as this could accidentally extinguish their lamps, potentially alerting other guards.
Land Route
Finish the mission without swimming
It’s allowed to touch the water, and you have the option of using the cave instead of swimming to the other islet. This makes the mission more manageable.
Island Badges
Deadly Ascent
Kill all guards on the island in ascending order.
Guards at the same elevation must be eliminated before progressing to a higher level. The community is uncertain if this is a bug or simply a complex task. Several members attempted it without success, but one astute individual deciphered the solution, enabling us to finally achieve this badge. Here are some guidelines you may need to adhere to:
- We recommend undertaking this challenge during the mission “Prepare for Trouble.”
- Avoid ascending to a higher level unless all guards on your current level have been eliminated.
- Prioritize eliminating guards over making them catatonic by killing the Custodes nearby. Dispatch the guards first and deal with the Custodes last.
- Ascend with each character and commence eliminating guards only after all characters have ascended.
- Once you’ve cleared all guards at a particular elevation, refrain from descending back down.
- The final guard you eliminate should be the one located on the rooftop of the small shed atop the island “mountains.”
If you meticulously adhere to these instructions, you should be able to earn the badge. I will provide updates if necessary.
Just Fun and Games
Finish a mission without attack anyone
I suggest attempting this challenge in the mission “John’s Revenge (Ch. 1)” em vez de “Prepare for Trouble.” In the latter mission, you’re required to eliminate guards and hide them in the magic bushes, which can be somewhat complicated. While there are environmental kills that activate automatically, you cannot eliminate guards from beneath a falling rock. This means you would have to lure a third guard to the cargo without triggering the falling rock, which can be quite vexing.
To make this task more manageable, consider bringing crewmates who excel at relocating guards from their positions, such as Gaëlle or Suleidy. With their assistance, you should be well-prepared to tackle the challenge successfully.
Switcheroo
Kill each Kindred while they are on the half of the island their partner is normally posted on
This essentially implies that each Kindred must meet their demise on the island where they are initially positioned. You have two approaches to achieve this: you can either employ stealth tactics to lure them to the other island, or you can incapacitate them (without securing them), transport them to the opposite islet, and then carry out the act of elimination.
That Silend Secret
Find the message in a bottle
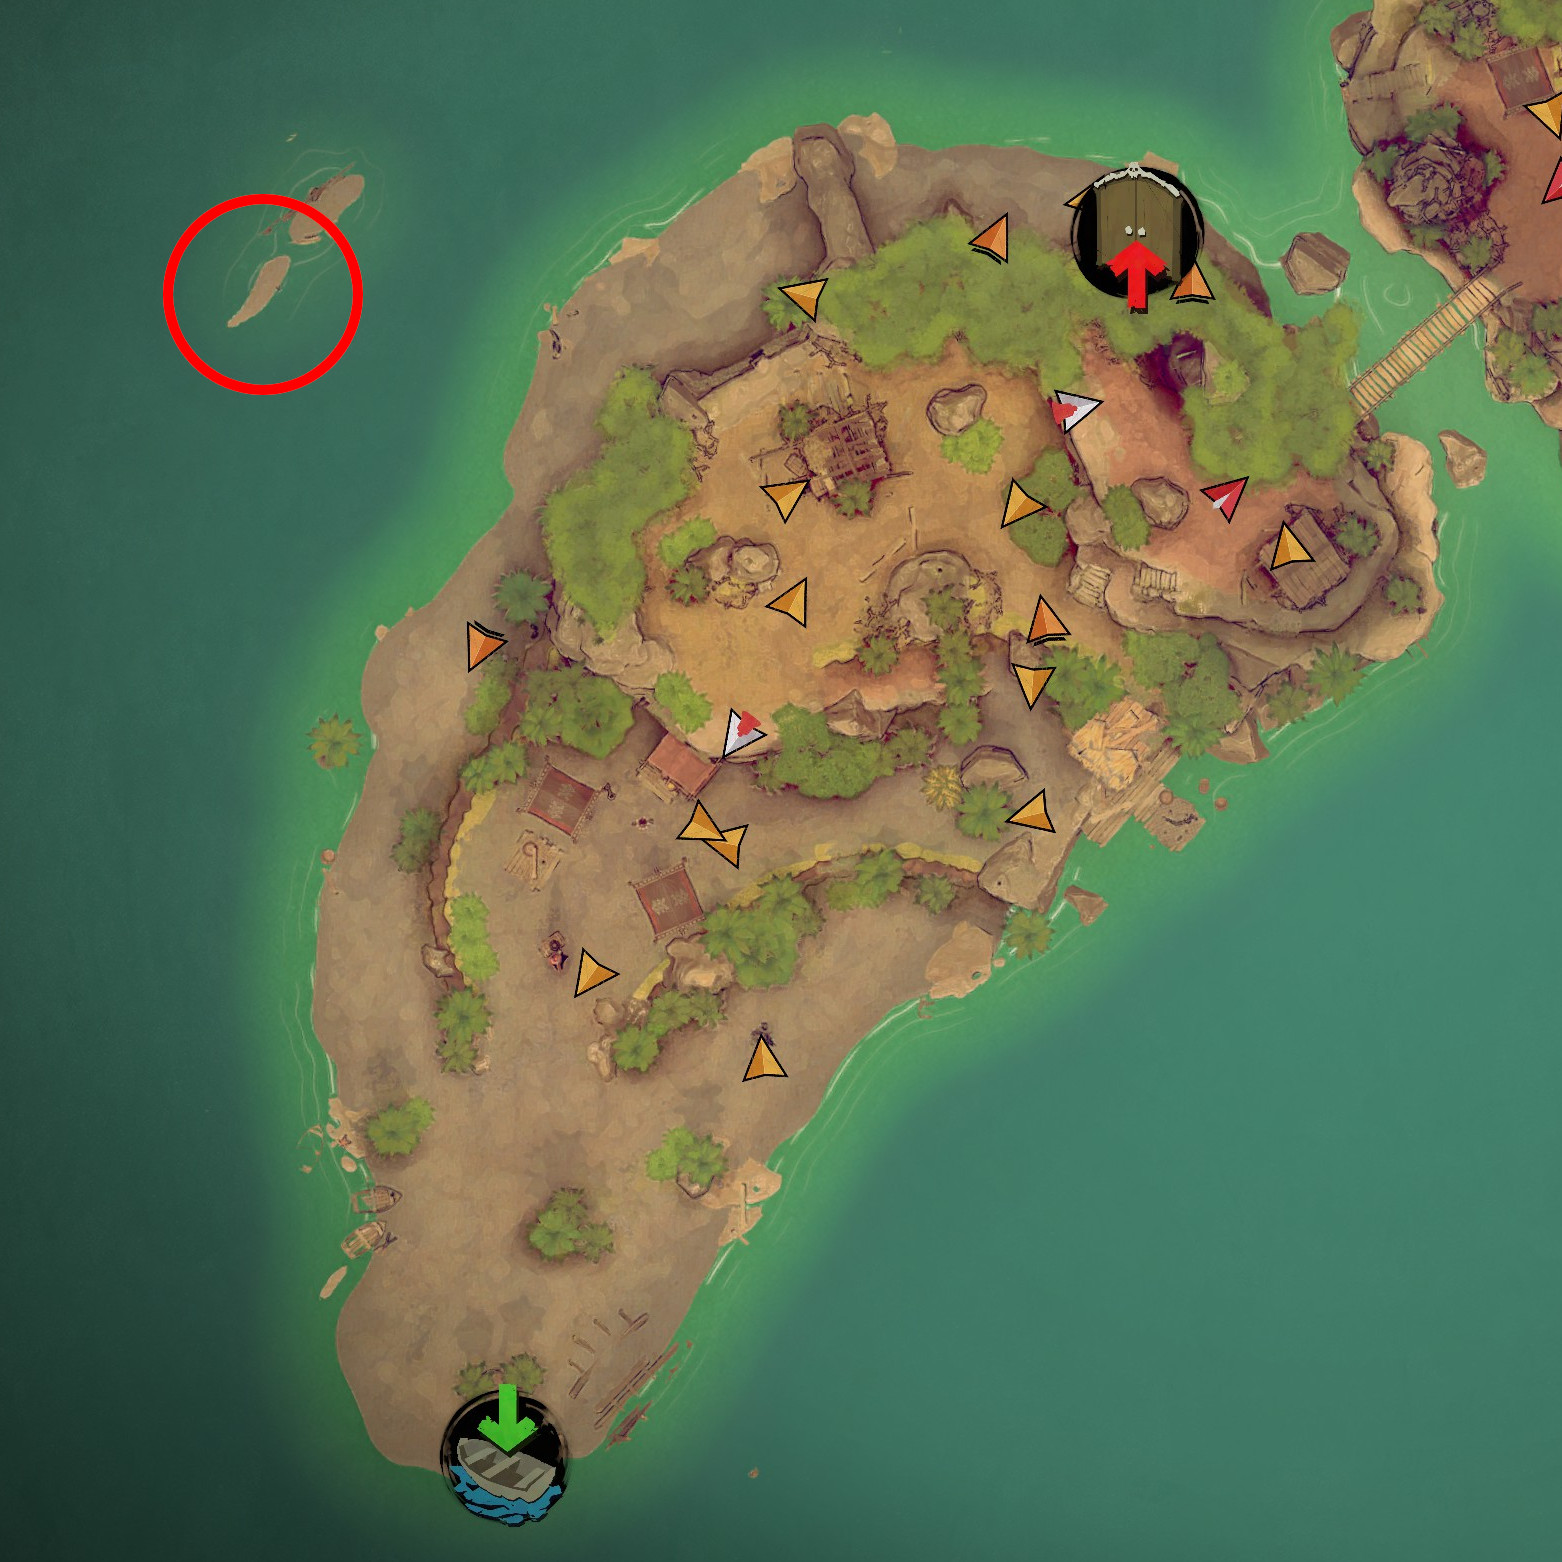
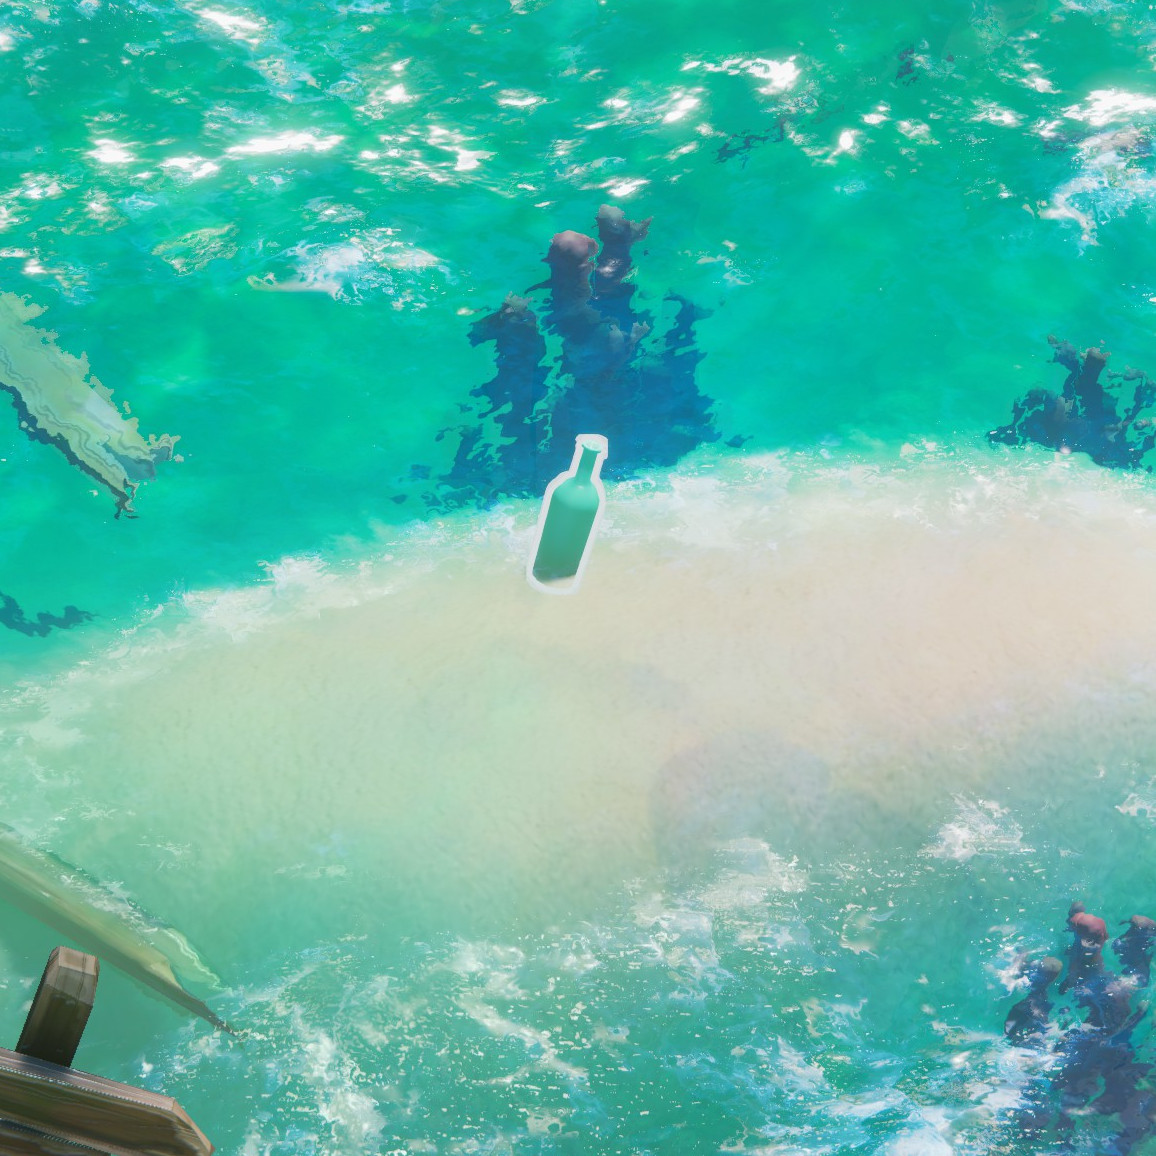
Simply swim there and interact with the bottle.
Salt-Soaked Caverns
Find the ominous door

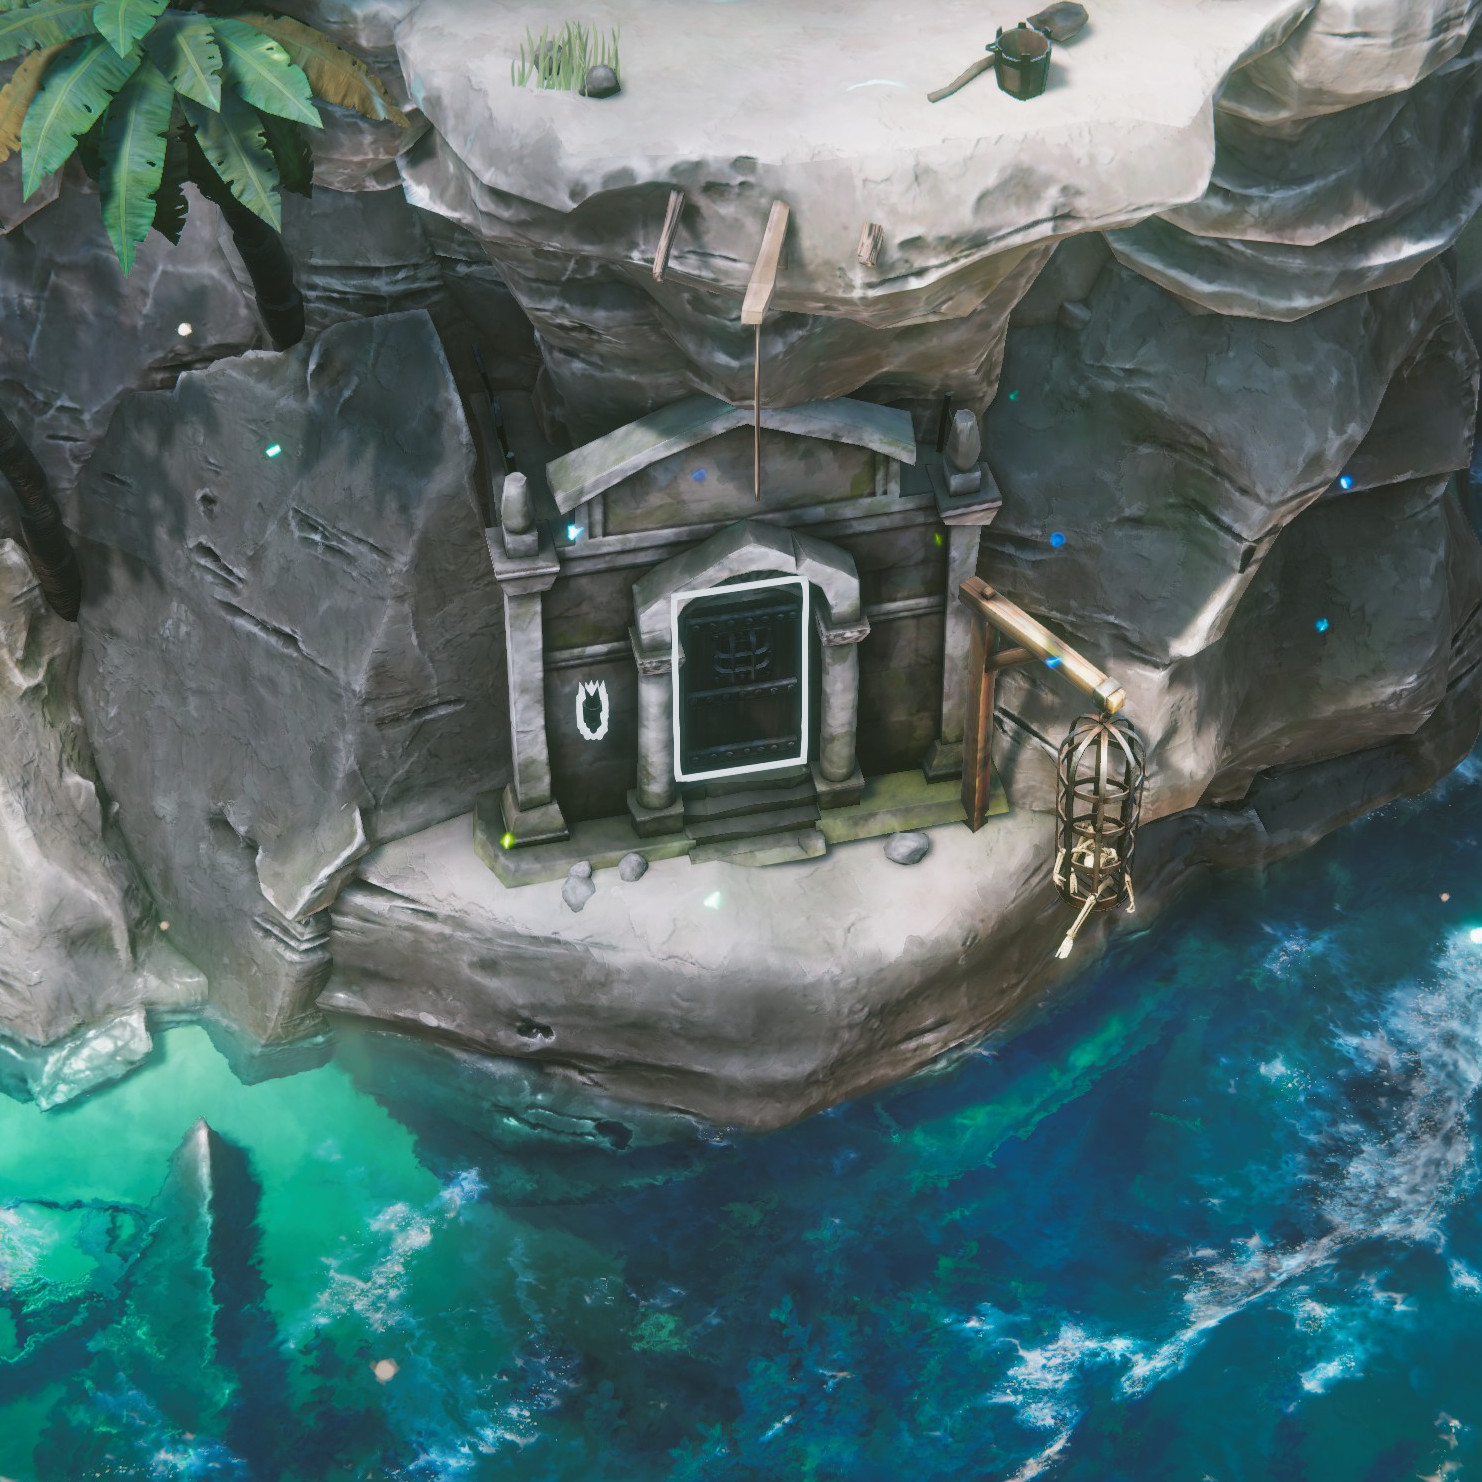
You can also just swim here and enter the door.
Isso é tudo o que estamos compartilhando hoje para isso Gambito das Sombras: A tripulação amaldiçoada guia. Este guia foi originalmente criado e escrito por Voit Peak. Caso não atualizemos este guia, você pode encontrar a atualização mais recente seguindo este link.