- Título: Residente Mal
- Data de lançamento:
- Desenvolvedor:
- Editor:
Informações sobre Resident Evil ainda estão incompletas. Por favor, ajude-nos a preencher os detalhes do jogo usando este formulário de contato.
This guide serves as a comprehensive resource for swiftly resolving the game’s puzzles, eliminating the need to scour multiple forums and videos for solutions. Adicionalmente, it offers insights into acquiring specific items and triggering events.
Introdução
Principalmente, this guide caters to players who have previously experienced the game, serving as a convenient “cheat sheet.” No entanto, it remains accessible to newcomers as well.
The creation of this guide is primarily motivated by two objectives:
- Centralizing essential information while minimizing extraneous content.
- Facilitating easy access to information within the game environment using Steam’s integrated browser (Shift+Tab). During my initial attempts to achieve “Don’t Stop Running” e “Ink is for Squids,” I played in fullscreen mode and frequently had to alt-tab to gather information from various sources. Infelizmente, this led to game crashes, and given the game’s lack of an automatic save feature, I found myself redoing tasks, resulting in considerable time wasted.
Portanto, if you prefer playing the game in “Tela cheia” mode while having crucial puzzle information readily available without the risk of alt-tabbing and game crashes, this guide is tailored to meet your needs.
Guia de localização de chaves antigas
Neste capítulo, we will provide you with the precise locations of the old keys you’ll need during Chris’s playthrough to advance through the main storyline. Adicionalmente, we’ll guide you to the whereabouts of the shotgun and magnum revolver, both valuable assets in your journey.
Old Key #1
Mansion 1F
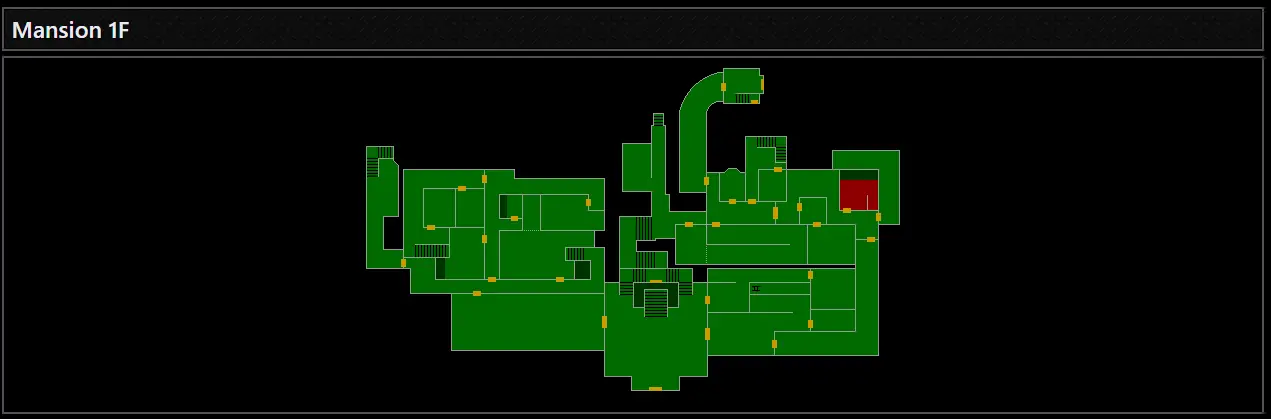
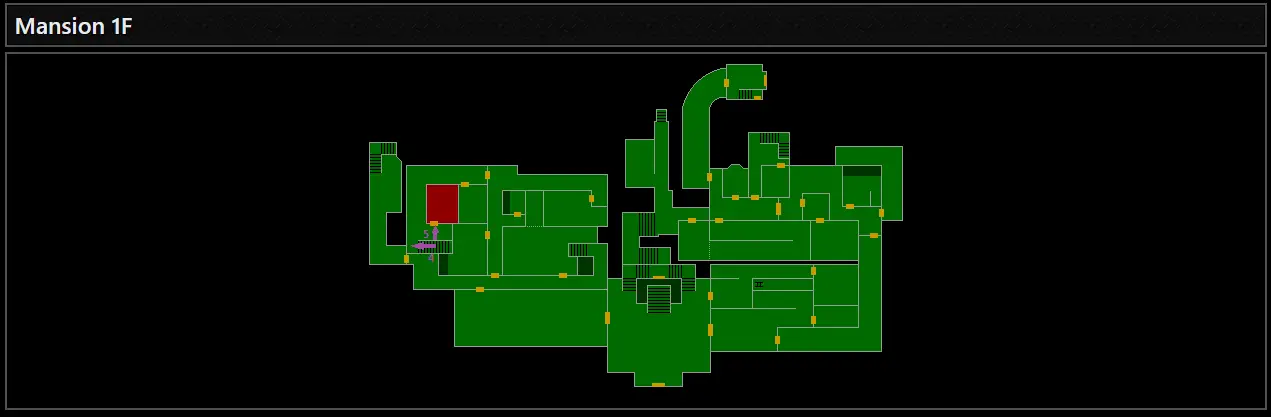
It is found in the bathtub, after draining it.
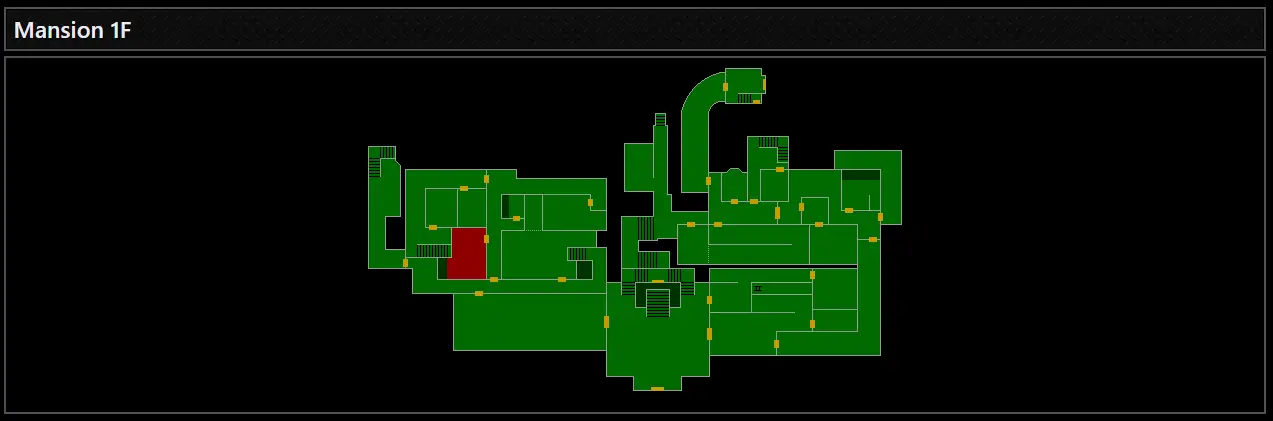
Old Key #2
Mansion 1F

It is located on the same table as the typewriter.
Old Key #3
Mansion 1F
It can be found in the wardrobe (be cautious of the zombie inside).
Old Key #4
Mansion B1
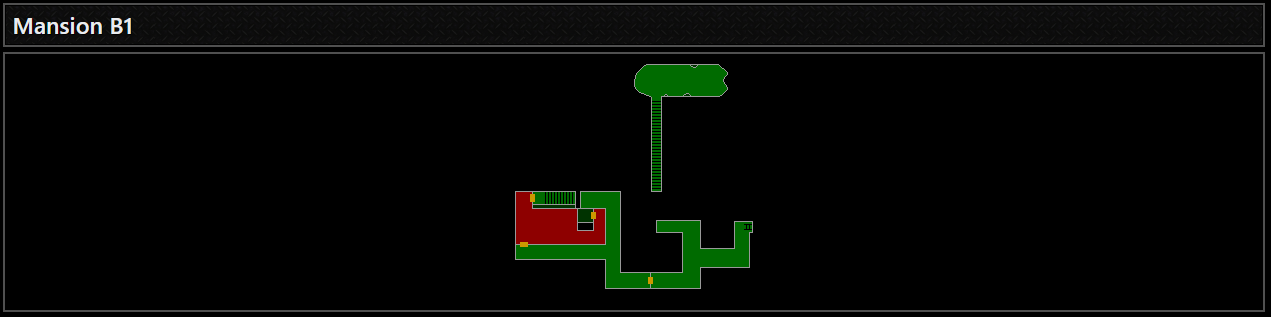
It is located on a kitchen shelf, at the back left corner of the room.
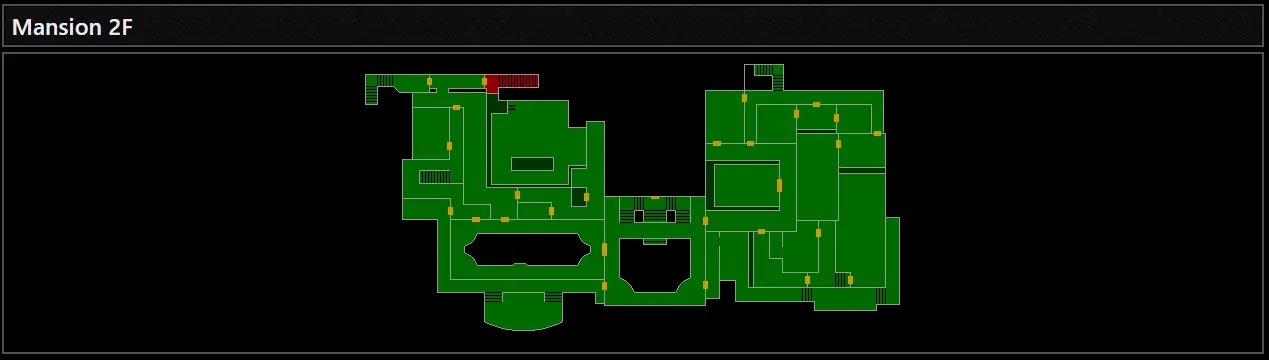
Old Key #5
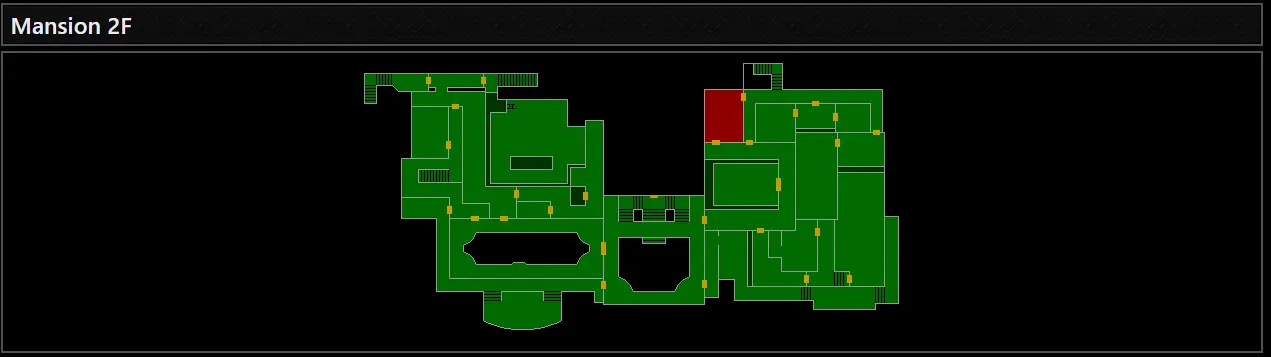
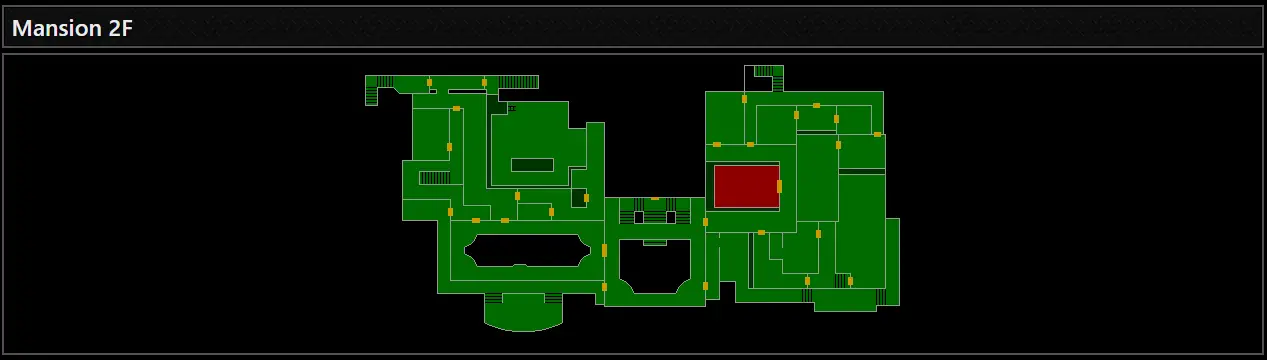
Mansion 2F

It is situated on the desk at the foot of the bed.
Armor key and dog whistle
Location of the Key Reward
Imitation of the Armor Key.
Pré-requisito (Chris Only)
- 1x Old Key.
In order to obtain the Armor Key without triggering the lethal trap that activates when attempting to retrieve it, you’ll need to secure a replica of the key.
Para fazer isso, retrieve the dog whistle in the next room:
Observação: ONLY FOR JILL.
Nesta sala, you will find a lighter, which is mandatory to pick up for the continuation of the adventure.
Once you’ve obtained it, head to the outdoor balcony located here:
For the quickest route, head up to the upper floor of the dining room, proceed through the door located at the far end of the room, and then continue through the door directly ahead, leading to the balcony.
Once on the balcony, employ the dog whistle once.
This action will summon two Cerberuses, one of which possesses a valuable item around its neck. Eliminate the Cerberus carrying the item and collect it. Take a closer look at the collar and press the button attached to it. This will yield a small gem.
Inspect the gem, rotating it until you identify the side adorned with an armor emblem. Press the interaction button. This will transform the gem into a convincing imitation of the “armadura” chave.
Agora, return to the location where the authentic “armadura” key is located.
Retrieve the genuine “armadura” chave.
Por último, access your inventory and employ the imitation key to safely disarm the trap.
Espingarda (Chris Only)
Localização

Recompensa
- Espingarda.
Pré-requisito
- 1x Old Key.
Explicação
Primeiro, you will need to retrieve the broken shotgun located here:

To gain access to the room, you’ll need an old key. Uma vez dentro, locate the broken shotgun in the back left corner of the room.
Ensure that you have an available inventory slot and then make your way to the room where the functional shotgun is stored, situated at the uppermost part of this section.
Remove the shotgun from the wall. Depois, affix the broken shotgun to the same wall. This action will deactivate the trap, ensuring safe passage when exiting the room.
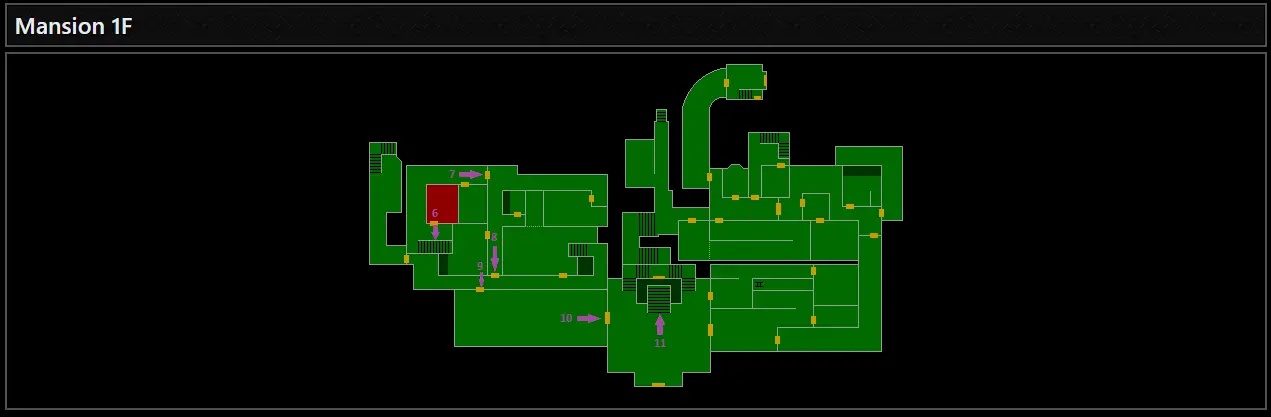
Richard’s Serum: Onde? + Best Route to Take
Localização
Mansion 1F

Recompensa
- Advancement in Richard’s quest + “Atrasando o inevitável” conquista.
Explicação
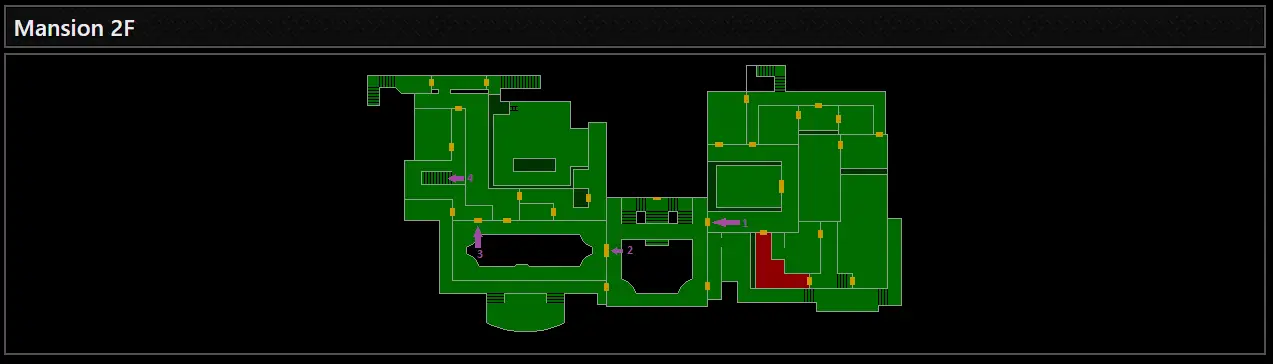
- As soon as you meet Richard, you will automatically leave the room. De lá:
Passos
Head left to reach the mansion’s main hall.
From the mezzanine of the hall, go through the door that is (mais ou menos) in front of you. You will find yourself on the upper floor of the dining room.
Pegue a porta à direita, which is at the far end of the room.
Take the stairs that are
Você tem duas opções:
- The first is to backtrack, but this may require you to use ammunition and/or healing items if you weren’t careful enough. Adicionalmente, Richard’s time is limited, so you should waste as little time as possible.
- For the second option, it’s much safer and just as quick (and it will unlock shortcuts if you haven’t already). Make sure you have the “espada” key in your inventory or have previously unlocked the door next to the room where you obtained the serum. It’s also the door that leads to the entrance of the greenhouse where you can obtain one of the 4 death masks.
Once you’ve acquired the serum, exit the room and proceed to your right until you reach the door at the far end of the hallway. Se você ainda não, use o “espada” key to unlock it.
Move to the end of this hallway, to the right of your character. Unlock the door if it’s still locked and then open it. You will find yourself in the hallway where you first encountered a zombie.
Continue to the right of your character, taking the door that leads to the dining room.
Return to the main hallway.
Head up to the first floor using the right side of the grand staircase, and take the first door on your right.
Uma vez dentro, locate the first door on your right again, and administer the serum to Richard.
If you find it challenging to follow these written instructions, you can refer to the provided map with a marked path to follow for assistance.
Piano and Golden Emblem
Localização
- Mansion 1F
Recompensa
- Golden Emblem.
Pré-requisito (Jill Only)
- Isqueiro.
You will find it in the same room as the dog whistle.
Explicação
To engage with the piano, your first task is to acquire the sheet music, which can be found in the following location:
This path becomes accessible once Richard has either been saved or has met his unfortunate fate.
Once you possess the sheet music, ensure that you have an empty slot in your inventory. Return to the room housing the piano.
Proceed to the back right corner of the room and push the dresser to reveal a concealed sheet music stand behind it. Combine the sheet music with the stand.
Finalmente, interact with the piano to initiate the opening of a secret door within the room. Make your way to the dining room, located above the fireplace, and retrieve the emblem.
Return to the piano room to collect the golden emblem, which was concealed behind the newly opened secret door triggered by the piano’s melody. Once you have the emblem, a porta vai fechar.
Replace the golden emblem with the wooden emblem to reopen the door.
Strategy for Chris (Apenas)
Considering Chris’s limited proficiency in this area, Rebecca will take the lead in playing the piano. No entanto, she requires some time for rehearsal. To optimize your time, proceed directly to the mansion’s main hall.
While en route, don’t forget to acquire the emblem situated above the fireplace in the dining room. Depois, return to Rebecca, and by the time you do, she will have completed her rehearsal.
Clock Needle
Localização
Recompensa
- Shield Key.
Explicação
Upon obtaining the golden emblem concealed behind the door that exclusively responds to the piano’s melody, promptly install it above the dining room fireplace. This action will grant you access to the inner workings of the clock.
Interact with the clock and opt for the sizable gear. Rotate it two consecutive times either to the left or to the right.
Bees and the Wind Symbol
Localização
Recompensa
- Wind Symbol
Explicação
On this wall, retrieve the fishhook:

On this wall, retrieve the bee lure and do not press the button:
Próximo, combine the bee lure with the fishhook.
Retrieve the bee on this wall:
Então, still on the same wall, place the lure with the fishhook.
Return to this wall:
Place the bee specimen and press the button.
The color of the mosaics
Localização
Recompensa
- Mouthless Death Mask.
Explicação
The aim of this puzzle is to ensure that every mosaic illuminated by the light shares a jewel in common with the central mosaic at the back of the room. Your objective is to align the colors of the various mosaics with those of the jewels found on the main mosaic.
You can successfully solve this puzzle by pressing just one switch for each illuminated mosaic.
1st mosaic (Yellow -> Vermelho)
2nd mosaic (Yellow -> Verde)
3rd mosaic (Red -> Roxo)
Uma vez feito isso, you will only need to interact with the main mosaic to open the secret passage and retrieve the mouthless death mask.
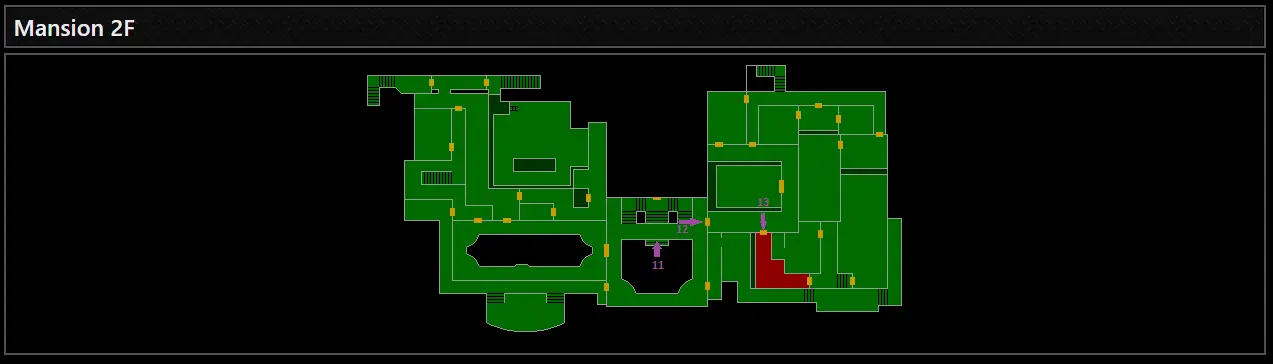
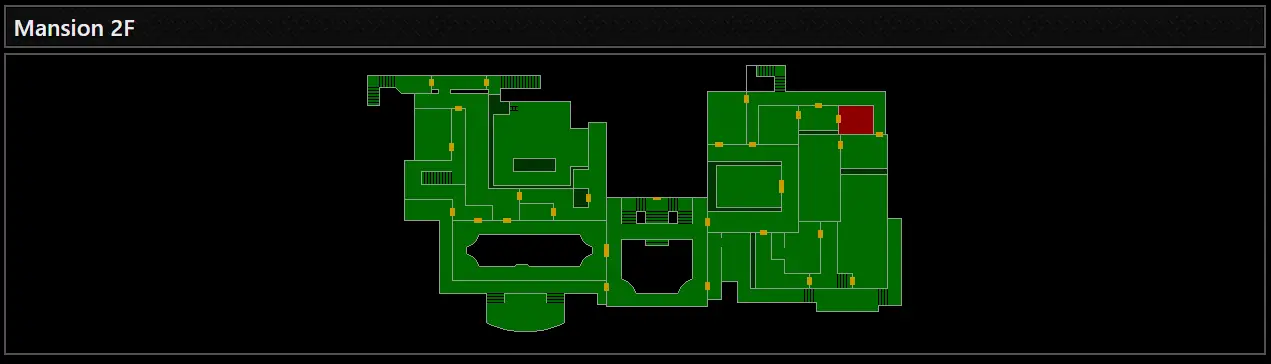
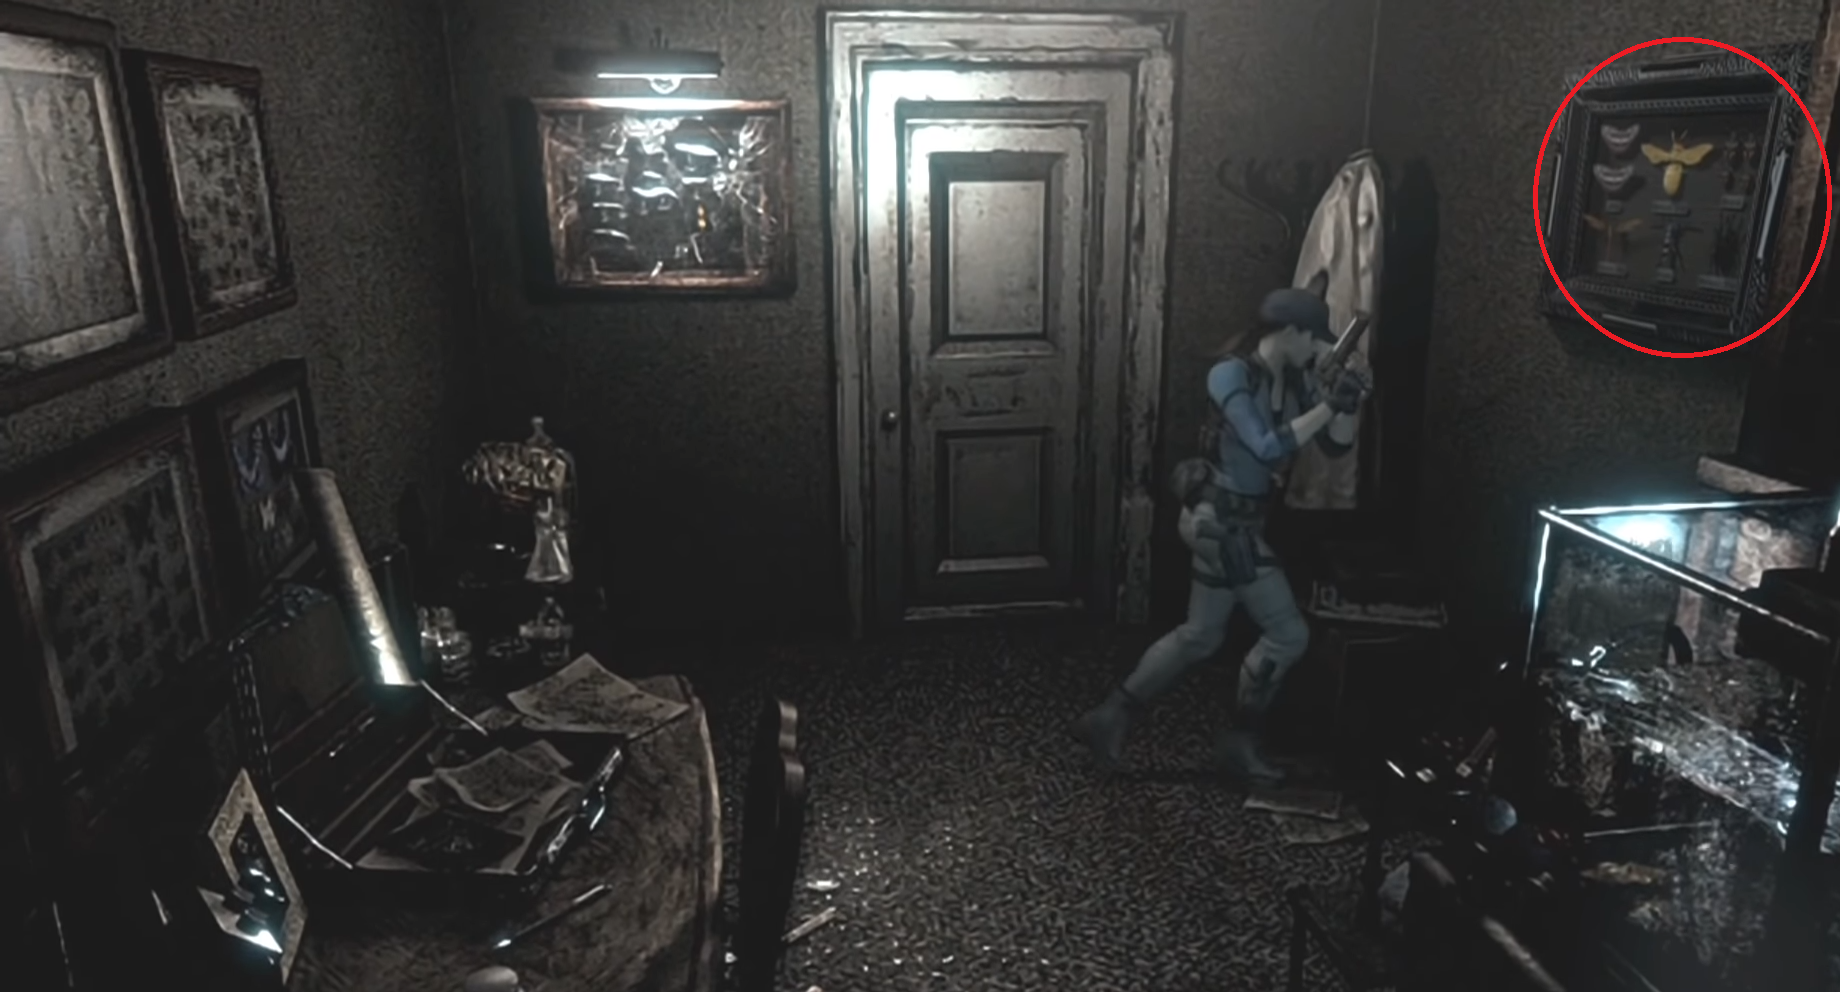
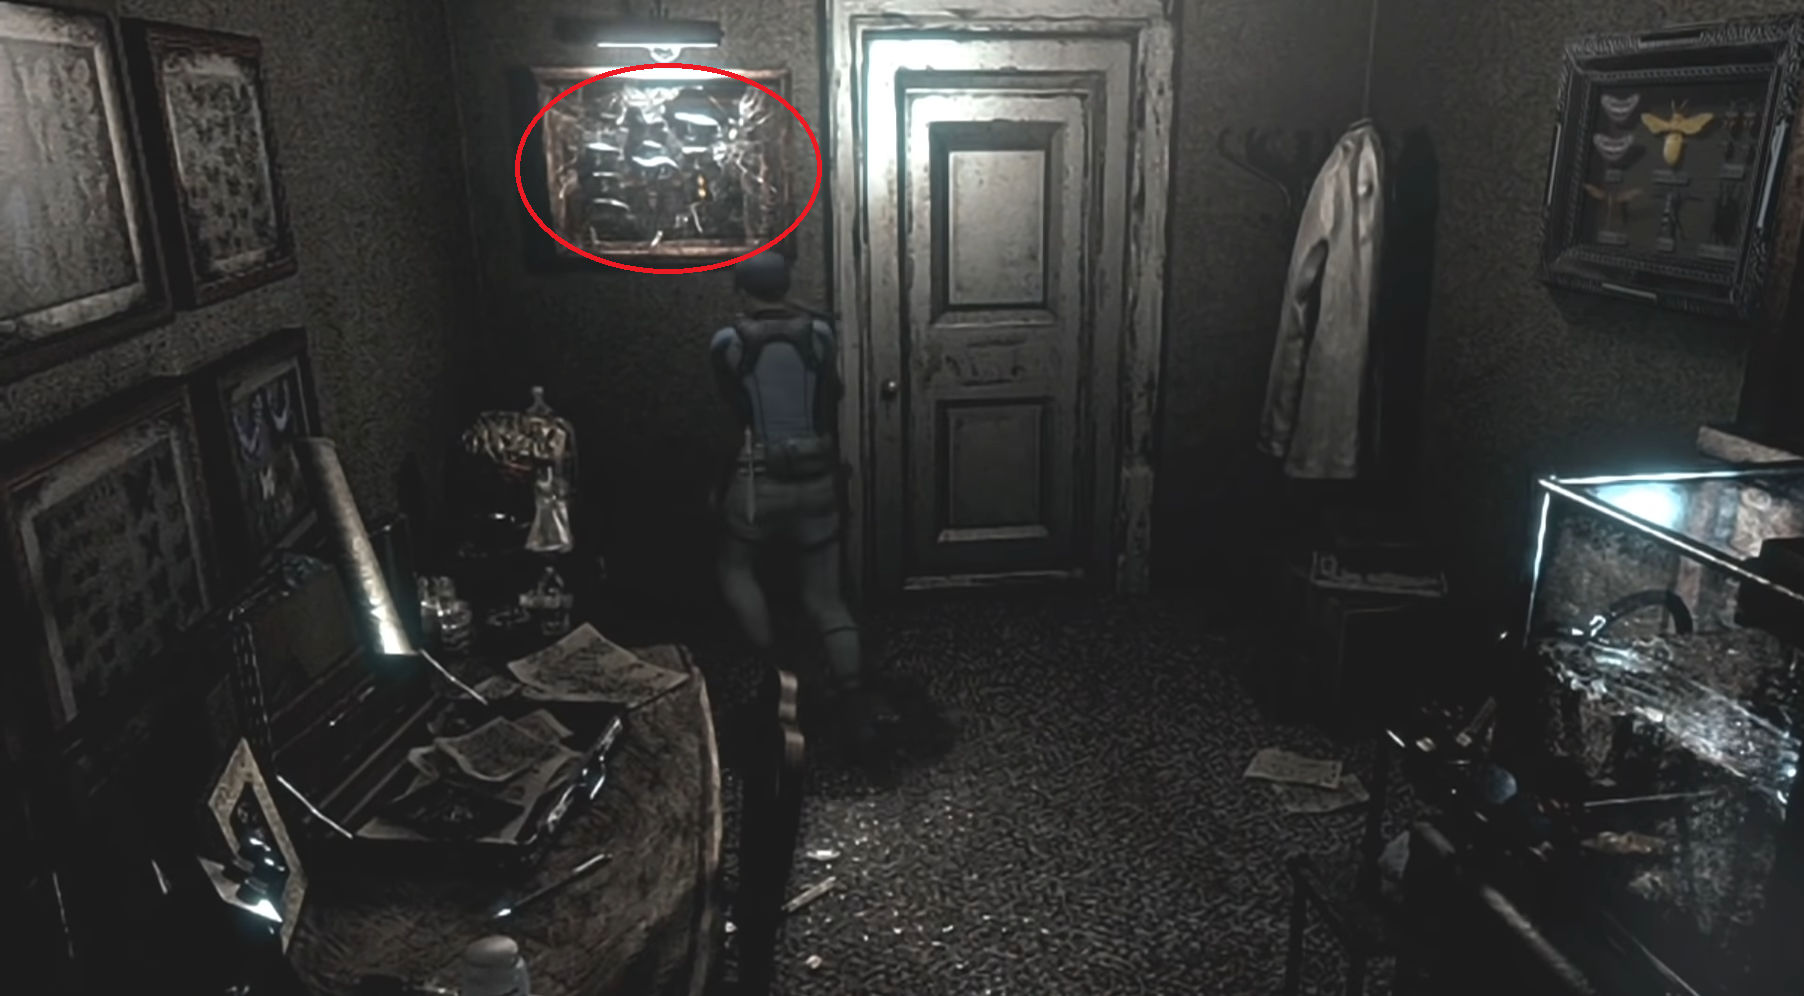
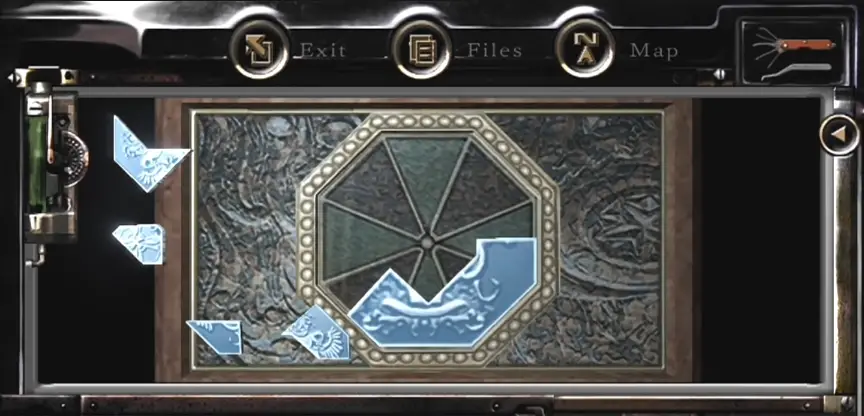
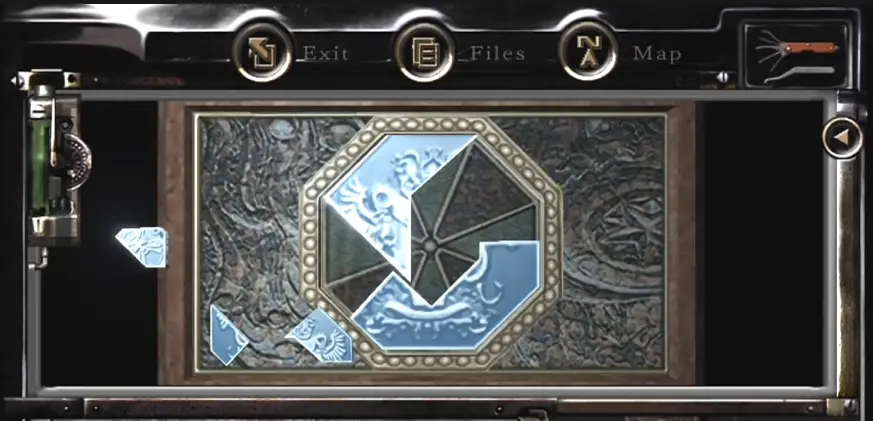
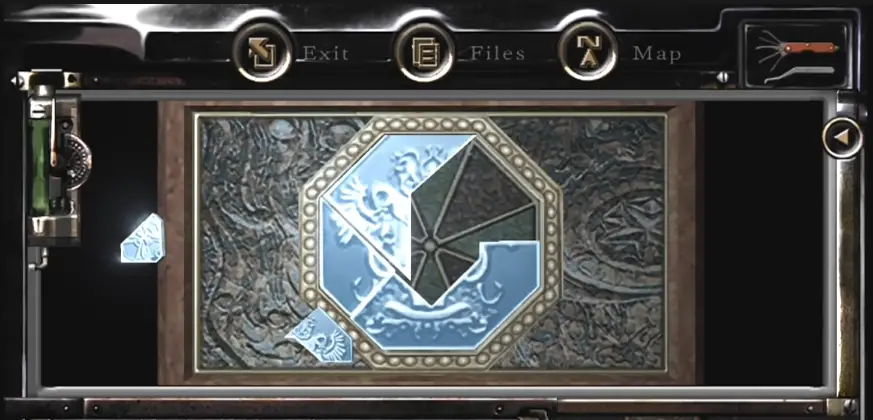
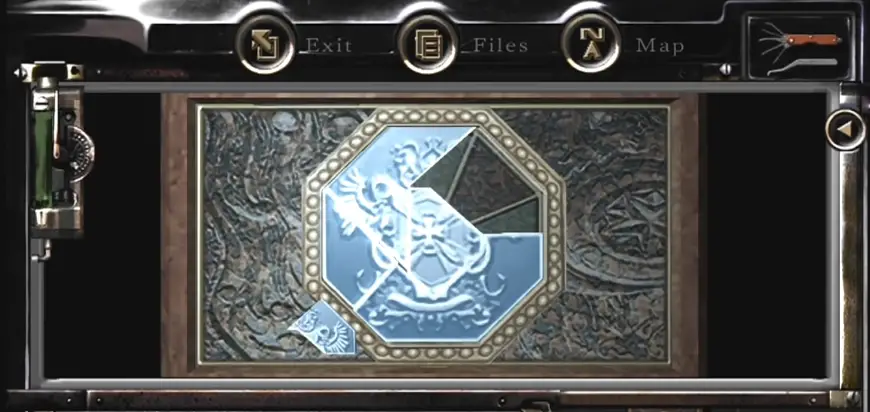
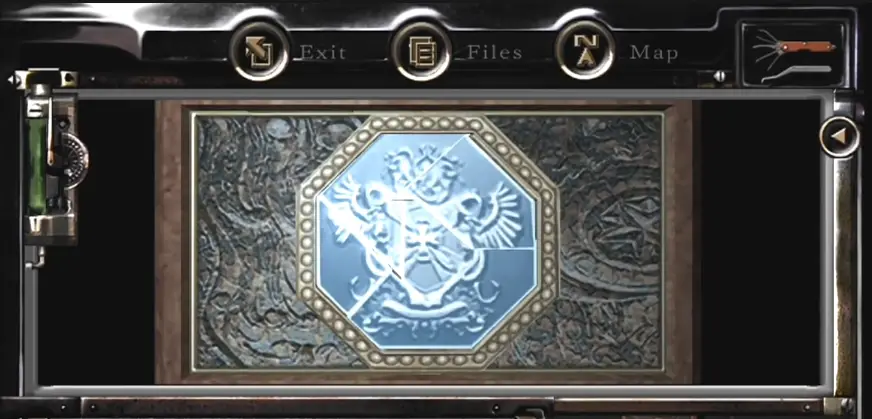
Cavaleiros’ statues and the first jewelry box
Localização
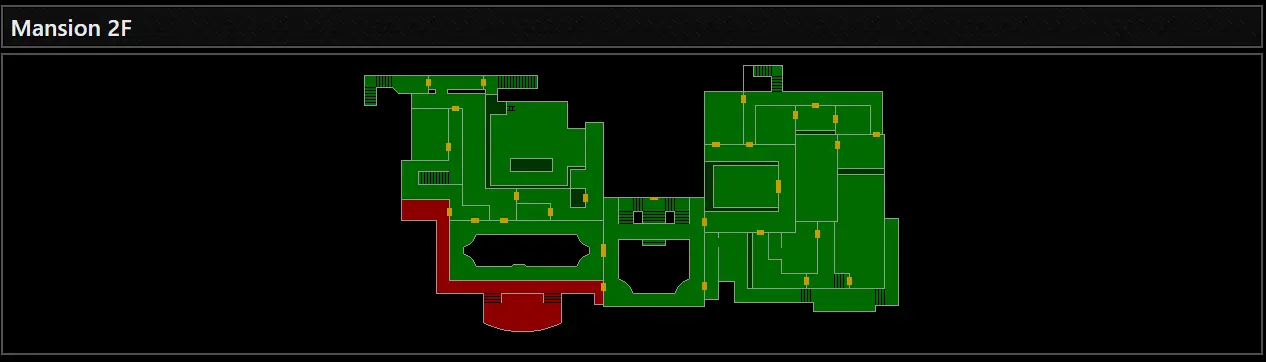
Mansion 2F
Recompensa
Mask of the Dead without eyes, nose, and mouth.
Explicação
To obtain the jewelry box stuck behind the bars, you will need to move the knight statues in this specific order:

The remaining statue will place itself. Uma vez feito isso, you can click on the switch in the middle of the room. Activating it will remove the barriers that were preventing you from taking the jewelry box.
Take it in your inventory and examine it. It is composed of different buttons on each of its faces. Only activate the buttons in the shape of half-hearts. Once both buttons are pressed, the box will open on its own, granting you one of the 4 death masks.
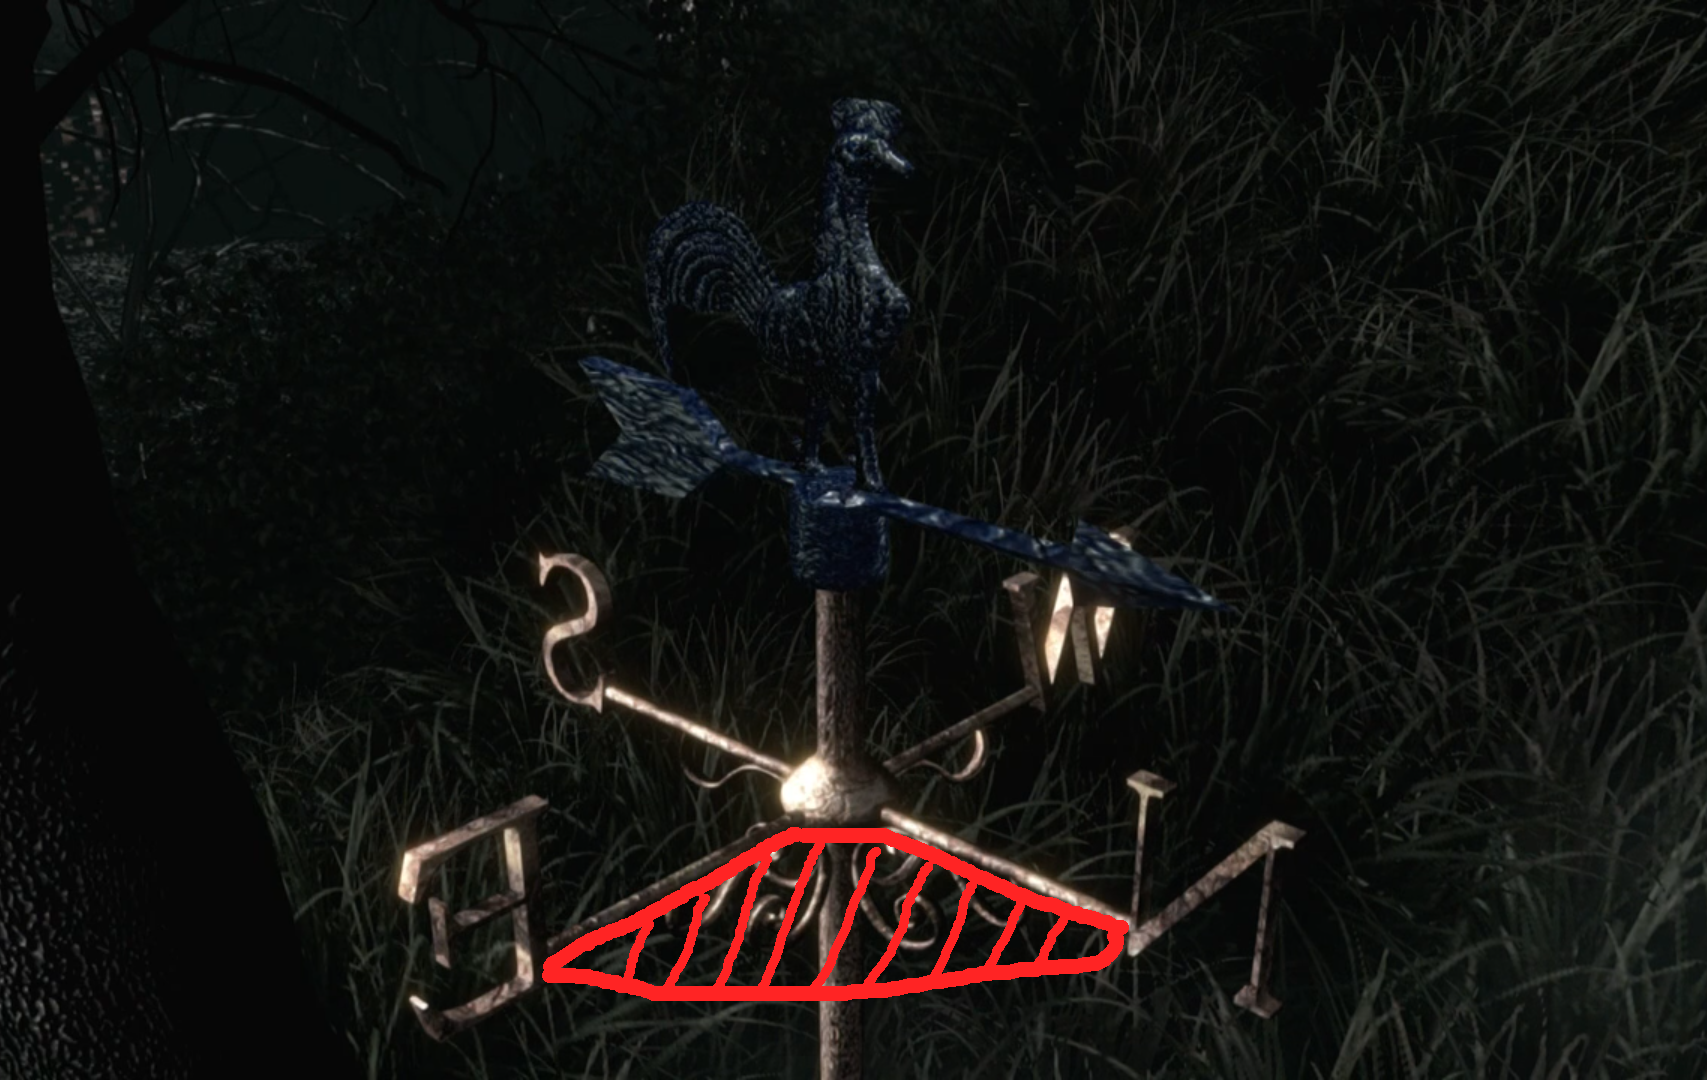
Weather Vanes
Localização
Courtyard 1F
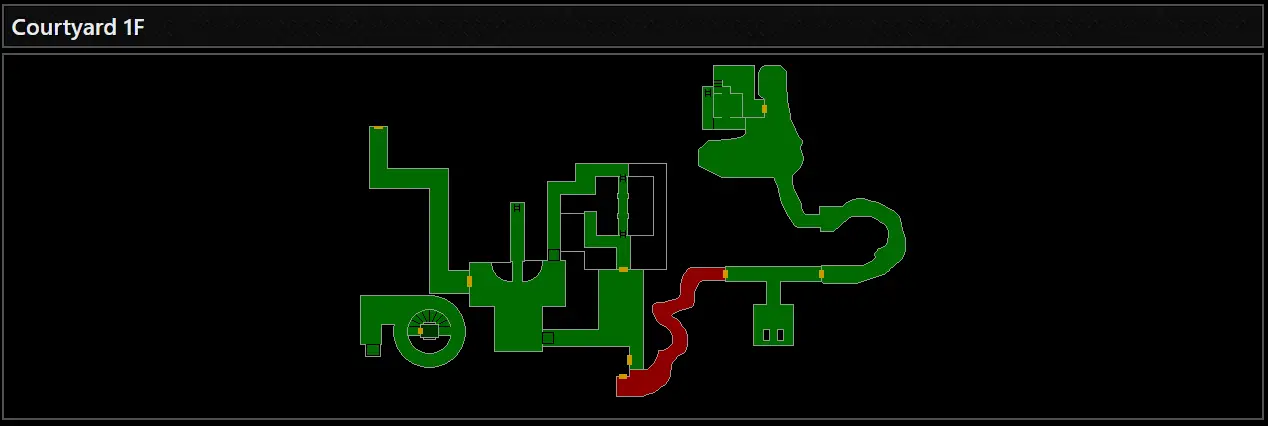
Recompensa
Access to the next area.
Explicação
The weather vanes are located along your right side (they are quite visible due to their red and blue color).
The weather vanes must be placed on specific cardinal points to move the Cerberus statues, allowing you to open the blocking door.
Here’s how to position them:
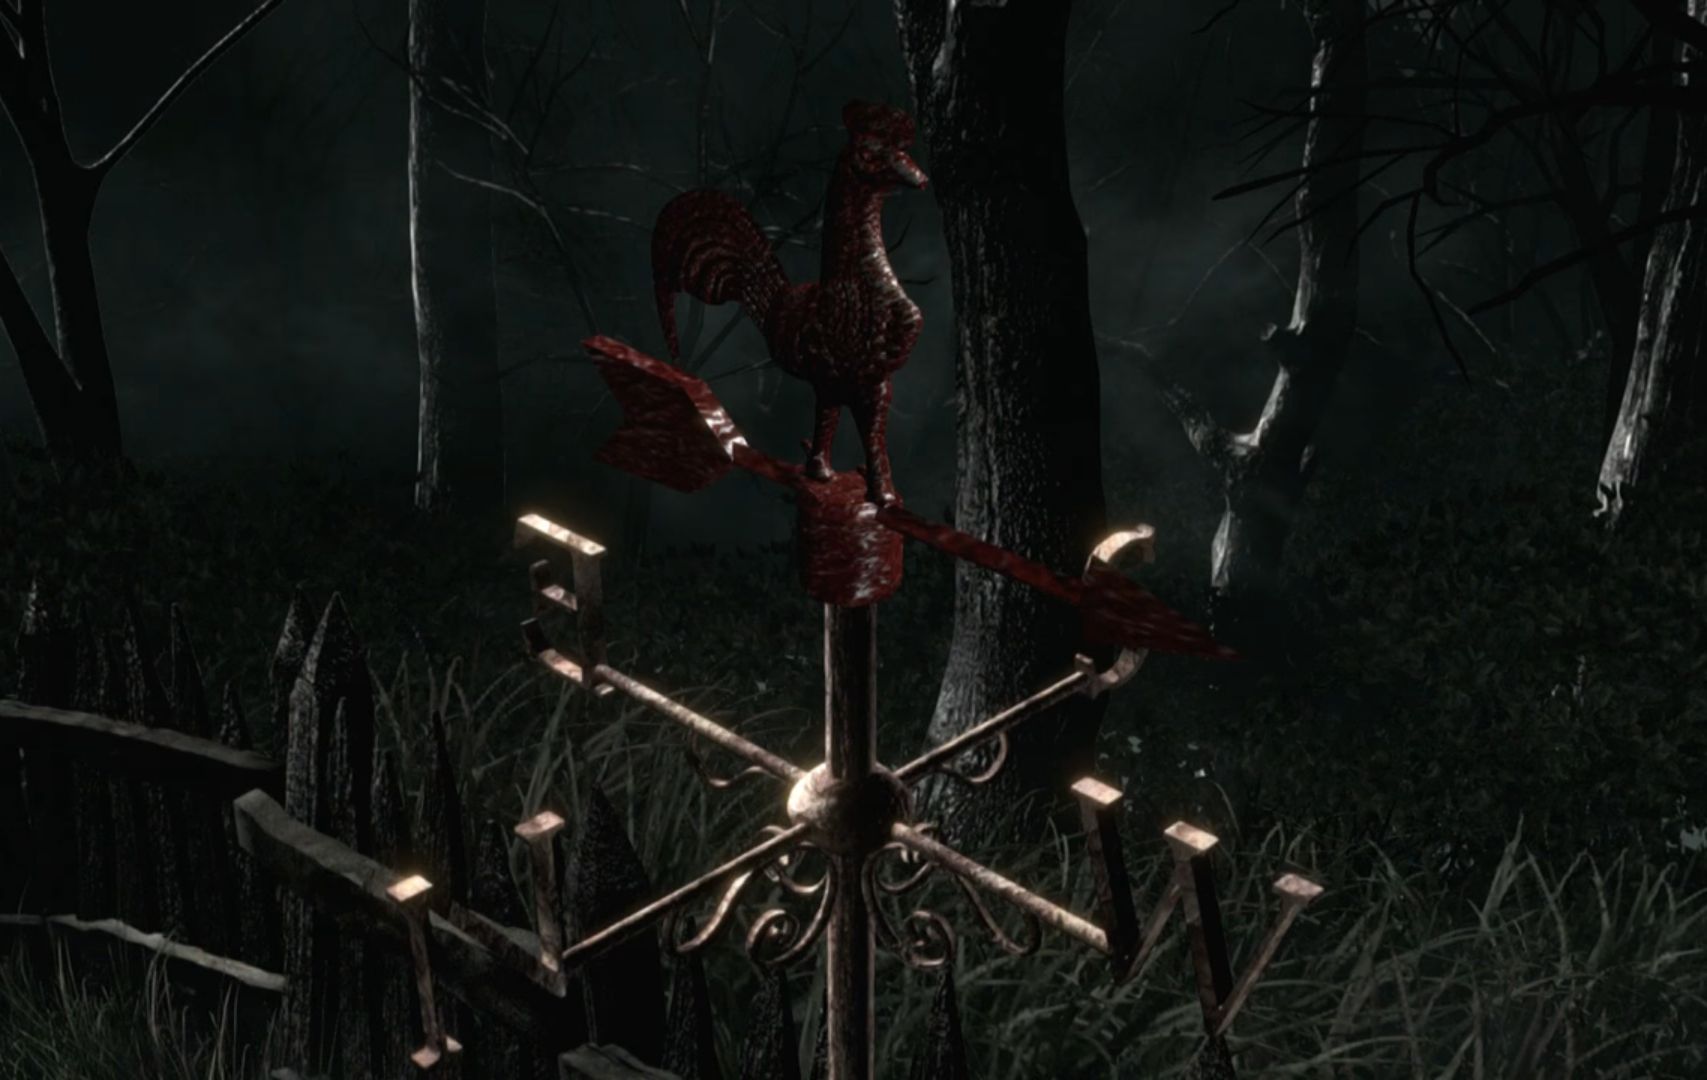
Red Weather Vane:
Blue Weather Vane:
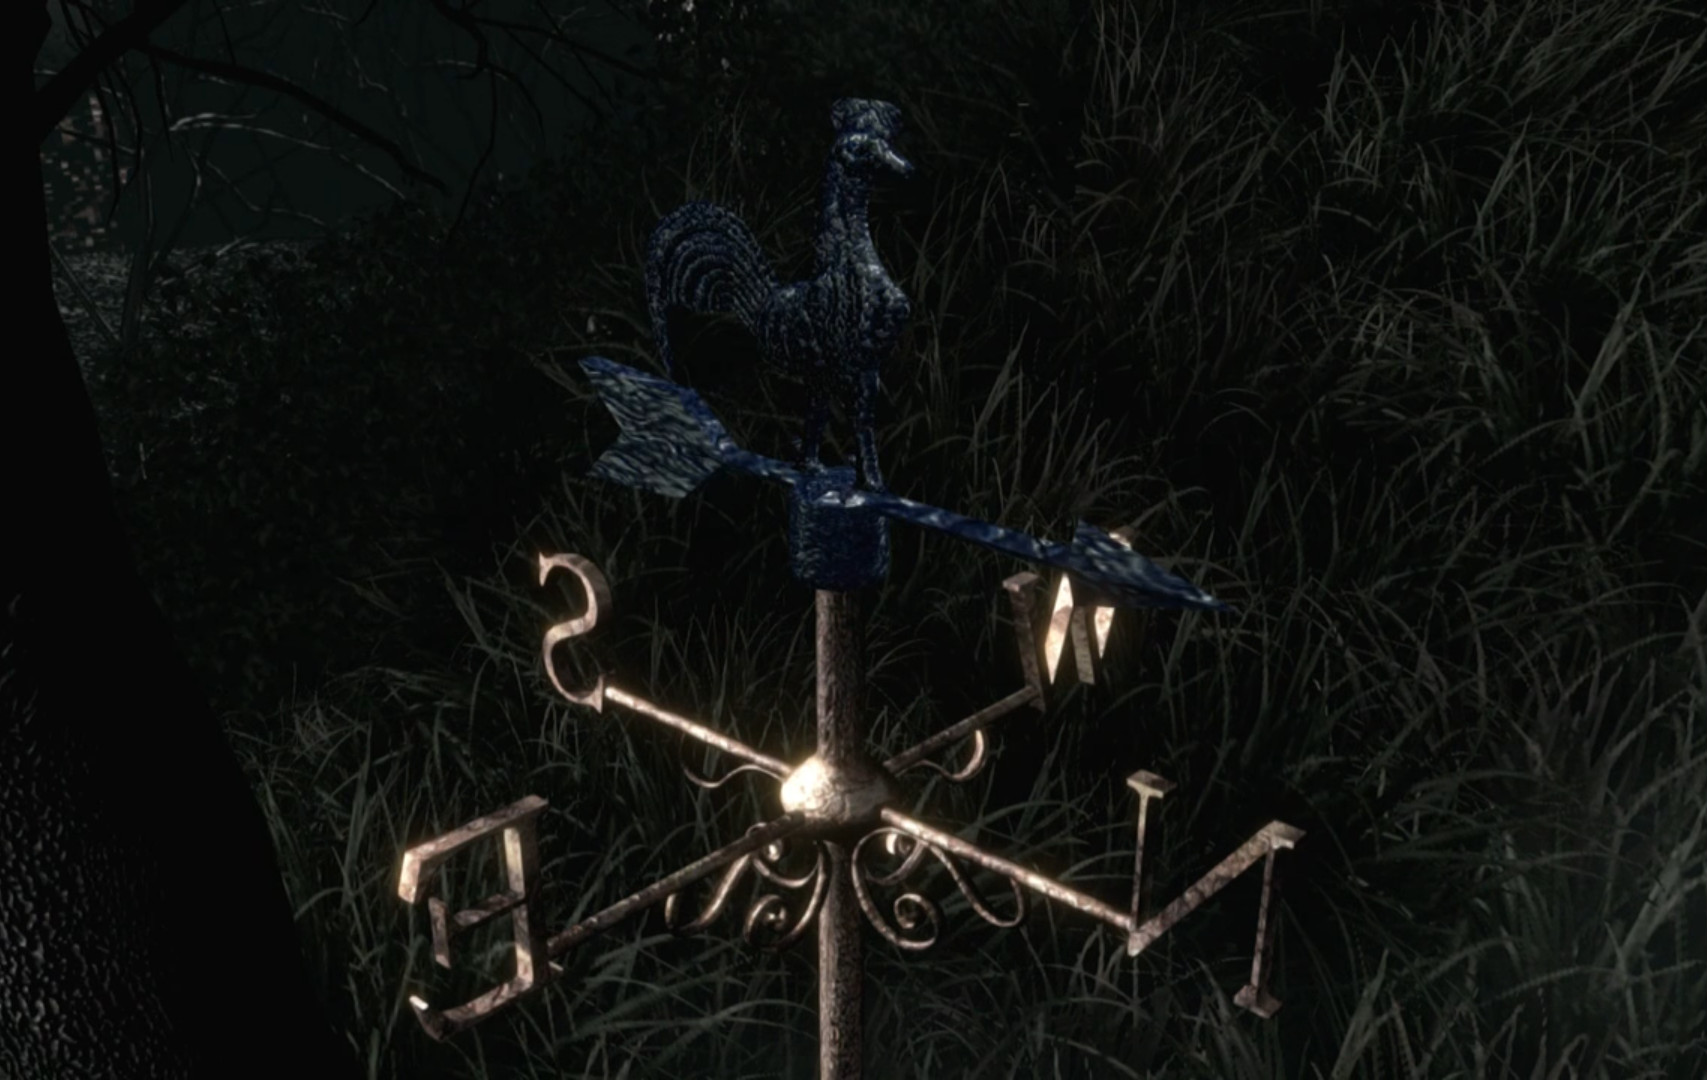
If you find it a bit challenging to position the pointer on the cardinal points, the technique is to press your interaction button when you see the pointer pass the cardinal point just before the one you’re aiming for. The trigger to lock the pointer is an area that extends from your cardinal point to the one that precedes it.
For easier visualization, the hatched red areas represent the zone in which you are allowed to press the interaction button to correctly lock the weather vane.
Red Weather Vane:
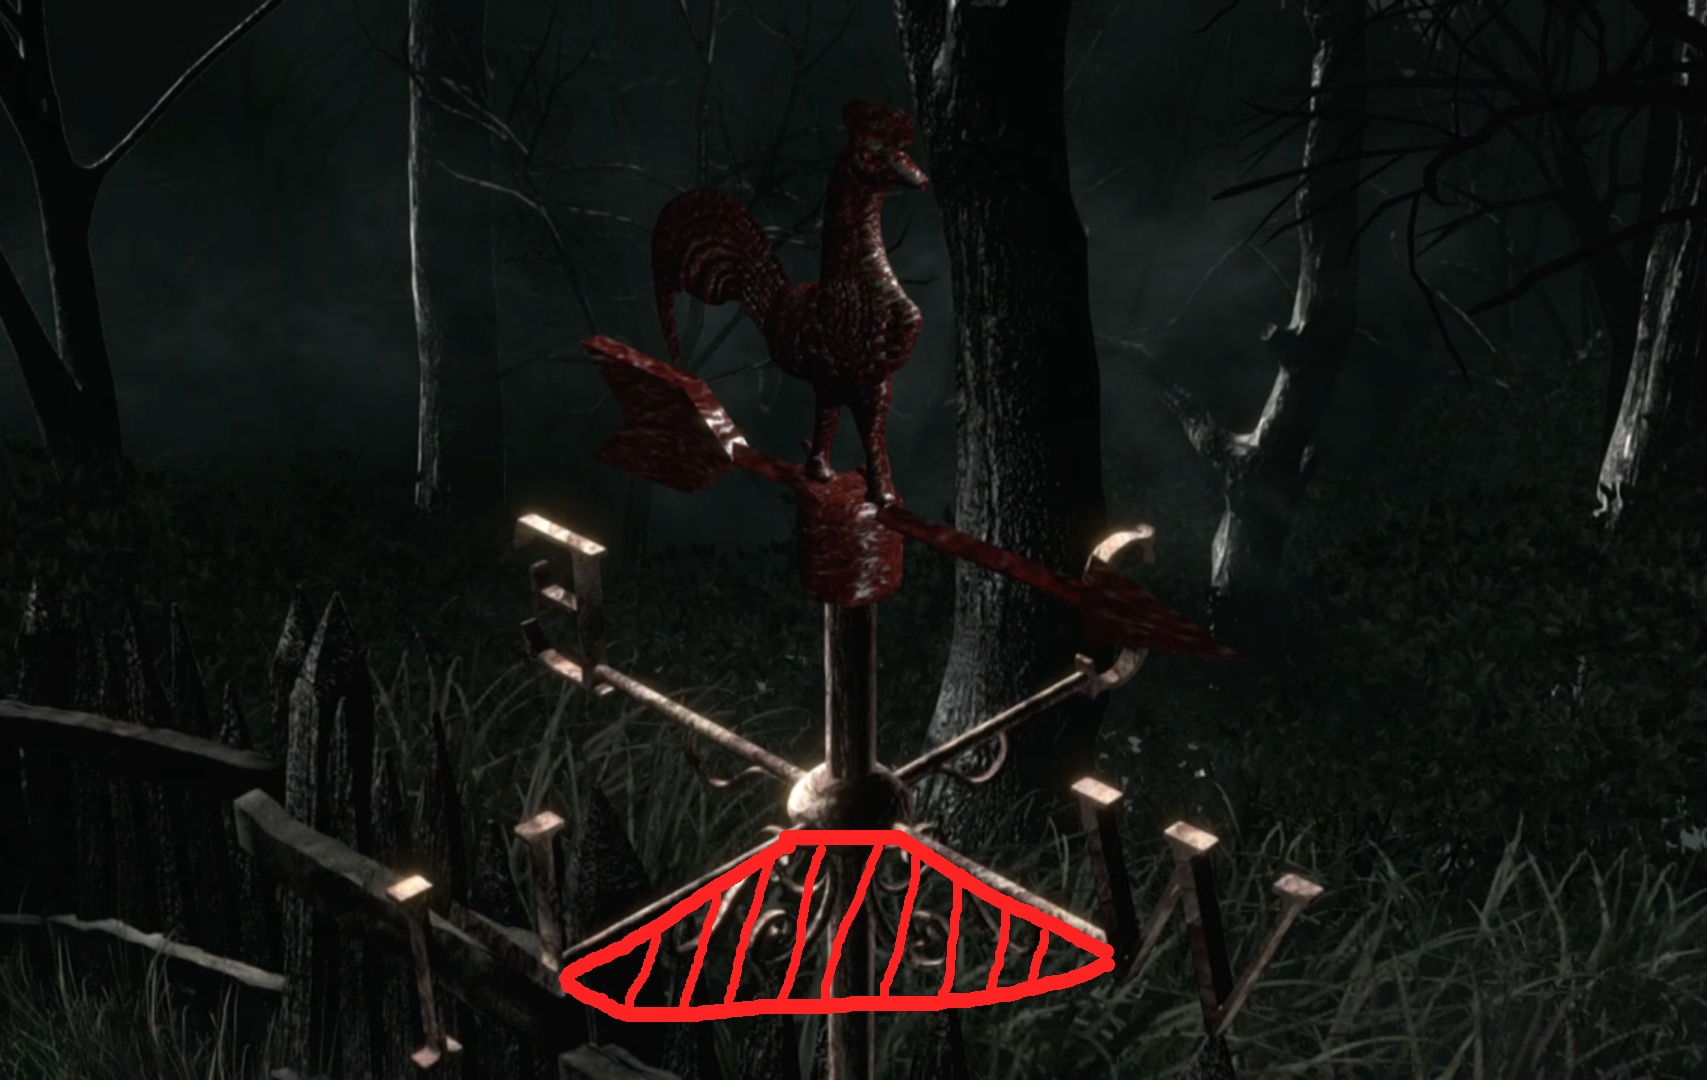
Blue Weather Vane:
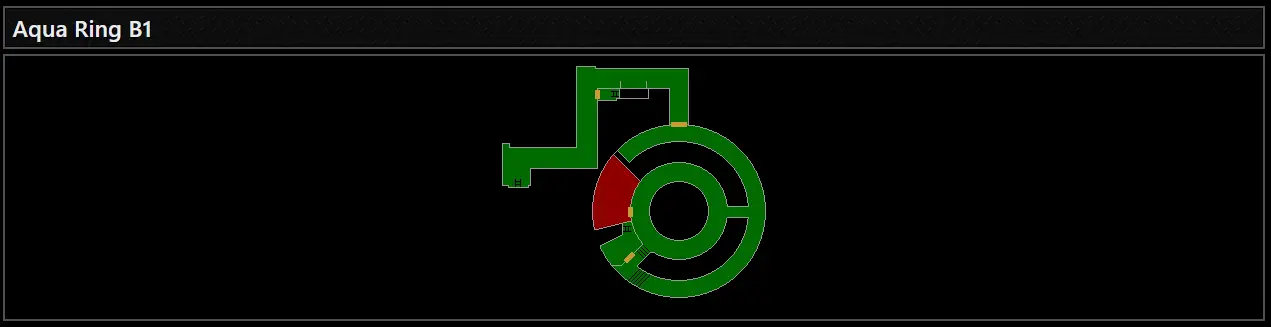
Tombstones
Localização
Courtyard 1F

Recompensa
Magnum Revolver.
Pré-requisito
Wind Symbol.
Explicação
Para este quebra -cabeça, you will need to retrieve the Wind Symbol located in the room, which is one of the rooms just above the save room under the stairs (the explanation to retrieve it is a little further up).
Head to the cemetery indicated above. Go to the back of it and place the Wind Symbol on the right tombstone.
Ao fazer isso, the tomb will grant you access to 3 other symbols. Take them and examine them. Behind the symbols, there are buttons, press them. Once this is done for all 3 símbolos, you can place them on the left tombstone.
Uma vez feito isso, the Magnum Revolver will appear, and you just have to pick it up.
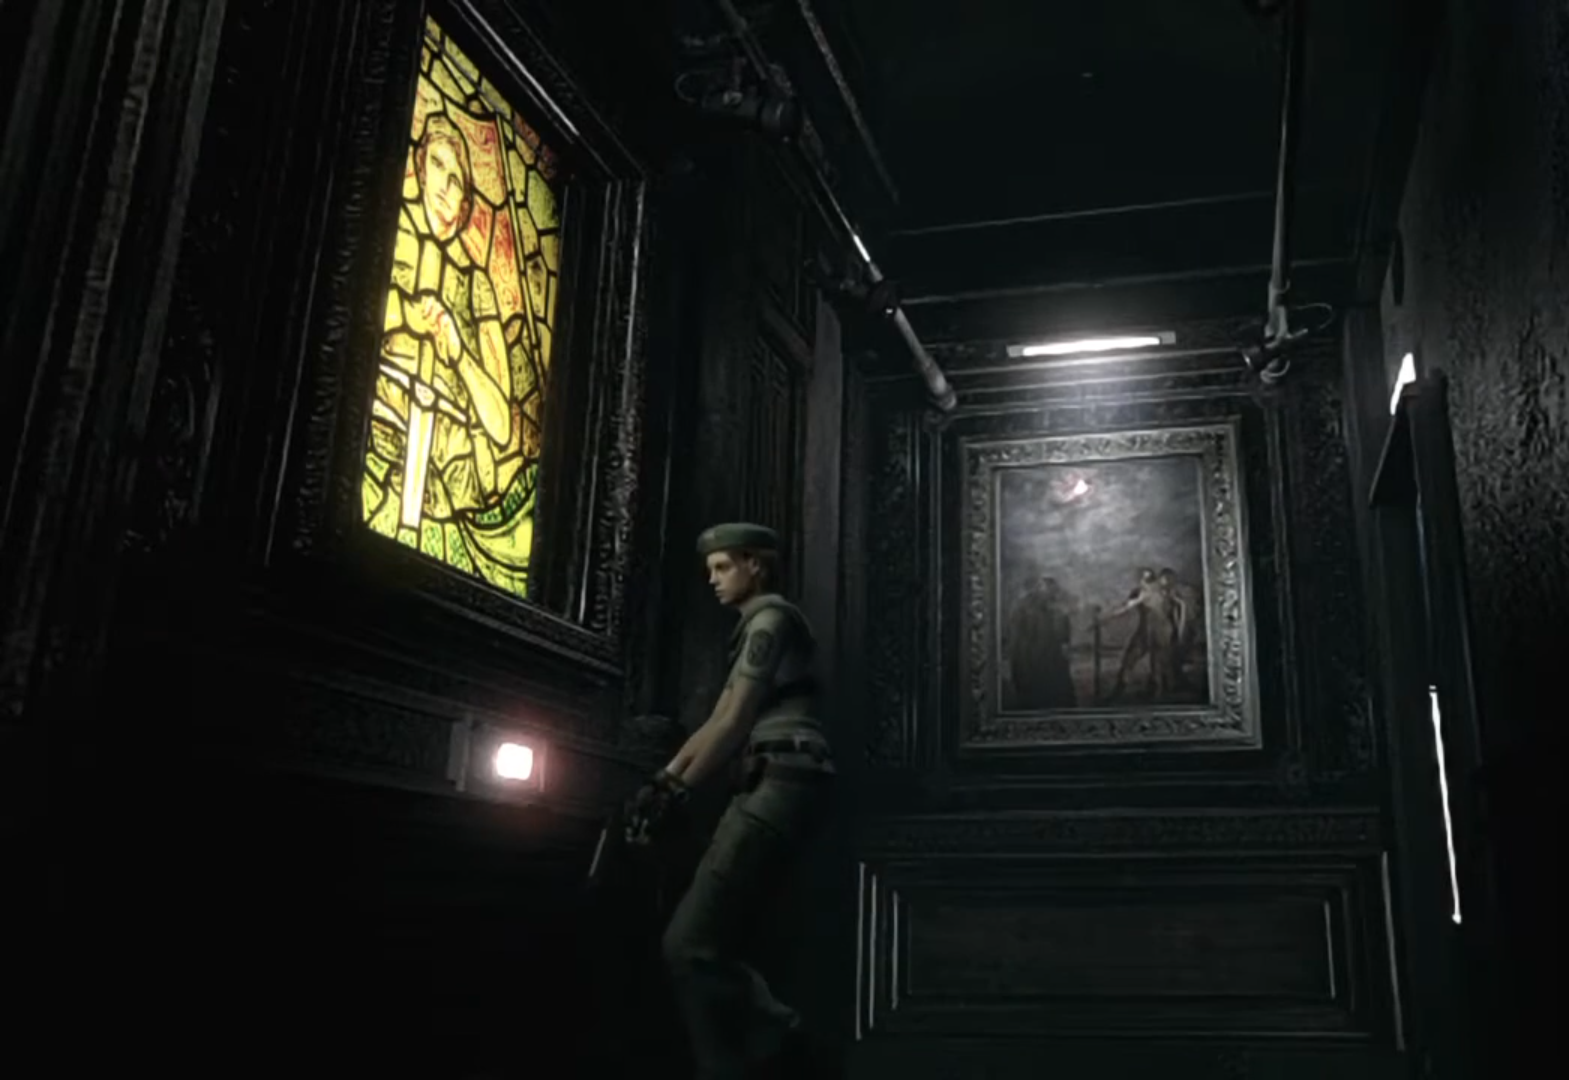
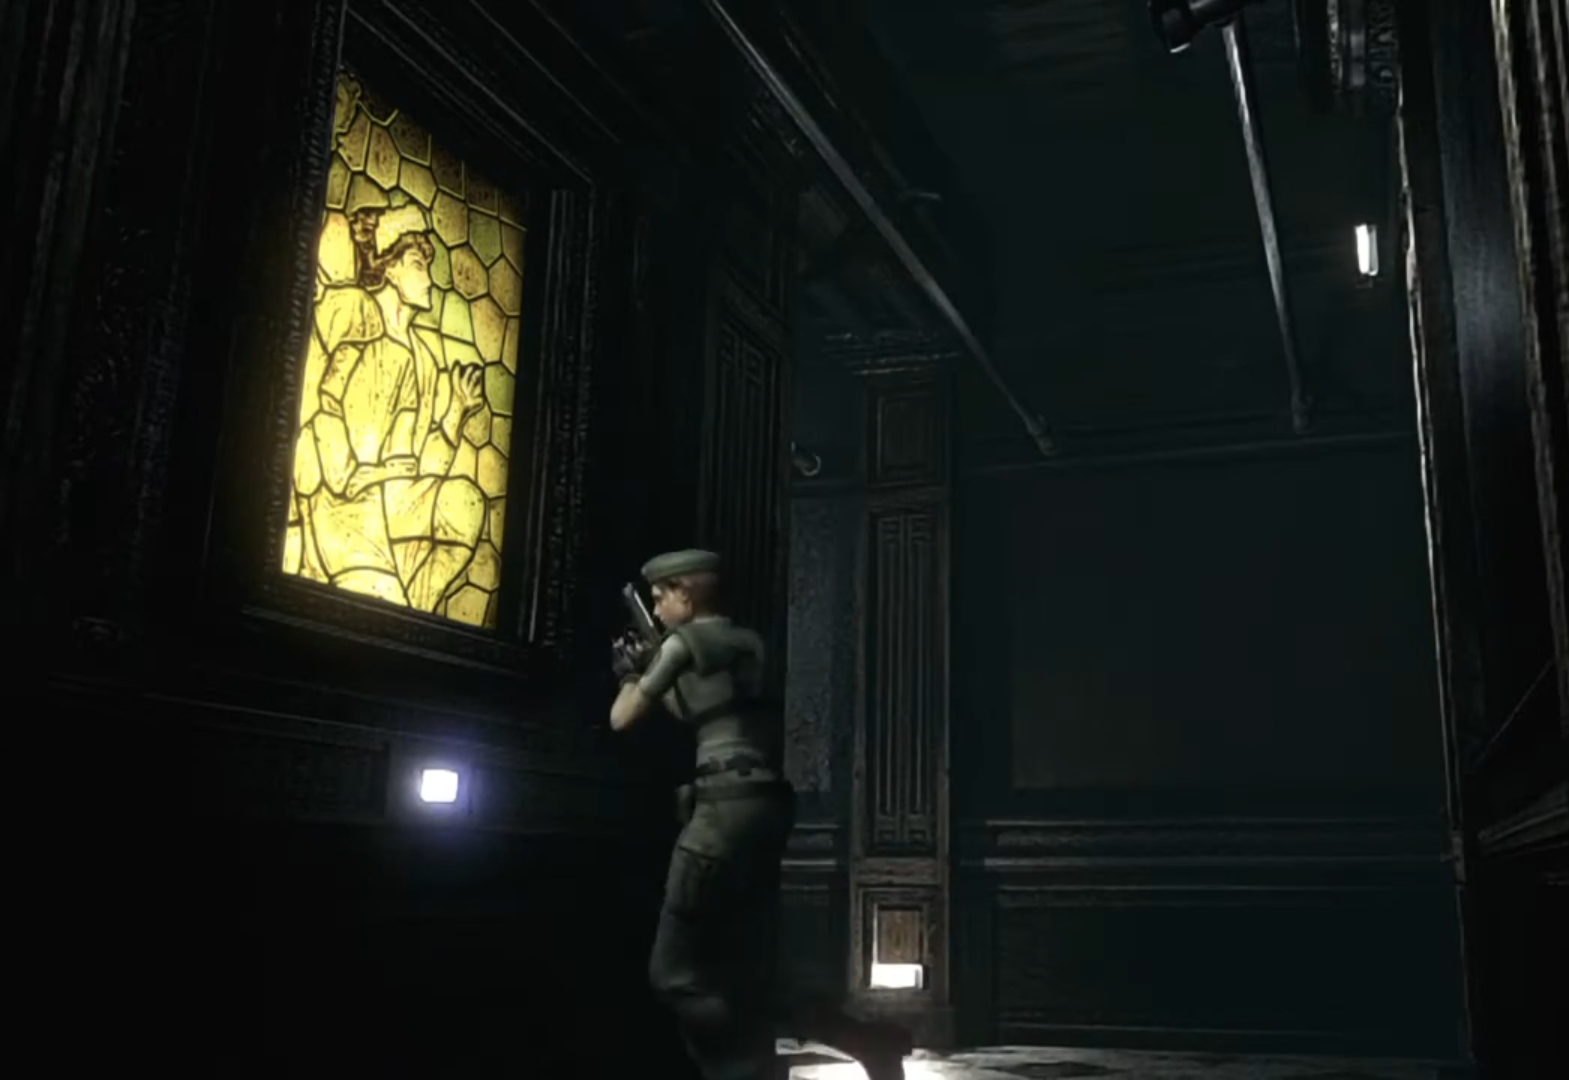
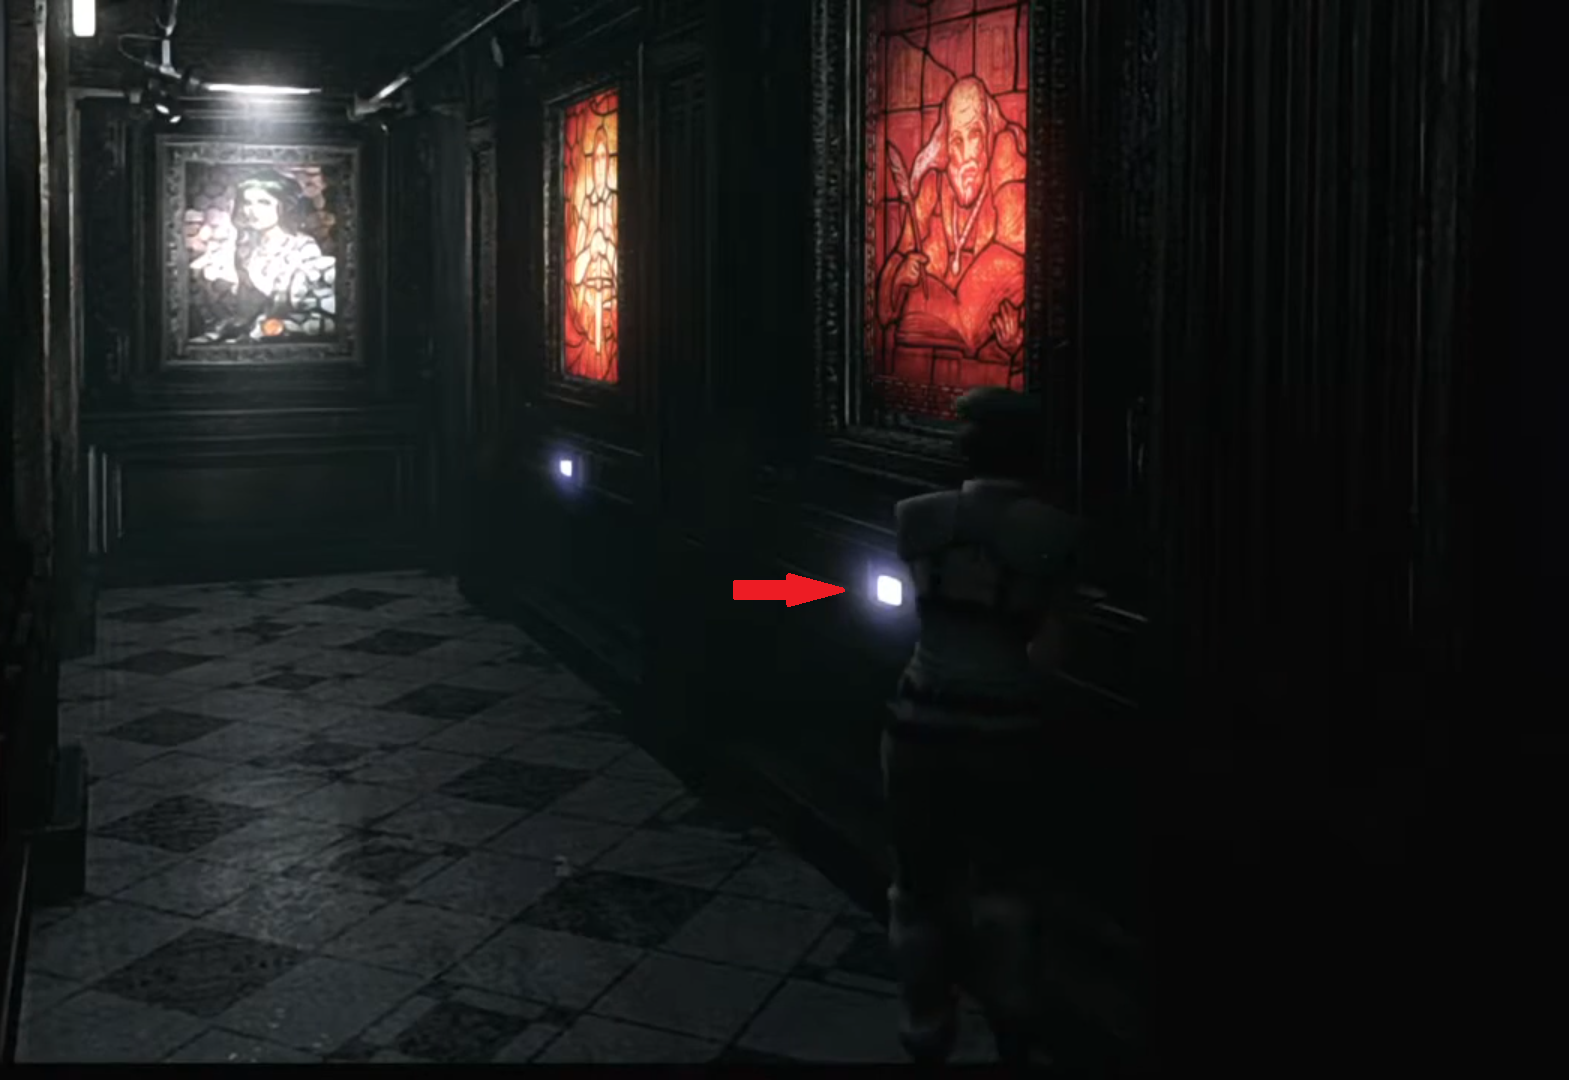
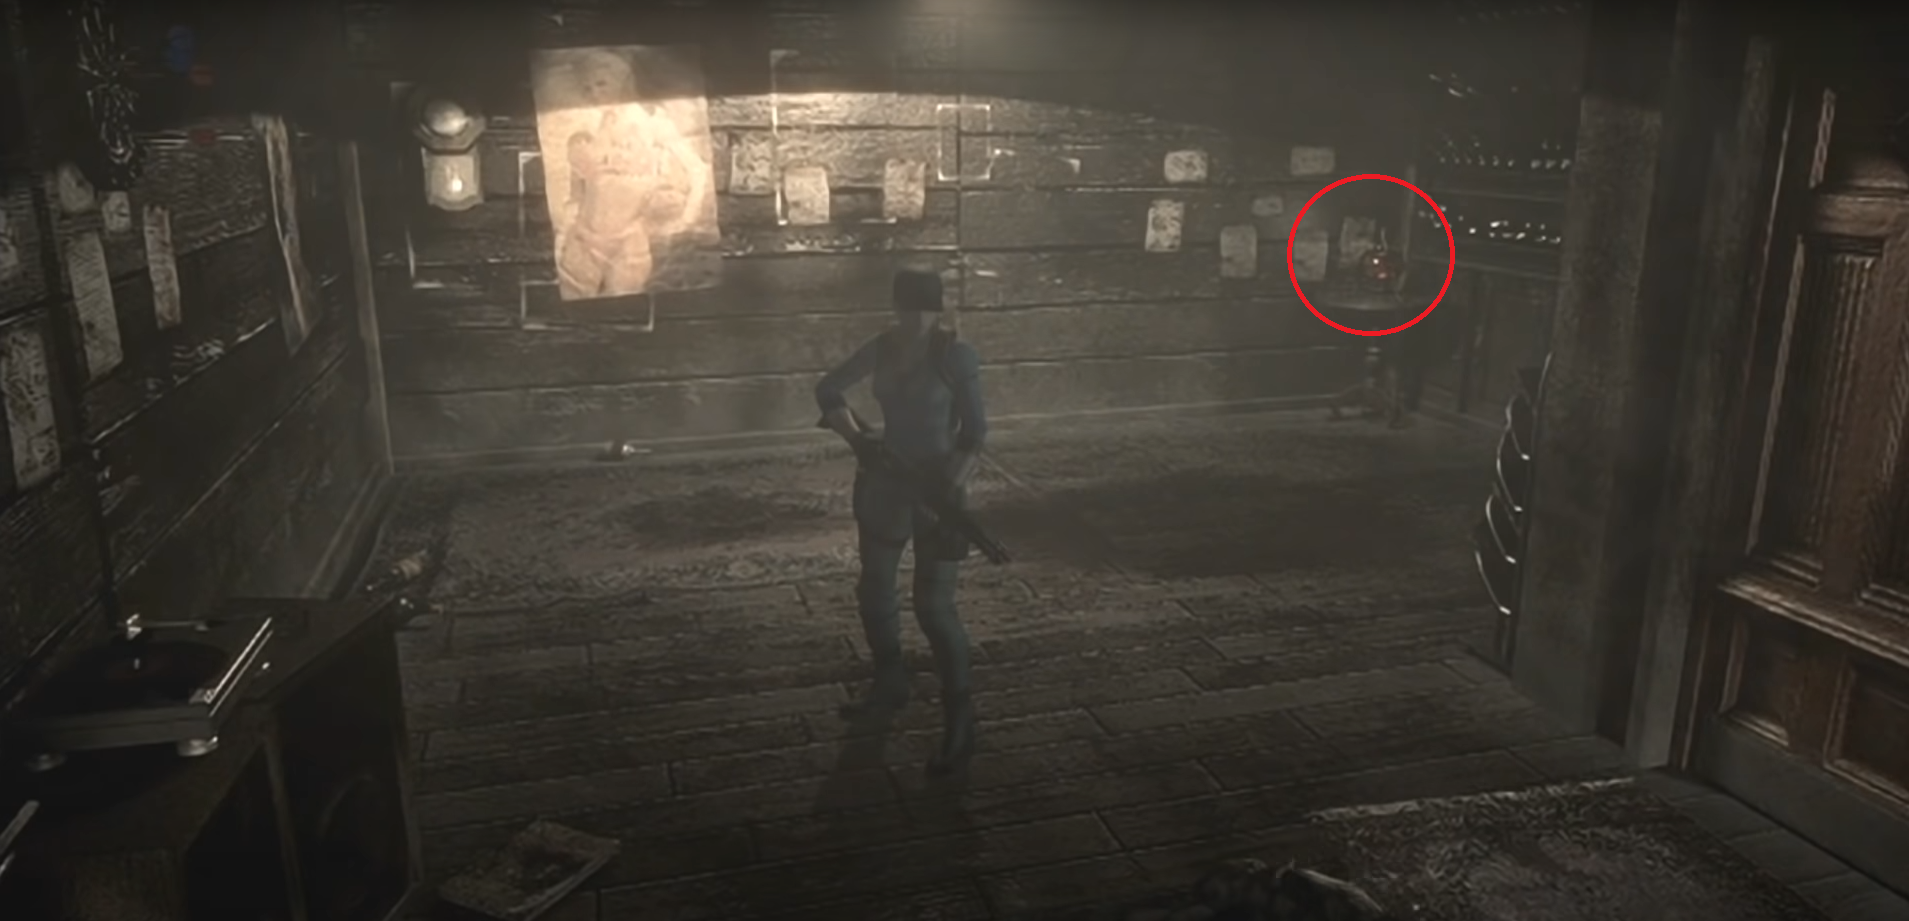
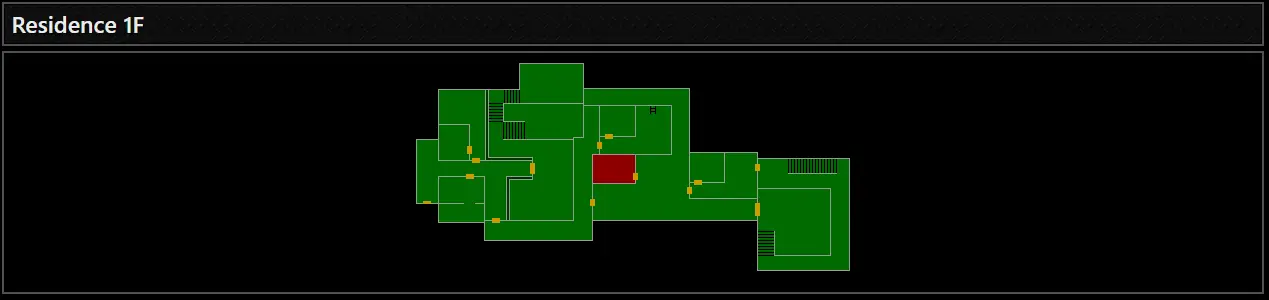
Red Book
Localização
Residence 1F
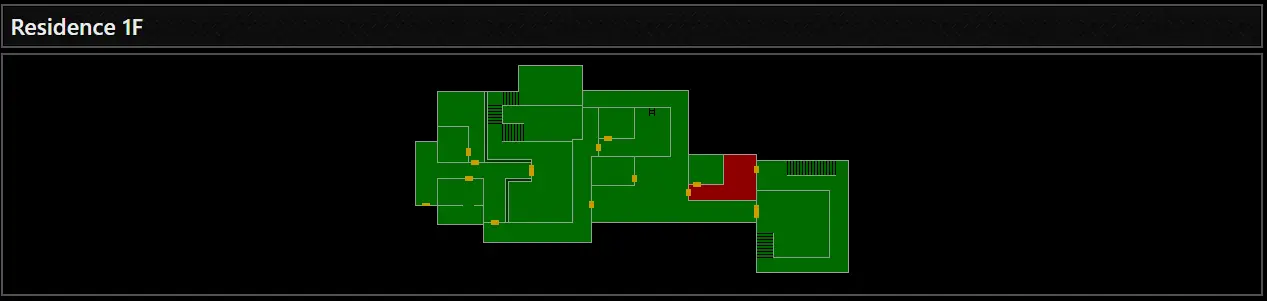
Recompensa
Access to the battle against Plant 42.
Explicação
This puzzle is quite straightforward. Simply retrieve the red book indicated in the next room:
It is located on the bar counter. Uma vez obtido, return to Room 003 located in the gallery. Insert the book into the bookshelf and reconstruct the pattern formed by the book spines by moving them.
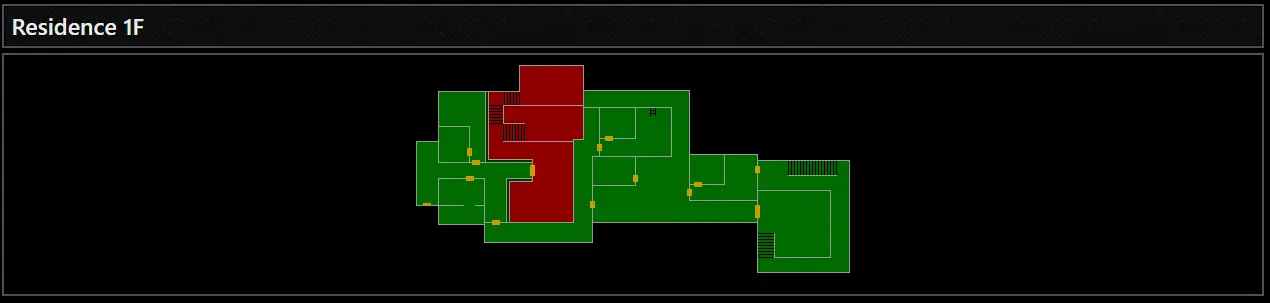
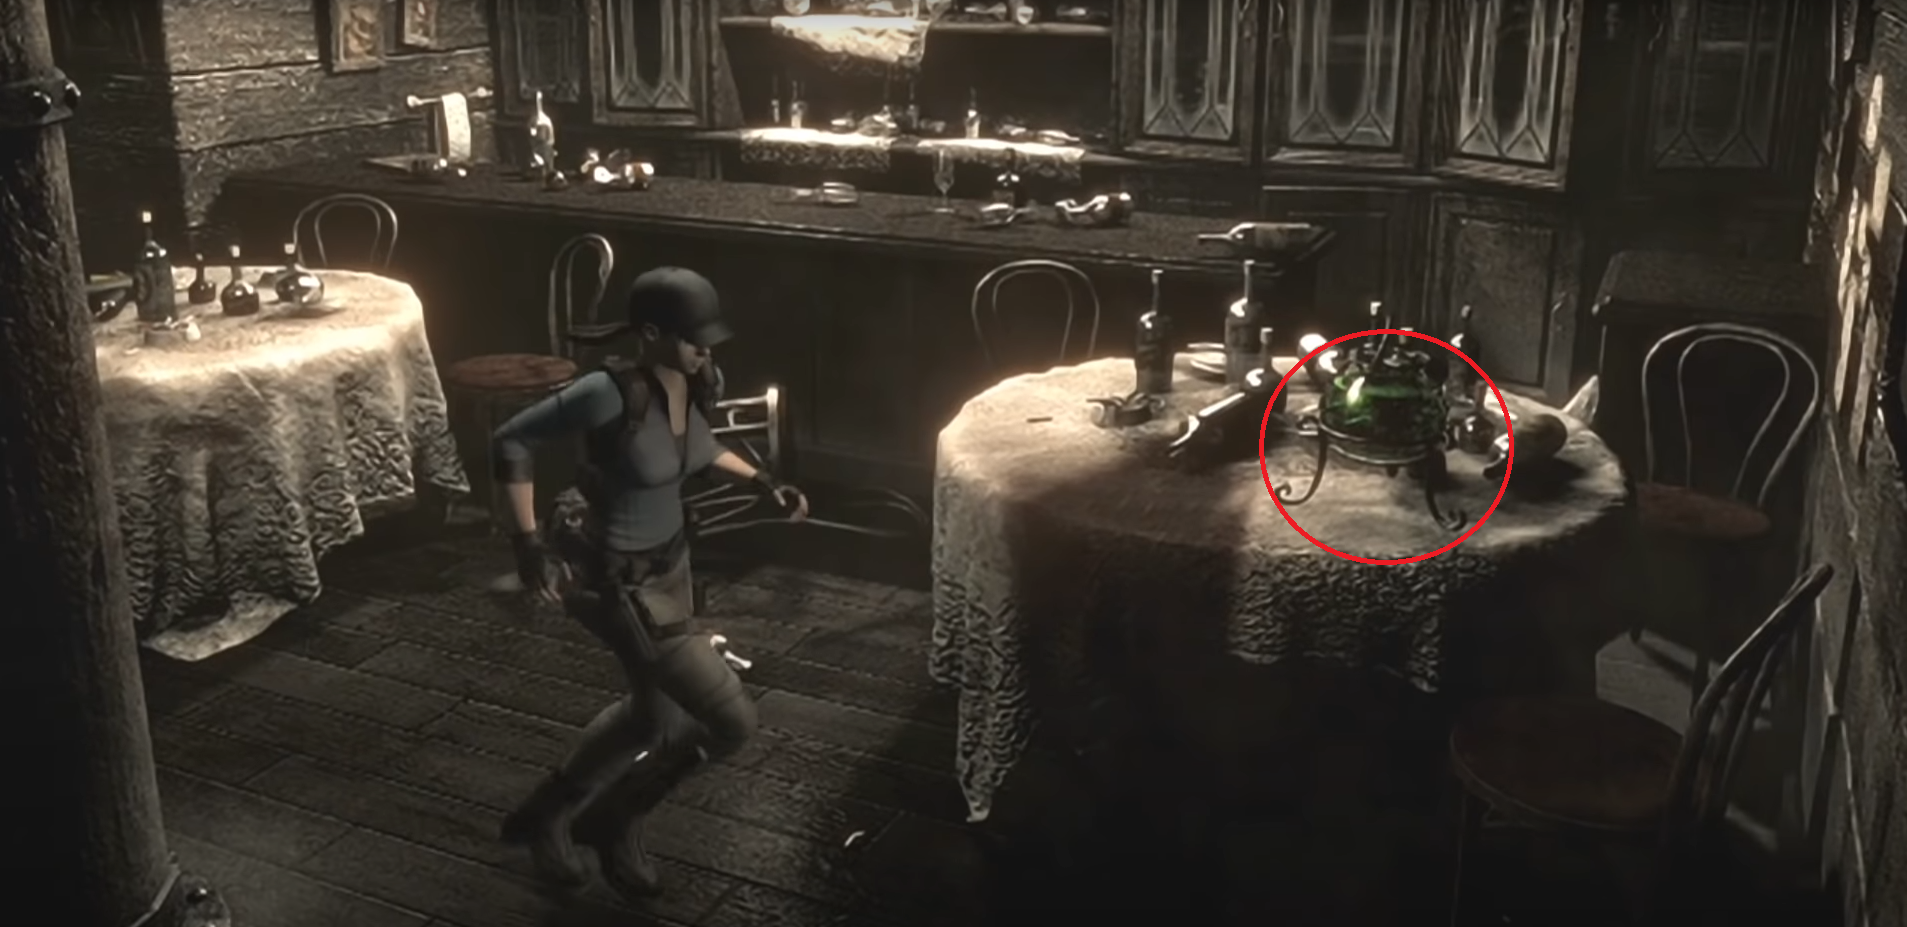
Gallery Door Code
Localização
Residence 1F
Recompensa
Access to the room for creating the V-VOLT.
Explicação
Para encontrar o código, simply go to the recreation room, located in the residence:
Within the room, there exist three lamps of distinct colors, which you can illuminate using a lighter. The illumination of these colored lamps gives rise to a symbol, casting a shadow onto the tabletop. This particular symbol carries significance, as it dictates the sequence in which you must input the code. To access this predetermined sequence, one must engage with the door terminal situated in the gallery.
Each of the colored lamps (nomeadamente, vermelho, verde, and orange) is linked to a distinct symbol. To decipher this connection, ascend the stairs in the room and inspect the pool table. The task entails aligning the symbols of the lamps with the numbers present on the billiard balls that share the same color as the lamps. It’s important to note that this aspect of the “puzzle” varies with each playthrough.
Em essência, a single lamp corresponds to a specific number, discernable on the billiard ball sharing its color. This number, por sua vez, correlates with the symbol projected by the lamp, ultimately determining the sequence for entering the code.
Lâmpada 1 (vermelho), to the right of the room’s entrance:
Lâmpada 2 (verde), on a table in front of the bar, located at the bottom of the stairs:
Lâmpada 3 (laranja), next to the pool table, in the top left corner from the entrance to the room:
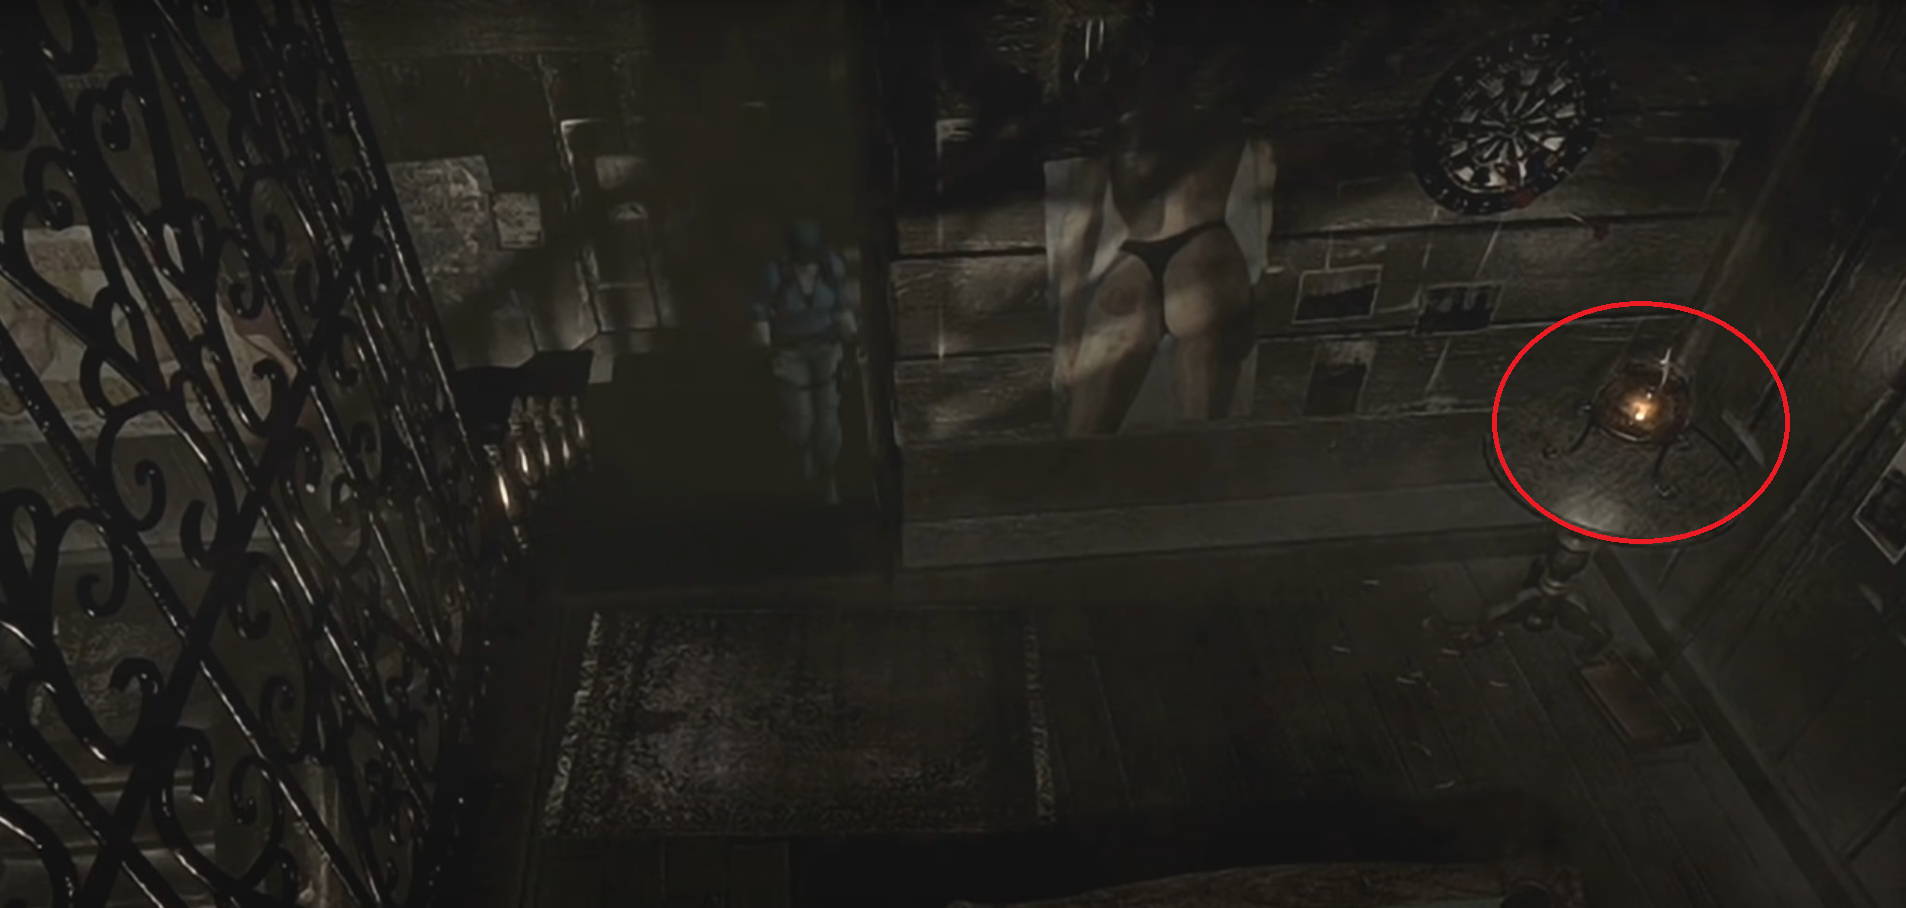
Chris is equipped with the lighter in his inventory from the outset of the game, whereas Jill does not possess it initially. Portanto, if you opt to illuminate the lamps, remember to retrieve the lighter, which can be located in the room where you initially acquired the dog whistle at the start of the game.
Possible solutions (6):
- 356
- 365
- 536
- 563
- 635
- 653
I have not verified it myself, but it seems that the code may differ depending on the difficulty level and the character being played.
Na minha opinião, it is faster to brute force the code than to light the lamps one by one and then associate the colors with the numbers and the numbers with the symbols.
V-Volt
Localização
Residence 1F
Recompensa
- The V-Volt. Used to weaken Plant 42.
Pré-requisito (Chris Only)
Chris doesn’t excel in critical situations. To craft the V-Volt, Rebecca is the one to handle the task. To facilitate this, it’s necessary to allow Richard to meet his demise when Rebecca requests you to procure the serum.
Once Richard has passed away, a unique cinematic unfolds as you enter the boss room. During this cinematic, you assume control of Rebecca to concoct the V-VOLT and rescue Chris. No entanto, if you opted to save Richard using the serum, the option to use the V-VOLT will be unavailable. Em vez de, you’ll find yourself in a somewhat protracted battle against Plant 42.
Explicação
To create the V-VOLT, você precisa 3 empty bottles.
Passos:
Fill one bottle with UMB no.3 (Vermelho).
Fill one bottle with water.
Mix the water and UMB no.3 to obtain NP-004 (Roxo).
Fill one bottle with Yellow-6.
Mix the Yellow-6 with NP-004 to obtain UMB-10 (Laranja).
Fill one bottle with water.
Fill one bottle with Yellow-6.
Mix the water and Yellow-6 to obtain UMB-7 (Verde).
Mix UMB-7 with UMB-10 to obtain VP-017 (Azul).
Fill one bottle with water.
Mix the water with VP-017.
You will finally have the V-VOLT.
Once the V-VOLT is created, return to the platform where you first encountered the sharks and enter this room:
Stand near the plant’s “tentacles,” open your inventory, and use the V-VOLT.
Trophy Hunting Jewels
Localização
Mansion 2F

Recompensa
- Yellow Jewel and Red Jewel.
Explicação
It’s somewhat complex to explain this in writing, so I prefer to provide you with a video by MrReign (who creates a lot of resolution videos for Resident Evil games) that demonstrates the solution in a more comprehensive manner.
Second Jewelry Box
Localização
Mansion 1F
Recompensa
- Brooch (key with the Spencer family emblem).
Pré-requisito
- Jóia vermelha
Explicação
Retrieve the jewelry box located on the shelf to your right.
Combine the box with the red jewel.
Here’s how to arrange the puzzle pieces:
Pedaço #1 (no rotation)
Pedaço #2 (2x clockwise rotations / Para a direita)
Pedaço #3 (1x clockwise rotation / Para a direita)
Pedaço #4 (7x clockwise rotations / Para a direita)
Pedaço #5 (no rotation)
Elevator Buttons Under the Waterfall
Localização
- Courtyard B1
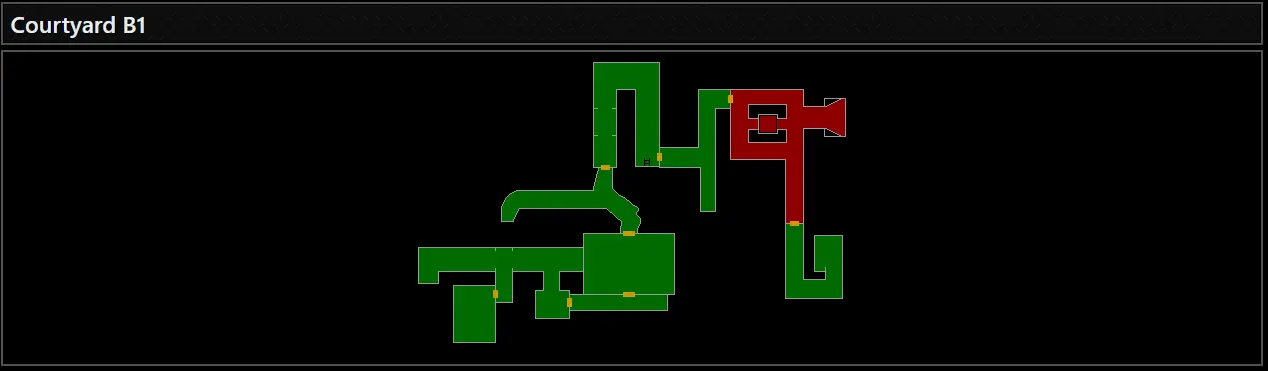
Recompensa
- Access to the next area.
Explicação
After obtaining the cylinder at the end of the path, which is accessible using the crank obtained from Enrico, return to the main room where the elevator is currently nonfunctional.
Interact with the control panel to acquire the tree object, and then merge it with the cylinder.
Nesta conjuntura, there’s no necessity to adjust the cylinder to align the numbers etched on the tree with those on the cylinder. Simply insert the tree combined with the cylinder back into the control panel as is.
Posteriormente, the buttons on the panel will illuminate. The prescribed sequence for clicking on them is as follows: 4 > 2 > 3 > 1.
Laboratory PC Code
Localização
- Laboratory B3
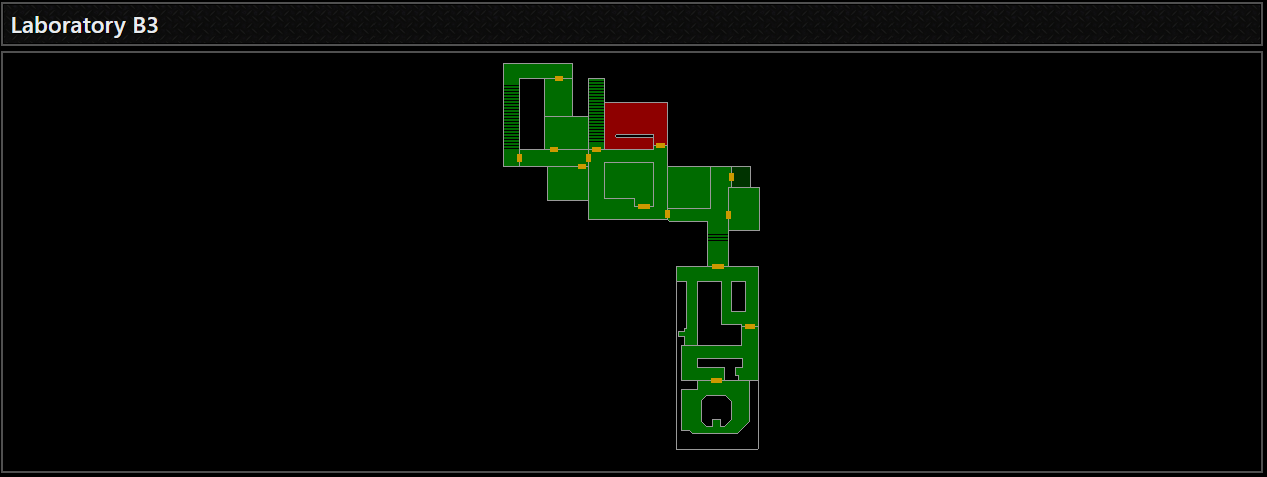
Recompensa
Unlocking both doors in the laboratory.
Explicação
Interact with the computer in the room. It will ask you for a username and its password.
- Usuário: JOHN
- Senha: ADA
Depois disso, you will access the menu to open the two electronically locked doors. A password will be required. Digitar CELL.
There’s also an easter egg with the second password. Instead of typing “CELL,” tipo “VERRUGA” (which was the second password in the original game) when prompted for the second password.
Projection Room Terminal
Localização
Laboratory B2

Recompensa
Laboratory Key.
Explicação
Once you’ve unlocked the doors using the computer, backtrack and return to the first floor to open the door that was previously locked.
Quando você entra, you’ll see the terminal to the right of the screen:
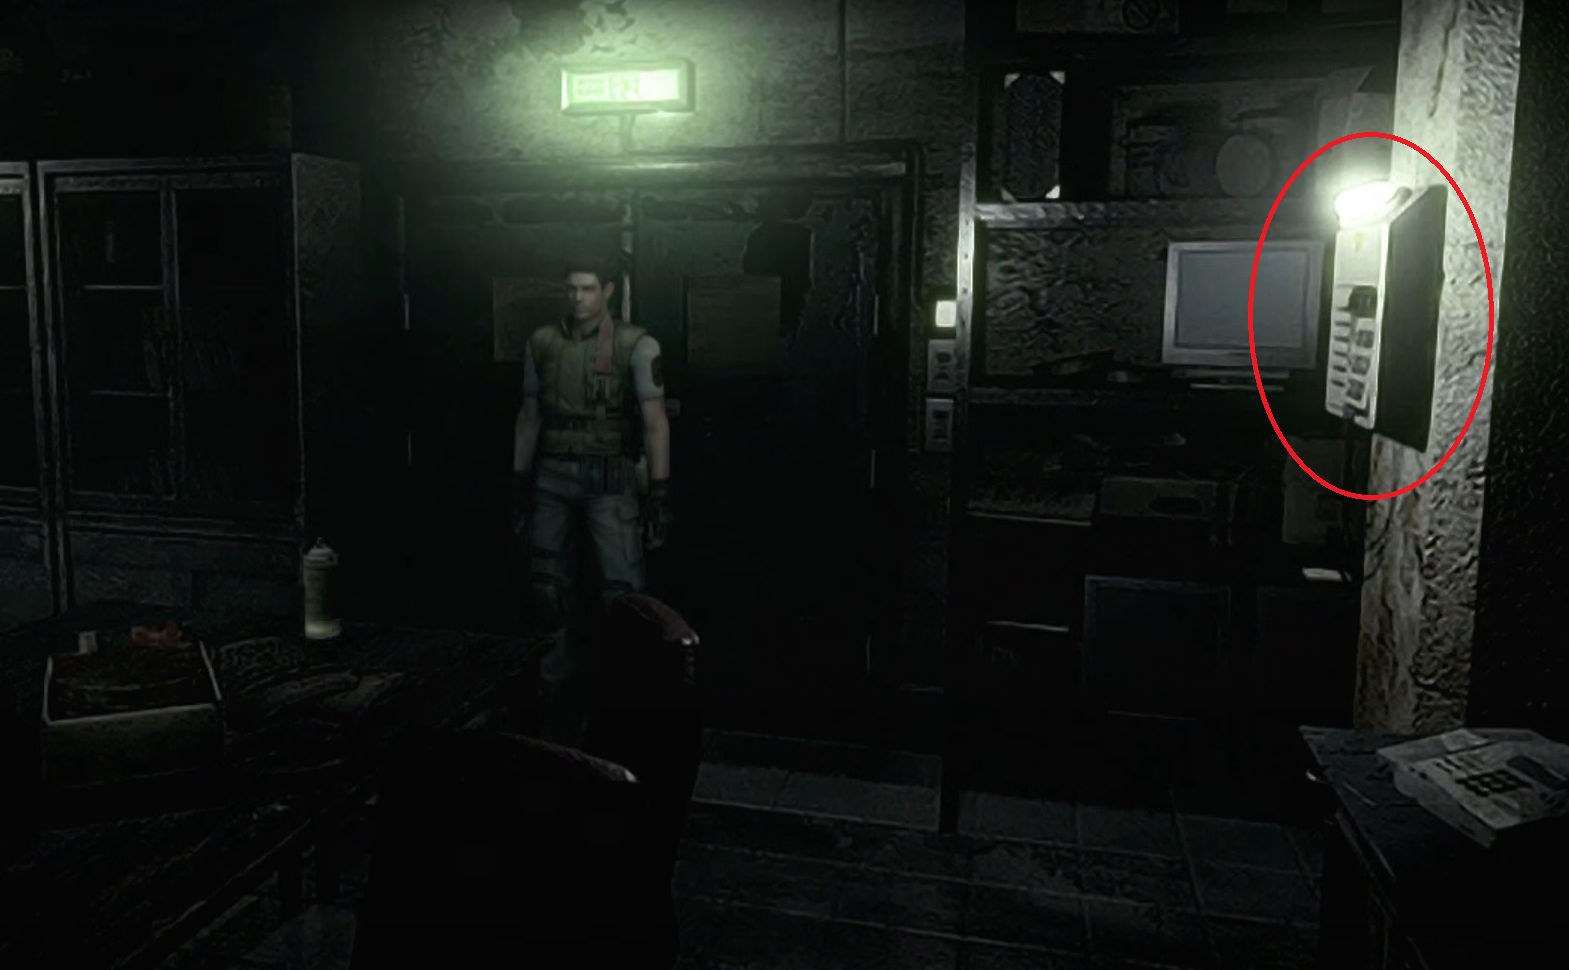
The code to enter is 8462
Isso é tudo o que estamos compartilhando hoje para isso Residente Mal guia. Este guia foi originalmente criado e escrito por Réji. Caso não atualizemos este guia, você pode encontrar a atualização mais recente seguindo este link.