
- Tytuł: Tell Me Why
- Data wydania:
- Wywoływacz:
- Wydawca:
Information about Tell Me Why is still incomplete. Pomóż nam wypełnić szczegóły gry za pomocą tego formularz kontaktowy.
Need help figuring out the location of all collectibles? Then this guide is for you! Pictures are included to make it easier for you to find the hidden collectibles.
Amount of collectibles
Tam są 13 collectibles in total.
- Rozdział 1: 5 przedmioty kolekcjonerskie
- Rozdział 2: 5 przedmioty kolekcjonerskie
- Rozdział 3: 3 przedmioty kolekcjonerskie.
Rozdział 1:
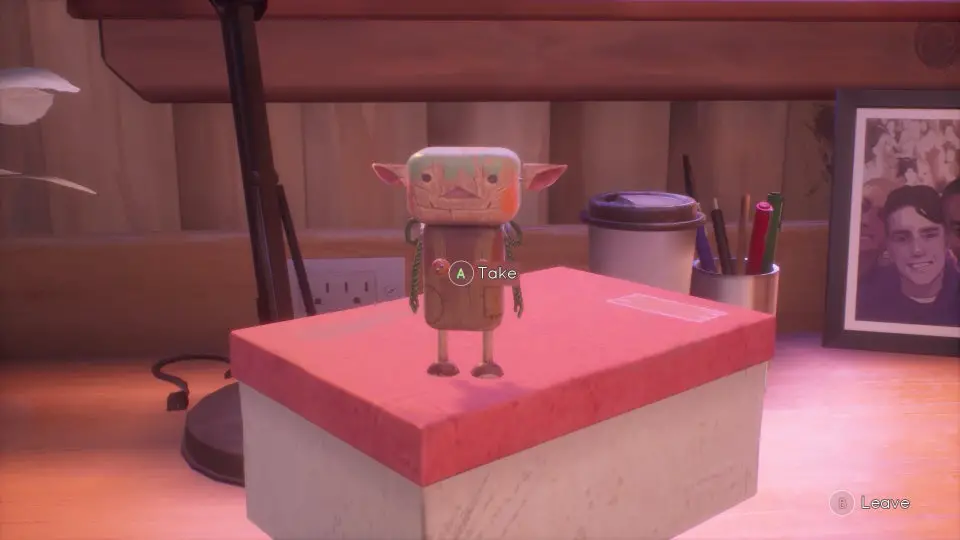
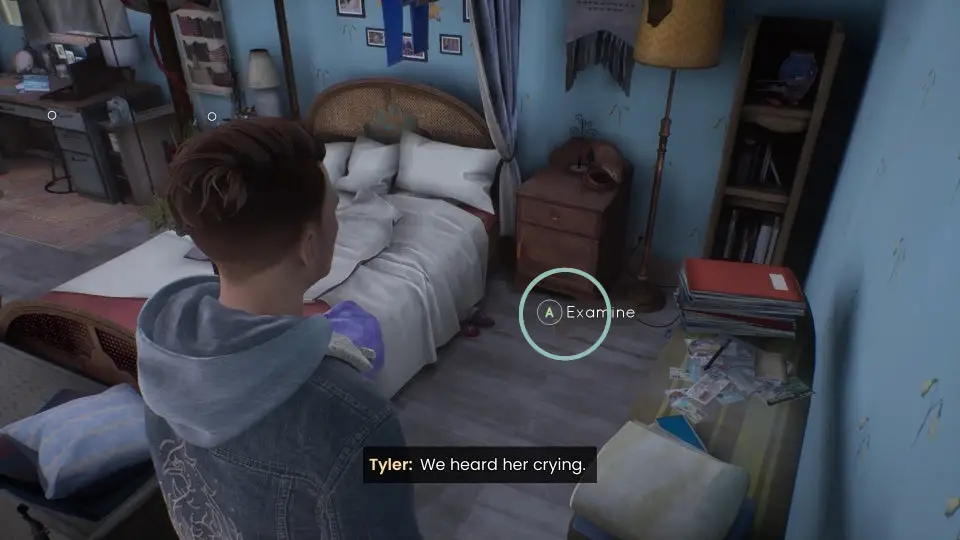
The Crafty Goblins 1/5:
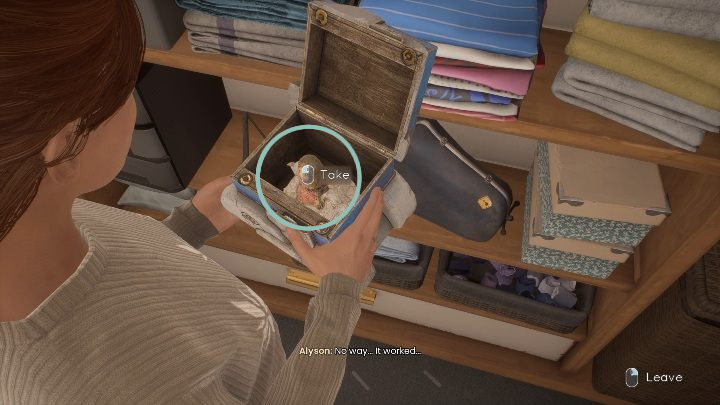
The first collectible is found under Alyson’s bed, and the second on the left side of Tyler’s desk. You need both for the collectible notification to pop up.
The Mad Hunter 2/5:
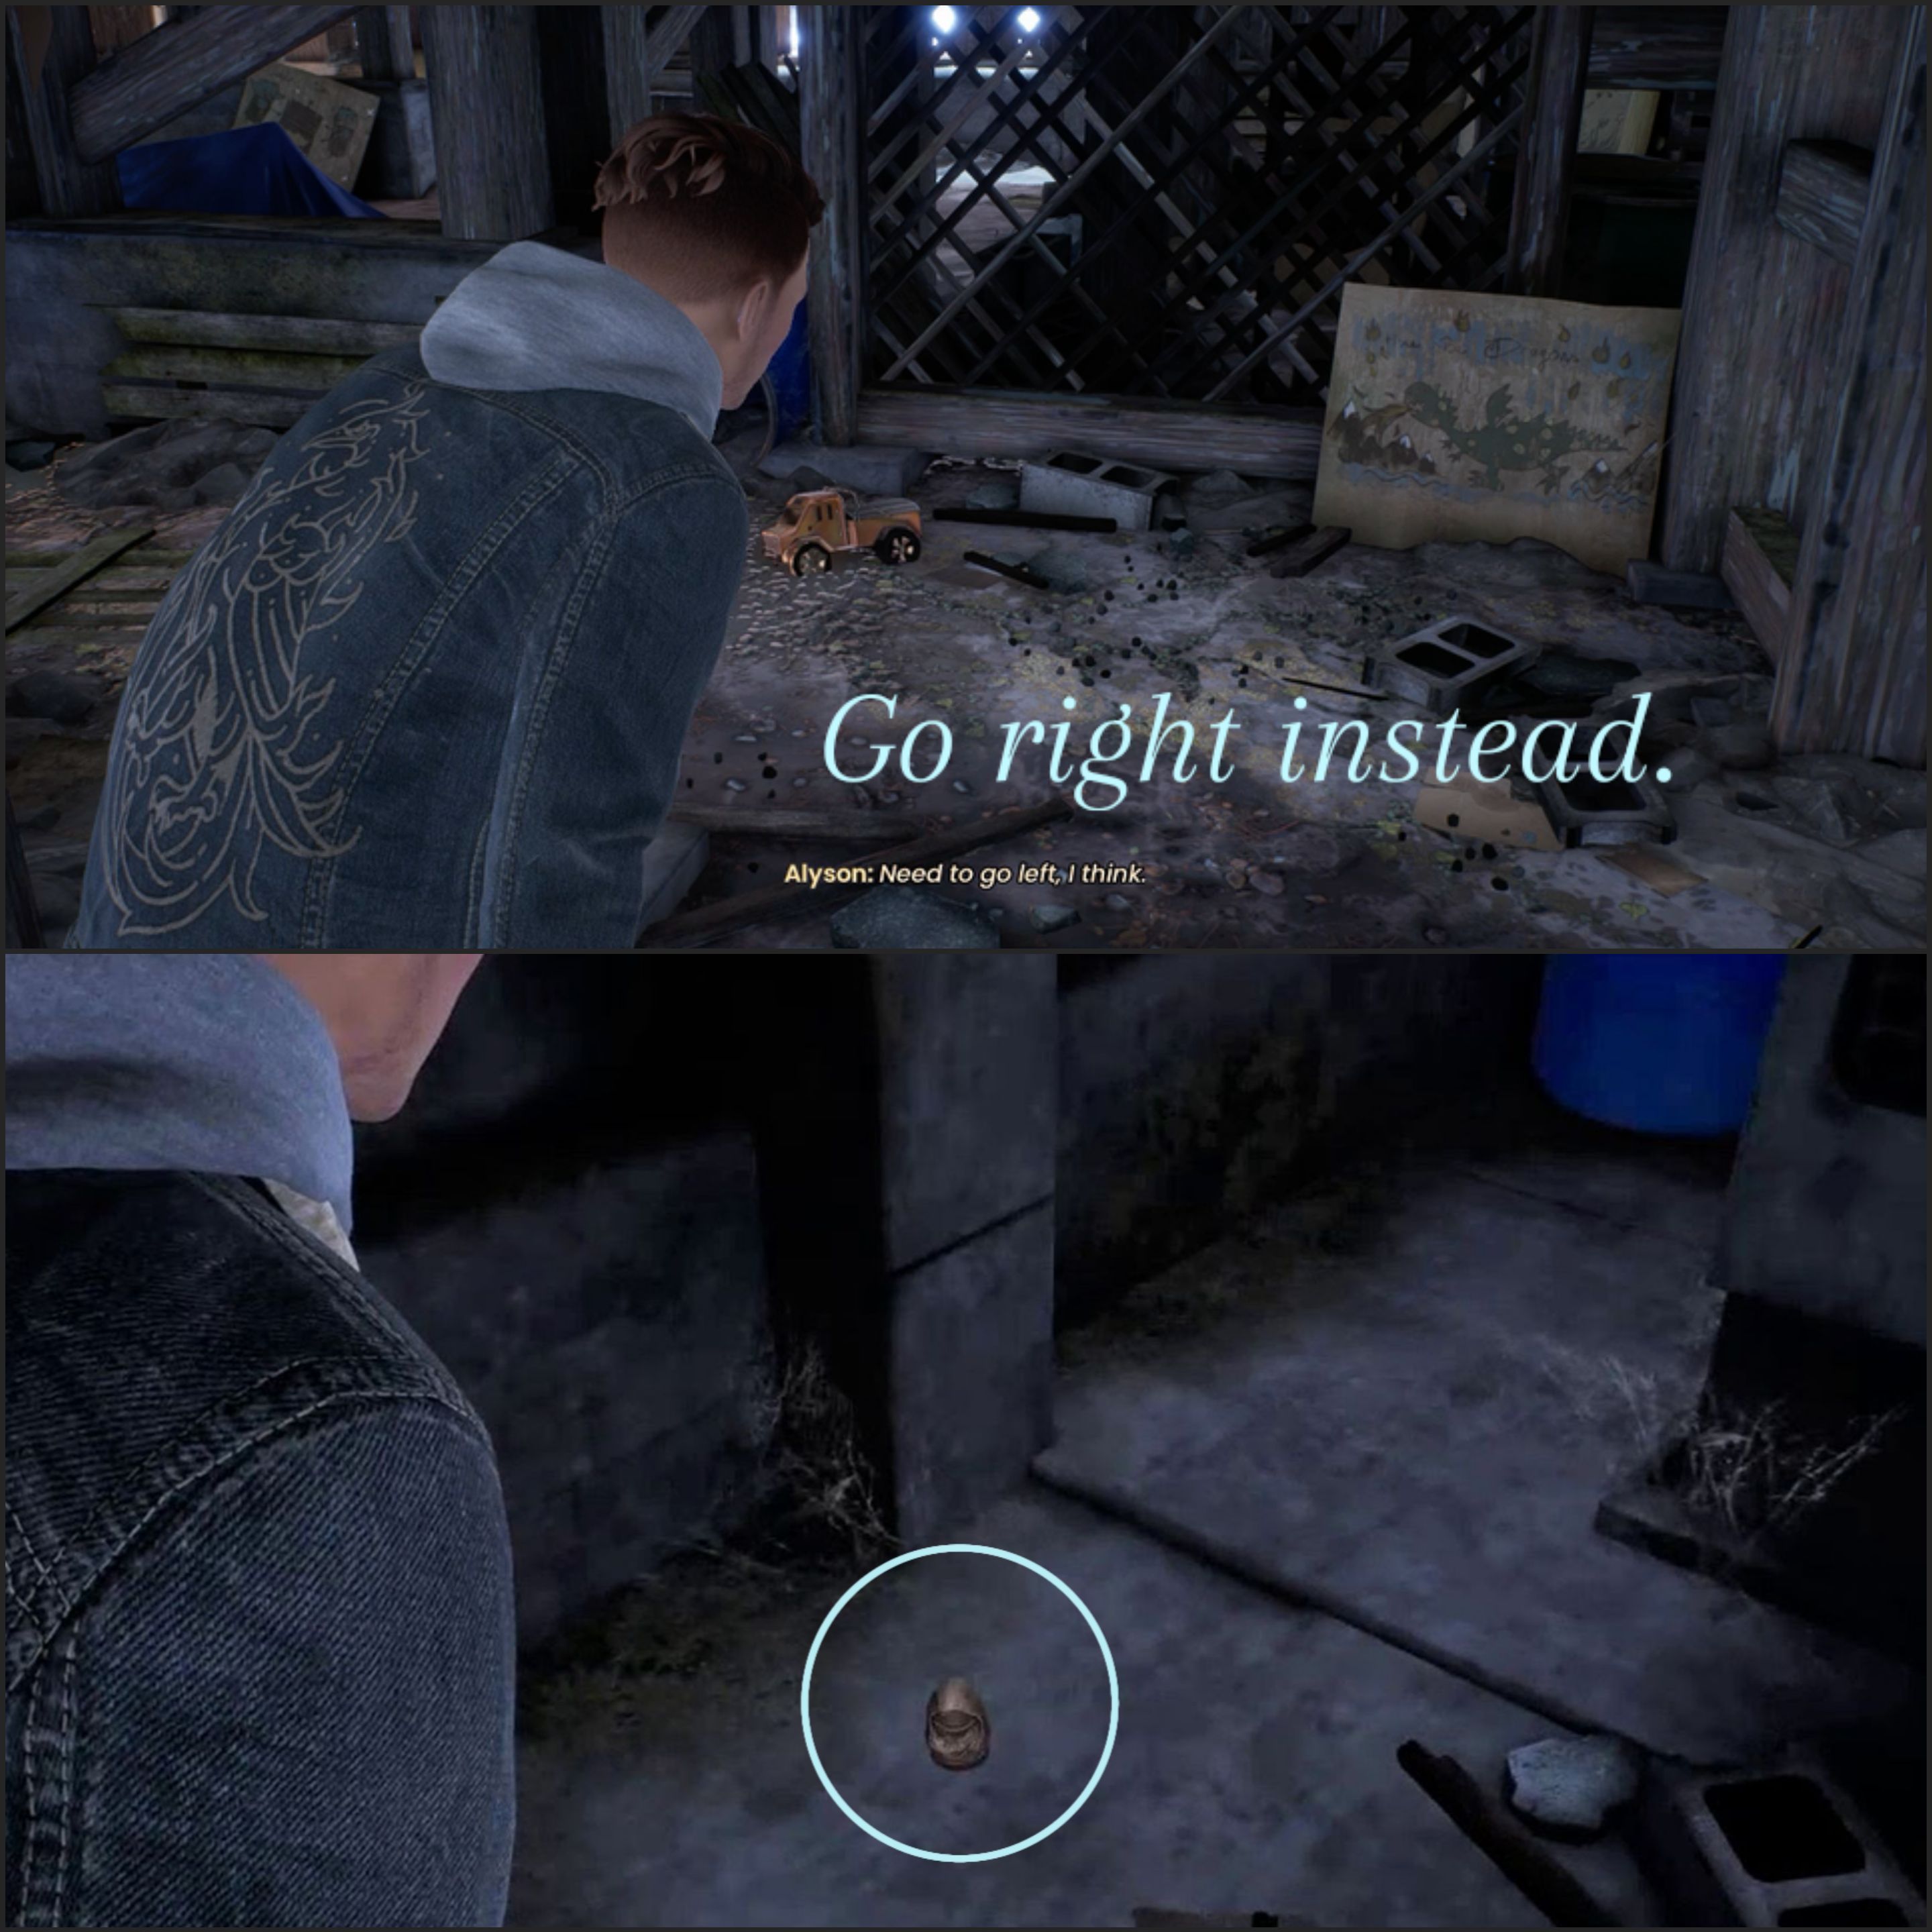
You can find this collectible under the house before you find the Goblins’ treasure. You can enter there on the side of the house, near the barn, oppositing way of the frog statues. Once you got in there, Alyson will tell you to go left, if you go right instead you’ll find the collectible.
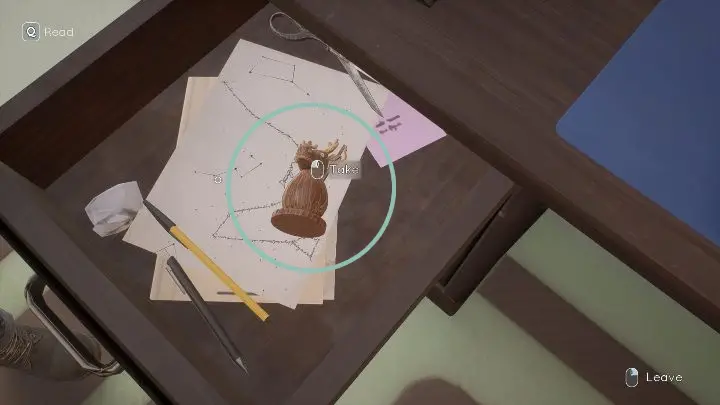
The Wise Princess 3/5:
This collectible is located to the right of Mary-Ann’s bed in her bedroom. You can enter her room after Tyler’s diary is missing by either breaking your way inside the room or solving the riddle mary-ann created. (See my other guide for help with the puzzle.)
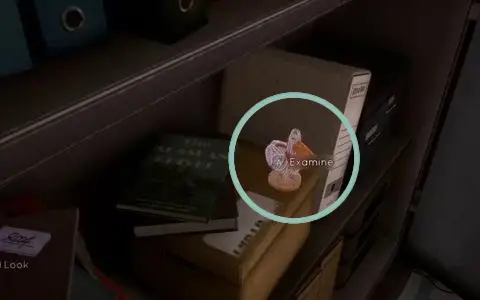
The Pious Pelican 4/5:
After meeting Tessa at the store you’re able to follow her into her office, then look into the large cupboard on her right, you’ll find the collectible there. I believe you’re supposed to do this before continuing the memories with Tyler.

The Ice King 5/5:
This collectible is obtained at the police station. Make sure to speak with eddy to get the keys and some coffee before meeting up with him. In the irrigation room, you will find the collectible on the floor next to a huge pile of white boxes.
Rozdział 2:
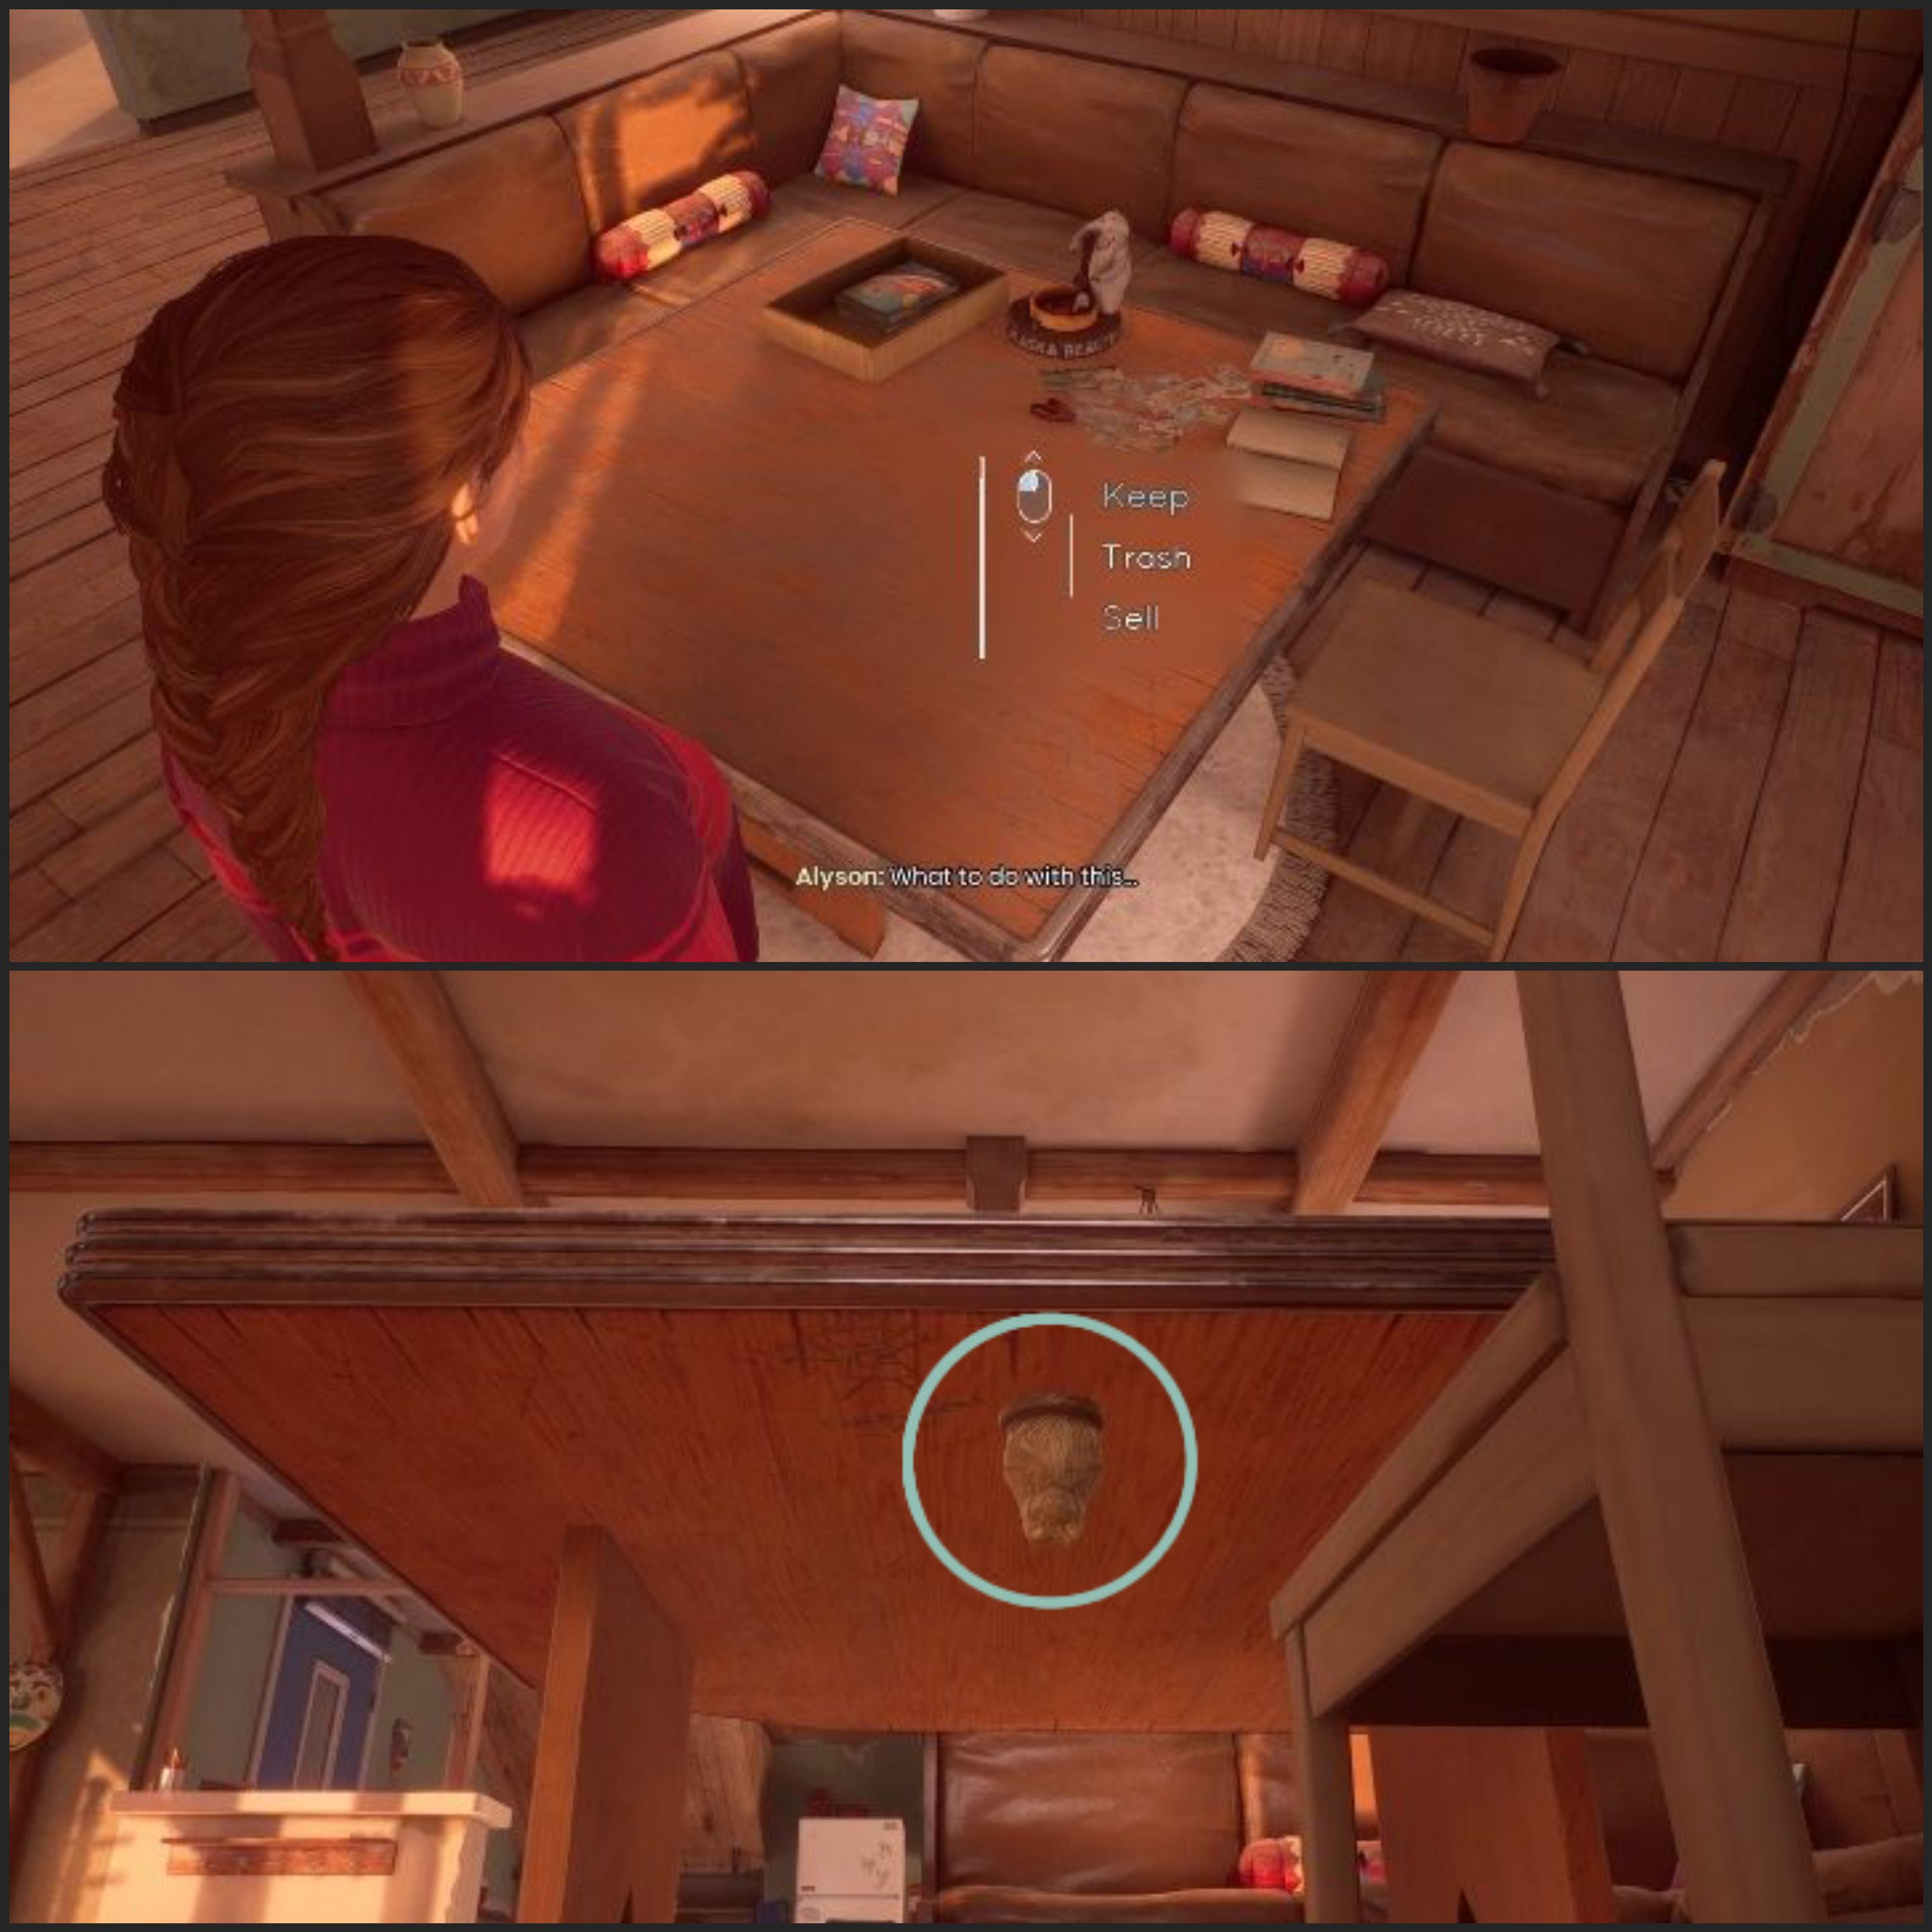
The Big Frog 1/5 :
This collectible is found under a table close to a wall with pictures of the twins in the living room. The collectible is attached to the bottom of the table with a piece of gum.
The Stalwart Moose 2/5:
This collectible is found in Eddy’s drawer which is located in his office upstairs in the police station.
The Mangy Muskrat 3/5:
This collectible is by the back of the storage room of the shop, near where the plushies are kept. You’ll get here in a plushie fight with Micheal.
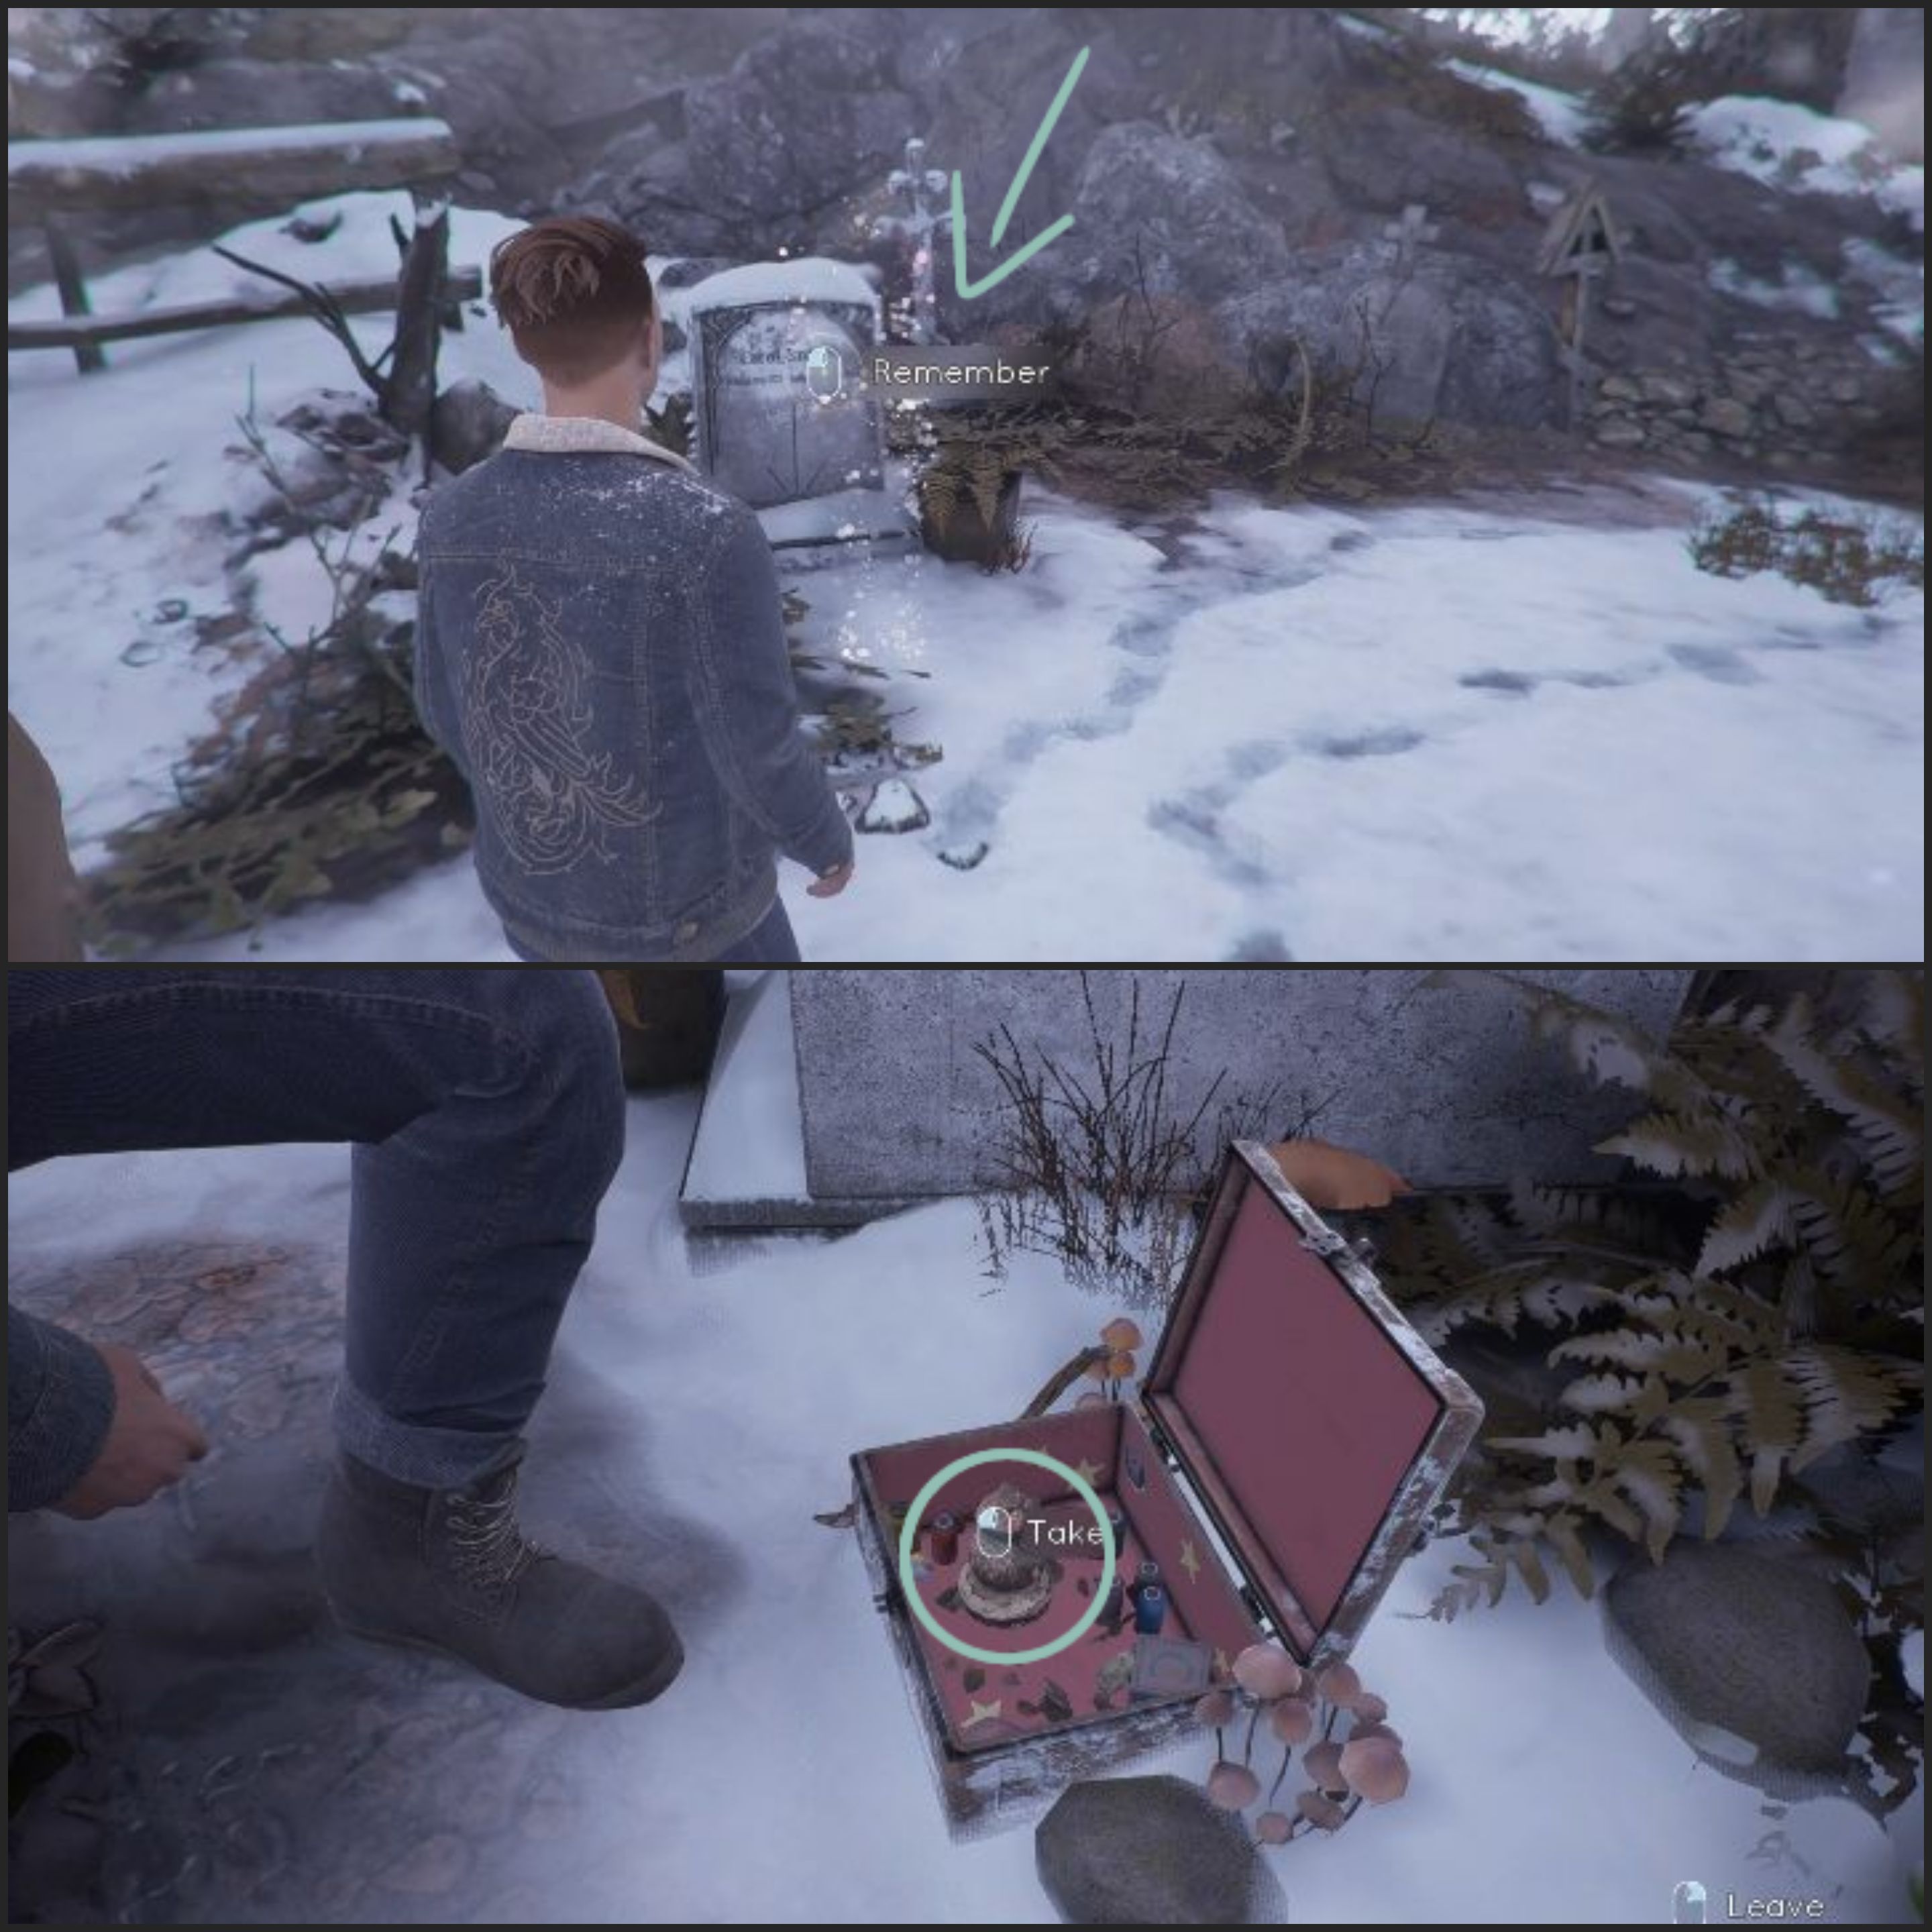
The Very Old Beaver 4/5:
In the graveyard, one if the first graves will be from Eddy’s mother named Carol. Behind this graveyard, there will be a small box with the collectible inside.

The Moon Hag 5/5:
Alyson will first extinguish the burning barn. Later you have to go search for a crowbar. Before you grab the crowbar, look at the other items. At your right you’ll find this collectible.
Rozdział 3:
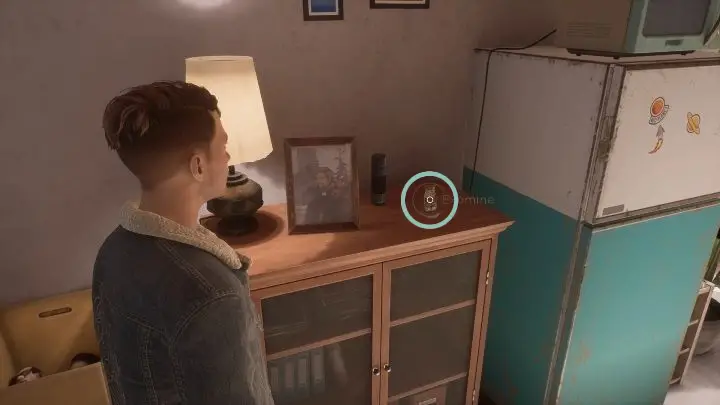
The Secret Keeper 1/3:
In Eddy’s room you will find a box on a shelf located on the left side of his room, near his bed. Interact with it. Go to the living room and find Alyson’s wallet which is in a dresser next to the kitchen. Grab a coin and go back to the box and insert it. You’ll have obtained your collectible.
The Old Bear 2/3:
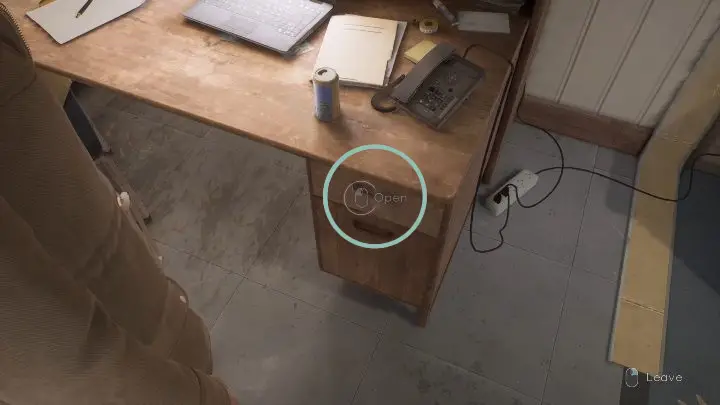
In Sam’s apartment you’ll have to open his desk drawer before talking to him.
The Gold Lady 3/3:
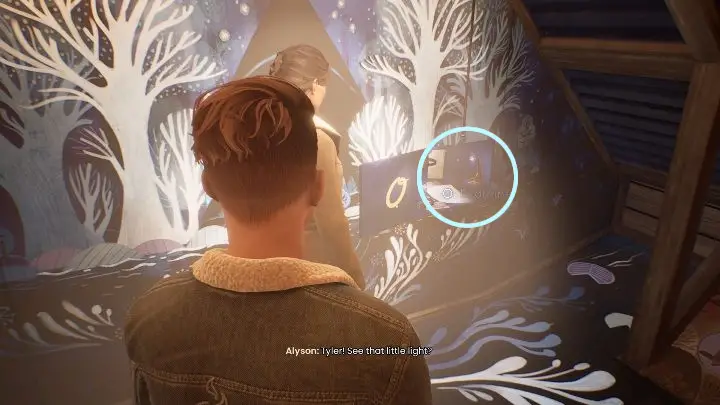
In the loft of the barn you will face a puzzle (check my other guide for instructions)
Once you finish the puzzle you’re able to open the safe located in the room.
The code for the safe: L, mi, o
To wszystko, co dzisiaj udostępniamy w tym celu Tell Me Why przewodnik. Ten przewodnik został pierwotnie stworzony i napisany przez CatyChu. Na wypadek, gdybyśmy nie zaktualizowali tego przewodnika, możesz znaleźć najnowszą aktualizację, postępując zgodnie z tym połączyć.