
W tym przewodniku, you will learn how to start the R/V Calypso’s engines. It will also include up to date tutorials on each system of the vessel
Auxiliary Engines
In order to start the main engines, potrzebujesz mocy. To get this power we will start the GM 2-71 Aux generator.
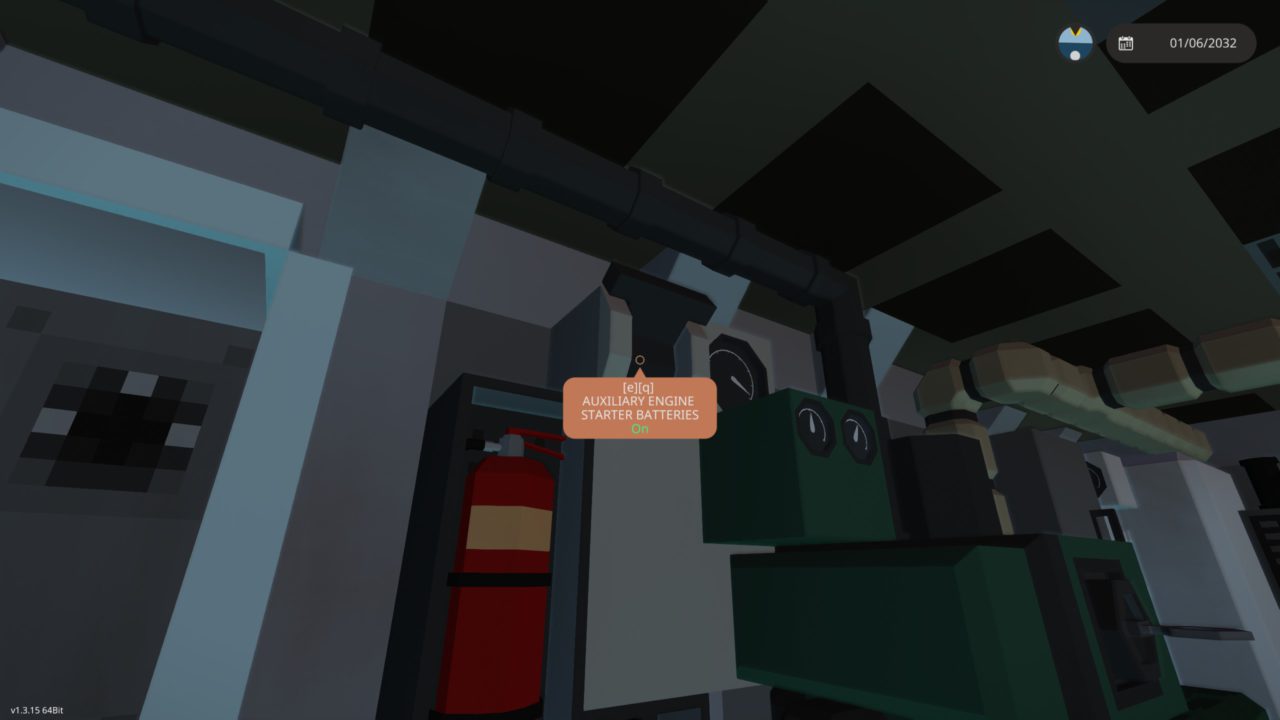
Krok 1 – Starter Power
You need to turn on the batteries that provide power to the generator’s starter.

Krok 2 – Fuel Valve
Next you need to provide fuel to the generator in order for it to start. Turn the ‘DAILY USE STARBOARD TANK VALVE’.

Krok 3 – Start the generator
Now it’s time to start the Generator to start producing power!
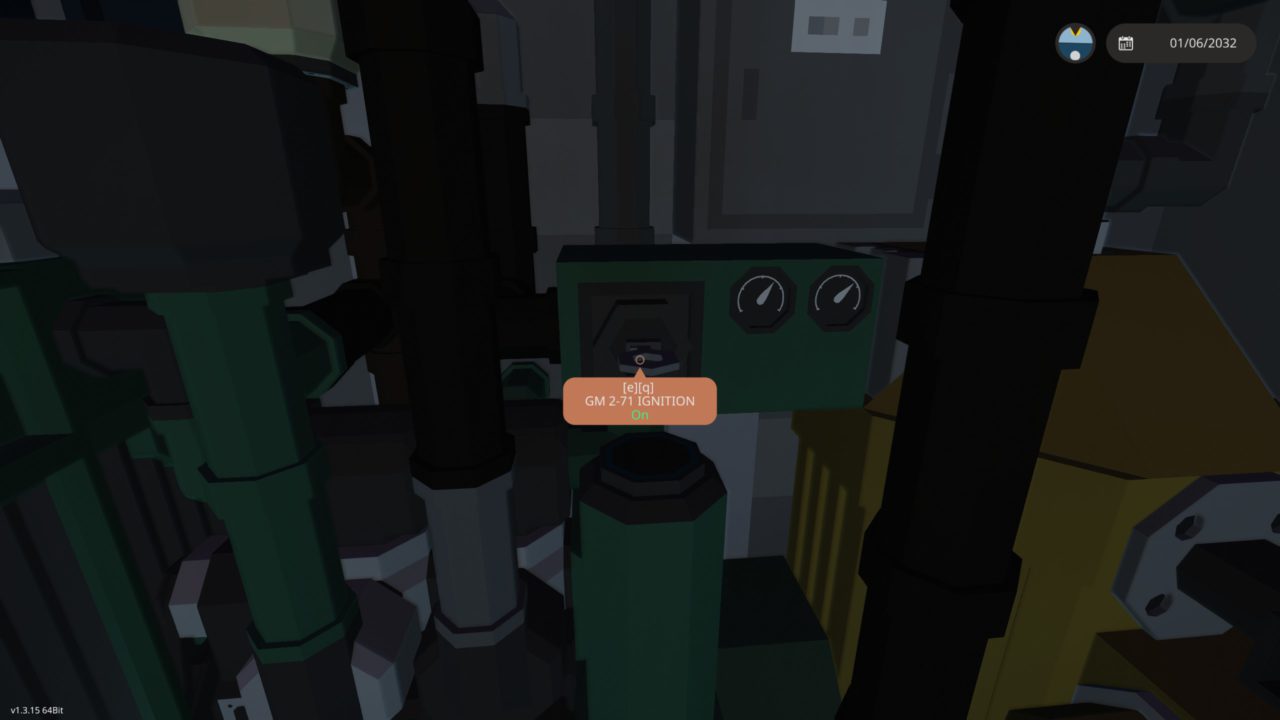
Krok 4 – Cut In
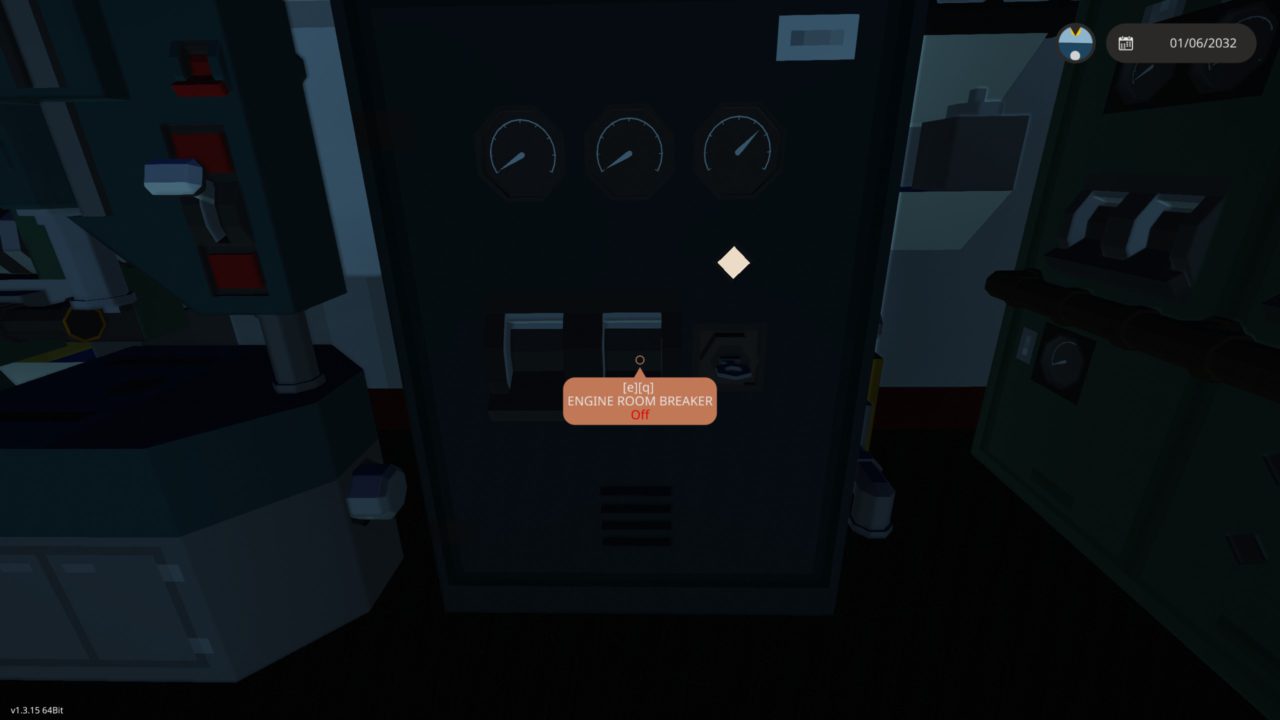
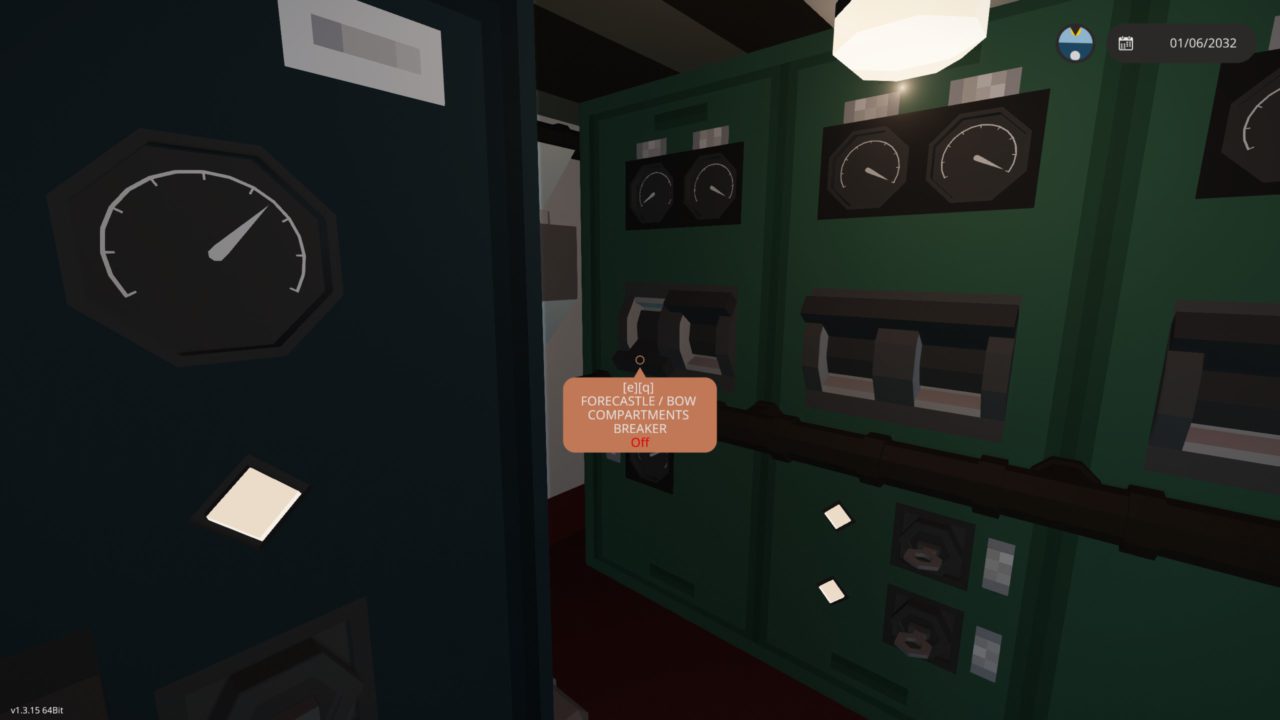
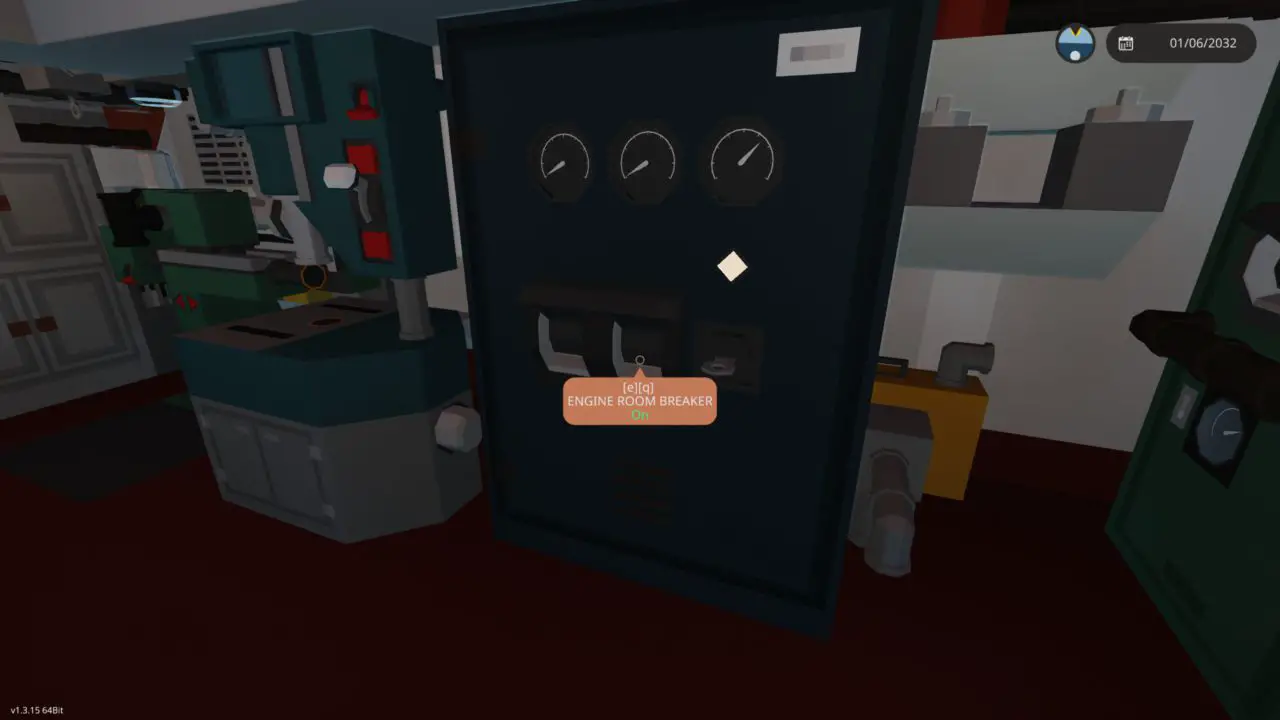
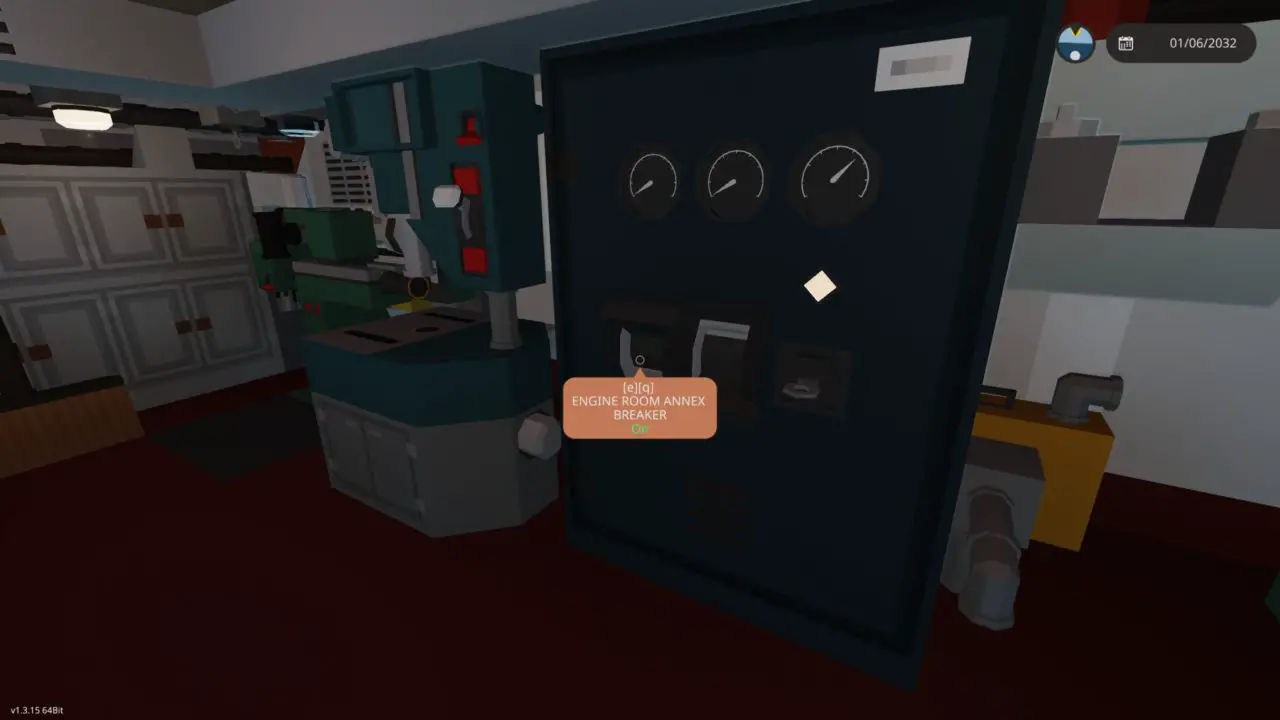
Now that the generator is producing power we have to cut it into the systems. Head over to the engine room Annex and go to the blue panel. Make sure the light is on and turn the key ‘GM 2-71 20kw GENERATOR CUT-IN’.

Next flip the breakers labeled ‘ENGINE ROOM BREAKER’ and ‘ENGINE ROOM ANNEX BREAKER’

Main Engines and Generators
Now it’s time to start the main engines. Head back to the engine room and flip on the lights.
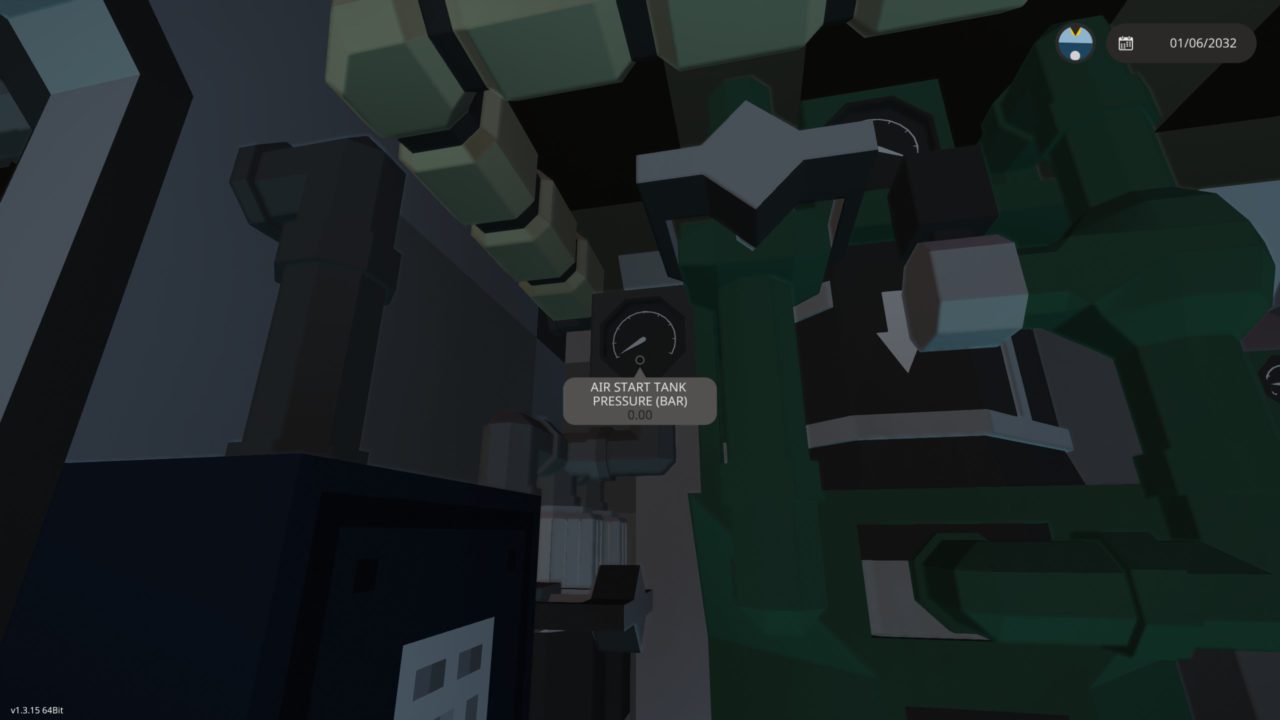
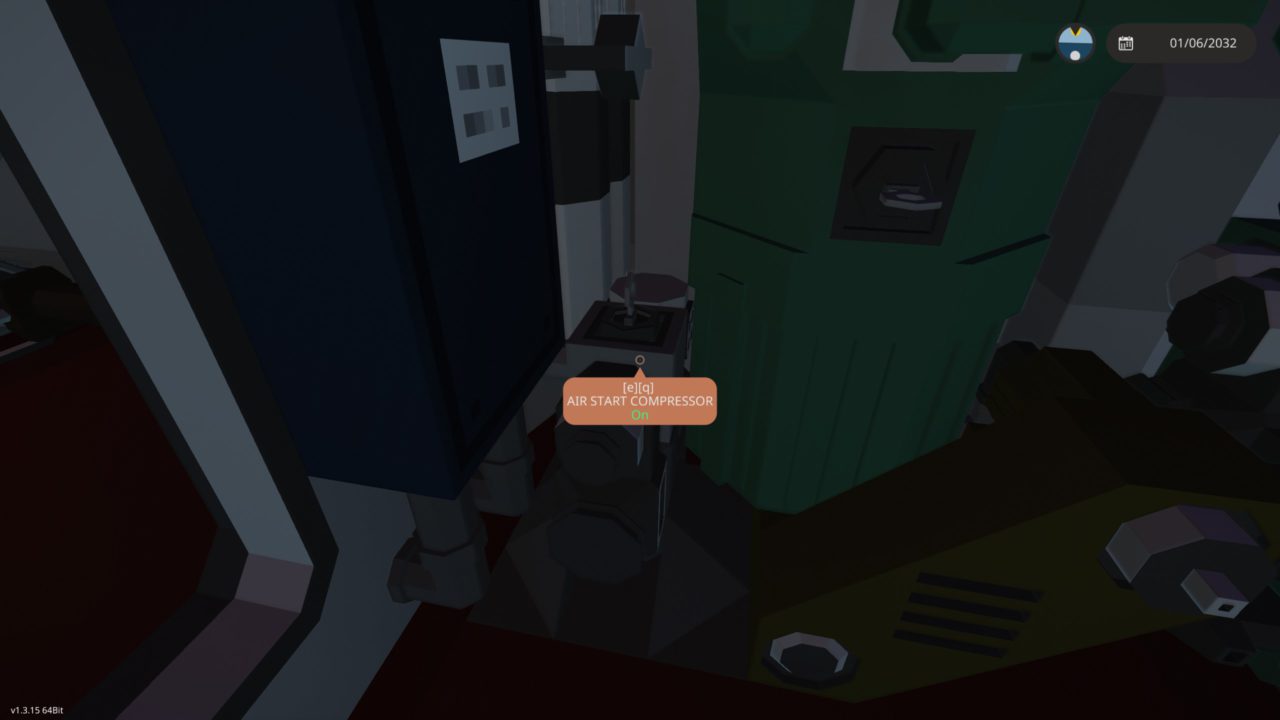
Krok 1 – Air compressor
In order to start the main engines, we need compressed air. The compressed air is what starts the pistons turning effectively ‘bump’ starting the engines.

The pressure gauge will slowly start to increase. You can start one engine at 7 BAR but it is best to wait until 10.42 BAR.
While that is filling up we’ll continue the start-up.
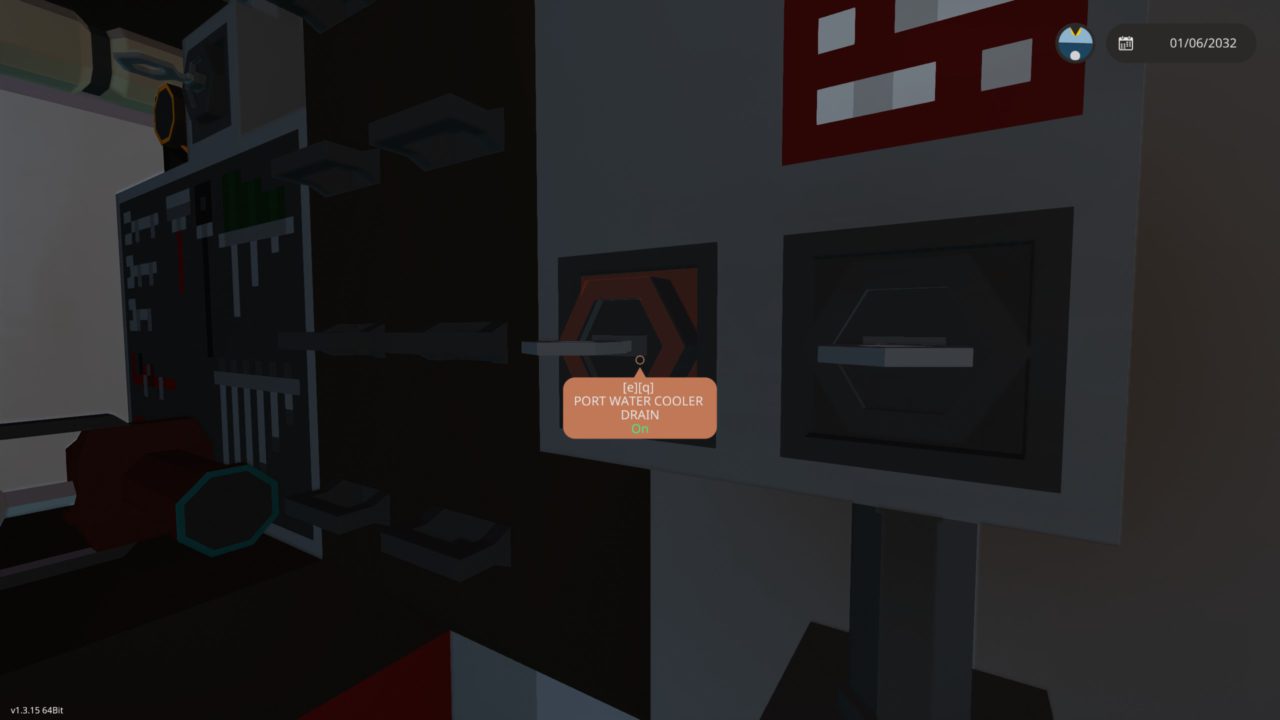
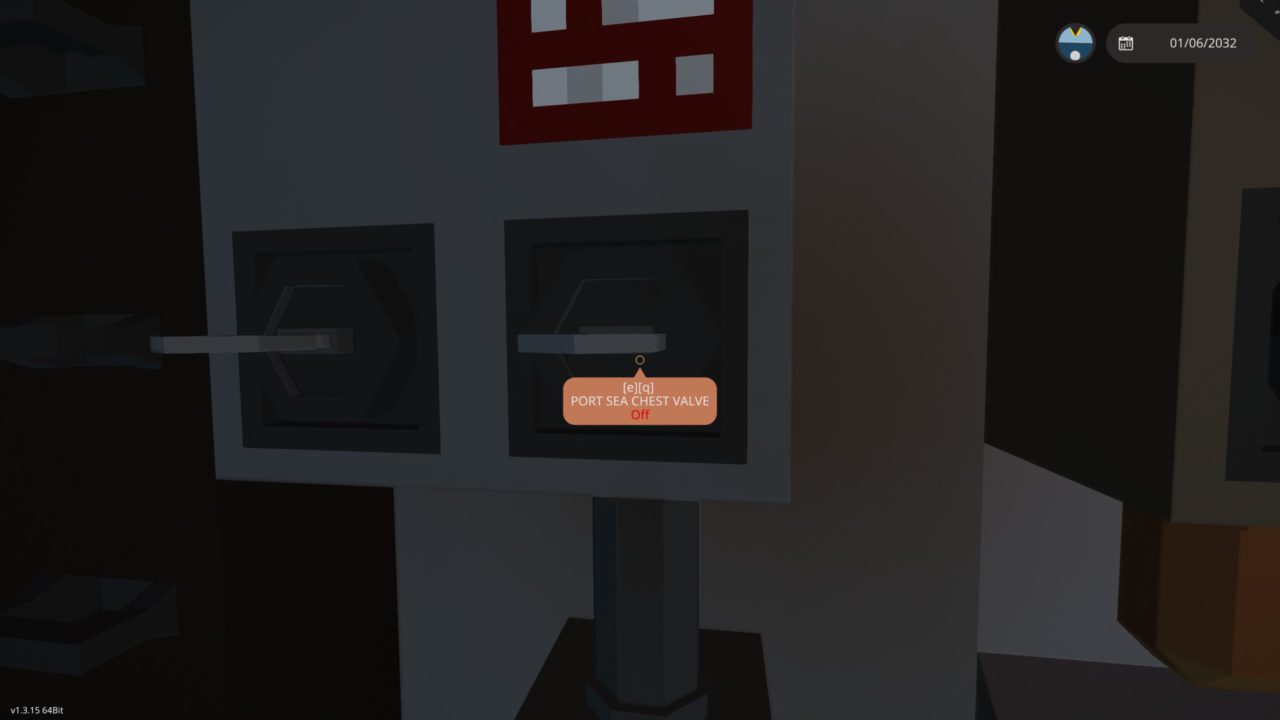
Krok 2 – Sea Chests
Sea chests are holes in the bottom of the boat that pump in sea water which is used to cool the fresh water which in turn cools the main engines. To open these first close the drain by turning off the water cooler drains.

Next turn on the sea chest valve.

Repeat the process for the port side.
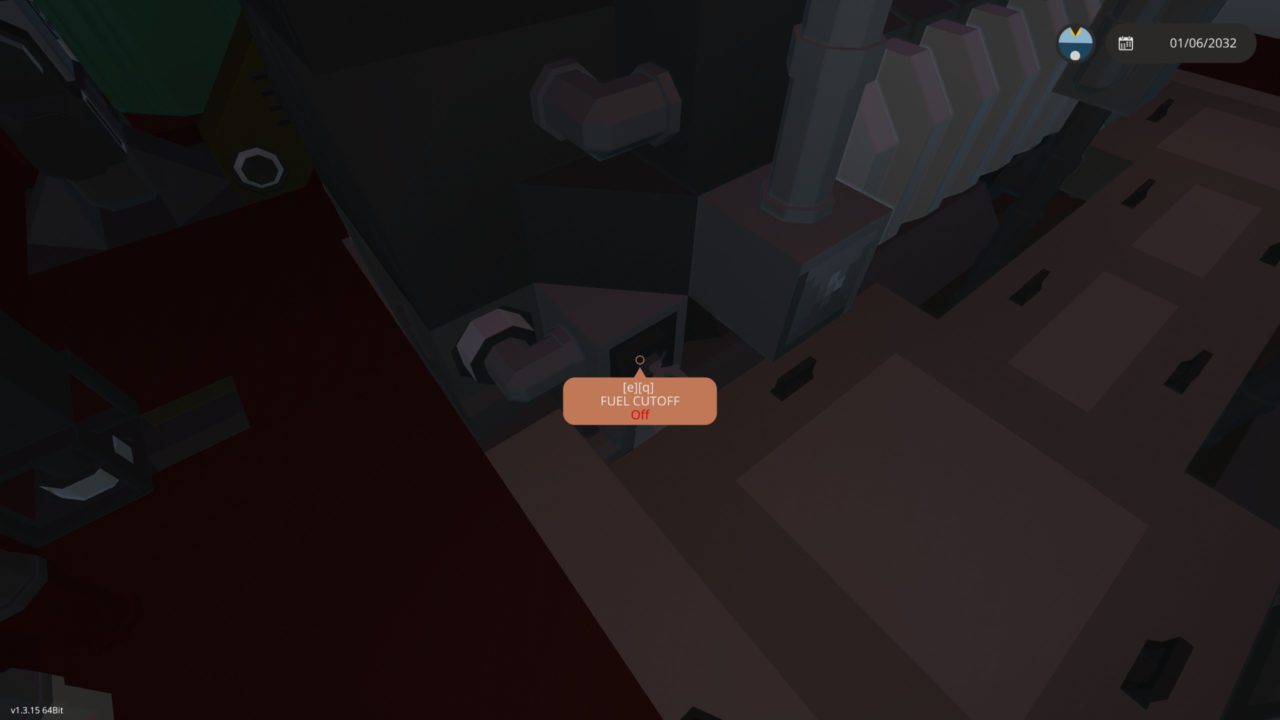
Krok 3 – Fuel Valve
Następny, it is time to open the other fuel valve

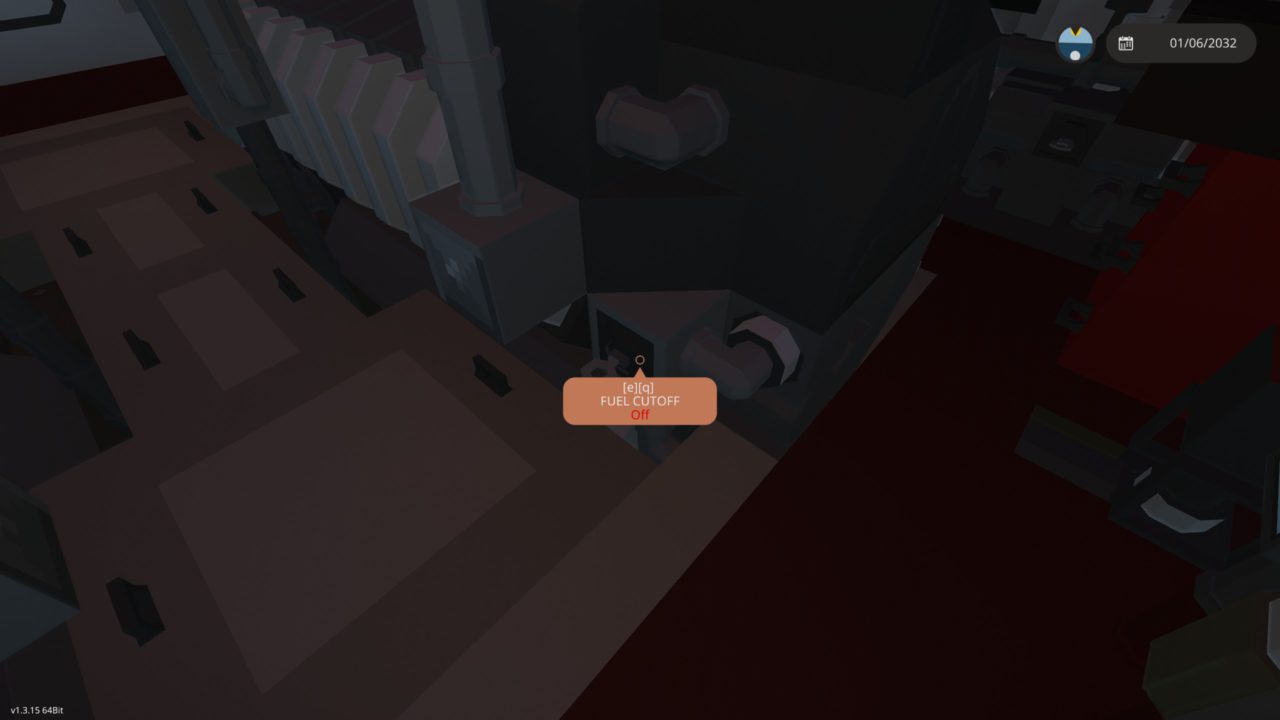
Krok 4 – Starting air and Engine Fuel Cutoff
Head over the the ‘AIR START TANK PRESSURE’ Gauge and make sure it’s 10.42 BAR. (You can start one engine with at least 7 BAR).
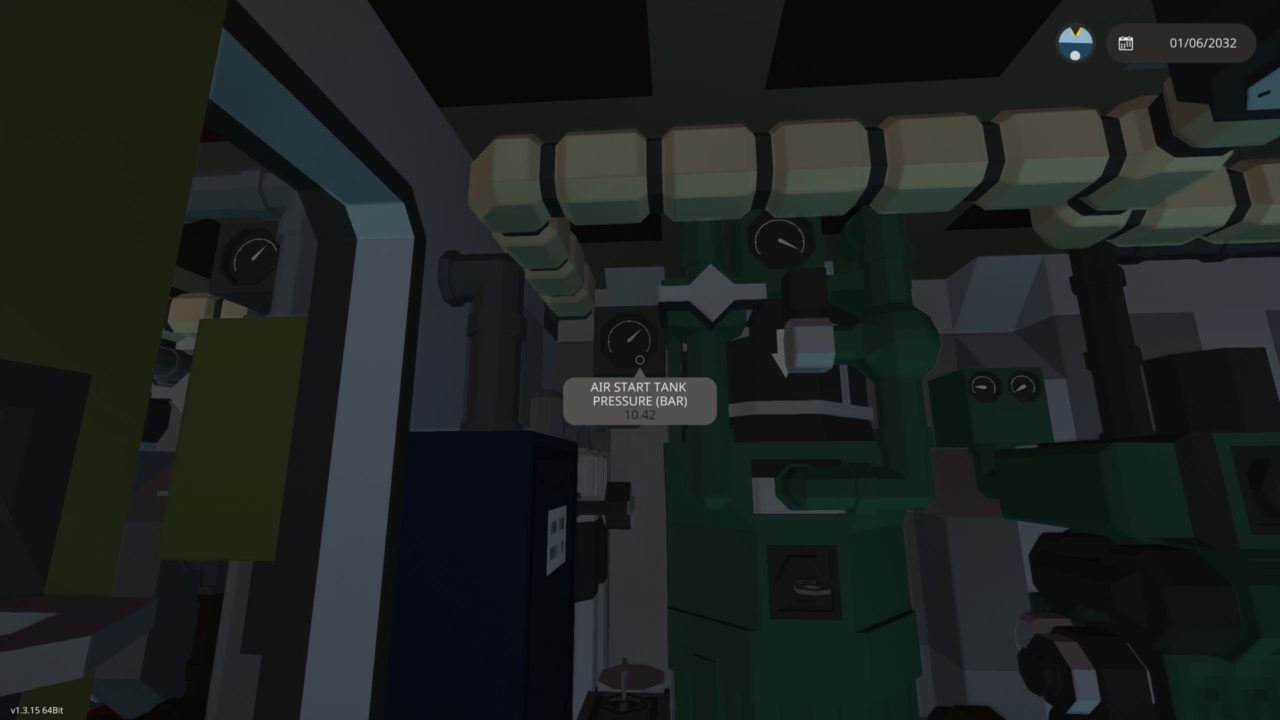
Jeśli tak jest 10.42 BAR head over to both of the main engines and turn on the fuel cutoff valves.
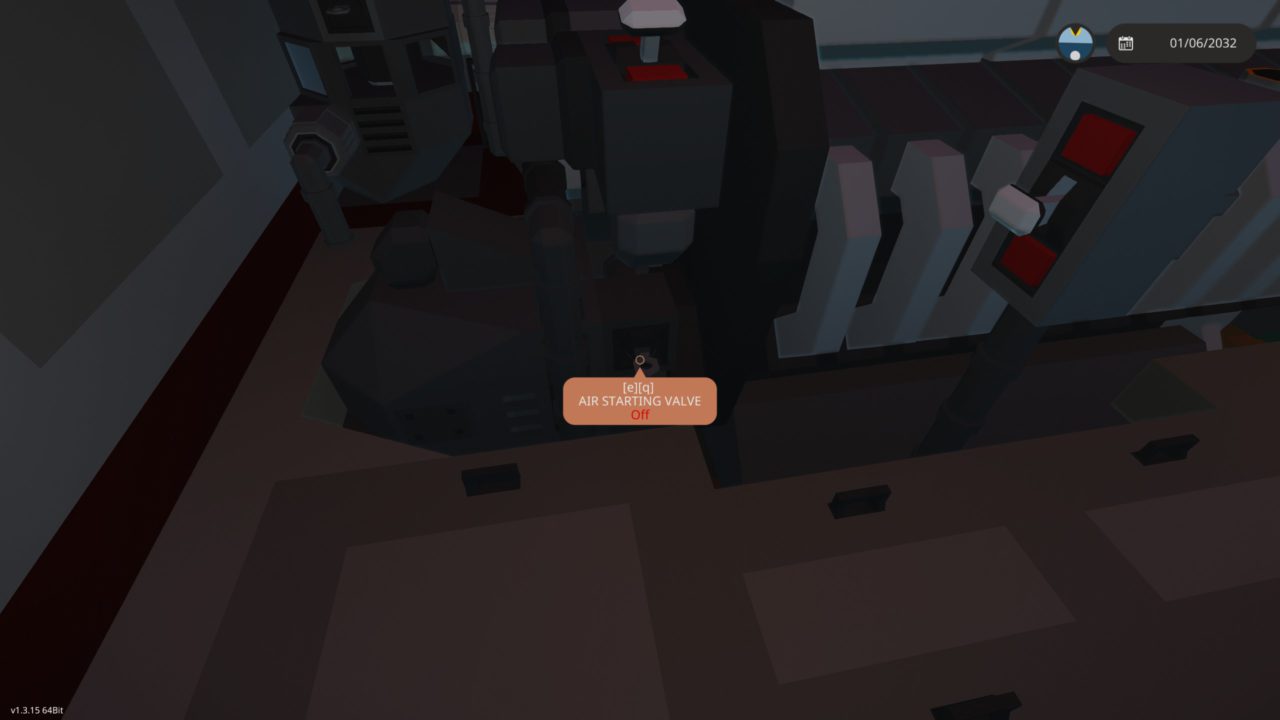
Krok 5 – Start A Engine!
On one of the engines turn on the ‘AIR STARTING VALVE’

The engine should start.
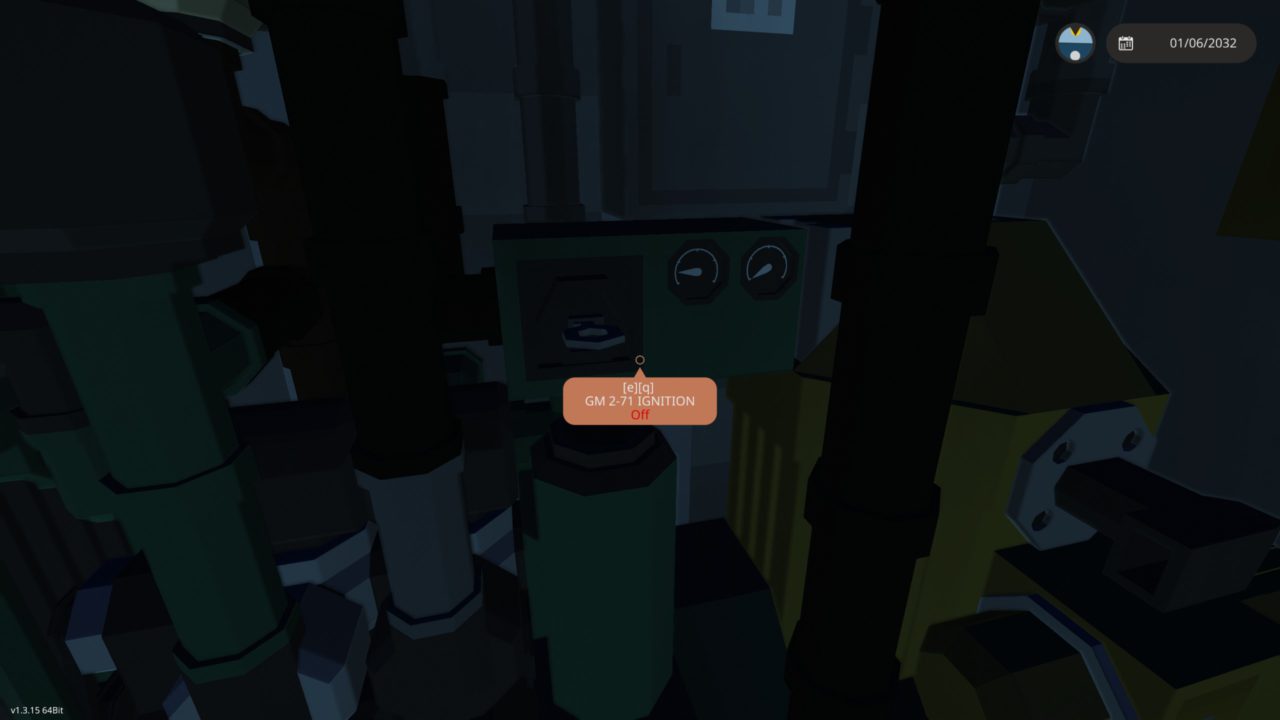
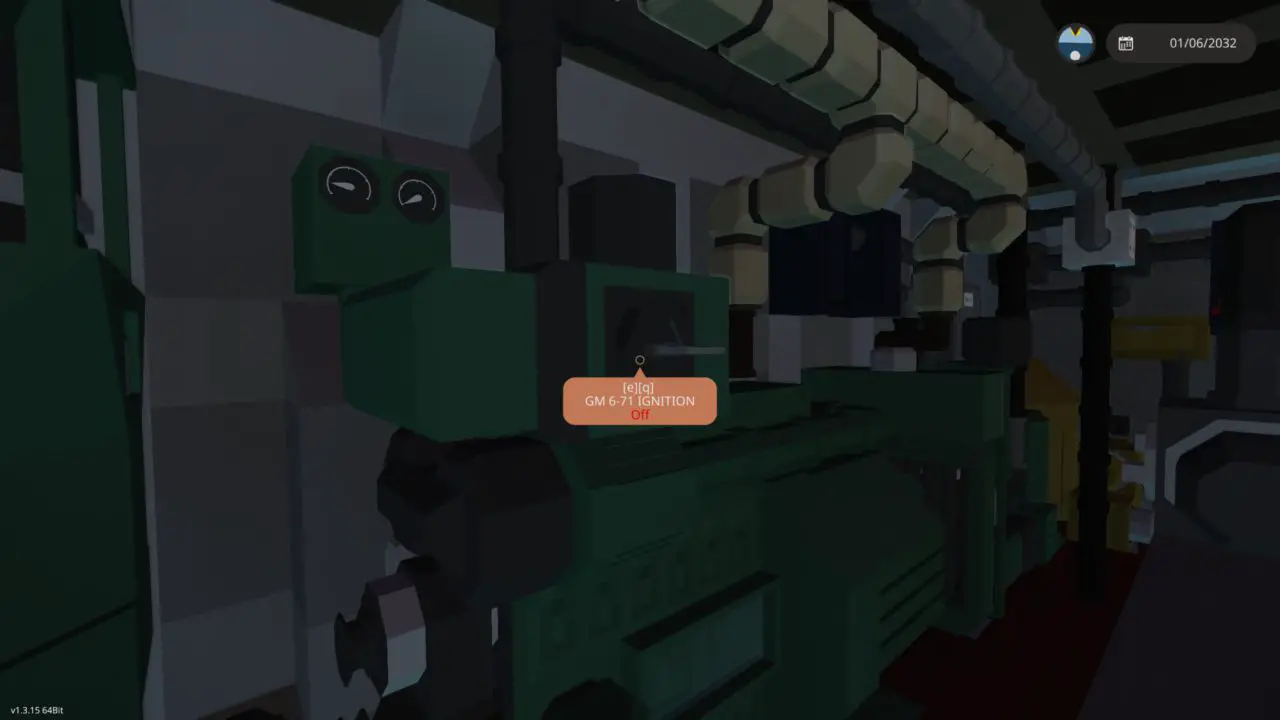
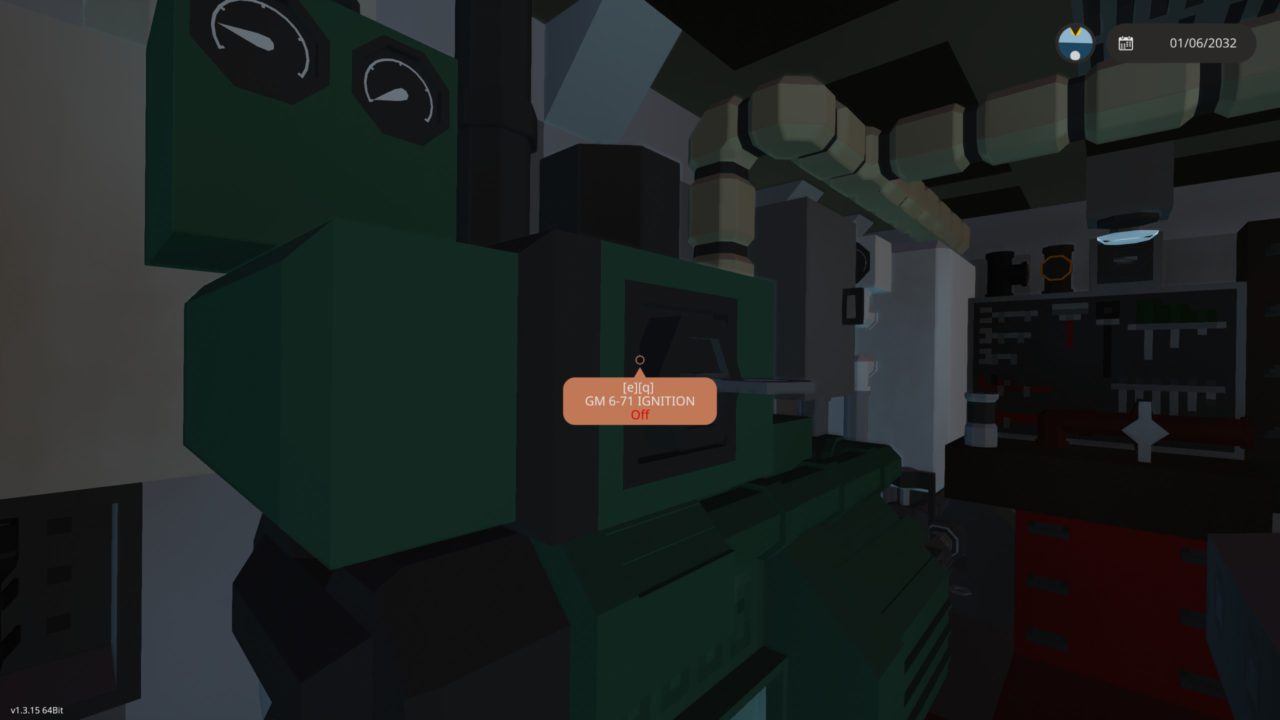
Krok 6 – Start the Main Generator
While we wait for the starting air to build back up head over to the GM 6-71 generator on the same side that the engine you just started is on. Turn the ignition on.
Krok 7 – Start The Last Engine!
By now the starting should have built back up enough so head over to the next engine and turn its ‘AIR STARTING VALVE’ to on.
Krok 8 – Start the Main Generator
Head over to the GM 6-71 generator on the same side that the engine you just started is on. Turn the ignition on.
Krok 9 – Turn off Air Compressor
On our way to the Engine Annex turn off the starting air compressor.
Krok 10 – POWERRRR!
In the engine annex room, turn on both Generators cut-in keys.


Next flip all the breakers on.
Krok 11 – Shut down aux gen
Finally we shut down the aux generator as we don’t need it anymore. Ale najpierw, we need to cut it out of the system. Turn the cut in key off.

Then Flip off the breakers.
Wreszcie, you can turn off the GM 2-71.
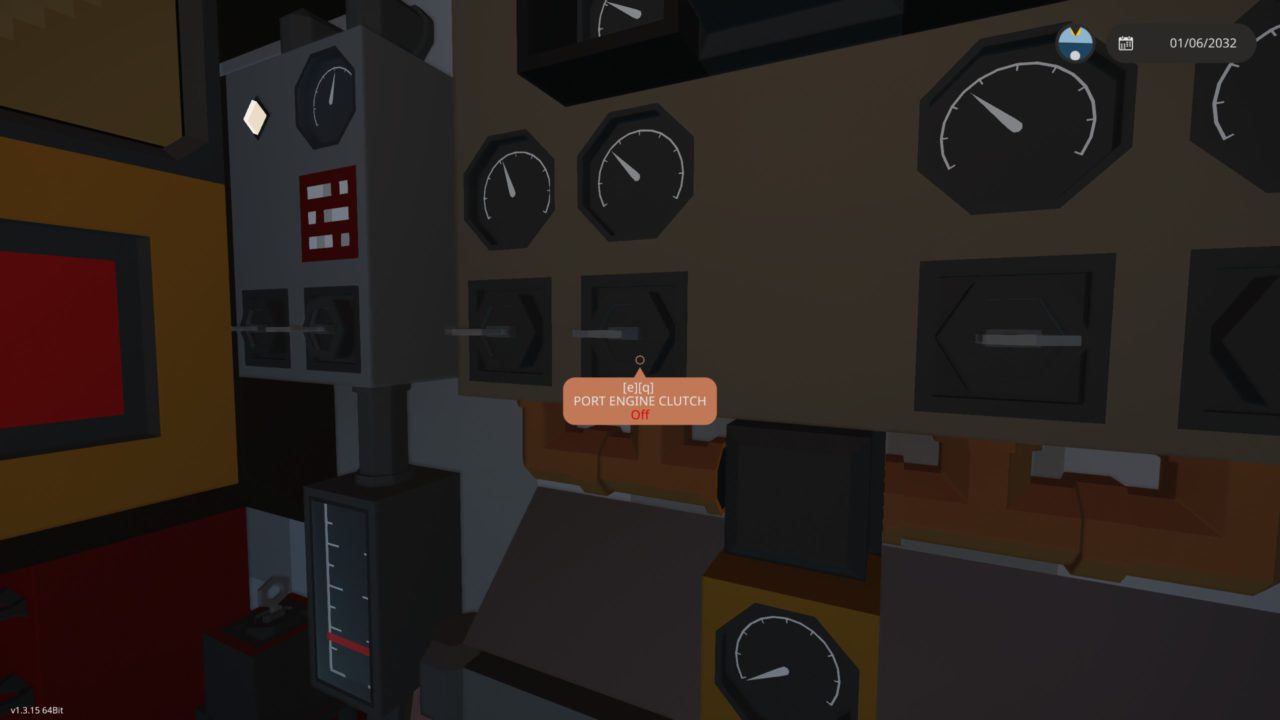
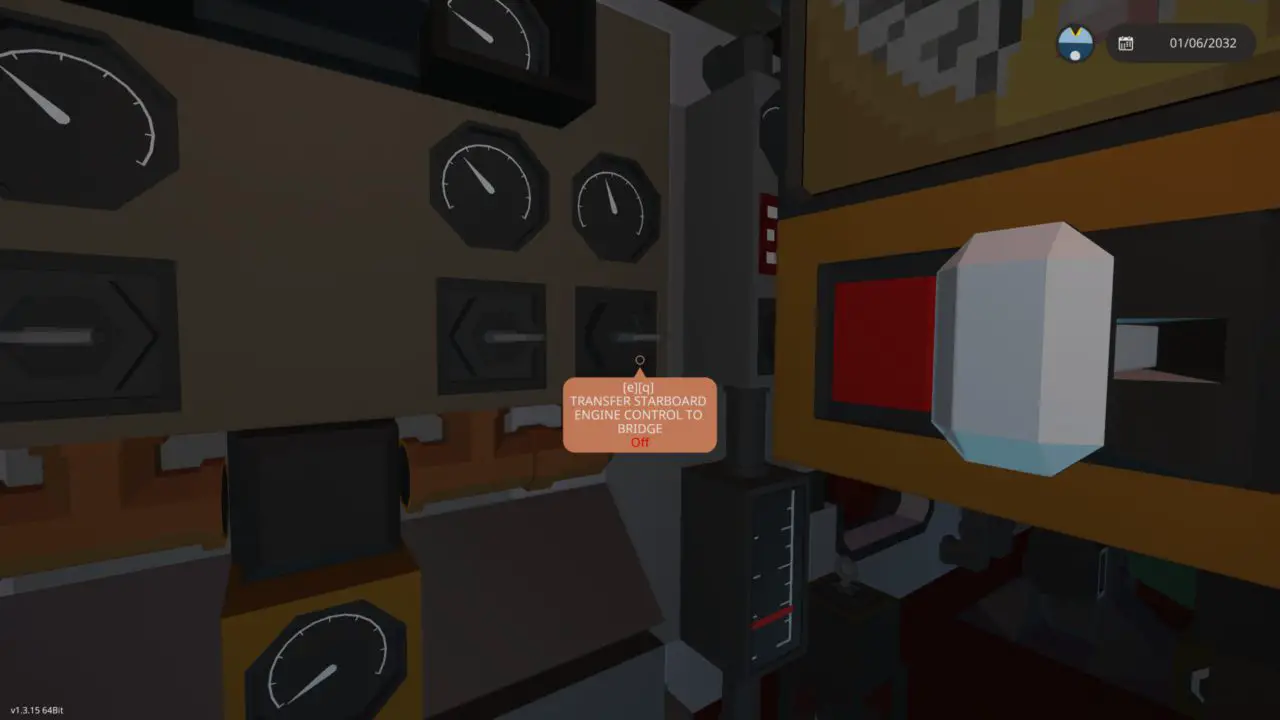
Krok 12 – Transfer Controls
Turn both Engine Clutch and Transfer Control to bridge for both the port and starboard engines.


Misc Engine Systems
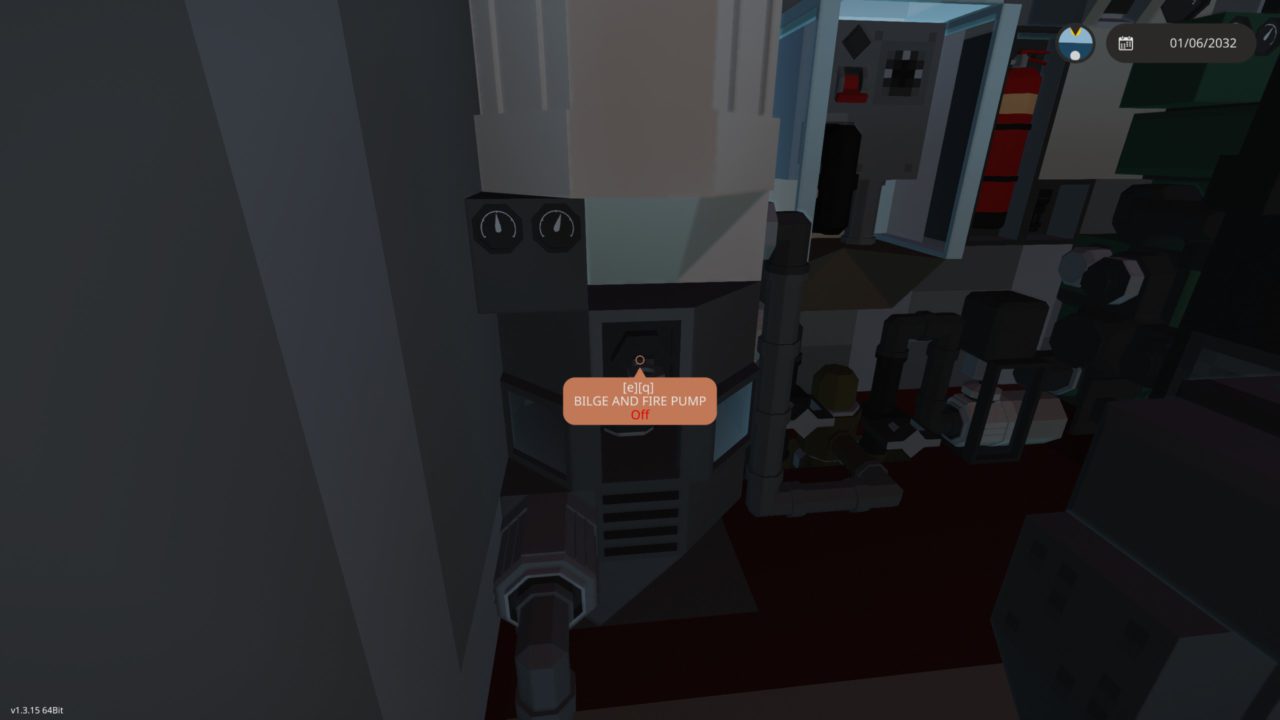
Wreszcie, We can turn on the bilges, fresh water distiller, and fridge compressor.
Turn on the ‘BILGE AND FIRE PUMP’.
Flip the aux engine starter batteries breaker to off.
Turn on the fresh water distiller (You will need this for heating) Also note that this uses a lot of power.

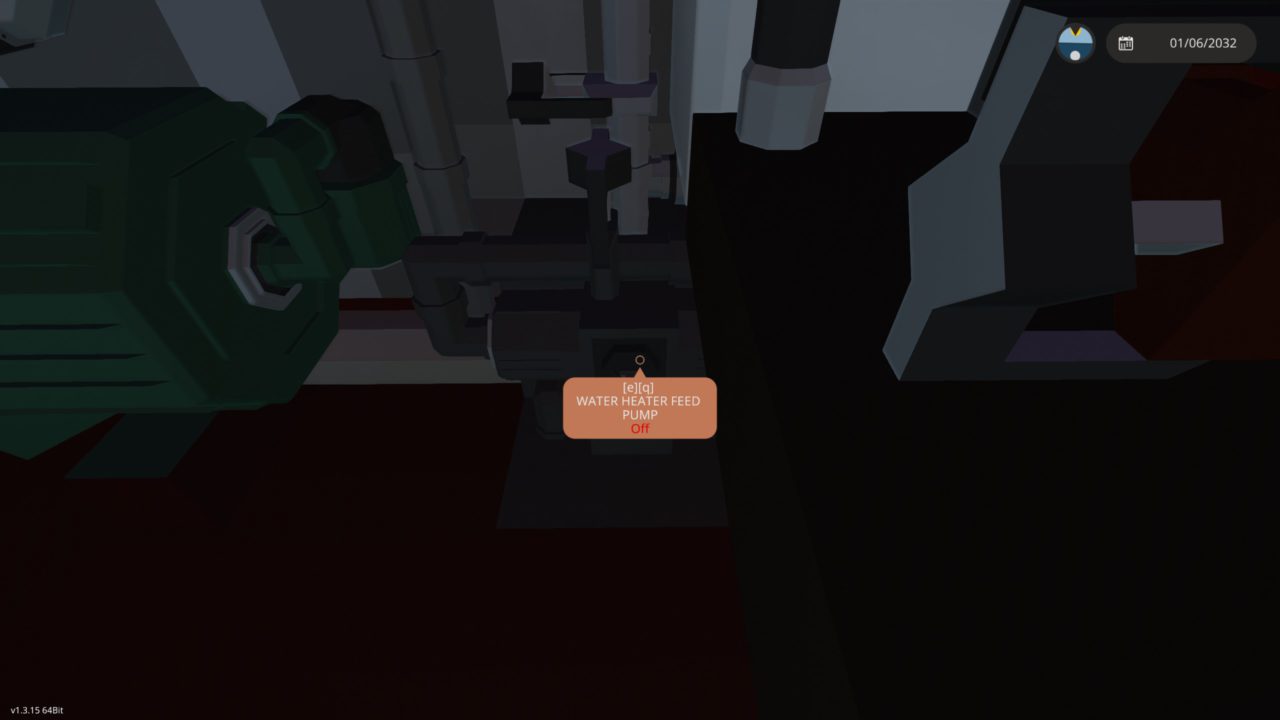
then head over to the water heater feed pump and turn it on.
Head into the engine annex room and flip the compressor power breaker on.

Wreszcie, flip the Compressor on.

To wszystko, co dzisiaj udostępniamy w tym celu Burze: Buduj i ratuj przewodnik. Ten przewodnik został pierwotnie stworzony i napisany przez CR4ZYR003TER. Na wypadek, gdybyśmy nie zaktualizowali tego przewodnika, możesz znaleźć najnowszą aktualizację, postępując zgodnie z tym połączyć.