
- Tytuł: Rogue Company
- Data wydania:
- Wywoływacz:
- Wydawca:
Information about Rogue Company is still incomplete. Pomóż nam wypełnić szczegóły gry za pomocą tego formularz kontaktowy.
Rogue Company is capped to 150 FPS by default. This guide explains how to change that setting.
Setting Framerate Limit Above 150 FPS
Domyślnie, Rogue Company has a framerate cap of 150 FPS. There is no in-game setting for this, so if you want to set it higher or lower, you’ll need to make the following changes to your config file:
Krok 1: Przejdź do:
C:\Users\[Użytkownik]\AppData\Local\RogueCompany\Saved\Config\WindowsNoEditor
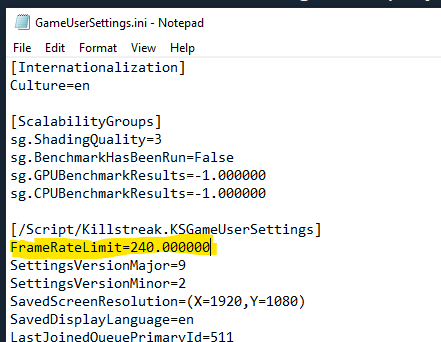
Krok 2: Otwarte GameUserSettings.ini
Krok 3: Pod “[/script/killstreak.ksgameusersettings]”, add the following line:
FrameRateLimit=240.000000
You may change 240 to whatever value you’d like. Zauważ to 0.000000 does NOT seem to uncap the framerate.
Krok 4: Save and close. Uruchom grę.
Notatka: If you find that the file reverts, you may need to set GameUserSettings.ini to read-only. Right-click the file, kliknij Właściwości, add a checkmark to “Read-only” and click OK.
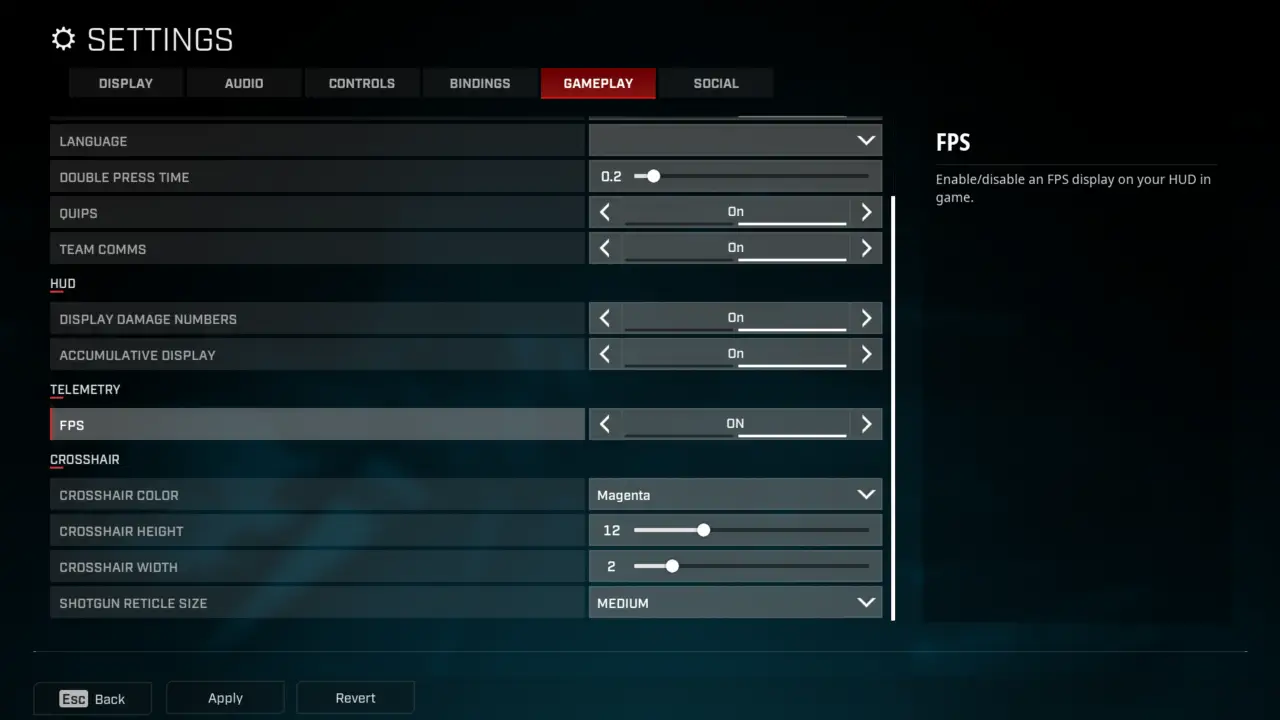
Verify Your FPS
To enable the in-game FPS monitor and verify your change, simply navigate to Settings – Gameplay and set Telemetry – FPS: NA.
Your current FPS will be displayed in the upper-left corner while in a match or in the Shooting Range.
To wszystko, co dzisiaj udostępniamy w tym celu Rogue Company przewodnik. Ten przewodnik został pierwotnie stworzony i napisany przez plagueseason. Na wypadek, gdybyśmy nie zaktualizowali tego przewodnika, możesz znaleźć najnowszą aktualizację, postępując zgodnie z tym połączyć.