- Tytuł: OSTRZEŻONY
- Data wydania:
- Wywoływacz:
- Wydawca:
Informacje o uprzedzeniu są nadal niekompletne. Pomóż nam wypełnić szczegóły gry za pomocą tego formularz kontaktowy.
Are you finding those laser puzzles a bit tricky? Dobrze, Nie martw się! This guide will help you out by providing all the solutions and some tips to make it super easy for you. And guess what? This guide is all set for the latest version, v0.75.2. Więc, let’s get started and solve those laser puzzles together!
Podstawy
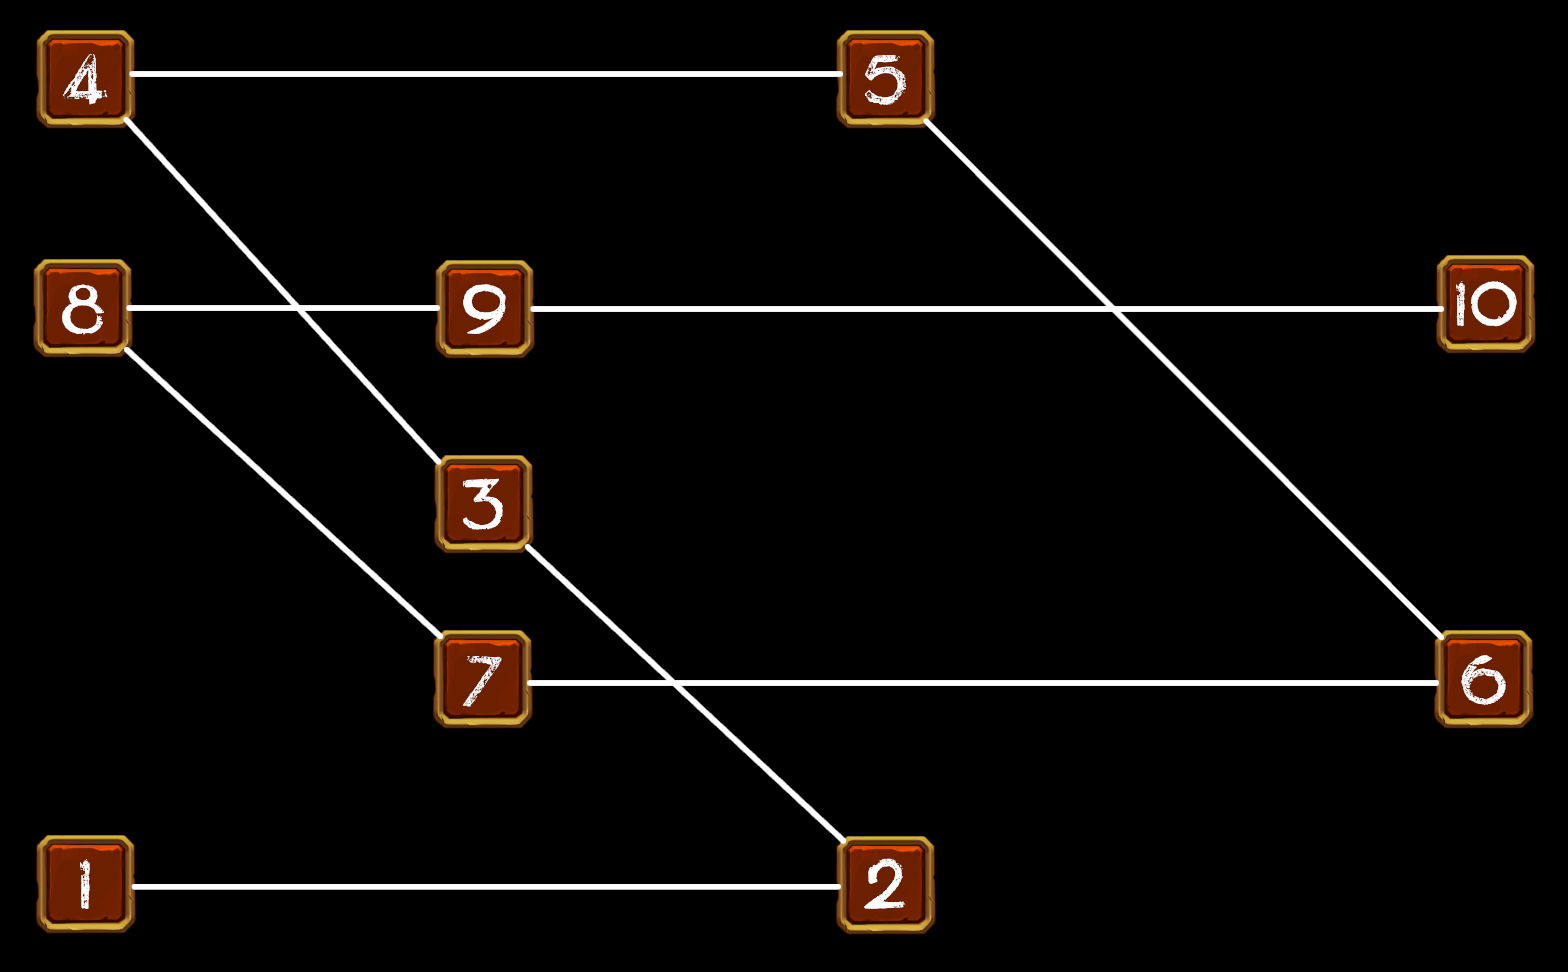
Let’s break it down. W tej grze, a map determines the outer appearance of the tomb and its variations, while a tomb variation determines the unique look and features inside the tomb. When you’re down in the lower tomb and you pull that blue lever, you’ll encounter the laser puzzles. These puzzles always contain 10 crystals and are consistent within each tomb variation.
If you want to delve deeper into maps, I suggest checking out your comprehensive map guide here: Forewarned Ultimate Map Guide and Tips. Pamiętać, even though some puzzles might seem complex initially, most of them can be solved by just rotating crystals to point at the first one they connect to. While some puzzles have multiple solutions, this guide focuses on providing the simplest versions.
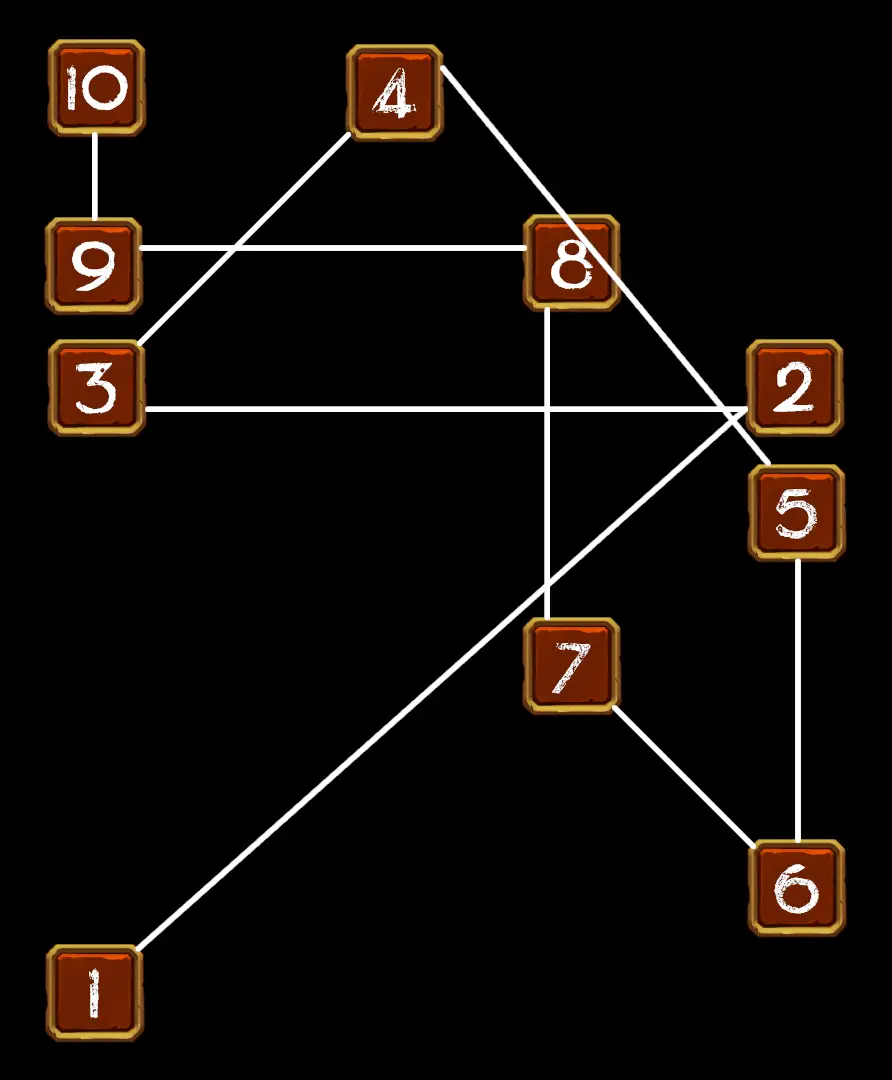
Zmiana grobowca 1 – Grobowiec waniliowy
W porządku, let’s focus on Tomb Variation 1, which includes the maps Cursed Sand Ruins and Crypt of the Great Pyramid.
For these maps, here’s a simple trick to solve the laser puzzle: Start by turning crystal #1 until the laser connects to the second crystal. Potem, the other crystals are set up to be solved by directing the laser to the first crystal it connects to. This method should make it much easier for you to conquer these puzzles. Powodzenia!
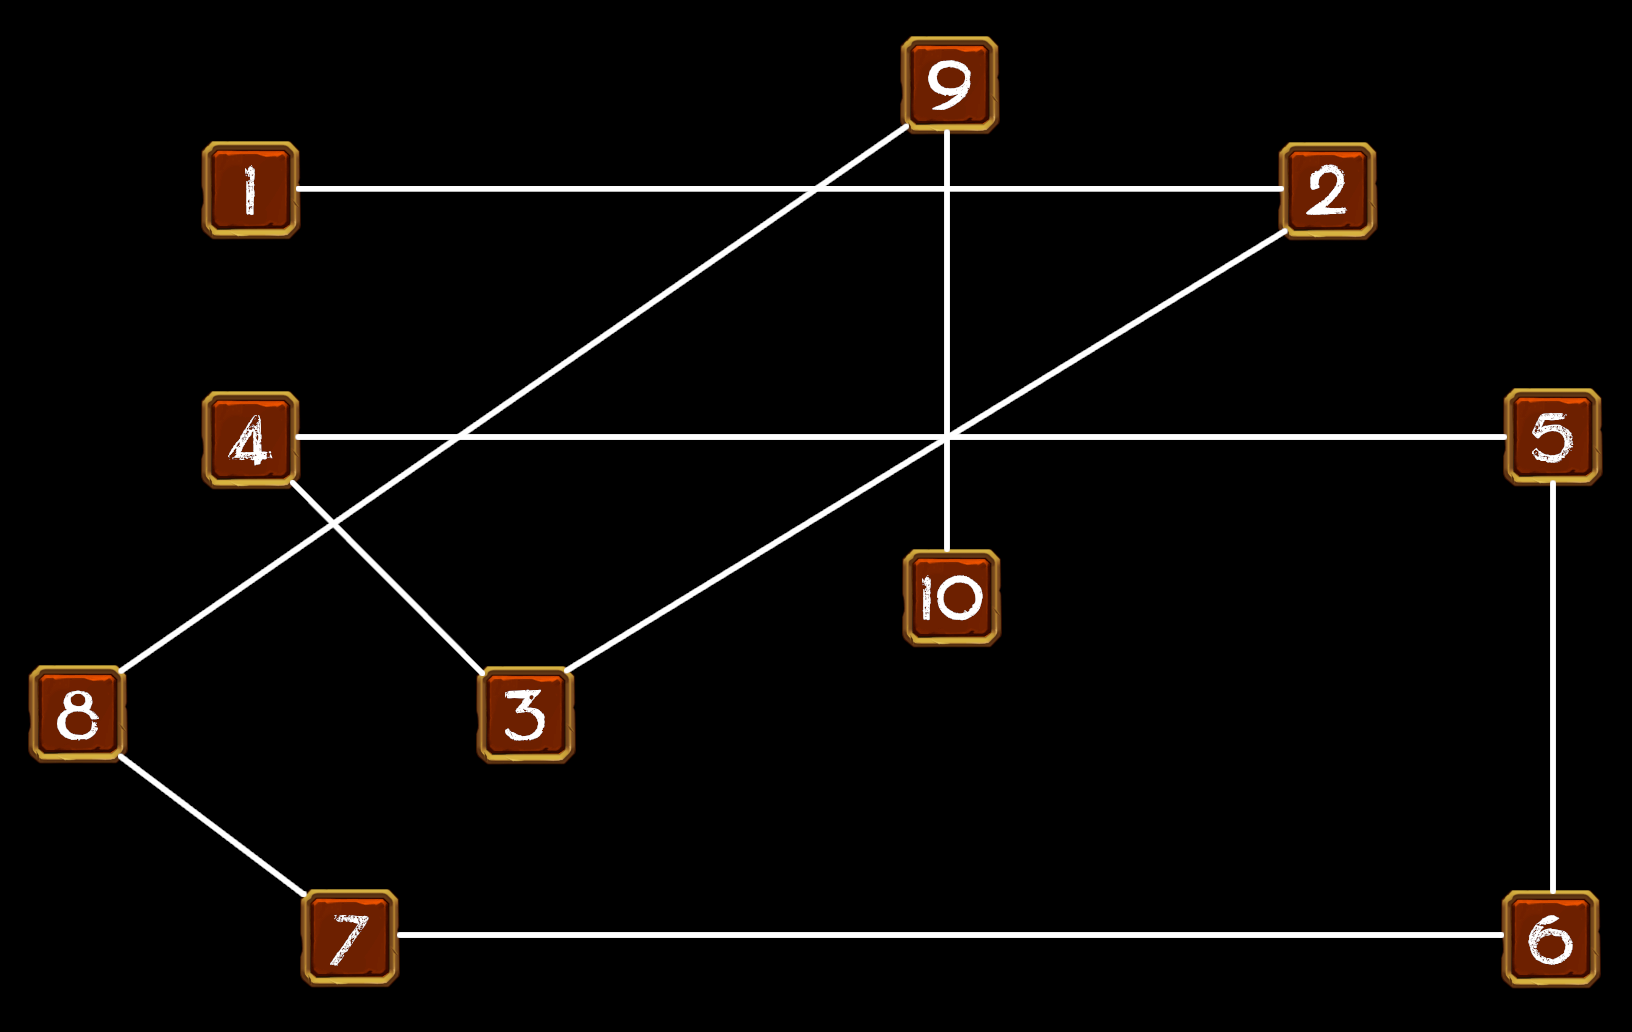
Zmiana grobowca 2 – Grób węża
Teraz, let’s shift our attention to Tomb Variation 2, which includes the maps Temple of the Pharaoh and Undercroft of Akar.
Here’s a handy solution for the laser puzzle on these maps: Rotate the crystals until the laser points at the first crystal it connects to, except for crystal #3, which should skip a crystal. To help you remember this solution, envision the completed puzzle as a clockwise spiral, resembling a snake, which matches the theme of this tomb variation. This should help you breeze through these puzzles!
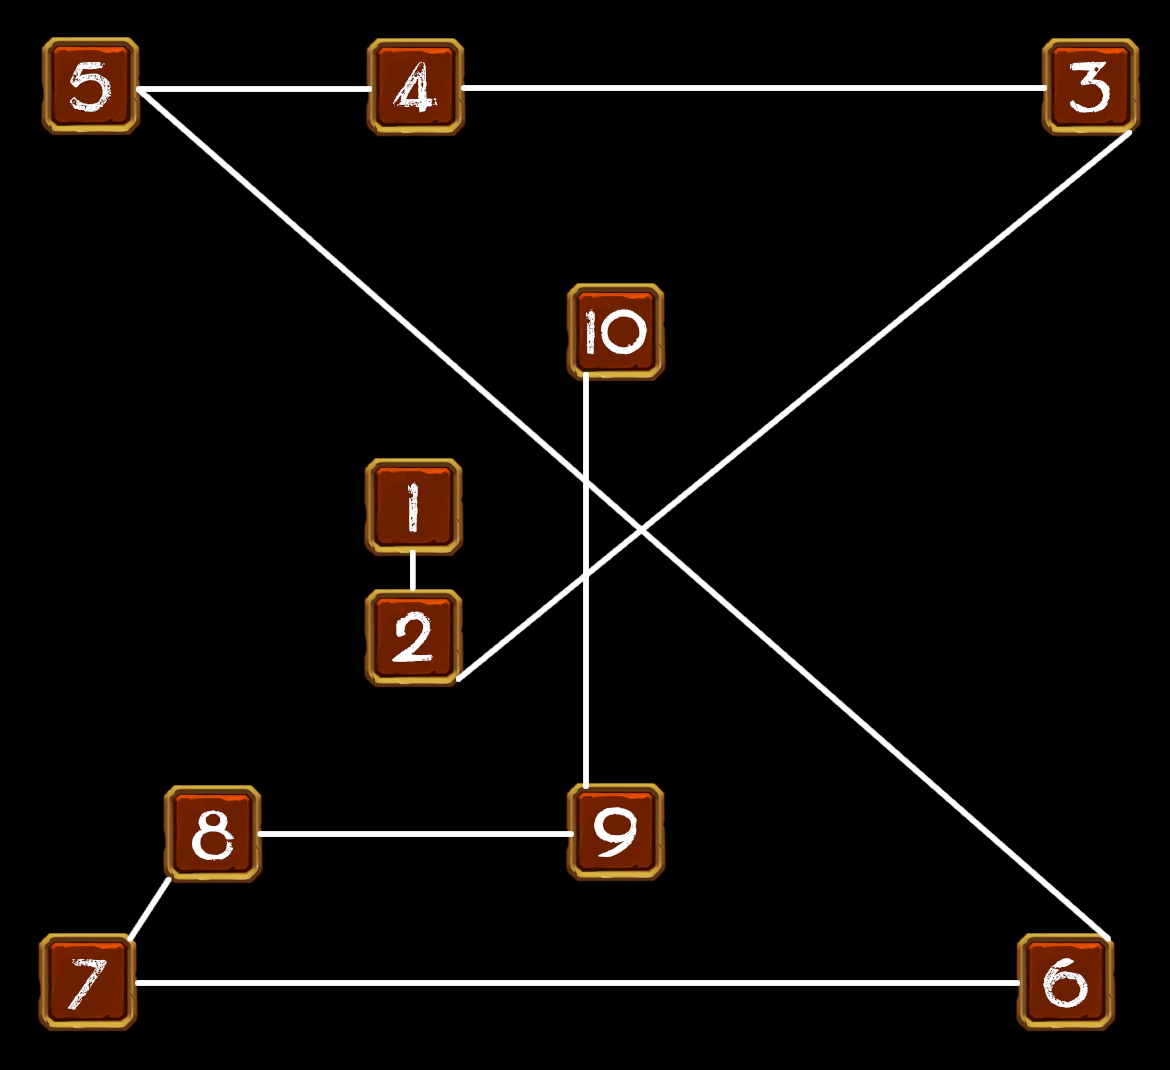
Zmiana grobowca 3 – Grobowiec piasku
Let’s tackle Tomb Variation 3, which includes the maps Sunken Dune Shrine and Hidden City of the Sahara.
Here’s a clever way to solve the laser puzzle on these maps: Rotate the crystals until the laser points at the first crystal it connects to, with the exception of crystal #1 and crystal #3, which should skip a crystal. To help you remember this solution, picture the completed puzzle as an hourglass, symbolizing the sand, which aligns with the theme of this tomb variation. This should make these puzzles a breeze for you!
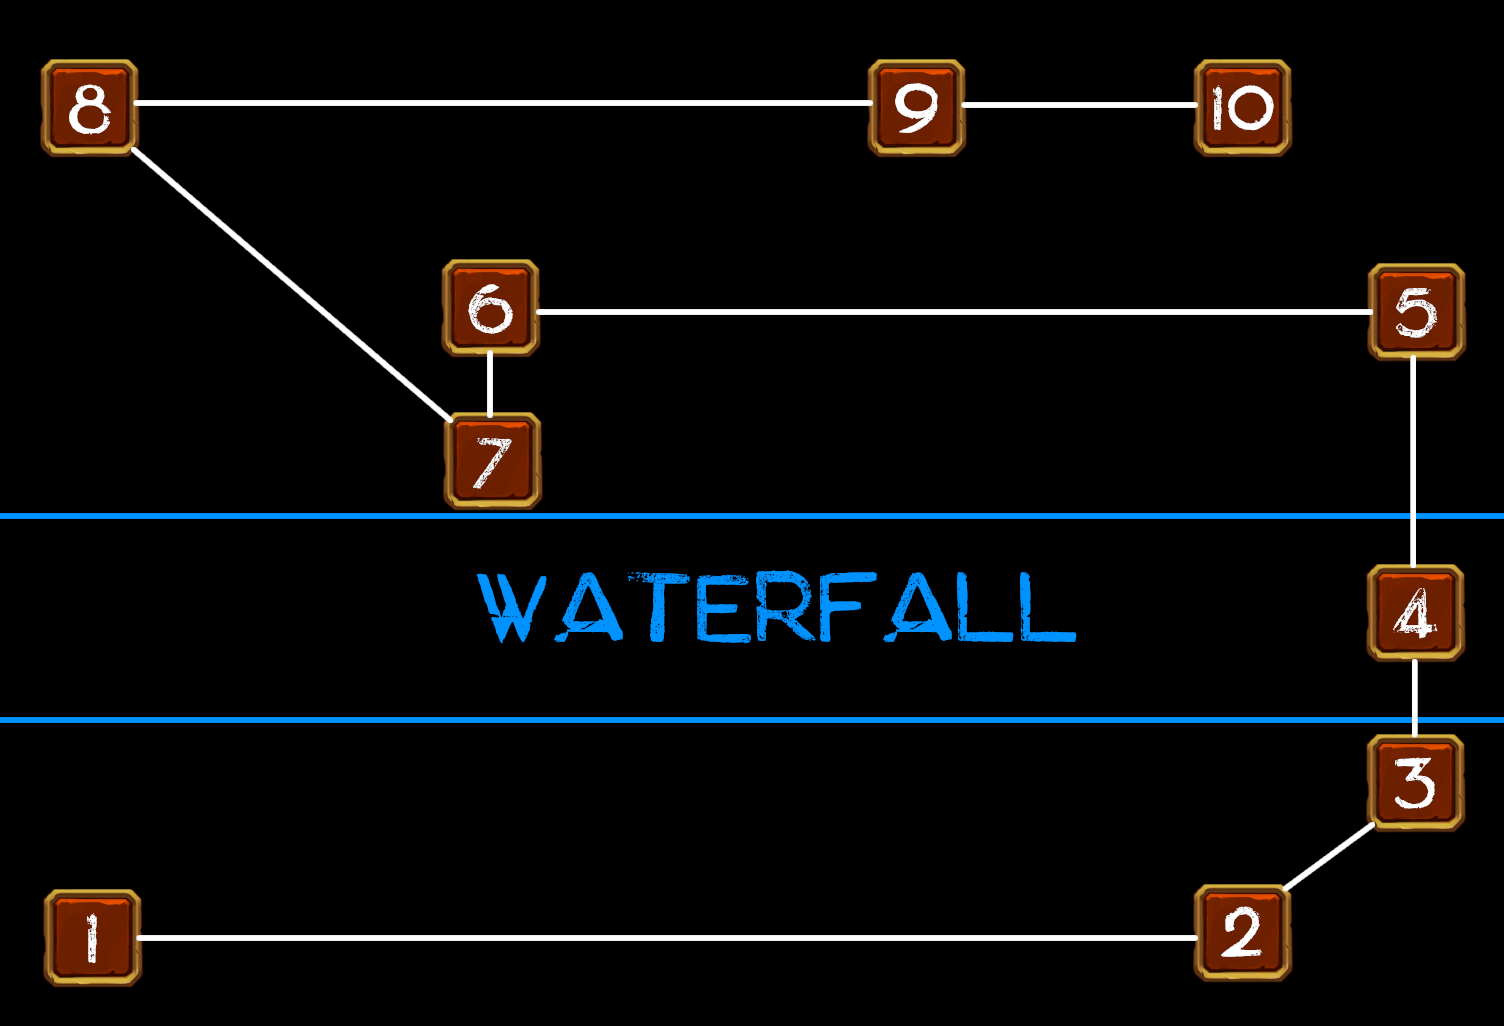
Zmiana grobowca 4 – Oaza
Teraz, let’s delve into Tomb Variation 4, which includes the maps Sobek Oasis (Noc) and Sobek Oasis (Dzień).
To conquer the laser puzzle on these maps, follow this strategy: Rotate the first three crystals until each one connects to the second available crystal. Potem, every crystal should connect to the first available crystal the laser reaches.
To help you remember this solution, keep in mind that the laser must pass through the right-hand waterfall. The remaining crystals are designed to be solved by pointing to the first available crystal. This should make these puzzles a walk in the park for you!
Zmiana grobowca 5 – Podziemny pałac
Świetnie, now let’s explore Tomb Variation 5, which includes the maps Dread Valley and Nekhbet Chasm. The solution for this variation is identical to Tomb Variation 1:
To conquer the laser puzzle, start by rotating crystal #1 until it connects to the second crystal the laser points to. Potem, the other crystals are arranged to be solved by directing the laser to the first crystal it connects to. This method should work smoothly for these puzzles as well. Powodzenia!
To wszystko, co dzisiaj udostępniamy w tym celu OSTRZEŻONY przewodnik. Ten przewodnik został pierwotnie stworzony i napisany przez A Aryveryheena. Na wypadek, gdybyśmy nie zaktualizowali tego przewodnika, możesz znaleźć najnowszą aktualizację, postępując zgodnie z tym połączyć.