In Easy Red 2 is possible to create custom color corrections. Oto jak możesz to zrobić.
Creating the LUT Texture
LUT (Lookup table) textures are sprites used to map each possible color that the PC can represent into another. With look texture, you can basically create color filters for the game.
A LUT texture looks like this:
![]()
To make your own one, you will need to take a neutral LUT texture (which is a texture that maps each color to itself, without adding any color correction) and edit it with an image editing software to add the desired color and light correction.
To make this easier, you can color correct a screenshot from the game with disabled color correction, and replicate the same applied correction to the neutral LUT texture. In this way, the correction applied to the screenshot will be the same correction the LUT will apply to the game.
This screenshot is a non-color corrected image from the game, and the LUT texture inside it is the neutral LUT texture.
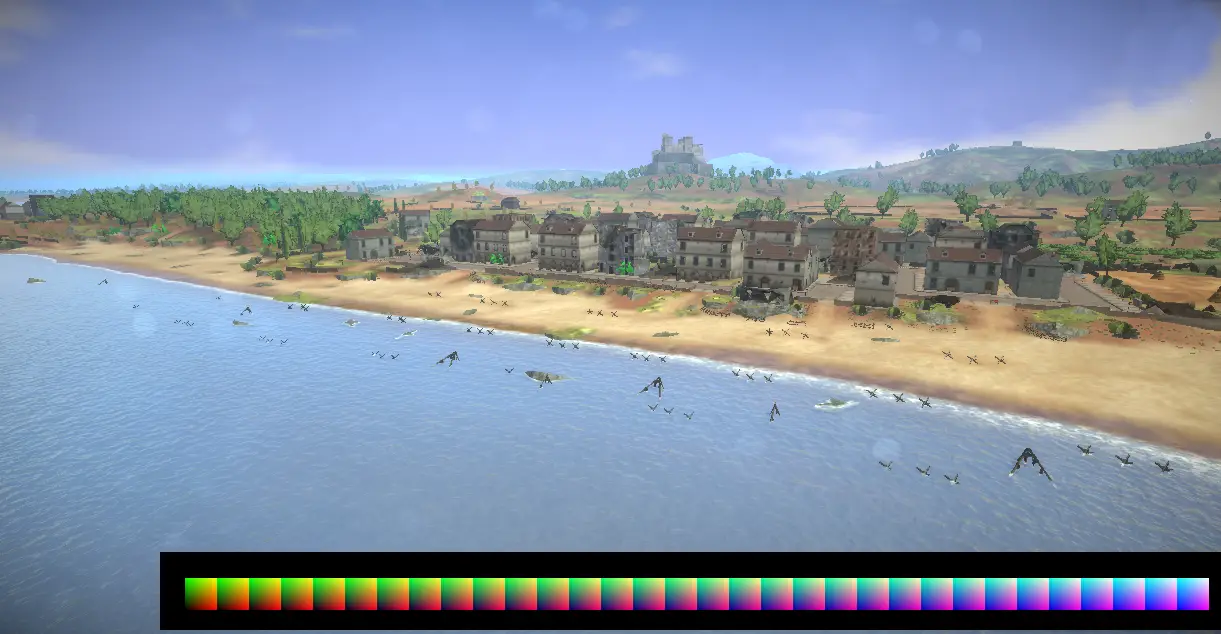
So what you need to, is take this image, and with photoshop, gimp or similar software apply some color correction (hue shift, saturation, lightness change, itp), then you will have to extract the LUT texture in an isolated image. Make sure the LUT stays 1024×32 pixels, as it is inside the screenshot.
Adding the LUT Texture to the Game
The next step is navigating on your PC to the folder
C:\Users\YOURUSER\AppData\LocalLow\CorvoStudio\Easy Red 2\lut
or for Linux,
~/.config/unity3d/CorvoStudio/Easy Red 2/lu/
and place the created LUT texture inside it.
Now you can start the game, open the settings menu, and the LUT texture you created will appear in the “color correction” dropdown:
To wszystko, co dzisiaj udostępniamy w tym celu Easy Red 2 przewodnik. Ten przewodnik został pierwotnie stworzony i napisany przez Marco Amadei. Na wypadek, gdybyśmy nie zaktualizowali tego przewodnika, możesz znaleźć najnowszą aktualizację, postępując zgodnie z tym połączyć.