Here’s an easy guide to help you make cool thumbnails for your texture and music packs on the workshop. This guide will make your content really stand out!
Invoering
Have you ever looked through the workshop and seen some texture packs or music packs that don’t just use the preview the editor makes? They have their own custom look. Maybe a music pack catches your eye without showing the generated title as a thumbnail. Have you wondered how they do it since the game doesn’t let you choose when you upload?
It’s not as hard as you might think. It’s pretty simple, almost like making a custom thumbnail for a level with just a couple more steps. Dus, let’s dive into it without any more delay.
Voorbereiding
The steps are pretty much the same whether you’re working on texture packs or music packs. I’ll mainly explain using the texture pack process, but I’ll mention any differences.
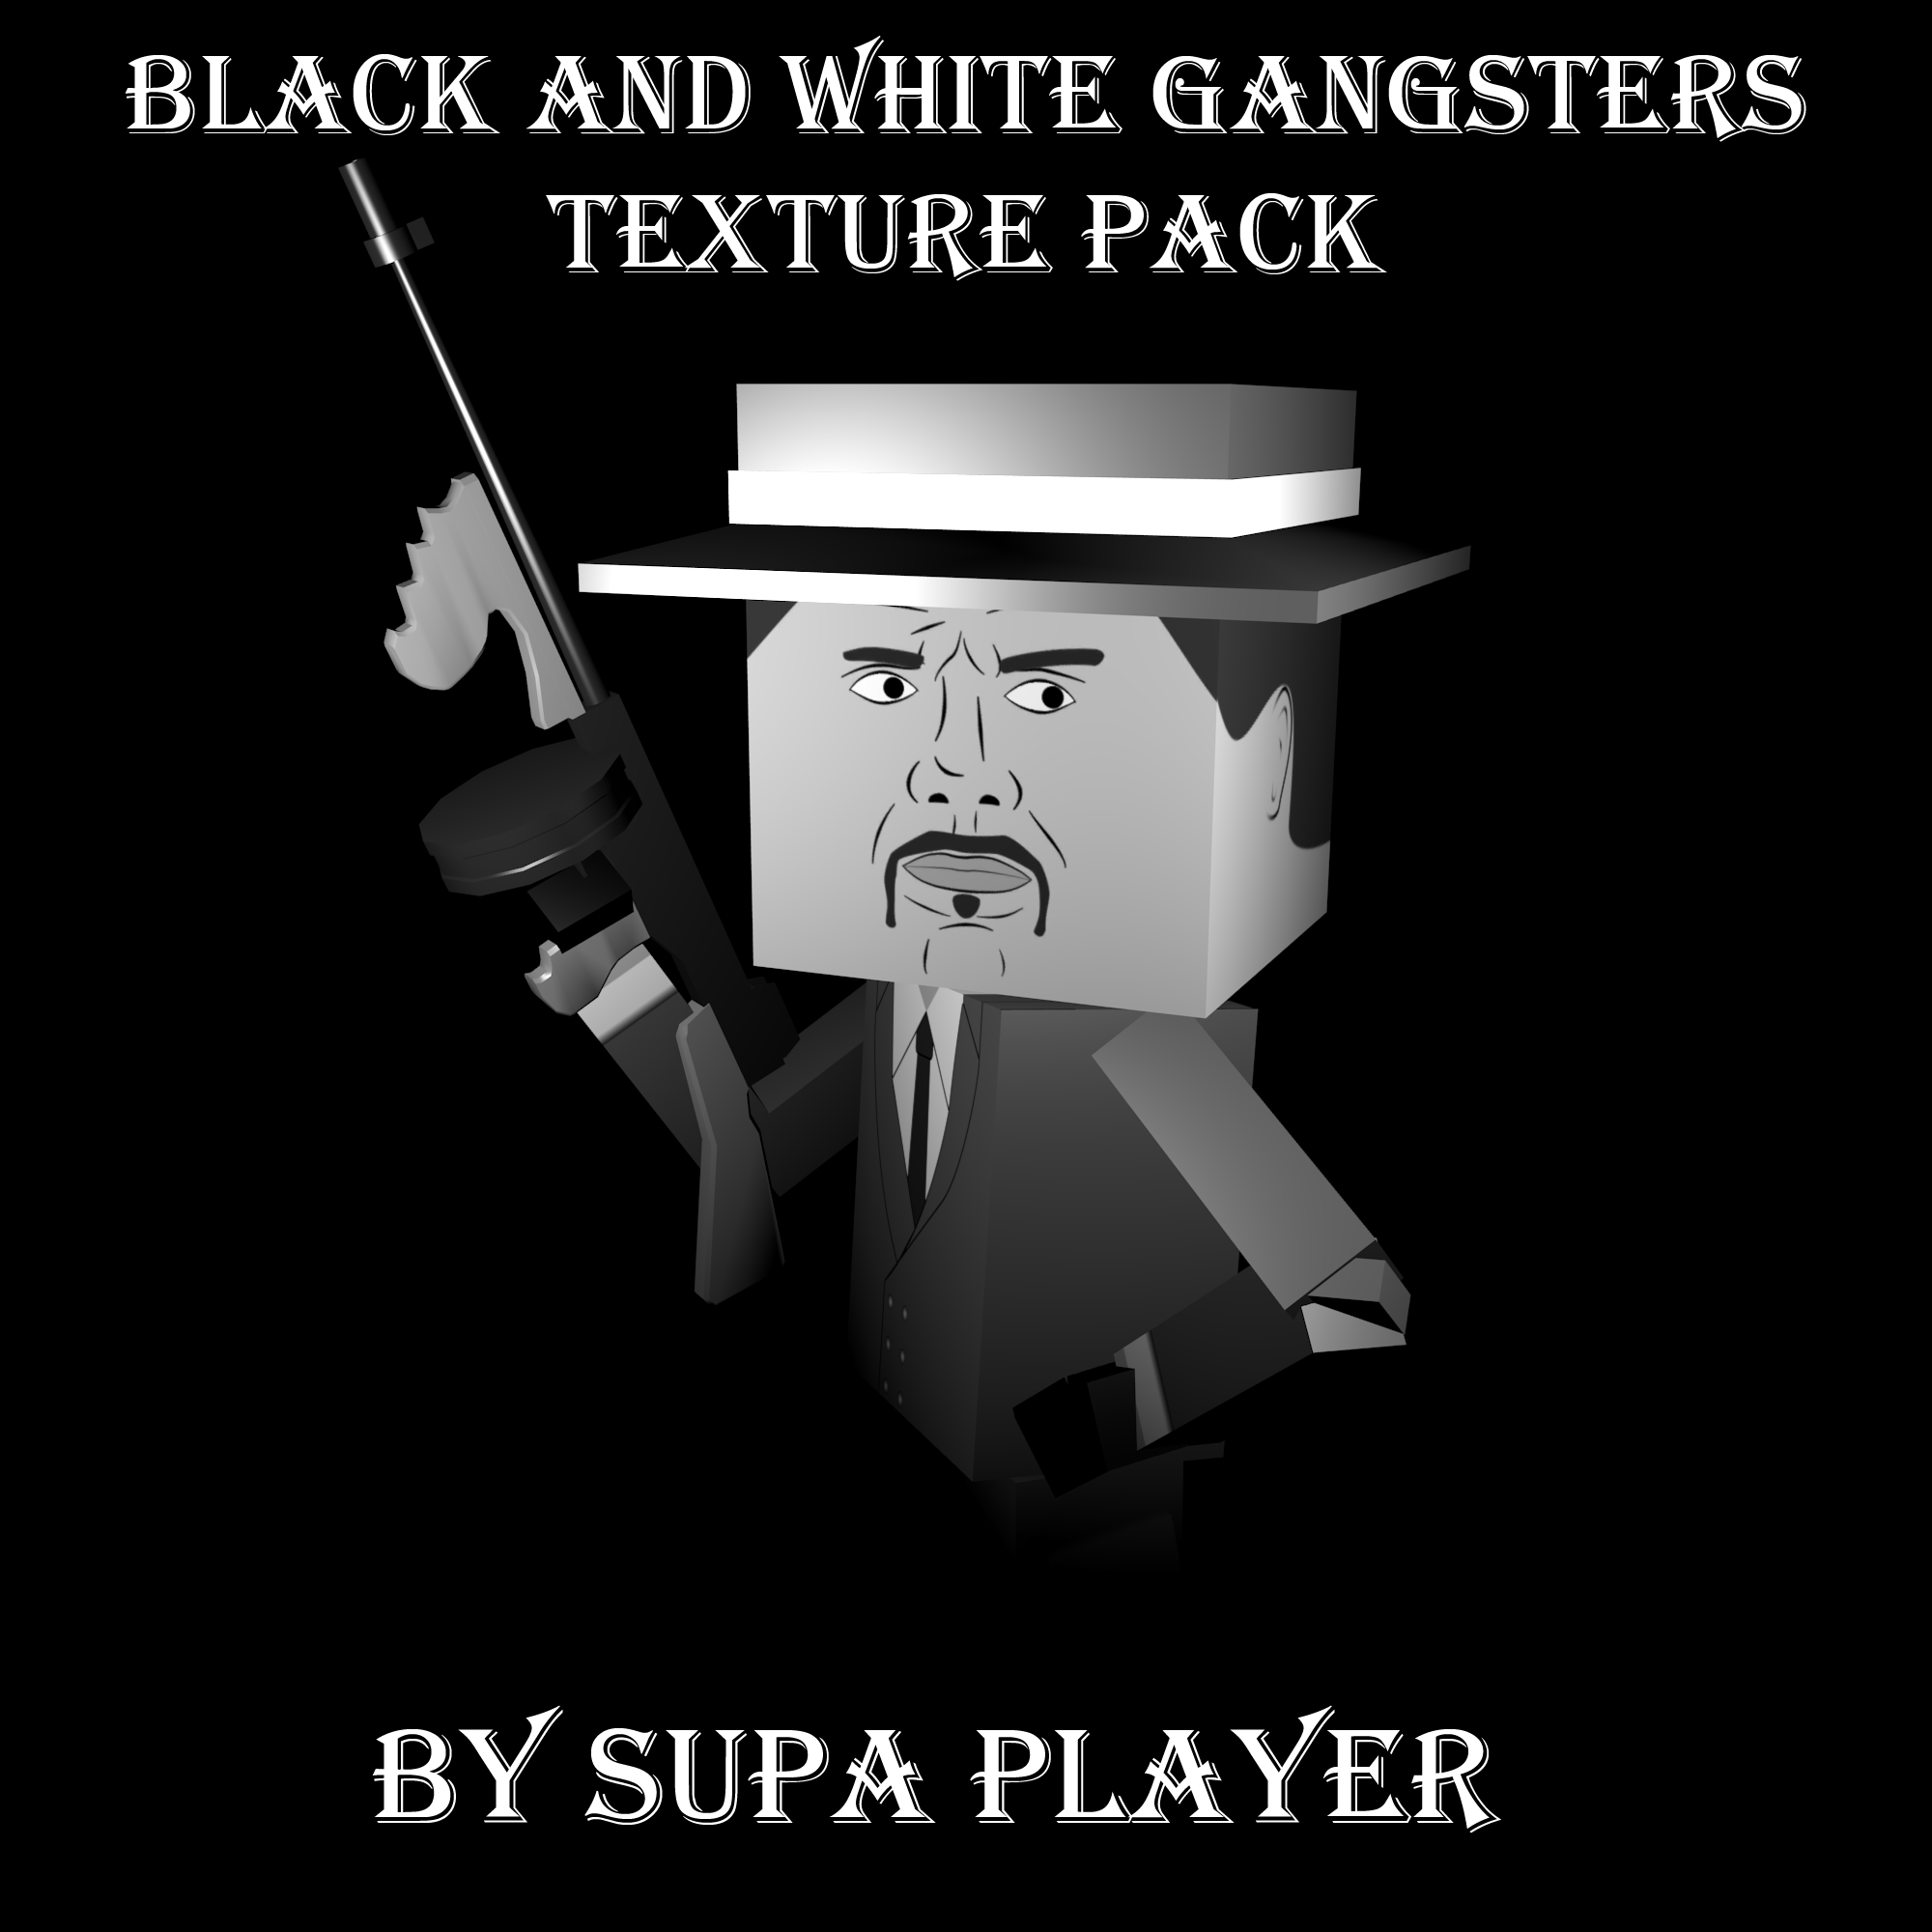
Hier, we’ve got our texture pack thumbnail all set, edited, and good to go. It’s a square shape and not too high-res for a smooth upload. This image, in dit geval, is one I made for a texture pack in a mapmaker contest before.
Volgende, we have to open Paint the Town Red and go into the texture editor. Echter, we can’t add the thumbnail file to the game just yet. If we do, it’ll get overloaded every time we make a new texture pack because the game will use its default generated thumbnail.
In the Editor
While you’re in the texture editor or music editor, open all the textures or tracks you want in your pack. Daarna, click the upload button (but don’t upload the pack yet). You’ll see a preview of your pack, something like this:

Look at the automatically generated lineup of textures; you can’t change it yourself. Music packs will show something similar, usually the pack’s title on a gradient background. Hoewel, due to an unknown update, it glitched, and now it doesn’t show any text.
Nu, when your pack is all set and ready to be uploaded, make sure to stay on this preview screen. The next step involves replacing the auto-generated thumbnail with your own during the actual upload process.
Swapping the Thumbnail
Because the game doesn’t let you change the thumbnail within the game itself, we’re going to use a different way to switch the thumbnail, similar to how you do it for a level thumbnail. This means we’ll have to leave the game and go into the game’s files. Volg deze stappen:
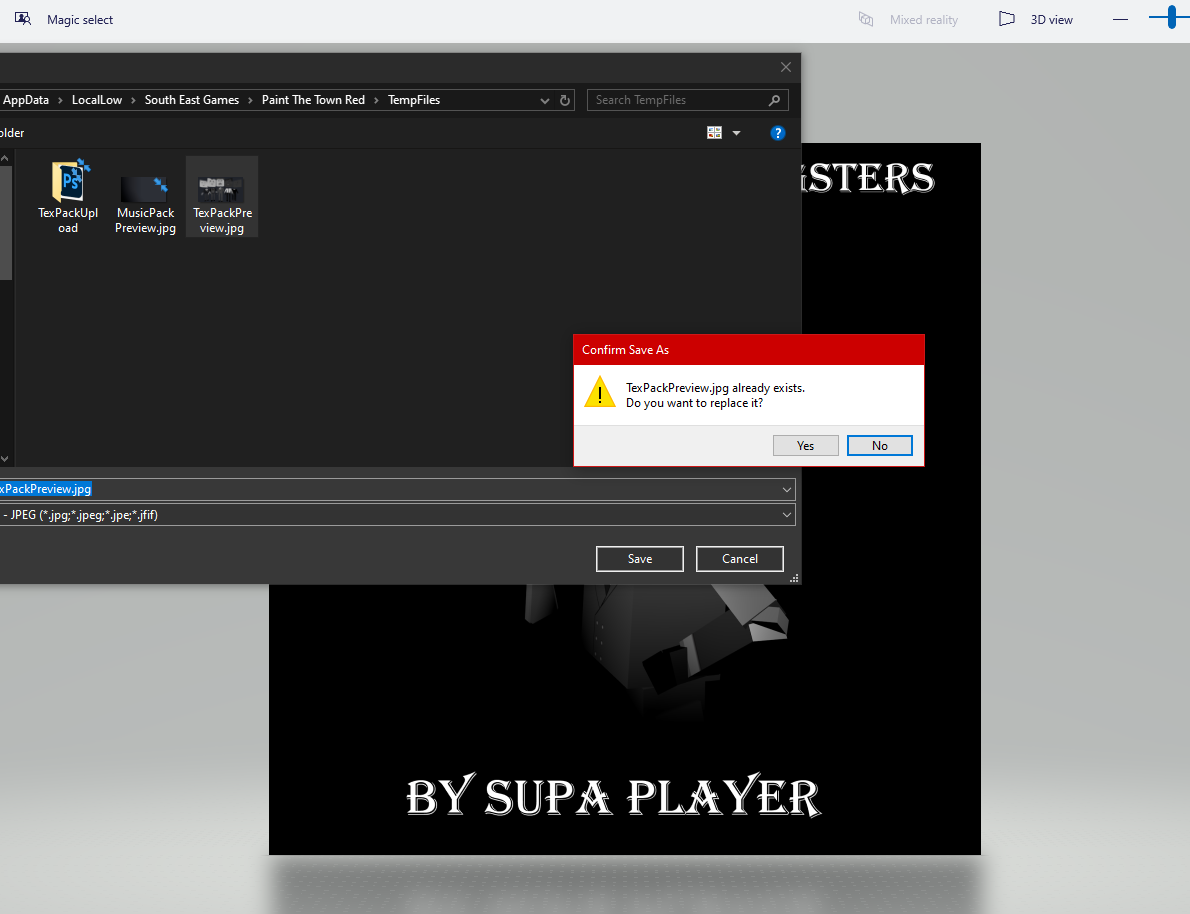
Open File Explorer and go to this place:
AppData\LocalLow\South East Games\Paint The Town Red\TempFiles
Now find a JPG file called “TexPackPreview.jpg” if you’re dealing with texture packs. For music packs, zijn “MusicPackPreview.jpg.” If you open these files, you’ll see they’re the exact files the game uses for the pack thumbnail. Nu, let’s swap it out.
Take your custom thumbnail and open it in any image editor. I’m using Microsoft Paint 3D for this example because it’s quick and easy. Gebruik de “save file as” option for your thumbnail and find the directory mentioned above. Choose the file you want to replace (of “TexPackPreview.jpg” of “MusicPackPreview.jpg”).
Klikken “redden ” and make sure a popup asks if you want to overwrite the file. Bevestigen, but don’t click “bevestigen” nog. Nu, let’s go back into the game.
Nu, it’s time for the swap, and we need to be quick about it.
While in Paint the Town Red, klik op “upload pack” to send the item to the workshop. While it’s uploading, quickly tab out of Paint the Town Red again. Return to your chosen image editor and click the confirmation option to replace the file.
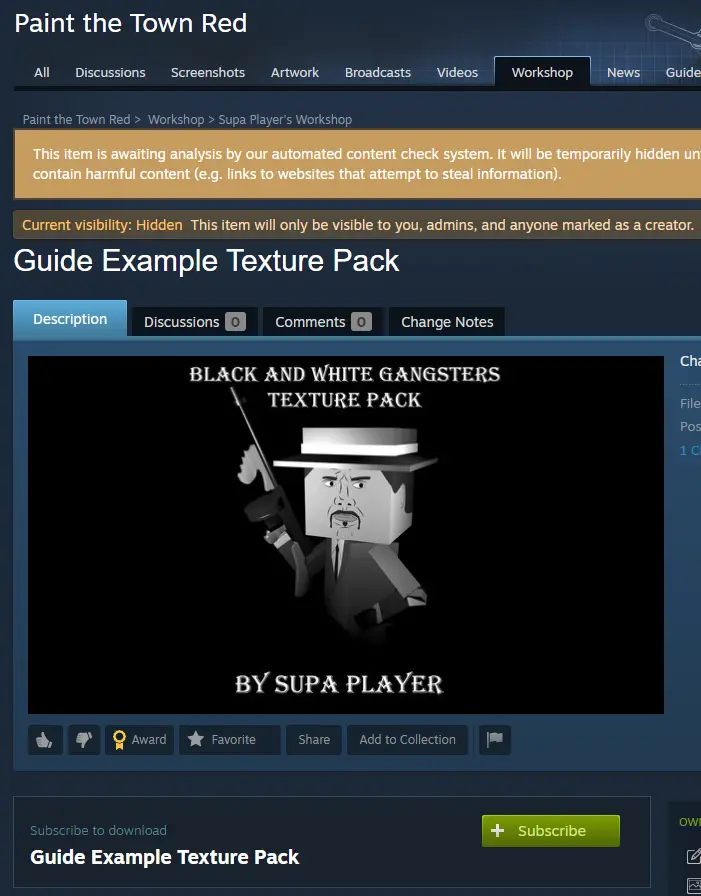
If you’ve done it fast enough, the game will let you see your workshop item. Voila! Your texture or music pack will now have a custom thumbnail instead of the default auto-generated one.
If everything goes smoothly, the workshop item should look like this after the upload:
Conclusie
Opnieuw, this process is quite simple, but it might need a bit of practice to master because you have to act swiftly to swap the files. Paint the Town Red doesn’t provide a direct method to do this within the game. It might take a few tries, and you might need to delete the workshop item and try again if it doesn’t work initially. Echter, the effort will be worthwhile when you successfully upload the item with a fantastic-looking thumbnail that’s sure to grab attention.
If you have any questions, feel free to ask them in the comments below.
Dat is alles wat we vandaag hiervoor delen Schilder de stad rood gids. Deze handleiding is oorspronkelijk gemaakt en geschreven door Supa Player. Voor het geval we er niet in slagen deze handleiding bij te werken, U kunt de laatste update vinden door dit te volgen link.