- Titel: Hammerwatch II
- Releasedatum:
- Ontwikkelaar:
- Uitgever:
Information about Hammerwatch II is still incomplete. Help ons alstublieft de details van het spel hiermee in te vullen contactformulier.
This guide will explain how to unlock all the achievements in Hammerwatch 2. Keep in mind that some achievements are not fully completed yet. If you have any ideas on how to earn these achievements, please share them with us.
Vrijwaring: This guide includes spoilers and is intended for those aiming to complete their achievement collection.
Boss Achievements

Arachnophobia
Kill the Shock Widow
Spider Caverns has a boss called Shock Widow behind a skull-marked entrance. You can access it from Wolf Cave or after freeing Ria van de Prison op Hammer Island.


Barred
Defeat Barrington
You will eventually come across an entrance with a boss skull on it on the third floor of the Thieves Tower while exploring it; within is Barrington. You must start the “I’ll Be The Hooker” quest from Garth, which is northwest of the Royal City of Adventurine (1 op de kaart), before you can enter the Thieves Tower. Then he gives you the go-ahead to see his friend Kalia south of the Royal City of Adventurine (2 op de kaart). When you begin the “Dack Unmasked” quest from Kalia, you will be told to enter the Thieves Tower by a hidden entrance that Kalia will provide the code for (3 op de kaart).


Dreaded Judge
Defeat the Judge
The Judge is housed in a dungeon called Obsidian Spire, which is north of Sild. WORK-IN-PROGRESS

Het einde
Defeat Blight
WORK-IN-PROGRESS

Ghost Buster
Defeat Dace
You must go to the Wishless Resting Place in south Fallowfields if you want to defeat Dace. Eenmaal binnen, you must make progress in the tombs and join the Children of Sai. When you eventually arrive at the chamber with the boss icon, descend the stairs to engage in combat with Dace.


Rescued at Last!
Defeat and Restore Malgar to Her Former Glory
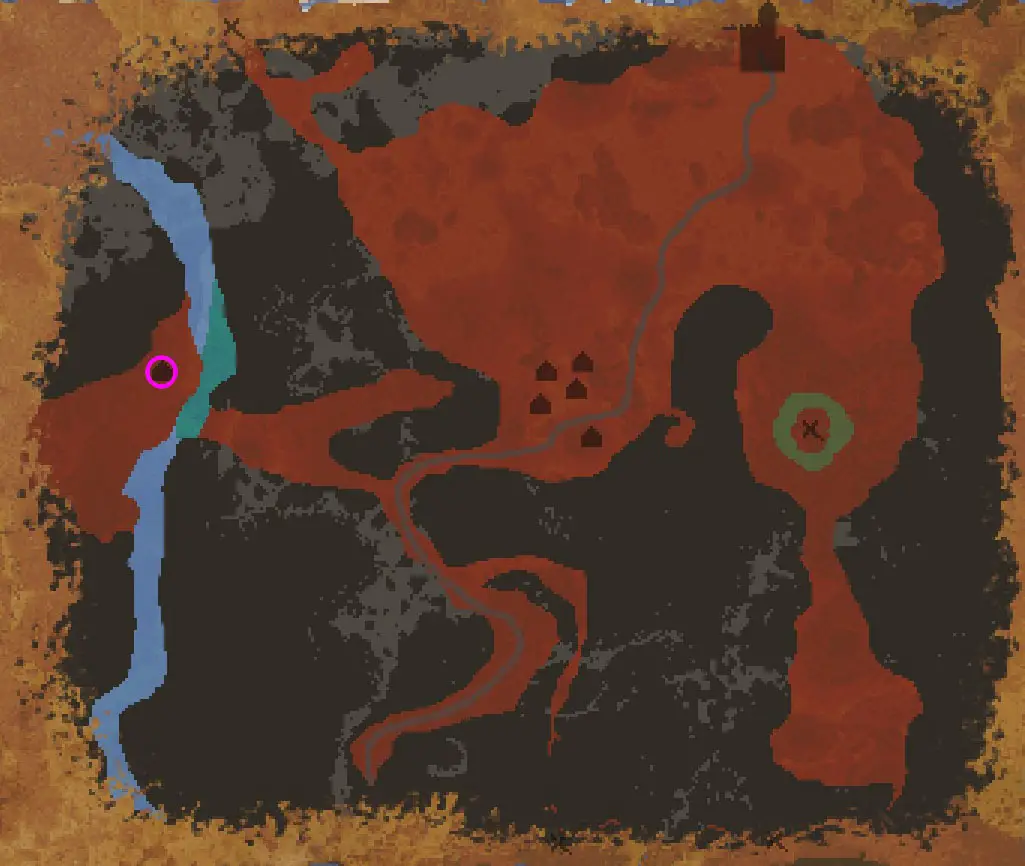
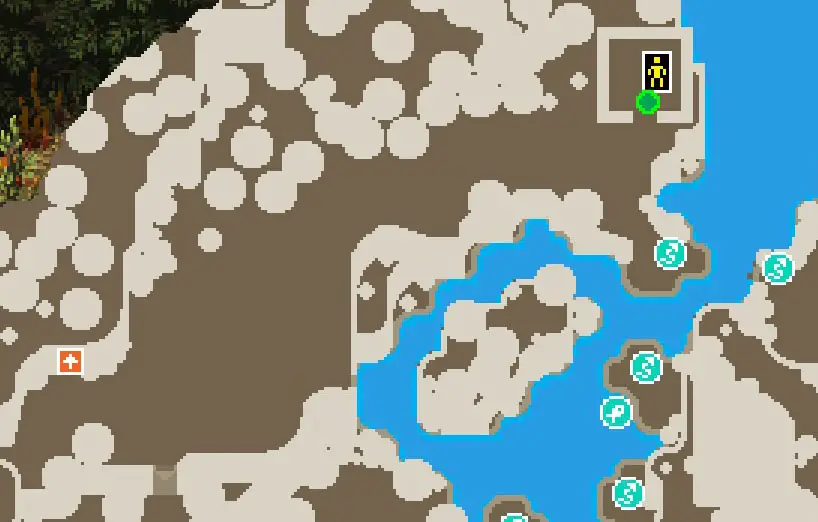
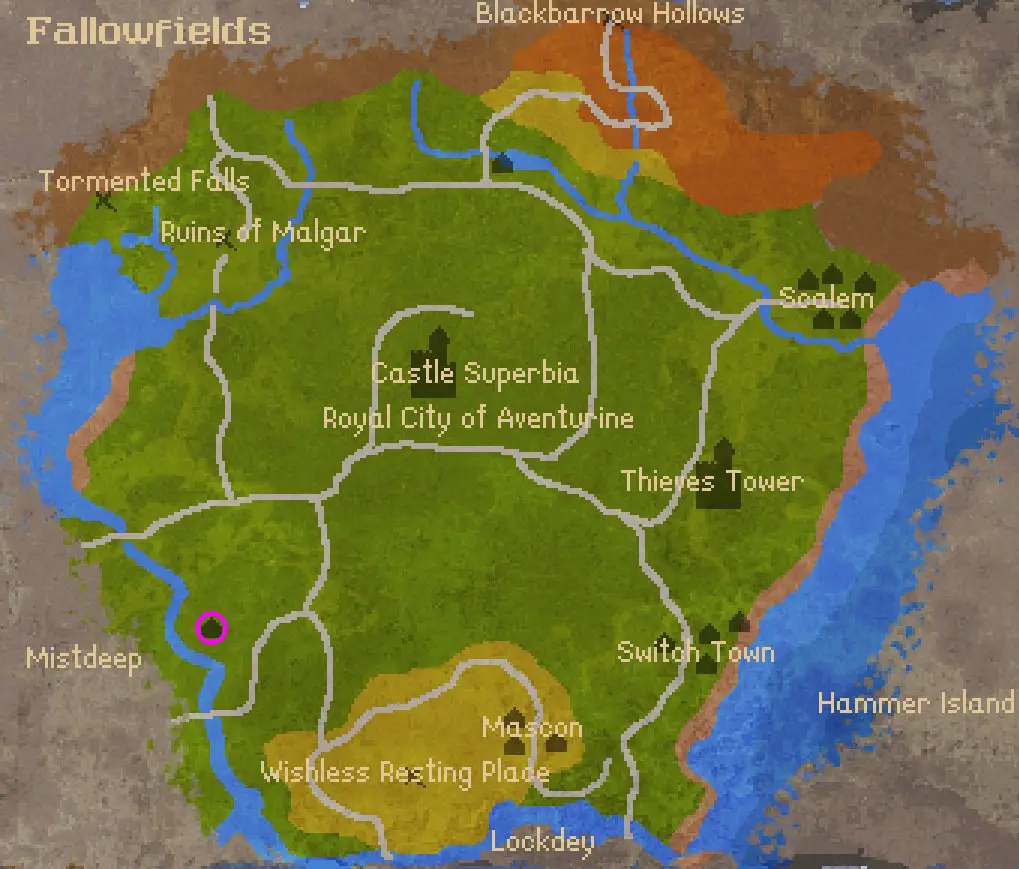
There has been a lot of planning done to permanently vanquish Malgar. In order to permanently beat this boss, which necessitates moving forward to a specific point in the main plot, you must first obtain Agnessa’s Medallion. De “Faux Orbuculum” task will be given to you, and it will direct you to Jyn (1 op de kaart), who is located southwest of Fallowfields, where she can tell you your future.
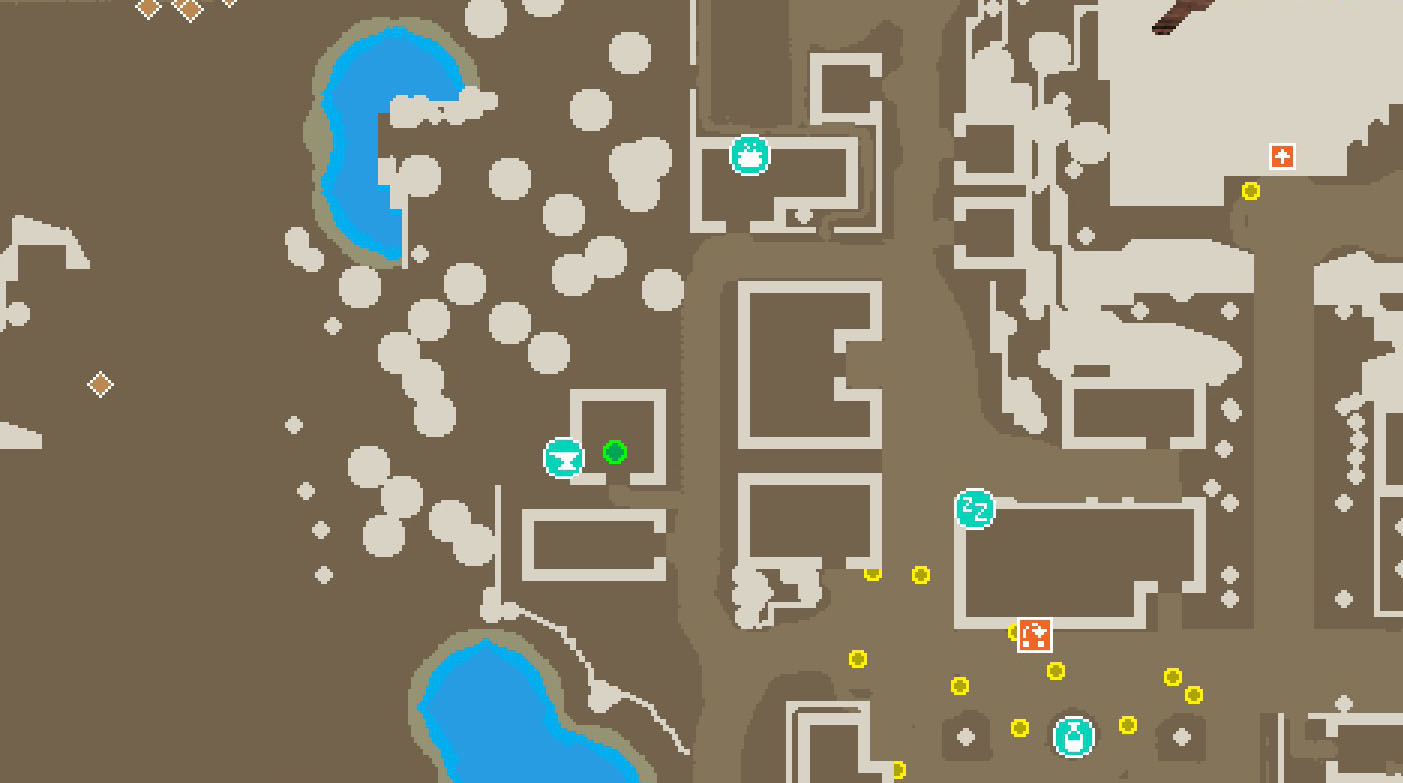
You will then receive a puzzle that will direct you to the blacksmith in the Royal City of Adventurine (located at position 2 op de kaart). Go back to Jyn and get Agnessa’s Medallion by entering her cellar. You can assist in dispelling the fog by locating The Loop of Light in the Wishless Resting Place south of Fallowfields (* on map), while it is not necessary for defeating Malgar. You must use a shovel inside to dig it up if you want to find it. You must move forward and defeat Malgar (3 op de kaart) if you don’t want that or have already obtained it. Put the amulet around her neck once you’ve defeated her to render her helpless forever.


Ultimate Doom
Defeat Doombringer
WORK-IN-PROGRESS

Walking the Plank
Defeat Sinkage
You’ll be told to head to the Pirate Hideout on Hammer Island at the beginning of the game. You must overcome Sinkage in order to move on to the mainland.

Completion Achievements

Boaring
Doden 500 Boars
West Fallowfields is where boars are most frequently seen.

Court Adjourned
Doden 1000 Archons
The Obsidian Spire in Blackbarrow’s north is home to archons.

Crab Rave
Doden 25 Crabs
WORK-IN-PROGRESS

I Am The Walrus
Doden 100 Frost Beetles
Only the grotto in Astral Heights holds the Frost Beetles. Take the Griffin to Brisk Observatory to get there.

Not On My Wasp!
Doden 1000 Wasps
Both southern and northern Fallowfields, as well as Blackbarrow, have wasp nests.

Now You’re Hooked!
Doden 1000 Piraten
One of your first foes to face up against is a pirate. As far as I know, Hammer Island is the only place you may engage in pirate combat.

That’s Not a Snowman!
Doden 250 Shamblers
The trolls are being fought by shamblers in the caves that lead to Blackbarrow.

Thieves Guild
Doden 1000 Thieves
Thieves are located in the Thieves Tower, who would have known?

What Big Teeth You Have!
Doden 1500 Wolven
Perhaps bugs are the most frequent opponent type, but I think wolves are the most frequent. They can be found in Blackbarrow, east Fallowfields, and Hammer Island.

Who’s Tripping Over My Bridge?
Doden 500 Trolls
If you’re seeking for a large population of trolls, head to Blackbarrow Hallows in northern Fallowfields. Trolls can also be found in the mountain caverns.

You’ve Alerted the Horde
Doden 3000 Horde
The undead are the horde. They can be encountered in cemeteries at night and in the corrupted Ruins of Malgar, where they are most frequently found.

Reach Adept
Train to Adept Tier
You’ll initially sail to Switch Town after defeating Sinkage and being given the ability to leave Hammer Island. The Adept Trainer is there, and for 1500 goud, they will train you to become an Adept, enabling you to use skill points to learn new skills and put on better equipment.


Reach Expert
Train to Expert Tier
You may find the Expert Trainer close to the town’s center once you arrive at the Royal City of Adventure. To become an Expert, you must reach level 15 and have 5000 goud, after which you can use skill points to learn even more new skills and put on the newest gear.


Reach Master
Train to Master Tier
You will enter Blackbarrow after leaving the caverns in quest of Captain Danielle Skinner, where you will find Skinner’s Griffin and the Master Trainer a little ways up the road. You must reach level 30 and have 15000 gold to be trained as a Master, which enables you to learn every talent in your skill tree and put on every piece of armor.

Level Cap
Reach Level 50
You can unlock this achievement after you reach Level 50, and as it states, there are no levels beyond that.

Hard Challenge
Beat the game on Hard
Complete the main questline on the Hard difficulty, as stated in the description, to unlock it.

Serious Commitment
Beat the game on Serious
Complete the main questline on the Serious (hardest) difficulty to unlock it, as stated in the description.

De-Ranged
Beat the game as Ranger
Complete the main questline as the Ranger to unlock it, as specified in the description.

Devilish Pact
Beat the game as Warlock
Complete the main questline as the Warlock to unlock it, as specified in the description.

Opportunist
Beat the game as Rogue
Complete the main questline as the Rogue to unlock it, as it is specifically stated in the description.

Shining Knight
Beat the game as Paladin
Complete the main questline as the Paladin to unlock it, as specified in the description.

You’re a Wizard!
Beat the game as Wizard
Complete the main questline as the Wizard to unlock it, as specified in the description.
Diverse prestaties

A Bald Plan
Capture Archibald
WORK-IN-PROGRESS

Belt Potion
Obtain and Equip any potion.
The potion maker will be one of the first NPCs you encounter on your way to Haart’s Landing. If you successfully finish her quest, you will receive a potion, and if auto-equip is enabled, you should also receive the accomplishment. Zo niet, put the potion on to achieve the goal.


Champ of Gadir
Win a game against someone in the card game Walls of Gadir.
You can play and win at Walls of Gadir gamblers anywhere in the world to complete the achievement.


Nine Lives!
Kill the crypt cat nine times.
A vendor and quest giver may be found in the Wishless Resting Place once you join the Children of Sai. To unlock this accomplishment and turn into a monster, kill the cat there nine times in a row.

Suit Up
Change the colors of your dress.
I’m aware of only one tailor in the entire game who can change the color of your character’s equipment. The Royal City of Adventurine is where they are situated.

Tomb Ranger
Enter the Wishless Resting Place in south Fallowfields.
Simply entering the Wishless Resting Place’s main door will unlock this achievement.

What should I do?
Have Jyn tell you your future.
Near the outer edge of the map, in southwest Fallowfields. By advancing through the main questline, you will obtain this.
Dat is alles wat we vandaag hiervoor delen Hammerwatch II gids. Deze handleiding is oorspronkelijk gemaakt en geschreven door PsychoDriveBy. Voor het geval we er niet in slagen deze handleiding bij te werken, U kunt de laatste update vinden door dit te volgen link.