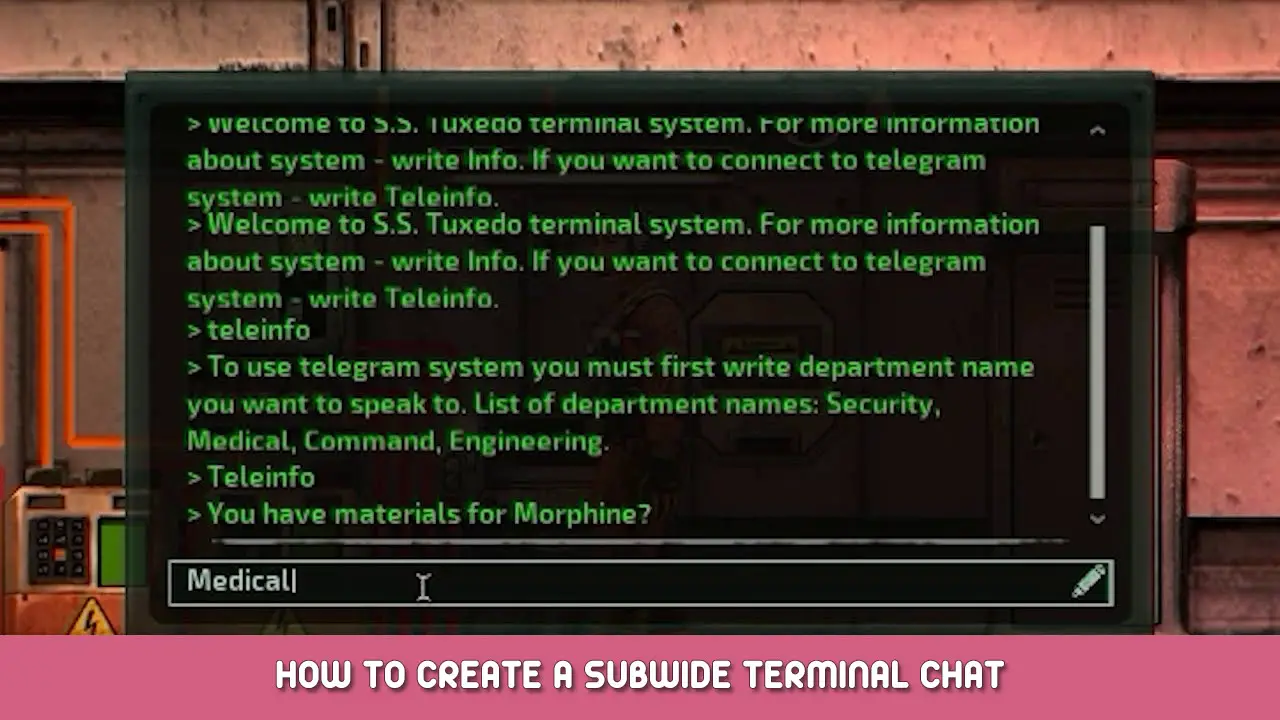

Create your own sub wide terminal chat that is separate from the in-game chat.
Functies:
- Terminal Titles for the room they are in
- Light indicator for Incoming messages
- Long-range Shuttle communication
- Several terminals all linked to the same chat
- In-game wiring friendly and expandable
Invoering
Er zijn 3 steps to this Guide, Echter, each step will function without the next step.
- Connecting the Terminals together
- Naming the Terminals
- Adding an incoming message indicator
This tutorial is a beginner-friendly guide that intends to introduce new engineers to Terminals and WIFI components. Each component used is explained, with pictures every step of the way!
Stap 1: Connecting the Terminals together

Components Required:
- 2x WIFI component
- 2x Terminal
- 4x Wire
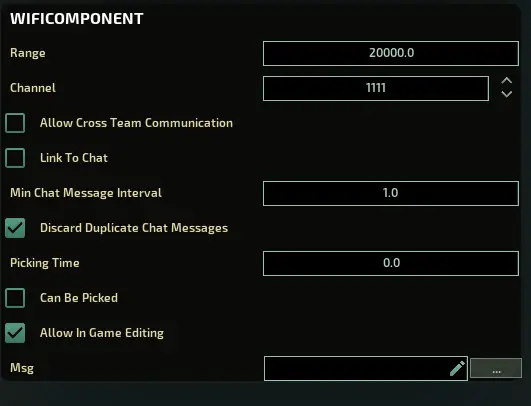
WIFI Component – Allows remote communication between other Wifi Components that are using the same channel. The Range value indicates how far the signal can travel
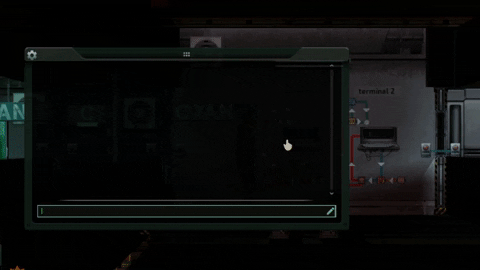
Terminal – Outputs a user-submitted string. also displays string inputs.
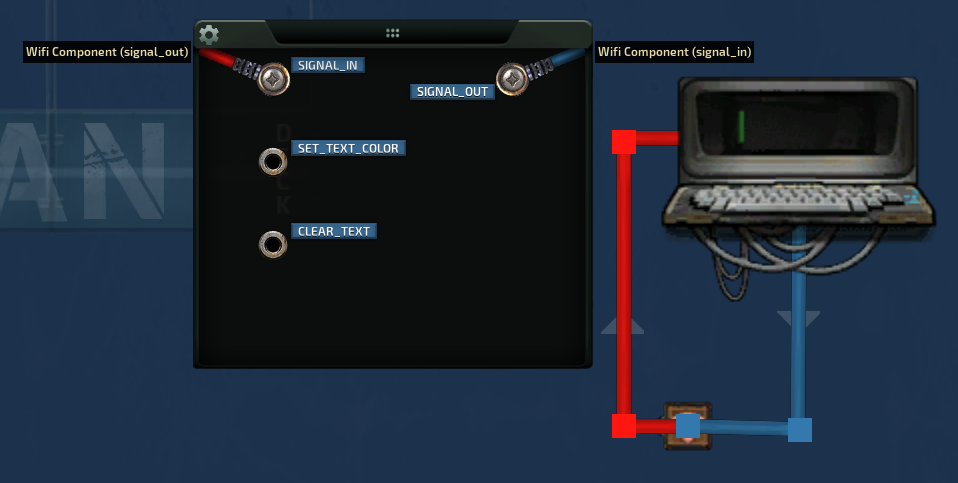
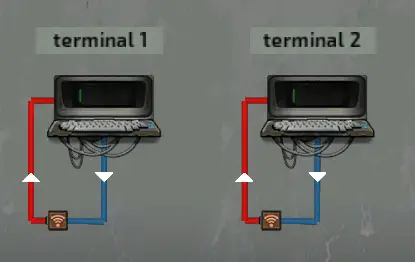
- Start by placing down a Terminal and a Wifi component.
- Eerst, we connect a wire from Terminal(Signal_In), to WIFI(Signal_Out)
- Then We connect a wire from Terminal(Signal_out), to WIFI(signal_in)
Setting the WIFI channel
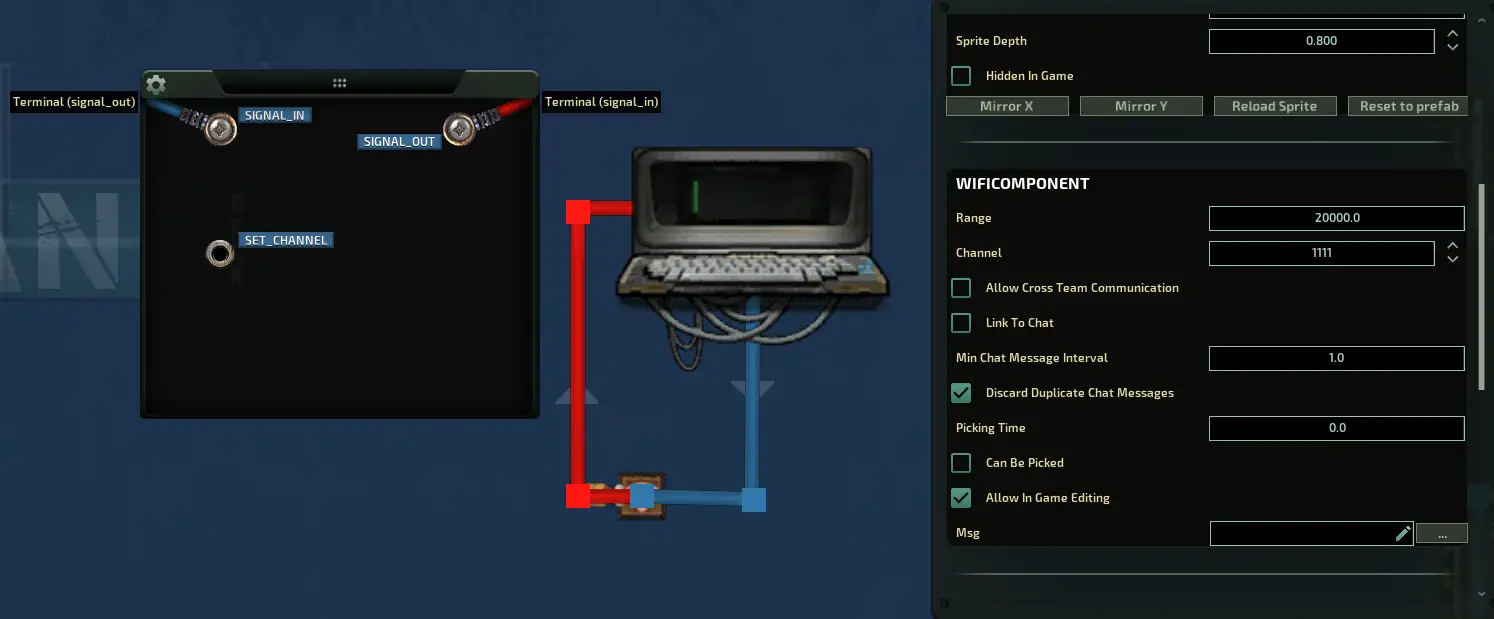
Nu, all we need to do is set the WIFI channel. This number is used universally for all connected Terminals, so use something memorable. i chose “1111”
Repeat for a second terminal
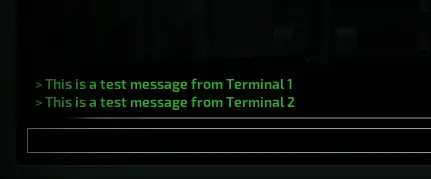
Nu, all we need to do is replicate the exact same process on a second terminal, and we now have a functioning chat! Stap 1 is complete! (copy and paste in sub editor)
Zien! Terminals and wifi isn’t scary at all! its the REGEX you need to worry about.
Skip to Step 4 voor “Adding extra terminals”
Stap 2: Naming the Terminals
In this step, we will learn how to set a title for each terminal, so that we can identify which terminal is typing. We will be working on the basis that we have 2 terminals as per the last step.
Components Required:
- 2x Concatenation Components (Concat)
- 2x Memory Components
- 4x wires
Concatenation Component – Joins the inputs together and outputs the joined value (Bijvoorbeeld, the inputs “modder” en “raptor” would output “mudraptor”).
Memory Component – an electrical component used to store signals for later use. In dit geval, we use it to store the Terminal Names.
- Start by placing down a Concat component and memory component next to each other.
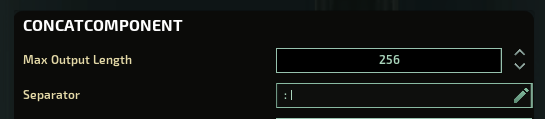
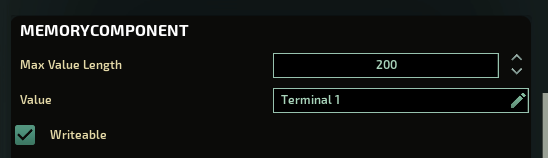
- entering the Concat settings, we find the “Separator” string and input whatever we will use to separate the title from the message. I use “: ” notice there’s a space in that.
Now for the Memory Component.
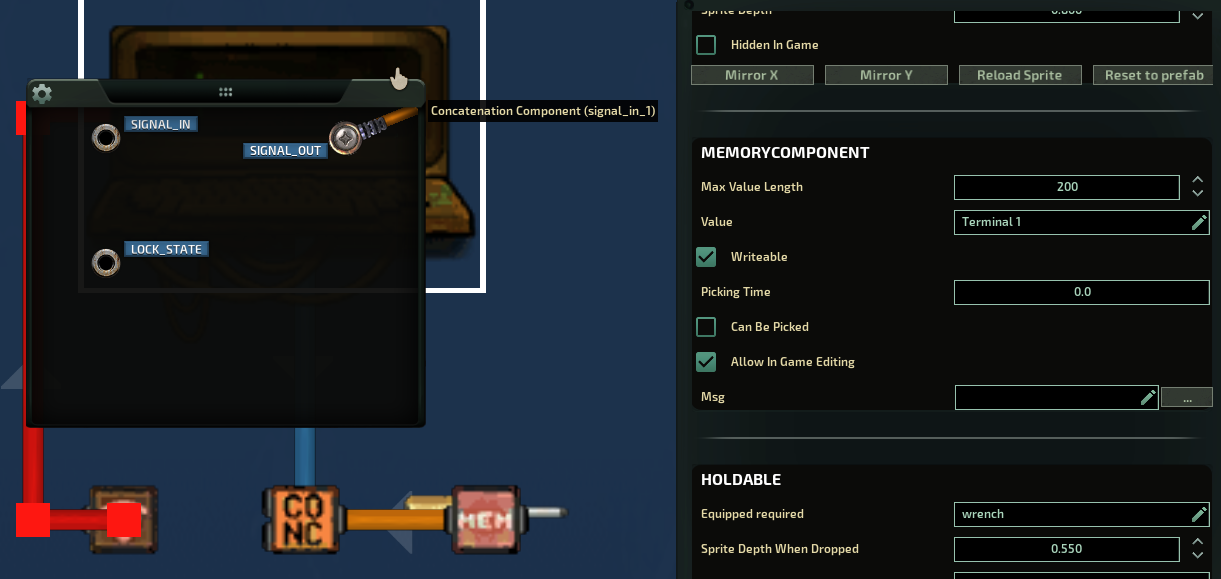
First we connect a wire from Memory(signal_out), to Concat(signal_in_1)
- Then we find the “value” string in the Memory Component.
- we change the value to the name of the Terminal. (could be a room, bijv.: Medbay)
If you want players to be able to change the value in-game, Check “Writable”
Thats the memory component set up. drawing our attention back to the concat;
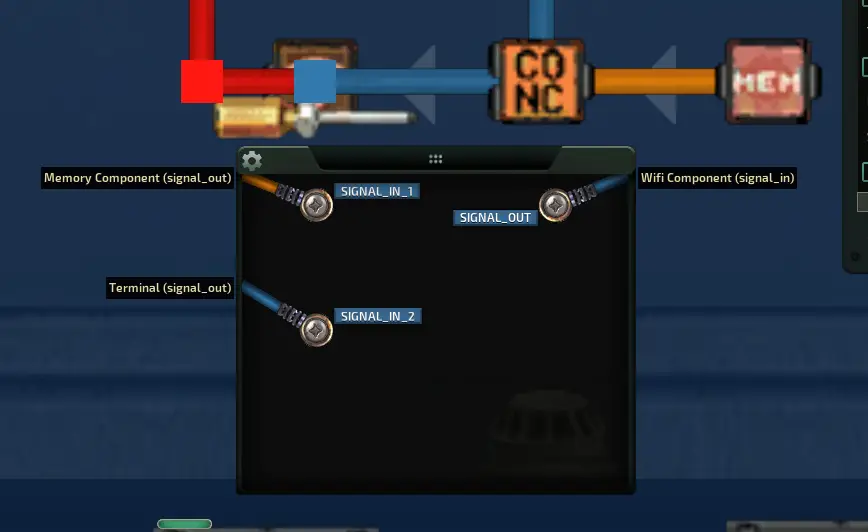
- Wij MOVE the Terminal(signal_out) wire from the WIFI(Signal_in) to Concat(Signal_in_2)
- To ensure you have done that correct, your WIFI should no longer have a signal_in cable, as it instead has been moved to the concat(Signal_in_2). Your terminal should now be connected to the concat.
- Eindelijk, we connect a wire from Concat(Signal_out), to WIFI(Signal_In)
- We repeat these steps for the second terminal (or if in sub editor, copy and paste)
- dont forget to change the room name to the second terminals room!
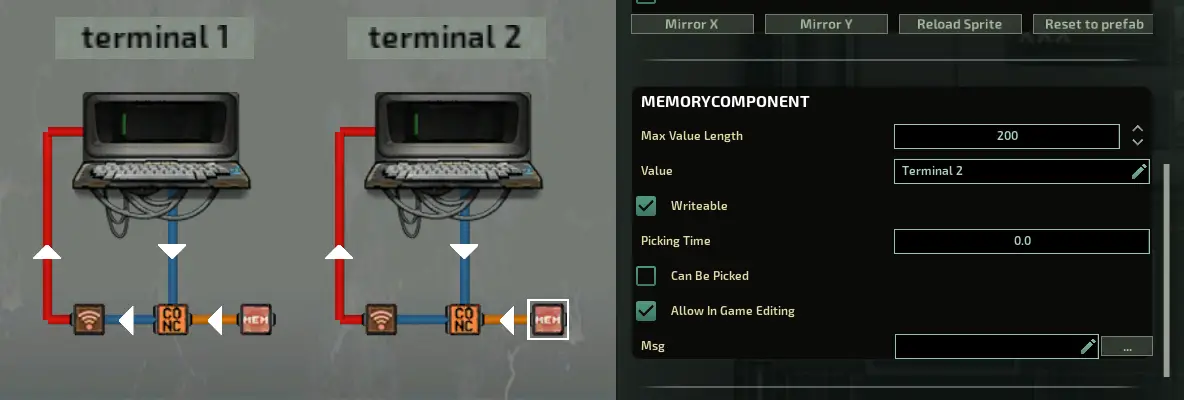
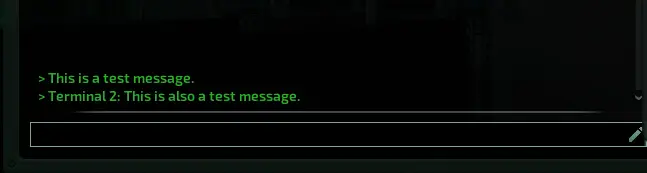
That’s Step 2 is done! now when terminals communicate, they will have a name attached to them. keep in mind you cannot see your own terminal’s name.
Stap 3: Adding an incoming message indicator
Components Required:
- 2x OR Component
- 2x Delay Component
- 2x Lights
- 8x Wire
Toggle light on
OR component – Sends a signal if either of the inputs receives a signal. We are using this to turn our WIFI signal (which is our message string) to a single 0-1 signaal
Delay Component – Delays all received signals for a specific amount of time. We use this to turn the light off after X seconds
- Start by placing down light and the OR component

- We connect a new wire from WIFI(signal_out), to OR(signal_in_1)
- The OR component does not need a second signal to work.

- entering the OR settings, we check that the Output: 1, and the False Output is blank.
- Dan, we connect a wire from OR(Signal_Out) to Light(Toggle_State)
- Note that Light(Set_state) will not work correctly in this instance
Nu, when a message is received through the WIFI component, it will toggle our lights state once.
Toggle light off after X seconds
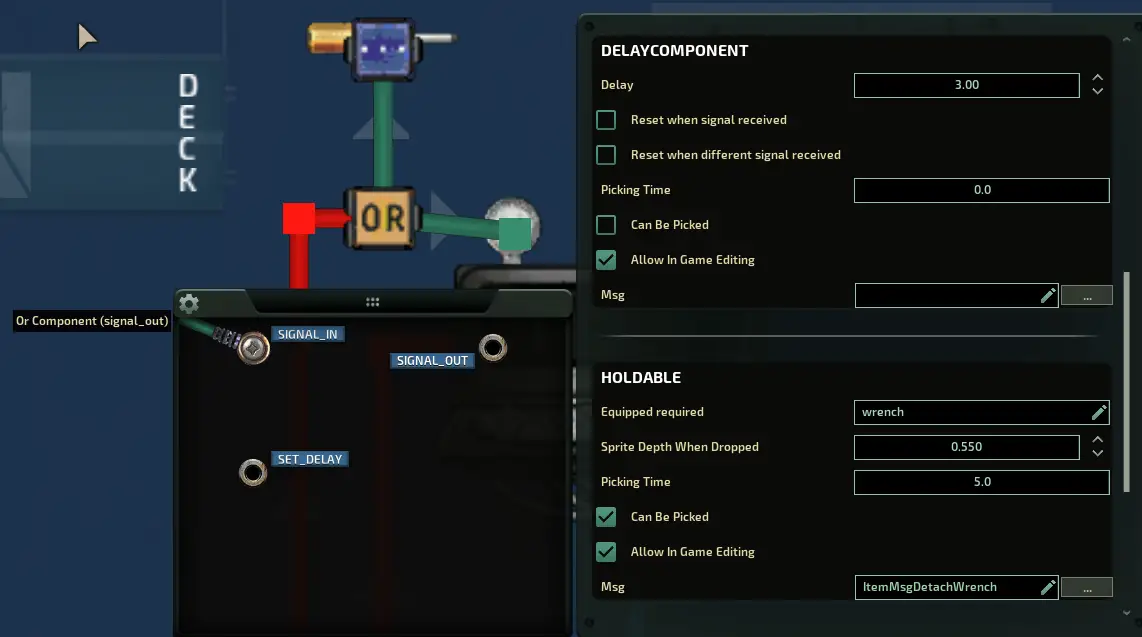
- Start by placing down a Delay component.
- We connect a wire from OR(signal_out), to Delay(Signal_in)
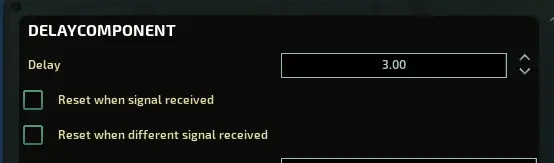
- Then we set the delay to what ever amount of time you want the light to remain on for (in seconden)
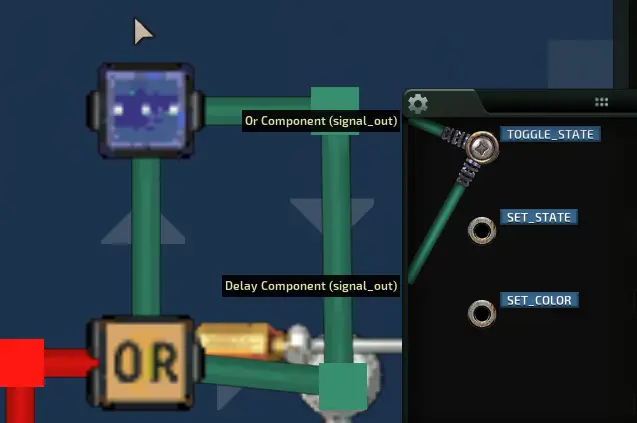
- Eindelijk, we connect a wire from Delay(Signal_out), to Light(toggle_state)
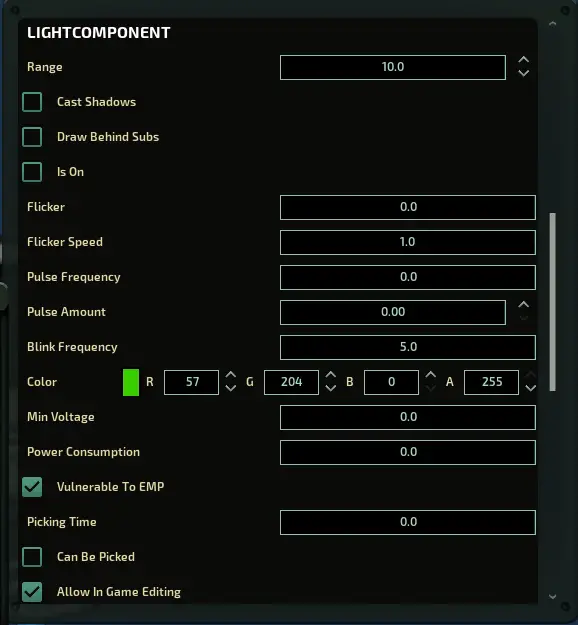
Ensure the light settings have “is on” unchecked, then you can play with the light to display how you want! here are the settings i used.
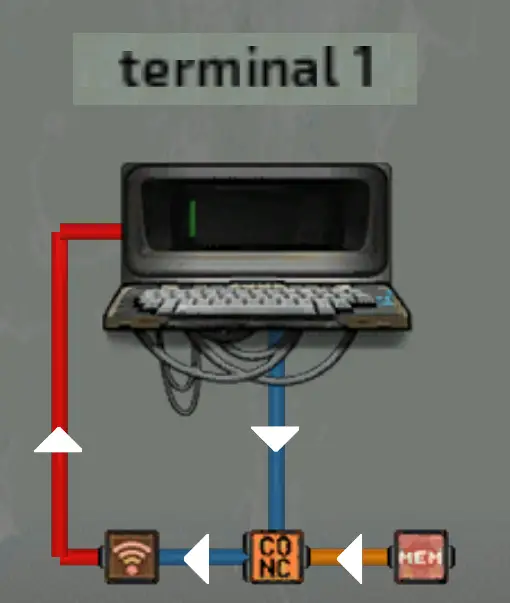
We repeat this for our second terminal, and we now have a complete communication system!
Stap 4: adding more terminals
The process of adding another terminal is simple!
all the terminals run off the exact same components, with the only difference being the room name that is saved on the Memory component.
In sub-builder:
- Simply select the entire machine, componenten, and wires included, and copy and paste them to each location. Keep in mind too many high ranged WIFI components can cause performance issues.
In het spel:
- Repeat the circuits in the game. keep in mind that all components need the exact same values to function, except for the Room name Memory component.
Dat is alles wat we vandaag hiervoor delen Barotrauma gids. Deze handleiding is oorspronkelijk gemaakt en geschreven door Impresa. Voor het geval we er niet in slagen deze handleiding bij te werken, U kunt de laatste update vinden door dit te volgen link.