- 제목: Wrestling Empire
- 출시일:
- 개발자:
- 발행자:
Information about Wrestling Empire is still incomplete. 이것을 사용하여 게임의 세부 정보를 입력할 수 있도록 도와주세요. 문의 양식.
There exist two distinct categories of modifications in the realm of gaming: code mods and content mods. Code mods employ the BepInEx modding framework to directly manipulate the game’s underlying code. 반면에, content mods introduce alterations or additions to specific in-game elements, encompassing items like costumes, themes, and characters. For a more comprehensive grasp of this concept, kindly refer to the diagram provided below.

It’s important to take note that WECCL, which stands for Wrestling Empire Custom Content Loader, ~이다, 본질적으로, a code mod in its own right.
Code Mods
The development of code mods is facilitated through BepInEx and necessitates a proficiency in C#. Given the intricacies involved in crafting BepInEx mods and the challenge of deciphering obfuscated code, this guide will refrain from delving into the specifics of their creation. 하지만, you can explore the following links to assist you in your journey:
It’s worth emphasizing that when it comes to code mods, it’s advisable to place them in the directory Wrestling Empire\BepInEx\plugins\Manual, as opposed to simply placing them in the “plugins” 접는 사람. This precaution helps prevent any potential interference from the mod launcher.
Content Mods
Content mods are comprised of structured files designed for use with WECCL, and creating them typically doesn’t necessitate any coding expertise. 하지만, it’s essential to ensure that WECCL is properly installed before embarking on the process of crafting content mods.
일반적으로, the content you wish to add should be placed within the “Assets” 예배 규칙서, while content that is intended to override existing assets should be located in the “Overrides” 예배 규칙서.
During the testing phase of your mods, you can locate the “Assets” 그리고 “Overrides” folders within this directory path:
Wrestling Empire\BepInEx\plugins\Manual\Assets
Wrestling Empire\BepInEx\plugins\Manual\Overrides
If these folders don’t exist, you have the option to create them.
뿐만 아니라, it’s worth noting that any audio files positioned in the “Assets” folder will be loaded as new themes. For comprehensive guidance on other features, please consult the documentation provided on WECCL’s Github page.
Uploading Mods
The most straightforward method for sharing your mods on Steam Workshop involves using the dedicated uploader, which is available for download from this 링크.
Inside the uploader, you’ll find a template mod that can be examined to grasp the file structure. To get ready for the upload process, your initial step is to generate an “Item.” Think of an “목” as a kind of “reservation” for your mod. 본질적으로, it establishes the unique ID that will be utilized for your mod and all its subsequent versions.
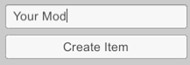
Once you’ve created the “목,” the next step is to place all the necessary files and content within its designated “content folder.”
![]()
When you navigate to the WorkshopContent section, you should encounter a display similar to the following:

Within the content folder, which is named after your item (이 경우, “YourMod”), you should have the following components:
- ㅏ “plugins” folder containing all the items you would typically place in the “수동” 예배 규칙서.
- ㅏ “manifest.txt” file with the following contents:
modName: <모드 이름>
작가: <작가>
버전: <버전> (SemVer recommended)
assemblyHash: <assembly hash> (only for code mods)
To obtain the assembly hash, you can process the “어셈블리 -csharp.dll” file located at Wrestling Empire\Wrestling Empire_Data\Managed through this provided 링크.
It’s worth noting that the template mod includes the “assemblyHash” 열쇠, even though it’s a content mod. 하지만, when you’re ready to publish content mods, it’s advisable to remove this key because content mods are typically version-independent.
Once you’ve completed these steps, make sure to include a preview image in the WorkshopContent directory, fill in the remaining fields as required, and then click the “Submit” button to share your mod on Steam Workshop.
![]()
An important note: when you’re publishing content mods, be sure to include WECCL as a dependency via Steam Workshop.
이를 수행하려면, 선택하다 “Add/Remove Required Items” from the menu located on the right-hand side, and then choose the necessary mods from the menu that appears. This ensures that users who download your mod will have the required WECCL mod installed as well.

![]()
This step is also applicable to mods that rely on other dependencies. It’s important to include all necessary dependencies when setting up your mod on Steam Workshop to ensure a seamless experience for users.
이것이 오늘 우리가 공유하는 모든 것입니다. Wrestling Empire 가이드. 이 가이드는 원래 작성자가 작성하고 작성했습니다. IngoH. 이 가이드를 업데이트하지 못한 경우, 다음을 수행하여 최신 업데이트를 찾을 수 있습니다. 링크.