
- 제목: 워해머: Vermintide 2
- 출시일:
- 개발자:
- 발행자:
워해머에 대한 정보: Vermintide 2 아직 불완전하다. 이것을 사용하여 게임의 세부 정보를 입력할 수 있도록 도와주세요. 문의 양식.
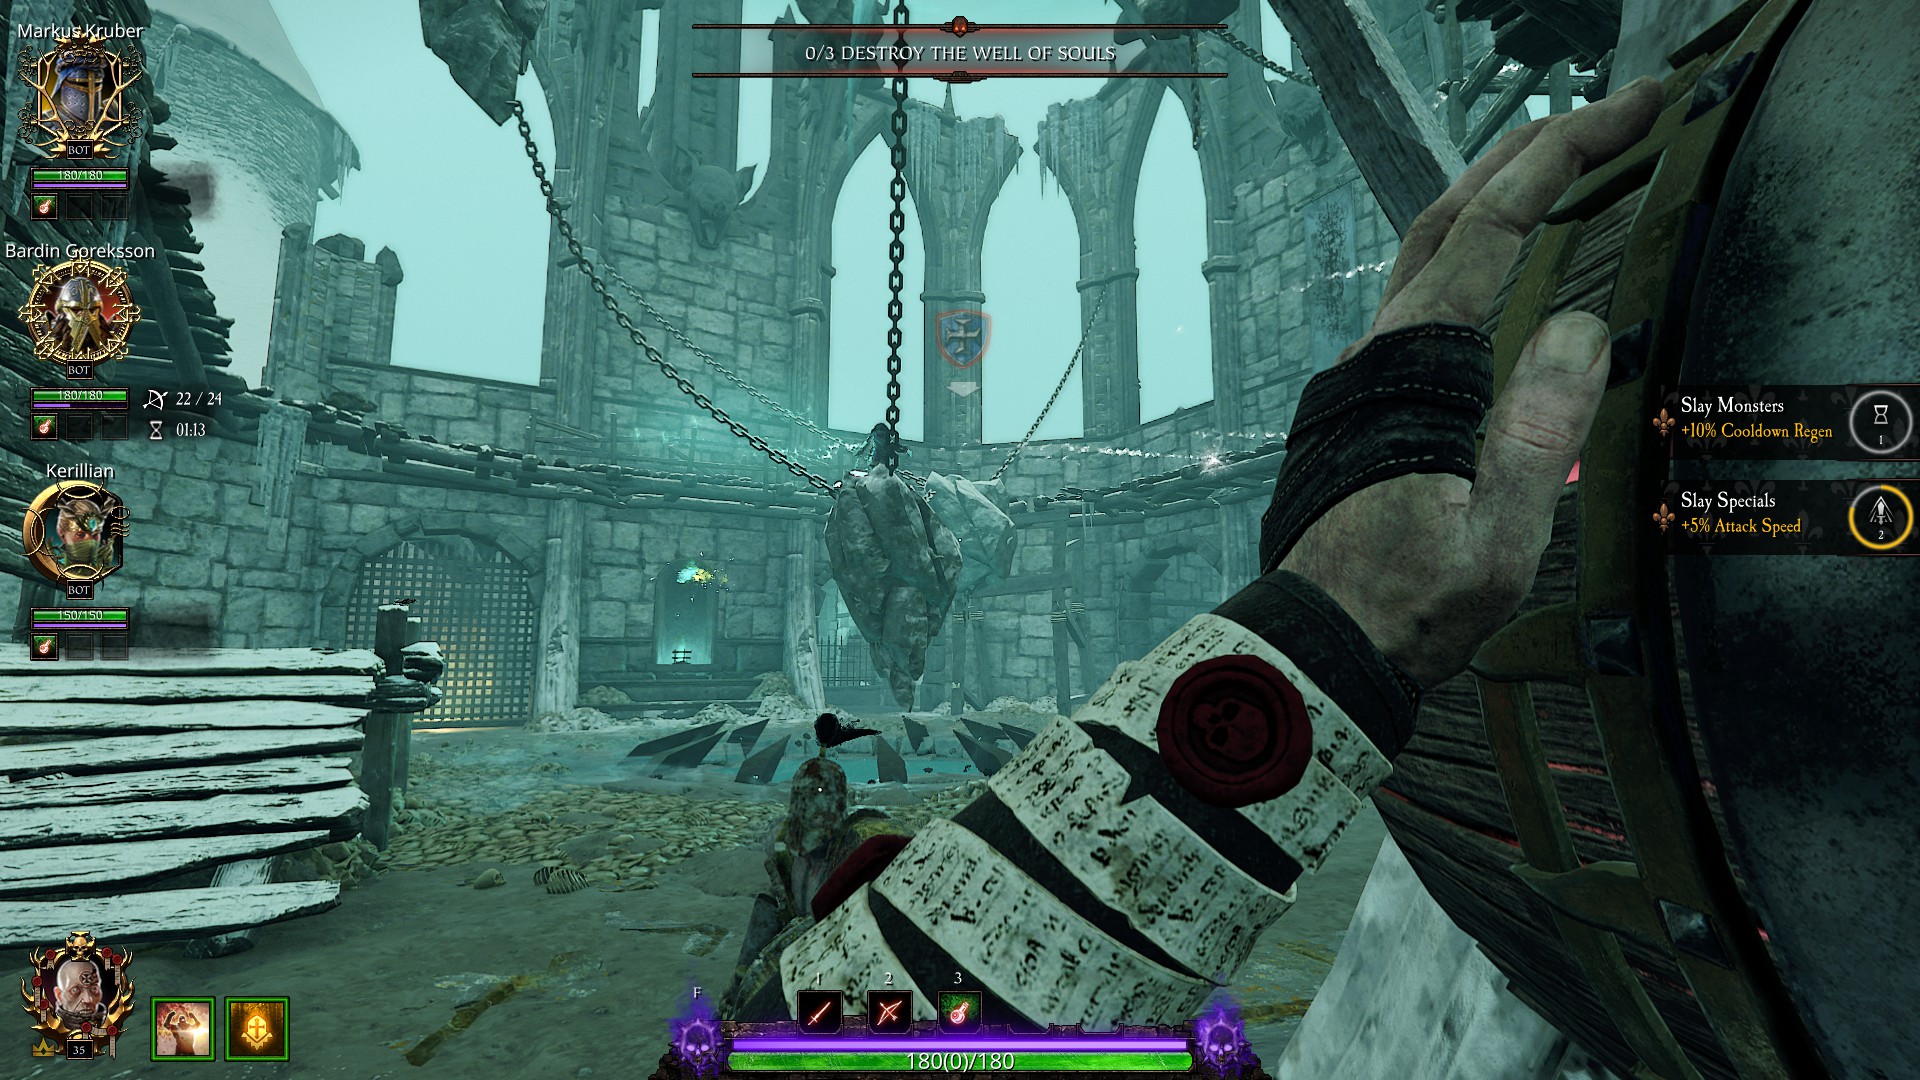
Guide for all skill levels: information on maps, 무기, 장비, bots, and more in Warhammer: Vermintide 2.
소개
이상으로 500 hours of experience playing Vermintide 2, I have acquired valuable knowledge and tricks that I believe can assist you in your missions. This guide aims to provide guidance for players of all skill levels.
추가적으로, I would like to mention that this is my first guide, and I welcome your feedback and opinions in the comments section.
Empire in Flames
In this particular map, there exists a convenient shortcut that can be useful if your teammates have fallen in battle.
By utilizing the nearby house, you can bypass the wine cellar entirely. 그렇게 하려면, position yourself on the brick located before the doorframe. With precise timing, execute a jump while simultaneously activating your career skill. 이렇게 하면 문을 통과할 수 있습니다.
일단 안으로, 계단을 올라가서 동료들이 구조를 기다리고 있는 집 반대편으로 내려갑니다., 그들이 다시 부활할 시간을 충분히 준다면.
이 방법은 특정 캐릭터 클래스에만 작동한다는 점에 유의하는 것이 중요합니다., 즉 슬레이어, 열광자, 축복받은 책을 들고 있는 전사 사제, 시녀, 그리고 배틀마법사.
이벤트 마지막 단계에서, 당신의 목표는 카트에 통 3개를 싣는 것입니다..
카트로 돌아가는 데 걸리는 거리가 길어 지하실에 있는 통을 얻는 것이 더 어려울 수 있습니다., 특히 끊임없이 몰려드는 적들과 함께라면. 하지만, 이 상황을 해결하기 위한 두 가지 옵션이 있습니다.
- 한 가지 접근 방식은 그룹이 위층에 머무르는 것입니다., 흑색 화약을 수레로 운반하는 책임을 맡은 동안 다가오는 적을 제거하는 데 집중하십시오., 적당한 안전 보장.
- 대안으로, 통을 위로 던질 수 있어요, 그룹의 다른 사람이 그것을 잡고 카트쪽으로 옮길 수 있도록 허용.
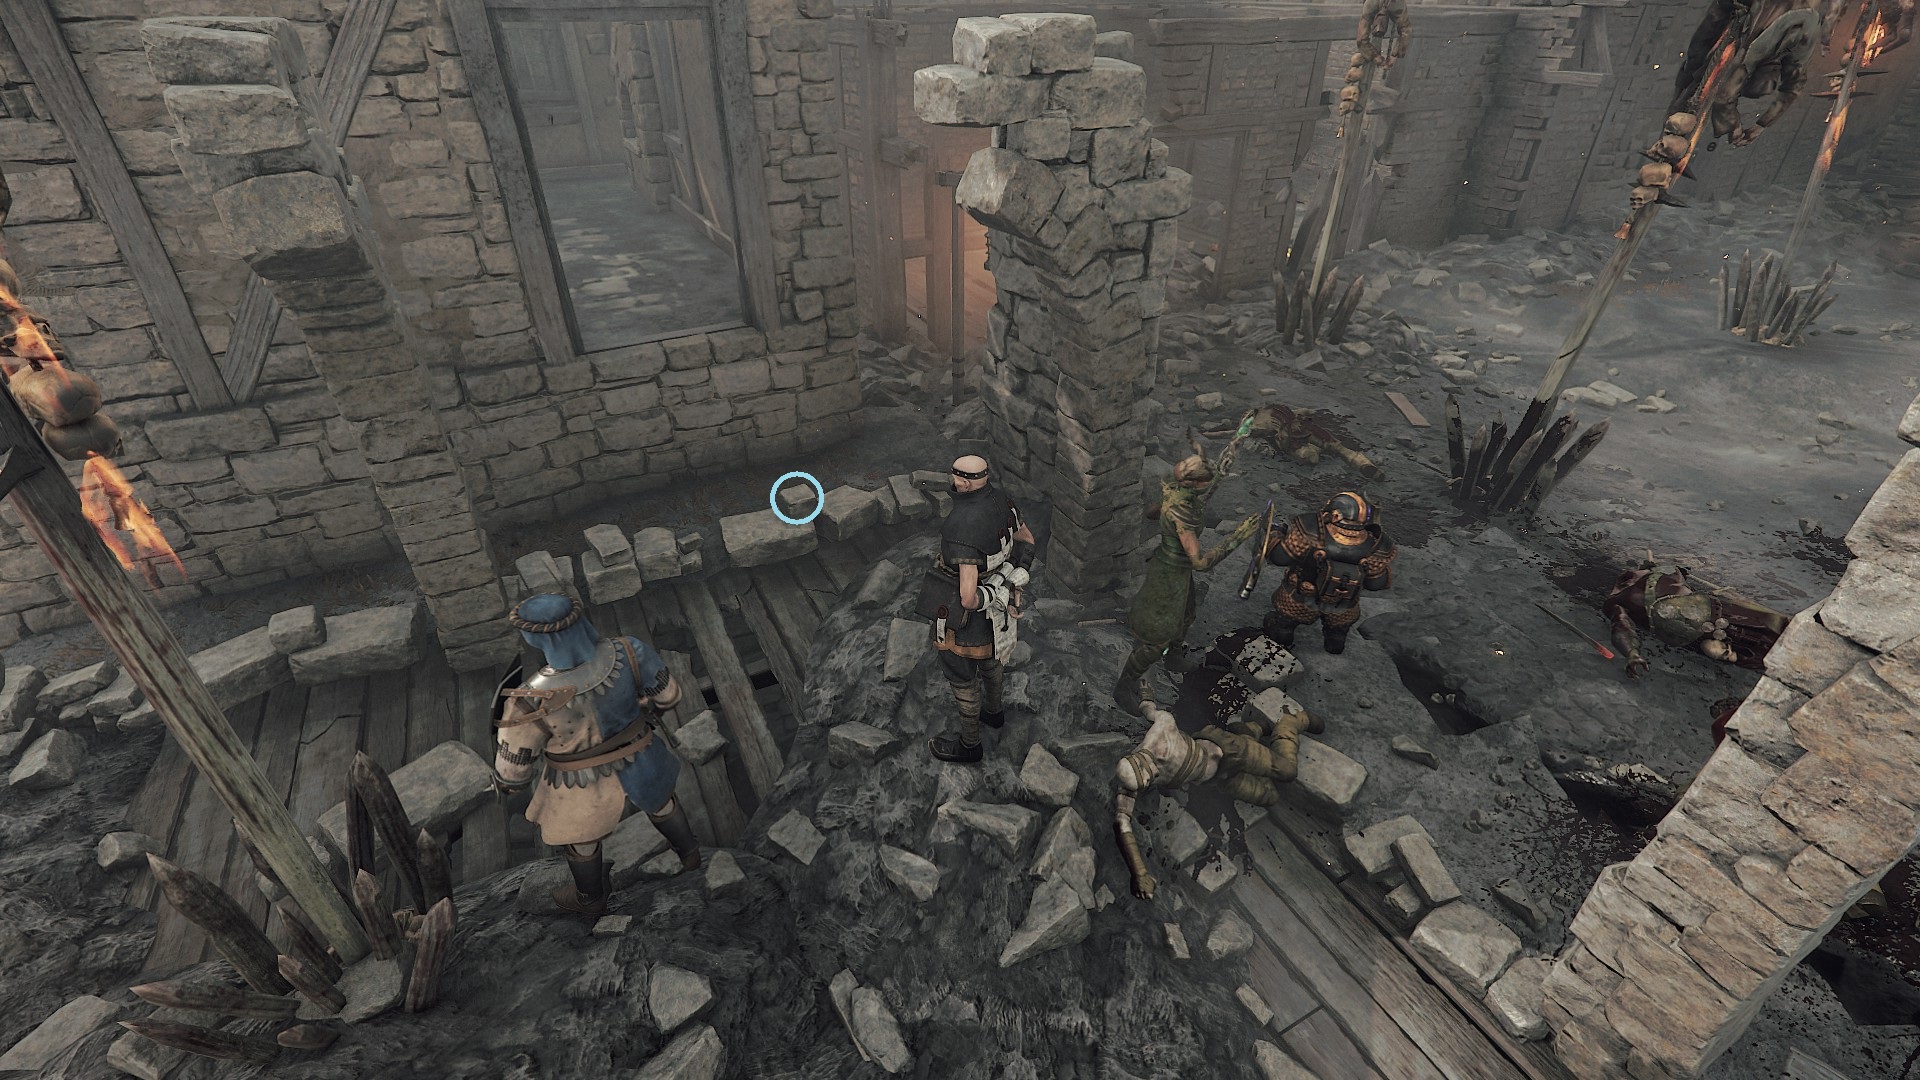
오래된 유령
첫 번째 가고일 머리를 성공적으로 배치한 후, 두 번째 머리 근처의 문 뒤에 있는 혼돈의 전사들의 출현에 대비하세요.
지하로 이동하기 전 혼돈의 전사들을 우선 처리하는 것이 좋습니다.. 그들의 존재는 심각한 위협이 될 수 있습니다, 특히 자주 생성되는 역병 승려들과 섞일 때, 매춘부, 그리고 쥐잡이꾼들.
또 다른 전략은 근처에 있는 가고일 머리를 먼저 회수한 후 나머지 머리 2개를 진행하는 것입니다..
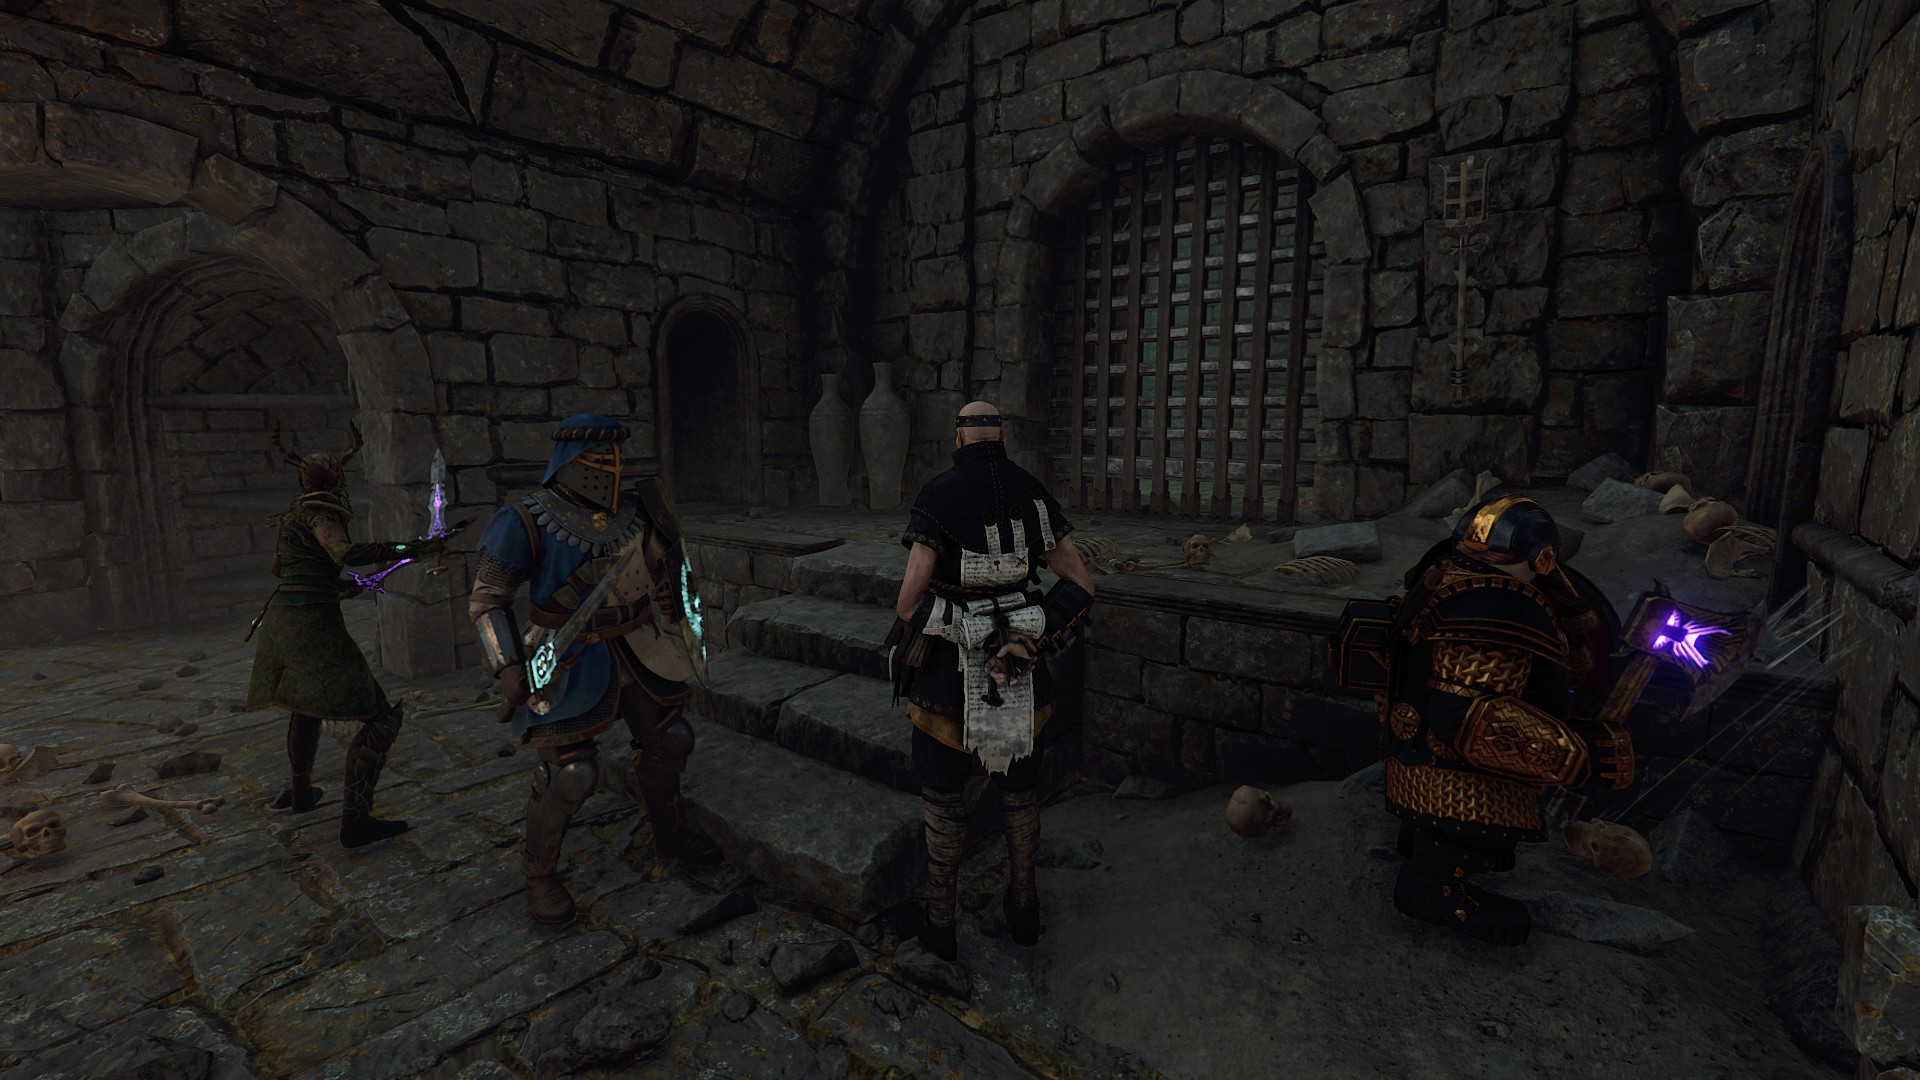
역병리퍼
이 특별한 임무에서는, Lohner once again sends you into a dark sewer. 하지만, there is a solution to illuminate your path: torches and fires that can be found throughout the area.
다행스럽게도, if these light sources are not sufficient for your needs or if you aim to complete the two Blightreaper challenges mentioned in Okri’s book, you have the option to equip a moonfire bow or a coruscation staff. These weapons not only serve their primary purpose but also provide additional light to guide your way.
It’s worth noting that this strategy is also applicable in the mission “Hunger in the Dark.”

Trial of Treachery
The final event in this particular map can present some challenges, especially with the presence of berserkers, armored enemies, blightstormers, life leeches, and a monster.
To handle this situation, many individuals choose to defend themselves in the crypt within the arena. This strategy works well because enemies can only approach from one side (excluding life leeches), and there is an unlimited supply of ammunition available.
하지만, what if you forget or are unable to light the beacons along the way?
그러한 경우, the shack with healing supplies before the arena will be locked, preventing access to the advantageous crypt for the fight.
그럼에도 불구하고, there is still a possibility to retrieve one or two healing draughts from outside the shack, ensuring some restorative support.
I will now share a trick with you on how to enter the crypt without the need to light the bonefires along the way.
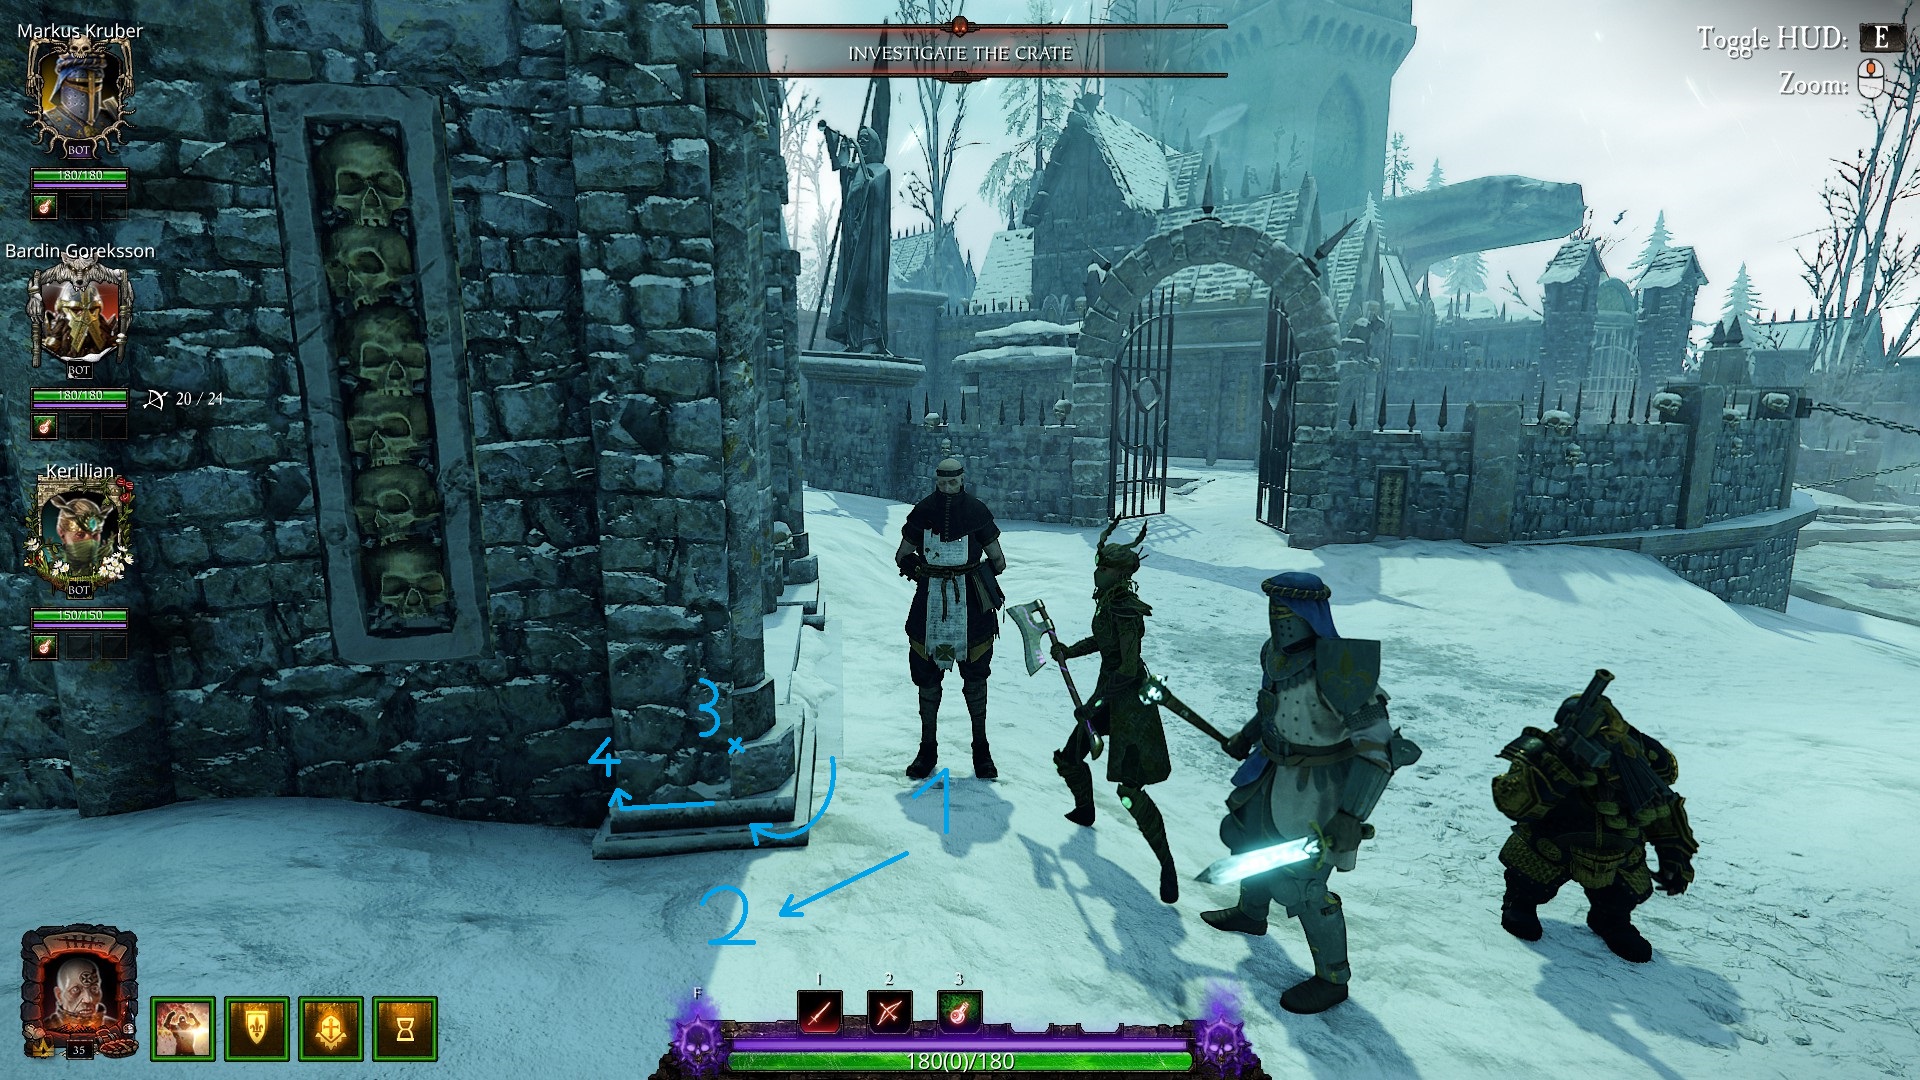
- 단계 1: Position yourself in front of the left side of the crypt.
- 단계 2: Perform a diagonal jump towards point 2.
- 단계 3: While in midair, press the D key (오른쪽으로 이동하다) 기둥을 중심으로 반원형 운동을 실행합니다., X 지점에 착륙했는지 확인.
올바르게 실행된 경우, 당신의 위치가 이전보다 기둥에 더 가까워졌음을 알 수 있습니다..
메모: 제공된 사진에서, 전철기 1 그리고 2 서로 약간 떨어져 보일 수 있습니다, 하지만 핵심은 점프가 기둥에 가까운 위치에 있는지 확인하는 것입니다..
마지막 단계에서는, 벽에 가까이 머물면서 벽을 따라 왼쪽으로 이동하여 진행하세요.. 그렇게함으로써, 당신은 성공적으로 암호에 들어갈 수 있어야합니다.
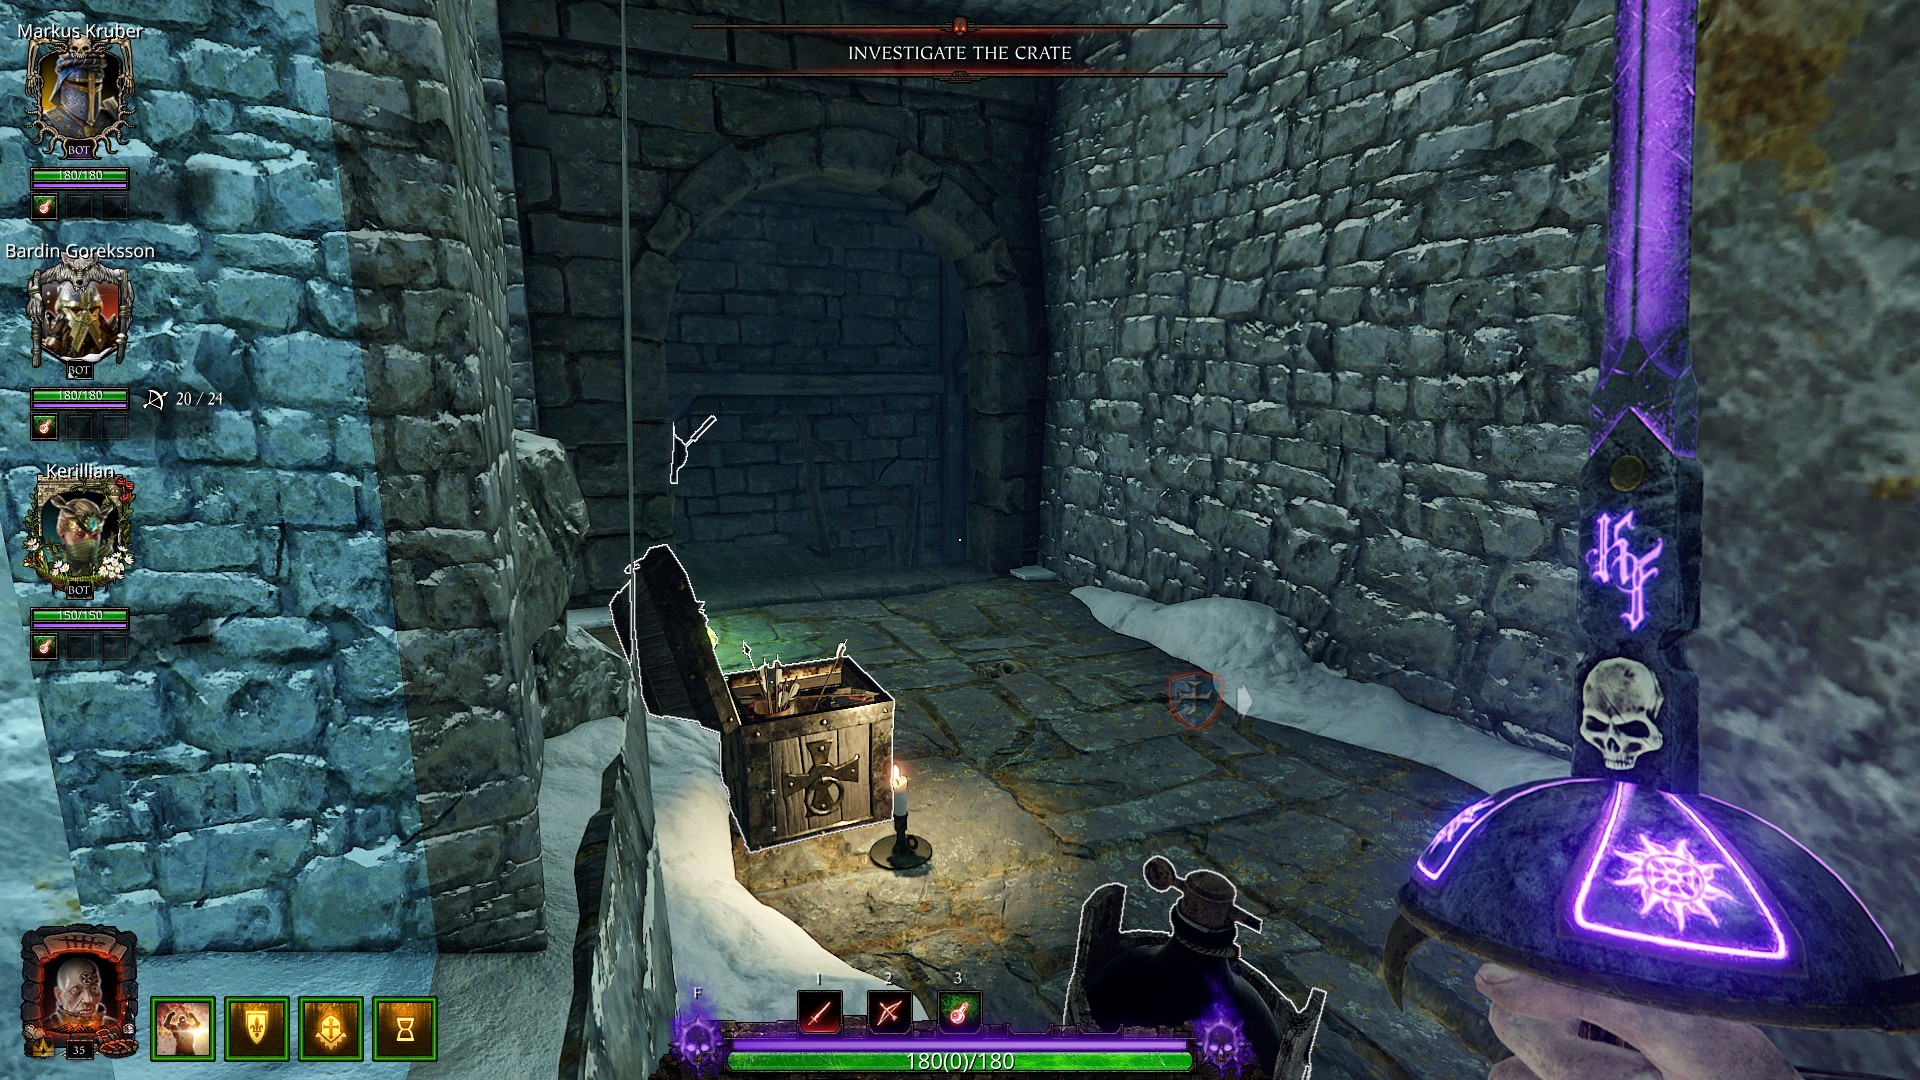
추가적으로, 지하실 지하에 있는 보급품을 회수하는 것을 잊지 마세요. 그들은 당신의 임무를 수행하는 데 도움이 되는 귀중한 자원을 제공할 수 있습니다..
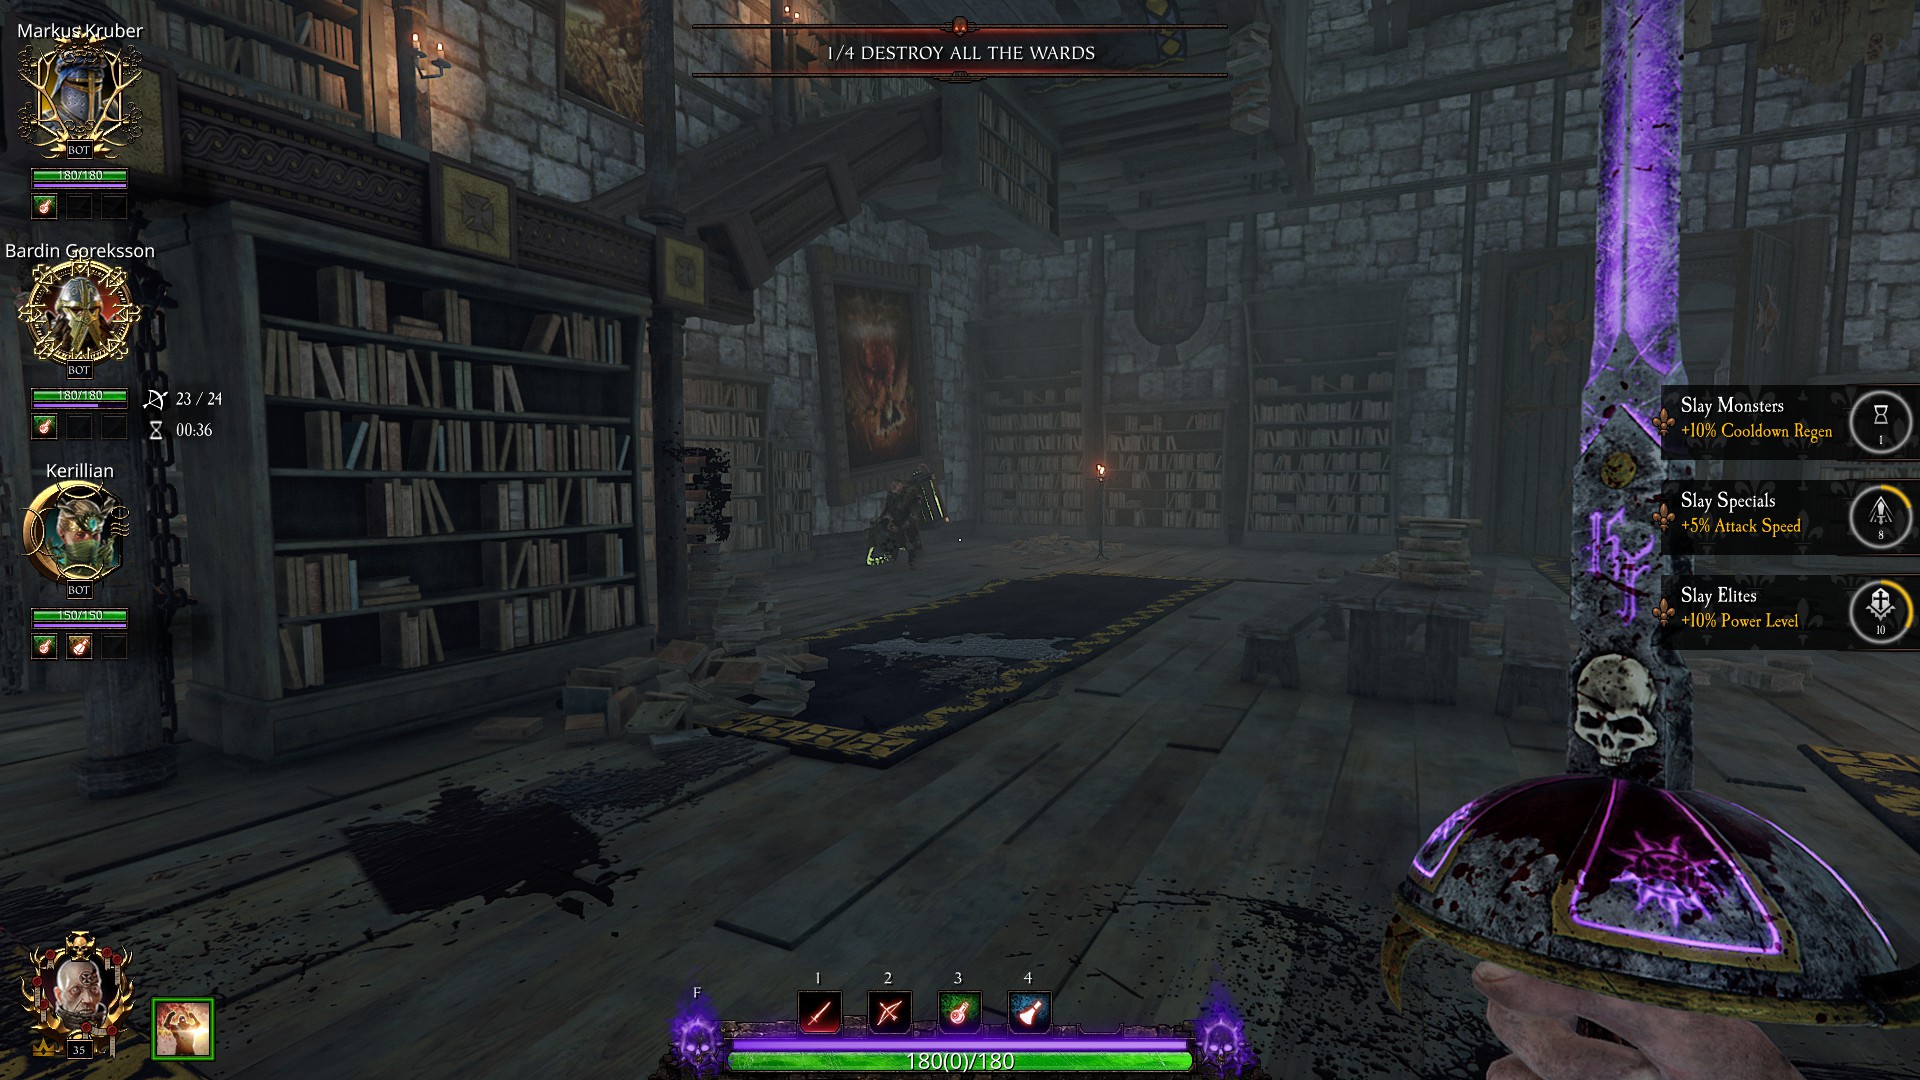
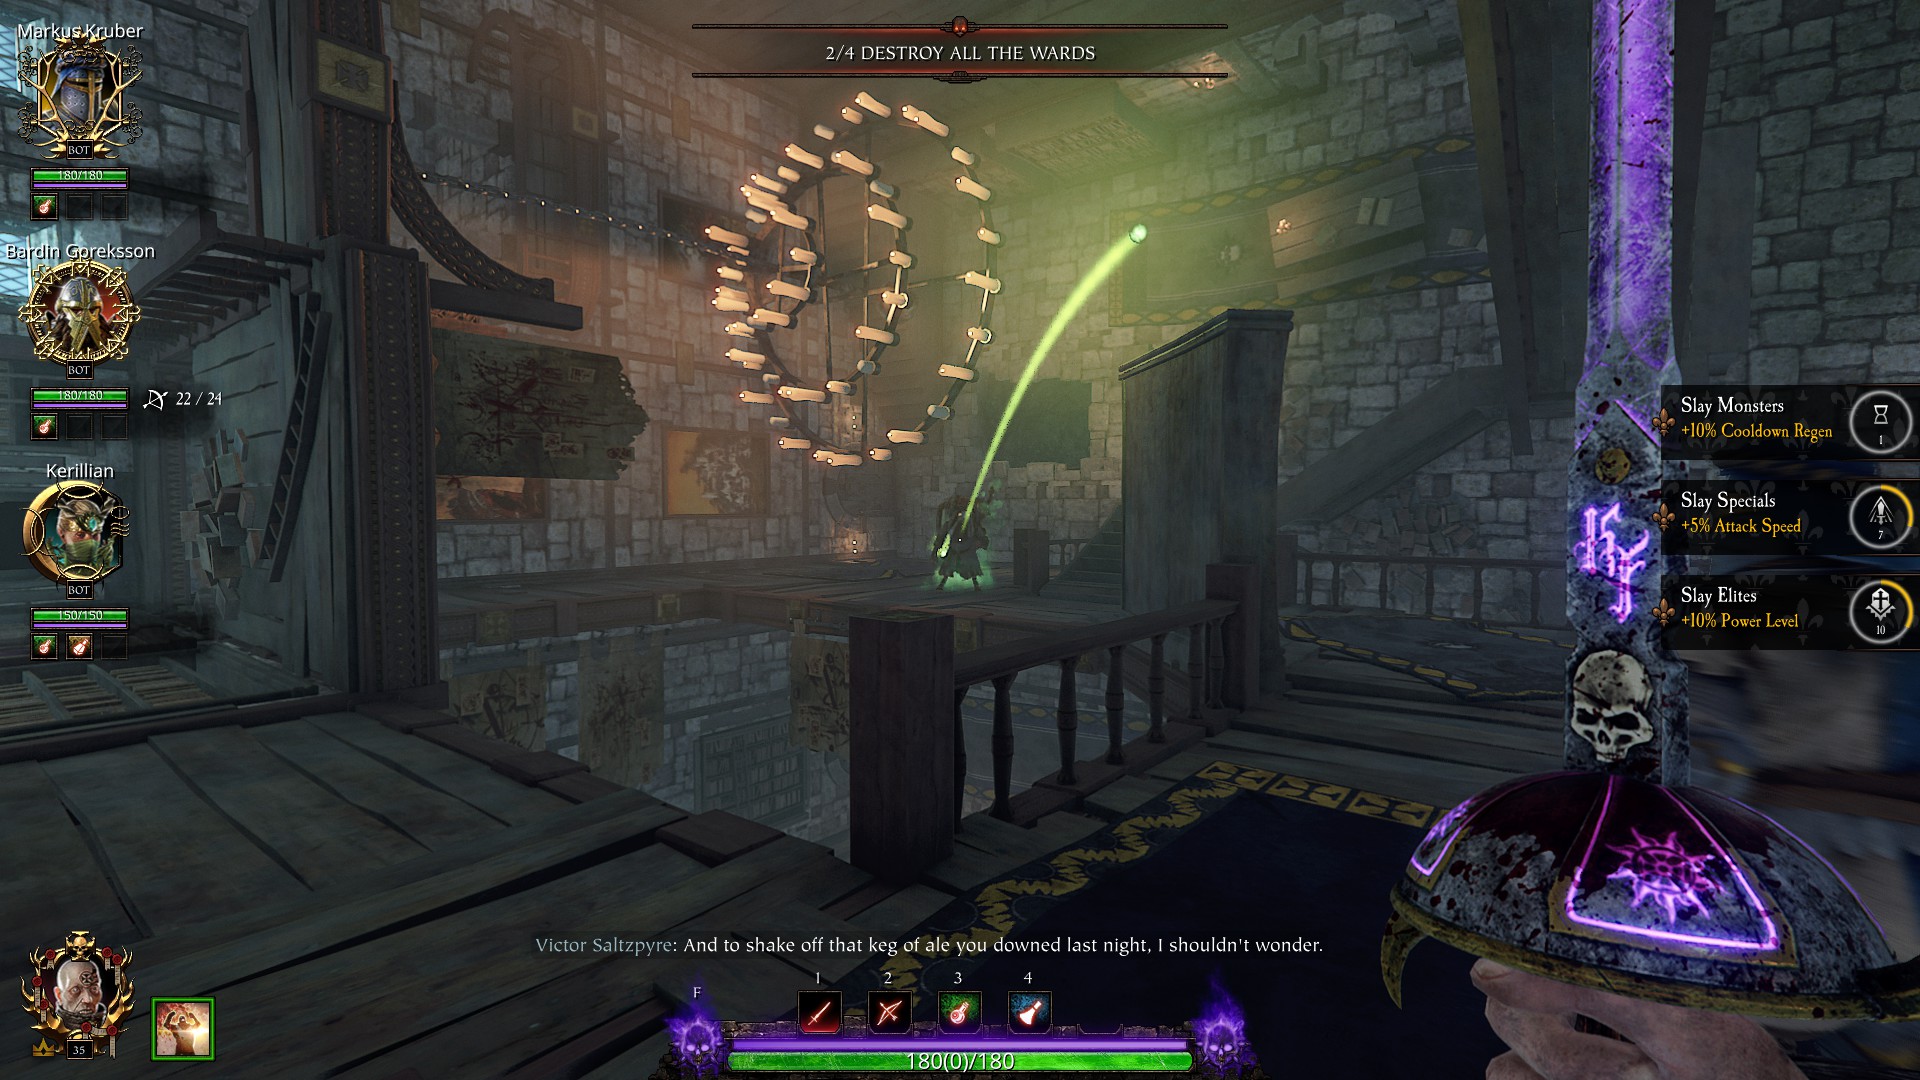
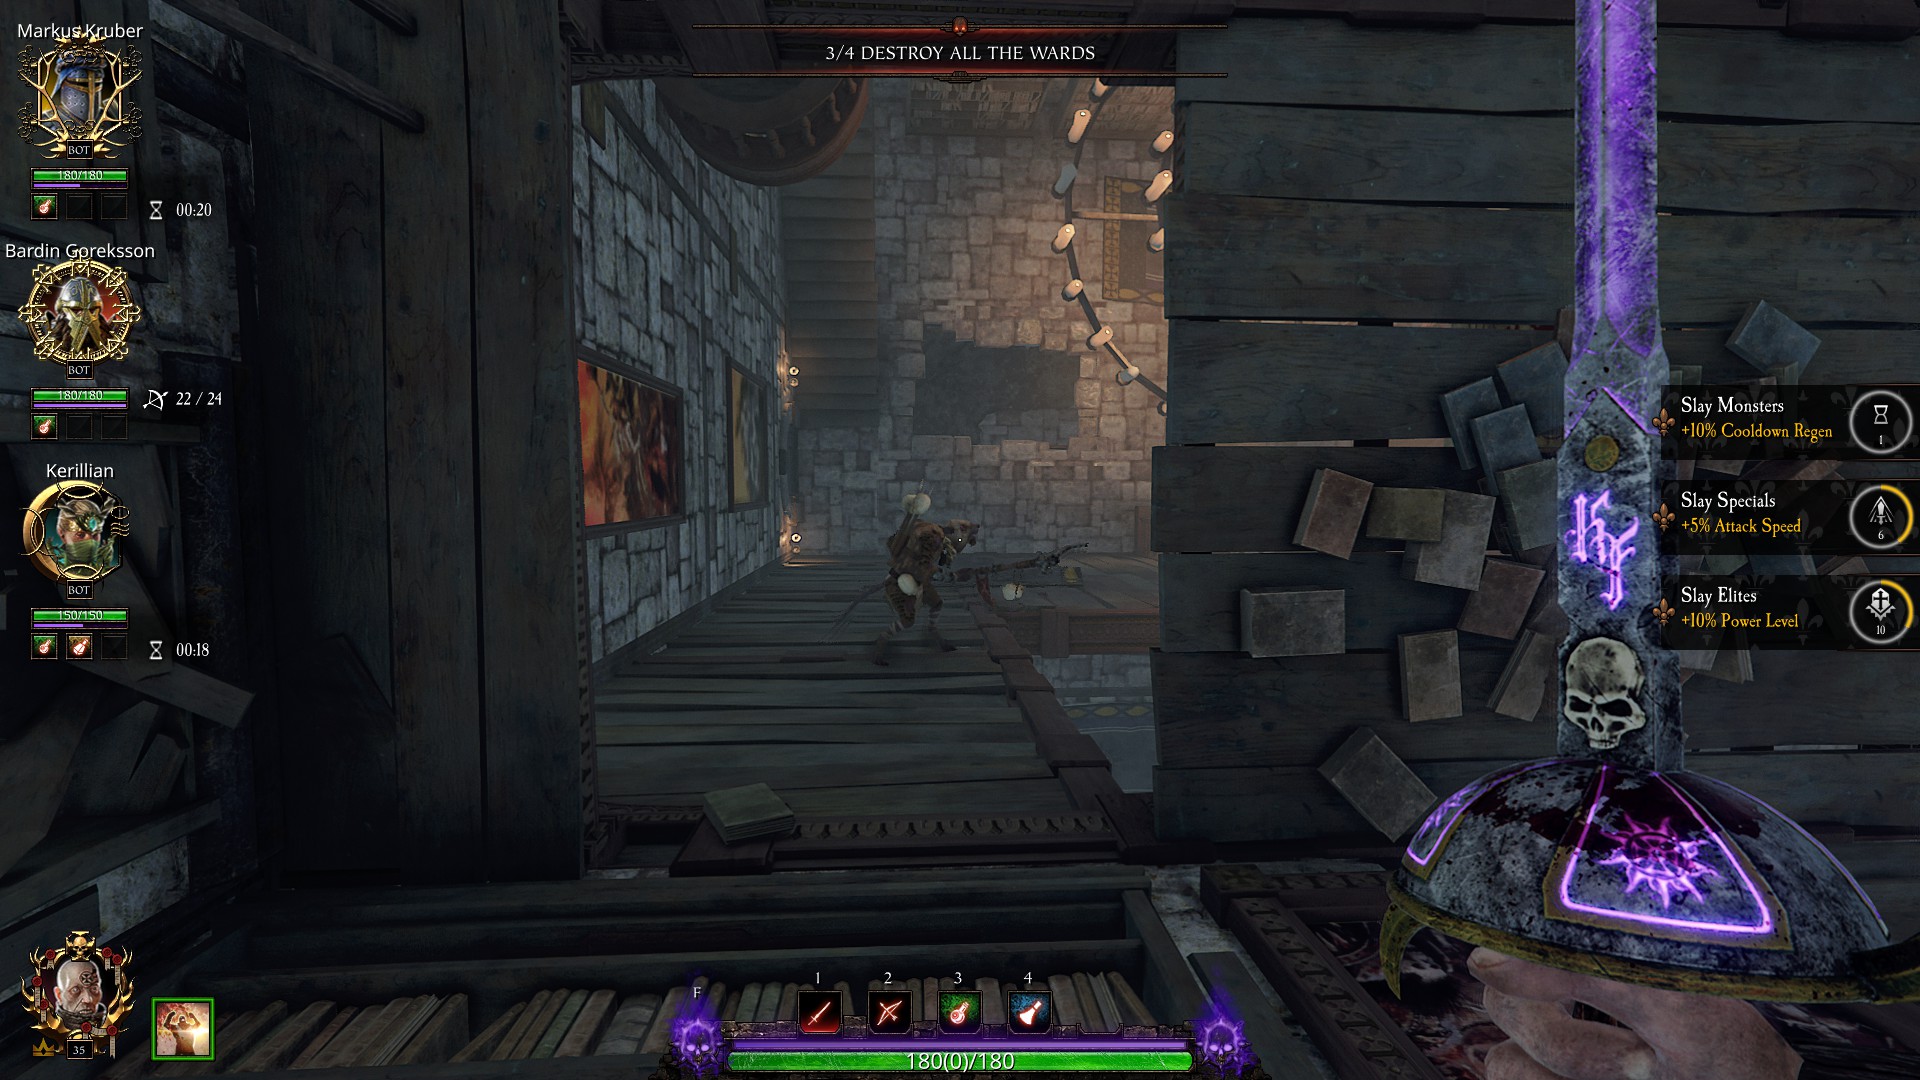
배반의 탑
소피아의 독백에 이어, 다음 목표는 도서관에 있는 4개의 와드를 파괴하는 것입니다..
일단 와드를 파괴했다면, 4개의 와드 중 3개는 실행할 때마다 동일한 특수 유닛이 동일한 위치에 지속적으로 생성된다는 점에 유의하는 것이 중요합니다.. 이는 임무 중에 이러한 특정 만남을 예상하고 준비할 수 있음을 의미합니다..

Ratling Gunner는 원래 위치와 동일한 위치에서 나타납니다..
적 Globadier가 위층에 나타납니다..
Hookrat이 실현됩니다.
즉시 제거되도록 보장, 그렇지 않으면, 당신이 전혀 예상하지 못한 순간에 뛰어내렸다가 다시 나타나는 경향이 있습니다..
와드에는 적이 생성되지 않습니다. 4.
잠시 후, 러스트리아 지역에 도착하게 됩니다.
이 지름길을 활용하면 정상에 도달하는 데 유리할 수 있습니다..
신속하게 정상에 도달하고 추락 위험을 최소화하기 위해, 이 특정 경로를 따르세요.
미션의 특정 섹션에서 낙하 피해를 방지하려면 러스트리아 파수꾼의 머리를 회전하세요..
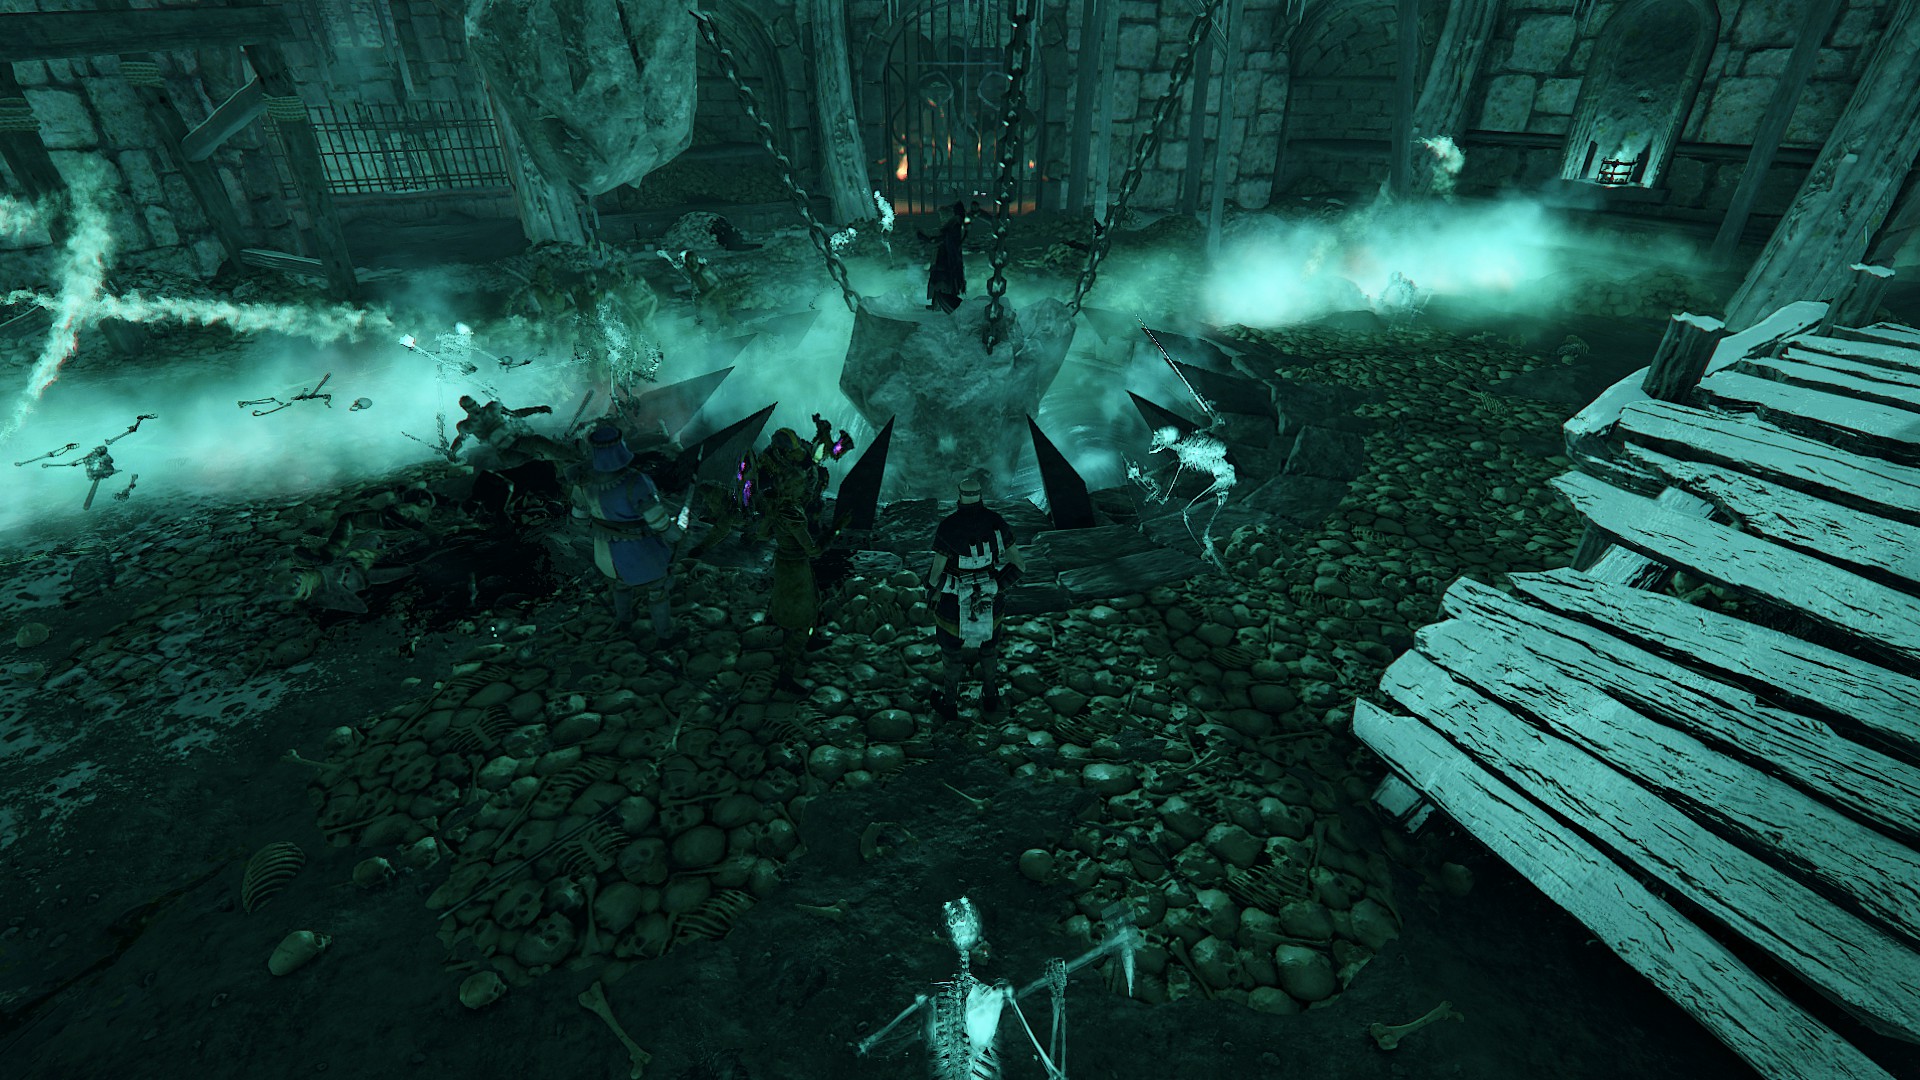
보스전 도중, 영혼의 우물에 통을 던지는 작업을 올바르게 처리하는 것이 중요합니다.. 안타깝게도, 일부 개인은 이와 관련하여 실수를 범합니다..
그들은 혼자 모험을 하다가 공격을 받거나 영혼의 샘에 너무 가까이 머물러 있습니다., 지속적으로 통에 불을 붙이려고 시도하는 그림자 해골의 표적이 됩니다.. 두 경우 모두, 배럴은 결국 폭발한다.
이런 사고를 방지하기 위해, 근처의 적들을 미리 처리하거나, 돌진, 은신 능력을 갖춘 직업을 활용하세요..
앞으로 나아가면서, 동시에 배럴을 45로 던집니다.° 각도. 이 거리를 유지함으로써, 목표에 충분히 가까워야 합니다.
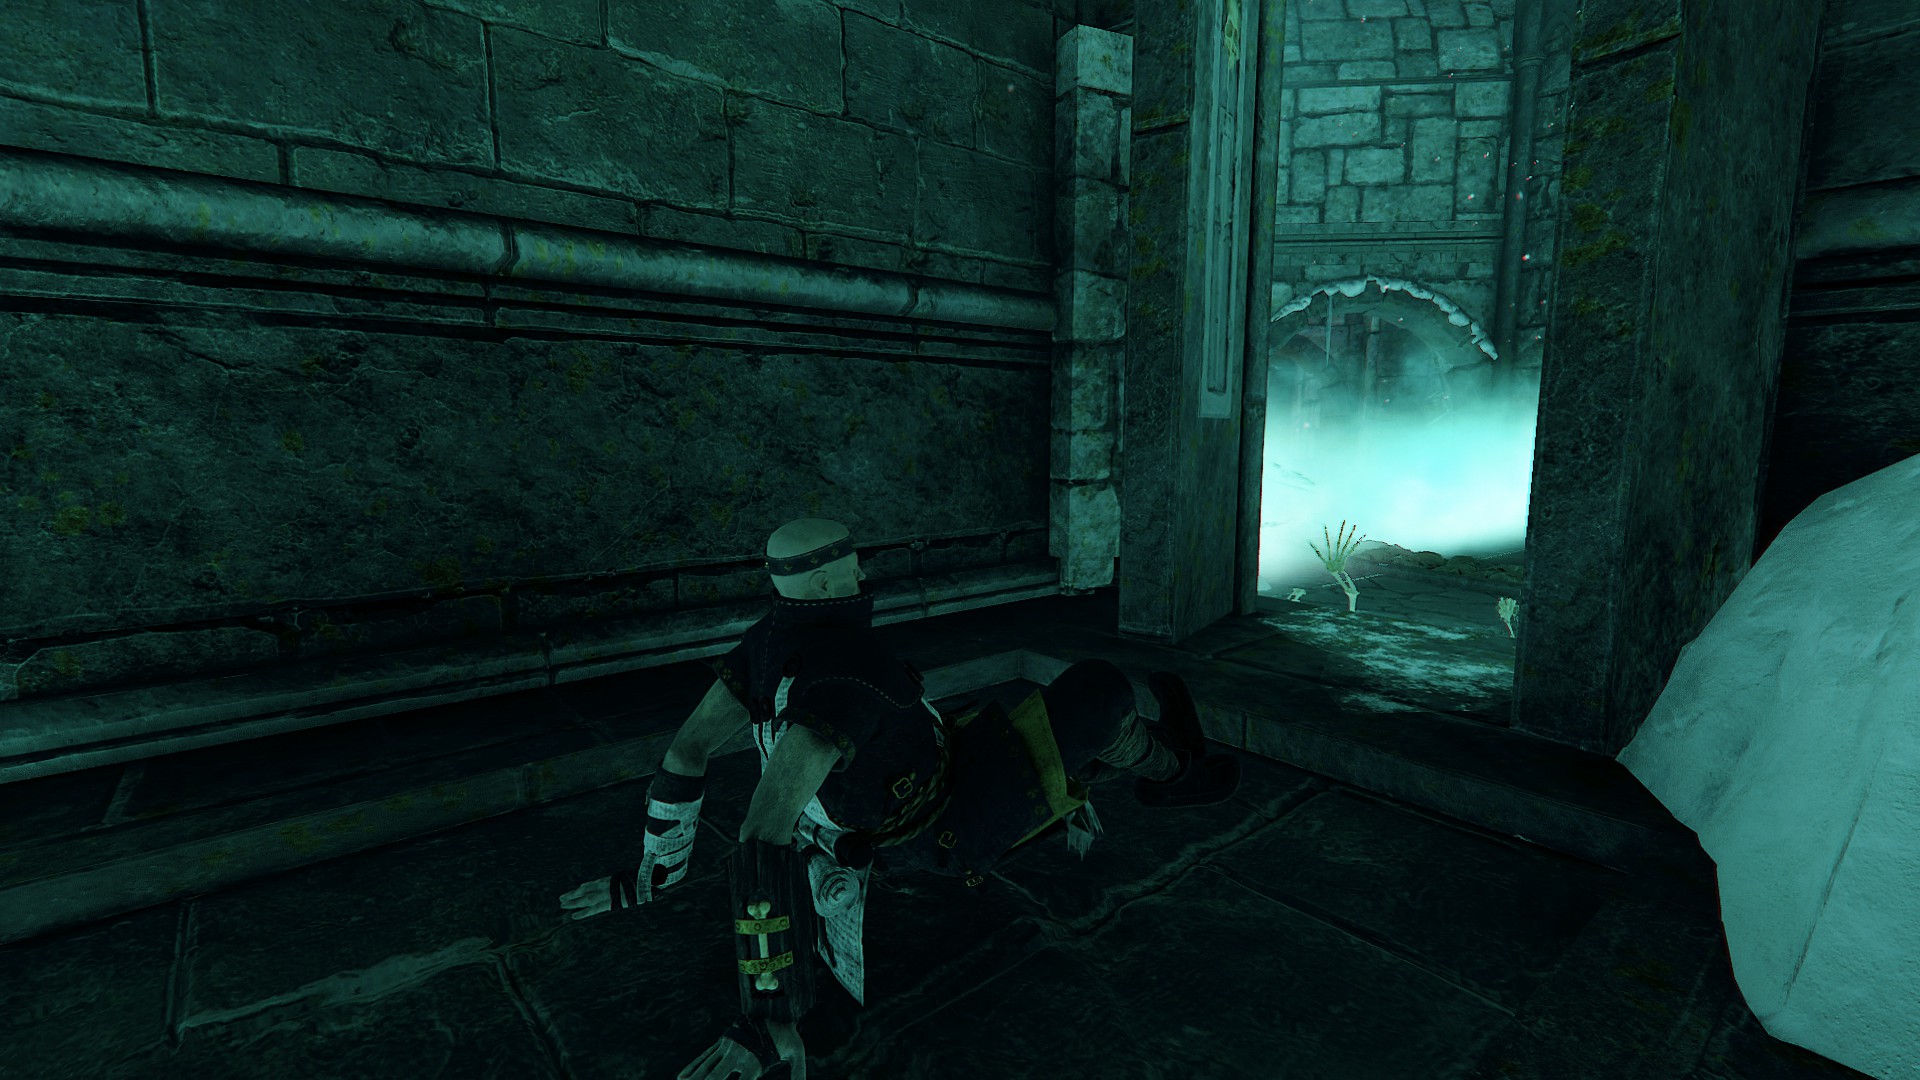
그후, 한 쌍의 뼈 손이 땅에서 튀어나와 플레이어에게 피해를 입힙니다. (봇 제외) 접촉 시.
이런 상황을 피하려면, 당신은 두 가지 대안을 마음대로 사용할 수 있습니다.
초기 선택은 원형 패턴으로 실행하는 것입니다.. 첫 번째 인스턴스에서는 바늘이 시계 방향으로 움직이고 두 번째 인스턴스에서는 시계 반대 방향으로 움직입니다..
두 번째 옵션은 보급실에서 엄폐하는 것입니다..
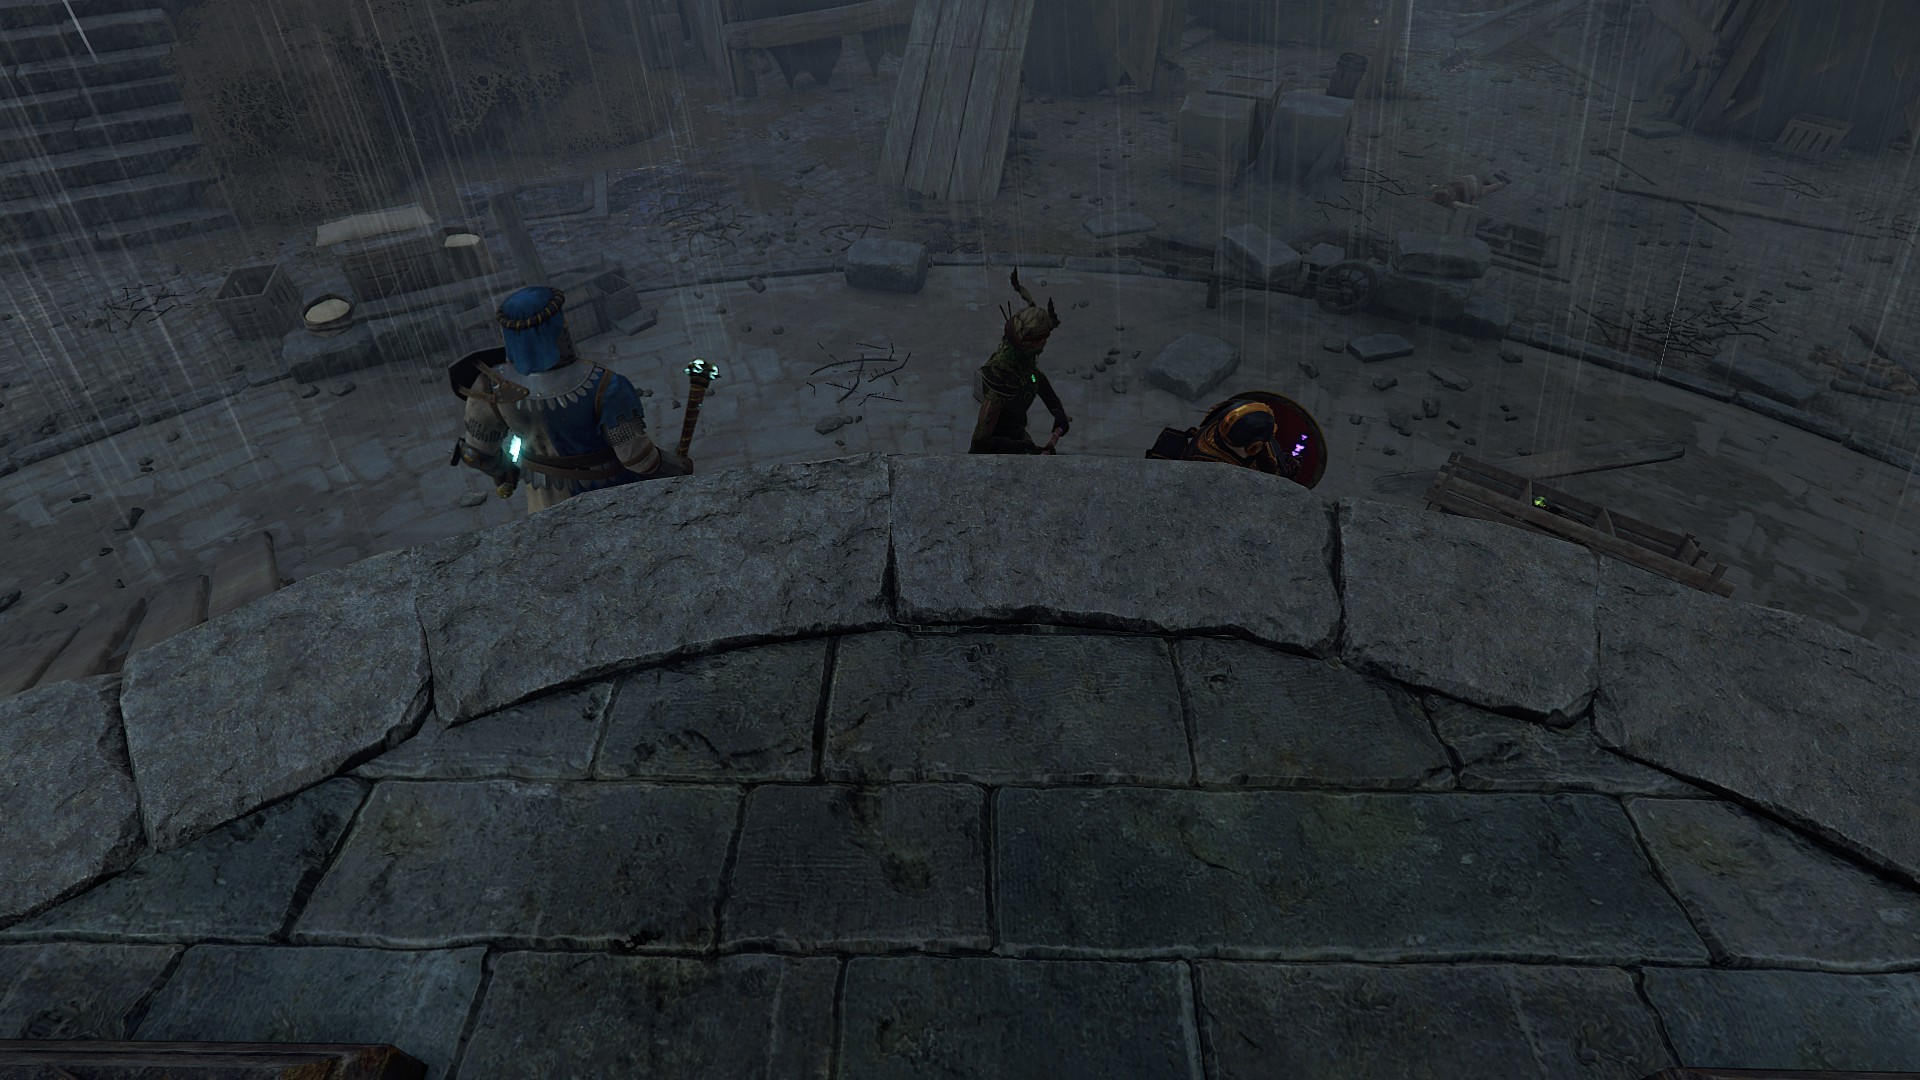
이 접근 방식에는 장점과 단점이 있습니다..
적과 교전하면서 원을 그리며 달릴 필요가 없다는 장점이 있습니다., 탄약을 무제한으로 공급받을 수 있다, 그리고 적 (거머리 제외) 방에 들어갈 수 없어서.
반면에, 단점은 적들이 방 밖에서 기다리고 있어 한 발짝이라도 나가면 공격한다는 것입니다.. 추가적으로, 벽에 너무 가까이 서 있으면, enemies might be able to attack you through the wall, a move colloquially known as a “Tilean handshake.”
그러므로, it is worth considering staying outside the room and only using it when necessary for supplies, taking a break, or in the event that your allies have fallen, as they will respawn outside one of the two supply rooms.
Fortunes of War
Fortunes of War stands as the most challenging mission in the entire game.
Not only does it feature a significant number of elite enemies, special units, and formidable monsters, but you also have a limited supply to work with.
One of the main obstacles is the presence of packmasters, but by positioning yourself beside the statue without a rune, you can avoid being hooked by them.
장거리 무기를 갖춘 사람을 지정하면 나머지 팀원들이 아래에서 계속 싸우는 동안 멀리서 적을 제거할 수 있습니다..
혹시 파티에 힘의 물약을 자주 떨어뜨리는 성배기사가 있다면, 당신의 매력의 특성을 혼합으로 수정하는 것이 좋습니다. 이 특정 임무에서는 힘의 물약이 집중의 물약만큼 유익하지 않을 수 있습니다. (그리고 아마도 모든 임무에서), 혼합물 특성을 사용하면 정기적으로 물약을 보충할 수 있습니다., 파도를 제거하는 데 큰 도움이 될 수 있습니다., 선택한 직업에 따라.
이 전략은 Waystalker와 같은 클래스에 특히 유리합니다., 그늘, 현상금 사냥꾼, 전사 사제, 전투마법사, 그리고 언체인드.
다른 임무에도 동일한 접근 방식을 적용할 수 있습니다..
카오스 황무지
이 게임 모드는 몇 가지 면에서 일반적인 임무와 다릅니다.. 먼저, 자신의 장비를 가져올 수 없으며 생존을 위해 무기를 업그레이드하고 혜택을 획득해야 합니다.. 여기, 나는 당신의 순례에 도움이 될 수 있는 몇 가지 혜택/저주를 소개하고 팁을 제공할 것입니다..
케인의 힘: 이 혜택은 당신에게 25% 전력은 증가하지만 50% 저주, Warrior Priest에게 이상적인 선택이 됩니다., 누가 소유하고 있는가 100% 저주 저항. 추가적으로, 워리어 프리스트는 너글의 역병 독기의 저주에 면역입니다..
모르가이헥의 파멸: 이 혜택은 치명타 확률을 보장합니다. 2 스텔스 종료 후 몇 초 후, Shade 클래스에 적합하게 만들기, 스텔스가 뛰어나고 치명타에 의존합니다..
라드리엘의 베일: 피해를 입었을 때, 이 혜택이 당신에게 주어집니다 5 30초의 재사용 대기시간과 함께 몇 초 동안 투명화됩니다.. 특히 Shade에 유용합니다., 들키지 않고 뒤에서 적을 공격할 수 있습니다..
귀하가 받은 혜택을 팀원과 공유하면 조율된 조치를 취할 수 있습니다.. 예를 들어, 이제 항목을 복제할 수 있다면, 당신의 동맹국은 당신이 복제하기를 원하는 아이템을 제공할 수 있습니다., 또는 특별한 아이템을 바탕으로 투쟁/조화의 성지로 안내할 수도 있습니다..
여행하는 동안, 더 많은 순례자의 주화를 제공하는 길을 찾는 것이 유익할 것입니다., 혜택을 구매하거나 무기를 업그레이드할 수 있습니다.. Slaanesh의 저주받은 레벨을 탐색하는 것도 고려할 수 있지만 Tzeentch의 저주받은 위치는 피해야 합니다..
내 생각에는, Tzeentch 저주는 가장 까다롭습니다.. 그만큼 “기회의 화살” 저주는 적을 더 위험한 버전으로 변화시킵니다., and dealing with a horde of plague monks, stormvermin, and warpfirethrowers (또는 더 나쁘다) can be quite daunting. 추가적으로, failing to destroy the crystal eggs in time summons a monster each time.
반면에, Slaanesh curses are relatively harmless or even beneficial. 예를 들어, 에서 “Glory of Greed” 저주, you won’t find any items, but enemies occasionally drop orbs that contain various supplies, including coins. This grants you an unlimited supply of healing, 폭탄, 탄약, and potions. While some players use this to farm pilgrim’s coins, it may not always be worth the time invested. 에서 “Unquenchable Thirst” 저주, you gradually take damage over time but discover more potions throughout the level. These potions effectively heal you, eliminating the need for draughts or bandages even if you sustain injuries. 하지만, it is crucial to warn your allies before unleashing a storm of bombs with the potion of endless bombs.
During your journey through the Chaos Wastes, you will encounter shrines where you can spend your pilgrim’s coins to acquire miracles and boons. Exercise caution before purchasing the miracle of Smednir or Grimnir, as they come with disadvantages that could potentially jeopardize the entire pilgrimage. This caution is especially crucial if you encounter the temple of Be’lakor or the citadel of eternity, both of which already pose significant challenges. It may also be wise to skip the chest of trials in the citadel, as an Ungor war herd can disrupt your progress if things go awry.
무기
이 섹션에서는, I will provide a brief overview of six weapons.
Coruscation Staff, Beam Staff, 배고픈 불꽃과 결합된 볼트 지팡이: 전투 마법사의 레벨 10 재능, 굶주린 불길, 시간이 지남에 따라 화재 피해를 증가시킵니다. 150% 비화상 손상을 다음과 같이 줄입니다. 30%. 이는 데미지 출력에 큰 영향을 미칩니다.. Coruscation Staff의 충전 공격은 주로 화염 피해를 입힙니다., 전투 마법사로 플레이할 때 Famished Flames를 장착하는 것이 유익합니다.. 빔 스태프의 가벼운 공격에도 동일하게 적용됩니다., 대체 공격이지만 (마우스 오른쪽 버튼을 클릭하여 약한 공격을 취소하여 수행) 불이 아닌 피해를 더 많이 입힙니다., 결과적으로 전체 전력이 감소합니다.. 볼트 스태프와 함께, 선택하는 것이 좋습니다 “화산의 힘” 대신에 “굶주린 불꽃.” 볼트 스태프는 시간이 지나도 손상을 입히지 않습니다., 화산의 힘은 완전히 충전된 공격의 위력을 증가시킵니다., 상당한 피해 출력 가능.
바르딘의 걸작 권총과 권총의 비교: 걸작 권총은 권총에 비해 몇 가지 단점이 있습니다.. 더 높은 난이도에서 특수 유닛을 죽이려면 두 발의 사격이 필요합니다., 반면 권총은 한 발만 필요합니다., 대격변에서도. 추가적으로, 걸작 권총은 권총보다 탄약 양이 두 배 더 많지 않습니다.. 정확도도 떨어지며 유효 범위도 짧습니다.. Blightstormer가 멀리서 주문을 시전할 때 “곡물 반대” 사명, 당신은 그들을 죽이거나 때리는 데 어려움을 겪을 수 있습니다.
그러므로, Outcast Engineer DLC를 구매하더라도, 당신의 믿을 수 있는 권총은 여전히 귀중한 선택입니다. 하지만, Masterwork Pistol은 단거리에서 탁월합니다.. 큰 피해를 신속하게 처리해야 하는 경우, 예를 들어 버서커를 상대로, 승려, 경고를 받은 스톰버민 순찰대, 아니면 괴물인가, the Masterwork Pistol is the better option.
An even more effective choice for dealing with berserkers is Victor Saltzpyre’s Rapier. With its special attack, you can shoot savage, chaos maulers, and Stormvermin while blocking their attacks. The Rapier also has higher stagger power than normal attacks. While primarily suitable for fighting hordes, the Rapier, with increased headshot damage, the off-hand shot, and a charged attack that facilitates targeting the enemy’s head, is also capable of dealing with armored foes.
장비
When playing with others, you may notice that most players prioritize hunting for books, particularly on Legend difficulty. 그러한 경우, it is advisable to equip a trinket with curse resistance, as it increases your maximum health and helps prevent untimely deaths. 하지만, on Cataclysm difficulty, it is uncommon to collect tomes and grimoires, so curse resistance is not as necessary.
The trait “Boon of Shallya” is a suitable choice for careers that can easily generate temporary health, such as the Mercenary or the Zealot, as they rely on temporary health instead of permanent health. When combined with a level 5 talent that grants temporary health upon staggering enemies and the level 15 재능 “Smiter,” which ensures the first hit always counts as a stagger and adds an additional stagger count when hitting a staggered enemy, you can rapidly accumulate a substantial amount of temporary health. 하지만, it is important to note that not all careers have the same level 5 and level 15 재능.
For the mission “Into the Nest,” it is advisable to carry a necklace with damage reduction against Skaven, as only Skaven enemies will appear there. The same applies to damage reduction against Chaos for “The War Camp” 사명.
봇
봇, despite never shooting at you and usually staying close to protect your back, can sometimes leave you in a precarious situation or fail to assist you when needed. If you answered “the Bots” to the question, you win a pumpkin—축하해요! 하지만, since only a hookrat, leech, or distraction is required to kill a Bot, I will not explain how to keep them alive. 대신에, I will focus on how they can be most helpful to you.
The distribution of roles within the group is crucial. Ranged classes should focus on keeping specials at bay, while tanks distract enemies and remain alive long enough to revive teammates unless they are distracted by a monster or warpshots from a ratling, in which case they may fail to assist you. 봇은 이러한 상황에 대해 특별한 우선순위를 가지고 있습니다..
추천 봇 경력은 다음과 같습니다.:
- 용병: 용병은 패시브 능력을 공유할 수 있습니다., 더 많은 근접 속도 제공. 자신의 경력 기술로, 일시적인 건강을 제공할 수 있습니다, 피해 감소, 아니면 즉시 부활하거나.
- 성배기사: 이 직업은 몬스터와 카오스 워리어를 제거하는 데 탁월합니다., 퀘스트를 통해 파티 전체에 상당한 이점을 제공합니다.. 퀘스트를 완료한 후, 책을 떨어뜨릴 수도 있어요.
- 레인저 베테랑: 원거리 클래스로 플레이하는 경우, 레인저 베테랑의 유용성을 잘 알고 있어야 합니다.. 그들은 특별한 적을 물리친 후 탄약을 떨어뜨리고 피해 감소를 제공하고 근접 속도를 높이는 에일을 떨어뜨릴 수도 있습니다.. 추가적으로, 폭탄이나 물약을 떨어뜨릴 수 있습니다., and their career skill can further increase melee speed while granting temporary health inside the smoke.
- Ironbreaker: The Ironbreaker excels at distracting enemies and boasts high durability. They are often the last surviving Bot. Bardin can also boost your power by 20% with the right talents.
- Waystalker: This delicate career is perfect for taking out specials. The Waystalker can share their passive skill for health regeneration and compensate for the melee-only careers in your team.
- Sister of the Thorn: This class can push back detaining specials like assassins or protect you with a wall of vines. They can boost your power by 15%, increase critical strike chance by 5%, and enhance all healing by 25%.
- Warrior Priest of Sigmar: Considered one of the best support careers in the game, the Warrior Priest not only provides blessings to the party but can also heal the group while smiting enemies. Their career skill grants a shield that makes you immune to damage for a period of time. The Warrior Priest can withstand substantial damage and revive teammates instantly.
- 사슬에서 풀려난: This career can tank a lot of damage, weaken burning enemies, and provide temporary health to the group.
If you are playing as a low HP class like the Shade and get knocked down on higher difficulties, the Bots may not revive you quickly enough. 그러한 경우, it may be helpful to bring a Mercenary or Warrior Priest along. With their talents “On Yer Feet, Mates!” 그리고 “The Comet’s Gift,” they can instantly revive you. 추가적으로, 그만큼 “Natural Bond” talent reduces the need for healing on Bots, but you can still heal them with bandages.
Other Things
The scarcity of equipment holds no significance as exotic items can possess identical statistics to those of veteran ones. 게다가, this not only pertains to their power level but also encompasses their inherent properties.

Even if you possess top-notch gear, a poor internet connection can leave you vulnerable to significant damage. Enemies may strike without warning, catching you off guard. Even with slight latency, the damage you receive may surpass what you are accustomed to.
If you experience even the slightest delay, it’s advisable to avoid playing as a Zealot with low health. Some players, including myself, choose to play as Zealot despite having only a single health point remaining, and there are valid reasons for doing so. While the Zealot’s passive skill prevents immediate death, its effect lasts for only a few seconds and has a lengthy cooldown period. Some players even decline healing after being downed. It’s important to note that two hits within a certain time frame are sufficient to eliminate you. This includes various forms of damage, such as area effects from specific missions like the “Garden of Morr” end event, including destroyed barrels of lamp oil, destroyed Nurgle buboes, the flame trail of a warpfirethrower, the flame trail of a stormfiend, and other types of damage such as explosions from black powder barrels or warpfirethrowers, friendly fire, unexpected attacks from behind, fall damage, or even the explosion of a bomb thrown by yourself or your allies if you remain too close. 그러므로, caution should be exercised.
While certain choices may enhance your strength, they also come with increased danger. The Unchained career of Sienna is a prime example. As her overcharge level increases, she can deal up to 60% more melee damage. 하지만, once overcharged, her only option to avoid death is to utilize her career skill, which shares a similar cooldown duration to the Zealot’s passive skill. Playing as Unchained can be likened to playing with fire, as taking damage or being struck by an ally while on the brink of overcharge can lead to your demise. It’s worth noting that few players venture to push Unchained to its limits.
If you still choose to play as a low-health Zealot, it is advisable to accumulate temporary health. Damage reduction offers little benefit in this state, so traits such as “Barkskin” or talents like “Armour of Faith” should be disregarded. 대신에, consider utilizing the “Boon of Shallya” trait and the “Holy Fortitude” 재능, both of which increase the effectiveness of healing received, including temporary health.
Here’s one last piece of advice: if you find yourself separated from your group and under attack by Elites, creating distance becomes crucial. Jumping off platforms, climbing over fences, or traversing obstacles can provide a slight advantage. Enemies often maintain their speed while attacking, but they become slower when climbing or maneuvering around objects. Utilize this brief window to reload, eliminate special enemies, or simply buy yourself some time.
I hope you find this guide helpful and wish you the best of luck in your battles against the Pactsworn!
이것이 오늘 우리가 공유하는 모든 것입니다. 워해머: Vermintide 2 가이드. 이 가이드는 원래 작성자가 작성하고 작성했습니다. Saizo19_. 이 가이드를 업데이트하지 못한 경우, 다음을 수행하여 최신 업데이트를 찾을 수 있습니다. 링크.