This guide is designed to address the inquiry concerning Alfred’s room in Tunnet. It originates from a recent question I encountered and opted to transform into a guide due to the absence of existing resources.
It’s important to acknowledge that utilizing this guide may diminish the enjoyment derived from independently unraveling the solution. Consider this a cautionary note before proceeding further.
The Problem
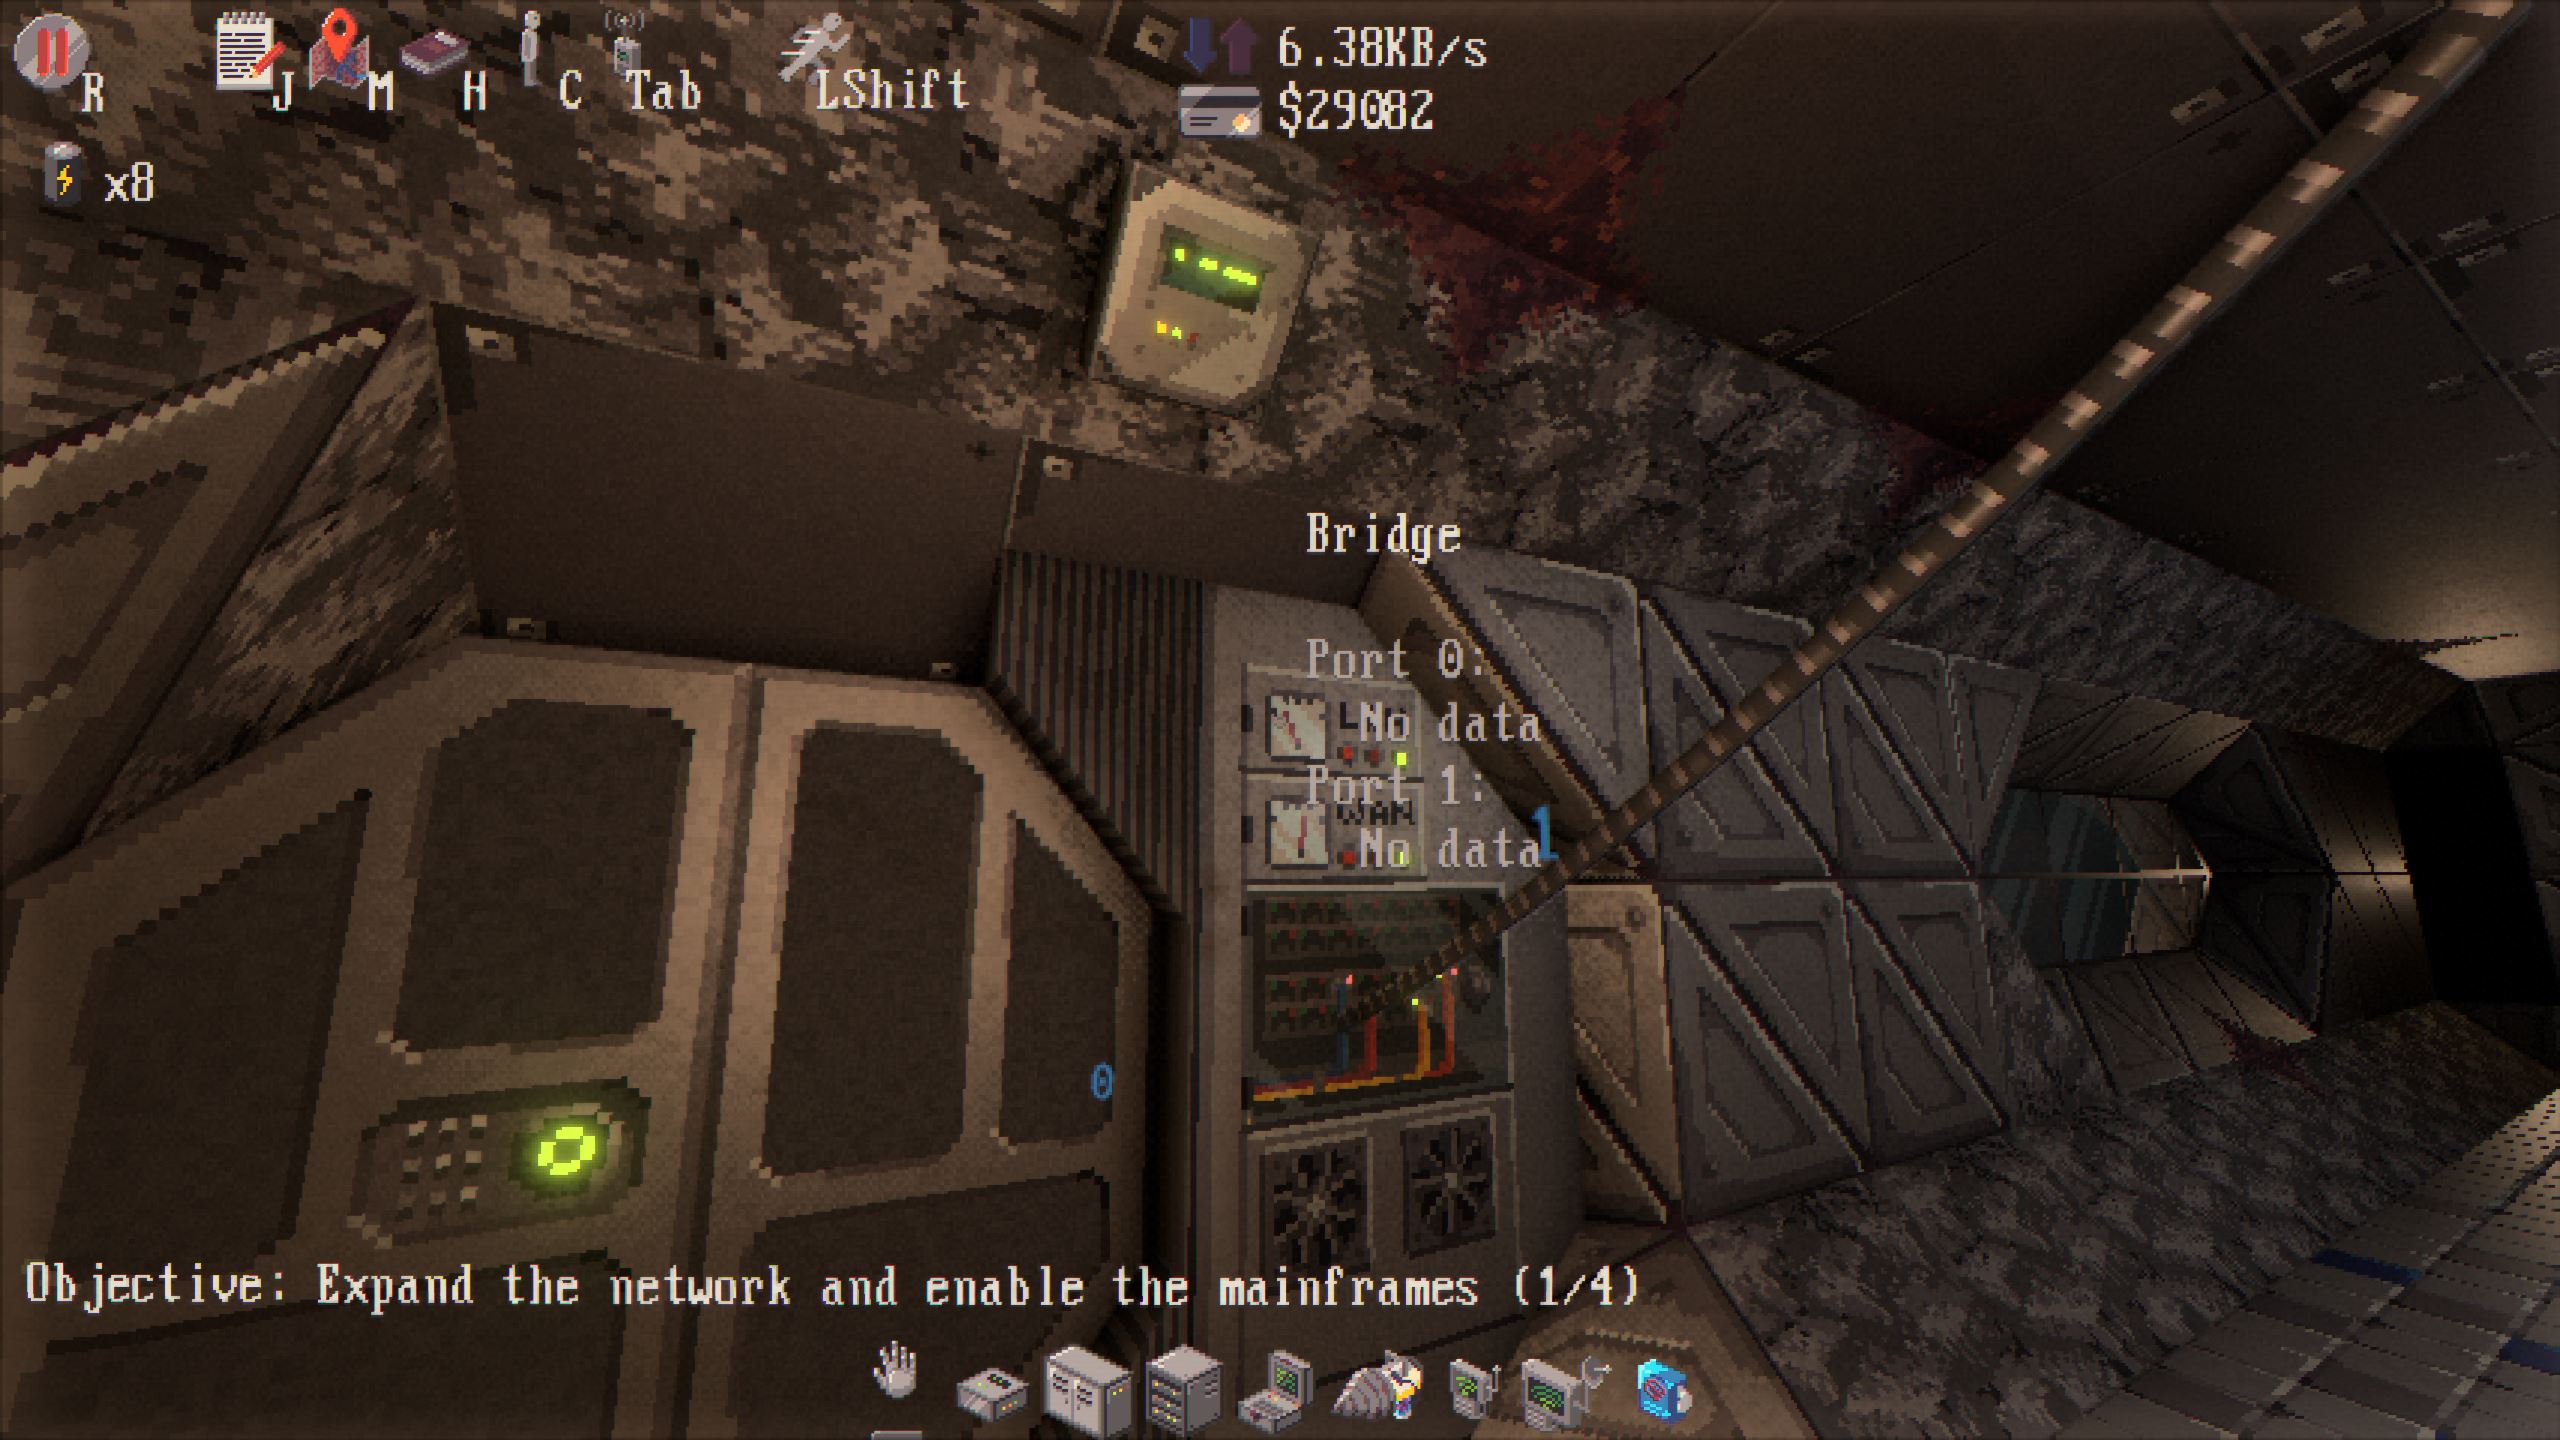
In Tunnet, there’s a rule that says you gotta use the bridge on the door to get to Alfred’s room or Chamber 4. This bridge is close to the starting lab, and you gotta switch it on to do stuff at the endpoint. Once it’s on, it changes the address from 0.0.1.0 에게 1.0.1.0, which kicks off the puzzle. 지금, if you’re still learning like me, you might not get exactly how this works, especially since it seems to do with a subnet.
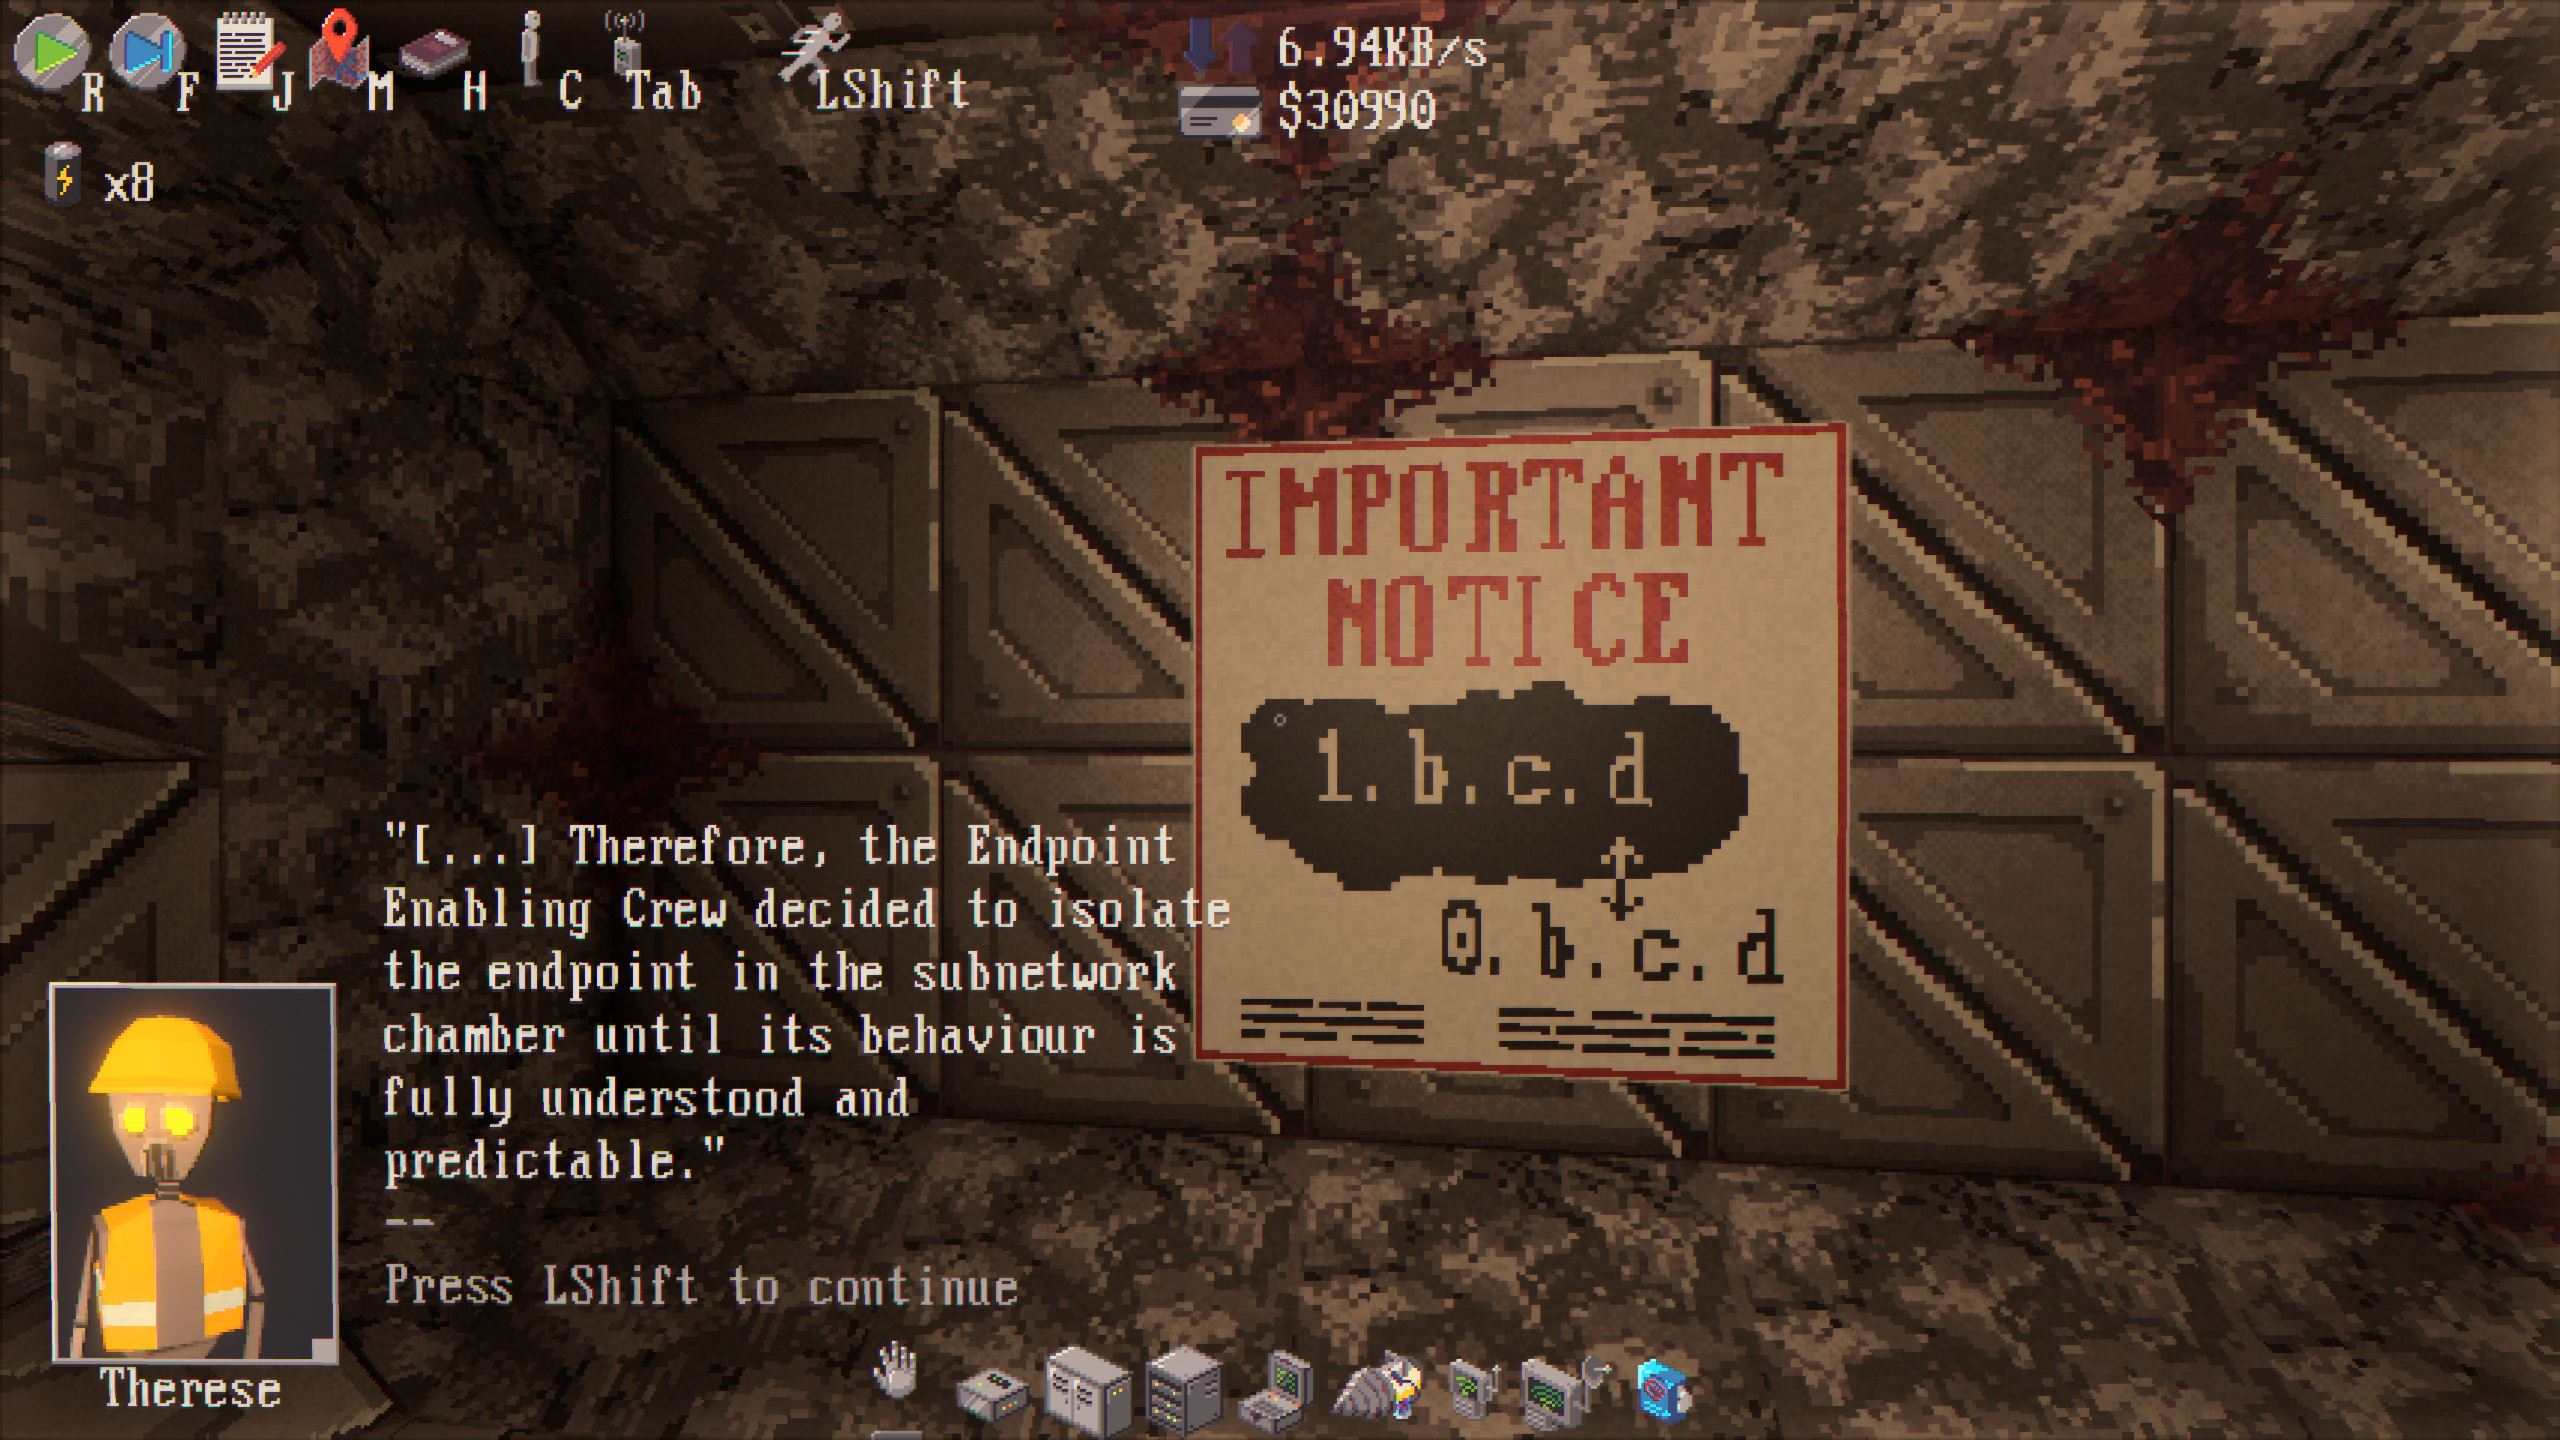
Inside the chamber, there’s a poster trying to explain this puzzle. It’s supposed to help players figure things out.
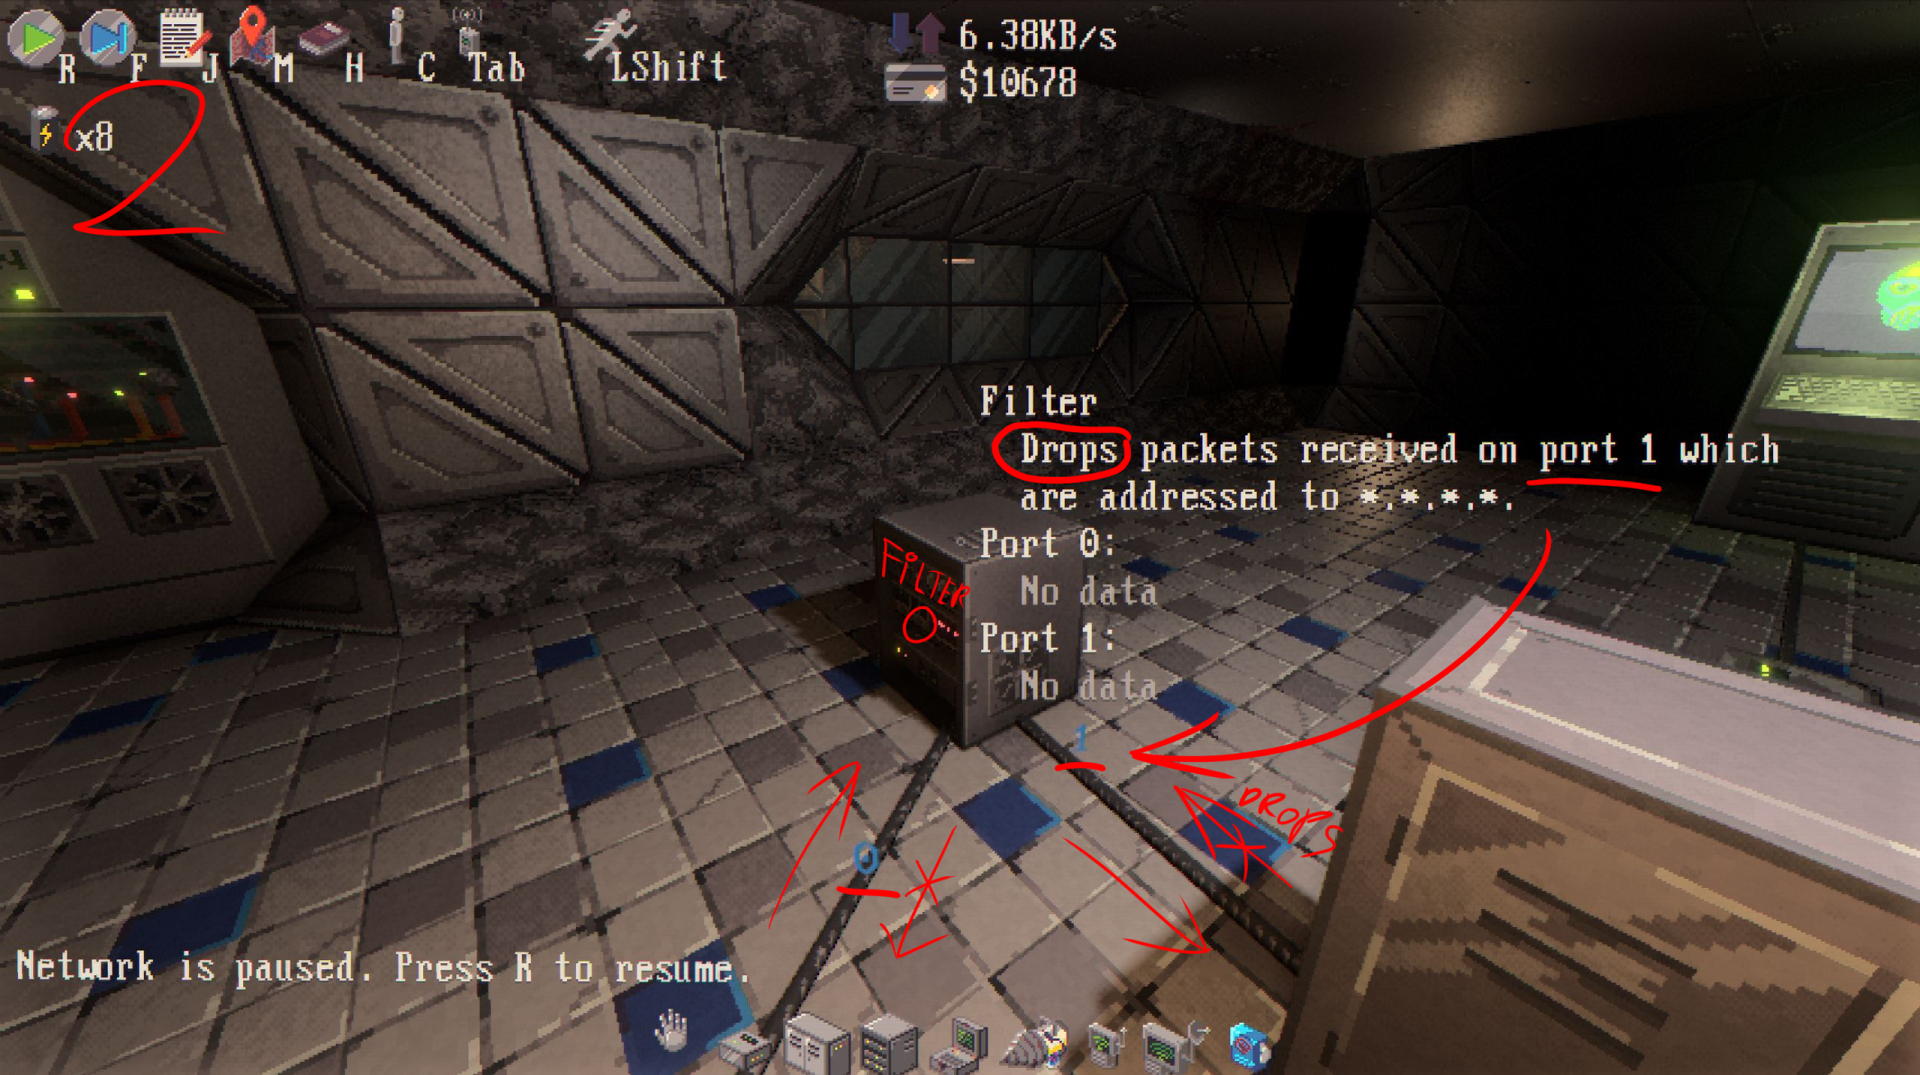
Albert’s room is set up with one hub and two filters, and you can’t change or remove them except for the hub. Practically speaking, they might not do much, but they’re probably there to teach you something, especially since it’s one of the first endpoints you encounter.
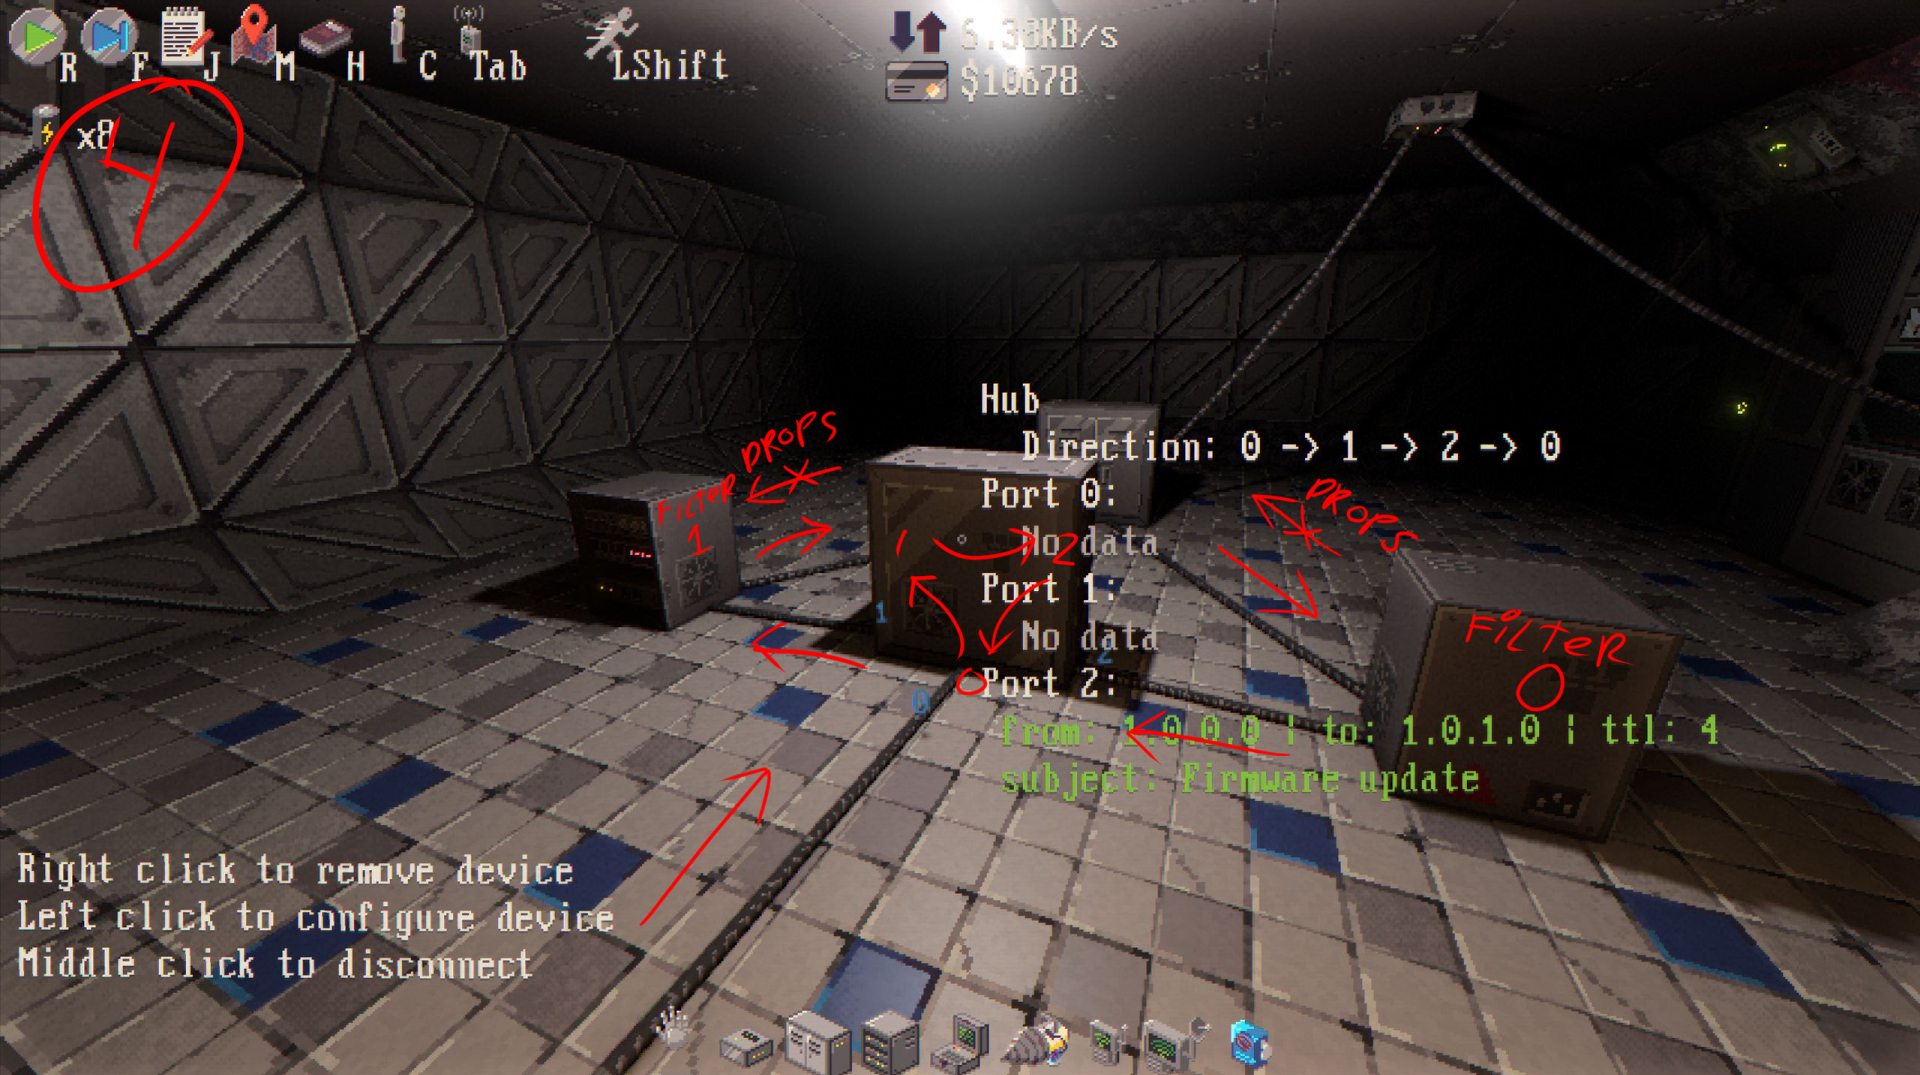
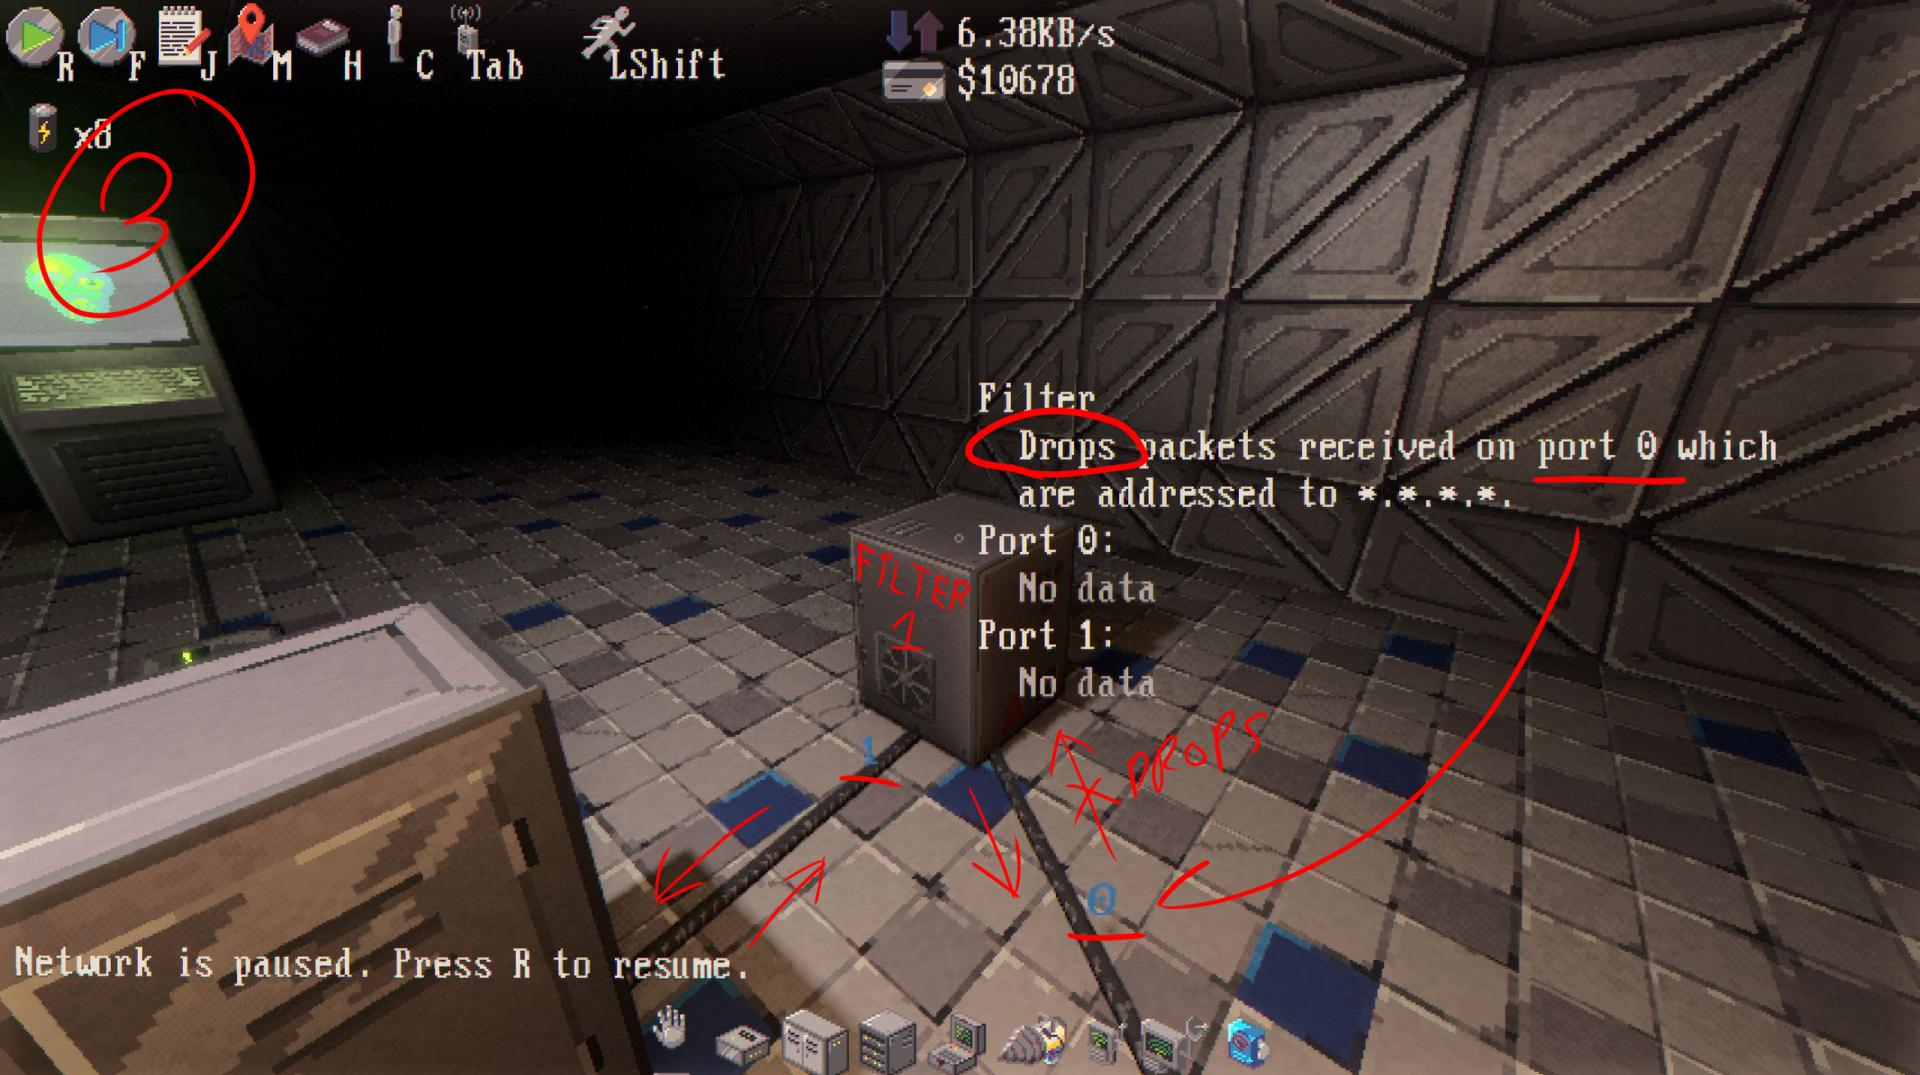
지금, the text I’m about to tell you is important, but it’ll make more sense if you keep the images in mind. They’re numbered from 1 에게 4 in the top left and under the images in a header.
How to Solve
The bridge on the door is crucial for correcting the address to reach Alfred at 1.0.1.0 대신에 0.0.1.0. This correction ensures Alfred receives the communication without rejection. Understanding subnets might not be in my wheelhouse, but routing through the bridge on the door is essential for converting the address to Alfred’s endpoint. 따라서, there’s no avoiding the use of the bridge, given this necessity.
But we’ve got a solution, and I’m about to lay it out for you so even if you’re still getting the hang of filters and hubs, you’ll be in the loop. Picture this: The main hub’s got port 0 hooked up to the bridge, kind of like the door to our communication chamber—it’s both the entrance and exit. 지금, I tweaked the hub setup a bit. Incoming traffic now heads to port 2, then gets filtered by the left filter. Since the right filter’s a no-go for our packet, let’s call the left one “filter 0” and the right one “filter 1”.
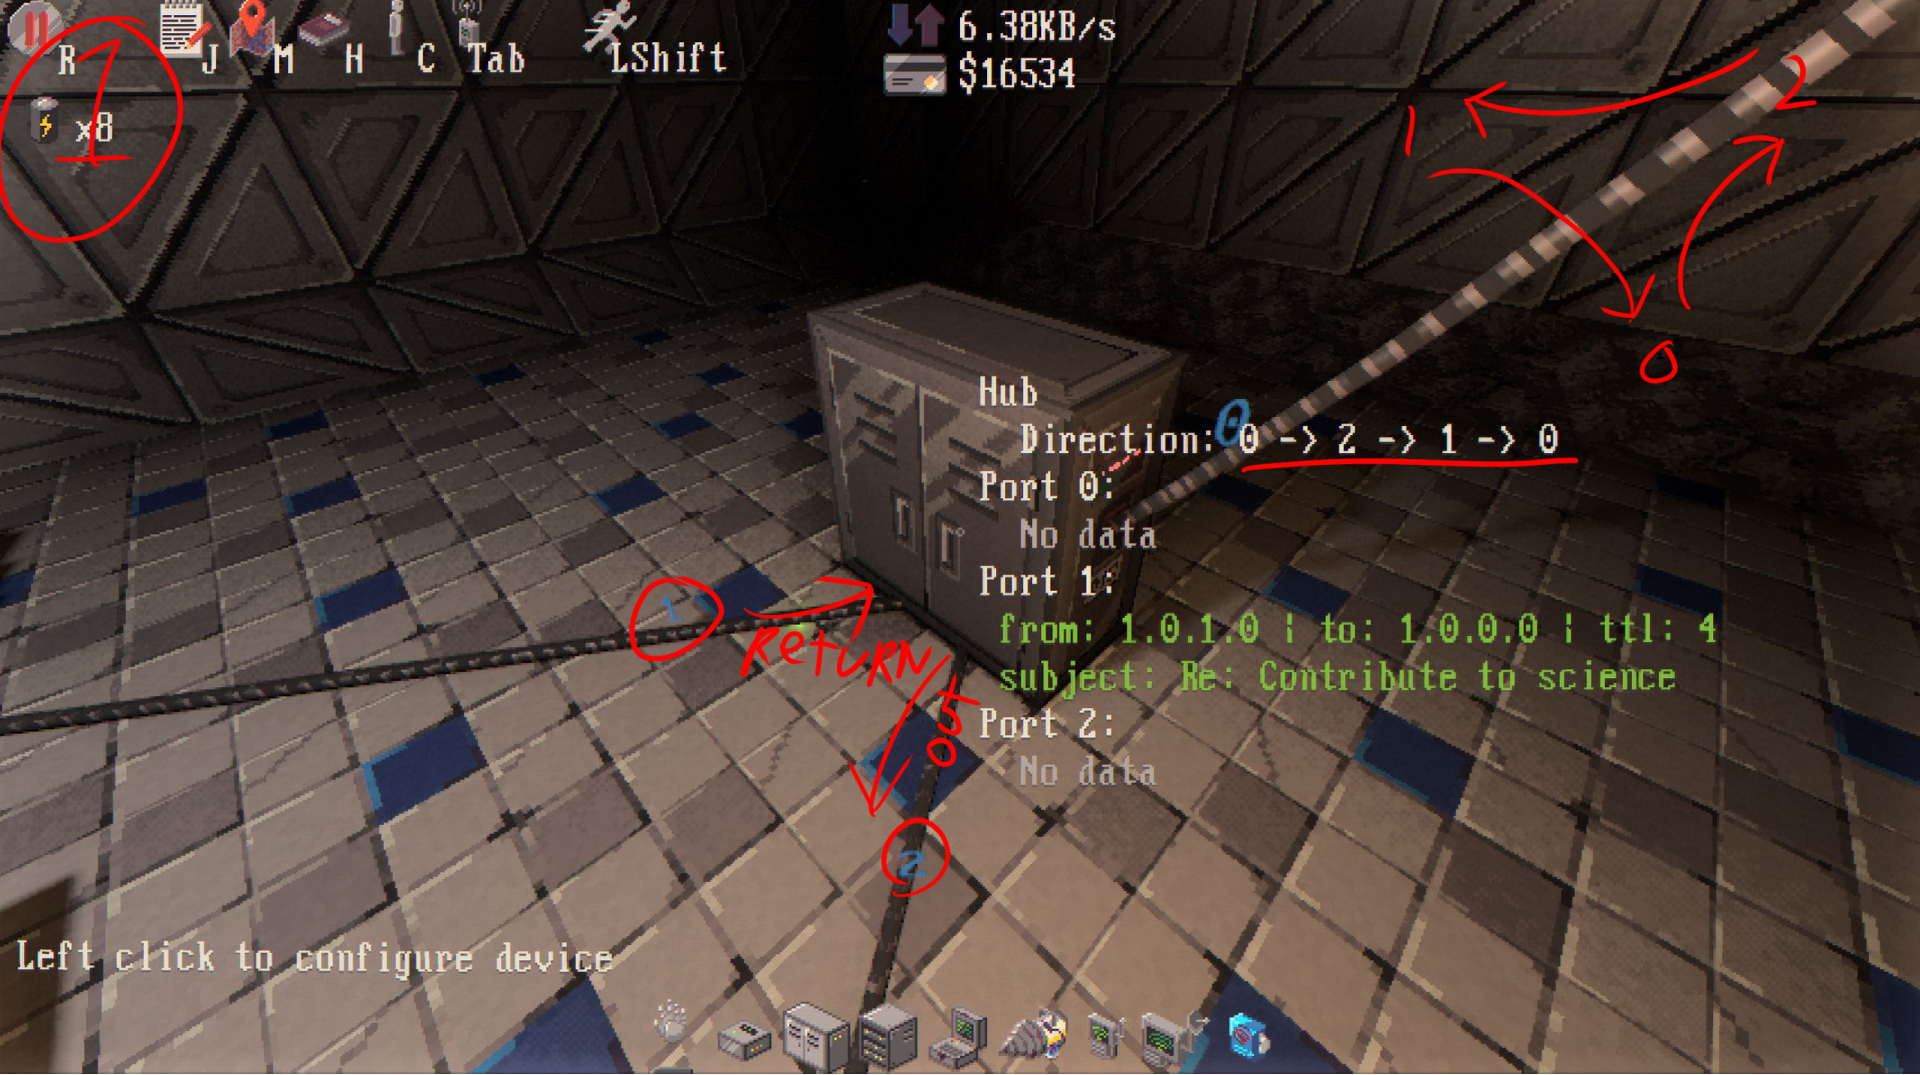
When our packet arrives from the hub’s port 2, it goes to filter 0’s port 0. This filter won’t drop it because it only drops packets from its port 1. 그래서, our packet keeps going to the hub I put between the filters.
After our packet arrives from filter 0, it reaches the second hub’s port 2. 거기에서, it goes to port 0 of the hub and then to our good friend Alfred!
From Alfred, packets will go to the hub and to its port 1 to filter 1.
You’ve probably noticed the pattern I’m trying to illustrate here. We navigate our packets through the filters by choosing paths that aren’t being filtered, as shown in the images. 그래서, 물론, this whole puzzle seems designed to teach us about filters and their functionalities.
지금, as our packet arrives at filter 1 via its port 1, it won’t be dropped and continues to its port 0, looping back to our initial hub, as indicated in the image.
보시다시피, our packet arrived at port 1 from filter 1, and it will directly proceed to the hub’s port 0 due to the configuration. It then leaves for the bridge to be converted to address 0.0.1.0 and onward to your network to request assistance, receive updates, and engage in other communications.
When digging, watch out for glitches that might take you out of the map and result in your demise. Apart from that caution, I hope this has given you a better understanding of how the mechanics operate. And don’t forget to peruse the posters and notes, even if they seem nonsensical at first! They often contain valuable explanations, though they might only make sense later on.