

- 제목: 스탠리 비유: 울트라 디럭스
- 출시일:
- 개발자:
- 발행자:
스탠리 비유에 관한 정보: 울트라 디럭스는 아직 미완성입니다. 이것을 사용하여 게임의 세부 정보를 입력할 수 있도록 도와주세요. 문의 양식.
This guide will be showing you the exact locations of all Stanley figurines in The Stanley Parable: 울트라 디럭스. 총 1개가 있습니다 6 figurines in the game and below are the details where you can find them.
How to Activate the Stanley Figurines Quest
To start collecting the Stanley Figurines, you have to get to the 2nd New Content door and choose that pathway. In order to get the New Content door to open, you must play through a few endings and then go the newly opened door in the hallway just before the choice doors.
As shown here:
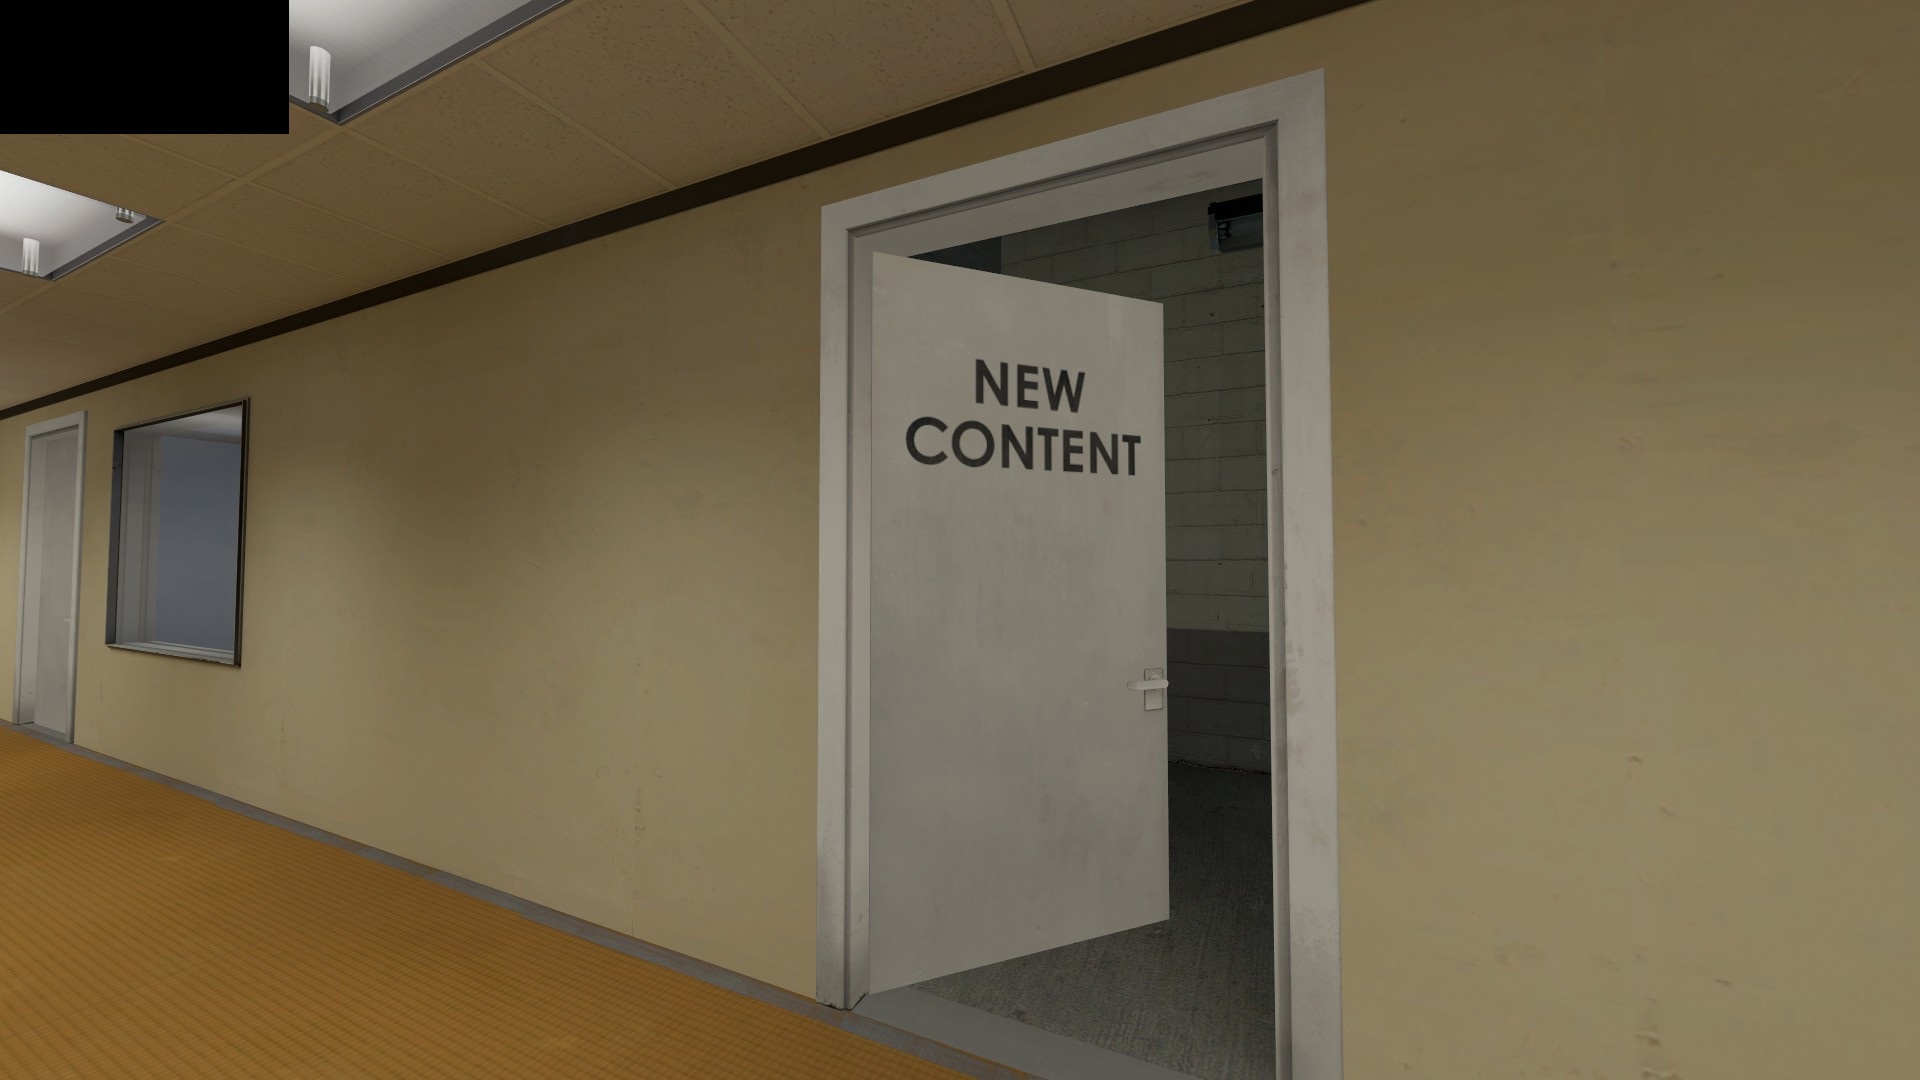
Complete the rather… sub-par ending of the “new content” and upon restart, the door should have neon lights next to it the second time you walk by. Entering the door a second time will bring you to a development office and then to an open Expo area where your journey begins.
작은 입상 #1
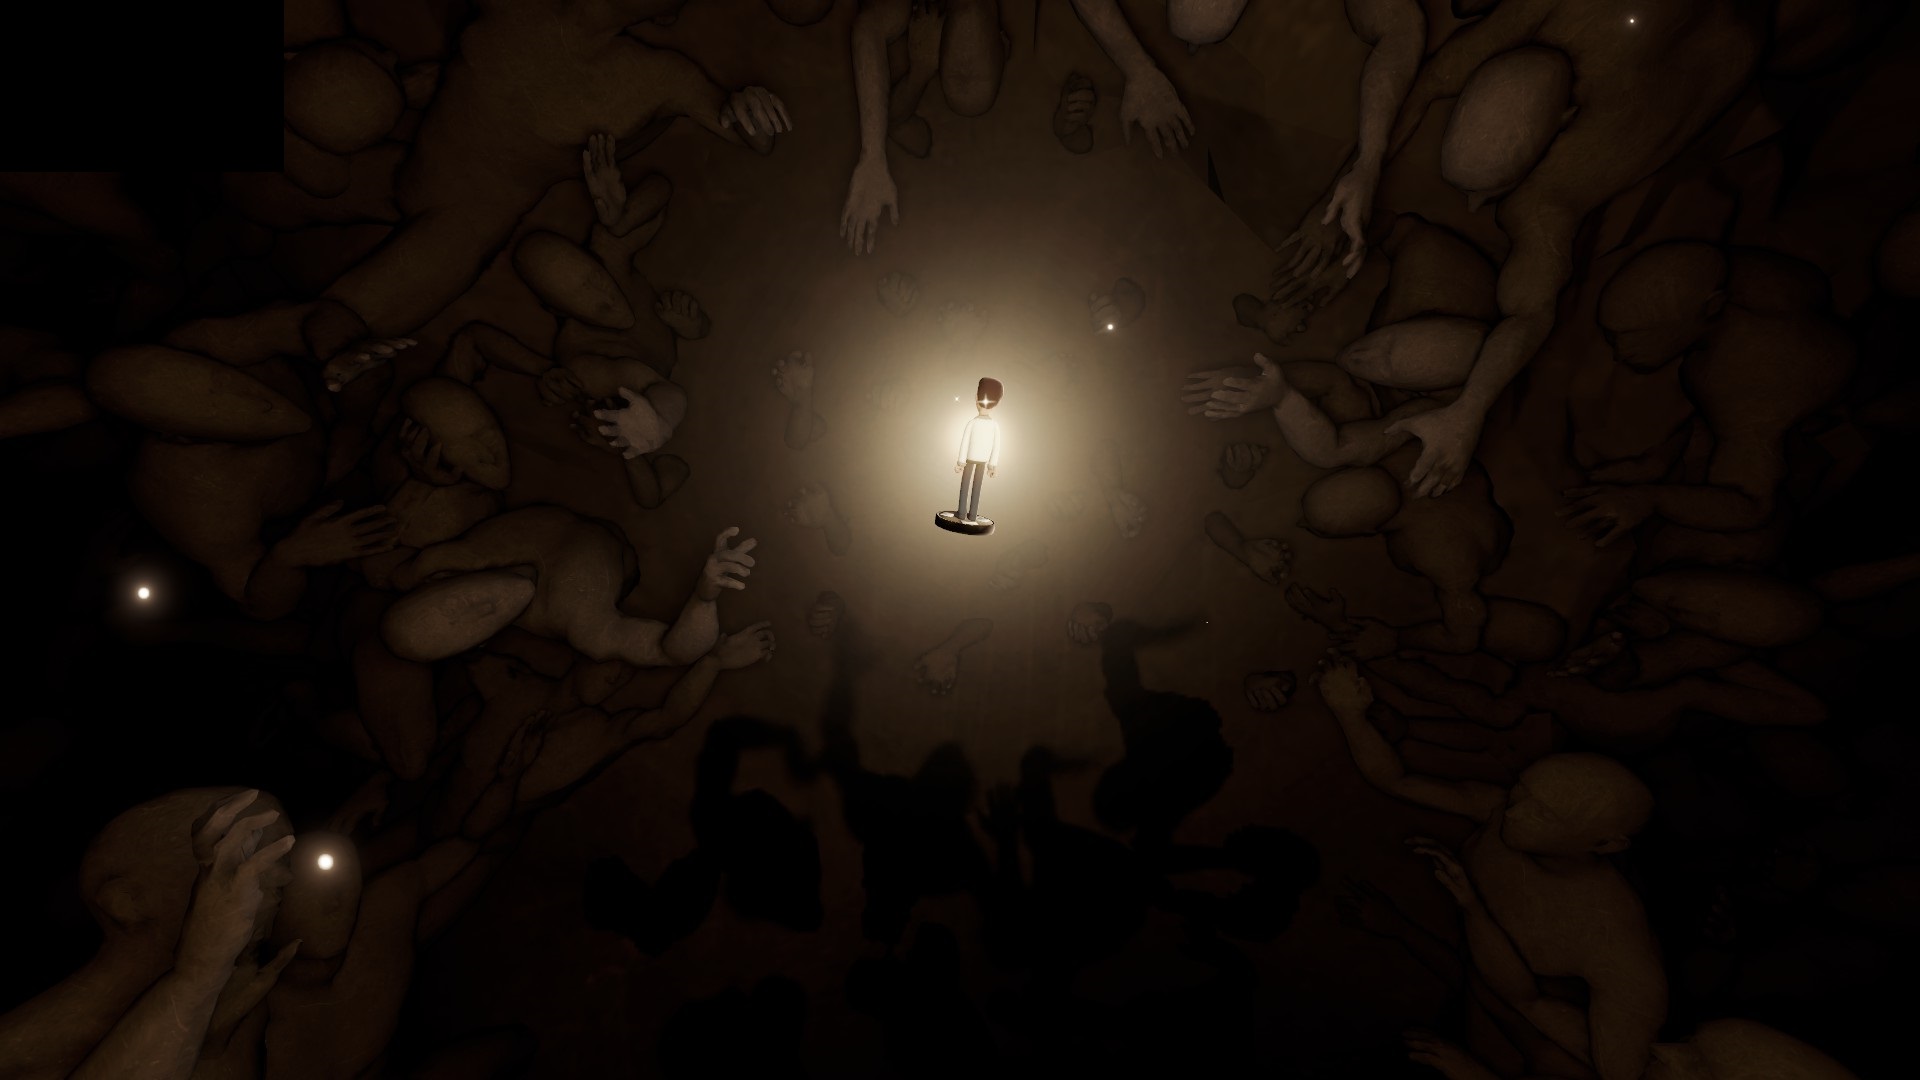
The first figurine can be found in the expo area, easily enough marked as “Collect Them All” with a large Stanley Figurine slowly rotating next to it. If you get lost, there is a map to help you find your way around the Expo area. 방에 들어가자마자, proceed forward towards the glowing light surrounded by outreaching sculptures.
As shown: The Expo Showroom:

The First Figurine:
After collecting the figurine, continue to the end and let the game restart.
작은 입상 #2
Now this is where your game may differ from mine. Each Figurine after the Expo can be found in any order you choose and do not have to follow my steps exactly. This is merely the order in which I found the Figurines.
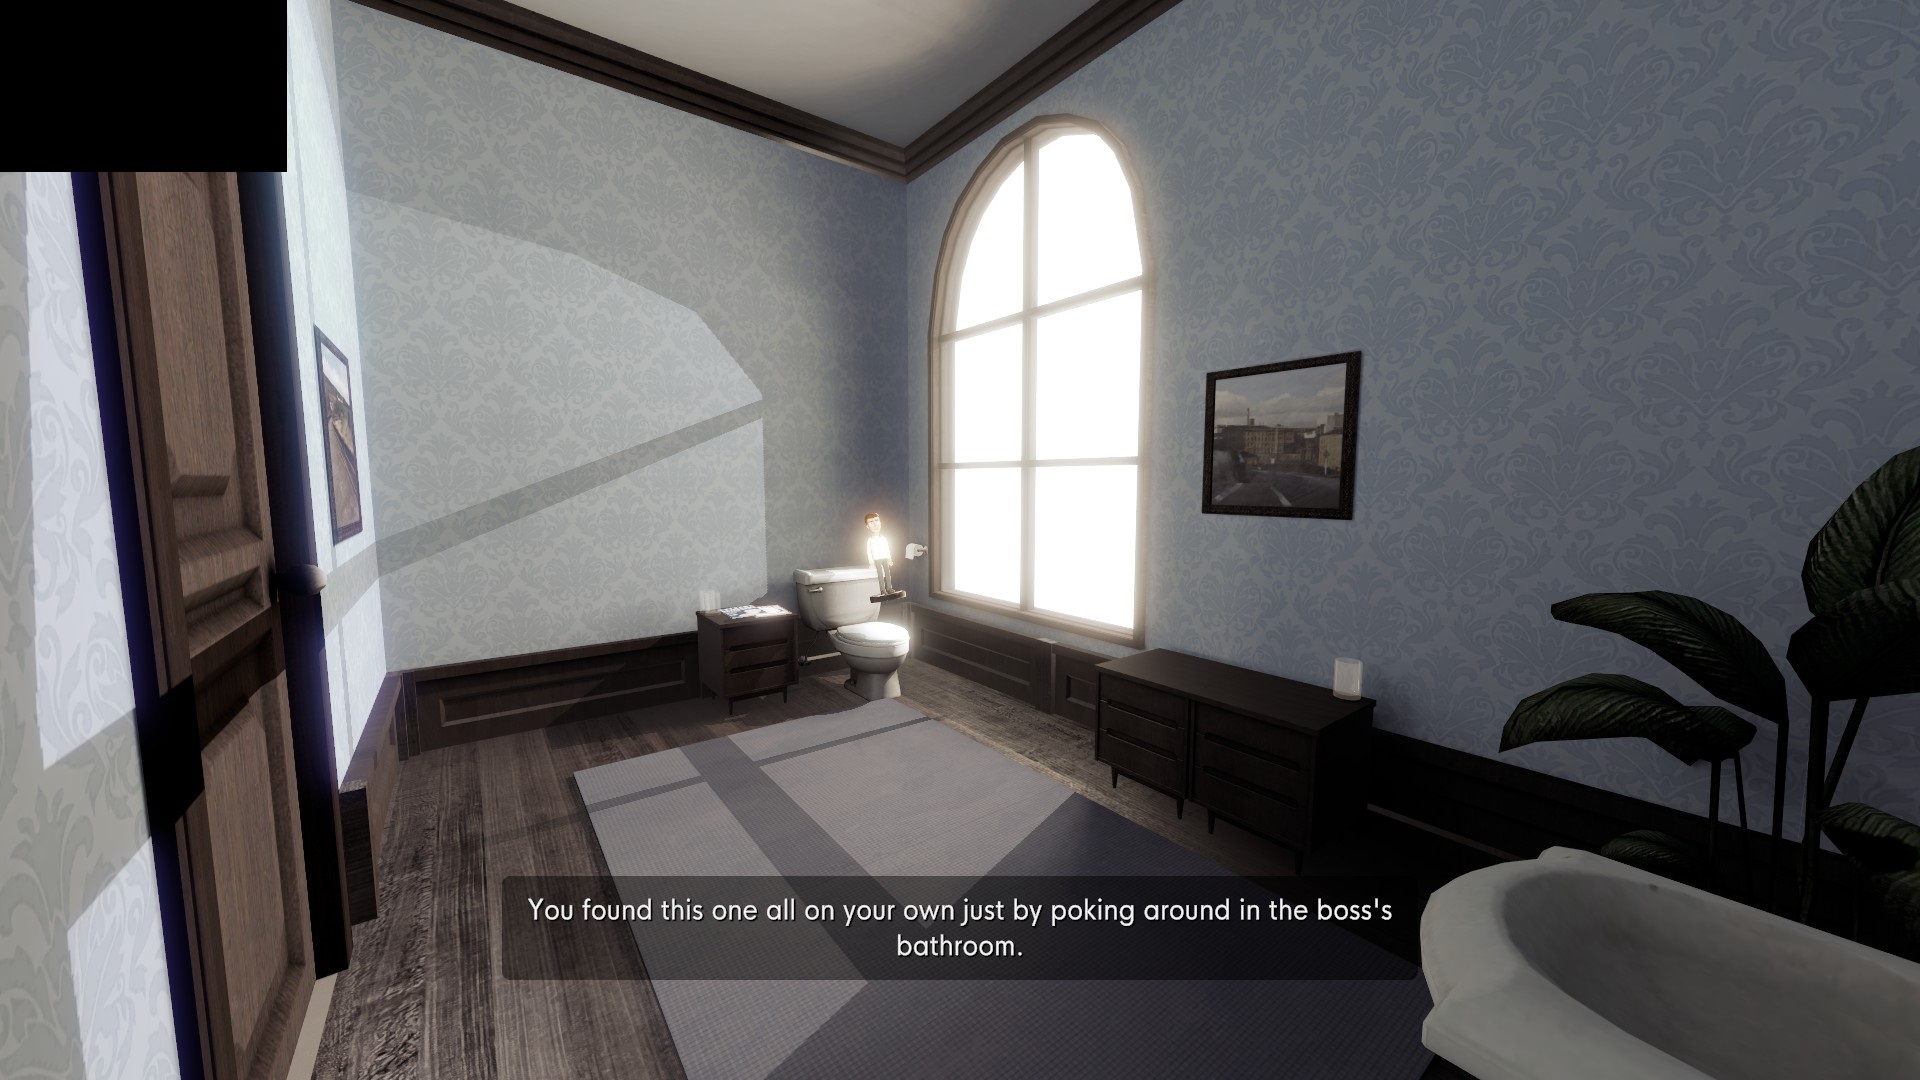
작은 입상 2 can be found in the boss’s private bathroom. After taking the left choice door to the meeting room and going 위로 the stairs, turn left at the secretary’s desk and proceed towards the door with a plaque on it instead of entering the boss’s office. After opening the door you’ll find the second Figurine hidden within the boss’s private bathroom.
The Second Figurine:
After collecting the Figurine, continue to the boss’s office.
작은 입상 #3
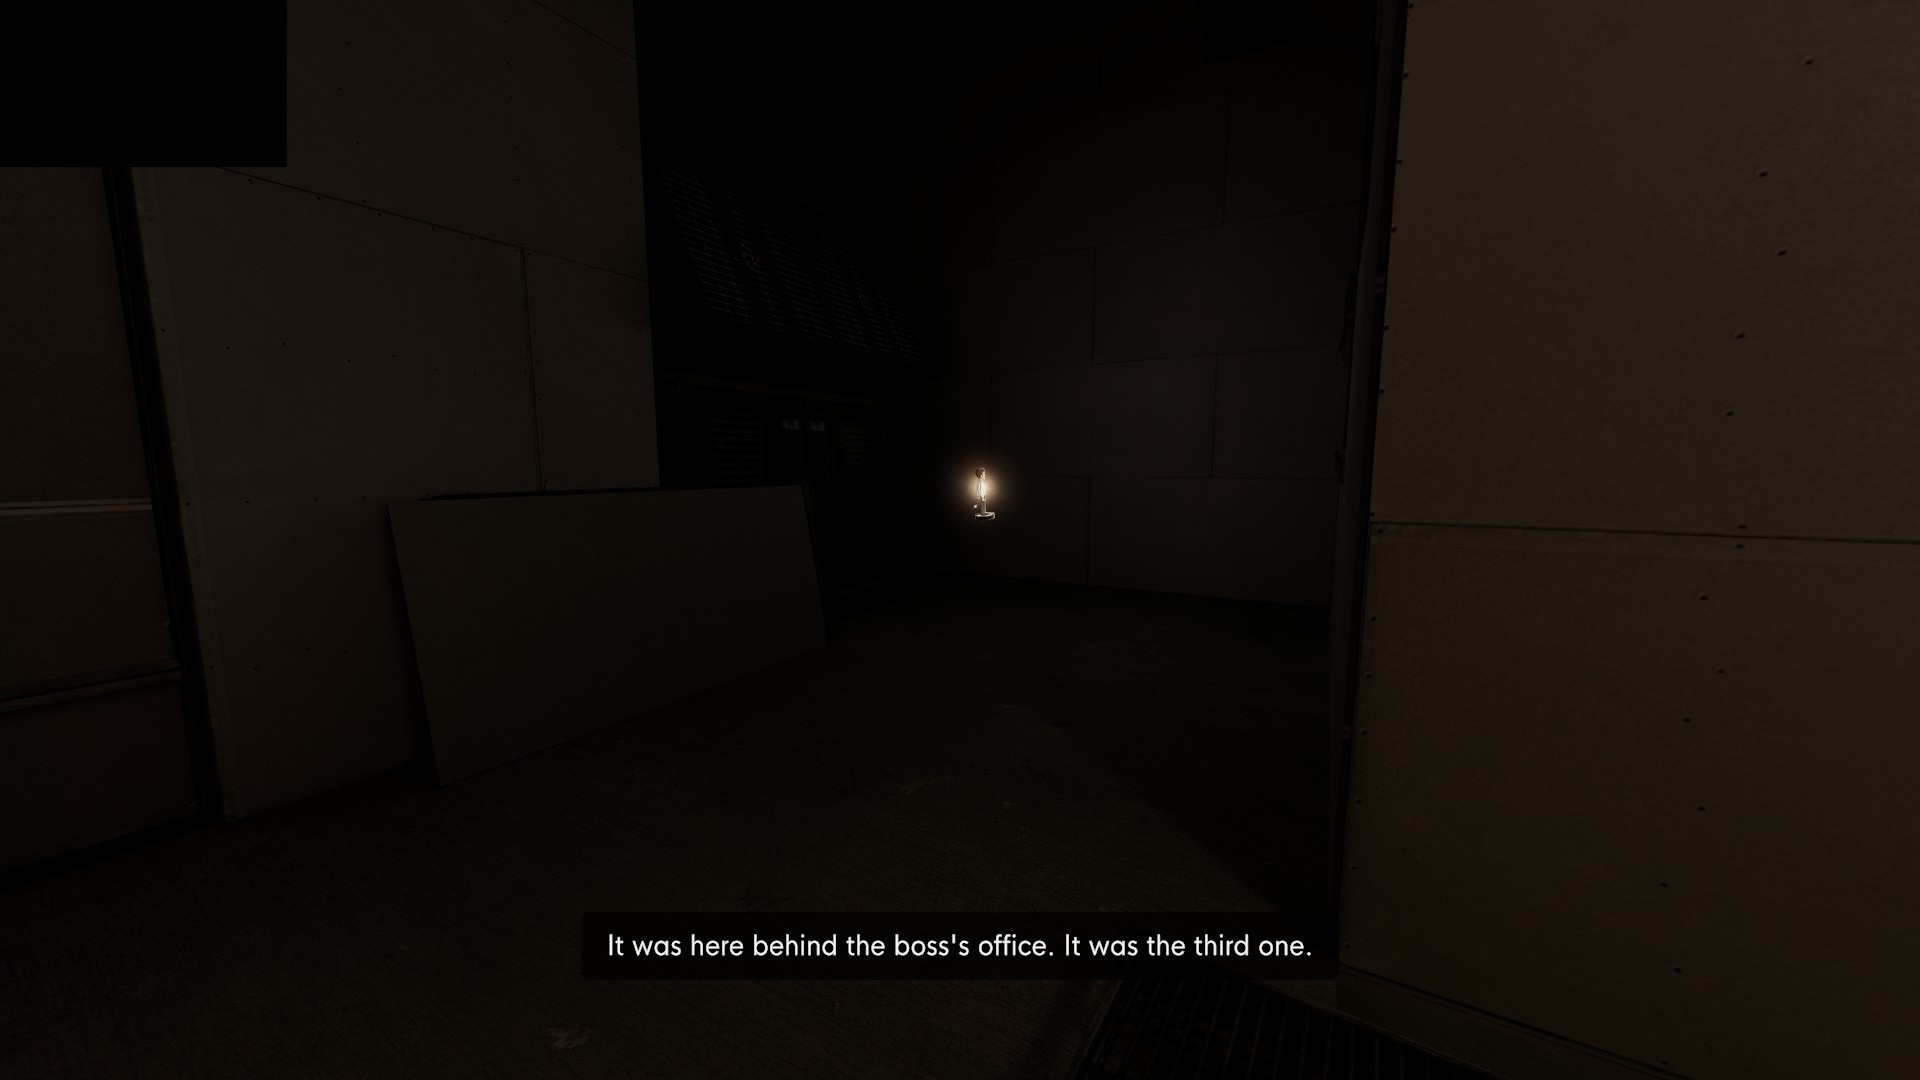
The third figurine can be found after continuing to the boss’s office and entering 2845 on the keypad to unlock the hidden passage. When the fireplace opens up to the hidden passageway, turn to the 오른쪽 (facing away from the lift) to find the Third Stanley Figurine hidden in the darkness.
The Third Figurine:
Continue the run to whichever ending you choose and let the game restart.
작은 입상 #4
The Fourth Figurine is found in the Shipping Department/Warehouse. Start a new run and take the right choice door to the break room and continuing straight down the hallway until you reach the shipping department/warehouse. Do not get on the cargo lift. 대신에, go up the plank of wood that makes a small ramp (marked with the red arrow), dropping down onto the bridge created by more planks towards the scaffolding with a figurine at the end.
The Fourth Figurine:
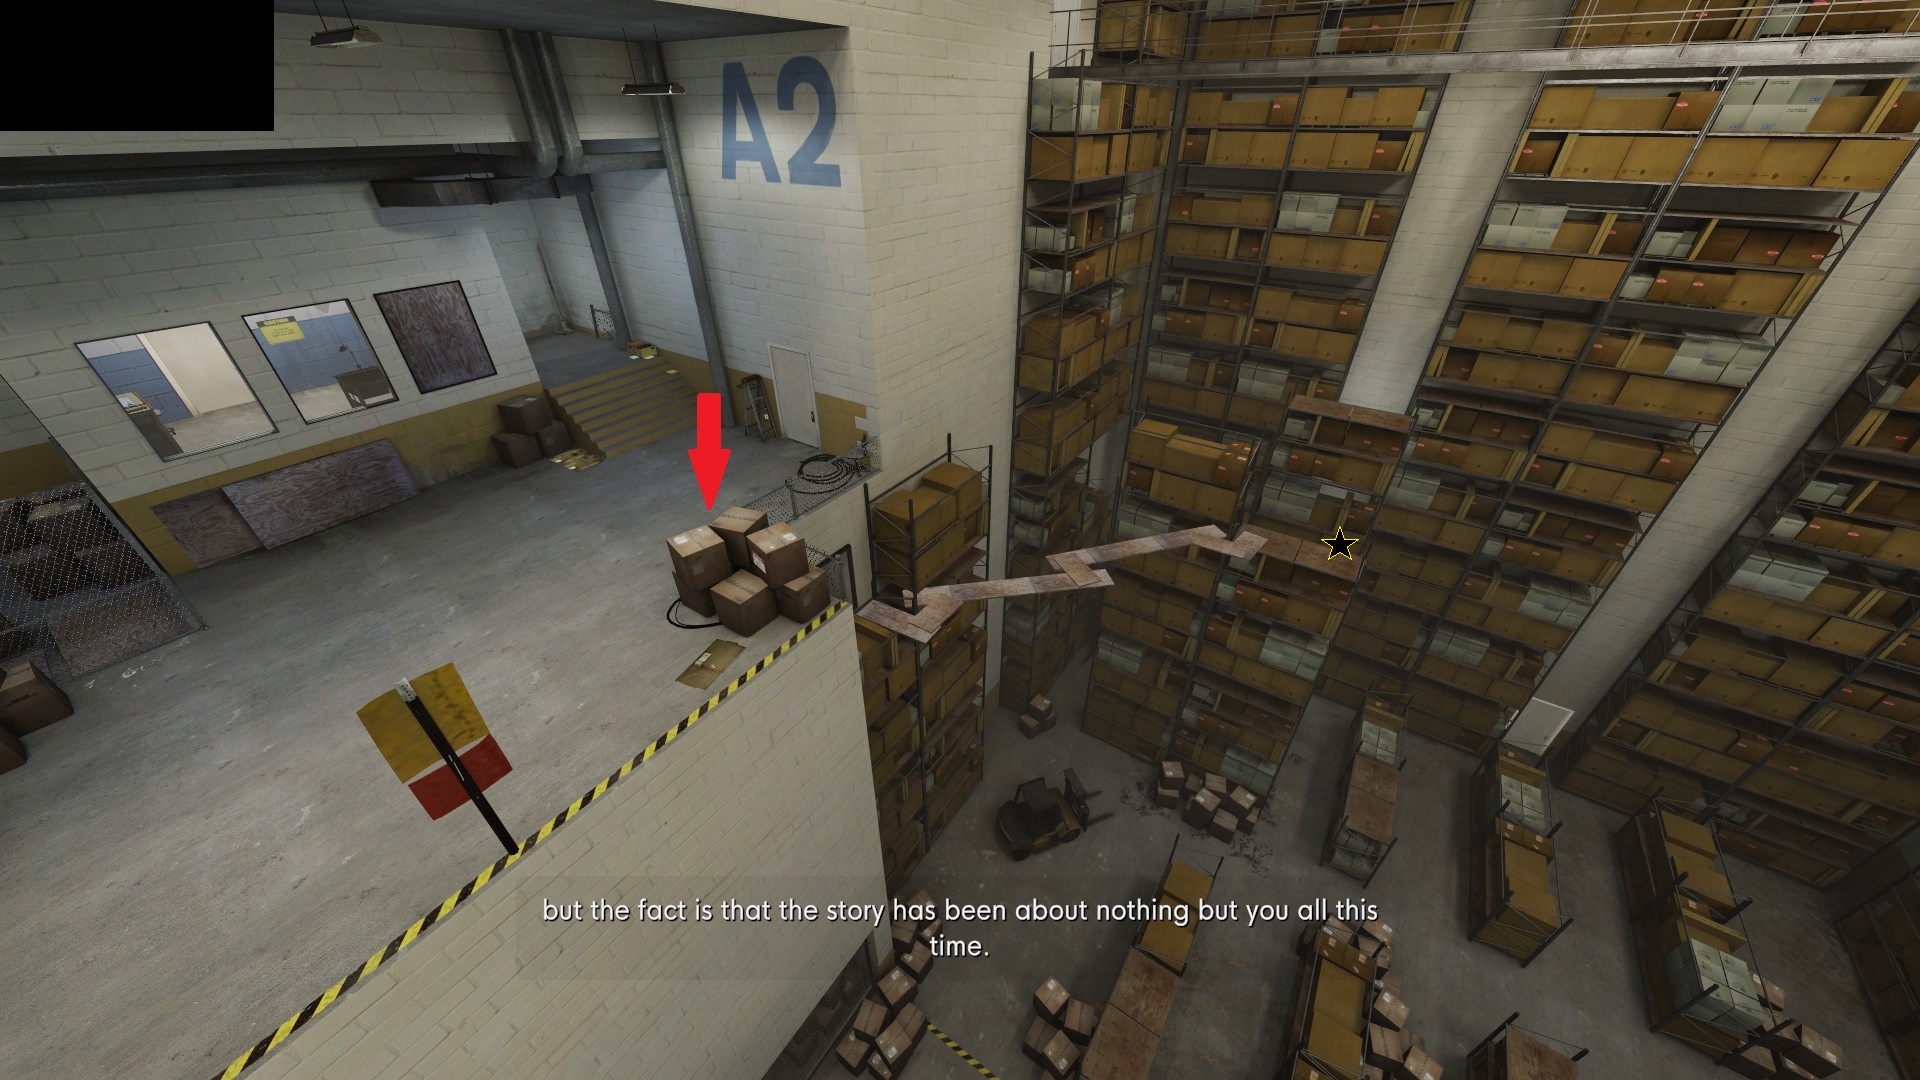
I already collected the figurine so the location is shown with a star. You can complete the run by either jumping to your death or by entering the air vent for one of the new endings.
작은 입상 #5
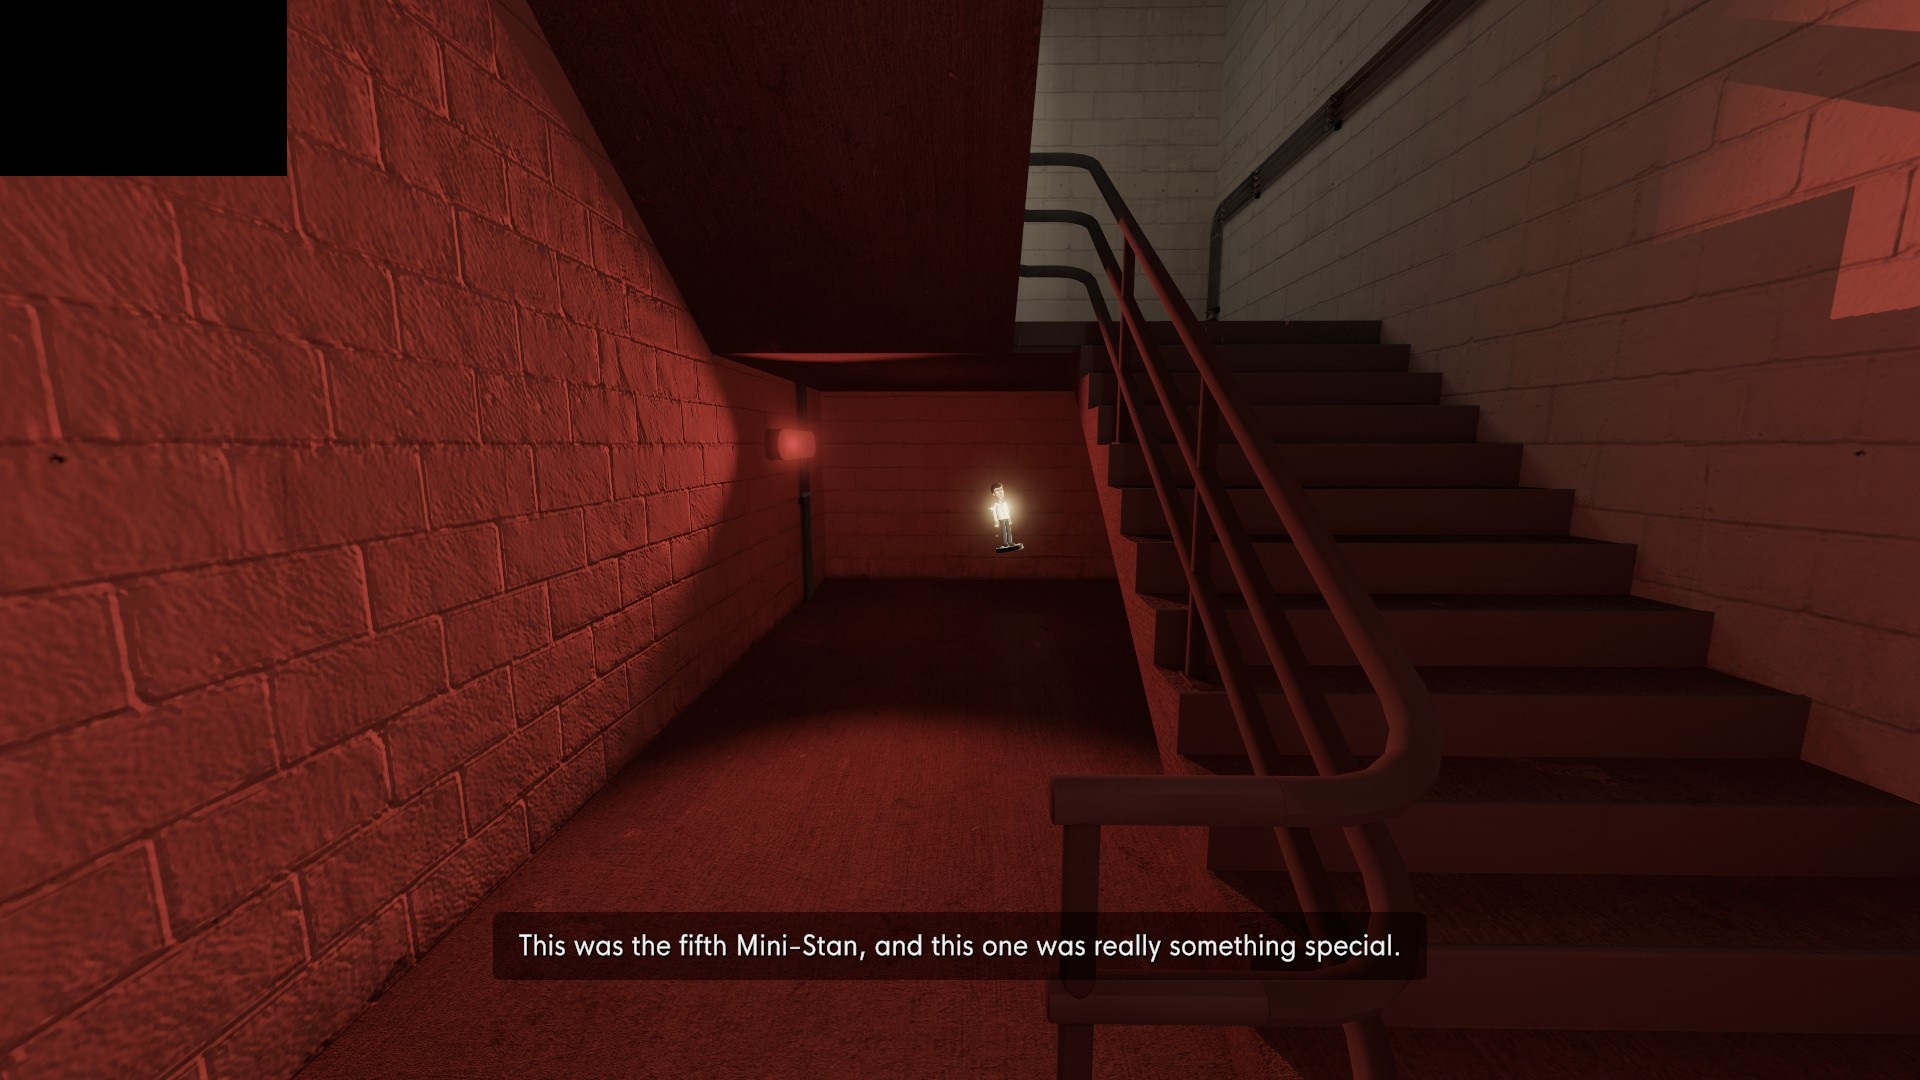
The Fifth Figurine can be gotten alongside the Second and Third. 가져 가라. Left Choice Door and proceed towards the stairwell after the meeting room. Take the stairs 아래에 and hidden under the stairwell is the Fifth Figurine.
The Fifth Figurine:
작은 입상 #6
The Sixth Figurine is found in the Shipping Department/Warehouse area again. DO NOT TAKE THE BUCKET WITH YOU, you cannot get the Figurine if you have the bucket with you. As much as it pains you or me to leave our friend behind.
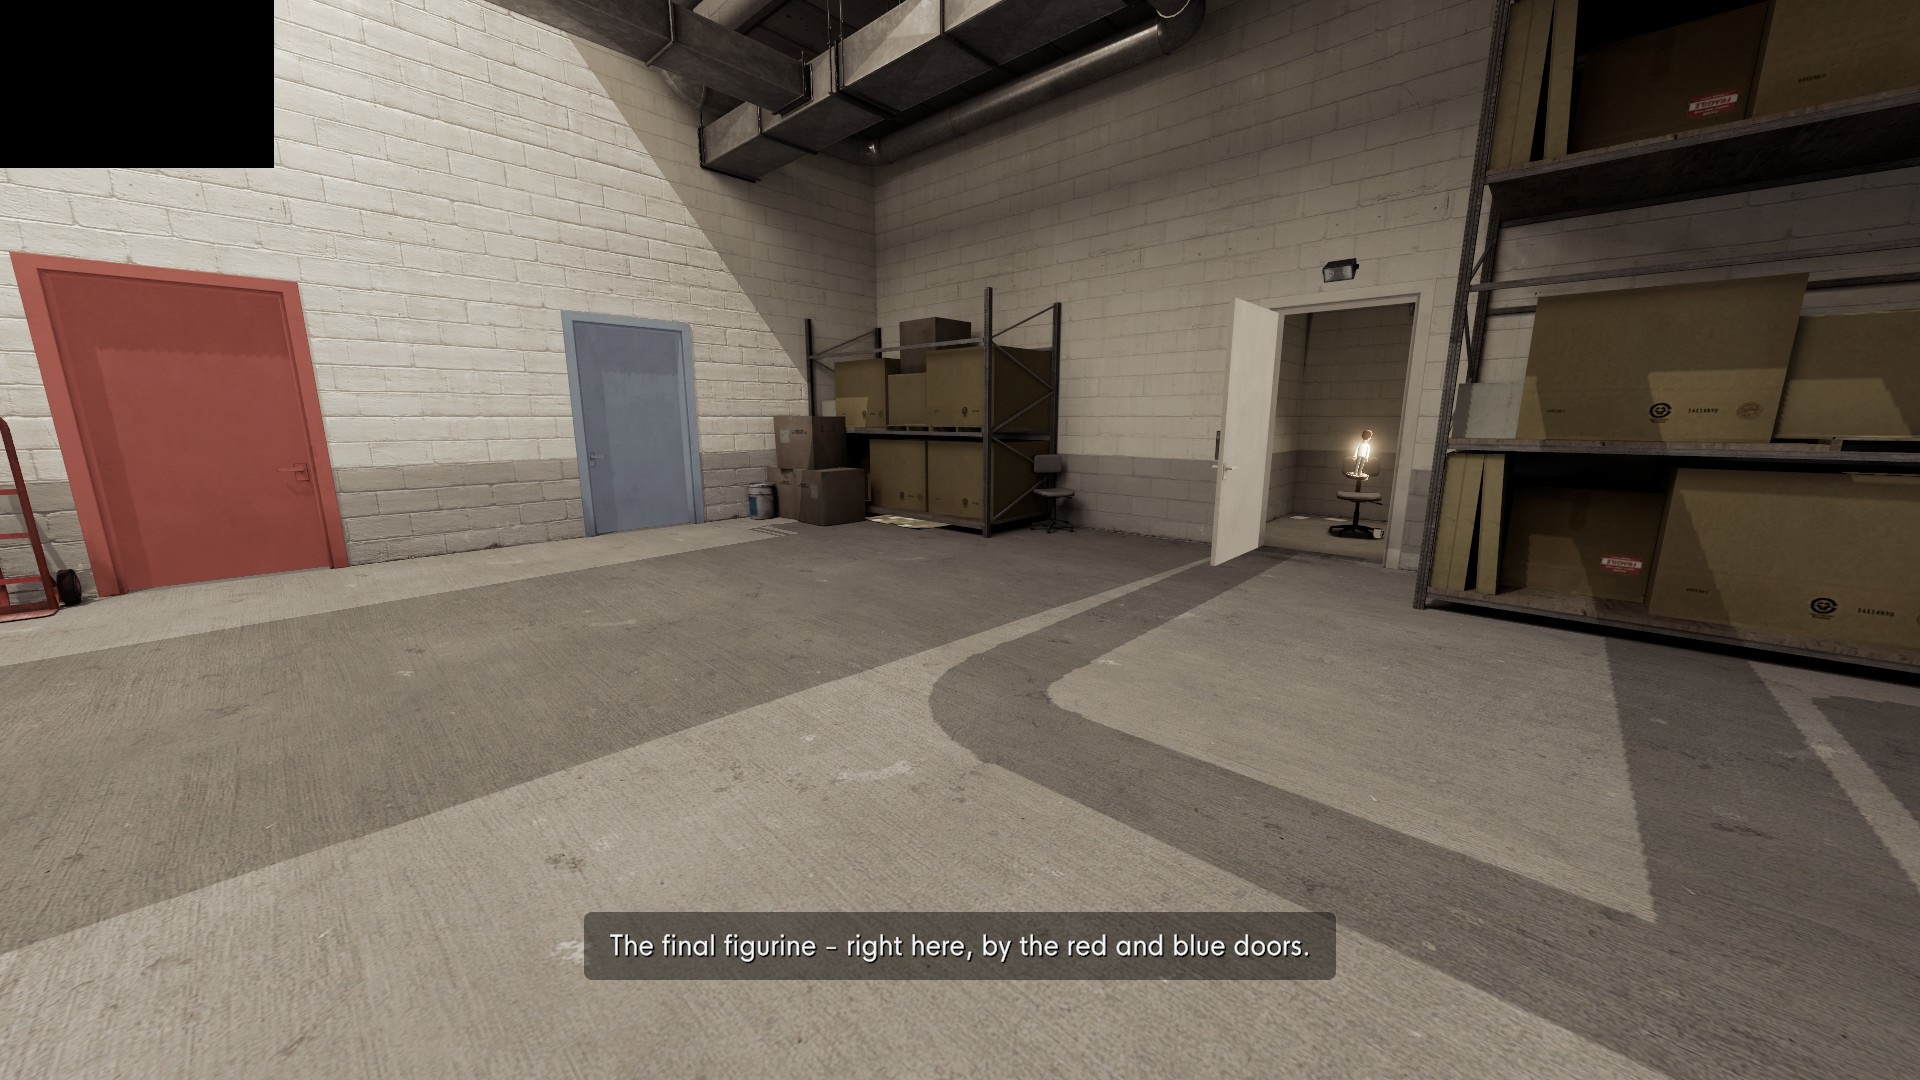
이번에는, take the cargo lift and drop down onto the catwalk, interrupting the narrator mid-sentence. After hearing his beratement, go forwards until you reach the Red and Blue Choice Doors. Before entering either one, a door to the right should be open with the Sixth Stanley Figurine on a desk chair in the open room.
The Sixth Figurine:
축하해요
That’s the six Stanley Figurines you need in order to complete the Quest! But is that all of them? 누가 알 겠어요?
이것이 오늘 우리가 공유하는 모든 것입니다. 스탠리 비유: 울트라 디럭스 가이드. 이 가이드는 원래 작성자가 작성하고 작성했습니다. Kermit Kujo. 이 가이드를 업데이트하지 못한 경우, 다음을 수행하여 최신 업데이트를 찾을 수 있습니다. 링크.